⚡ FLASH SALE: Get 60% OFF All Premium 3D & STL Models! ⚡
The roar of a finely tuned engine, the gleam of polished chrome under the sun, the elegant curves of a supercar – these aren’t just details for automotive enthusiasts; they’re the elements that make 3D car models come alive. In today’s digital landscape, high-quality 3D automotive assets are indispensable, powering everything from photorealistic visualizations and immersive game experiences to cutting-edge AR/VR applications and precision 3D printing. But transforming a raw concept into a hyper-realistic, production-ready 3D car model is a journey that demands a blend of artistic vision and deep technical expertise.
This comprehensive guide delves into the intricate technical workflows behind creating, optimizing, and deploying professional 3D car models. We’ll explore the nuances of clean topology, the artistry of UV mapping, the science of PBR materials, and the critical steps for rendering and game engine optimization. Whether you’re a seasoned 3D artist, an aspiring game developer, or an automotive designer seeking unparalleled digital fidelity, mastering these techniques is key. Join us as we unlock the secrets to achieving automotive perfection in 3D, ensuring your models not only look stunning but also perform flawlessly across diverse platforms. For those looking to jumpstart their projects with ready-made, high-quality assets, platforms like 88cars3d.com offer an excellent starting point, providing models meticulously crafted to these exacting standards.
The foundation of any exceptional 3D car model lies in its topology – the arrangement of vertices, edges, and faces that define its surface. For automotive models, clean, quad-dominant topology isn’t merely a preference; it’s a necessity. It ensures smooth deformations when the model is subdivided, prevents unsightly pinching during rendering, and maintains the integrity of the vehicle’s signature curves and sharp creases. Poor topology can lead to artifacts, difficult UV mapping, and problems with animation or sculpting. Understanding how to manage edge flow is particularly critical for cars, where subtle shifts in curvature can drastically alter how light reflects off the surface, impacting the perception of realism.
The process often begins with reference images and blueprints, meticulously blocking out the major forms. From there, artists focus on building a mesh that respects the underlying design, using as few polygons as necessary to define the core shape while ensuring sufficient detail where needed. This balance is crucial for maintaining performance across various applications. Automotive surfaces are characterized by sweeping, continuous lines, and the topology must reflect this, guiding the eye and allowing subdivision algorithms to create perfectly smooth results without introducing unwanted bumps or dimples. A well-constructed mesh also simplifies the application of decals and textures, as UV seams can be strategically placed along natural breaks in the topology.
The golden rule in polygonal modeling, especially for subdivision surfaces, is to use quads (four-sided polygons). While triangles are perfectly acceptable for static, non-deforming objects or for game engine optimization, a mesh destined for subdivision must be primarily composed of quads. Subdivision surface modifiers, such as Catmull-Clark in Blender, 3ds Max, or Maya, interpolate between these quads to create a smoother, higher-resolution mesh. Triangles and N-gons (polygons with more than four sides) can introduce unpredictable creases and artifacts when subdivided, making it difficult to control the final surface quality. For automotive designs, where every curve needs to be pristine, quads provide the predictable and uniform distribution of polygons required for perfectly smooth body panels.
When modeling, the base mesh (often referred to as the low-poly mesh) should be as clean and efficient as possible, defining the major forms and important edge loops with a minimal polygon count. A typical base mesh for a hero car might range from 30,000 to 80,000 polygons, which then subdivides to millions of polygons for high-fidelity renders. This approach allows for incredible detail without the burden of manually modeling every minute surface variation. The challenge lies in ensuring that the quad flow naturally follows the contours of the car, defining features like wheel wells, door lines, and window frames with precise loops that can be easily manipulated or sharpened.
Edge flow refers to the direction and continuity of edges on a mesh, and for cars, it’s paramount for capturing reflections accurately and defining sharp creases. Good edge flow means that the edges follow the natural contours and design lines of the vehicle. For instance, edges should flow along the length of a fender, around the circumference of a wheel well, and define the crisp lines of a spoiler. Crucially, areas of high curvature or sharp edges, like panel gaps or the lip of a headlight housing, require denser edge loops to hold their shape after subdivision. These “support loops” or “holding edges” are placed close to the hard edge, preventing it from softening too much.
A common pitfall to avoid is the creation of poles, especially those with five or more edges converging at a single vertex (N-poles). While poles are sometimes unavoidable, placing them in flat, inconspicuous areas is crucial. In highly reflective surfaces like car paint, an N-pole can create an undesirable pinch or distortion in reflections, making the surface appear lumpy or uneven. Tools like Blender’s Retopology tools, 3ds Max’s Graphite Modeling Tools, or Maya’s Quad Draw allow artists to meticulously control edge placement. Techniques such as adding additional edge loops with the “Loop Cut” tool, sliding edges, and carefully merging vertices are essential for refining the mesh until the zebra stripes (reflection analysis) are perfectly smooth and continuous across the entire car body. This meticulous attention to edge flow is what separates a good model from a truly exceptional one.
Once the topology is solid, the next critical step for adding visual fidelity is UV mapping. UVs are the 2D coordinates that tell your 3D software how to project a 2D texture onto the 3D surface of your model. For complex objects like cars, precise UV mapping is paramount. It dictates how decals, paint schemes, wear and tear, and intricate details are displayed, directly impacting the realism of the final render or game asset. Automotive surfaces present unique challenges due to their compound curves, the need for seamless material transitions, and the requirement for specific areas to receive high-resolution textures, such as badges, grilles, and intricate lighting elements.
Effective UV mapping for a car model involves a strategic approach to seam placement, ensuring consistent texel density, and intelligent packing of UV islands. Poor UVs can lead to stretched or squashed textures, visible seams, inefficient use of texture space, and difficulties in painting or baking maps. Artists must meticulously unwrap each component of the car – from the main body shell to individual wheels, interior elements, and intricate engine parts – and then arrange these “UV islands” efficiently within the 0-1 UV space. This process is often time-consuming but crucial for achieving a professional finish, especially when multiple materials and detailed textures are involved.
The placement of UV seams is perhaps the most critical decision in the UV mapping process for cars. Seams are where the 3D surface is “cut” to flatten it into 2D, and if placed poorly, they can become glaringly obvious lines on your textured model. For automotive models, the best practice is to hide seams along natural breaks in the geometry, such as panel gaps, underneath the car, along the edges of trim pieces, or where one material meets another (e.g., where glass meets body paint). For very large, continuous surfaces like the main body panels, algorithms like “Atlas” or “LSCM” unwrap can be used, followed by careful manual adjustments to minimize distortion and strategically place remaining seams.
Equally important is maintaining consistent texel density across the entire model. Texel density refers to the number of texture pixels per unit of surface area on your model. If different parts of your car have vastly different texel densities, some areas will appear blurry (low density) while others might be excessively sharp (high density), creating an inconsistent visual quality. Tools within software like Blender’s UV Editor, 3ds Max’s Unwrap UVW modifier, and Maya’s UV Editor allow artists to visualize and unify texel density across multiple UV islands, ensuring that all parts of the car receive an appropriate and even distribution of texture resolution. For a high-quality 3D car model, a target texel density of 10.24 pixels/cm or higher is often desired for close-up renders, meaning a 4K texture (4096 pixels) on a 4-meter-long car part would be roughly 10 pixels per centimeter.
Car models are rarely a single material; they are a complex assembly of paint, glass, chrome, rubber, plastic, and various interior fabrics. Each of these materials often requires its own set of textures, and sometimes even a unique UV layout. While a single UV map can sometimes suffice for the entire car, using multiple UV sets (also known as UV channels or UV layers) is a common professional practice. For instance, the main body might have one UV set for its base paint and wear, while a second UV set could be dedicated purely to decals like racing stripes, logos, or intricate sponsor graphics. This allows decals to be layered non-destructively and scaled independently without affecting the underlying paint textures.
When dealing with many small, distinct components like headlights, grilles, or interior buttons, it’s often more efficient to create separate UV islands for each of these. Then, these islands can be packed into a few, well-organized texture atlases – a single large texture file containing multiple smaller textures. This approach reduces the number of materials and draw calls in game engines, significantly improving performance. For precise decal placement, projecting textures using triplanar mapping or utilizing dedicated decal systems in game engines can offer flexibility. However, for baked textures, ensuring non-overlapping UVs is critical. Ultimately, the goal is to create UVs that are not only efficient but also intuitive for anyone who needs to texture or modify the model, allowing for easy application of complex liveries and detailed surface treatments.
Beyond impeccable modeling and UVs, the true magic of photorealistic 3D car models lies in their materials. Physically Based Rendering (PBR) has revolutionized the industry by providing a standardized approach to material creation that accurately simulates how light interacts with surfaces in the real world. This results in incredibly convincing visuals that look consistent across various lighting conditions and render engines. PBR materials rely on a set of standardized texture maps, each controlling a specific aspect of how light is reflected and absorbed by a surface, such as its color, shininess, and metallic properties. Mastering PBR is crucial for achieving the nuanced reflections, vibrant paint, and realistic finishes that define a high-quality automotive asset.
Creating PBR materials for a car model involves not just generating textures but also understanding how to assemble them into complex shader networks. These networks, found in software like Blender’s Shader Editor, 3ds Max’s Slate Material Editor, or Maya’s Hypershade, allow artists to layer effects, blend materials, and add intricate details like paint flakes, subtle dirt, or micro-scratches. The challenge lies in balancing artistic interpretation with physical accuracy, ensuring that every material – from the reflective clear coat of the paint to the intricate weaves of interior fabrics – reacts to light just as its real-world counterpart would. This attention to detail is what gives a 3D car model its lifelike presence.
There are two primary PBR workflows: Metallic/Roughness and Specular/Glossiness. Both aim for the same physical accuracy but achieve it with different sets of texture maps. The **Metallic/Roughness** workflow, often favored for its intuitive nature and efficiency in game engines, typically uses:
The **Specular/Glossiness** workflow, while offering slightly more control over the specular reflection’s color, uses: Diffuse, Specular (color and intensity of reflections), and Glossiness (inverse of roughness). For automotive applications, both are viable, but Metallic/Roughness has become the industry standard. Creating realistic car paint, for example, involves a clear understanding of these maps. The “base coat” might be a metallic material with a specific color, and then a “clear coat” layer is added on top, which is a non-metallic, highly reflective, and very smooth (low roughness) material, often with additional texture maps for subtle orange peel or micro-scratches. Tire rubber would be non-metallic, dark, and highly rough, while chrome would be metallic, very reflective, and very smooth. Texture resolutions of 2K (2048×2048) or 4K (4096×4096) are standard for detailed components, with 8K (8192×8192) reserved for hero assets or close-up shots.
Modern 3D software provides powerful node-based material editors for building complex shader networks. These allow artists to combine multiple textures, procedural maps, and mathematical operations to create highly nuanced materials. For a realistic car paint shader, you might start with a base PBR Metallic/Roughness material. On top of this, you could layer a clear coat shader, which acts as a dielectric (non-metallic) layer with very low roughness and high metallic values. Within this clear coat, you might introduce a procedural noise texture to simulate subtle “orange peel” or subtle dirt accumulation, controlled by a mask. For special metallic paints, a “flake” map can be used, often a tiny noise pattern plugged into the normal map or even the metallic map, creating sparkling glints as light catches the virtual metallic flakes.
Tire shaders can be equally complex, combining a base rubber material with procedural bump maps for tread patterns (if not modeled), and additional layers for dirt, dust, or wetness effects. Glass shaders require careful attention to transmission (color and transparency) and reflection properties, often with a subtle normal map for imperfections. Software like Substance Painter and Substance Designer are invaluable for generating high-quality PBR texture sets, allowing artists to procedurally create wear, rust, dirt, and paint chipping effects that can then be seamlessly integrated into a custom shader network in Blender, 3ds Max, or Maya. The ability to blend materials and procedurally enhance surfaces ensures that every part of the 3D car model feels authentic and worn by the virtual elements.
With a meticulously modeled and textured 3D car, the next step is to bring it to life through rendering. High-fidelity automotive rendering is an art form itself, demanding a deep understanding of lighting, camera angles, composition, and render engine settings. The goal is to produce images that are indistinguishable from real-world photography, showcasing the vehicle’s design, materials, and emotional appeal. This often involves crafting studio-like environments or placing the car within a believable outdoor scene, then carefully orchestrating light to highlight its contours and reflective surfaces. It’s where all the previous hard work truly shines.
A typical rendering workflow for a hero shot involves setting up a virtual studio, choosing the right camera lens and perspective, and then meticulously fine-tuning every light source. This is followed by configuring the render engine to achieve the desired level of realism and speed, often balancing render time with image quality. Finally, post-processing techniques are applied to enhance the image, adding depth, vibrancy, and cinematic effects. This entire process is iterative, with artists constantly adjusting and refining until the perfect shot is achieved, making sure the final output evokes the power, elegance, and beauty of the automotive subject.
Lighting is arguably the most critical element in automotive rendering. It dictates how the car’s curves are perceived, how reflections behave, and the overall mood of the image. For studio renders, a common approach is a “three-point lighting” setup (key, fill, and rim lights), but for cars, this is often expanded upon. Large, softbox-like area lights are frequently used to create broad, even reflections across body panels, mimicking professional photo studios. Light tunnels or environments with strategically placed large emissive planes can also create beautiful, continuous reflections that emphasize the vehicle’s form. The key light defines the main direction of illumination, highlighting the car’s primary features. Fill lights soften shadows and reveal details in darker areas, while rim lights (placed behind the car) create a subtle outline, separating it from the background and enhancing its three-dimensional form.
For outdoor or environmental renders, High Dynamic Range Images (HDRIs) are indispensable. An HDRI acts as both a light source and a reflection map, providing realistic environmental lighting and complex, accurate reflections on the car’s surface. Artists often combine HDRIs with additional manual area lights or sun lamps to enhance specific details or create dramatic shadows. Placing light sources to highlight specific design lines or “character lines” on the car’s body is crucial. Observing how light falls on real cars and studying automotive photography can provide invaluable insights into effective lighting strategies, ensuring that every angle and curve is presented in its best light. The choice of renderer – whether it’s Corona, V-Ray, Cycles (Blender), or Arnold – will influence specific light properties, but the underlying principles remain constant across all.
Each render engine (Corona, V-Ray, Cycles, Arnold) has its unique suite of settings that need to be optimized for both speed and quality. Key parameters include global illumination (which simulates indirect light bounce), sampling rates (controlling noise levels), and ray depth (how many times light bounces). For photorealistic automotive renders, higher settings are often preferred, leading to longer render times but cleaner, more accurate results. Techniques like denoising (either built-in or external) can significantly reduce render times by cleaning up noisy images with minimal quality loss. Utilizing render elements or passes (e.g., diffuse, reflection, specular, Z-depth, normal, object ID) is a professional workflow that provides immense flexibility in post-processing. Instead of rendering one final image, you render separate layers that can be individually manipulated.
Post-processing is where the final polish is applied, transforming a raw render into a magazine-quality image. Software like Adobe Photoshop, Affinity Photo, or GIMP are used for this stage. Common post-processing steps include:
By separating these adjustments into post-processing, artists can make non-destructive changes quickly without re-rendering the entire scene. This iterative refinement process, from initial render to final composite, is essential for achieving truly stunning automotive visualizations.
While high-fidelity renders aim for photorealism without strict performance constraints, deploying 3D car models in real-time environments like game engines (Unity, Unreal Engine) or AR/VR applications demands a completely different set of considerations. Here, the goal is to strike a delicate balance between visual quality and performance, ensuring smooth frame rates and responsive interactions. An unoptimized high-poly model, even with stunning PBR textures, can bring a game or AR experience to a crawl. The workflow shifts from purely aesthetic decisions to technical strategies that maximize efficiency without sacrificing too much visual fidelity. This involves careful management of polygon counts, draw calls, texture memory, and material complexity.
Game engine optimization is an iterative process of profiling, identifying bottlenecks, and applying targeted techniques. It’s not uncommon for a single hero car in a game to undergo multiple optimization passes throughout its development cycle. Understanding the limitations of the target platform – whether it’s a high-end PC, a mobile device, or a standalone VR headset – is crucial, as each will have vastly different budget allowances for polygons, textures, and effects. The demand for realistic vehicle behavior and appearance in games means that artists and developers must work hand-in-hand to ensure the 3D car model is not only visually appealing but also a performant asset within the game’s ecosystem.
One of the most fundamental optimization techniques for real-time applications is the implementation of Level of Detail (LODs). Instead of rendering a single, high-polygon version of a car model regardless of its distance from the camera, LODs provide multiple versions of the same model, each with a progressively lower polygon count. When the car is close to the camera, LOD0 (the highest poly version) is rendered. As it moves further away, the engine switches to LOD1, then LOD2, and so on, rendering fewer polygons and improving performance without a noticeable drop in quality from a distance. For a hero car, you might have LOD0 (50,000-150,000 polygons), LOD1 (20,000-40,000 polys), LOD2 (5,000-10,000 polys), and a final LOD3 (1,000-2,000 polys) for extreme distances. These are typically created by manually decimation or using automated tools in Blender, Maya, or dedicated LOD generation software.
Reducing draw calls is another critical optimization. A draw call is a command sent from the CPU to the GPU to draw a batch of objects. Each draw call incurs overhead, so fewer draw calls generally mean better performance. Cars, with their many individual parts (wheels, doors, interior components, etc.), can generate numerous draw calls. Strategies to reduce them include:
By implementing these techniques, developers can significantly improve the rendering efficiency of complex 3D car models in real-time scenarios.
Augmented Reality (AR) and Virtual Reality (VR) applications often have even stricter performance budgets than traditional games, especially on mobile or standalone headsets. For AR/VR 3D car models, aggressive optimization is key. Polygon counts need to be kept as low as possible – often below 50,000 triangles for an entire car, and sometimes even lower for highly constrained mobile AR experiences. Draw calls are also a major concern, often needing to be in the single digits for the entire vehicle. This necessitates even more aggressive mesh combining and texture atlasing.
Specific AR/VR optimization techniques include:
When sourcing models for AR/VR, ensuring they are already optimized for these platforms, like many of the assets found on 88cars3d.com, can save significant development time and ensure a smooth, immersive user experience. The trade-off between visual fidelity and performance is often a tightrope walk in AR/VR, requiring careful planning and meticulous execution.
The journey of a 3D car model doesn’t end with its creation or optimization; it extends to its usability across various platforms and applications. This often hinges on understanding and managing different 3D file formats. The choice of format can impact everything from data integrity and material transfer to animation support and real-time performance. Furthermore, for those looking to bring their digital car designs into the physical world, specific preparations are needed to ensure the model is suitable for 3D printing, a process that demands a watertight, manifold mesh and precise scaling.
Navigating the diverse landscape of 3D file formats requires knowledge of their strengths, weaknesses, and intended uses. A model destined for an architectural visualization project might use a different format than one intended for a mobile game. Ensuring compatibility and seamless data exchange between different 3D software packages and engines is a constant challenge for 3D artists. Moreover, the growing popularity of 3D printing adds another layer of technical requirements, transforming a visually appealing digital asset into a physically robust object. This section explores these critical aspects, providing guidance on how to manage your 3D car models effectively for any destination.
The world of 3D file formats is vast, but a few stand out as industry standards, especially for automotive models:
Choosing the right file format depends entirely on the intended use case. For robust interchange, FBX is king. For web/AR/VR, GLB/USDZ are ideal. For raw mesh data, OBJ is reliable, and for 3D printing, STL is standard.
Translating a digital 3D car model into a physical object via 3D printing introduces a unique set of technical requirements. Unlike rendering, which forgivingly handles non-manifold geometry or open meshes, 3D printers need a perfectly “watertight” or “manifold” mesh. This means the model must be a completely enclosed volume with no holes, no inverted normals (faces pointing inward), no intersecting geometry, and no zero-thickness surfaces. Any imperfections in the mesh can lead to printing errors, failed prints, or physical weaknesses in the final object.
Key steps and considerations for 3D printing preparation:
Proper preparation is vital. A beautifully rendered 3D car model still needs this meticulous technical oversight to make a successful transition from screen to physical object.
The journey from a digital concept to a fully realized, production-ready 3D car model is a testament to the blend of artistic skill and rigorous technical understanding. We’ve traversed the intricate landscape of topology and edge flow, revealing how clean geometry is the bedrock of realism and performance. We’ve explored the precision of UV mapping, understanding its crucial role in texture fidelity, and delved into the science of PBR materials, where every reflective surface and nuanced detail is meticulously crafted. From the strategic lighting of high-fidelity renders to the exacting demands of game engine and AR/VR optimization, each stage demands a dedicated skillset and an eye for both beauty and efficiency.
Mastering these workflows – from the selection of appropriate file formats to the meticulous preparation for 3D printing – empowers artists and developers to create immersive experiences and stunning visualizations that captivate audiences. The digital automotive realm is continuously evolving, pushing the boundaries of realism and interaction. By adhering to industry best practices and continually refining your technical prowess, you equip yourself to meet these challenges head-on.
For those eager to accelerate their projects and build upon a foundation of excellence, explore the vast collection of meticulously crafted 3D car models available on 88cars3d.com. Each model is designed with these technical insights in mind, offering clean topology, realistic materials, and various optimized formats to jumpstart your next rendering, game development, or AR/VR venture. Continue to learn, experiment, and push the limits of what’s possible in the captivating world of 3D automotive design.
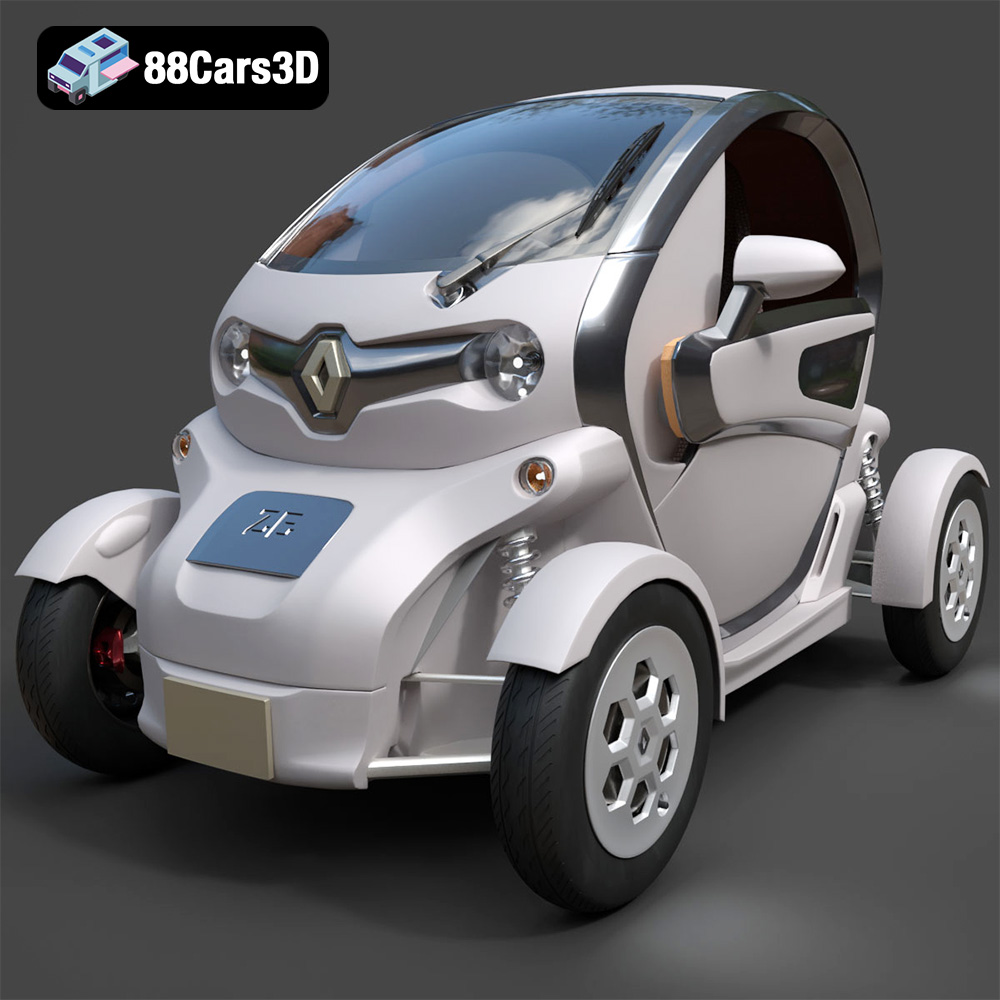
Texture: Yes
Material: Yes
Download the Renault Twizy ZE 3D Model featuring clean geometry, realistic detailing, and a fully modeled interior. Includes .blend, .fbx, .obj, .glb, .stl, .ply, .unreal, and .max formats for rendering, simulation, and game development.
Price: $4.99
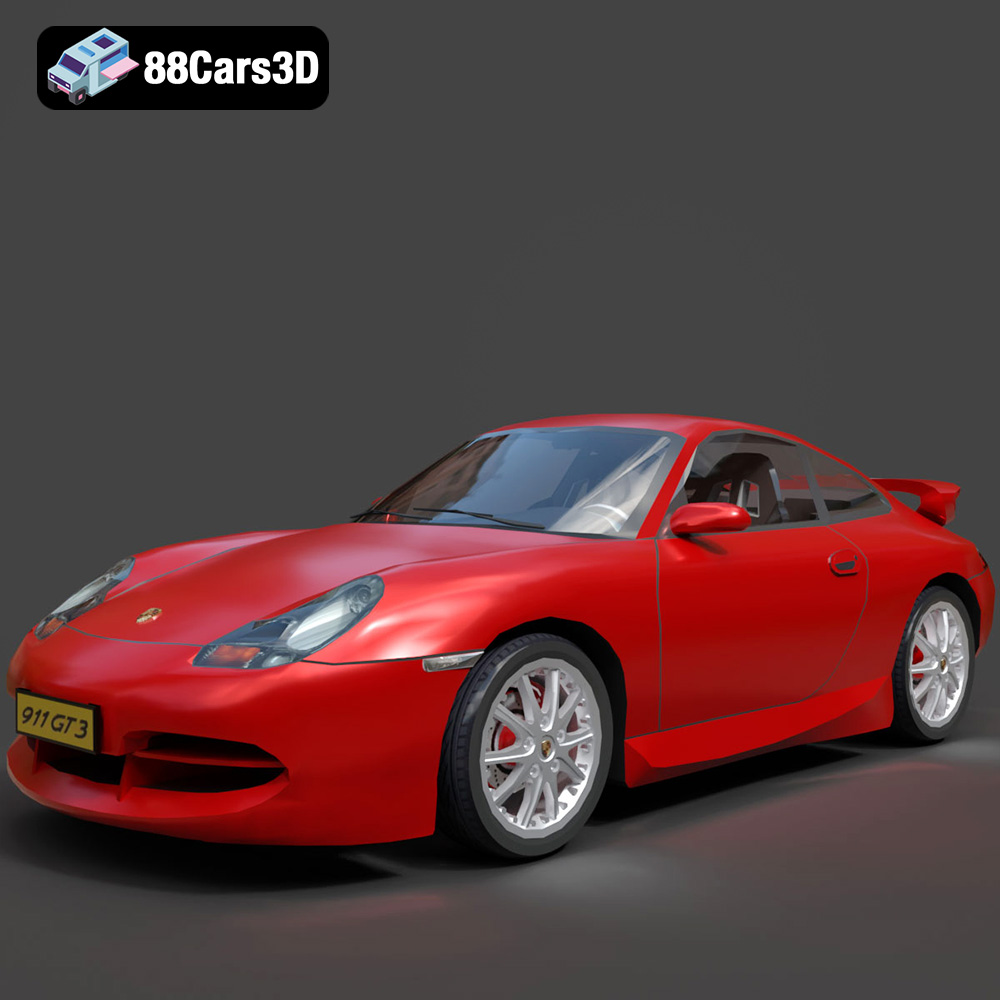
Texture: Yes
Material: Yes
Download the Porsche 911 GT3 3D Model featuring clean geometry, realistic detailing, and a fully modeled interior. Includes .blend, .fbx, .obj, .glb, .stl, .ply, .unreal, and .max formats for rendering, simulation, and game development.
Price: $4.99
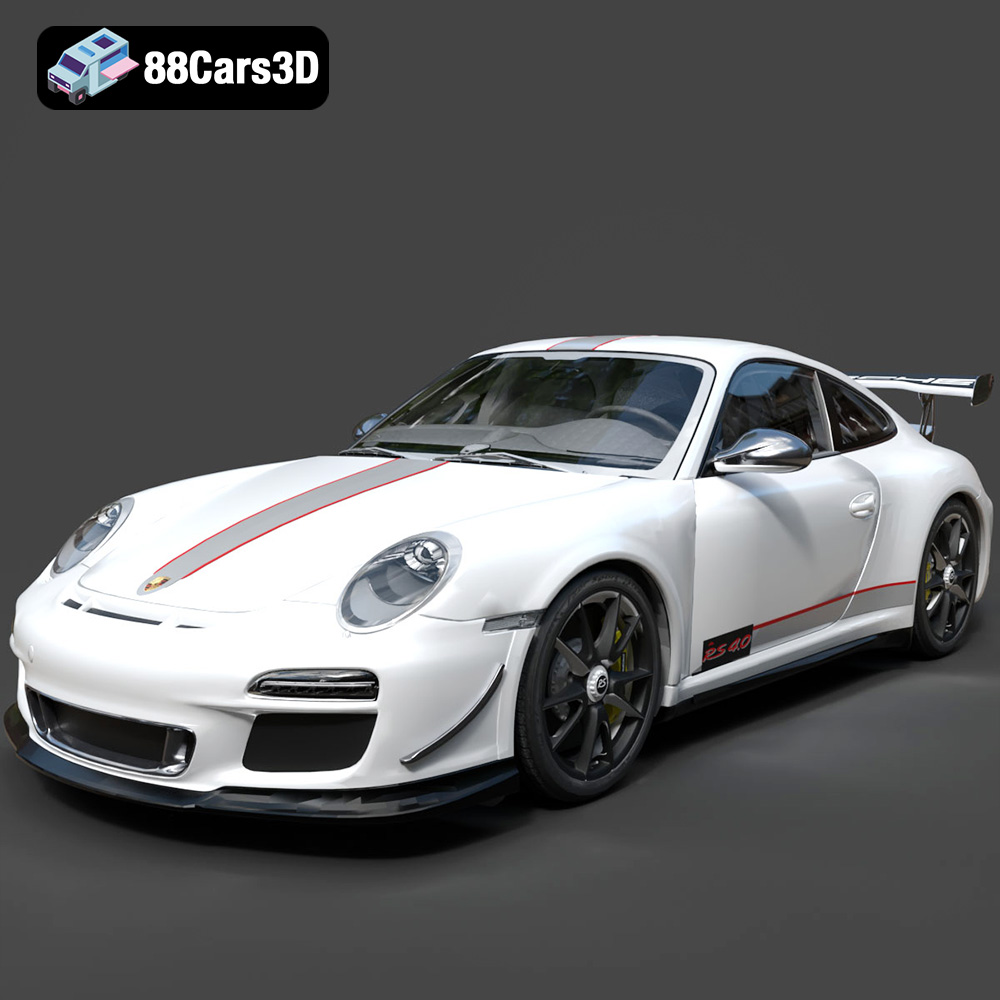
Texture: Yes
Material: Yes
Download the Porsche 911 997 GT3 RS 4.0 2011 3D Model featuring clean geometry, realistic detailing, and a fully modeled interior. Includes .blend, .fbx, .obj, .glb, .stl, .ply, .unreal, and .max formats for rendering, simulation, and game development.
Price: $4.99
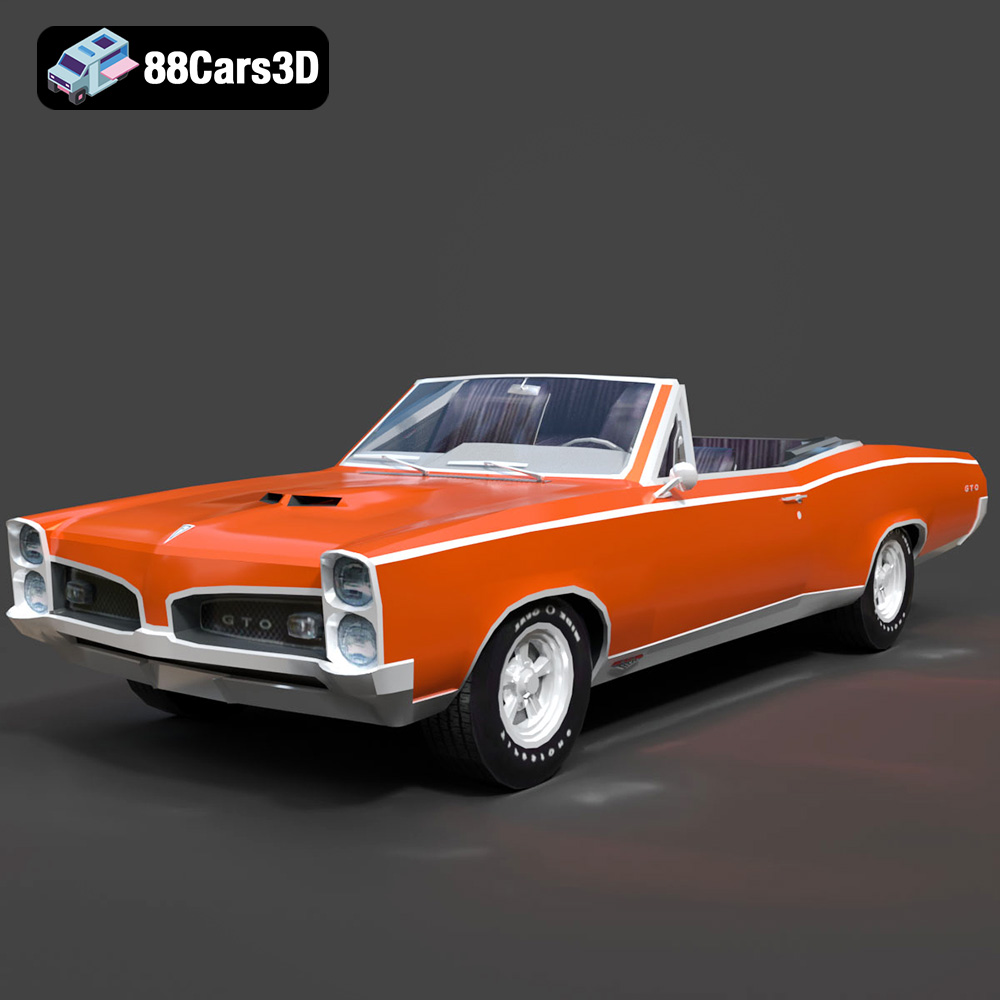
Texture: Yes
Material: Yes
Download the Pontiac GTO Cabrio 1967 3D Model featuring clean geometry, realistic detailing, and a fully modeled interior. Includes .blend, .fbx, .obj, .glb, .stl, .ply, .unreal, and .max formats for rendering, simulation, and game development.
Price: $4.99
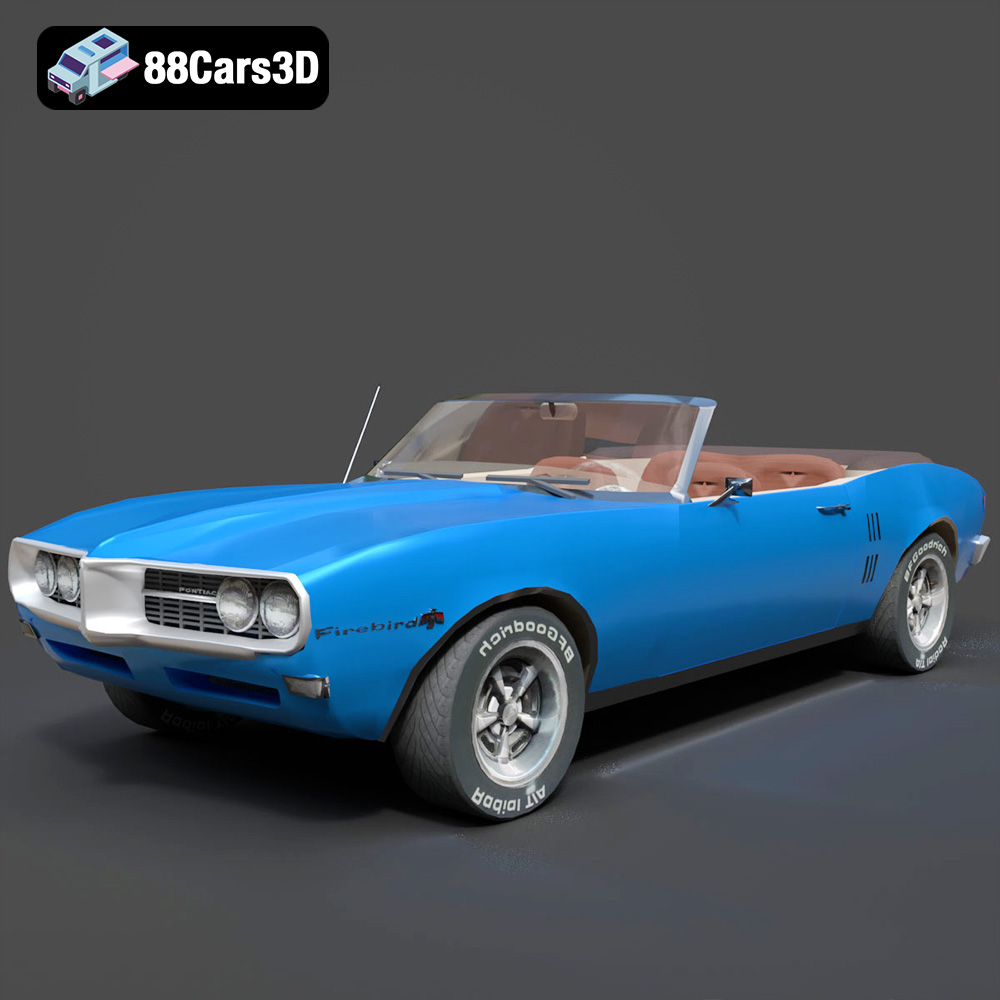
Texture: Yes
Material: Yes
Download the Pontiac Firebird Convertible 1968 3D Model featuring clean geometry, realistic detailing, and a fully modeled interior. Includes .blend, .fbx, .obj, .glb, .stl, .ply, .unreal, and .max formats for rendering, simulation, and game development.
Price: $4.99

Texture: Yes
Material: Yes
Download the Peugeot 508 2011 3D Model featuring clean geometry, realistic detailing, and a fully modeled interior. Includes .blend, .fbx, .obj, .glb, .stl, .ply, .unreal, and .max formats for rendering, simulation, and game development.
Price: $4.99
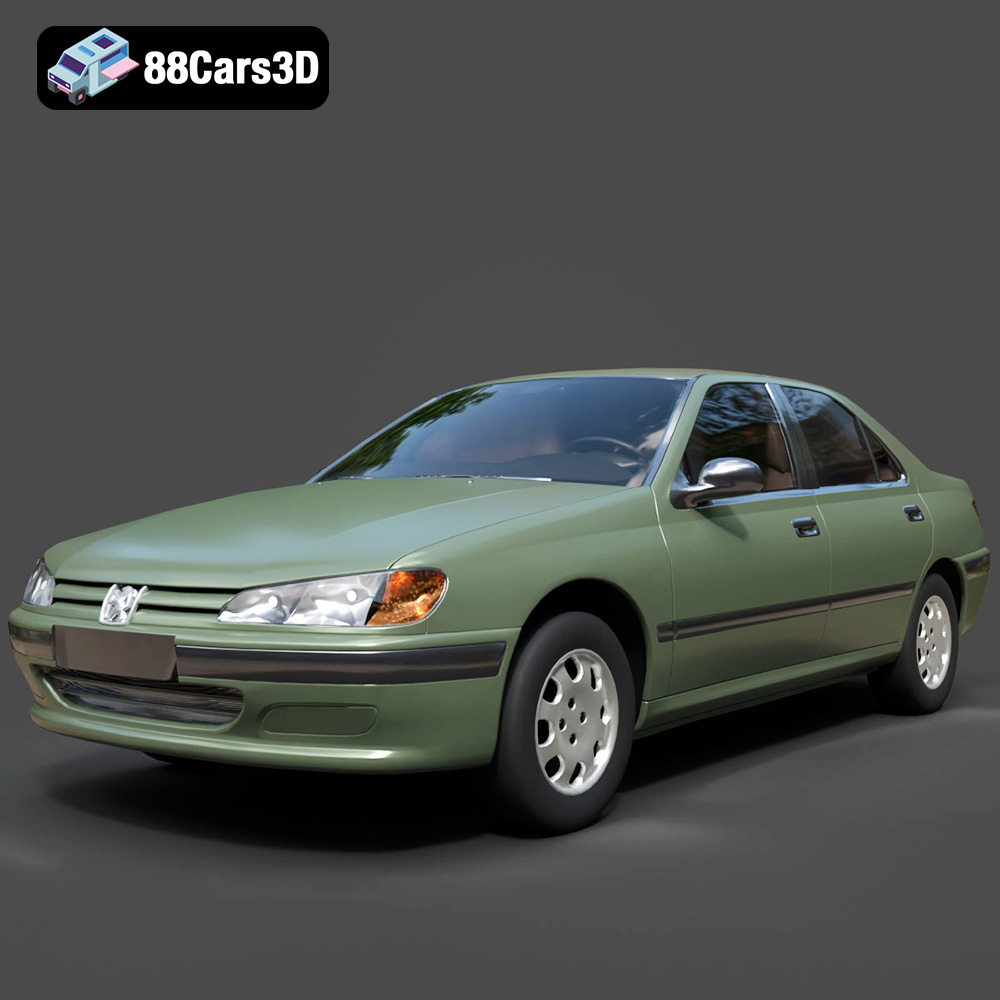
Texture: Yes
Material: Yes
Download the Peugeot 406 1996 3D Model featuring clean geometry, realistic detailing, and a fully modeled interior. Includes .blend, .fbx, .obj, .glb, .stl, .ply, .unreal, and .max formats for rendering, simulation, and game development.
Price: $10
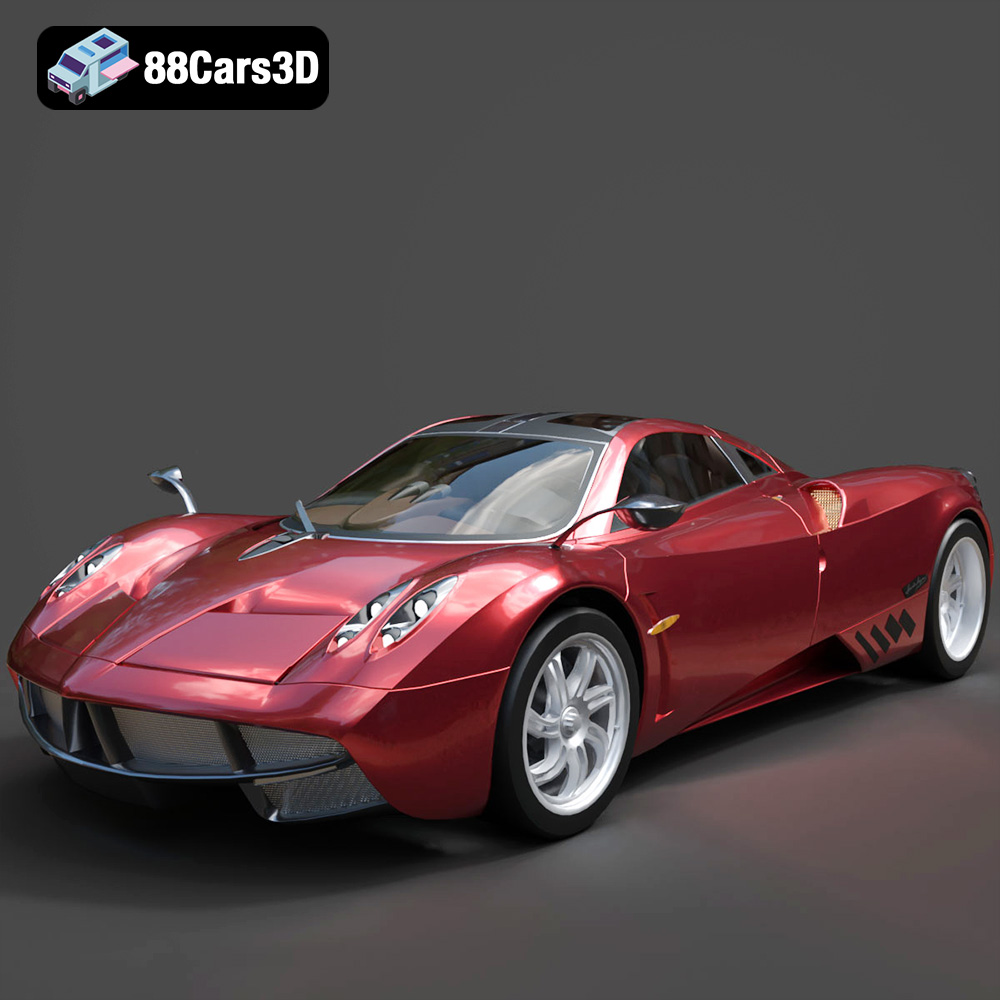
Texture: Yes
Material: Yes
Download the Pagani Huayra 2012 3D Model featuring clean geometry, realistic detailing, and a fully modeled interior. Includes .blend, .fbx, .obj, .glb, .stl, .ply, .unreal, and .max formats for rendering, simulation, and game development.
Price: $10
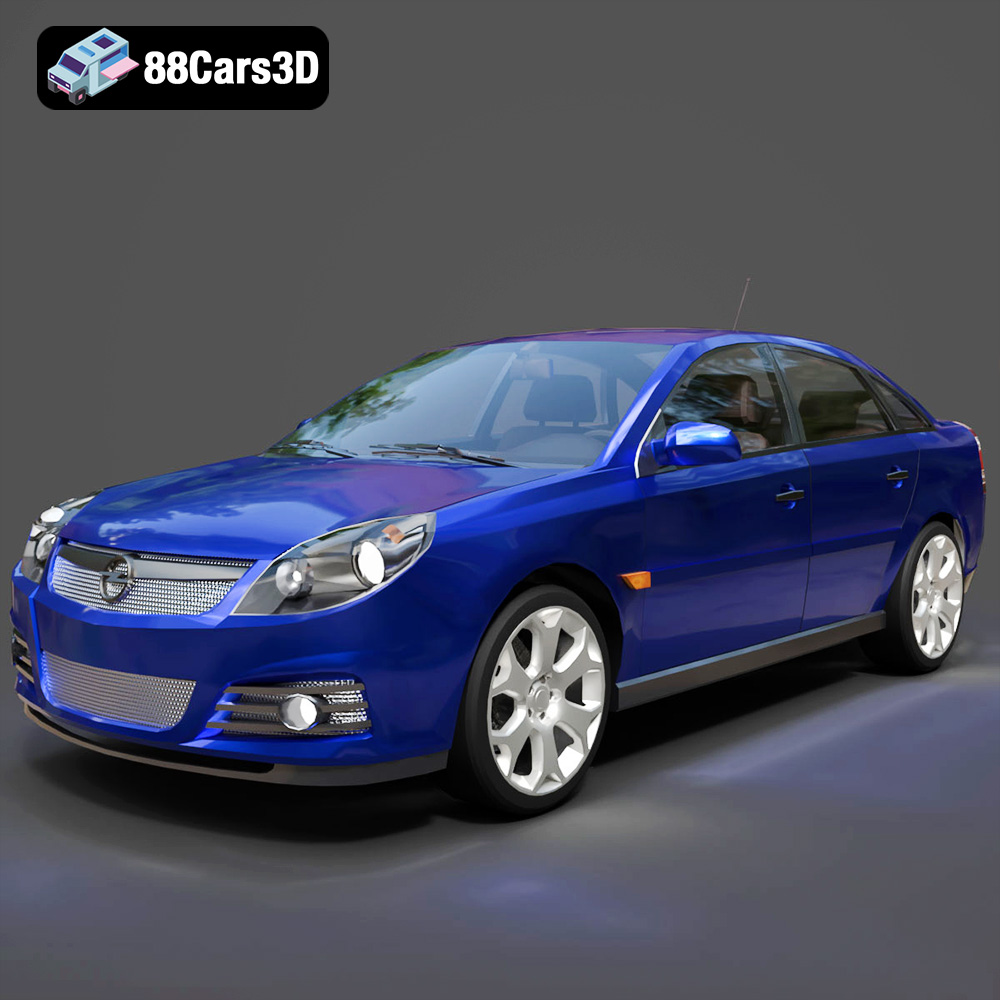
Texture: Yes
Material: Yes
Download the Opel Vectra C 2005 3D Model featuring clean geometry, realistic detailing, and a fully modeled interior. Includes .blend, .fbx, .obj, .glb, .stl, .ply, .unreal, and .max formats for rendering, simulation, and game development.
Price: $10

Texture: Yes
Material: Yes
Download the Opel Insignia OPC 3D Model featuring clean geometry, realistic detailing, and a fully modeled interior. Includes .blend, .fbx, .obj, .glb, .stl, .ply, .unreal, and .max formats for rendering, simulation, and game development.
Price: $10