Mastering 3D Car Models: From Flawless Topology to Game-Ready Assets and Photorealistic Renders
Mastering 3D Car Models: From Flawless Topology to Game-Ready Assets and Photorealistic Renders
In the dynamic world of 3D visualization, the demand for high-quality 3D car models is insatiable. From breathtaking cinematic renders and cutting-edge game development to immersive AR/VR experiences and precise automotive design visualizations, the fidelity and performance of these digital assets are paramount. A truly exceptional 3D car model is more than just a pretty shell; it’s a meticulously crafted piece of digital engineering, built on a foundation of clean topology, optimized UV mapping, and expertly designed materials. Understanding the intricate workflows behind creating and utilizing these models is crucial for any artist or developer looking to stand out.
This comprehensive guide will take you on a deep dive into the technical intricacies of automotive 3D modeling. We’ll explore everything from establishing perfect edge flow and strategic UV unwrapping to crafting photorealistic PBR materials and optimizing assets for diverse applications like real-time game engines and 3D printing. Whether you’re a seasoned 3D artist, a game developer, an architect, or an automotive designer, mastering these techniques will empower you to unlock the full potential of your projects. Prepare to elevate your craft as we unravel the secrets behind creating and deploying world-class 3D car models that meet the highest industry standards.
The Foundation of Excellence: Automotive 3D Modeling Topology and Edge Flow
The underlying mesh structure, or topology, is the bedrock of any high-quality 3D car model. For automotive designs, where smooth, flowing curves and sharp, defined creases are critical, impeccable topology and edge flow are non-negotiable. Poor topology can lead to artifacts, pinching, and deformation issues during subdivision, rendering, or animation, compromising the model’s visual integrity. The goal is always to maintain an all-quad mesh structure wherever possible, as quads subdivide predictably and allow for clean deformation.
A car’s surface is a complex interplay of convex and concave shapes. Achieving smooth transitions, crisp panel gaps, and perfectly rounded wheel arches requires careful placement of edges. Edge loops should follow the natural contours of the vehicle, defining key features like door lines, hood creases, and fender flares. This thoughtful placement ensures that when subdivision surfaces (like those used in 3ds Max, Maya, or Blender) are applied, the mesh smooths out beautifully without introducing unwanted bumps or dents. For areas requiring sharp details, such as vents or intricate grille patterns, edge loops need to be placed closer together to “hold” the sharpness, preventing them from softening too much upon subdivision.
When modeling a car, particularly a high-poly version intended for rendering or cinematic use, starting with a robust base mesh is key. This initial mesh should capture the overall silhouette and main features with a relatively low polygon count, allowing for easy adjustments. As details are added, the polygon count naturally increases. For intricate components like interior dashboards or engine parts, a dense, clean mesh ensures fidelity. For instance, a realistic exterior car body for a high-end render might comfortably sit between 150,000 to 500,000 polygons, while a detailed engine could easily add another 200,000-400,000, depending on the required level of visual fidelity. Platforms like 88cars3d.com prioritize models built with such clean topology to ensure versatility across various professional applications.
Maintaining Smoothness: Loop Tools and Crease Sets
Achieving perfect curvature and crisp edges can be challenging. In software like Blender, Maya, and 3ds Max, various tools aid in this process. Loop tools, for example, can help distribute vertices evenly along an edge loop, ensuring consistent curve quality. When working with subdivision surfaces, using “crease sets” or “edge weighting” can define how sharp an edge remains after smoothing, allowing artists to control the balance between smooth surfaces and defined hard edges without adding excessive geometry. This non-destructive approach maintains a cleaner mesh while providing excellent visual control. Proper planning of edge loops around these creased areas is crucial; edges should flow into and out of the creased regions cleanly, avoiding poles (vertices with more or less than four edges) in areas of high curvature.
Optimizing for Performance: Decimation and Retopology Strategies
While high-poly models are great for realism, they are often too heavy for real-time applications like games or AR/VR. This is where optimization comes into play. Retopology is the process of creating a new, optimized mesh over an existing high-polygon model, typically aiming for a much lower polygon count while preserving critical details and shape. This is often done manually or with semi-automated tools, focusing on an all-quad topology suitable for animation and real-time rendering. Another technique, decimation, uses algorithms to reduce polygon count by removing triangles, often used for quickly generating LODs (Levels of Detail). While effective, decimation can sometimes produce less desirable, triangulated topology, making manual retopology the preferred method for crucial game assets. The target polygon count for a game-ready vehicle can range from 20,000-80,000 triangles, depending on the platform and desired fidelity, a significant reduction from render-ready models.
Unwrapping the Details: UV Mapping for Complex Car Surfaces
Once a 3D car model‘s geometry is perfect, the next critical step is UV mapping. UVs are 2D coordinates that tell your rendering software how to project 2D textures onto the 3D surface. Without proper UVs, textures will appear stretched, distorted, or misaligned, ruining the visual realism of even the best-modeled car. The complex, curved surfaces of a vehicle present unique challenges for UV mapping, requiring careful planning and execution to avoid unsightly seams and texture imperfections.
The primary goal of UV mapping is to create a set of UV islands that efficiently utilize texture space, minimize distortion, and allow for easy texturing. For a car, this often means separating major panels (hood, doors, fenders, roof) into distinct UV islands. Components like wheels, tires, lights, and interior elements will also have their own islands. When unwrapping, techniques such as planar, cylindrical, and spherical projections are often used as starting points for different parts of the car, followed by manual adjustments and relaxation algorithms to flatten the UV islands while preserving their proportions relative to the 3D surface. Seams, where the 3D model is “cut” in the UV space, should be strategically placed in inconspicuous areas, such as along panel gaps, under trim pieces, or in hidden crevices, to make them less noticeable in the final render.
Efficient UV packing is also vital. This involves arranging all UV islands within the 0-1 UV space (the texture square) to maximize coverage and minimize empty areas. This helps to ensure that texture resolution is utilized effectively across the entire model. Overlapping UVs can be used for symmetrical parts, allowing a single texture area to cover two identical mirrored components (e.g., left and right doors), saving texture memory. However, for unique details or baked ambient occlusion, non-overlapping UVs are essential. Maintaining a consistent texel density across all UV islands ensures that texture resolution appears uniform across different parts of the car, preventing some areas from looking blurry while others are sharp.
Avoiding Stretching and Distortion: Seam Placement Best Practices
Strategic seam placement is an art. For car bodies, seams are often placed along natural breaks in the geometry, such as panel lines, edges of trim, or the undersides of components. For example, a car door might have a seam running along its interior edge where it meets the frame, or a wheel well might have seams hidden on its inner, less visible surfaces. The key is to make these cuts where they are least visible and where they minimize texture stretching. Tools in 3ds Max, Blender, or Maya offer various ways to visualize texture stretching (e.g., checker maps), allowing artists to identify and correct problem areas before the texturing phase. For instance, a common strategy for a large, curved surface like a car hood is to make a single cut along its centerline underneath, or along its edges where it meets other panels, then unwrap and relax the resulting UV island.
Multi-Tile UVs (UDIMs) for High-Resolution Textures
For extremely high-fidelity automotive rendering, a single 0-1 UV space often isn’t enough to provide the necessary texture detail without resorting to massive, inefficient texture maps. This is where Multi-Tile UVs, commonly known as UDIMs (a system popularized by Mari, but supported by Substance Painter, Blender, etc.), come into play. UDIMs allow you to spread your UV islands across multiple UV tiles (e.g., 1001, 1002, 1003, etc.), each with its own texture map. This means you can assign a dedicated 4K or 8K texture to the car body, another to the wheels, and another to the interior, without having to cram them all into a single, potentially gigantic texture file. This approach is invaluable for cinematic quality 3D car models, providing unparalleled detail and flexibility while managing texture memory more efficiently.
Bringing it to Life: PBR Material Creation and Shader Networks
With precise geometry and efficient UVs, the next step is to imbue your 3D car model with realistic materials using Physically Based Rendering (PBR). PBR represents a paradigm shift in material creation, aiming to simulate how light interacts with surfaces in the real world, leading to incredibly convincing and consistent results across different lighting environments. There are two primary PBR workflows: Metallic-Roughness and Specular-Glossiness, with Metallic-Roughness being the more prevalent in modern pipelines.
The core of PBR lies in a set of essential texture maps:
- Albedo/Base Color: Defines the base color of the surface without any lighting information.
- Metallic: A grayscale map (0 for dielectric/non-metal, 1 for metal) indicating whether a material is metallic.
- Roughness: A grayscale map defining the micro-surface detail, influencing how shiny or matte a surface appears (0 for perfectly smooth/shiny, 1 for perfectly rough/matte).
- Normal: A map that fakes surface details by manipulating how light reflects off the surface, adding bumps, scratches, and panel lines without extra geometry.
- Ambient Occlusion (AO): A grayscale map that simulates soft shadows in crevices and corners, enhancing depth.
Creating realistic car paint is particularly challenging and rewarding. It involves not just the base color and metallic properties but often advanced shader techniques to simulate clear coats, metallic flakes, and anisotropic reflections. A clear coat shader layer over the base paint material, for instance, adds a layer of reflective gloss that mimics real-world automotive finishes, complete with falloff and fresnel effects. The careful calibration of these textures, often sourced from real-world references or created in tools like Substance Painter or Quixel Mixer, is crucial for achieving photorealistic results.
Advanced Car Paint: Flakes, Clear Coat, and Anisotropy
Achieving truly convincing car paint goes beyond basic PBR. Modern automotive finishes feature metallic flakes embedded within the paint, often topped with a reflective clear coat. In rendering software like Corona, V-Ray (3ds Max), Cycles (Blender), or Arnold (Maya), this can be simulated using layered materials. A base material handles the metallic paint with subtle flake textures (often a noise map or procedural texture piped into the metallic or normal channels), and a separate, highly reflective, transparent material acts as the clear coat. The clear coat material requires accurate IOR (Index of Refraction) values (typically around 1.5-1.6 for car paint) and an appropriate falloff for its reflections. Anisotropy, where reflections appear stretched or brushed, is another key component, particularly for metallic or brushed surfaces like chrome trim or certain car paints. This is achieved by adjusting the tangent direction in the material’s shader network, giving the appearance of directional micro-scratches or grain.
Calibrating PBR Values: Real-World References and IOR
The accuracy of PBR materials hinges on using physically accurate values. This means referring to real-world data for properties like IOR, reflectivity values (for metals and dielectrics), and roughness ranges. For example, pure gold has a specific metallic and albedo value, while rubber has distinct roughness and IOR. Websites and databases dedicated to PBR values can be invaluable resources. Using a color picker to sample real-world materials from reference photos in a linear color space can provide a good starting point for your albedo maps. Consistency in lighting conditions and calibration of your monitor are also vital to ensure that what you see on screen accurately represents the material’s properties. Regular checks against known good PBR examples help fine-tune values for optimal realism.
The Art of Illumination: Rendering Workflows for Photorealism
A perfectly modeled and textured 3D car model still needs compelling lighting and an efficient rendering workflow to truly shine. The choice of renderer, lighting setup, and post-processing techniques are paramount in creating photorealistic automotive rendering. Popular renderers each offer unique strengths: Corona Renderer and V-Ray (often with 3ds Max) are known for their ease of use, speed, and photorealistic results; Cycles (Blender) and Arnold (Maya) excel in versatility and artistic control; Redshift is favored for its GPU-accelerated performance.
The foundation of realistic lighting often starts with High Dynamic Range Images (HDRIs). An HDRI captures light information from a real-world environment, including color, intensity, and direction, and can be used to illuminate your scene with incredible accuracy. Placing your 3D car model within an HDRI environment instantly provides realistic reflections, refractions, and diffuse lighting that matches the real world. For studio-style shots, a more controlled lighting setup using virtual studio lights (area lights, dome lights, spotlights) is often preferred. These can mimic softboxes, strip lights, and reflectors, allowing for precise control over highlights, shadows, and overall mood.
Camera settings are just as important as lighting. Mimicking real-world photography principles – aperture (for depth of field), shutter speed (for motion blur), and ISO (for exposure) – will yield more photographic results. Render settings optimization involves balancing quality with render time. Techniques like adaptive sampling, denoising (AI-powered solutions like NVIDIA OptiX or Intel Open Image Denoise are standard), and optimizing ray bounces can significantly speed up rendering without sacrificing quality. Finally, render passes (like diffuse, reflection, refractions, Z-depth, normal, and object IDs) are invaluable for post-processing and compositing in software like Adobe Photoshop or After Effects, allowing for fine-tuned adjustments and creative enhancements.
Environment-Driven Lighting: HDRIs for Instant Realism
HDRIs are a game-changer for automotive rendering. By simply loading a high-quality HDRI (e.g., from Poly Haven or HDRi Haven) into your renderer’s environment slot, your car model is immediately illuminated by a believable environment. The reflections on the car’s body, glass, and chrome will accurately mirror the surroundings, providing instant realism. To further enhance this, ground planes that catch shadows and reflections are often used, along with subtle fill lights to lift shadows or accentuate specific features. Different HDRIs (sunny days, overcast, cityscapes, studio setups) can dramatically change the mood and look of your render, making them an indispensable tool for showcasing a 3D car model in various contexts.
Optimizing Render Times: Progressive vs. Bucket Rendering & Denoisers
Render times for complex automotive rendering can be substantial. Understanding your renderer’s engine is key to optimization. Progressive rendering (common in Corona, V-Ray, and Cycles) renders the entire image iteratively, gradually refining it. Bucket rendering (also in V-Ray and Arnold) breaks the image into smaller regions or “buckets” and renders them individually. Each has its advantages. Progressive is great for quick previews, while bucket rendering can be more efficient for final renders on multi-core CPUs. Crucially, modern denoisers are a must-have. They use AI to intelligently remove noise from slightly undersampled images, allowing artists to significantly reduce render samples (and thus render times) while maintaining visual quality. Experimenting with render passes can also reduce overall render time by offloading complex effects like depth of field or motion blur to post-production.
Performance Prowess: Game Engine Optimization & Real-Time Visualization
While photorealistic renders are stunning, developing game assets or real-time visualizations for platforms like Unity or Unreal Engine demands a completely different approach to optimization. Performance is paramount, as maintaining high frame rates requires models that are incredibly efficient in terms of polygon count, material complexity, and draw calls. A 3D car model designed for a cinematic render will almost certainly be too heavy for a real-time environment without significant optimization.
The cornerstone of game optimization for complex assets like vehicles is the implementation of Levels of Detail (LODs). LODs are simplified versions of the original high-polygon model that are swapped in and out based on the camera’s distance from the object. For instance, a game-ready car might have LOD0 (the highest detail) at 50,000-80,000 triangles for close-ups, LOD1 at 20,000-30,000 triangles for medium distances, and LOD2 at 5,000-10,000 triangles for distant views, and potentially even an impostor (a 2D sprite) for extreme distances. This dramatically reduces the geometric load on the GPU when multiple cars are on screen.
Reducing draw calls is another critical optimization. Each material and mesh object in a scene generates at least one draw call, instructing the GPU to render it. Consolidating materials through texture atlasing (combining multiple smaller textures into one larger texture) and combining meshes where appropriate can significantly cut down draw calls. For example, all car interior textures could be combined into one atlas, allowing the entire interior to be rendered with a single material. Additionally, creating optimized collision meshes (often much simpler than the visual mesh) and generating efficient lightmap UVs are essential for stable physics and baked global illumination within game engines.
Implementing LODs: Balancing Fidelity and Frame Rate
Creating effective LODs involves careful consideration. While automatic LOD generation tools exist in engines like Unity and Unreal, manual creation or fine-tuning often yields better results. The process typically involves duplicating the base mesh and then using decimation or manual polygon reduction techniques to create progressively lower-poly versions. It’s crucial that each LOD maintains the silhouette and key features of the car, even at lower poly counts, to avoid noticeable popping or visual glitches when switching between levels. Artists often aim for roughly a 50% reduction in polygon count between each LOD level. Ensuring that the UVs are consistent across LODs (if using the same textures) is also vital to prevent texture stretching or flickering during transitions.
Baked Lighting vs. Real-time Global Illumination
Game engines offer different lighting approaches. Baked lighting pre-calculates global illumination, shadows, and ambient occlusion onto textures (lightmaps) or vertex colors during development. This is highly performant but static, ideal for environments where lighting doesn’t change dynamically. For vehicles, baked lighting can be used for interior components or static elements. Real-time global illumination, on the other hand, calculates light bounces dynamically, offering incredible realism but at a much higher computational cost. Modern engines like Unreal Engine’s Lumen provide impressive real-time GI, but it requires powerful hardware. For mobile game assets or AR/VR, baked lighting and carefully placed static lights remain the most performant choice, potentially augmented with screen-space effects for reflections and ambient occlusion.
Expanding Horizons: AR/VR, 3D Printing, and File Format Mastery
The versatility of 3D car models extends beyond traditional rendering and gaming. Emerging fields like Augmented Reality (AR) and Virtual Reality (VR), alongside industrial applications like 3D printing, demand specialized optimization and a deep understanding of file formats. The same foundational principles of clean topology and efficient UVs apply, but with specific constraints and requirements unique to each application.
For AR/VR optimization, the challenge intensifies. Mobile AR/VR applications have extremely strict polygon budgets, often requiring models that are significantly lighter than even typical game assets. A single 3D car model might need to be below 20,000 triangles, sometimes even less, to ensure a smooth frame rate on mobile devices. Materials must be simplified, often leveraging single PBR shader networks without complex layering or expensive effects. Draw calls need to be minimal, ideally using texture atlases and instancing for repetitive elements. The goal is to maximize performance while retaining visual fidelity, often relying on clever use of normal maps to simulate high-detail geometry. When sourcing models from marketplaces such as 88cars3d.com, artists developing for AR/VR should look for explicitly optimized low-poly options or models that are easy to decimate.
3D printing preparation presents an entirely different set of technical hurdles. Here, the focus shifts from visual realism to geometric integrity. A model intended for 3D printing must be “watertight” (manifold), meaning it has no holes, non-manifold edges, or inverted normals, forming a completely enclosed volume. Wall thickness becomes crucial, as parts must be thick enough to be structurally sound when printed. Small, intricate details might need to be exaggerated or simplified to be printable, depending on the printer’s resolution and material. Mesh repair tools in software like Meshmixer, Blender (3D Print Toolbox), or Netfabb are often indispensable for fixing issues that arise from modeling errors or scan data.
Mastering file formats is essential for seamless interoperability across different software and platforms. The industry standard for interchange is FBX, which can store geometry, UVs, materials (though material translation can be tricky), animations, and cameras. OBJ is a simpler format, excellent for geometry and UVs but less robust for complex scene data. For web-based AR/VR, GLB (a binary version of glTF) is increasingly popular due to its compact size and inclusion of embedded textures. Apple’s USDZ is the go-to for iOS AR applications. Understanding the strengths and limitations of each format, and potential data loss during conversion, is vital for ensuring your 3D car model maintains its integrity as it moves through your pipeline.
AR/VR Specifics: Mobile Optimization and Real-time Shaders
For AR/VR experiences, especially on mobile, every polygon and every shader instruction counts. Models need to be heavily optimized, often requiring aggressive polygon reduction and carefully baked normal maps to retain detail. Materials should be kept simple, ideally using a single PBR shader that can render efficiently in real-time. Transparent materials, reflections, and complex lighting models are computationally expensive and should be used sparingly or faked with screen-space effects. Vertex color baking, where lighting or ambient occlusion information is stored directly in the model’s vertices, is another technique to reduce shader complexity for mobile devices, although it reduces flexibility.
Preparing for Production: 3D Printing Mesh Repair and Slicing
Before sending a 3D car model to a printer, meticulous preparation is needed. Tools exist within 3ds Max, Blender, and dedicated 3D printing software to analyze and repair meshes. Common issues include non-manifold geometry (e.g., edges shared by more than two faces), inverted normals (faces pointing inwards), and self-intersecting geometry. These must be resolved to ensure the slicer software can correctly generate print paths. Wall thickness analysis helps identify areas that are too thin to print reliably. Once the mesh is repaired and optimized, it’s typically exported as an STL or OBJ file, then imported into a slicer program (e.g., Cura, PrusaSlicer) which converts the 3D model into printer-specific G-code instructions, ready for physical production.
Conclusion
The journey from a conceptual idea to a fully realized, high-performance 3D car model is a multifaceted one, demanding a blend of artistic vision and technical mastery. We’ve traversed the critical stages, from the foundational importance of clean topology and efficient UV mapping, through the meticulous craft of creating realistic PBR materials, to the art of photorealistic automotive rendering. We’ve also explored the specialized requirements for game assets, real-time visualization, AR/VR optimization, and the unique challenges of preparing models for 3D printing, alongside navigating the diverse landscape of file formats.
Each of these stages is interconnected, with decisions made early in the modeling process impacting downstream workflows. A clean mesh with proper edge flow not only subdivides beautifully for renders but also simplifies UV unwrapping and retopology for game engines. Likewise, a well-calibrated PBR material will look great in any lighting condition, whether in a renderer like Corona or a real-time engine like Unity. The key to success lies in understanding these interdependencies and adopting industry best practices at every step.
The digital automotive world continues to evolve rapidly, pushing the boundaries of realism and interactivity. By mastering the technical skills and workflows discussed, you equip yourself with the tools to create exceptional assets that meet the highest standards. Whether you’re aiming for cinematic quality, optimized game experiences, or precise industrial visualization, the dedication to quality will always shine through. Explore high-quality assets and elevate your projects by visiting marketplaces that prioritize excellence in every detail, just like the models available on 88cars3d.com.
Featured 3D Car Models

MINI Cooper S-007 3D Model
Texture: Yes
Material: Yes
Download the MINI Cooper S-007 3D Model featuring clean geometry, realistic detailing, and a fully modeled interior. Includes .blend, .fbx, .obj, .glb, .stl, .ply, .unreal, and .max formats for rendering, simulation, and game development.
Price: $4.99
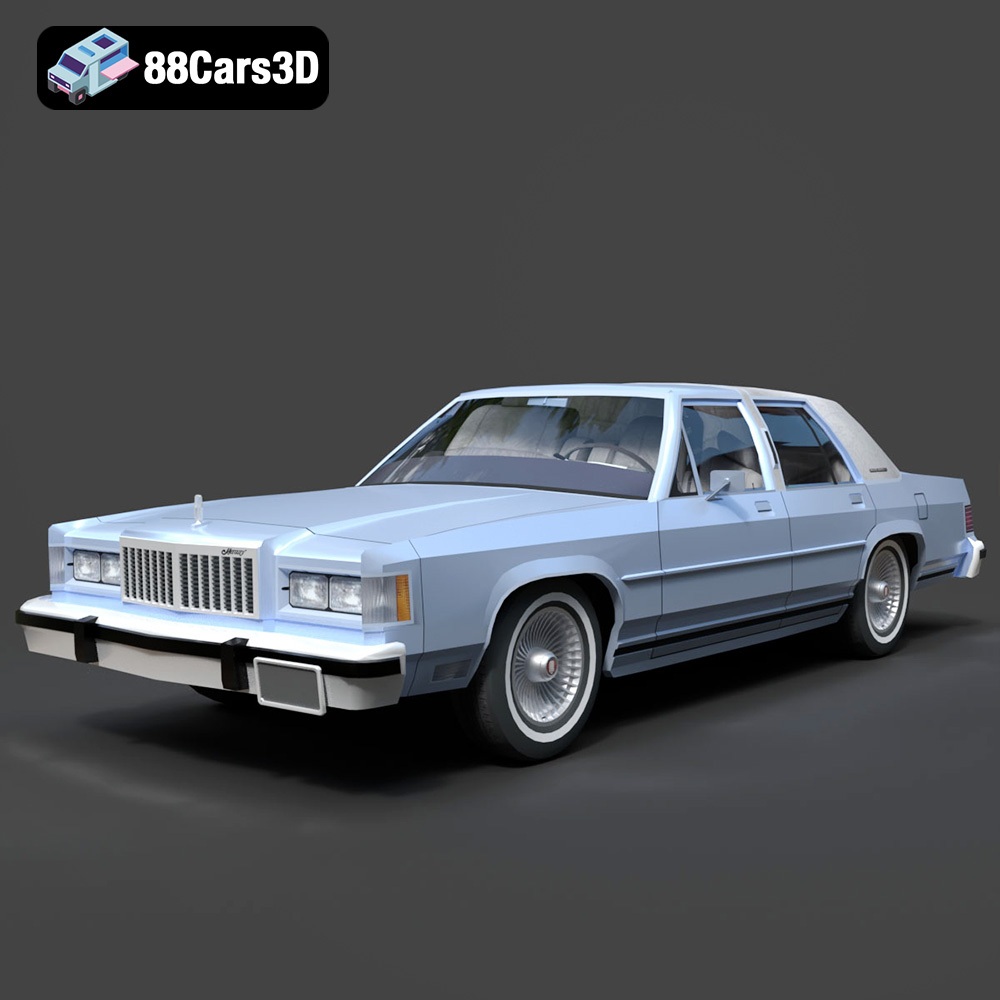
Mercury Grand Marquis LS 1986 3D Model
Texture: Yes
Material: Yes
Download the Mercury Grand Marquis LS 1986 3D Model featuring clean geometry, realistic detailing, and a fully modeled interior. Includes .blend, .fbx, .obj, .glb, .stl, .ply, .unreal, and .max formats for rendering, simulation, and game development.
Price: $4.99

Mercedes-Benz SLS AMG 2010 3D Model
Texture: Yes
Material: Yes
Download the Mercedes-Benz SLS AMG 2010 3D Model featuring clean geometry, realistic detailing, and a fully modeled interior. Includes .blend, .fbx, .obj, .glb, .stl, .ply, .unreal, and .max formats for rendering, simulation, and game development.
Price: $4.99
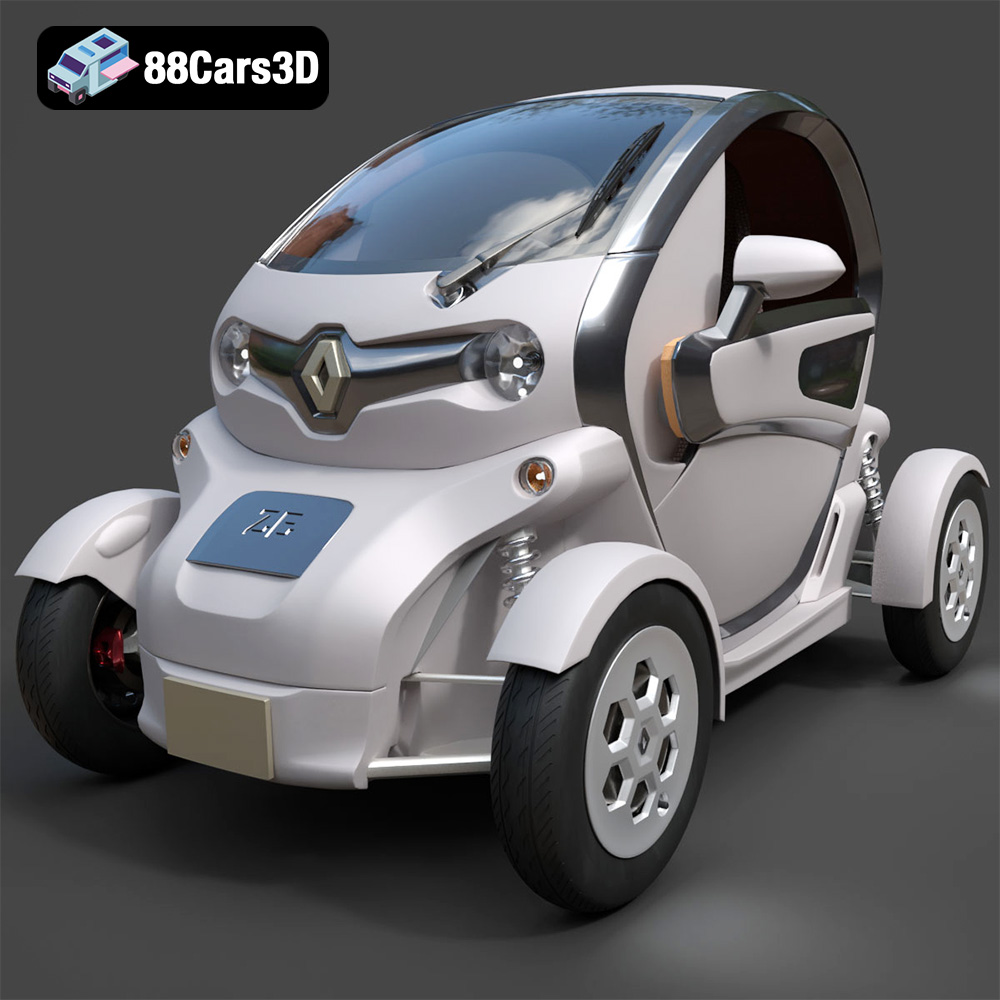
Renault Twizy ZE 3D Model
Texture: Yes
Material: Yes
Download the Renault Twizy ZE 3D Model featuring clean geometry, realistic detailing, and a fully modeled interior. Includes .blend, .fbx, .obj, .glb, .stl, .ply, .unreal, and .max formats for rendering, simulation, and game development.
Price: $4.99
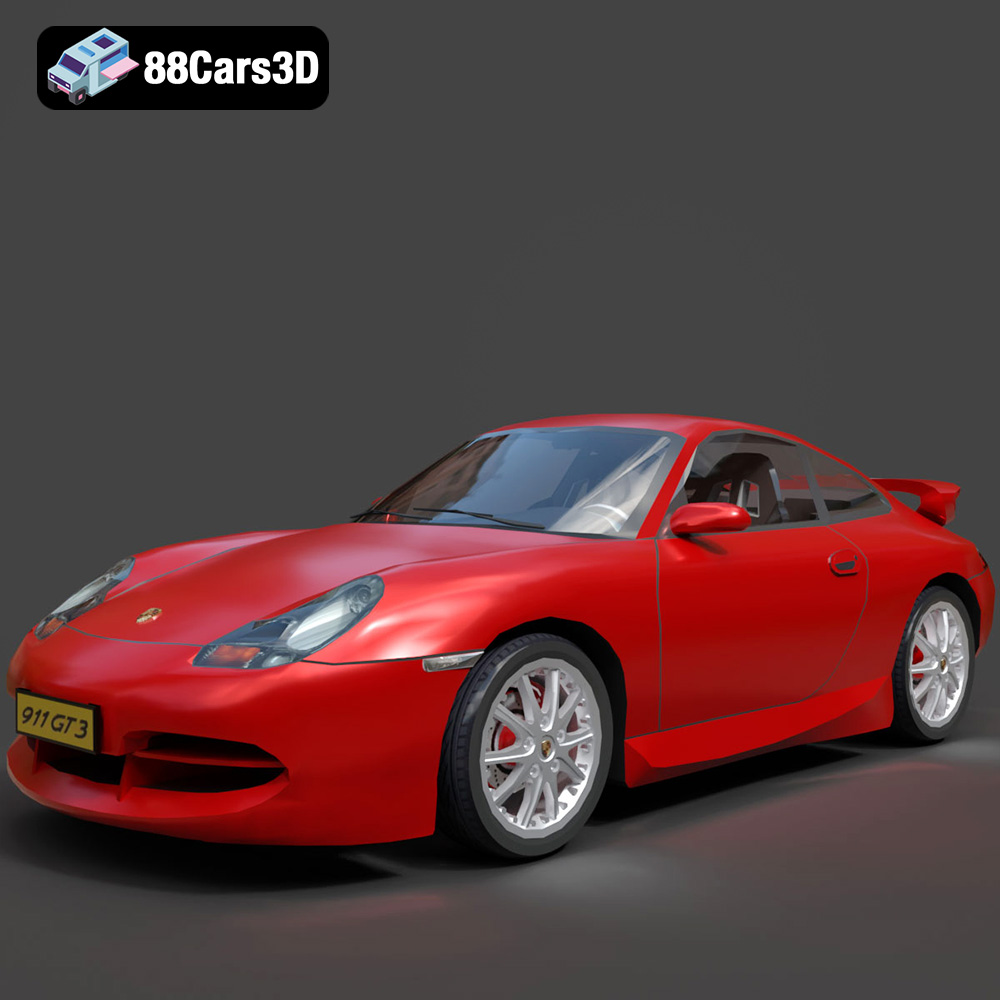
Porsche 911 GT3 3D Model
Texture: Yes
Material: Yes
Download the Porsche 911 GT3 3D Model featuring clean geometry, realistic detailing, and a fully modeled interior. Includes .blend, .fbx, .obj, .glb, .stl, .ply, .unreal, and .max formats for rendering, simulation, and game development.
Price: $4.99
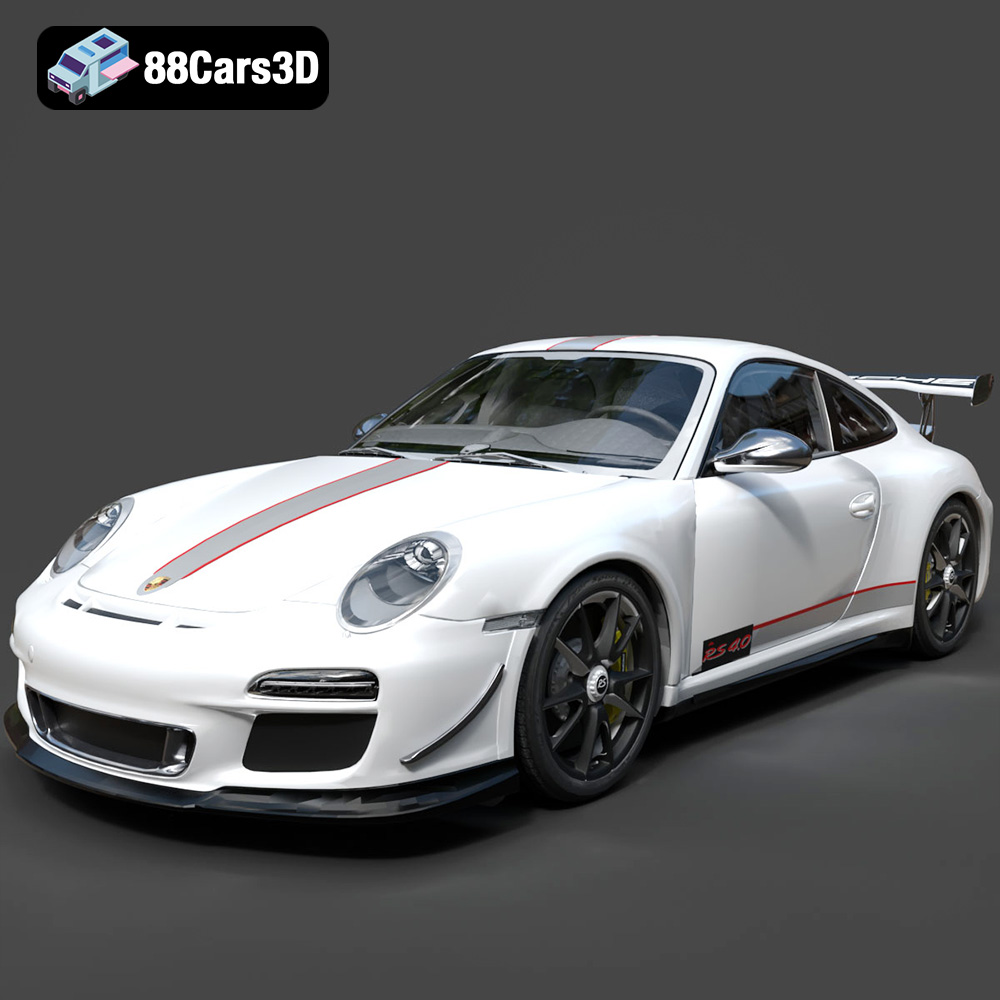
Porsche 911 997 GT3 RS 4.0 2011 3D Model
Texture: Yes
Material: Yes
Download the Porsche 911 997 GT3 RS 4.0 2011 3D Model featuring clean geometry, realistic detailing, and a fully modeled interior. Includes .blend, .fbx, .obj, .glb, .stl, .ply, .unreal, and .max formats for rendering, simulation, and game development.
Price: $4.99
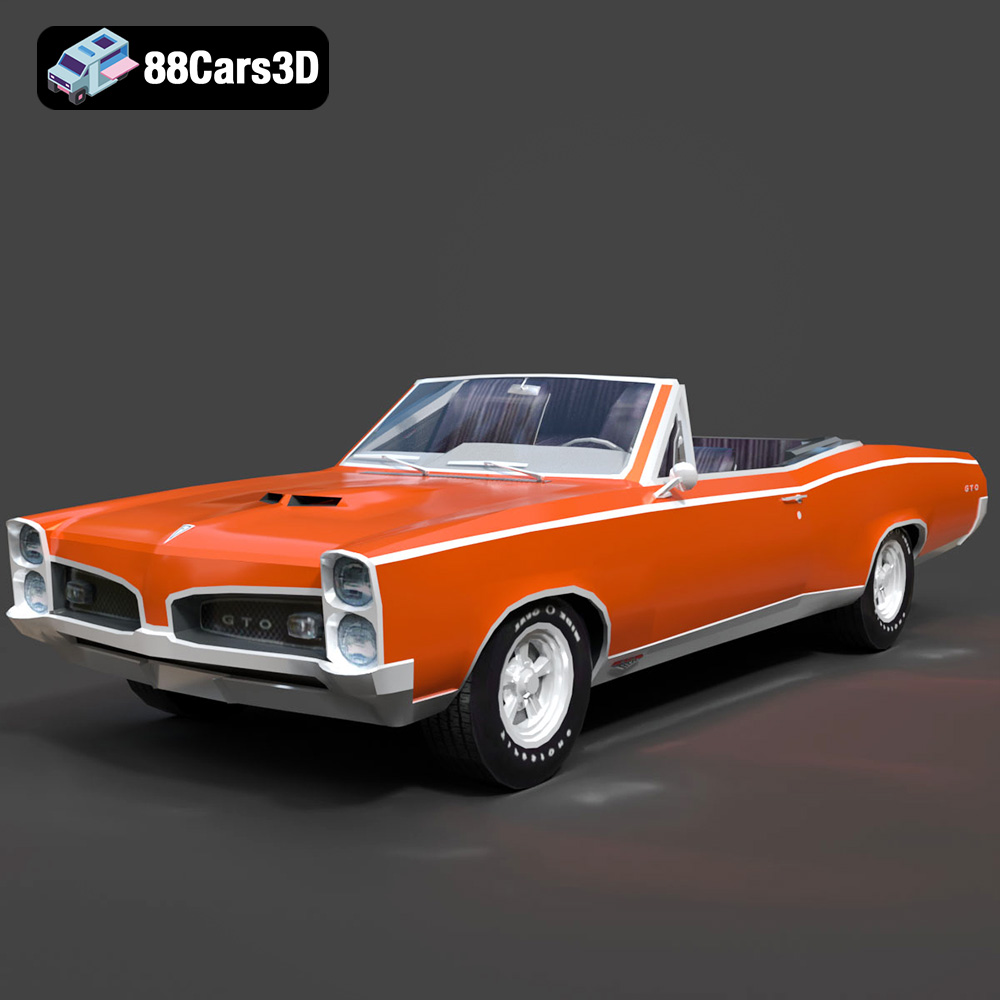
Pontiac GTO Cabrio 1967 3D Model
Texture: Yes
Material: Yes
Download the Pontiac GTO Cabrio 1967 3D Model featuring clean geometry, realistic detailing, and a fully modeled interior. Includes .blend, .fbx, .obj, .glb, .stl, .ply, .unreal, and .max formats for rendering, simulation, and game development.
Price: $4.99
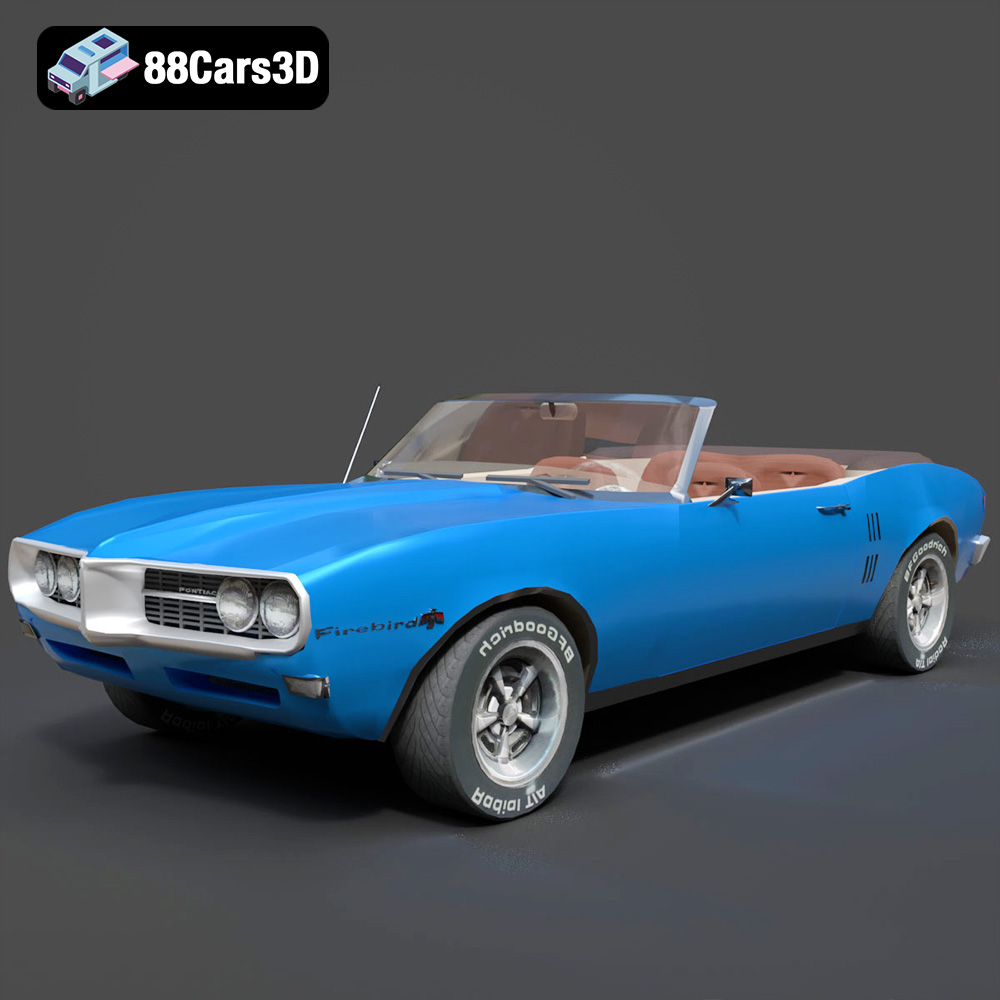
Pontiac Firebird Convertible 1968 3D Model
Texture: Yes
Material: Yes
Download the Pontiac Firebird Convertible 1968 3D Model featuring clean geometry, realistic detailing, and a fully modeled interior. Includes .blend, .fbx, .obj, .glb, .stl, .ply, .unreal, and .max formats for rendering, simulation, and game development.
Price: $4.99

Peugeot 508 2011 3D Model
Texture: Yes
Material: Yes
Download the Peugeot 508 2011 3D Model featuring clean geometry, realistic detailing, and a fully modeled interior. Includes .blend, .fbx, .obj, .glb, .stl, .ply, .unreal, and .max formats for rendering, simulation, and game development.
Price: $4.99
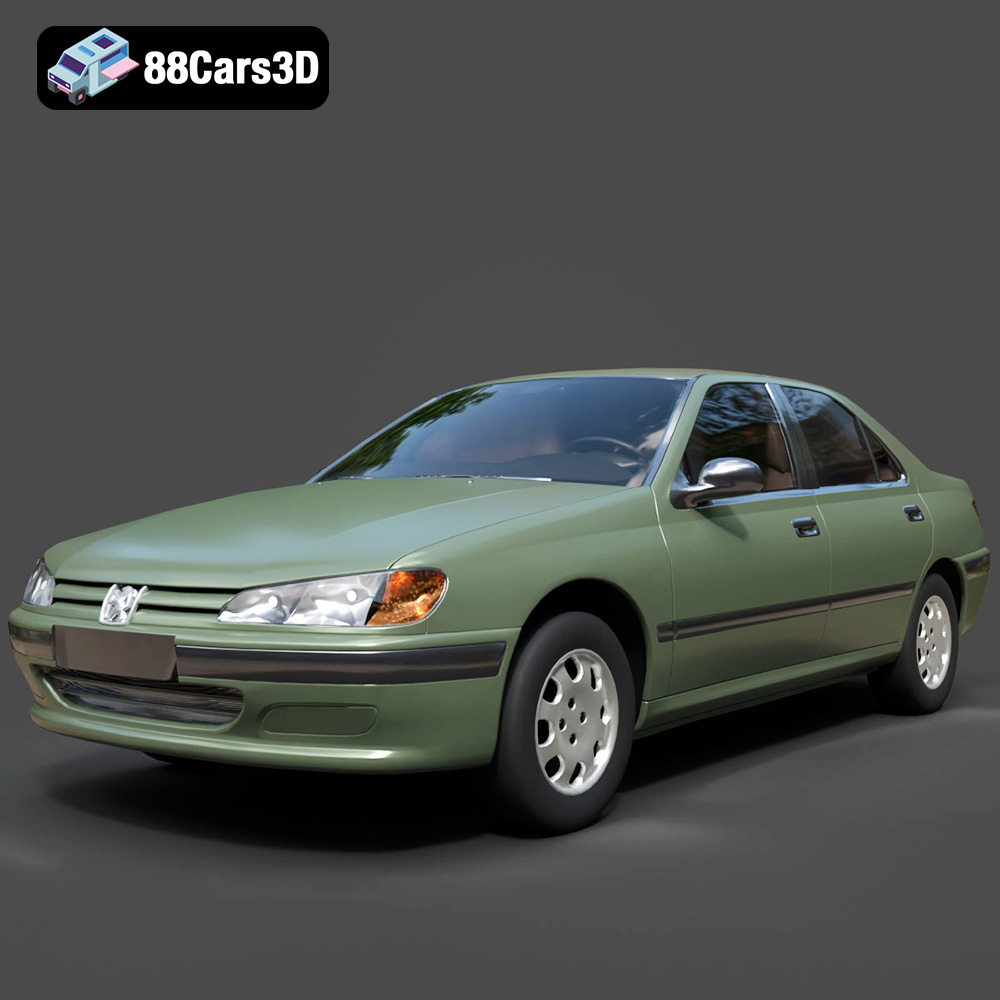
Peugeot 406 1996 3D Model
Texture: Yes
Material: Yes
Download the Peugeot 406 1996 3D Model featuring clean geometry, realistic detailing, and a fully modeled interior. Includes .blend, .fbx, .obj, .glb, .stl, .ply, .unreal, and .max formats for rendering, simulation, and game development.
Price: $10
