The Foundation: Mastering 3D Car Model Topology and Edge Flow
In the dynamic world of 3D artistry, automotive design stands as a pinnacle of technical skill and aesthetic prowess. Crafting compelling 3D car models requires a profound understanding of numerous disciplines, from meticulous mesh construction to sophisticated material science and advanced rendering techniques. Whether you’re a seasoned professional aiming for hyper-realistic renders, a game developer optimizing for performance, or an AR/VR enthusiast pushing the boundaries of immersion, the journey of bringing a car to life in three dimensions is both challenging and incredibly rewarding.
This comprehensive guide delves deep into the technical intricacies of working with 3D car models. We’ll explore the foundational principles of topology, demystify UV mapping, unlock the secrets of PBR materials, and navigate the complex landscapes of rendering and game engine optimization. We’ll also touch upon specialized applications like AR/VR, 3D printing, and professional visualization, ensuring you have the knowledge to tackle any project. By the end of this extensive exploration, you’ll possess a clearer roadmap for elevating your 3D automotive projects, ensuring they not only look stunning but also perform flawlessly across various platforms.
The Foundation: Mastering 3D Car Model Topology and Edge Flow
At the heart of any high-quality 3D car model lies impeccable topology and edge flow. These are not merely aesthetic considerations but fundamental requirements that dictate a model’s deformability, its ability to subdivide smoothly, and its overall performance. For automotive models, which are characterized by sleek curves, sharp creases, and reflective surfaces, clean topology is paramount. It ensures that reflections glide smoothly across the body panels without unsightly bumps or pinches, and that complex details like panel gaps and vents can be accurately represented.
Proper edge flow means that the edges of your mesh follow the natural contours and directional lines of the car’s design. This is crucial for maintaining the integrity of the design when applying subdivision surfaces (like OpenSubdiv or TurboSmooth) and for facilitating efficient UV mapping and texturing. A model with haphazard or overly dense topology in flat areas will be difficult to work with, generate larger file sizes, and potentially lead to rendering artifacts. Conversely, a well-structured mesh allows for easy modification, ensures predictable behavior during animation, and provides a solid base for both high-resolution renders and optimized game assets.
Quad Dominance and Edge Flow Principles
The golden rule for modeling, especially for subdivision surfaces, is to use primarily
quadrilaterals (quads). Quads provide predictable deformation and smooth subdivision, making them ideal for automotive surfaces. While triangles are sometimes unavoidable in very specific, flat areas or for optimizing game meshes, they should be minimized and never appear on curved or deforming surfaces where they can cause pinching. Good edge flow means that your edge loops follow the major contours and silhouette of the car, defining panel breaks, fender flares, and character lines. Think of how light would flow over the car – your edge loops should mimic this. For instance, edge loops should run parallel to the edges of windows, doors, and the car’s overall silhouette, providing clean support for these areas when subdivided.
When creating hard-surface details like sharp edges or panel gaps, supporting edge loops are essential. These are extra edge loops placed close to a sharp edge to “hold” its sharpness when subdivision is applied. Without them, a sharp edge would become rounded and soft. The proximity of these supporting loops to the main edge determines the sharpness of the crease. Too close, and it can create an unnaturally harsh edge; too far, and it becomes too soft. Achieving the right balance is a skill developed through practice and careful observation.
Managing Detail vs. Performance: High-Poly vs. Game-Ready Meshes
The ideal polygon count for a 3D car model varies drastically depending on its intended use. For high-resolution cinematic renders or marketing visuals, a high-polygon count (high-poly) model is desirable. These models often feature extensive detail, smooth surfaces, and minimal optimization, typically ranging from 200,000 to 1,000,000+ polygons, especially after subdivision. They prioritize visual fidelity above all else, often relying on powerful render engines and lengthy render times.
Conversely, for real-time applications like video games, AR/VR experiences, or interactive configurators, game-ready models demand aggressive optimization. These models aim for a significantly lower polygon count, typically between 50,000 to 150,000 polygons for a hero car, and even lower for background vehicles (e.g., 5,000-30,000 polys). Optimization strategies include removing unnecessary internal geometry, collapsing edge loops in flat areas, and leveraging normal maps to convey high-poly detail. For game development, creating multiple
Levels of Detail (LODs) is standard practice. An LOD_0 might be the most detailed model visible up close, while LOD_1, LOD_2, and LOD_3 progressively reduce polygon count as the car moves further from the camera, significantly improving real-time performance without noticeable visual degradation.
Bringing Surfaces to Life: Advanced UV Mapping and Texturing Strategies
Once your 3D car model boasts impeccable topology, the next critical step is to prepare its surfaces for texturing through UV mapping. UV mapping is the process of flattening the 3D surfaces of your model into a 2D space, allowing you to apply 2D textures (like paint, dirt, or labels) seamlessly to the 3D object. For complex forms like cars, effective UV mapping is essential for realistic material representation, avoiding distortion, and optimizing texture memory. Poor UVs can lead to stretched textures, visible seams, and inefficient texture packing, all of which detract from the realism and performance of your model.
Modern workflows emphasize
non-overlapping UVs for most applications, especially when baking maps like ambient occlusion, normal maps, or lightmaps. Overlapping UVs, while sometimes used for tiling textures on repetitive elements, can cause artifacts during baking and complicate material assignments. A well-organized UV layout ensures that every pixel of your texture map is utilized efficiently and precisely corresponds to a unique surface area of your 3D model, allowing for bespoke detail on every part of the car, from the delicate stitching on the interior to the intricate badges on the exterior.
Unwrapping Complex Surfaces: Best Practices for Automotive UVs
Unwrapping a car model requires strategic planning. The goal is to minimize stretching and seams while maximizing texel density consistency across the model. Start by identifying natural seam lines on the car – these often correspond to panel gaps, edges of different material types (e.g., body panel meets window trim), or areas that are less visible. Common areas for seams include the underside of the car, along sharp creases, and inside wheel wells. Software like 3ds Max, Blender, or Maya offer various unwrapping tools such as planar, cylindrical, spherical projections, and advanced algorithms like
unwrap modifiers (3ds Max) or
seam-based unwrappers (Blender). A popular technique involves creating manual seams along logical boundaries and then using a “peel” or “unfold” function to flatten the resulting UV islands.
Consider using multiple UV sets or UV channels for different purposes. For instance, one UV set might be dedicated to diffuse/albedo, metallic, and roughness maps, optimized for minimal distortion. Another separate UV set could be used for lightmap baking in game engines, where uniform texel density and non-overlapping islands are critical. This separation provides flexibility and allows for highly specific optimization for different rendering passes or engine requirements, preventing conflicts and ensuring optimal visual quality and performance. When sourcing models from marketplaces such as 88cars3d.com, check the description for details on UV map quality and organization, as this significantly impacts your workflow.
Optimizing UV Space and Texel Density
Texel density refers to the number of texture pixels per unit of 3D space. Consistent texel density is vital for a uniform level of detail across your model. Imagine a car where the hood texture is crisp, but the fender texture is blurry – inconsistent texel density is often the culprit. Before unwrapping, it’s beneficial to scale down or up various parts of your model temporarily to visually assess and normalize their relative sizes in UV space. After unwrapping, pack your UV islands efficiently within the 0-1 UV coordinate space to maximize texture resolution usage and minimize wasted texture space. Tools like
UV Packer in Blender, or the packing algorithms in 3ds Max and Maya, can automate this process, though manual adjustments are often necessary for optimal results.
For large, high-detail models, a single 0-1 UV space might not be sufficient. Here,
UDIM workflows (e.g., Mari, Substance Painter) come into play. UDIMs allow you to use multiple UV tiles (e.g., 1001, 1002, 1003…) to distribute your UV islands across multiple texture maps, effectively overcoming the resolution limitations of a single texture. This means you can have a 4K texture for the car body (UDIM 1001), another 4K for the interior (UDIM 1002), and so on, achieving incredibly high detail across the entire vehicle without compromising performance by using one enormous texture. Platforms like 88cars3d.com often provide models with meticulously organized UVs, sometimes even supporting UDIMs, to streamline your texturing process.
The Art of Realism: PBR Materials and Shader Network Mastery
To truly bring a 3D car model to life, you need materials that react realistically to light. This is where
Physically Based Rendering (PBR) comes in. PBR materials are designed to mimic real-world light interactions, providing consistent and accurate results across various lighting conditions and render engines. Unlike older, artistic-driven material workflows, PBR relies on physically accurate properties like albedo (base color), roughness, metallic, and normal maps to define how light bounces off or is absorbed by a surface. Mastering PBR is crucial for achieving the photorealistic renders expected in automotive visualization, game development, and high-end cinematics.
Building effective shader networks involves not just assigning PBR textures but also understanding how different material properties interact. For a car, this means crafting everything from highly reflective, clear-coat paints to dull, matte plastics, intricate leather, and transparent glass. Each material requires a unique combination of textures and shader settings to accurately represent its real-world counterpart. This level of detail and accuracy is what separates a good render from an exceptional one, immersing the viewer in a believable virtual environment where every surface tells a story of its material properties.
Deconstructing PBR: Key Maps and Their Functions
The core of PBR lies in its key texture maps:
- Albedo (Base Color) Map: This map defines the pure color of the surface, stripped of any lighting or shading information. For car paint, it would be the base color before any metallic flake or clear coat.
- Metallic Map: A grayscale map where white (1.0) indicates a metallic surface (e.g., chrome, polished aluminum) and black (0.0) indicates a dielectric (non-metallic) surface (e.g., plastic, rubber, wood).
- Roughness Map (or Glossiness): A grayscale map defining the microscopic surface irregularities. White (1.0) means a very rough, diffuse surface (like matte plastic), while black (0.0) means a very smooth, reflective surface (like polished chrome). Some engines use a Glossiness map, which is the inverse of Roughness.
- Normal Map: A specialized texture that fakes surface detail by manipulating the direction of surface normals, making low-polygon models appear to have high-polygon detail. Crucial for adding intricate panel lines, subtle bumps, or fabric weaves without adding geometry.
- Ambient Occlusion (AO) Map: While not strictly a PBR property, AO maps are often used to simulate soft shadows in crevices and corners, enhancing depth and realism, especially in game engines.
- Height/Displacement Map: Used to physically displace geometry, adding real depth to surfaces. Best for intricate details like tire treads or embossed logos on higher-poly models or for rendering pipelines that support true displacement.
Each map plays a vital role in defining how light interacts with the car’s surfaces, contributing to its overall realism.
Building Realistic Car Paint and Interior Shaders
Creating believable car paint is an art form itself. Modern car paint often features multiple layers: a base coat (color), metallic flakes, and a clear coat. In a PBR workflow, this translates into a complex shader network. The base color is driven by the Albedo map. Metallic flakes can be simulated using a combination of the Metallic map and sometimes a separate “flake” texture or procedural noise node, often with a subtle normal map to give them directionality. The clear coat is typically handled by a separate “coat” layer in the shader, with its own roughness and fresnel properties, giving it that characteristic glossy, reflective sheen. Advanced shaders might even incorporate
anisotropy to simulate the brushed metal effect seen on some car interiors or specialized paint finishes.
For interiors, the challenge lies in variety: leather, fabric, plastics, polished wood, carbon fiber, and various metallics. Each material needs its own PBR texture set. Leather, for example, requires an Albedo map for color, a Roughness map to define its subtle sheen, and often a Normal map to convey its grain and texture. Fabrics require similar maps, with an emphasis on the weave pattern in the Normal and Albedo. Plastics range from highly reflective to matte, controlled by the Roughness map. When setting up these materials in render engines like Corona Renderer, V-Ray, Cycles, or Arnold, understanding the specific nodes (e.g., “CoronaPhysicalMtl,” “VrayMtl,” “Principled BSDF”) and how to connect your PBR maps to their respective slots is key. The quality of ready-to-use models from platforms like 88cars3d.com often showcases meticulously crafted PBR materials, significantly reducing setup time for artists.
Illuminating the Scene: Professional Rendering Workflows and Lighting
Even the most perfectly modeled and textured 3D car can look flat and unconvincing without proper lighting and a robust rendering workflow. Lighting is not just about illuminating your subject; it’s about shaping its form, highlighting its curves, revealing its materials, and setting the mood. Professional automotive rendering workflows emphasize control, precision, and an iterative approach to achieve photorealistic results that captivate the viewer. This process often involves a careful balance of artificial lights, realistic environments, and meticulous camera settings, culminating in a visually stunning final image.
Beyond the initial setup, mastering your chosen render engine’s capabilities – be it Corona, V-Ray, Cycles, or Arnold – is crucial. Each engine has its nuances, strengths, and specific settings that can drastically impact render quality and speed. Understanding global illumination, render passes, and denoisers allows artists to produce cleaner, more detailed images while optimizing render times. The final stage, post-processing, acts as the polish, refining colors, contrast, and effects to truly make the render shine, transforming raw output into a professional-grade visual.
Crafting the Perfect Scene: Lighting and Environment Setup
For automotive renders, the environment plays as critical a role as the lighting. Often, a
High Dynamic Range Image (HDRI) is used as the primary light source. HDRIs capture real-world lighting and reflections, providing a comprehensive and realistic illumination solution. Placing your car model within a studio HDRI environment provides soft, even lighting, ideal for showcasing forms and materials. For exterior shots, a rich outdoor HDRI (e.g., a cloudy sky, a city street) can instantly ground the car in a believable setting, contributing accurate reflections and ambient light.
In addition to HDRIs, strategic placement of
physical light sources (e.g., area lights, photometric lights) can emphasize specific features. A large, soft area light overhead can simulate a skylight or studio softbox, providing clean highlights. Smaller rim lights placed behind the car can separate it from the background and highlight its silhouette. For interior shots, careful placement of subtle fill lights is necessary to reveal details without creating harsh shadows. Always consider the camera’s perspective and how the lights interact with the car’s reflective surfaces. Use light blockers or gobos to shape light and create interesting shadows. Experiment with various light temperatures and intensities to evoke different moods, from a bright showroom to a moody evening drive.
Mastering Render Engines and Post-Processing for Stunning Visuals
Each major render engine –
Corona Renderer, V-Ray, Cycles (Blender), and Arnold (Maya/3ds Max) – offers powerful capabilities. All utilize
Physically Based Rendering (PBR) and
Global Illumination (GI), simulating how light bounces and interacts within a scene.
- Corona Renderer: Known for its ease of use, speed, and intuitive interface, making it popular for architectural and product visualization. Its interactive rendering and realistic material handling are excellent for automotive work.
- V-Ray: A long-standing industry standard, highly versatile and powerful, offering extensive control over every aspect of rendering. Widely used in film, architecture, and automotive for its robustness.
- Cycles: Blender’s integrated, physically based path tracer. Constantly improving, it offers strong GPU rendering, adaptive sampling, and a robust node-based shader system.
- Arnold: A high-performance Monte Carlo path tracer, celebrated for its robust handling of complex scenes, impressive volumetrics, and predictable, unbiased results, making it a staple in VFX and animation.
Regardless of the engine, understanding settings like samples, ray depth, and denoisers is crucial for balancing quality and render time. Aim for enough samples to reduce noise, but don’t overdo it. Utilize
denoisers (e.g., OptiX, OpenImageDenoise, V-Ray Denoiser) to clean up noise in post-production, saving significant render time.
After rendering, the raw image often needs refinement.
Post-processing and compositing in software like Adobe Photoshop, Affinity Photo, or DaVinci Resolve is where the final magic happens. Utilize render passes (e.g., reflection, refraction, diffuse, Z-depth, object ID) to gain granular control. Adjust exposure, contrast, color balance, and saturation. Add subtle effects like lens flares, vignetting, or chromatic aberration to enhance realism. Compositing multiple passes allows you to correct specific elements without re-rendering the entire scene, making the workflow incredibly efficient and powerful. This stage is critical for matching client expectations and achieving that professional, magazine-quality finish for your 3D car models.
Optimizing for Immersion: Game Engine and Real-Time Application Strategies
The transition of a high-fidelity 3D car model from a static render to a real-time interactive experience in a game engine or AR/VR application presents a unique set of challenges and opportunities. Performance is paramount in real-time environments; frames per second (FPS) directly impact user immersion and experience. Therefore, significant optimization is required to ensure that your automotive assets run smoothly while retaining as much visual fidelity as possible. This involves a comprehensive approach that touches upon mesh complexity, texture management, and how the game engine handles the asset.
Successful real-time optimization means understanding the limitations and capabilities of platforms like Unity, Unreal Engine, or custom AR/VR frameworks. It’s a balance between visual quality and computational cost. Every polygon, every texture, and every draw call contributes to the overall processing load. By intelligently managing these factors, artists and developers can deliver stunning 3D car models that perform flawlessly, whether they’re racing across a virtual track, being explored in an interactive configurator, or appearing in a mixed reality experience.
Strategies for Real-Time Performance: LODs and Culling
One of the most effective strategies for optimizing 3D car models in real-time environments is the implementation of
Levels of Detail (LODs). As discussed earlier, LODs are multiple versions of the same model, each with a progressively lower polygon count. A high-detail LOD_0 is used when the car is close to the camera, while LOD_1, LOD_2, and so on, are automatically swapped in as the car moves further away. For a high-quality car model, you might have 3-5 LODs, transitioning from 150,000 polygons down to 5,000 or even fewer for distant views. Game engines like Unity and Unreal Engine have built-in LOD systems that simplify this process. It’s crucial to ensure smooth transitions between LODs to avoid noticeable popping.
Another vital optimization technique is
Culling.
- Frustum Culling: The engine automatically prevents rendering of objects that are outside the camera’s view frustum (the visible cone).
- Occlusion Culling: This advanced technique prevents rendering of objects that are hidden behind other objects, even if they are within the camera’s frustum. For example, if a car is behind a building, it won’t be rendered. This requires pre-baking occlusion data in the engine, but it can significantly reduce draw calls in complex scenes.
Proper culling combined with efficient LODs ensures that the GPU only renders what is absolutely necessary and visible to the player, maximizing performance for your 3D car models.
Efficient Texture Management and Collision Detection
Textures are often a major contributor to memory usage and draw calls in game engines.
Texture Atlasing is a common optimization strategy where multiple smaller textures (e.g., textures for different interior components, engine parts) are combined into a single, larger texture map. This reduces the number of draw calls, as the engine only needs to bind one texture instead of many. When creating atlases, ensure consistent texel density and proper padding between UV islands to prevent bleeding. For textures that don’t need unique detail, consider using
tiling textures with masks for variation, or leveraging a few generic PBR materials across many smaller objects.
For interactive experiences,
Collision Detection is fundamental. You don’t want your car to fall through the ground or pass through other vehicles. Simple, low-polygon collision meshes (often referred to as “colliders” or “collision hulls”) are used for physics calculations, not the detailed visual mesh. These should be kept as simple as possible – often just primitive shapes like boxes or capsules, or a simplified convex hull of the car body. Avoid using the high-polygon visual mesh for collision, as this would be computationally expensive. Many game engines also support
skeletal rigging for cars, particularly for components like suspension, steering, and doors, enabling realistic animation and vehicle physics. When acquiring professional 3D car models from platforms like 88cars3d.com, check if they include optimized LODs, PBR materials, and basic collision meshes, as these save immense development time.
Beyond the Screen: Preparing 3D Cars for AR/VR, 3D Printing, and Visualization
The utility of high-quality 3D car models extends far beyond traditional renders and game environments. Emerging technologies like Augmented Reality (AR) and Virtual Reality (VR), alongside established fields like 3D printing and advanced visualization, are constantly pushing the boundaries of how we interact with and utilize digital assets. Each of these applications has its own unique set of technical requirements and best practices, demanding specialized preparation to ensure optimal performance, fidelity, and tangible output. Understanding these nuances is key to maximizing the versatility and impact of your 3D automotive creations.
From ensuring razor-sharp details for a physical print to maintaining smooth frame rates in a mobile AR experience, the journey from a raw 3D model to a specialized application requires thoughtful planning and execution. This section explores the specific considerations needed to adapt your 3D car models for these diverse and exciting new frontiers, equipping you with the knowledge to make your models shine in any medium.
AR/VR Immersion: Optimizing for Mobile and Real-Time Environments
AR/VR experiences, especially on mobile platforms, demand extremely aggressive optimization. The target poly count for a single car model in mobile AR/VR can be as low as 20,000-50,000 polygons, sometimes even less. This requires careful decimation and optimization of the mesh while retaining crucial details via normal maps.
Draw calls are a critical performance bottleneck in AR/VR; minimize them by atlasing textures and combining meshes where possible. If your car has multiple separate parts (e.g., body, wheels, interior components), try to combine them into fewer objects, using a single material if appropriate.
Texture resolution should be balanced – 1K or 2K textures are often sufficient for mobile, with higher resolutions reserved for critical, up-close details. Consider using
baked lighting (lightmaps) for static elements to reduce real-time lighting calculations.
Occlusion Culling and aggressive
LODs are absolutely essential. For AR, ensure the model is scaled correctly to real-world dimensions (e.g., 1 unit = 1 meter) and that its pivot point is at the base for easy placement. File formats like
GLB (for glTF) and
USDZ are particularly optimized for AR/VR, especially for Apple’s ARKit and Google’s ARCore, offering compact file sizes and PBR material support. When procuring assets from marketplaces like 88cars3d.com for AR/VR, look for models explicitly marked as “game-ready” or “AR/VR optimized,” as they often come with pre-configured LODs and optimized materials.
Preparing Models for Tangible Reality: 3D Printing Considerations
3D printing a car model involves a completely different set of technical requirements. The most critical aspect is ensuring the mesh is
watertight and manifold. This means there are no holes, gaps, or internal intersecting geometry. Every edge must be connected to exactly two faces, forming a continuous, closed surface. Non-manifold geometry (e.g., edges connected to more than two faces, floating vertices) will cause errors in the slicing software and result in an unprintable model.
Technically, high-polygon count is generally beneficial for 3D printing, as it allows for smoother surfaces, but excessively dense meshes can be hard for slicers to process. Aim for a balance, ensuring key features like panel lines, grilles, and badges have enough resolution to be visible in the physical print. Use mesh repair tools (e.g., Netfabb, Meshmixer, Blender’s 3D Print Toolbox) to identify and fix issues like flipped normals, interior faces, and small gaps. Wall thickness is another crucial factor: ensure all parts of the car model have sufficient thickness to be structurally sound after printing. Too thin, and parts might break or not print at all. Depending on the scale and printer, a minimum wall thickness of 1-2mm is often recommended. Also, consider splitting the car into multiple parts (e.g., body, wheels, interior) for easier printing, better detail, and assembly, especially for larger models.
File Formats, Compatibility, and Workflow Integration
The journey of a 3D car model from creation to deployment often involves multiple software applications and platforms, each with its preferred or supported file formats. Understanding the characteristics, strengths, and limitations of different 3D file formats is crucial for a smooth and efficient workflow. Incorrect format choices can lead to lost data, broken materials, or compatibility nightmares, wasting valuable time and effort. Navigating this ecosystem effectively ensures that your high-quality 3D car models retain their integrity and functionality across various stages of production.
From the robust interchange formats used in professional pipelines to the lightweight, web-optimized formats for real-time experiences, each serves a specific purpose. Mastering the nuances of data transfer and ensuring seamless integration between different software environments is a hallmark of an efficient 3D artist or team. This section will demystify the most common 3D file formats relevant to automotive models, providing insights into their use cases and how to maintain data integrity throughout your creative process.
Navigating the Ecosystem: Standard and Emerging File Formats
The 3D industry relies on a variety of file formats, each suited for different stages and applications:
- FBX (Filmbox): Developed by Autodesk, FBX is arguably the most prevalent interchange format in the 3D industry. It supports not only geometry (meshes, UVs, normals) but also animations, rigs, cameras, lights, and PBR materials. It’s an excellent choice for transferring models between 3ds Max, Maya, Blender, Unity, and Unreal Engine due to its comprehensive data support.
- OBJ (Wavefront Object): A widely supported, simpler format primarily for geometry, UVs, and vertex normals. It does not natively support animations, rigs, or complex PBR materials (though it can link to MTL files for basic material properties). It’s a reliable choice for static models and compatibility across almost any 3D software.
- GLB/glTF (Graphics Language Transmission Format): An open-standard, royalty-free format designed for efficient transmission of 3D scenes and models, particularly optimized for web-based 3D, AR, and VR. GLB is the binary version of glTF, containing all assets (geometry, textures, materials, animations) in a single file, making it highly portable and efficient for real-time applications.
- USDZ (Universal Scene Description Zip): Developed by Pixar and adopted by Apple, USDZ is a proprietary format built on Pixar’s USD framework, specifically designed for AR on Apple devices. It’s an ideal choice for delivering interactive 3D content to iOS users.
- STL (Stereolithography): The industry standard for 3D printing. It represents 3D surfaces as a collection of unconnected triangles, suitable only for solid, watertight meshes. It lacks color or texture information.
Each format has its niche, and understanding which one to use is crucial for an efficient workflow.
Ensuring Compatibility and Smooth Data Exchange
When working across multiple software platforms or collaborating with others, ensuring data compatibility is key. Always strive for clean exports. Before exporting to an interchange format like FBX or OBJ, it’s good practice to:
- Clean up your scene: Remove unnecessary objects, cameras, lights, and duplicate geometry.
- Freeze transformations: Ensure scales are uniform and rotations are zeroed out (e.g., in Blender, apply scale/rotation; in 3ds Max, reset XForm).
- Check normals: Ensure all face normals are pointing outwards. Flipped normals can cause rendering artifacts.
- Verify materials: While FBX carries some material data, always confirm PBR textures are correctly linked and assigned in the target software, as shader networks rarely transfer perfectly across different render engines.
- Bake animations: If animations are present, bake them to prevent compatibility issues.
- Use standardized units: Consistent units (e.g., meters, centimeters) across all software prevents scaling problems.
When acquiring high-quality 3D car models from platforms like 88cars3d.com, you often find them available in multiple file formats, specifically prepared for various use cases (e.g., FBX for general use, OBJ for basic imports, GLB for web/AR). This foresight in providing optimized and compatible files significantly streamlines the integration into your project, allowing you to focus on creativity rather than troubleshooting data transfer issues. Always refer to the documentation of your target software for recommended import/export settings to ensure the best possible transfer of your meticulously crafted 3D car models.
Conclusion
The journey of mastering 3D car models is a multifaceted endeavor, demanding technical precision, artistic vision, and a continuous thirst for knowledge. From the foundational principles of clean topology and efficient UV mapping to the advanced alchemy of PBR materials and sophisticated rendering techniques, every stage plays a critical role in bringing a digital vehicle to life. Whether your goal is a breathtaking cinematic render, a high-performance game asset, an interactive AR/VR experience, or a physically printed model, the dedication to understanding these technical intricacies is what elevates a good model to an exceptional one.
We’ve traversed the landscape of modeling best practices, delved into the specifics of material creation, explored the art of lighting and rendering, and dissected the critical considerations for real-time optimization and specialized applications. Remember that the quality of your base model, its topology, and UVs, forms the bedrock for everything that follows. By adhering to industry best practices and continuously refining your skills, you can unlock the full potential of your automotive visions.
For those seeking a head start with meticulously crafted assets, platforms like 88cars3d.com offer a curated selection of high-quality 3D car models, designed with clean topology, realistic PBR materials, and optimized UVs, ready for your next project. Embrace these tools, apply the knowledge shared in this guide, and continue to push the boundaries of what’s possible in the exhilarating world of 3D automotive design.
Featured 3D Car Models
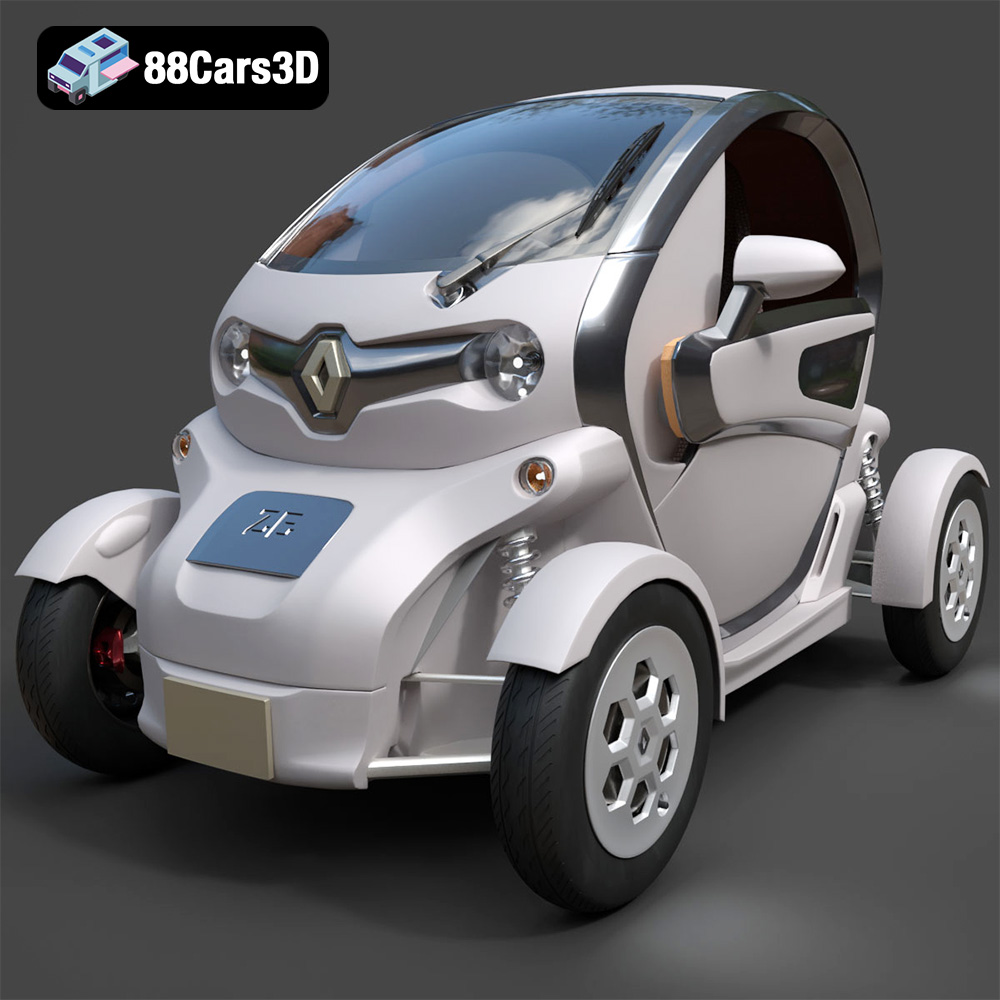
Renault Twizy ZE 3D Model
Texture: Yes
Material: Yes
Download the Renault Twizy ZE 3D Model featuring clean geometry, realistic detailing, and a fully modeled interior. Includes .blend, .fbx, .obj, .glb, .stl, .ply, .unreal, and .max formats for rendering, simulation, and game development.
Price: $4.99
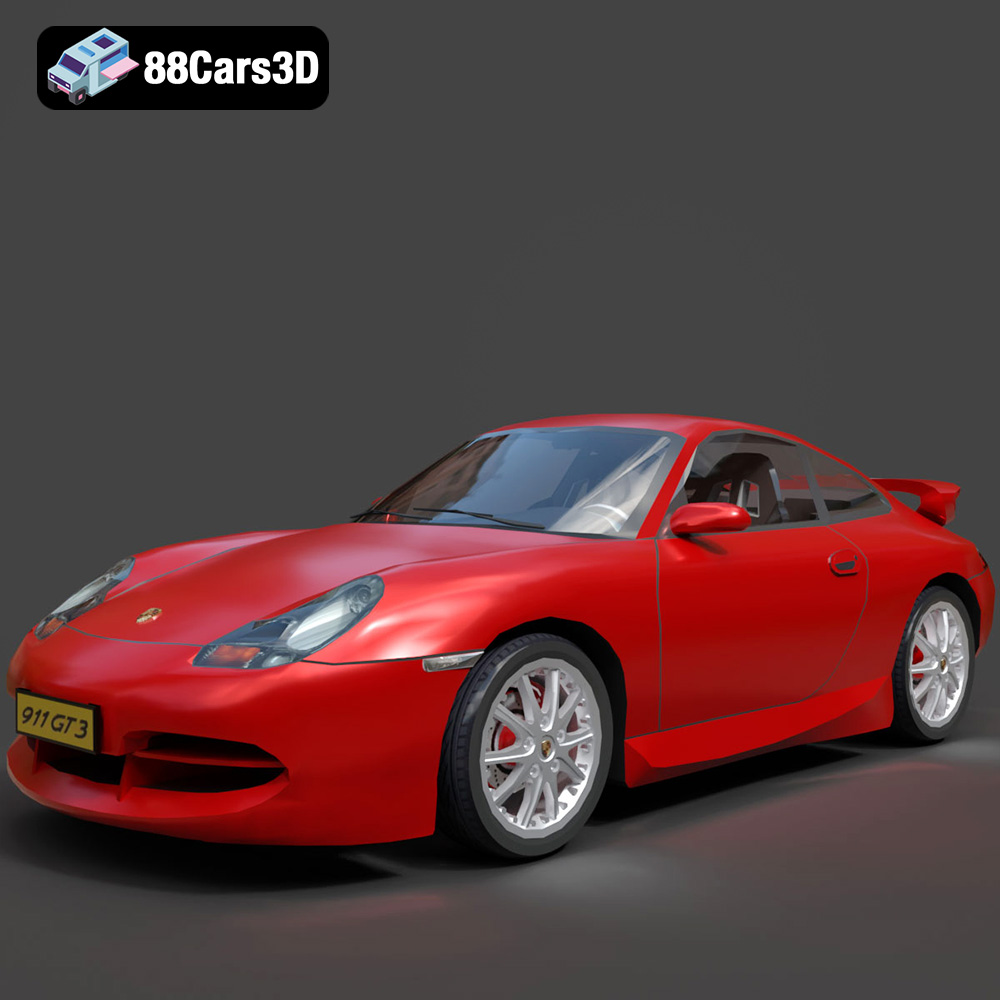
Porsche 911 GT3 3D Model
Texture: Yes
Material: Yes
Download the Porsche 911 GT3 3D Model featuring clean geometry, realistic detailing, and a fully modeled interior. Includes .blend, .fbx, .obj, .glb, .stl, .ply, .unreal, and .max formats for rendering, simulation, and game development.
Price: $4.99
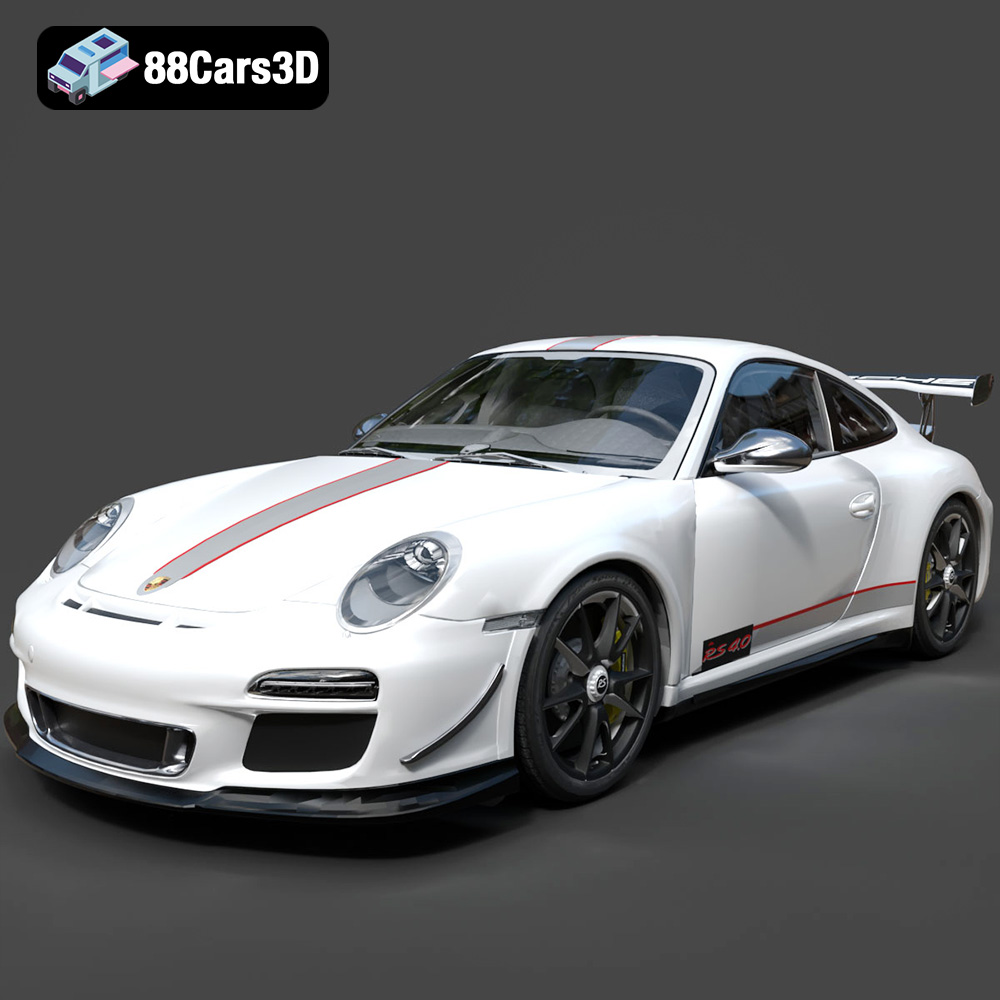
Porsche 911 997 GT3 RS 4.0 2011 3D Model
Texture: Yes
Material: Yes
Download the Porsche 911 997 GT3 RS 4.0 2011 3D Model featuring clean geometry, realistic detailing, and a fully modeled interior. Includes .blend, .fbx, .obj, .glb, .stl, .ply, .unreal, and .max formats for rendering, simulation, and game development.
Price: $4.99
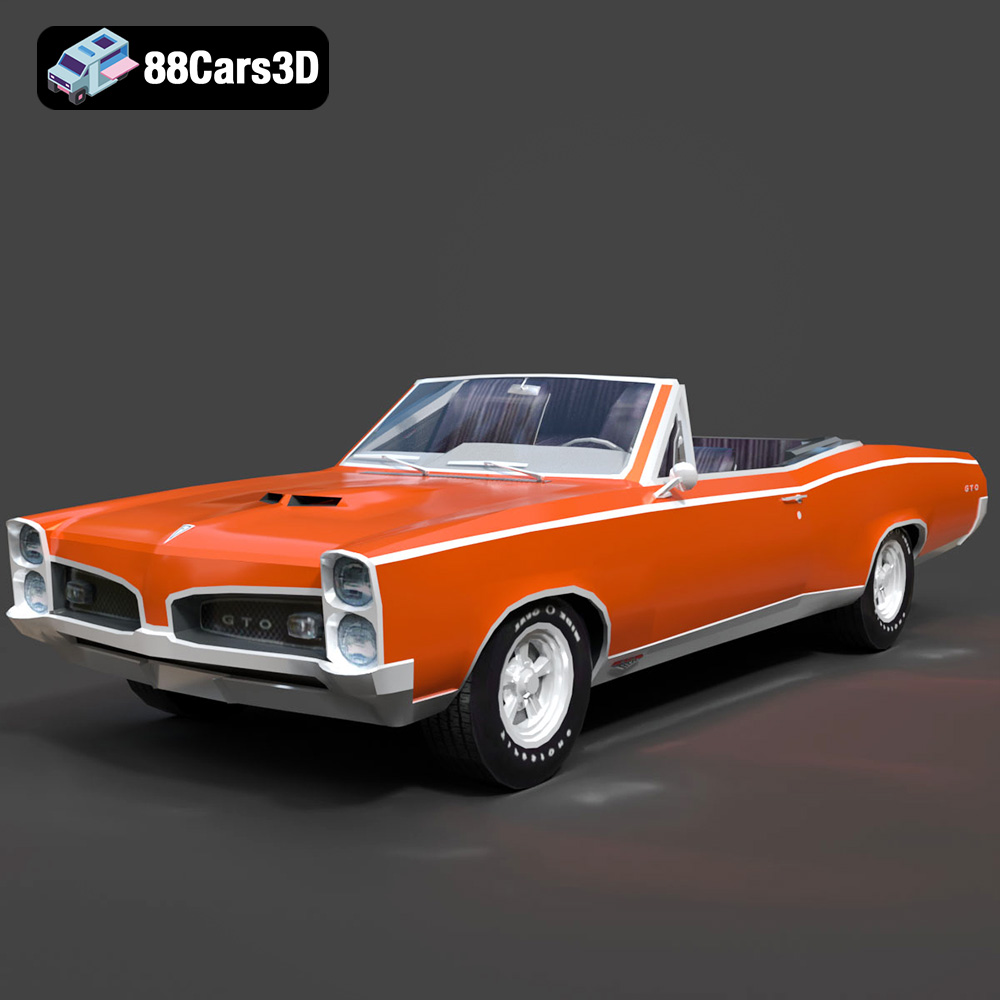
Pontiac GTO Cabrio 1967 3D Model
Texture: Yes
Material: Yes
Download the Pontiac GTO Cabrio 1967 3D Model featuring clean geometry, realistic detailing, and a fully modeled interior. Includes .blend, .fbx, .obj, .glb, .stl, .ply, .unreal, and .max formats for rendering, simulation, and game development.
Price: $4.99
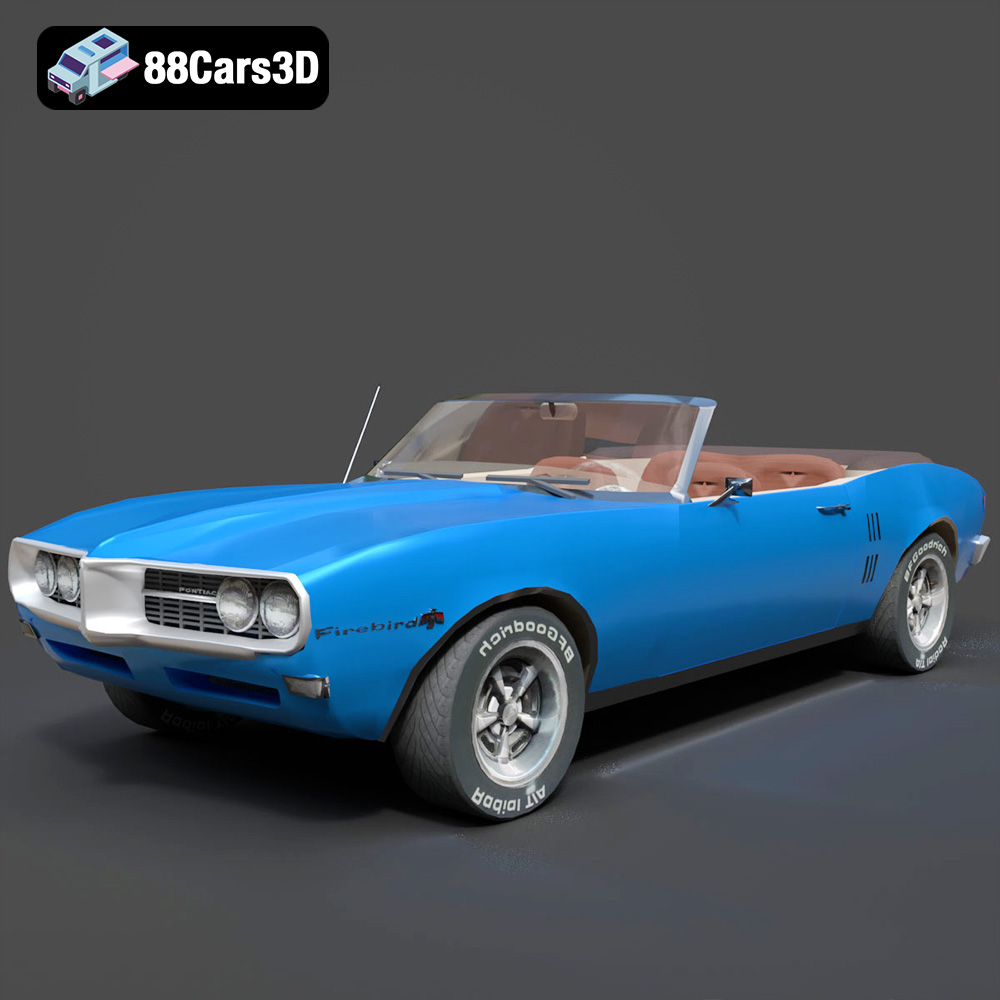
Pontiac Firebird Convertible 1968 3D Model
Texture: Yes
Material: Yes
Download the Pontiac Firebird Convertible 1968 3D Model featuring clean geometry, realistic detailing, and a fully modeled interior. Includes .blend, .fbx, .obj, .glb, .stl, .ply, .unreal, and .max formats for rendering, simulation, and game development.
Price: $4.99

Peugeot 508 2011 3D Model
Texture: Yes
Material: Yes
Download the Peugeot 508 2011 3D Model featuring clean geometry, realistic detailing, and a fully modeled interior. Includes .blend, .fbx, .obj, .glb, .stl, .ply, .unreal, and .max formats for rendering, simulation, and game development.
Price: $4.99
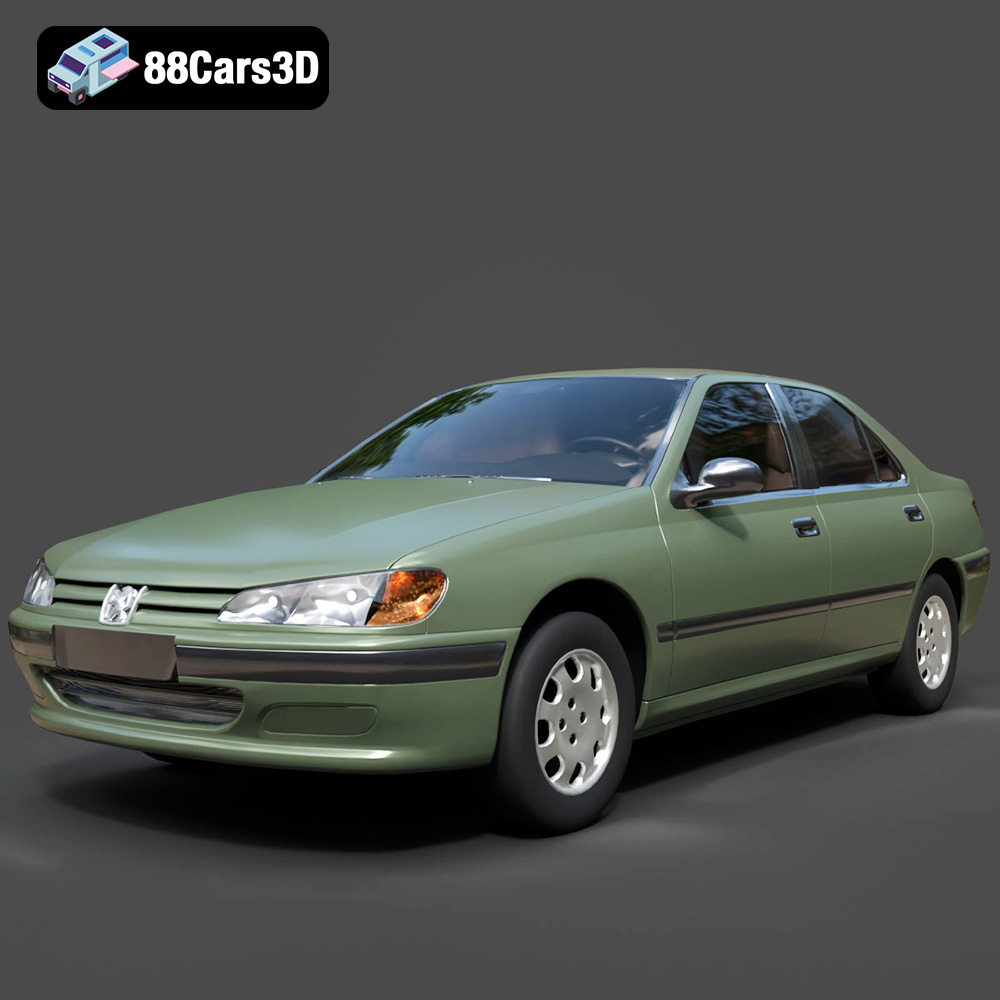
Peugeot 406 1996 3D Model
Texture: Yes
Material: Yes
Download the Peugeot 406 1996 3D Model featuring clean geometry, realistic detailing, and a fully modeled interior. Includes .blend, .fbx, .obj, .glb, .stl, .ply, .unreal, and .max formats for rendering, simulation, and game development.
Price: $10
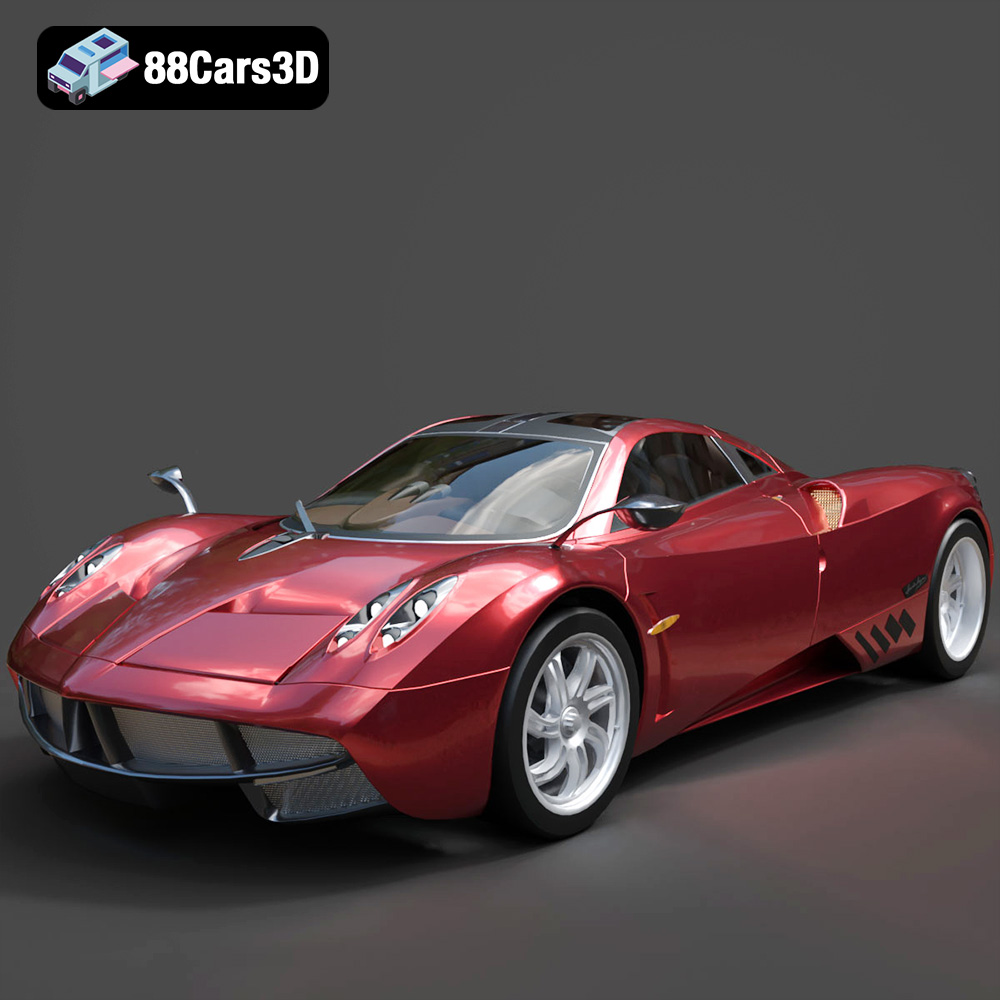
Pagani Huayra 2012 3D Model
Texture: Yes
Material: Yes
Download the Pagani Huayra 2012 3D Model featuring clean geometry, realistic detailing, and a fully modeled interior. Includes .blend, .fbx, .obj, .glb, .stl, .ply, .unreal, and .max formats for rendering, simulation, and game development.
Price: $10
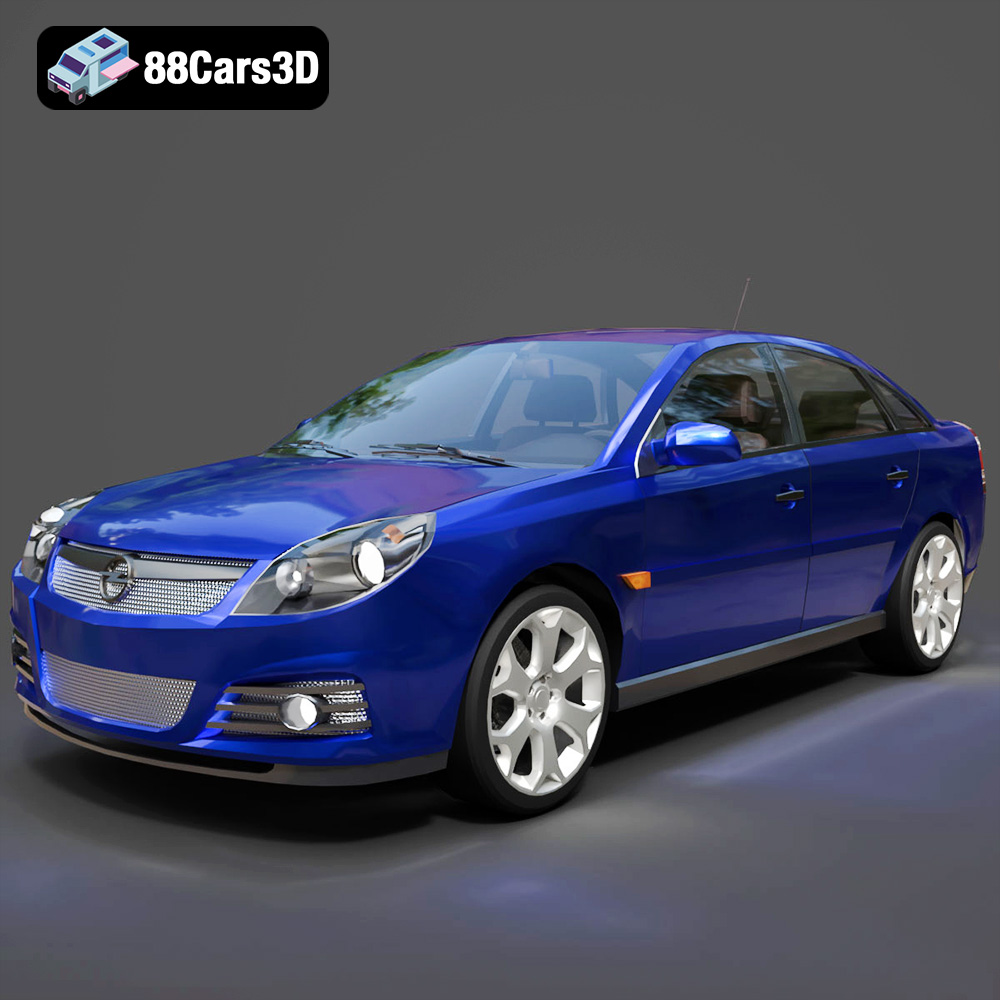
Opel Vectra C 2005 3D Model
Texture: Yes
Material: Yes
Download the Opel Vectra C 2005 3D Model featuring clean geometry, realistic detailing, and a fully modeled interior. Includes .blend, .fbx, .obj, .glb, .stl, .ply, .unreal, and .max formats for rendering, simulation, and game development.
Price: $10

Opel Insignia OPC 3D Model
Texture: Yes
Material: Yes
Download the Opel Insignia OPC 3D Model featuring clean geometry, realistic detailing, and a fully modeled interior. Includes .blend, .fbx, .obj, .glb, .stl, .ply, .unreal, and .max formats for rendering, simulation, and game development.
Price: $10
