The Foundation of Excellence: Automotive 3D Model Topology and Edge Flow
In the expansive realm of 3D visualization, few subjects captivate the imagination and demand meticulous precision quite like automotive design. From sleek supercars destined for high-octane game engines to meticulously crafted vintage vehicles for photorealistic architectural renderings, the quality of 3D car models serves as the bedrock for any successful project. For professionals in automotive design, game development, cinematic animation, or even cutting-edge AR/VR experiences, understanding the intricate technical details behind a truly outstanding 3D car model is paramount. It’s the difference between a passable asset and a show-stopping masterpiece that defines realism and performance.
This comprehensive guide delves deep into the technical intricacies, best practices, and advanced workflows essential for creating, optimizing, and deploying high-quality 3D car models across diverse applications. We’ll explore everything from the foundational principles of topology and UV mapping to advanced PBR material creation, rendering strategies, game engine optimization, and preparing models for specialized uses like 3D printing and immersive AR/VR visualization. Whether you’re a seasoned 3D artist aiming to refine your craft or a project manager seeking to understand the value of premium assets, this article will equip you with the knowledge to appreciate and produce truly exceptional automotive 3D content. By the end, you’ll have a clear understanding of what makes a 3D car model truly professional-grade, a standard consistently upheld by platforms like 88cars3d.com.
The Foundation of Excellence: Automotive 3D Model Topology and Edge Flow
The underlying structure of a 3D car model, known as its topology, is arguably the most critical aspect determining its quality, versatility, and performance. For automotive models, which feature smooth, often complex curves and distinct panel lines, impeccable topology is non-negotiable. Clean topology means the mesh is composed primarily of quadrilaterals (quads), arranged in an intelligent way to create continuous loops of edges, known as edge flow. This structured approach ensures smooth deformations during animation, predictable subdivision surface results, and efficient UV unwrapping.
Poor topology, characterized by excessive triangles, N-gons (polygons with more than four sides), or spiraling edge loops, leads to unsightly pinching, artifacts, and challenges in all subsequent stages of the 3D pipeline. A typical high-poly automotive model might range from 200,000 to 1,000,000 polygons for intricate details like engine bays and interiors, while optimized game assets might target 50,000 to 150,000 polygons for exterior views. Regardless of polycount, the underlying quad-dominant structure is key. When sourcing models from marketplaces such as 88cars3d.com, always scrutinize the wireframe to ensure this foundational quality.
Clean Quads vs. Triangles: The Mesh Debate
While modern renderers and game engines can technically handle triangulated meshes, a quad-dominant topology offers significant advantages. Quads facilitate predictable subdivision (e.g., using a TurboSmooth or Subdivision Surface modifier in 3ds Max or Blender), allowing artists to work with a lower-poly base mesh and smoothly increase detail. Triangles can cause unpredictable shading, especially on curved surfaces, leading to faceted appearances or “pinching” when subdivided. N-gons are even worse, as they don’t have a clear definition for subdivision and can cause unpredictable triangulation by the software, leading to shading errors.
Best practice dictates keeping triangles to an absolute minimum, typically only in areas where geometry is entirely flat and won’t deform, or where they are unavoidable (e.g., very acute angles, complex boolean operations later cleaned up). Even then, strategically placed triangles should ideally connect to surrounding quads to maintain good edge flow. Tools like the Quad Draw in Maya or Retopology tools in Blender allow artists to build clean quad meshes over high-detail sculpts, ensuring an optimal base.
Optimizing Edge Flow for Deformation and Animation
Edge flow refers to the direction and continuity of edge loops across the surface of a model. For automotive models, crucial edge loops should follow the natural curves, creases, and panel lines of the vehicle. For instance, there should be clear edge loops defining the separation between the hood and the fender, around wheel wells, and along the car’s body lines. These loops serve multiple purposes:
- Sharpness and Detail: Tightly packed edge loops along creases help to maintain crisp details without relying on excessive polygon density across the entire surface.
- Subdivision Control: When applying subdivision modifiers, these supporting edge loops prevent the model from becoming overly rounded, preserving the design intent.
- Deformation and Animation: While cars typically don’t deform like organic characters, components like doors, hoods, and trunks need to open and close smoothly. Good edge flow around these pivot points and hinge areas is crucial for clean animation without stretching or intersecting geometry.
- UV Mapping: Logical edge loops provide natural seams for unwrapping, minimizing distortion and making the process much more manageable.
Techniques involve using tools like “Connect Edges” in 3ds Max or “Loop Cut and Slide” in Blender to strategically add or refine edge loops, ensuring they encircle features and guide the surface’s curvature effectively. Avoiding poles (vertices with more or less than 5 edges meeting at them) on smooth, critical surfaces is also a common practice to prevent shading anomalies.
The Skin of Realism: Advanced UV Mapping for Complex Car Surfaces
Once the topology is solid, the next critical step for adding realism is UV mapping. UVs are 2D coordinates that tell the 3D software how to project a 2D texture onto the 3D surface. For something as complex and visually critical as a car, perfect UVs are essential for high-quality textures, decals, and accurate material representation. Poor UVs lead to stretched, distorted, or blurry textures, significantly degrading the visual fidelity of your automotive rendering or game assets.
The goal is to unwrap the 3D model into a flat 2D layout (the UV map) with minimal stretching, overlapping, and consistent texel density across all surfaces. This often involves segmenting the car into logical pieces – hood, doors, fenders, roof, bumpers, glass, interior elements – each with its own carefully laid out UV islands. A well-executed UV map enables artists to apply detailed paint textures, racing stripes, clear coat effects, and intricate interior fabrics with precision, making the model truly shine.
Strategic UV Unwrapping Techniques
Effective UV unwrapping for complex car surfaces requires a strategic approach to seam placement and projection methods:
- Seam Placement: Seams are where the 3D mesh is “cut” to flatten it into 2D. For cars, these should be placed in inconspicuous areas, such as along natural panel lines, under the car, or where different materials meet. For instance, the seam for a door might run along its bottom edge and inside face, minimizing visibility. Many artists use tools like “Edge Loop Selection” in Blender or “Pelt” mapping in 3ds Max to define these seams precisely.
- Projection Methods: Different parts of a car benefit from different projection methods. Cylindrical projection works well for wheel arches or exhaust pipes, planar projection for flat panels, and spherical projection for rounded mirrors. Advanced techniques like “ABF (Angle-Based Flattening)” or “LSCM (Least Squares Conformal Mapping)” algorithms, found in software like RizomUV or even built into Maya and Blender, are invaluable for minimizing distortion across complex, organic surfaces.
- Symmetry: Most cars are symmetrical. Leveraging symmetry during UV unwrapping (e.g., unwrapping one half and then mirroring the UVs) saves time and ensures consistency.
After unwrapping, it’s crucial to check for distortion using a checkerboard texture. Areas with stretched or compressed squares indicate poor UVs that need re-adjustment. Tools like “UV Editor” in Maya, “UV Unwrap” modifier in 3ds Max, or the dedicated UV workspace in Blender provide visual feedback for this process.
UV Atlasing and Texel Density Consistency
For optimal performance, especially in game engines, multiple smaller UV islands are often packed into a single larger UV map, known as a UV atlas. This reduces the number of texture calls (draw calls), improving rendering efficiency. For a car, you might have one atlas for the exterior body, another for the interior, and separate smaller atlases for wheels, lights, and transparent parts.
- Texel Density: This refers to the number of texture pixels per unit of 3D surface area. Consistent texel density across the entire model is crucial. If the hood has a higher texel density than the fender, the texture on the fender will appear blurrier even if they use the same texture resolution. Tools within 3ds Max, Blender, and Maya allow artists to visualize and normalize texel density across different UV islands, ensuring uniform texture quality. For realistic close-ups, texel density can be upwards of 10.24 px/cm (1024 pixels per 1 meter square), while for distant objects, it might be much lower, like 2.56 px/cm.
- Padding and Margins: When packing UV islands into an atlas, sufficient padding (empty space) between islands is essential to prevent texture bleeding, especially when using mipmaps or texture compression. A margin of 4-8 pixels is generally recommended for production-ready assets.
Proper UV mapping is a laborious but rewarding process that directly impacts the final visual quality. It’s a hallmark of professional-grade 3D car models and a key differentiator in assets acquired from trusted sources.
Breathing Life into Surfaces: PBR Material Creation and Shader Networks
Achieving photorealism in automotive rendering hinges on the meticulous creation of PBR materials (Physically Based Rendering materials). PBR accurately simulates how light interacts with real-world surfaces, resulting in predictable and consistent rendering outcomes across various lighting conditions. This realism is fundamental for any high-quality 3D car model, especially when aiming for professional visualization or cinematic quality.
A car’s surface is a symphony of complex materials: metallic paints with clear coats, intricate carbon fiber weaves, glossy glass, textured tires, and various interior fabrics. Each of these requires a nuanced PBR setup, typically comprising multiple texture maps (Albedo, Roughness, Metalness, Normal, Displacement) and a sophisticated shader network. Understanding the core principles of PBR and how to translate real-world material properties into digital values is vital for bringing a car model to life.
Core PBR Principles: Albedo, Roughness, Metalness, Normal Maps
PBR relies on a few core principles and corresponding texture maps to accurately represent surfaces:
- Energy Conservation: Light reflected from a surface (diffuse + specular) cannot exceed the incoming light. This means darker albedo values reflect less light overall.
- Albedo (Base Color): This map defines the inherent color of a surface without any lighting information. For metals, it should be a darker value; for non-metals (dielectrics), it’s the actual color. RGB values range from 0 to 1, or 0-255.
- Roughness (or Glossiness): This grayscale map dictates how rough or smooth a surface is, directly influencing the spread and intensity of specular reflections. A value of 0 (black) is perfectly smooth/glossy, while 1 (white) is extremely rough/matte. Car paint often has varying roughness from body to clear coat.
- Metalness: This binary grayscale map distinguishes between metallic (white, value 1) and non-metallic (black, value 0) surfaces. Metals behave differently with light (absorbing diffuse, reflecting specular); non-metals reflect diffuse and have a weaker specular component.
- Normal Maps: These maps simulate fine surface details (bumps, scratches, panel gaps) without adding actual geometry. They use RGB values to encode direction vectors for surface normals, creating the illusion of detail, and are crucial for optimizing polygon counts for game assets while retaining visual fidelity. Textures typically range from 2K (2048×2048) to 8K (8192×8192) depending on the detail level and application.
- Ambient Occlusion (AO): Although not strictly PBR, AO maps simulate soft shadows created by ambient light being blocked by nearby geometry, enhancing depth and realism. They are often baked from high-poly models.
These maps are then fed into a PBR shader (e.g., Standard Surface in Arnold, Corona Physical Material, V-Ray PBR material, Principled BSDF in Blender Cycles) which handles the complex light calculations based on these inputs.
Advanced Shader Customization and Layering
While the core PBR maps provide a solid base, true realism for automotive models often requires advanced shader customization and layering:
- Clear Coat: Car paint is typically a metallic base coat covered by a glossy clear coat. PBR shaders in renderers like Corona Renderer or V-Ray offer dedicated clear coat layers with their own roughness, IOR (Index of Refraction), and color parameters, allowing for highly realistic automotive finishes.
- Anisotropy: This effect, where reflections appear stretched or compressed in a specific direction (like brushed metal or certain types of car paint), adds another layer of realism. Advanced shaders support anisotropic controls, often driven by a texture map or procedural input.
- Subsurface Scattering (SSS): For materials like headlights (some plastics) or leather, SSS simulates light scattering beneath the surface, giving them a softer, more organic look.
- Procedural Textures: Combining image textures with procedural nodes (e.g., noise, grunge, wear masks) within the shader network can add subtle imperfections and variations, making the model less “perfect” and more believable. For example, a dirt map might blend two different roughness values or colors.
- Shader Graphs (Node-Based Shaders): Tools like Blender’s Shader Editor, Maya’s Hypershade, or Substance Designer allow artists to build complex material networks using nodes, providing immense control over every aspect of the material’s appearance. This is invaluable for creating custom effects like iridescent paint, metallic flakes, or intricate tire tread patterns.
Mastering PBR materials and shader networks is key to achieving the stunning visual quality seen in high-end automotive rendering and visualization projects. It ensures that the 3D car models react authentically to diverse lighting conditions, from studio setups to outdoor environments.
The Art of Illumination: High-Fidelity Automotive Rendering Workflows
Even the most perfectly modeled and textured car will fall flat without expert lighting and rendering. Automotive rendering is a specialized field that demands a keen understanding of light, composition, and a robust rendering workflow. The goal is not just to illuminate the car but to highlight its design, materials, and form in a compelling and artistic manner. This involves strategic light placement, environmental context, and optimizing renderer settings for both speed and quality.
Whether you’re using 3ds Max with Corona Renderer, Blender Cycles, V-Ray, or Arnold, the principles remain consistent: simulate reality to create stunning visuals. A typical rendering workflow for a hero shot of a car can involve hours of iterative adjustments, focusing on reflections, shadows, and how light accentuates the car’s intricate curves and finishes. This is where visualization truly transforms into art.
Scene Setup and Lighting Strategies
Effective lighting for 3D car models often starts with a fundamental understanding of how light interacts with highly reflective surfaces:
- Image-Based Lighting (IBL) / HDRIs: High Dynamic Range Images (HDRIs) are indispensable. They capture real-world lighting information, providing realistic environmental reflections and ambient illumination. Using an HDRI as the primary light source in renderers like Corona, V-Ray, or Cycles immediately grounds the car in a realistic context. Often, a single high-quality HDRI (e.g., 16K or 32K resolution) can provide excellent reflections and soft ambient light.
- Key, Fill, and Rim Lights: Beyond IBL, supplementary area lights are used to sculpt the form of the car.
- Key Light: The primary light source, defining the main direction of light and casting dominant shadows. Position it to emphasize the car’s most important features.
- Fill Light: A softer, less intense light used to lighten shadows created by the key light, preventing areas from becoming too dark.
- Rim Light: Placed behind and to the side of the car, rim lights create a bright outline, separating the car from the background and enhancing its silhouette.
- Reflector Cards/Planes: In virtual studios, large white or gray planes are often used as reflectors. These aren’t direct light sources but bounce light back onto the car, filling in shadows and creating large, soft, pleasing reflections on the car’s bodywork, mimicking real photo studios.
- Caustics and Refraction: For headlights, taillights, and glass, ensuring accurate caustics (light focusing through transparent objects) and realistic refraction (light bending as it passes through glass) is crucial. Most modern path-tracing renderers handle this well, but requires sufficient render samples.
The placement of these lights is highly artistic, often requiring many test renders to find the perfect balance that highlights the car’s design elements and paint finish.
Rendering Engine Specifics (Corona, V-Ray, Cycles, Arnold) and Optimization
Each renderer has its strengths and specific optimization techniques:
- Corona Renderer (3ds Max/Cinema 4D): Known for its ease of use and realistic results with minimal tweaking. It’s a biased renderer that excels at physical accuracy. Optimization involves adjusting passes (samples), denoising (often using NVIDIA OptiX or Intel Open Image Denoise), and understanding light mix capabilities for post-render lighting adjustments.
- V-Ray (3ds Max/Maya/Blender/SketchUp): A versatile and industry-standard renderer. It offers both biased and unbiased solutions. Optimization includes efficient sampling (e.g., using adaptive image sampler), GI (Global Illumination) settings (Brute Force/Light Cache combo is common), and render elements for extensive post-production control.
- Blender Cycles: Blender’s built-in physically based path tracer. Leveraging GPU rendering (CUDA, OptiX, HIP) provides significant speedups. Optimization involves judicious use of samples, activating adaptive sampling, and using the built-in OIDN (Open Image Denoise) for clean results at lower samples. Emissive meshes are often used to create subtle reflection shapes.
- Arnold (Maya/3ds Max/Cinema 4D): Another industry-standard, unbiased, Monte Carlo path tracer, known for its robustness and quality in complex scenes. Optimization involves balancing samples for diffuse, specular, transmission, and volume, as well as efficient use of light groups and AOV (Arbitrary Output Variables) for compositing.
General rendering optimization tips include: keeping polygon counts reasonable (via LODs if applicable), using efficient texture resolutions, and ensuring materials are set up correctly to avoid unnecessary calculations. For production-quality images, resolutions like 4K (3840×2160) or 8K (7680×4320) are common, with render times ranging from minutes to hours per frame depending on complexity and hardware.
From Studio to Screen: Game Engine and Real-Time Optimization
Deploying high-fidelity 3D car models into real-time environments like Unity or Unreal Engine presents a unique set of challenges compared to offline rendering. The primary goal shifts from ultimate photorealism to maintaining visual quality while achieving stable frame rates (e.g., 60 FPS or higher). This requires significant optimization of geometry, textures, materials, and overall scene complexity. A truly versatile 3D car model, like those found on 88cars3d.com, will be structured with real-time applications in mind, often providing optimized versions or clear guidelines for adaptation.
Optimizing automotive assets for games and real-time applications involves a multi-faceted approach, focusing on reducing draw calls, polygon count, and memory footprint without sacrificing too much visual fidelity. This is crucial for smooth performance on a wide range of hardware, from high-end PCs to mobile devices for AR/VR.
Level of Detail (LODs) and Draw Call Management
One of the most critical optimization techniques for game assets is the implementation of Level of Detail (LODs). LODs are multiple versions of the same 3D model, each with a progressively lower polygon count. The game engine dynamically switches between these versions based on the camera’s distance from the object:
- LOD0 (High-Poly): Used when the car is close to the camera, retaining maximum detail (e.g., 50,000 – 150,000 polygons for a full car exterior).
- LOD1 (Medium-Poly): Used at mid-distances, with noticeable but acceptable reduction in detail (e.g., 20,000 – 40,000 polygons).
- LOD2 (Low-Poly): Used for distant views, significantly reducing polygons while maintaining overall silhouette (e.g., 5,000 – 15,000 polygons).
- LOD3 (Very Low-Poly / Impostor): For cars very far away, sometimes a simple box or a 2D billboard (impostor) is used, reducing the poly count to mere hundreds or even a single plane.
Tools like 3ds Max’s ProOptimizer, Blender’s Decimate modifier, or integrated LOD systems in Unity and Unreal Engine facilitate this process. A carefully crafted LOD setup can dramatically reduce the computational load on the GPU. Additionally, reducing draw calls (the number of instructions the CPU sends to the GPU to render objects) is vital. This is achieved through techniques like batching (combining similar meshes) and efficient material setup.
Texture Atlasing and Shader Optimization for Performance
Beyond geometry, optimizing textures and shaders is paramount for real-time performance:
- Texture Atlasing: As discussed in UV mapping, combining multiple smaller textures into a single, larger texture atlas reduces the number of texture lookups and draw calls. For a car, rather than having individual textures for the hood, door, and fender, they might all be part of one “body paint” atlas, even if they have separate UV islands. This also applies to interior parts, undercarriage, and small details.
- Texture Resolution and Compression: Use appropriate texture resolutions (e.g., 2K for hero assets, 1K or 512px for less critical details) and leverage GPU-friendly texture compression formats (e.g., DXT for desktop, ETC for mobile) to reduce memory usage.
- Shader Complexity: Real-time shaders should be as lightweight as possible. Avoid excessively complex node networks with many mathematical operations or numerous texture samples if simpler alternatives exist. Utilize baked lightmaps and occlusion maps instead of real-time calculations where possible. Unreal Engine’s Material Editor and Unity’s Shader Graph allow for visual creation and optimization of shaders.
- Material Instancing: In engines like Unreal, using Material Instances derived from a master material allows for variations (e.g., different paint colors) without creating entirely new materials, saving compilation time and memory.
- Dynamic vs. Static Elements: Identify which parts of the car need to be dynamic (e.g., wheels rotating, doors opening) and which can be static (body, chassis). Static objects can benefit from baked lighting and occlusion, further improving performance.
Striking the right balance between visual quality and performance is a constant challenge, but with proper optimization techniques, high-quality 3D car models can deliver stunning results even in demanding real-time environments.
Beyond Visualization: File Formats, AR/VR, and 3D Printing Preparation
The utility of a high-quality 3D car model extends far beyond static renders and traditional game development. With the rise of immersive technologies like AR/VR and accessible manufacturing methods like 3D printing, the adaptability of a model to various workflows and platforms is increasingly important. This requires an understanding of diverse file formats and specific optimization or preparation steps for each application.
A truly versatile automotive asset, one you might find on platforms dedicated to professional models, should be available in multiple formats and adhere to standards that allow for seamless integration into these specialized pipelines. This ensures that a single investment in a premium model can serve multiple purposes, from interactive product configurators to physical prototypes.
Navigating File Formats and Compatibility (FBX, OBJ, GLB, USDZ)
Choosing the right file format is crucial for compatibility and preserving data:
- FBX (Filmbox): The industry standard for transferring 3D data between different software (e.g., 3ds Max, Maya, Blender, Unity, Unreal Engine). It supports geometry, UVs, PBR materials, textures, animations, and skeletal data. FBX is highly versatile and generally recommended for asset exchange, though version compatibility can sometimes be an issue.
- OBJ (Wavefront Object): A widely supported, simpler format primarily for geometry and UVs. It’s excellent for basic mesh transfer but doesn’t support animations or advanced material properties directly, relying on an accompanying .MTL file for basic material definitions. Good for simple imports or when FBX has issues.
- GLB (Binary glTF): GLB is the binary version of glTF (Graphics Language Transmission Format). It’s gaining immense popularity as an open-standard, royalty-free format for web-based 3D, AR, and VR. It packages geometry, PBR materials, textures, and animations into a single, efficient file. Ideal for light-weight, real-time web applications and mobile AR.
- USDZ (Universal Scene Description Zip): Developed by Apple and Pixar, USDZ is a proprietary format specifically designed for AR experiences on Apple devices. It’s an optimized, uncompressed, and cryptographically signed archive file containing USD assets. Like GLB, it’s efficient for mobile AR, allowing for quick viewing and interaction.
When preparing models for different destinations, it’s often necessary to convert between these formats, ensuring all relevant data (especially PBR textures) is correctly interpreted. Platforms like Blender, Maya, and 3ds Max offer robust import/export options, and dedicated converters are also available.
Tailoring Models for AR/VR Experiences and 3D Printing
Each application has unique requirements for 3D car models:
- AR/VR Optimization:
- Extreme Performance: AR/VR operates under even stricter performance budgets than traditional games. This means aggressively optimized LODs, minimal draw calls, highly efficient shaders, and low-resolution textures (e.g., 512px-1K) are crucial, especially for mobile AR.
- Scale and Perception: Models must be scaled correctly to real-world units (e.g., meters) to appear accurate in AR/VR. Proper pivot points and coordinate systems are also important for interaction.
- Lighting: Often, AR experiences rely on real-world lighting, so models need to integrate ambient shadows and reflection probes effectively. VR environments may use baked lighting for performance.
- Interactivity: Models need to be correctly rigged and grouped for interaction (e.g., opening doors, changing paint color) within the AR/VR application framework.
- 3D Printing Preparation:
- Watertight Mesh: The model must be a single, solid (manifold) mesh without any holes, inverted normals, or self-intersecting geometry. This is the most critical requirement. Tools like Blender’s 3D Print Toolbox addon, 3ds Max’s STL Check, or external software like Meshmixer can identify and repair these issues.
- Wall Thickness: Ensure all parts of the model have sufficient wall thickness (e.g., minimum 0.8mm – 2mm depending on printing technology and material) to prevent fragility. Thin details may need to be thickened or removed.
- Polygon Count: While high-poly is fine for detail, extremely dense meshes can sometimes cause issues with slicer software. Decimation can be used, but carefully, to retain surface details.
- Scale: Model must be scaled accurately to the desired print size. Units should be consistent (e.g., millimeters).
- Export Format: STL (Stereolithography) is the most common format for 3D printing, though OBJ is also widely accepted. Some advanced printers support 3MF.
Preparing 3D car models for these specialized applications requires a thorough understanding of their unique constraints and opportunities, ensuring the asset performs flawlessly and fulfills its intended purpose.
The Final Polish: Post-Processing and Compositing for Impact
After all the painstaking work of modeling, texturing, lighting, and rendering, the final stage in creating a truly captivating automotive rendering is post-processing and compositing. This is where the image transitions from a raw render to a polished, professional piece of art. Even the most perfectly rendered image can benefit significantly from careful adjustments in a dedicated image editing or compositing software (e.g., Photoshop, GIMP, Affinity Photo, DaVinci Resolve Fusion, Nuke, After Effects).
Post-processing isn’t about fixing bad renders; it’s about enhancing good ones. It allows for artistic control over color, tone, focus, and atmospheric effects that can elevate the visual impact and emotional resonance of the 3D car model. This final polish is what separates a technically correct image from a visually stunning one, making it ready for client presentations, marketing campaigns, or a portfolio showcase.
Color Grading and Tonal Adjustments
The initial steps in post-processing often involve refining the image’s overall color and tone:
- Exposure and Contrast: Adjusting global exposure and contrast can bring out details and add punch to the image. This mimics a photographer’s control over light.
- White Balance: Correcting the white balance ensures that white objects appear neutral white, removing any unwanted color casts introduced by lighting or environment.
- Color Grading: This involves subtly shifting the color palette of the image to evoke a specific mood or style. This can be done through curves, color balance, or dedicated LUTs (Look-Up Tables). For automotive renders, cooler tones might emphasize sophistication, while warmer tones suggest power or speed.
- Levels and Curves: These powerful tools allow for precise control over the tonal range of the image, adjusting highlights, midtones, and shadows independently to achieve desired brightness and contrast.
- Saturation and Vibrance: Carefully adjusting color intensity can make the car paint pop without looking oversaturated or unrealistic. Vibrance is often preferred as it boosts less saturated colors more, protecting skin tones (though less critical for cars).
Using render elements (also known as AOVs – Arbitrary Output Variables) from renderers like Corona, V-Ray, or Arnold (e.g., separate passes for reflections, refractions, shadows, raw lighting) allows for non-destructive adjustments to specific aspects of the image without affecting others.
Enhancing Realism with Effects and Layers
Beyond basic tonal adjustments, several effects can significantly enhance the realism and aesthetic appeal of a 3D car model:
- Lens Effects (Bloom, Glare, Vignette):
- Bloom: Soft glow around bright areas (e.g., headlights, chrome reflections) adds a cinematic quality.
- Glare/Lens Flares: Realistic light scattering effects from very bright light sources, mimicking camera optics.
- Vignette: Subtle darkening of the image edges to draw the viewer’s eye towards the center (the car).
- Depth of Field (DoF): Simulating the focus of a camera lens, DoF blurs parts of the image that are out of focus, enhancing realism and guiding attention to the car itself. While some renderers offer in-camera DoF, it can also be accurately simulated in post using a Z-depth render pass.
- Chromatic Aberration: A subtle fringe of color along high-contrast edges, mimicking lens imperfections, can add a touch of photographic realism.
- Motion Blur: For animated sequences or implied motion in still images, motion blur (either rendered or added in post with a motion vector pass) conveys speed and dynamism.
- Atmospheric Effects (Fog, Haze): Adding subtle atmospheric perspective or environmental fog can give the image more depth and integrate the car into its environment more convincingly. These can be rendered as separate passes or added in compositing.
- Dust and Scratches: Adding a subtle layer of environmental dust, fingerprints, or micro-scratches via texture overlays can break up perfect surfaces, adding an organic, believable touch to the material, especially on glass or glossy paint.
Each of these effects should be applied subtly and judiciously, as overdoing them can quickly lead to an artificial or overly processed look. The goal is to enhance, not overpower, the inherent quality of the 3D car model and its rendering.
Conclusion: Driving Excellence in 3D Automotive Design
The journey from a blank canvas to a high-fidelity 3D car model, ready for diverse applications, is a testament to technical skill, artistic vision, and meticulous attention to detail. We’ve traversed the intricate landscape of topology, explored the nuances of UV mapping, dissected the science of PBR materials, navigated complex rendering workflows, and mastered the art of game engine optimization. We also delved into specialized applications like AR/VR visualization and precise 3D printing preparation, concluding with the crucial final touches of post-processing.
Each stage, from ensuring pristine edge flow to crafting nuanced shader networks and optimizing for real-time performance, plays a vital role in elevating a 3D car model from mere geometry to a living, breathing digital asset. The demand for such quality is constant, whether it’s for cinematic effects, immersive interactive experiences, or precise industrial design. Understanding these technical requirements not only empowers artists to create better models but also enables clients and project managers to evaluate and appreciate the true value of premium assets.
For those seeking to bypass the arduous creation process or augment their existing libraries with professional-grade content, platforms like 88cars3d.com offer a curated selection of 3D car models that meet these exacting standards. Investing in meticulously crafted assets ensures that your projects begin with a strong foundation, allowing you to focus on unleashing creativity without being bogged down by fundamental technical challenges. Embrace these best practices, refine your workflows, and continue to push the boundaries of what’s possible in the exhilarating world of 3D automotive design.
Featured 3D Car Models
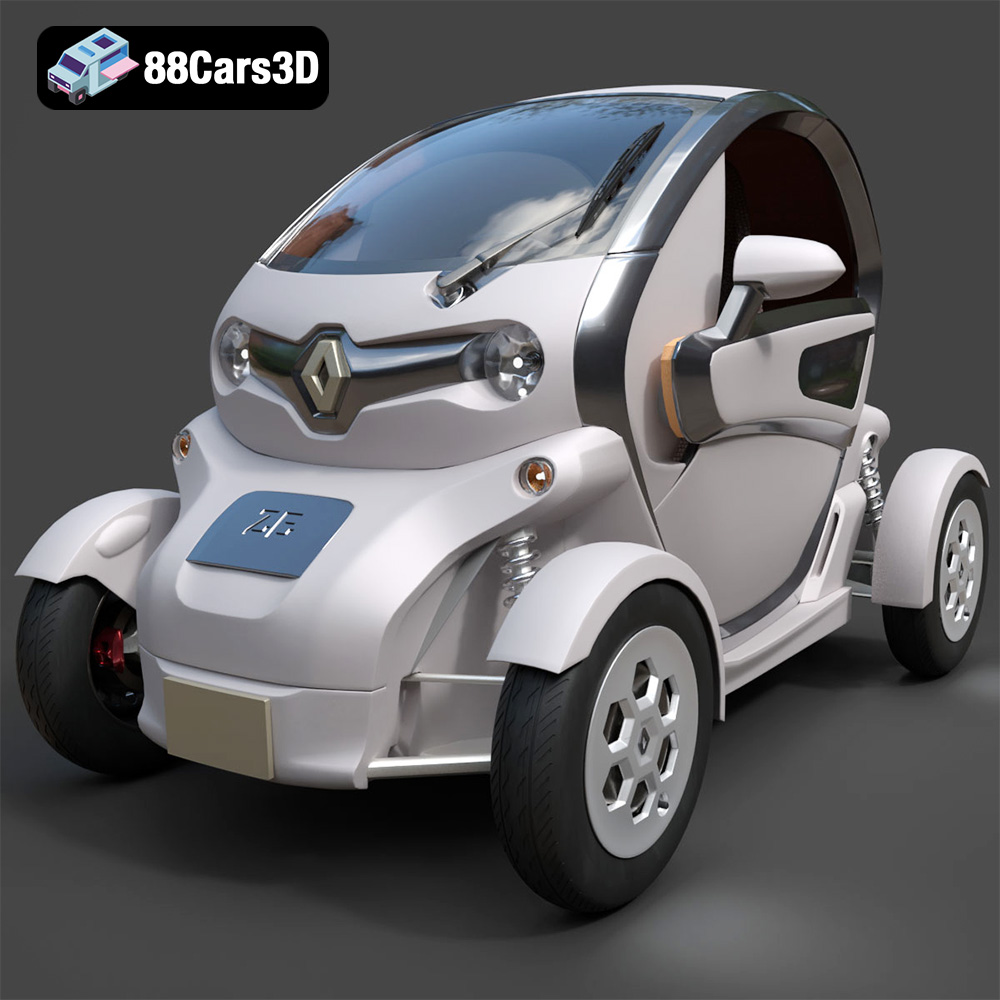
Renault Twizy ZE 3D Model
Texture: Yes
Material: Yes
Download the Renault Twizy ZE 3D Model featuring clean geometry, realistic detailing, and a fully modeled interior. Includes .blend, .fbx, .obj, .glb, .stl, .ply, .unreal, and .max formats for rendering, simulation, and game development.
Price: $4.99
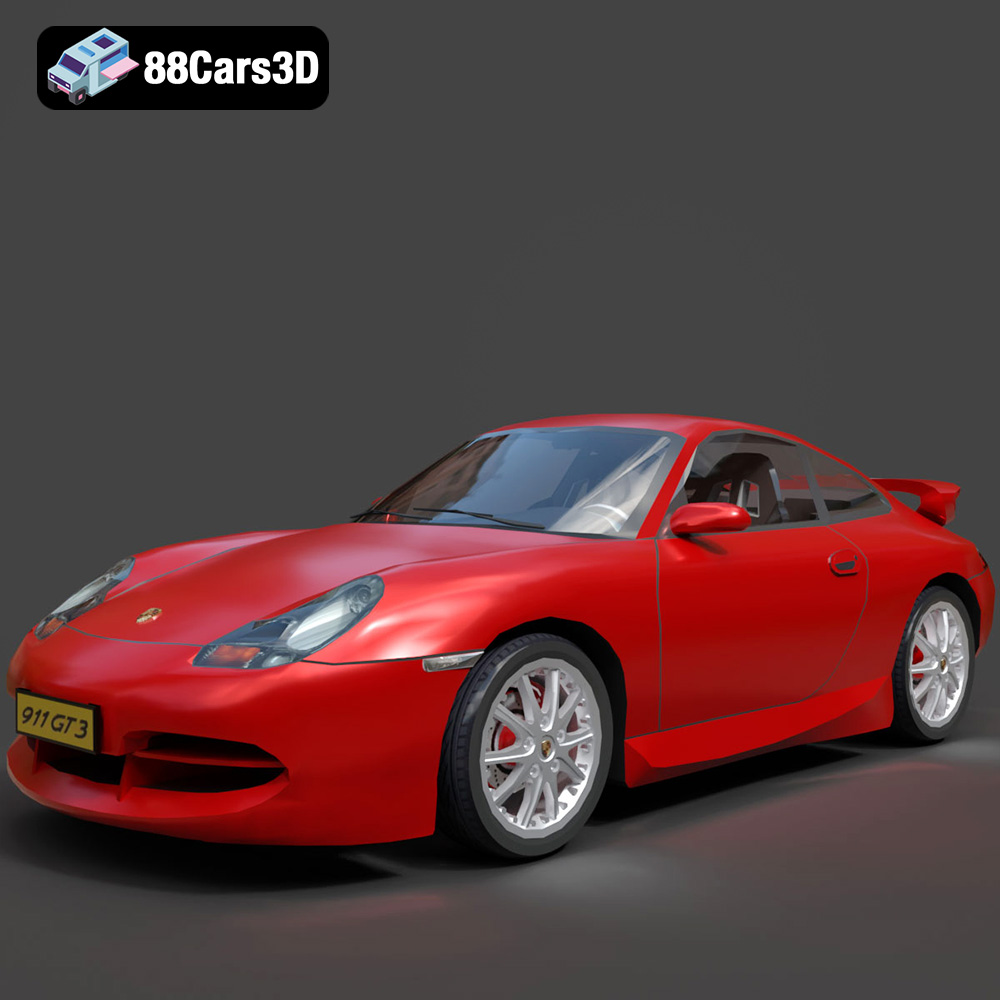
Porsche 911 GT3 3D Model
Texture: Yes
Material: Yes
Download the Porsche 911 GT3 3D Model featuring clean geometry, realistic detailing, and a fully modeled interior. Includes .blend, .fbx, .obj, .glb, .stl, .ply, .unreal, and .max formats for rendering, simulation, and game development.
Price: $4.99
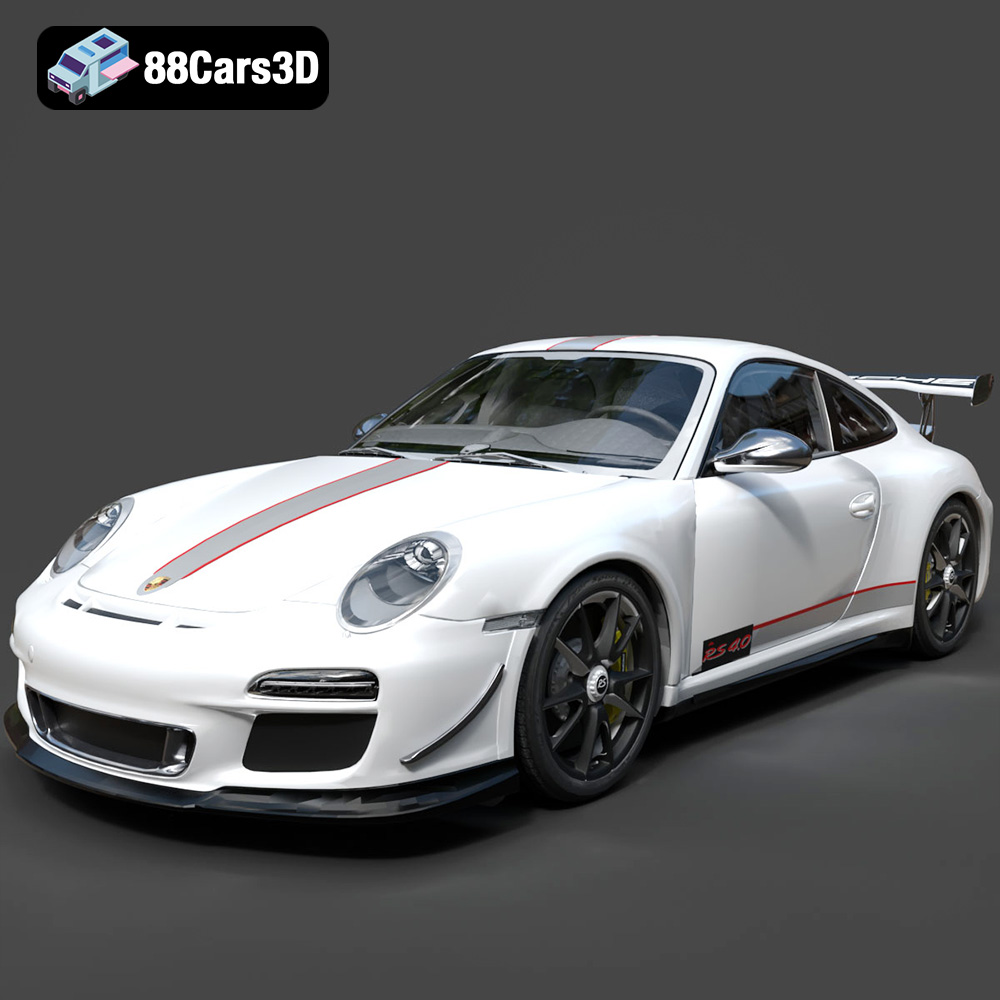
Porsche 911 997 GT3 RS 4.0 2011 3D Model
Texture: Yes
Material: Yes
Download the Porsche 911 997 GT3 RS 4.0 2011 3D Model featuring clean geometry, realistic detailing, and a fully modeled interior. Includes .blend, .fbx, .obj, .glb, .stl, .ply, .unreal, and .max formats for rendering, simulation, and game development.
Price: $4.99
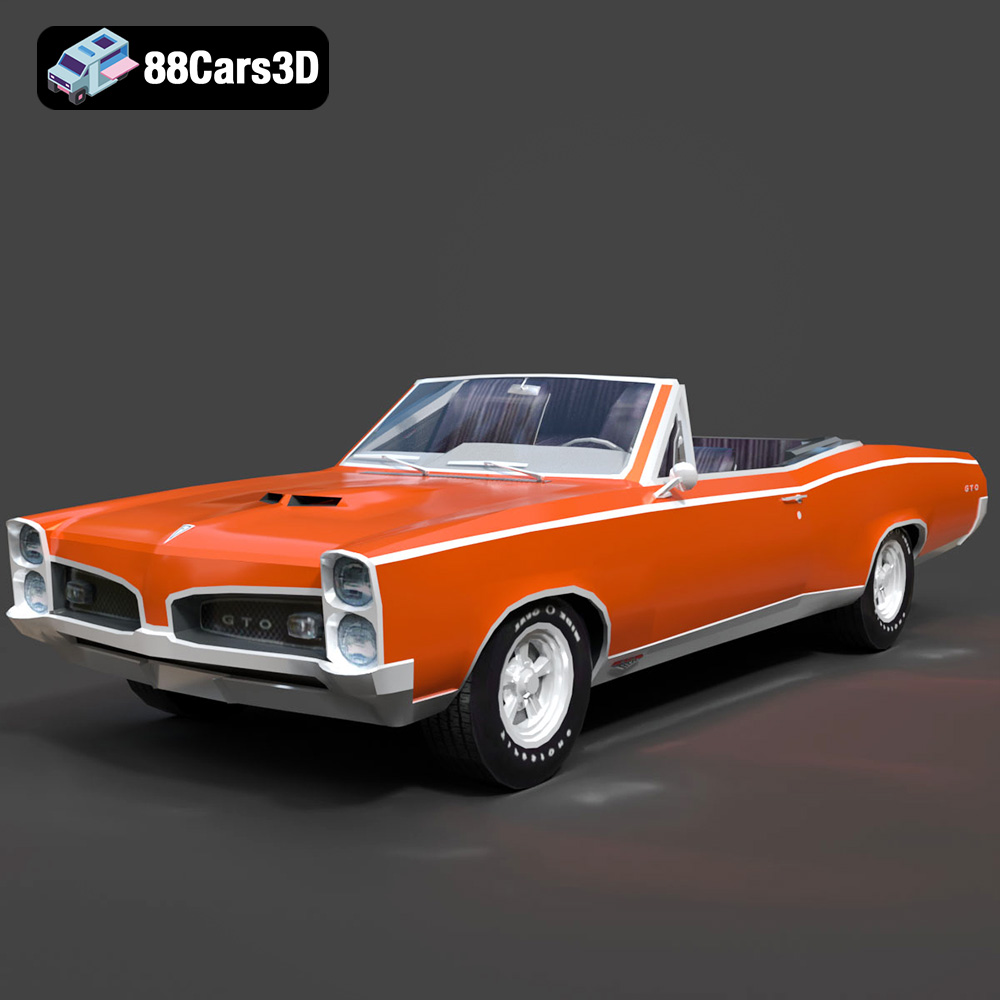
Pontiac GTO Cabrio 1967 3D Model
Texture: Yes
Material: Yes
Download the Pontiac GTO Cabrio 1967 3D Model featuring clean geometry, realistic detailing, and a fully modeled interior. Includes .blend, .fbx, .obj, .glb, .stl, .ply, .unreal, and .max formats for rendering, simulation, and game development.
Price: $4.99
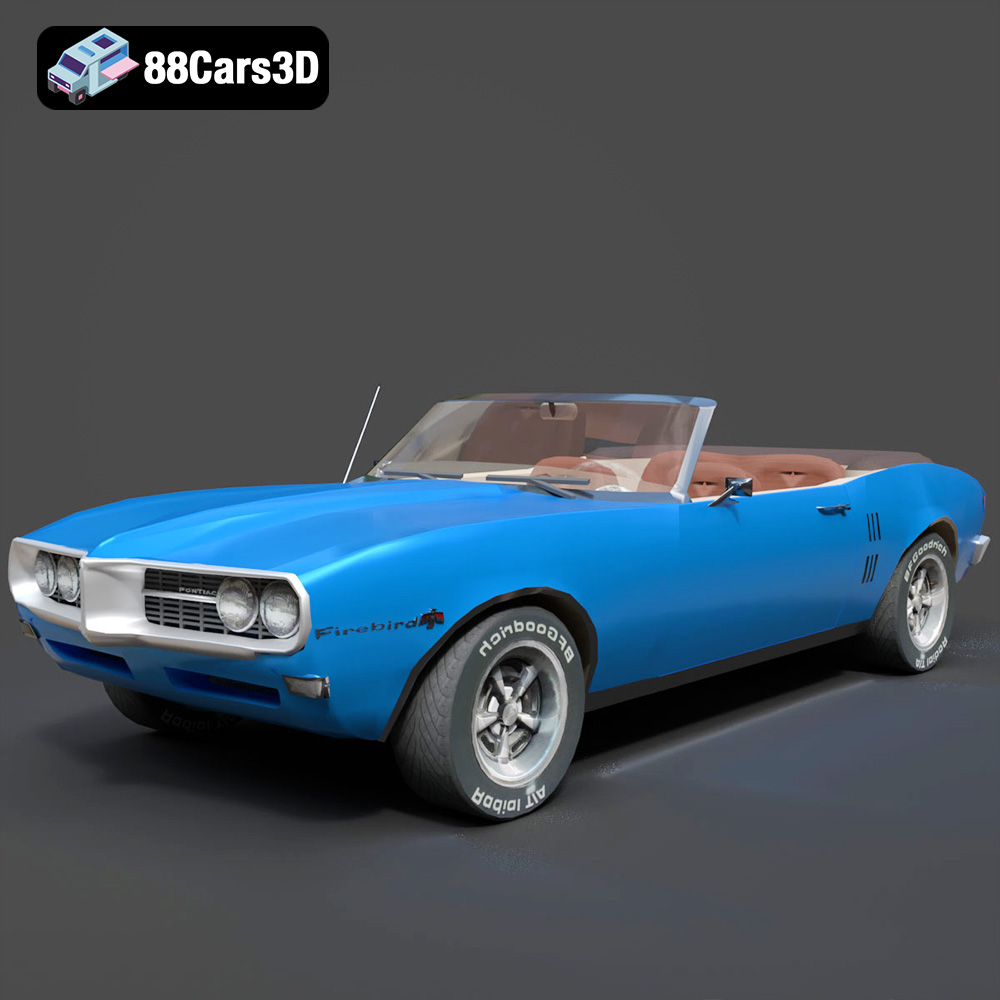
Pontiac Firebird Convertible 1968 3D Model
Texture: Yes
Material: Yes
Download the Pontiac Firebird Convertible 1968 3D Model featuring clean geometry, realistic detailing, and a fully modeled interior. Includes .blend, .fbx, .obj, .glb, .stl, .ply, .unreal, and .max formats for rendering, simulation, and game development.
Price: $4.99

Peugeot 508 2011 3D Model
Texture: Yes
Material: Yes
Download the Peugeot 508 2011 3D Model featuring clean geometry, realistic detailing, and a fully modeled interior. Includes .blend, .fbx, .obj, .glb, .stl, .ply, .unreal, and .max formats for rendering, simulation, and game development.
Price: $4.99
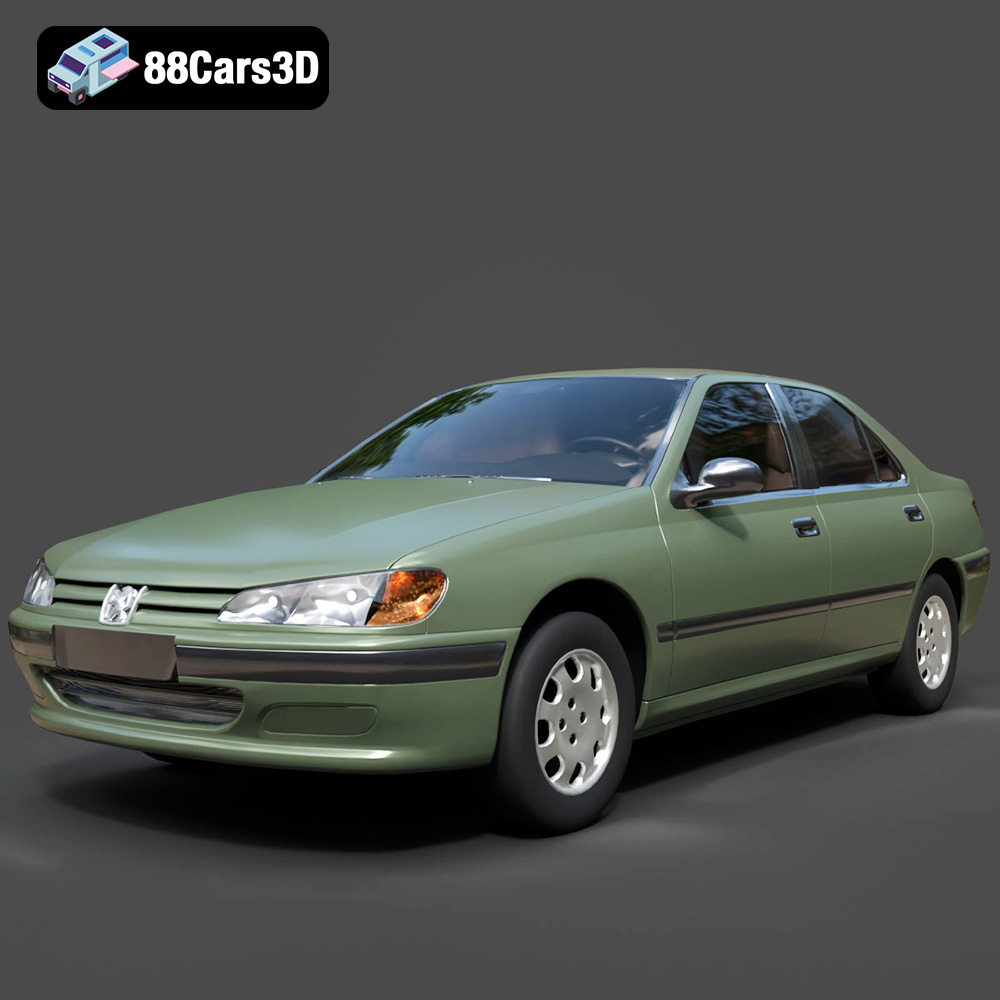
Peugeot 406 1996 3D Model
Texture: Yes
Material: Yes
Download the Peugeot 406 1996 3D Model featuring clean geometry, realistic detailing, and a fully modeled interior. Includes .blend, .fbx, .obj, .glb, .stl, .ply, .unreal, and .max formats for rendering, simulation, and game development.
Price: $10
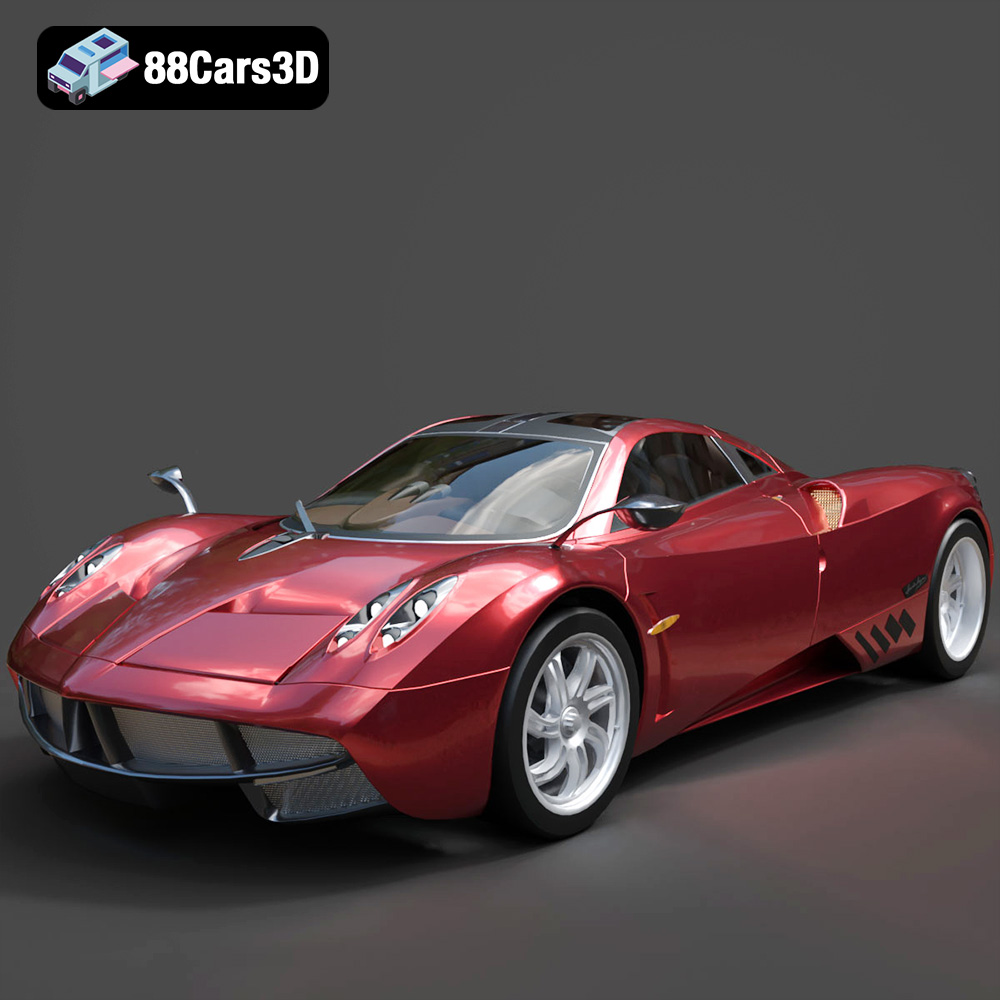
Pagani Huayra 2012 3D Model
Texture: Yes
Material: Yes
Download the Pagani Huayra 2012 3D Model featuring clean geometry, realistic detailing, and a fully modeled interior. Includes .blend, .fbx, .obj, .glb, .stl, .ply, .unreal, and .max formats for rendering, simulation, and game development.
Price: $10
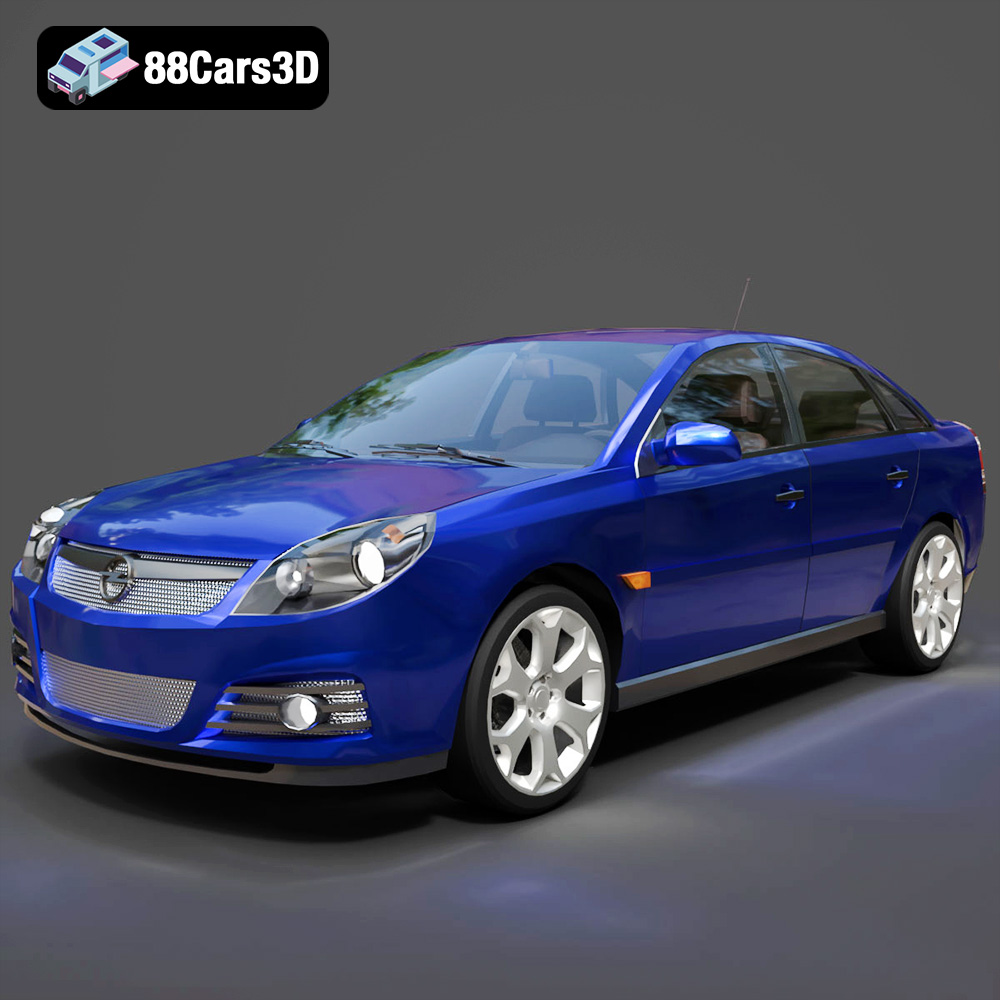
Opel Vectra C 2005 3D Model
Texture: Yes
Material: Yes
Download the Opel Vectra C 2005 3D Model featuring clean geometry, realistic detailing, and a fully modeled interior. Includes .blend, .fbx, .obj, .glb, .stl, .ply, .unreal, and .max formats for rendering, simulation, and game development.
Price: $10

Opel Insignia OPC 3D Model
Texture: Yes
Material: Yes
Download the Opel Insignia OPC 3D Model featuring clean geometry, realistic detailing, and a fully modeled interior. Includes .blend, .fbx, .obj, .glb, .stl, .ply, .unreal, and .max formats for rendering, simulation, and game development.
Price: $10
