⚡ FLASH SALE: Get 60% OFF All Premium 3D & STL Models! ⚡
The allure of a perfectly rendered automobile, gleaming under a virtual spotlight or seamlessly integrated into an interactive experience, is undeniable. For 3D artists, game developers, automotive designers, and visualization professionals, crafting such photorealistic 3D car models is both an art and a science, demanding a deep understanding of intricate technical workflows. From the meticulous precision of modeling topology to the subtle nuances of physically based materials and the rigorous demands of real-time optimization, every stage presents unique challenges and opportunities for excellence.
This comprehensive guide delves into the technical bedrock of creating, optimizing, and deploying high-quality 3D car models. We’ll explore the essential principles that underpin professional-grade automotive assets, offering insights into best practices, software-specific techniques, and industry-standard solutions. Whether your goal is a breathtaking marketing render, a high-performance game asset, or a precise model for AR/VR and 3D printing, mastering these concepts will elevate your work from good to truly exceptional. Prepare to dive deep into the world of virtual automotive craftsmanship, unlocking the secrets to achieving unparalleled realism and efficiency.
The journey to a photorealistic 3D car model begins not with textures or renders, but with its underlying mesh: the topology. For automotive models, pristine topology is paramount. It dictates how light reflects, how subdivision surfaces smooth out, and how easily the model can be deformed or animated. A clean, quad-dominant mesh with intentional edge flow is the cornerstone of a professional asset. It ensures smooth curvature, prevents shading artifacts, and simplifies UV mapping. Poor topology, conversely, leads to pinched surfaces, rendering glitches, and a frustrating experience for any subsequent artist working on the model.
Automotive surfaces are characterized by complex, sweeping curves and sharp, defined creases. Achieving these with precision requires a strategic approach to edge loop placement. Key areas like wheel wells, door seams, hood lines, and fender flares demand careful attention to direct the flow of polygons. Every polygon should contribute meaningfully to the form, avoiding unnecessary density in flat areas while ensuring sufficient detail where curvature is high. This balance is critical for managing polygon counts without sacrificing visual integrity, particularly for game assets or real-time applications where every triangle counts.
In 3D modeling, quads (four-sided polygons) are the preferred primitive for organic and hard-surface models, especially when using subdivision surface modifiers (like TurboSmooth in 3ds Max or Subdivision Surface in Blender). Quads deform predictably and allow for smooth transitions. While triangles (3-sided polygons) are unavoidable in some instances (e.g., at the termination of an edge loop, especially for game engine export), N-gons (polygons with more than four sides) should be strictly avoided in a base mesh as they cause unpredictable deformation and shading issues, particularly when subdividing. The goal is a mesh composed almost entirely of quads.
Poles, or vertices where more or less than four edges meet, are another critical aspect of topology. A 3-edge pole (a vertex where three edges meet) can be used to terminate an edge loop, while a 5-edge pole (where five edges meet) is often used to branch off new edge loops or change the direction of flow. While not inherently bad, excessive or poorly placed poles can lead to pinching or undesirable surface distortions. For automotive surfaces, it’s crucial to place these poles in areas of minimal curvature or where they won’t interfere with crucial reflections. Understanding how to manage and strategically place these poles is a hallmark of an experienced modeler.
The elegant curves and precise lines of a car body are defined by well-placed edge loops. These loops guide the flow of subdivision surfaces, ensuring that the final smoothed mesh accurately reflects the designer’s intent. For sharp edges, such as door seams or character lines, ‘holding loops’ or ‘control loops’ are used. These are additional edge loops placed very close to the primary edge, effectively tightening the subdivision surface and creating a crisp transition without adding unnecessary geometry to the entire model. For instance, around a headlight cut-out or a window frame, several closely spaced edge loops will define the sharpness, while further away, the density can decrease.
Consider the side profile of a fender. A single edge loop might define its general shape, but to capture the subtle bulge and the precise radius of its curvature, multiple concentric edge loops are required. The spacing of these loops directly impacts the smoothness of the surface; closer loops produce tighter curves, while wider spacing creates gentler transitions. This meticulous attention to detail in edge flow not only contributes to visual fidelity but also greatly facilitates the subsequent stages of UV mapping and texturing, as a clean mesh provides a predictable surface for texture projection.
Once a 3D car model boasts impeccable topology, the next critical step is UV mapping. UV mapping is the process of unwrapping the 3D surface into a 2D plane, allowing textures to be painted or applied without distortion. For the complex, compound curves found on vehicles, efficient and clean UVs are essential for achieving realistic materials and avoiding unsightly stretching or seams. Poor UVs can undermine even the best modeling and texturing efforts, making the final render look amateurish despite high-resolution textures.
The goal of UV unwrapping for a car model is to create seamless, uniform islands (UV shells) that maximize texture space efficiency and minimize distortion. Automotive surfaces often feature large, continuous panels like the hood, roof, and doors, which ideally should have their own dedicated UV space to accommodate high-resolution details like paint flakes or subtle surface imperfections. This requires careful consideration of where to place seams – often along natural breaks in the geometry or areas less visible to the camera, such as the underside of panels or along sharp creases that naturally define a boundary.
Strategic seam placement is crucial. For car bodies, seams are typically placed where different panels meet (e.g., along door gaps, hood lines, or fender edges) or in less visible areas (e.g., the bottom edge of a rocker panel, underneath mirrors). The goal is to minimize visible texture seams, which can disrupt the illusion of a continuous surface. Software like 3ds Max’s Unwrap UVW Modifier, Blender’s UV Editor, or Maya’s UV Toolkit provide powerful tools for marking seams and unwrapping meshes. After unwrapping, it’s vital to check for uniform texel density across all UV shells. Texel density refers to the number of texture pixels per unit of 3D space. Maintaining uniform texel density ensures that textures appear equally sharp across the entire model, preventing some areas from looking blurry while others are crisp. Tools within UV editors allow for scaling UV islands to achieve this consistency, ensuring that a door panel and a small badge receive appropriate pixel allocation based on their real-world size.
For high-fidelity automotive models, a multi-material workflow is standard. This means different parts of the car (body, interior, wheels, lights, chassis) often have their own material slots and corresponding UV maps or texture atlases. This approach simplifies material creation and allows for specific texture resolutions and PBR map sets for each component. For instance, the main car body might require extremely high resolution for paint details, while the underside of the chassis might tolerate lower resolution. When sourcing models from marketplaces such as 88cars3d.com, you’ll often find models organized in this logical multi-material structure, simplifying your workflow.
For exceptionally large and detailed surfaces, or for cinematic rendering, artists often turn to UDIMs (U-Dimension). UDIMs are an extension of the UV mapping concept, allowing a single mesh to utilize multiple UV tiles, each with its own texture map, within a single material. Instead of cramming all UVs into the standard 0-1 UV space, UDIMs expand this into a grid (e.g., 0-1, 1-2, 2-3 in the U direction; 0-1, 1-2, 2-3 in the V direction, and so on). This allows for staggering amounts of texture detail on continuous surfaces, like an entire car body, without the limitations of a single massive texture file. Software like Mari, Substance Painter, and most modern renderers fully support UDIM workflows, making them ideal for high-end automotive visualization where every scratch and flake needs to be razor-sharp.
The visual impact of a 3D car model largely hinges on its materials. Physically Based Rendering (PBR) has revolutionized material creation, enabling artists to simulate how light interacts with surfaces in a physically accurate manner. This results in incredibly realistic reflections, refractions, and diffuse lighting, making models appear truly grounded in reality. Understanding PBR principles – whether using a metallic/roughness or specular/glossiness workflow – is fundamental for any professional 3D artist aiming for photorealism in automotive rendering.
Creating believable car materials involves more than just applying a base color. It’s about meticulously crafting shader networks that replicate the complex interplay of light with various automotive surfaces: the multi-layered depth of car paint, the delicate transparency of glass, the subtle sheen of rubber, and the crisp reflections of chrome. Each material requires a distinct approach, often involving multiple texture maps and procedural nodes to achieve its characteristic look. Platforms like 88cars3d.com offer models with meticulously crafted PBR materials, ready for high-fidelity rendering across various engines.
Car paint is one of the most challenging materials to replicate due to its unique layered structure. A typical automotive paint shader consists of several layers: a base coat (diffuse color, often metallic), a clear coat (a highly reflective, glossy layer on top), and sometimes an additional flake layer for metallic paints. The base coat defines the car’s primary color and often incorporates a metallic map to control the metallic sheen. The clear coat is typically a very glossy dielectric material, responsible for the deep reflections and specular highlights. Its roughness (or glossiness) map might include subtle imperfections like micro-scratches or dust, adding to the realism.
For metallic paints, an additional “flake” layer is often introduced. This layer uses a normal map (or even a displacement map) with a fine, randomized noise pattern, giving the impression of tiny metallic flakes embedded within the paint, which sparkle and glint as light hits them from different angles. This effect is crucial for replicating the authentic shimmer of real-world metallic finishes. Furthermore, a detailed normal map derived from real-world car surface imperfections can add micro-scratches, orange peel texture, or subtle ripples, significantly enhancing realism. The shader network often blends these layers using fresnel effects, ensuring the clear coat’s reflectivity changes with the viewing angle, just as it would in reality.
While the pristine, showroom-new look is often desired, adding subtle signs of wear, dirt, and decals can dramatically increase realism and storytelling potential. This involves using additional texture maps and blending techniques within the shader network. Decals, such as manufacturer logos or racing stripes, are typically applied using alpha masks and blend nodes, ensuring they sit perfectly on the car’s surface without disrupting the underlying paint material. These can be projected onto the UVs or even directly onto the 3D mesh using tri-planar projection, especially for complex curved areas.
Dirt, dust, and water spots can be simulated using layered textures combined with procedural masks or ambient occlusion maps to define where these elements accumulate. For instance, a dirt layer might be blended over the base paint using a mask that’s denser in crevices and lower parts of the car. Scratches and chips can be added using dedicated normal maps, roughness maps, and sometimes even displacement maps, revealing a different underlying material (e.g., primer or bare metal) where the paint has chipped away. These imperfections, even if subtle, break up the perfect uniformity of the surface, making the model feel more tangible and believable.
A brilliantly modeled and textured 3D car model can only achieve its full potential with expert lighting and rendering. The art of automotive rendering lies in meticulously crafting an environment and illumination setup that accentuates the vehicle’s form, materials, and design details. This involves a delicate balance of global illumination, direct lighting, and camera optics to create compelling visuals. Modern rendering engines such as Corona Renderer, V-Ray, Cycles (Blender), and Arnold (Maya) offer powerful tools to achieve stunning photorealism, each with its own strengths and workflow nuances.
Professional automotive rendering often goes beyond simply pressing the “render” button. It encompasses a thoughtful approach to scene setup, from choosing the right High Dynamic Range Image (HDRI) to precisely placing physical lights and fine-tuning camera settings to mimic real-world photography. Optimization is also key, balancing render quality with achievable render times, especially for animations or large batches of images. The ultimate goal is to present the car model in its best possible light, whether it’s an abstract studio setting or a dynamic outdoor environment.
High Dynamic Range Images (HDRIs) are indispensable for realistic lighting in automotive rendering. An HDRI captures the full range of light intensities from a real-world location, providing both realistic environmental lighting and reflections. When used as an environment map, an HDRI illuminates the scene, casts subtle shadows, and provides accurate reflections on the car body, mimicking the chosen real-world location (e.g., a studio, city street, or open field). The choice of HDRI significantly impacts the mood and aesthetic of the render; a studio HDRI offers clean, controlled lighting, while an outdoor HDRI brings natural light and atmospheric effects.
While HDRIs provide excellent overall illumination, physical lights are often used in conjunction to enhance specific features, create dramatic highlights, or simulate artificial light sources. Area lights can mimic large softboxes in a studio setup, providing broad, even illumination. Spotlights can be used to emphasize badges, wheel details, or interior elements. Rim lights placed behind the car can separate it from the background and create a glowing outline. The strategic placement and intensity of these physical lights, combined with the HDRI, allow for precise control over reflections and shadows, creating depth and visual interest. In 3ds Max with Corona or V-Ray, or Blender with Cycles, artists have granular control over light temperature, intensity, and falloff, accurately simulating real-world light sources.
Optimizing render settings is crucial for achieving high-quality images efficiently. Each renderer has its unique parameters, but common considerations include sampling rates, ray depth, and global illumination settings. Higher sampling rates generally lead to cleaner images with less noise, but at the cost of increased render time. Modern renderers offer sophisticated denoising solutions, often utilizing AI-powered algorithms (e.g., NVIDIA OptiX denoiser in Cycles/Arnold, Corona Denoiser, V-Ray Denoiser) that can dramatically reduce noise in post-processing, allowing artists to use lower sampling rates and achieve faster renders without sacrificing quality.
Render passes, or AOV (Arbitrary Output Variables), are another powerful tool. These allow the renderer to output separate layers of information, such as diffuse color, raw reflections, shadows, ambient occlusion, and Z-depth. By rendering these elements separately, artists gain immense flexibility during post-processing in software like Photoshop or After Effects. For instance, reflection passes can be adjusted independently, shadows can be intensified, or ambient occlusion can be subtly blended to enhance depth, all without re-rendering the entire scene. This compositing workflow provides fine-tuned control over the final image, allowing for subtle adjustments and creative enhancements that push realism even further.
While cinematic renders aim for the highest fidelity regardless of polygon count, game development and AR/VR applications demand extreme optimization. The challenge is to maintain visual quality and brand recognition while adhering to strict performance budgets. This involves a suite of techniques designed to reduce complexity, minimize draw calls, and ensure smooth framerates on diverse hardware. A high-resolution 3D car model, often hundreds of thousands or even millions of polygons, must be meticulously prepared to run efficiently in real-time environments like Unity or Unreal Engine.
The goal is to create “game-ready” assets that look stunning but are engineered for performance. This is where concepts like Levels of Detail (LODs), mesh decimation, texture atlasing, and material merging become critical. Without these optimizations, even a single highly detailed car could cripple performance, making the interactive experience unplayable. When sourcing game-ready models from marketplaces such as 88cars3d.com, look for clear specifications on polygon count, LODs included, and optimized UV layouts.
Levels of Detail (LODs) are fundamental for real-time performance optimization. This technique involves creating multiple versions of the same 3D model, each with a progressively lower polygon count. The game engine then automatically switches between these LODs based on the camera’s distance from the object. For instance, a car close to the player might use LOD0 (the highest detail mesh), while a car further away might use LOD1, LOD2, or even LOD3 (a heavily decimated version). This ensures that only necessary geometric detail is rendered, saving precious processing power.
Typical LOD breakdowns for a high-quality game car might look like this:
Mesh decimation tools in software like Maya, Blender, or 3ds Max can automatically reduce polygon counts, but for critical assets like car bodies, manual retopology or careful targeted decimation is often preferred to preserve critical edge flow and UV integrity.
Another major performance bottleneck in real-time engines is draw calls. A draw call is an instruction from the CPU to the GPU to render an object. Each time a new material or texture is applied, a new draw call is typically generated. For a car model with many separate parts and materials (body, wheels, windows, headlights, interior pieces, etc.), this can quickly lead to hundreds of draw calls, impacting performance. Reducing draw calls is paramount.
One primary strategy for draw call reduction is material merging and texture atlasing. This involves combining multiple smaller textures (e.g., textures for headlights, taillights, badges) into a single larger texture atlas. All parts of the model that share the same material and texture atlas can then be rendered with a single draw call, even if they are geometrically separate. This often requires reorganizing UV maps so that multiple parts reside on different areas of the same large UV map. For example, all glass elements might share one texture atlas and one material, while all interior plastics share another. Similarly, combining separate mesh objects into one larger mesh (where appropriate) can also reduce draw calls. For AR/VR specific optimizations, techniques like single-pass stereo rendering (rendering both eyes in one pass), occlusion culling (not rendering objects blocked by others), and aggressive polygon reduction for mobile VR headsets are critical to maintain high frame rates and prevent motion sickness.
The utility of high-quality 3D car models extends far beyond digital rendering and game environments. They are increasingly valuable for physical prototyping through 3D printing and for deployment across various platforms via diverse file formats. Preparing a 3D car model for 3D printing introduces a new set of technical considerations, focusing on mesh integrity and physical properties. Similarly, understanding the nuances of different 3D file formats is crucial for ensuring compatibility and optimal performance across a wide range of applications, from web-based viewers to professional CAD software and augmented reality experiences.
The ability to convert and optimize models for different purposes—be it a desktop 3D printer, an industrial machine, or a specific AR viewer—showcases the true versatility of a well-crafted 3D automotive asset. This often involves specific mesh repair workflows, precise scaling, and an understanding of how each file format encapsulates geometry, materials, and animation data.
Preparing a 3D car model for 3D printing requires transforming it into a “manifold” or “watertight” mesh. This means the mesh must be fully enclosed, with no open edges, holes, or inverted (flipped) normals. Each face should clearly define an inside and an outside. Non-manifold geometry, such as intersecting polygons or interior faces, will confuse a 3D printer’s slicer software and result in errors or failed prints. Software tools like Meshmixer, Netfabb, or the 3D Print Toolbox in Blender are invaluable for analyzing and repairing mesh issues, automatically closing holes and resolving self-intersections.
Another critical aspect is wall thickness. Car models, especially intricate ones, often have very thin components (e.g., grilles, mirror stalks, spoilers). For successful 3D printing, these elements must meet the minimum wall thickness requirements of the chosen printing technology and material (e.g., 1-2mm for FDM, possibly thinner for SLA/resin). If parts are too thin, they may not print correctly or will be extremely fragile. Scaling is also paramount. A model designed in meters might need to be accurately scaled down to millimeters for a tabletop print, ensuring all details remain proportional and within printing tolerances. Hollowed designs can save material and print time for larger models, but require vent holes to allow uncured resin or powder to escape during the printing process.
The 3D industry utilizes a variety of file formats, each with its strengths and specific applications. Understanding their capabilities is key to seamless data exchange:
Converting between formats often involves considerations like preserving material definitions, baked textures, and animation data. While tools exist for conversion, care must be taken to ensure all attributes are correctly transferred and re-interpreted by the target software or platform, often requiring manual adjustments.
The creation of high-quality 3D car models is a multifaceted discipline, demanding a blend of artistic vision and rigorous technical expertise. From the foundational integrity of clean topology and efficient UV mapping to the advanced artistry of PBR materials and sophisticated rendering workflows, every stage contributes to the ultimate realism and utility of the final asset. We’ve explored the critical techniques for optimizing models for performance-driven environments like game engines and AR/VR, as well as the unique preparations required for physical output through 3D printing. Understanding these technical nuances is what differentiates a truly professional 3D artist.
The journey from concept to a perfectly rendered or interactively deployed 3D car model is undoubtedly complex, but incredibly rewarding. As technology continues to evolve, so too will the tools and techniques available to artists. By mastering these core principles and staying abreast of industry best practices, you equip yourself to tackle any challenge and create stunning automotive visualizations that captivate audiences. We encourage you to continuously learn, experiment, and refine your craft. And for those seeking a head start with meticulously prepared, production-ready assets, explore the diverse range of high-quality 3D car models available on platforms like 88cars3d.com, designed to meet the demanding standards of today’s professional workflows.

Texture: Yes
Material: Yes
Download the Nissan Fuga 2003 3D Model featuring clean geometry, realistic detailing, and a fully modeled interior. Includes .blend, .fbx, .obj, .glb, .stl, .ply, .unreal, and .max formats for rendering, simulation, and game development.
Price: $4.99
Texture: Yes
Material: Yes
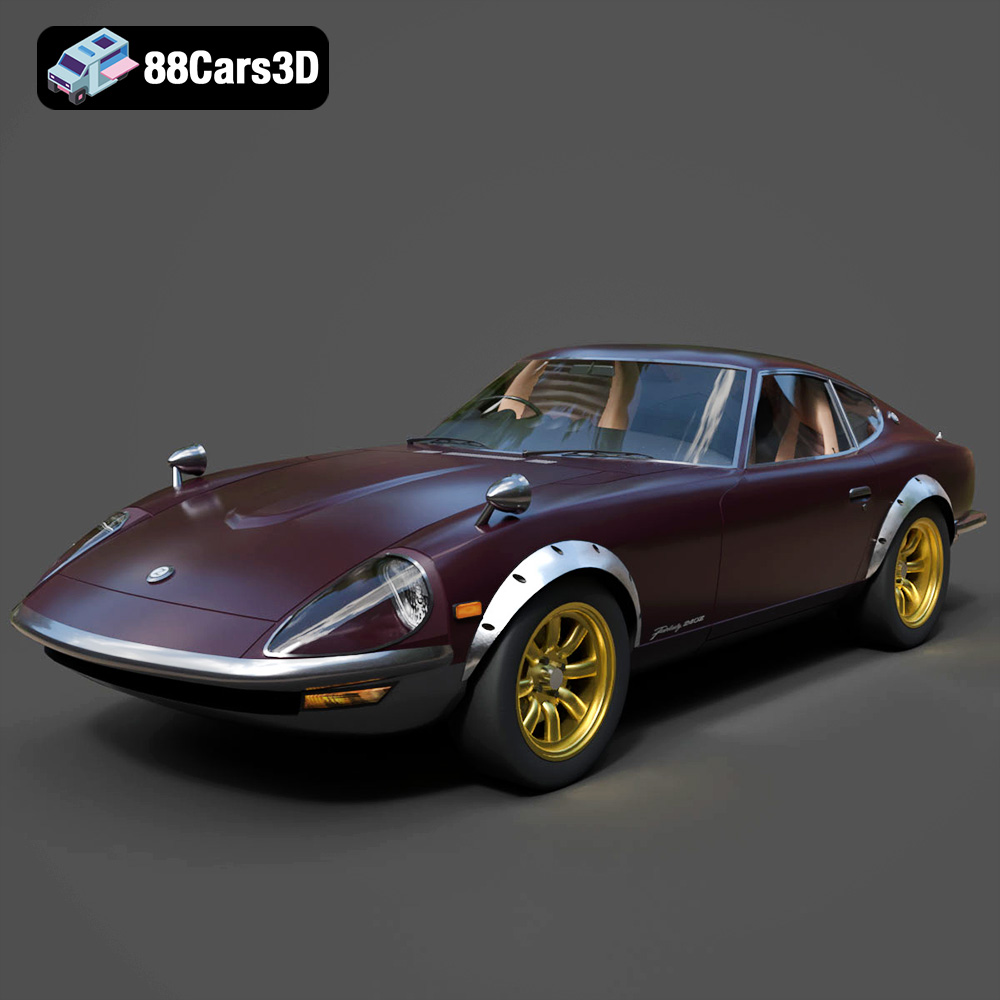
Download the Nissan FairLady 240ZG 3D Model featuring clean geometry, realistic detailing, and a fully modeled interior. Includes .blend, .fbx, .obj, .glb, .stl, .ply, .unreal, and .max formats for rendering, simulation, and game development.
Price: $4.99
Texture: Yes
Material: Yes
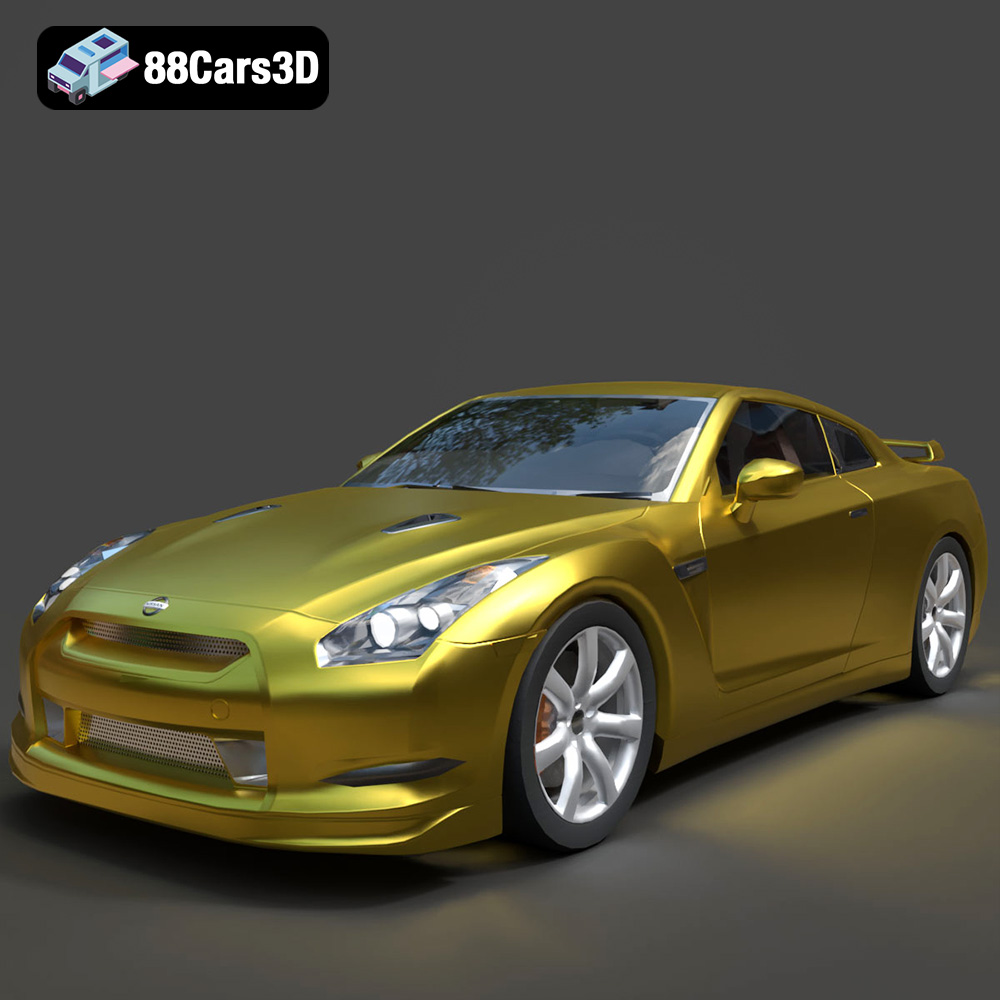
Download the Nissan GT-R 2008 3D Model featuring clean geometry, realistic detailing, and a fully modeled interior. Includes .blend, .fbx, .obj, .glb, .stl, .ply, .unreal, and .max formats for rendering, simulation, and game development.
Price: $4.99

Texture: Yes
Material: Yes
Download the Nissan Cube 3D Model featuring clean geometry, realistic detailing, and a fully modeled interior. Includes .blend, .fbx, .obj, .glb, .stl, .ply, .unreal, and .max formats for rendering, simulation, and game development.
Price: $4.99

Texture: Yes
Material: Yes
Download the Nissan Cedric Y32 3D Model featuring clean geometry, realistic detailing, and a fully modeled interior. Includes .blend, .fbx, .obj, .glb, .stl, .ply, .unreal, and .max formats for rendering, simulation, and game development.
Price: $4.99

Texture: Yes
Material: Yes
Download the Nissan Cima Infiniti Q45 2007 3D Model featuring clean geometry, realistic detailing, and a fully modeled interior. Includes .blend, .fbx, .obj, .glb, .stl, .ply, .unreal, and .max formats for rendering, simulation, and game development.
Price: $4.99

Texture: Yes
Material: Yes
Download the Nissan Juke 2025 3D Model featuring clean geometry, realistic detailing, and a fully modeled interior. Includes .blend, .fbx, .obj, .glb, .stl, .ply, .unreal, and .max formats for rendering, simulation, and game development.
Price: $4.99
Texture: Yes
Material: Yes
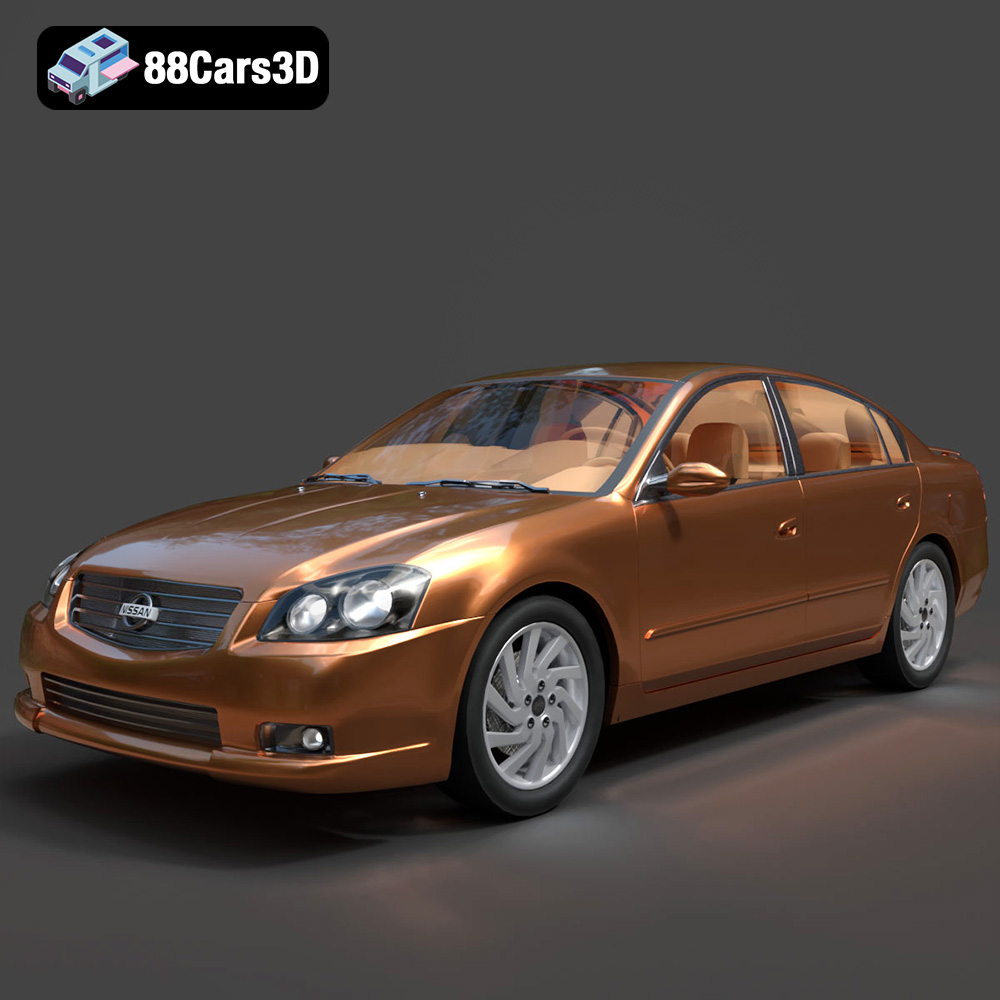
Download the Nissan Altima 007 3D Model featuring clean geometry, realistic detailing, and a fully modeled interior. Includes .blend, .fbx, .obj, .glb, .stl, .ply, .unreal, and .max formats for rendering, simulation, and game development.
Price: $4.99
Texture: Yes
Material: Yes
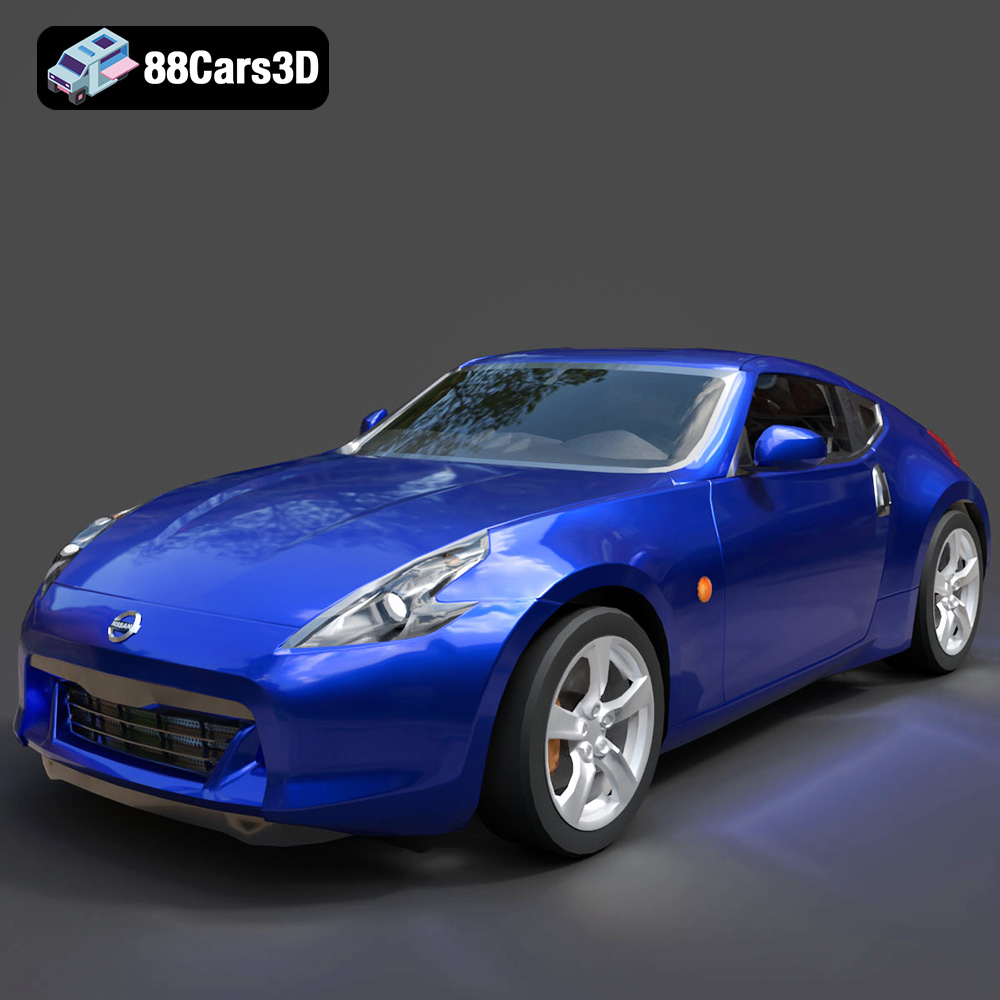
Download the Nissan 370Z 2020 3D Model featuring clean geometry, realistic detailing, and a fully modeled interior. Includes .blend, .fbx, .obj, .glb, .stl, .ply, .unreal, and .max formats for rendering, simulation, and game development.
Price: $4.99
Texture: Yes
Material: Yes
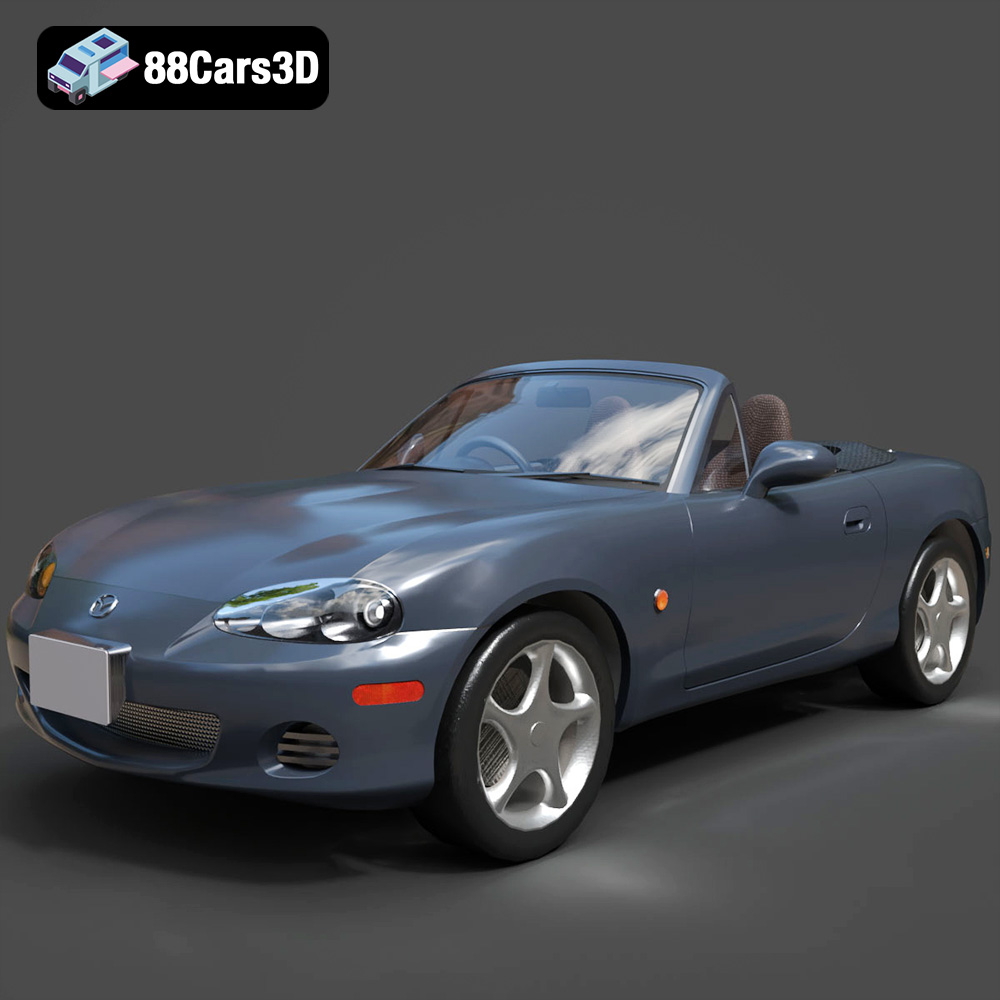
Download the Mazda MX-5 2025 3D Model featuring clean geometry, realistic detailing, and a fully modeled interior. Includes .blend, .fbx, .obj, .glb, .stl, .ply, .unreal, and .max formats for rendering, simulation, and game development.
Price: $4.99