The High-Fidelity Dilemma: Why Optimization is Non-Negotiable
The allure of a gleaming supercar, meticulously rendered with every curve and reflection, is undeniable. For automotive enthusiasts, designers, and game developers, the pursuit of photorealistic rendering is a constant goal. Modern 3D software and advanced modeling techniques allow us to craft automotive models with astonishing levels of detail, often comprising millions of polygons. These high-fidelity assets are perfect for cinematic showcases or static renders, but they present a significant challenge when translated into the dynamic, performance-critical environment of a real-time game engine like Unreal Engine 5.
The problem is clear: a raw, high-polygon CAD model, while visually stunning, will cripple frame rates and lead to an unplayable experience in a real-time application. The dream of fluid, interactive experiences with breathtaking automotive visuals often clashes with the harsh realities of performance budgets. How do we bridge this gap? How can we take those incredibly detailed automotive 3D models and transform them into efficient, high-performance game asset optimization without sacrificing the visual quality that makes them so compelling? This guide will dive deep into the essential techniques and best practices to achieve just that, ensuring your automotive models are not just beautiful, but truly “game-ready.”
The High-Fidelity Dilemma: Why Optimization is Non-Negotiable
Automotive design often originates from Computer-Aided Design (CAD) software, where precision and geometric accuracy are paramount. These models are typically constructed with an extremely high polygon count, often using NURBS surfaces or subdivision modeling techniques that generate dense meshes to ensure perfectly smooth curves and crisp edges. While ideal for manufacturing and marketing renders, this level of detail is a performance killer in real-time engines.
Every polygon, vertex, and edge demands processing power from the GPU. When a scene contains multiple high-poly vehicles, each with millions of triangles, the rendering pipeline quickly becomes overwhelmed. The result is low frame rates, stuttering animations, and a poor user experience. Unreal Engine 5, despite its formidable capabilities, still operates under these fundamental constraints. To achieve smooth, interactive experiences, especially across various hardware platforms, robust game asset optimization is not merely recommended; it’s absolutely essential.
The Art and Science of Retopology for Automotive Assets
At the heart of transforming high-poly models into game-ready assets lies retopology. This critical process involves creating a new, optimized, low-polygon mesh that accurately follows the silhouette and major forms of the original high-detail model. The goal is a clean, quad-based topology that is efficient for rendering, animation, and UV mapping, all while maintaining the visual integrity of the original design.
Manual Retopology Techniques for Precision
For automotive models, which are often hard-surface and demand exact curvature, manual retopology is frequently the preferred method. This approach gives artists granular control over edge flow and polygon distribution. Tools like Maya’s Quad Draw, Blender’s Retopoflow, or ZBrush’s ZRemesher with manual guidance are invaluable. Artists carefully draw new polygon strips, ensuring that edge loops follow the natural contours of the vehicle, such as around wheel wells, door seams, and body panel breaks. This meticulous process is vital for preserving crucial details.
Key considerations include maintaining even polygon distribution where possible and allocating more polygon density to areas of high curvature or critical visual importance. Straight surfaces, conversely, can have sparser geometry. The efficiency gained from a clean, optimized mesh through careful retopology is immense, directly impacting performance within Unreal Engine 5 and other real-time environments.
Automated Retopology Tools: A Balance of Speed and Control
While manual retopology offers the best results for precision, automated tools can significantly speed up the initial phases or provide a solid base mesh. ZBrush’s ZRemesher, QuadriFlow, and Instant Meshes are popular choices. These tools analyze the high-poly mesh and generate a new, optimized topology. However, they may require post-processing to refine edge loops and ensure specific hard-surface details are accurately captured. For automotive models, automated solutions often struggle with maintaining sharp creases or precise panel gaps without some manual intervention. A hybrid approach, using automated tools for a first pass followed by manual cleanup, often strikes the best balance between speed and quality for achieving ideal game asset optimization.
Mastering UV Unwrapping for Optimal Texture Mapping
Once you have a clean, low-poly mesh through retopology, the next crucial step is UV unwrapping. This process involves flattening the 3D surface of your model into a 2D space, creating a texture coordinate map that tells the rendering engine how to apply textures. A well-executed UV layout is paramount for accurate texture projection, efficient texture memory usage, and flawless normal map baking.
Efficient UV Layout Strategies for Hard Surfaces
For automotive models, efficient UV layout requires strategic seam placement. Seams should be placed in areas that are naturally hidden or along sharp creases and panel lines where a break in the texture will be less noticeable. The goal is to minimize stretching and distortion, ensuring that textures appear consistent across the model. Maximizing the use of the 0-1 UV space is also critical; larger UV islands should correspond to more visually prominent areas of the vehicle, allowing for higher texel density and sharper details.
Consistent texel density across all UV islands is an important principle. This means that if a texture is projected onto the model, the resolution (pixels per unit of surface area) should be roughly the same everywhere. Inconsistent texel density can lead to blurry areas next to sharp ones, breaking the illusion of photorealistic rendering. Packing UVs tightly, without overlap, further optimizes texture memory and improves cache efficiency in Unreal Engine 5.
Multi-UV Set Approaches for Complexity and Decals
For complex automotive models, a single UV set might not be sufficient. You might use multiple UV sets: one for the main body textures, another for specific details like headlights or interior elements, and a third for decals or custom paint jobs. This allows for greater flexibility and resolution control over different parts of the vehicle. For example, a dedicated UV set for lightmap data is often required for static lighting in Unreal Engine, even if your main textures use a different set. Understanding these advanced UV unwrapping techniques enables highly detailed and flexible texturing pipelines, a cornerstone of effective game asset optimization.
Unleashing Detail: Normal Map Baking and PBR Materials
With an optimized low-poly mesh and clean UVs, the next step is to reclaim the intricate surface details lost during retopology. This is achieved through normal map baking, a fundamental technique that transfers the fine surface information from your high-poly source model to your low-poly game mesh. This illusion of detail, without the computational cost of actual geometry, is vital for photorealistic rendering in real-time.
The Baking Process Explained and Best Practices
The normal map baking process involves projecting surface normals (which define how light bounces off a surface) from the high-polygon model onto the corresponding low-polygon model. Software like Substance Painter, Marmoset Toolbag, or even directly within Blender/Maya, allows you to define a “cage” or projection volume around your low-poly mesh. This cage ensures that the high-poly details are accurately captured onto the low-poly’s surface. The output is a normal map texture, usually a blueish-purple image, that stores directional information.
Common baking issues include skewing, where details appear distorted, and artifacts, which can manifest as dark spots or seams. These are often caused by improper cage settings, overlapping UVs, or a significant difference in shape between the high and low-poly meshes. Careful preparation of both models and meticulous UVs are key to avoiding these problems. Proper padding and anti-aliasing during the bake also prevent visual seams or pixelation when viewing the model up close in Unreal Engine 5.
Deep Dive into PBR Materials in Unreal Engine 5
To achieve stunning photorealistic rendering, particularly for materials like car paint, glass, and metals, adherence to Physically Based Rendering (PBR) principles is paramount. PBR materials simulate how light interacts with surfaces in a physically accurate way, leading to more believable results regardless of lighting conditions. In Unreal Engine 5, this means utilizing a set of texture maps:
- Albedo (Base Color): Defines the diffuse color of the surface without any lighting information.
- Normal Map: Provides the illusion of high-resolution surface detail.
- Roughness Map: Controls how rough or smooth a surface is, influencing specular reflections.
- Metallic Map: Dictates whether a surface is metallic or dielectric (non-metallic).
- Ambient Occlusion (AO) Map: Simulates soft self-shadowing in crevices and corners, adding depth.
Creating high-quality PBR textures for automotive models requires attention to detail. For instance, car paint often involves complex clear-coat shaders and flake effects, which can be achieved through combinations of normal maps, custom material functions, and clever use of roughness and metallic maps. By combining perfectly baked normal maps with meticulously crafted PBR materials, your optimized low-poly vehicle will appear virtually indistinguishable from its high-poly counterpart, all while being performant in Unreal Engine 5. High-quality models sourced from 88cars3d.com come with professionally prepared PBR textures and materials, saving artists valuable time.
Dynamic Scaling: Implementing Levels of Detail (LODs) in Unreal Engine 5
Even with an expertly retopology-optimized model, rendering every vehicle in a vast open world at full detail would still be computationally expensive. This is where Levels of Detail (LODs) come into play. LODs are simplified versions of your mesh that are automatically swapped in by Unreal Engine 5 as the object moves further away from the camera. This dynamic scaling is a cornerstone of efficient game asset optimization, ensuring that visual quality is maintained only where it’s perceptible, maximizing performance.
Manual vs. Automated LOD Generation in Unreal Engine 5
There are two primary approaches to generating LODs: manual creation and automated generation. Manual LODs involve creating separate, increasingly decimated meshes for each LOD level. This provides the highest quality control, allowing artists to strategically remove polygons while preserving critical silhouettes and features. For complex automotive models, a manually created LOD0 (your fully optimized mesh) and carefully guided manual decimation for subsequent LODs (LOD1, LOD2, LOD3, etc.) is often preferred for best results.
Unreal Engine 5 also offers powerful automated LOD generation tools directly within the Static Mesh Editor. These tools can automatically decimate your mesh based on a target triangle percentage or specific screen size. While convenient, automated LODs might sometimes remove polygons in visually noticeable ways or introduce undesirable artifacts, especially on hard-surface models. It’s often best to use these as a starting point and manually clean up any issues, particularly for the first few LODs that will be seen more frequently.
LOD Configuration and Transition Settings for Seamless Experience
Properly configuring LODs in Unreal Engine 5 is crucial for a seamless player experience. Each LOD level can be assigned a “screen size” threshold. This value determines at what point (in terms of percentage of screen coverage) the engine switches to a lower detail mesh. For instance, if an object occupies 50% of the screen, it might use LOD0. If it shrinks to 20%, it might switch to LOD1. Fine-tuning these thresholds, along with fade distances, prevents jarring “pop-in” effects, ensuring smooth transitions between different detail levels. Consistent material assignments across LODs are also vital to prevent visual discrepancies during these transitions. Implementing robust LODs is a prime example of how thoughtful game asset optimization directly enhances performance without sacrificing perceived visual fidelity.
Final Touches: Optimization Beyond the Mesh
While retopology, UV unwrapping, normal map baking, and LODs form the core of optimizing automotive models, several other considerations contribute to a truly game-ready asset for Unreal Engine 5. A holistic approach to game asset optimization encompasses not just the visual mesh, but all associated data and engine interactions.
Collision Meshes: Performance-Driven Physics
For accurate physics and player interaction, every vehicle needs a collision mesh. This is typically a much simpler, invisible mesh that approximates the shape of the car. Using the visual mesh for collision detection would be computationally expensive. Unreal Engine 5 can generate simple collision meshes automatically, but for complex or irregularly shaped vehicles, creating a custom, optimized collision mesh (often a series of convex hull shapes) is far more efficient and accurate. This prevents unnecessary physics calculations and improves performance, especially when many vehicles are interacting.
Lightmap UVs for Static Lighting
If your project utilizes static lighting (baked lighting), you’ll need a second set of UVs specifically for lightmaps. These UVs must be completely non-overlapping and have sufficient padding between islands to prevent light bleeding artifacts. While the main UVs prioritize texture density and minimal distortion for PBR materials, lightmap UVs prioritize clean, unique mapping for accurate shadow and light baking. Unreal Engine 5 can generate these automatically, but often, manual creation or adjustment yields better, artifact-free results for complex automotive surfaces.
Data Packing, Instancing, and Blueprints
Efficiently managing textures and materials is another facet of game asset optimization. Consider texture atlases to combine multiple smaller textures into one larger sheet, reducing draw calls. For materials, use material instances in Unreal Engine 5. This allows you to create variations (e.g., different paint colors, finishes) from a single master material, significantly reducing material complexity and improving rendering performance. Furthermore, for complex automotive assets with multiple moving parts (wheels, doors, steering wheel), structuring them as hierarchical blueprints in Unreal Engine 5 allows for organized control, animation, and interaction, ensuring that all components are correctly associated and perform efficiently within the engine’s ecosystem.
Conclusion: Crafting High-Performance Automotive Masterpieces
Transforming high-fidelity automotive models into performant, game-ready assets for Unreal Engine 5 is a multifaceted process that demands technical skill and an artistic eye. It’s a journey from raw, detail-rich CAD data to optimized, visually stunning interactive experiences. By mastering the core techniques of retopology, meticulously executing UV unwrapping, and skillfully applying normal map baking, you lay the foundation for efficient geometry and incredible surface detail. Implementing dynamic LODs ensures scalability across distances, while leveraging robust PBR materials unlocks truly photorealistic rendering.
Ultimately, the goal of game asset optimization is to strike that perfect balance: retaining the visual splendor of a high-end automotive design without compromising the fluid performance essential for real-time applications. The techniques outlined in this guide provide a robust framework for achieving this. Whether you’re a seasoned game developer or an aspiring 3D artist, these principles will elevate your automotive projects in Unreal Engine 5.
If you’re looking for a head start with meticulously optimized, high-quality automotive 3D models specifically designed for real-time engines and photorealistic rendering, explore the extensive collection at 88cars3d.com. Our models are crafted with these optimization best practices in mind, providing a solid foundation for your next project, saving you invaluable development time and ensuring your vehicles look spectacular and perform flawlessly. Dive in, experiment with these techniques, and bring your high-performance automotive visions to life!
Featured 3D Car Models

Suzuki SX4-002 3D Model
Texture: Yes
Material: Yes
Download the Suzuki SX4-002 3D Model featuring clean geometry, realistic detailing, and a fully modeled interior. Includes .blend, .fbx, .obj, .glb, .stl, .ply, .unreal, and .max formats for rendering, simulation, and game development.
Price: $10

Tesla Model S 2024 3D Model
Texture: Yes
Material: Yes
Download the Tesla Model S 2024 3D Model featuring clean geometry, realistic detailing, and a fully modeled interior. Includes .blend, .fbx, .obj, .glb, .stl, .ply, .unreal, and .max formats for rendering, simulation, and game development.
Price: $10

Subaru Impreza WRX STi-002 3D Model
Texture: Yes
Material: Yes
Download the Subaru Impreza WRX STi-002 3D Model featuring clean geometry, realistic detailing, and a fully modeled interior. Includes .blend, .fbx, .obj, .glb, .stl, .ply, .unreal, and .max formats for rendering, simulation, and game development.
Price: $10

Toyota Mark II (X100) 1998 3D Model
Texture: Yes
Material: Yes
Download the Toyota Mark II (X100) 3D Model featuring clean geometry, realistic detailing, and a fully modeled interior. Includes .blend, .fbx, .obj, .glb, .stl, .ply, .unreal, and .max formats for rendering, simulation, and game development.
Price: $10

Toyota Corona 1985 3D Model
Texture: Yes
Material: Yes
Download the Toyota Corona 1985 3D Model featuring clean geometry, realistic detailing, and a fully modeled interior. Includes .blend, .fbx, .obj, .glb, .stl, .ply, .unreal, and .max formats for rendering, simulation, and game development.
Price: $10

Toyota Mark II X81 1990 3D Model
Texture: Yes
Material: Yes
Download the Toyota Mark II X81 1990 3D Model featuring clean geometry, realistic detailing, and a fully modeled interior. Includes .blend, .fbx, .obj, .glb, .stl, .ply, .unreal, and .max formats for rendering, simulation, and game development.
Price: $10

Toyota iQ EV 2012 3D Model
Texture: Yes
Material: Yes
Download the Toyota iQ EV 2012 3D Model featuring clean geometry, realistic detailing, and a fully modeled interior. Includes .blend, .fbx, .obj, .glb, .stl, .ply, .unreal, and .max formats for rendering, simulation, and game development.
Price: $10

Toyota Aygo 2013 3D Model
Texture: Yes
Material: Yes
Download the Toyota Aygo 2013 3D Model featuring clean geometry, realistic detailing, and a fully modeled interior. Includes .blend, .fbx, .obj, .glb, .stl, .ply, .unreal, and .max formats for rendering, simulation, and game development.
Price: $10

Toyota Crown S180 2005 3D Model
Texture: Yes
Material: Yes
Download the Toyota Crown S180 2005 3D Model featuring clean geometry, realistic detailing, and a fully modeled interior. Includes .blend, .fbx, .obj, .glb, .stl, .ply, .unreal, and .max formats for rendering, simulation, and game development.
Price: $10

Toyota Celica 2004 3D Model
Texture: Yes
Material: Yes
Download the Toyota Celica 2004 3D Model featuring clean geometry, realistic detailing, and a fully modeled interior. Includes .blend, .fbx, .obj, .glb, .stl, .ply, .unreal, and .max formats for rendering, simulation, and game development.
Price: $10

Toyota Corolla AE100 1992 3D Model
Texture: Yes
Material: Yes
Download the Toyota Corolla AE100 1992 3D Model featuring clean geometry, realistic detailing, and a fully modeled interior. Includes .blend, .fbx, .obj, .glb, .stl, .ply, .unreal, and .max formats for rendering, simulation, and game development.
Price: $10

Toyota Mark II X110 2000 3D Model
Texture: Yes
Material: Yes
Download the Toyota Mark II X110 2000 3D Model featuring clean geometry, realistic detailing, and a fully modeled interior. Includes .blend, .fbx, .obj, .glb, .stl, .ply, .unreal, and .max formats for rendering, simulation, and game development.
Price: $10

Toyota Corolla 2020 3D Model
Texture: Yes
Material: Yes
Download the Toyota Corolla 2020 3D Model featuring clean geometry, realistic detailing, and a fully modeled interior. Includes .blend, .fbx, .obj, .glb, .stl, .ply, .unreal, and .max formats for rendering, simulation, and game development.
Price: $10

Toyota Yaris 2020 3D Model
Texture: Yes
Material: Yes
Download the Toyota Yaris 2020 3D Model featuring clean geometry, realistic detailing, and a fully modeled interior. Includes .blend, .fbx, .obj, .glb, .stl, .ply, .unreal, and .max formats for rendering, simulation, and game development.
Price: $9.9

Volkswagen Beetle 2012 3D Model
Texture: Yes
Material: Yes
Download the Volkswagen Beetle 2012 3D Model featuring clean geometry, realistic detailing, and a fully modeled interior. Includes .blend, .fbx, .obj, .glb, .stl, .ply, .unreal, and .max formats for rendering, simulation, and game development.
Price: $9.9

Toyota Matrix 2005 3D Model
Texture: Yes
Material: Yes
Download the Toyota Matrix 2005 3D Model featuring clean geometry, realistic detailing, and a fully modeled interior. Includes .blend, .fbx, .obj, .glb, .stl, .ply, .unreal, and .max formats for rendering, simulation, and game development.
Price: $9.9

Toyota Yaris Sedan 3D Model
Texture: Yes
Material: Yes
Download the Toyota Yaris Sedan 3D Model featuring clean geometry, realistic detailing, and a fully modeled interior. Includes .blend, .fbx, .obj, .glb, .stl, .ply, .unreal, and .max formats for rendering, simulation, and game development.
Price: $9.9

Volkswagen Golf R-004 2024 3D Model
Texture: Yes
Material: Yes
Download the Volkswagen Golf R-004 2024 3D Model featuring clean geometry, realistic detailing, and a fully modeled interior. Includes .blend, .fbx, .obj, .glb, .stl, .ply, .unreal, and .max formats for rendering, simulation, and game development.
Price: $9.9

Volkswagen Golf 5 Door 2010 3D Model
Texture: Yes
Material: Yes
Download the Volkswagen Golf 5 Door 2010 3D Model featuring clean geometry, realistic detailing, and a fully modeled interior. Includes .blend, .fbx, .obj, .glb, .stl, .ply, .unreal, and .max formats for rendering, simulation, and game development.
Price: $9.9

Toyota Premio 2010 3D Model
Texture: Yes
Material: Yes
Download the Toyota Premio 2010 3D Model featuring clean geometry, realistic detailing, and a fully modeled interior. Includes .blend, .fbx, .obj, .glb, .stl, .ply, .unreal, and .max formats for rendering, simulation, and game development.
Price: $9.9

Toyota Opa 2000 3D Model
Texture: Yes
Material: Yes
Download the Toyota Opa 2000 3D Model featuring clean geometry, realistic detailing, and a fully modeled interior. Includes .blend, .fbx, .obj, .glb, .stl, .ply, .unreal, and .max formats for rendering, simulation, and game development.
Price: $9.9

Volkswagen Polo 5 Door 2010 3D Model
Texture: Yes
Material: Yes
Download the Volkswagen Polo 5 Door 2010 3D Model featuring clean geometry, realistic detailing, and a fully modeled interior. Includes .blend, .fbx, .obj, .glb, .stl, .ply, .unreal, and .max formats for rendering, simulation, and game development.
Price: $9.9

Toyota Prius 2024 3D Model
Texture: Yes
Material: Yes
Download the Toyota Prius 2024 3D Model featuring clean geometry, realistic detailing, and a fully modeled interior. Includes .blend, .fbx, .obj, .glb, .stl, .ply, .unreal, and .max formats for rendering, simulation, and game development.
Price: $9.9

Toyota Yaris 1999 3D Model
Texture: Yes
Material: Yes
Download the Toyota Yaris 1999 3D Model featuring clean geometry, realistic detailing, and a fully modeled interior. Includes .blend, .fbx, .obj, .glb, .stl, .ply, .unreal, and .max formats for rendering, simulation, and game development.
Price: $9.9

Toyota Supra 2020 3D Model
Texture: Yes
Material: Yes
Download the Toyota Supra 2020 3D Model featuring clean geometry, realistic detailing, and a fully modeled interior. Includes .blend, .fbx, .obj, .glb, .stl, .ply, .unreal, and .max formats for rendering, simulation, and game development.
Price: $9.9

Volkswagen New Beetle 2000 3D Model
Texture: Yes
Material: Yes
Download the Volkswagen New Beetle 2000 3D Model featuring clean geometry, realistic detailing, and a fully modeled interior. Includes .blend, .fbx, .obj, .glb, .stl, .ply, .unreal, and .max formats for rendering, simulation, and game development.
Price: $14.99

Volkswagen Jetta 2005 3D Model
Texture: Yes
Material: Yes
Download the Volkswagen Jetta 2005 3D Model featuring clean geometry, realistic detailing, and a fully modeled interior. Includes .blend, .fbx, .obj, .glb, .stl, .ply, .unreal, and .max formats for rendering, simulation, and game development.
Price: $18.99

Volkswagen Golf 3-Door 3D Model
Texture: Yes
Material: Yes
Download the Volkswagen Golf 3-Door 3D Model featuring clean geometry, realistic detailing, and a fully modeled interior. Includes .blend, .fbx, .obj, .glb, .stl, .ply, .unreal, and .max formats for rendering, simulation, and game development.
Price: $14.99

Volvo V70 2005 3D Model
Texture: Yes
Material: Yes
Download the Volvo V70 2005 3D Model featuring clean geometry, realistic detailing, and a fully modeled interior. Includes .blend, .fbx, .obj, .glb, .stl, .ply, .unreal, and .max formats for rendering, simulation, and game development.
Price: $14.99

Volkswagen Bora 2004 3D Model
Texture: Yes
Material: Yes
Download the Volkswagen Bora 2004 3D Model featuring clean geometry, realistic detailing, and a fully modeled interior. Includes .blend, .fbx, .obj, .glb, .stl, .ply, .unreal, and .max formats for rendering, simulation, and game development.
Price: $14.99

Volkswagen Lupo 3D Model
Texture: Yes
Material: Yes
Download the Volkswagen Lupo 3D Model featuring clean geometry, realistic detailing, and a fully modeled interior. Includes .blend, .fbx, .obj, .glb, .stl, .ply, .unreal, and .max formats for rendering, simulation, and game development.
Price: $19.99

Volkswagen Passat B5 2000 3D Model
Texture: Yes
Material: Yes
Download the Volkswagen Passat B5 2000 3D Model featuring clean geometry, realistic detailing, and a fully modeled interior. Includes .blend, .fbx, .obj, .glb, .stl, .ply, .unreal, and .max formats for rendering, simulation, and game development.
Price: $19.99

Volkswagen Passat CC 3D Model
Texture: Yes
Material: Yes
Download the Volkswagen Passat CC 3D Model featuring clean geometry, realistic detailing, and a fully modeled interior. Includes .blend, .fbx, .obj, .glb, .stl, .ply, .unreal, and .max formats for rendering, simulation, and game development.
Price: $19.99

Volkswagen Golf V 2006 3D Model
Texture: Yes
Material: Yes
Download the Volkswagen Golf V 2006 3D Model featuring clean geometry, realistic detailing, and a fully modeled interior. Includes .blend, .fbx, .obj, .glb, .stl, .ply, .unreal, and .max formats for rendering, simulation, and game development.
Price: $19.99

Volvo S60 R-Design 2024 3D Model
Texture: Yes
Material: Yes
Download the Volvo S60 R-Design 3D Model featuring clean geometry, realistic detailing, and a fully modeled interior. Includes .blend, .fbx, .obj, .glb, .stl, .ply, .unreal, and .max formats for rendering, simulation, and game development.
Price: $19.99

Volkswagen Passat 2025 3D Model
Texture: Yes
Material: Yes
Download the Volkswagen Passat 2025 3D Model featuring clean geometry, realistic detailing, and a fully modeled interior. Includes .blend, .fbx, .obj, .glb, .stl, .ply, .unreal, and .max formats for rendering, simulation, and game development.
Price: $25.99

Volkswagen Passat Variant B6 2005 3D Model
Texture: Yes
Material: Yes
Download the Volkswagen Passat Variant B6 2005 3D Model featuring clean geometry, realistic detailing, and a fully modeled interior. Includes .blend, .fbx, .obj, .glb, .stl, .ply, .unreal, and .max formats for rendering, simulation, and game development.
Price: $25.99

Volkswagen Phaeton W12 2004 3D Model
Texture: Yes
Material: Yes
Download the Volkswagen Phaeton W12 2004 3D Model featuring clean geometry, realistic detailing, and a fully modeled interior. Includes .blend, .fbx, .obj, .glb, .stl, .ply, .unreal, and .max formats for rendering, simulation, and game development.
Price: $25.99

Volkswagen Scirocco 2015 3D Model
Texture: Yes
Material: Yes
Download the Volkswagen Scirocco 2015 3D Model featuring clean geometry, realistic detailing, and a fully modeled interior. Includes .blend, .fbx, .obj, .glb, .stl, .ply, .unreal, and .max formats for rendering, simulation, and game development.
Price: $25.99

Volvo S60 2024 3D Model
Texture: Yes
Material: Yes
Download the Volvo S60 2024 3D Model featuring clean geometry, realistic detailing, and a fully modeled interior. Includes .blend, .fbx, .obj, .glb, .stl, .ply, .unreal, and .max formats for rendering, simulation, and game development.
Price: $25.99

Volkswagen Polo 3D Model
Texture: Yes
Material: Yes
Download the Volkswagen Polo 3D Model featuring clean geometry, realistic detailing, and a fully modeled interior. Includes .blend, .fbx, .obj, .glb, .stl, .ply, .unreal, and .max formats for rendering, simulation, and game development.
Price: $25.99

Volkswagen Golf 5-Doors 2018 3D Model
Texture: Yes
Material: Yes
Download the Volkswagen Golf 5-Doors 3D Model featuring clean geometry, realistic detailing, and a fully modeled interior. Includes .blend, .fbx, .obj, .glb, .stl, .ply, .unreal, and .max formats for rendering, simulation, and game development.
Price: $25.99

Volvo C70 T5 2000 3D Model
Texture: Yes
Material: Yes
Download the Volvo C70 T5 2000 3D Model featuring clean geometry, realistic detailing, and a fully modeled interior. Includes .blend, .fbx, .obj, .glb, .stl, .ply, .unreal, and .max formats for rendering, simulation, and game development.
Price: $23.99

Volvo S40 Sedan 2004 3D Model
Texture: Yes
Material: Yes
Download the Volvo S40 Sedan 2004 3D Model featuring clean geometry, realistic detailing, and a fully modeled interior. Includes .blend, .fbx, .obj, .glb, .stl, .ply, .unreal, and .max formats for rendering, simulation, and game development.
Price: $23.99

Volvo C30 BEV 2012 3D Model
Texture: Yes
Material: Yes
Download the Volvo C30 BEV 2012 3D Model featuring clean geometry, realistic detailing, and a fully modeled interior. Includes .blend, .fbx, .obj, .glb, .stl, .ply, .unreal, and .max formats for rendering, simulation, and game development.
Price: $23.99

Volvo C70 1998 3D Model
Texture: Yes
Material: Yes
Download the Volvo C70 1998 3D Model featuring clean geometry, realistic detailing, and a fully modeled interior. Includes .blend, .fbx, .obj, .glb, .stl, .ply, .unreal, and .max formats for rendering, simulation, and game development.
Price: $23.99

Mazda B-Series 3D Model
Texture: Yes
Material: Yes
Download the Mazda B-Series 3D Model featuring clean geometry, realistic detailing, and a fully modeled interior. Includes .blend, .fbx, .obj, .glb, .stl, .ply, .unreal, and .max formats for rendering, simulation, and game development.
Price: $23.99

Mercsedes Benz Z3-006 3D Model
Texture: Yes
Material: Yes
Download the Mercsedes Benz Z3-006 3D Model featuring clean geometry, realistic detailing, and a fully modeled interior. Includes .blend, .fbx, .obj, .glb, .stl, .ply, .unreal, and .max formats for rendering, simulation, and game development.
Price: $23.99

Mazda RX-7 3D Model
Texture: Yes
Material: Yes
Download the Mazda RX-7 3D Model featuring clean geometry, realistic detailing, and a fully modeled interior. Includes .blend, .fbx, .obj, .glb, .stl, .ply, .unreal, and .max formats for rendering, simulation, and game development.
Price: $23.99

Volvo VCC-003 3D Model
Texture: Yes
Material: Yes
Download the Volvo VCC-003 3D Model featuring clean geometry, realistic detailing, and a fully modeled interior. Includes .blend, .fbx, .obj, .glb, .stl, .ply, .unreal, and .max formats for rendering, simulation, and game development.
Price: $23.99

Mercedes-Benz SLR McLaren 2005 3D Model
Texture: Yes
Material: Yes
Download the Mercedes-Benz SLR McLaren 2005 3D Model featuring clean geometry, realistic detailing, and a fully modeled interior. Includes .blend, .fbx, .obj, .glb, .stl, .ply, .unreal, and .max formats for rendering, simulation, and game development.
Price: $23.99

GAZ 3110 Pickup 2000 3D Model
Texture: Yes
Material: Yes
Download the GAZ 3110 Pickup 3D Model featuring clean geometry, realistic detailing, and a fully modeled interior. Includes .blend, .fbx, .obj, .glb, .stl, .ply, .unreal, and .max formats for rendering, simulation, and game development.
Price: $23.99

Mazda 626 GF 1997 3D Model
Texture: Yes
Material: Yes
Download the Mazda 626 GF 1997 3D Model featuring clean geometry, realistic detailing, and a fully modeled interior. Includes .blend, .fbx, .obj, .glb, .stl, .ply, .unreal, and .max formats for rendering, simulation, and game development.
Price: $23.99

Volvo S80 2011 3D Model
Texture: Yes
Material: Yes
Download the Volvo S80 2011 3D Model featuring clean geometry, realistic detailing, and a fully modeled interior. Includes .blend, .fbx, .obj, .glb, .stl, .ply, .unreal, and .max formats for rendering, simulation, and game development.
Price: $23.99

Volkswagen Touran restyle-006 3D Model
Texture: Yes
Material: Yes
Download the Volkswagen Touran restyle-006 3D Model featuring clean geometry, realistic detailing, and a fully modeled interior. Includes .blend, .fbx, .obj, .glb, .stl, .ply, .unreal, and .max formats for rendering, simulation, and game development.
Price: $23.99

Skoda Octavia Scout 3D Model
Texture: Yes
Material: Yes
Download the Skoda Octavia Scout 3D Model featuring clean geometry, realistic detailing, and a fully modeled interior. Includes .blend, .fbx, .obj, .glb, .stl, .ply, .unreal, and .max formats for rendering, simulation, and game development.
Price: $23.99

Volkswagen Golf V 2006 3D Model
Texture: Yes
Material: Yes
Download the Volkswagen Golf V 2006 3D Model featuring clean geometry, realistic detailing, and a fully modeled interior. Includes .blend, .fbx, .obj, .glb, .stl, .ply, .unreal, and .max formats for rendering, simulation, and game development.
Price: $23.99

Mazda CX-7 3D Model
Texture: Yes
Material: Yes
Download the Mazda CX-7 3D Model featuring clean geometry, realistic detailing, and a fully modeled interior. Includes .blend, .fbx, .obj, .glb, .stl, .ply, .unreal, and .max formats for rendering, simulation, and game development.
Price: $23.99

Mazda Familia 3D Model
Texture: Yes
Material: Yes
Download the Mazda Familia 3D Model featuring clean geometry, realistic detailing, and a fully modeled interior. Includes .blend, .fbx, .obj, .glb, .stl, .ply, .unreal, and .max formats for rendering, simulation, and game development.
Price: $23.99

GAS 21 3D Model
Texture: Yes
Material: Yes
Download the GAS 21 3D Model featuring clean geometry, realistic detailing, and a fully modeled interior. Includes .blend, .fbx, .obj, .glb, .stl, .ply, .unreal, and .max formats for rendering, simulation, and game development.
Price: $23.99

Mercedes-Benz SL500 AMG (R129) 3D Model
Texture: Yes
Material: Yes
Download the Mercedes-Benz SL500 AMG (R129) 3D Model featuring clean geometry, realistic detailing, and a fully modeled interior. Includes .blend, .fbx, .obj, .glb, .stl, .ply, .unreal, and .max formats for rendering, simulation, and game development.
Price: $23.99

Mercedes-Benz S-Class W221 2005 3D Model
Texture: Yes
Material: Yes
Download the Mercedes-Benz S-Class W221 2005 3D Model featuring clean geometry, realistic detailing, and a fully modeled interior. Includes .blend, .fbx, .obj, .glb, .stl, .ply, .unreal, and .max formats for rendering, simulation, and game development.
Price: $23.99

Mercedes-Benz E-Class W212 2009 3D Model
Texture: Yes
Material: Yes
Download the Mercedes-Benz E-Class W212 2009 3D Model featuring clean geometry, realistic detailing, and a fully modeled interior. Includes .blend, .fbx, .obj, .glb, .stl, .ply, .unreal, and .max formats for rendering, simulation, and game development.
Price: $23.99

Mercedes-Benz E-class Estate S212 2009 3D Model
Texture: Yes
Material: Yes
Download the Mercedes-Benz E-class Estate S212 2009 3D Model featuring clean geometry, realistic detailing, and a fully modeled interior. Includes .blend, .fbx, .obj, .glb, .stl, .ply, .unreal, and .max formats for rendering, simulation, and game development.
Price: $23.99

Mercedes-Benz 190 W201 3D Model
Texture: Yes
Material: Yes
Download the Mercedes-Benz 190 W201 3D Model featuring clean geometry, realistic detailing, and a fully modeled interior. Includes .blend, .fbx, .obj, .glb, .stl, .ply, .unreal, and .max formats for rendering, simulation, and game development.
Price: $23.99

Mercedes-Benz C230 SportCoupé 2005 3D Model
Texture: Yes
Material: Yes
Download the Mercedes-Benz C230 SportCoupé 2005 3D Model featuring clean geometry, realistic detailing, and a fully modeled interior. Includes .blend, .fbx, .obj, .glb, .stl, .ply, .unreal, and .max formats for rendering, simulation, and game development.
Price: $23.99

Mercedes-Benz SLK 3D Model
Texture: Yes
Material: Yes
Download the Mercedes-Benz SLK 3D Model featuring clean geometry, realistic detailing, and a fully modeled interior. Includes .blend, .fbx, .obj, .glb, .stl, .ply, .unreal, and .max formats for rendering, simulation, and game development.
Price: $23.99

Mercedes 600 SEC W140 1992 3D Model
Texture: Yes
Material: Yes
Download the Mercedes 600 SEC W140 1992 3D Model featuring clean geometry, realistic detailing, and a fully modeled interior. Includes .blend, .fbx, .obj, .glb, .stl, .ply, .unreal, and .max formats for rendering, simulation, and game development.
Price: $23.99

Mercedes S-Class 2010 3D Model
Texture: Yes
Material: Yes
Download the Mercedes S-Class 2010 3D Model featuring clean geometry, realistic detailing, and a fully modeled interior. Includes .blend, .fbx, .obj, .glb, .stl, .ply, .unreal, and .max formats for rendering, simulation, and game development.
Price: $23.99

McLaren MP4-12C-001 3D Model
Texture: Yes
Material: Yes
Download the McLaren MP4-12C-001 3D Model featuring clean geometry, realistic detailing, and a fully modeled interior. Includes .blend, .fbx, .obj, .glb, .stl, .ply, .unreal, and .max formats for rendering, simulation, and game development.
Price: $23.99

Mercedes-Benz SLK 350 2005 3D Model
Texture: Yes
Material: Yes
Download the Mercedes-Benz SLK 350 2005 3D Model featuring clean geometry, realistic detailing, and a fully modeled interior. Includes .blend, .fbx, .obj, .glb, .stl, .ply, .unreal, and .max formats for rendering, simulation, and game development.
Price: $23.99

Mercedes-Benz SL 65 AMG 3D Model
Texture: Yes
Material: Yes
Download the Mercedes-Benz SL 65 AMG 3D Model featuring clean geometry, realistic detailing, and a fully modeled interior. Includes .blend, .fbx, .obj, .glb, .stl, .ply, .unreal, and .max formats for rendering, simulation, and game development.
Price: $23.99

Mercedes-Benz S500 3D Model
Texture: Yes
Material: Yes
Download the Mercedes-Benz S500 3D Model featuring clean geometry, realistic detailing, and a fully modeled interior. Includes .blend, .fbx, .obj, .glb, .stl, .ply, .unreal, and .max formats for rendering, simulation, and game development.
Price: $23.99

Mercedes-Benz S55 W220 AMG 1999 3D Model
Texture: Yes
Material: Yes
Download the Mercedes-Benz S55 W220 AMG 1999 3D Model featuring clean geometry, realistic detailing, and a fully modeled interior. Includes .blend, .fbx, .obj, .glb, .stl, .ply, .unreal, and .max formats for rendering, simulation, and game development.
Price: $23.99

Mercedes-Benz CLA45 AMG 2017 3D Model
Texture: Yes
Material: Yes
Download the Mercedes-Benz CLA45 AMG 2017 3D Model featuring clean geometry, realistic detailing, and a fully modeled interior. Includes .blend, .fbx, .obj, .glb, .stl, .ply, .unreal, and .max formats for rendering, simulation, and game development.
Price: $38.99

Mercedes-Benz CL65 C215 AMG 3D Model
Texture: Yes
Material: Yes
Download the Mercedes-Benz CL65 C215 AMG 3D Model featuring clean geometry, realistic detailing, and a fully modeled interior. Includes .blend, .fbx, .obj, .glb, .stl, .ply, .unreal, and .max formats for rendering, simulation, and game development.
Price: $23.99

Mercedes-Benz A45 2021 3D Model
Texture: Yes
Material: Yes
Download the Mercedes-Benz A45 2021 3D Model featuring clean geometry, realistic detailing, and a fully modeled interior. Includes .blend, .fbx, .obj, .glb, .stl, .ply, .unreal, and .max formats for rendering, simulation, and game development.
Price: $23.99

Mercedes-Benz 300SL 1955 3D Model
Texture: Yes
Material: Yes
Download the Mercedes-Benz 300SL 1955 3D Model featuring clean geometry, realistic detailing, and a fully modeled interior. Includes .blend, .fbx, .obj, .glb, .stl, .ply, .unreal, and .max formats for rendering, simulation, and game development.
Price: $23.99

Mercedes-Benz 190SL 1955 3D Model
Texture: Yes
Material: Yes
Download the Mercedes-Benz 190SL 1955 3D Model featuring clean geometry, realistic detailing, and a fully modeled interior. Includes .blend, .fbx, .obj, .glb, .stl, .ply, .unreal, and .max formats for rendering, simulation, and game development.
Price: $23.99

Mercedes-Benz W124 Brabus V12 3D Model
Texture: Yes
Material: Yes
Download the Mercedes-Benz W124 Brabus V12 3D Model featuring clean geometry, realistic detailing, and a fully modeled interior. Includes .blend, .fbx, .obj, .glb, .stl, .ply, .unreal, and .max formats for rendering, simulation, and game development.
Price: $23.99

Mercedes-Benz SLS AMG GT3-002 3D Model
Texture: Yes
Material: Yes
Download the Mercedes-Benz SLS AMG GT3-002 3D Model featuring clean geometry, realistic detailing, and a fully modeled interior. Includes .blend, .fbx, .obj, .glb, .stl, .ply, .unreal, and .max formats for rendering, simulation, and game development.
Price: $38.99

Mercedes-Benz C-Class-001 3D Model
Texture: Yes
Material: Yes
Download the Mercedes-Benz C-Class-001 3D Model featuring clean geometry, realistic detailing, and a fully modeled interior. Includes .blend, .fbx, .obj, .glb, .stl, .ply, .unreal, and .max formats for rendering, simulation, and game development.
Price: $38.99

Mercedes-Benz B-Klasse 2023 3D Model
Texture: Yes
Material: Yes
Download the Mercedes-Benz B-Klasse 2023 3D Model featuring clean geometry, realistic detailing, and a fully modeled interior. Includes .blend, .fbx, .obj, .glb, .stl, .ply, .unreal, and .max formats for rendering, simulation, and game development.
Price: $38.99

Mercedes-Benz A-Klasse W168 3D Model
Texture: Yes
Material: Yes
Download the Mercedes-Benz A-Klasse W168 3D Model featuring clean geometry, realistic detailing, and a fully modeled interior. Includes .blend, .fbx, .obj, .glb, .stl, .ply, .unreal, and .max formats for rendering, simulation, and game development.
Price: $38.99

Mercedes-Benz 500SL 2000 3D Model
Texture: Yes
Material: Yes
Download the Mercedes-Benz 500SL 2000 3D Model featuring clean geometry, realistic detailing, and a fully modeled interior. Includes .blend, .fbx, .obj, .glb, .stl, .ply, .unreal, and .max formats for rendering, simulation, and game development.
Price: $38.99

Mercedes-Benz 500SEC 3D Model
Texture: Yes
Material: Yes
Download the Mercedes-Benz 500SEC 3D Model featuring clean geometry, realistic detailing, and a fully modeled interior. Includes .blend, .fbx, .obj, .glb, .stl, .ply, .unreal, and .max formats for rendering, simulation, and game development.
Price: $38.99

Mercedes-Benz Citan 2025 3D Model
Texture: Yes
Material: Yes
Download the Mercedes-Benz Citan 2025 3D Model featuring clean geometry, realistic detailing, and a fully modeled interior. Includes .blend, .fbx, .obj, .glb, .stl, .ply, .unreal, and .max formats for rendering, simulation, and game development.
Price: $38.99

Mercedes-Benz C63 AMG 2012 3D Model
Texture: Yes
Material: Yes
Download the Mercedes-Benz C63 AMG 2012 3D Model featuring clean geometry, realistic detailing, and a fully modeled interior. Includes .blend, .fbx, .obj, .glb, .stl, .ply, .unreal, and .max formats for rendering, simulation, and game development.
Price: $38.99

Mercedes-Benz E-Class S211 3D Model
Texture: Yes
Material: Yes
Download the Mercedes-Benz E-Class S211 3D Model featuring clean geometry, realistic detailing, and a fully modeled interior. Includes .blend, .fbx, .obj, .glb, .stl, .ply, .unreal, and .max formats for rendering, simulation, and game development.
Price: $38.99

Mercedes-Benz CLS63 AMG (C218) 2014 3D Model
Texture: Yes
Material: Yes
Download the Mercedes-Benz CLS63 AMG (C218) 2014 3D Model featuring clean geometry, realistic detailing, and a fully modeled interior. Includes .blend, .fbx, .obj, .glb, .stl, .ply, .unreal, and .max formats for rendering, simulation, and game development.
Price: $38.99

Mercedes-Benz CLS-Klasse 3D Model
Texture: Yes
Material: Yes
Download the Mercedes-Benz CLS-Klasse 3D Model featuring clean geometry, realistic detailing, and a fully modeled interior. Includes .blend, .fbx, .obj, .glb, .stl, .ply, .unreal, and .max formats for rendering, simulation, and game development.
Price: $38.99
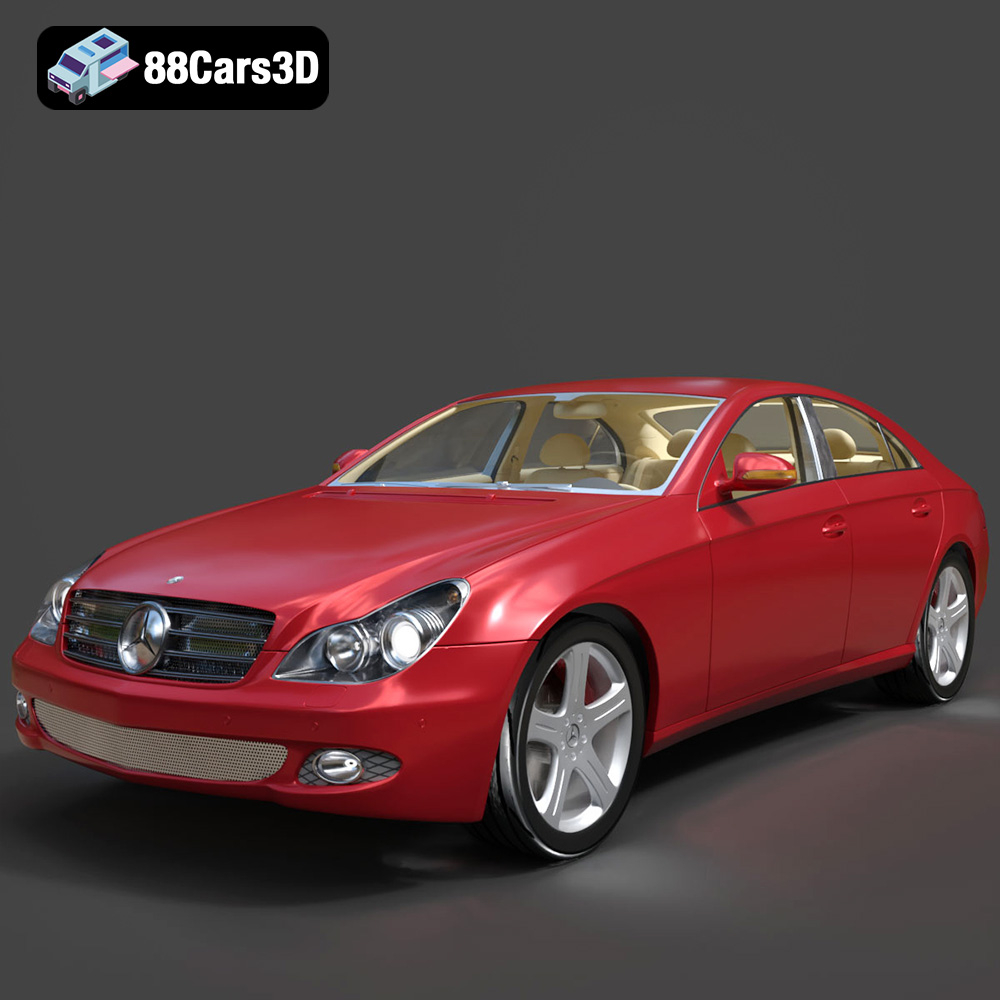
Mercedes-Benz CLS 500 3D Model
Texture: Yes
Material: Yes
Download the Mercedes-Benz CLS 500 3D Model featuring clean geometry, realistic detailing, and a fully modeled interior. Includes .blend, .fbx, .obj, .glb, .stl, .ply, .unreal, and .max formats for rendering, simulation, and game development.
Price: $38.99

Mercedes-Benz CL-Klasse 2001 3D Model
Texture: Yes
Material: Yes
Download the Mercedes-Benz CL-Klasse 2001 3D Model featuring clean geometry, realistic detailing, and a fully modeled interior. Includes .blend, .fbx, .obj, .glb, .stl, .ply, .unreal, and .max formats for rendering, simulation, and game development.
Price: $38.99
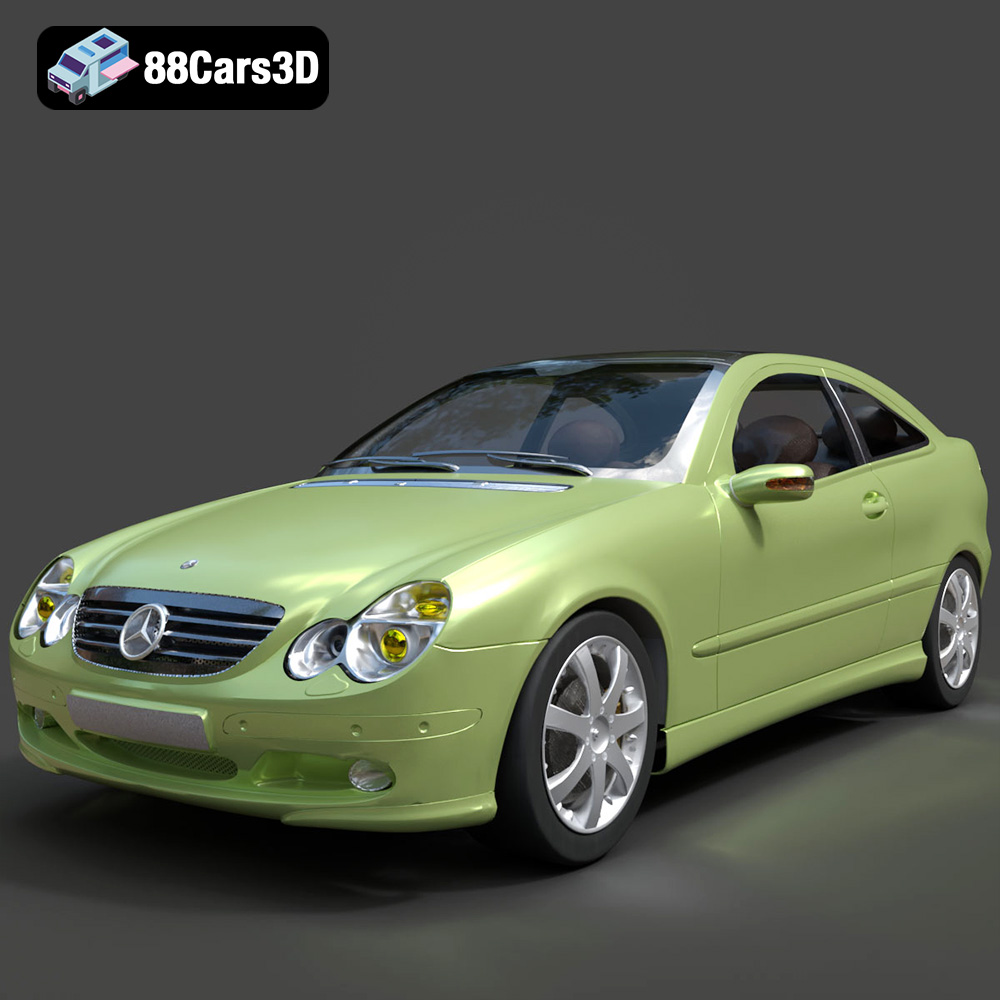
Mercedes-Benz C-Klasse Sportcoupe 2000 3D Model
Texture: Yes
Material: Yes
Download the Mercedes-Benz C-Klasse Sportcoupe 2000 3D Model featuring clean geometry, realistic detailing, and a fully modeled interior. Includes .blend, .fbx, .obj, .glb, .stl, .ply, .unreal, and .max formats for rendering, simulation, and game development.
Price: $38.99
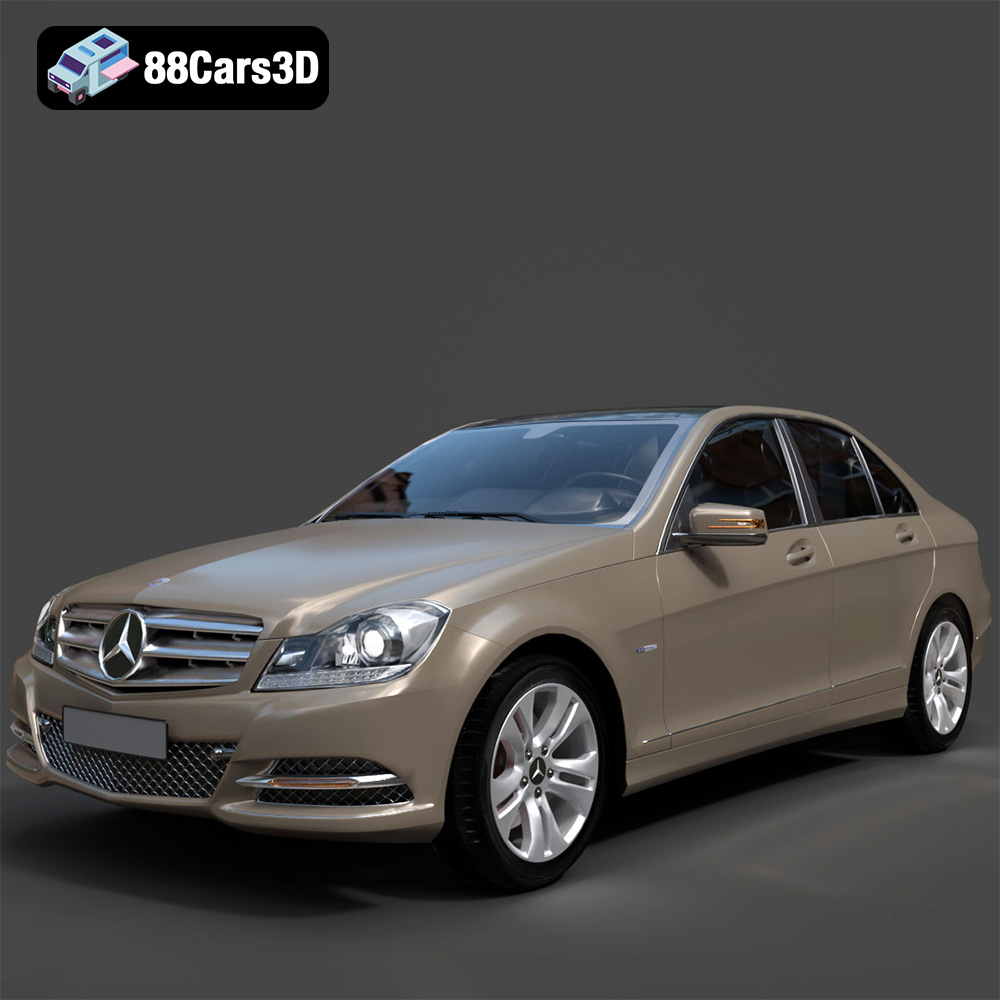
Mercedes-Benz C-Klasse 204 2011 3D Model
Texture: Yes
Material: Yes
Download the Mercedes-Benz C-Klasse 204 2011 3D Model featuring clean geometry, realistic detailing, and a fully modeled interior. Includes .blend, .fbx, .obj, .glb, .stl, .ply, .unreal, and .max formats for rendering, simulation, and game development.
Price: $38.99
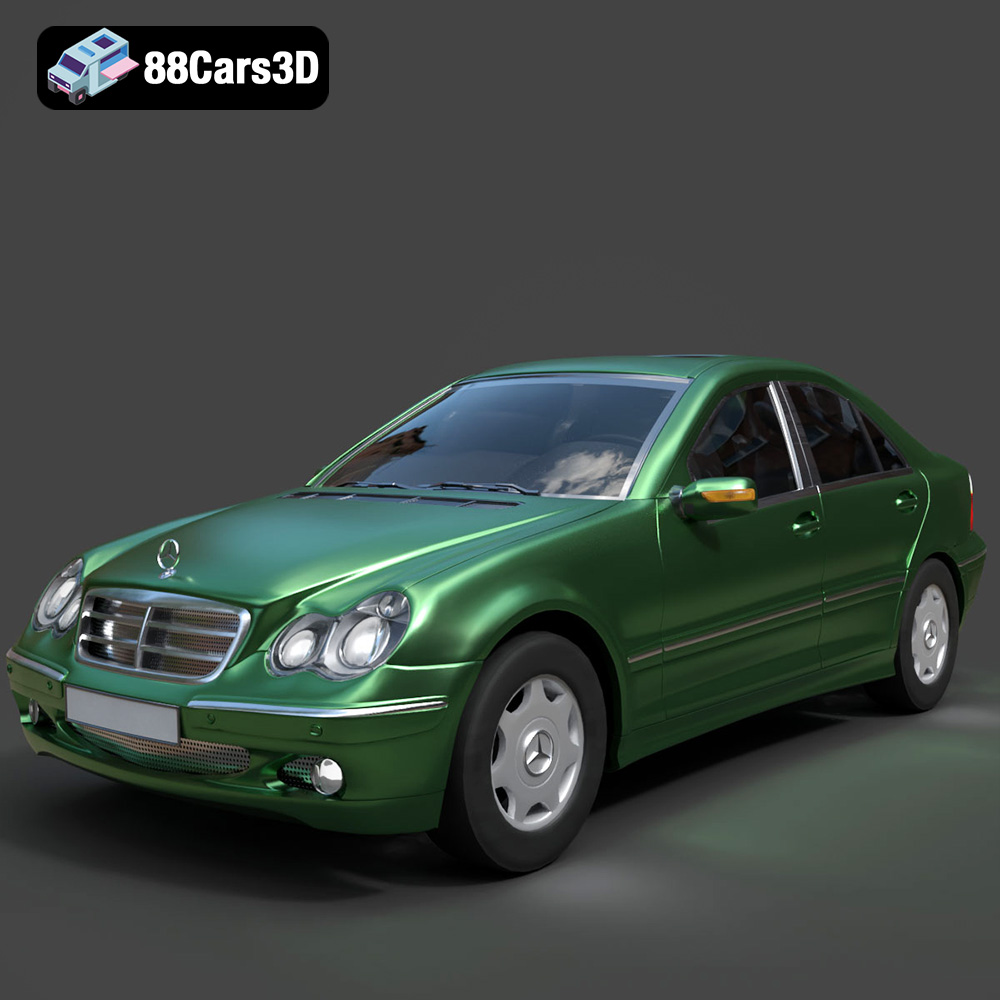
Mercedes-Benz C-Class Sedan 2000 3D Model
Texture: Yes
Material: Yes
Download the Mercedes-Benz C-Class Sedan 3D Model featuring clean geometry, realistic detailing, and a fully modeled interior. Includes .blend, .fbx, .obj, .glb, .stl, .ply, .unreal, and .max formats for rendering, simulation, and game development.
Price: $38.99
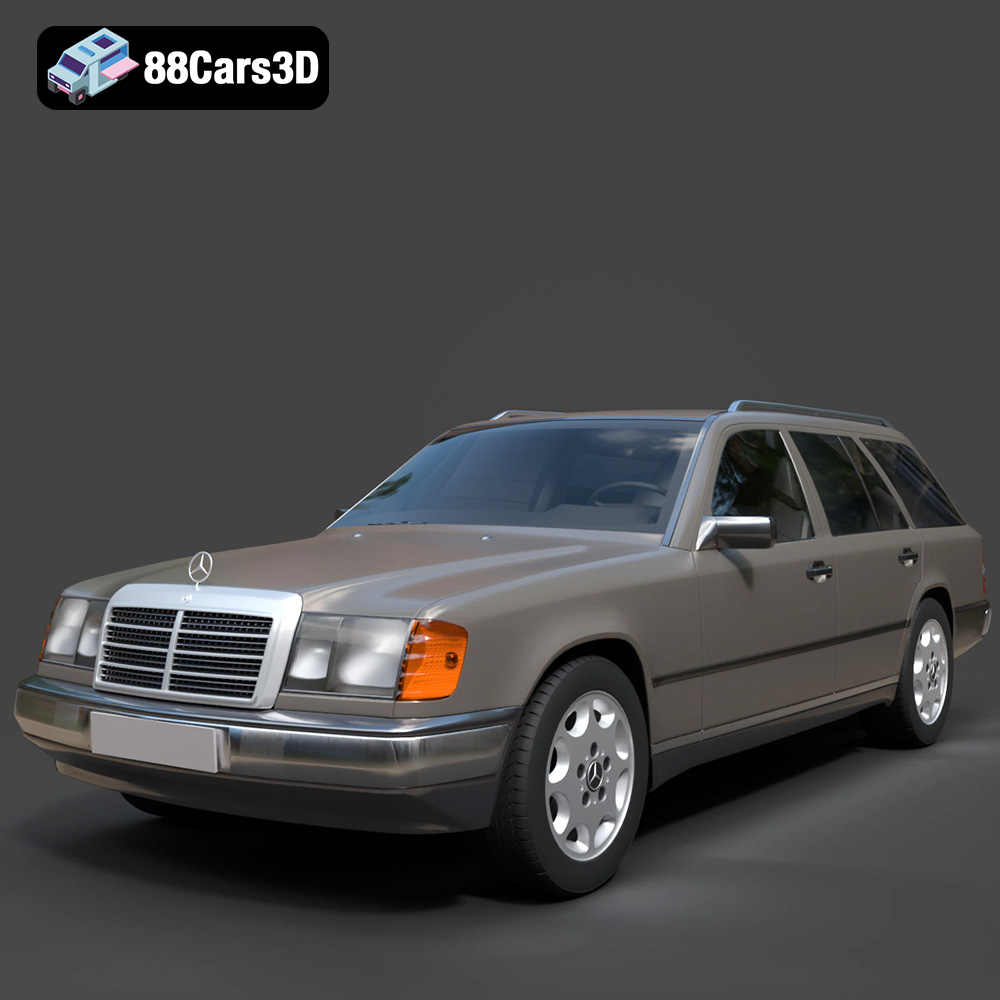
Mercedes E-Class w124 Kombi 3D Model
Texture: Yes
Material: Yes
Download the Mercedes E-Class w124 Kombi 3D Model featuring clean geometry, realistic detailing, and a fully modeled interior. Includes .blend, .fbx, .obj, .glb, .stl, .ply, .unreal, and .max formats for rendering, simulation, and game development.
Price: $38.99
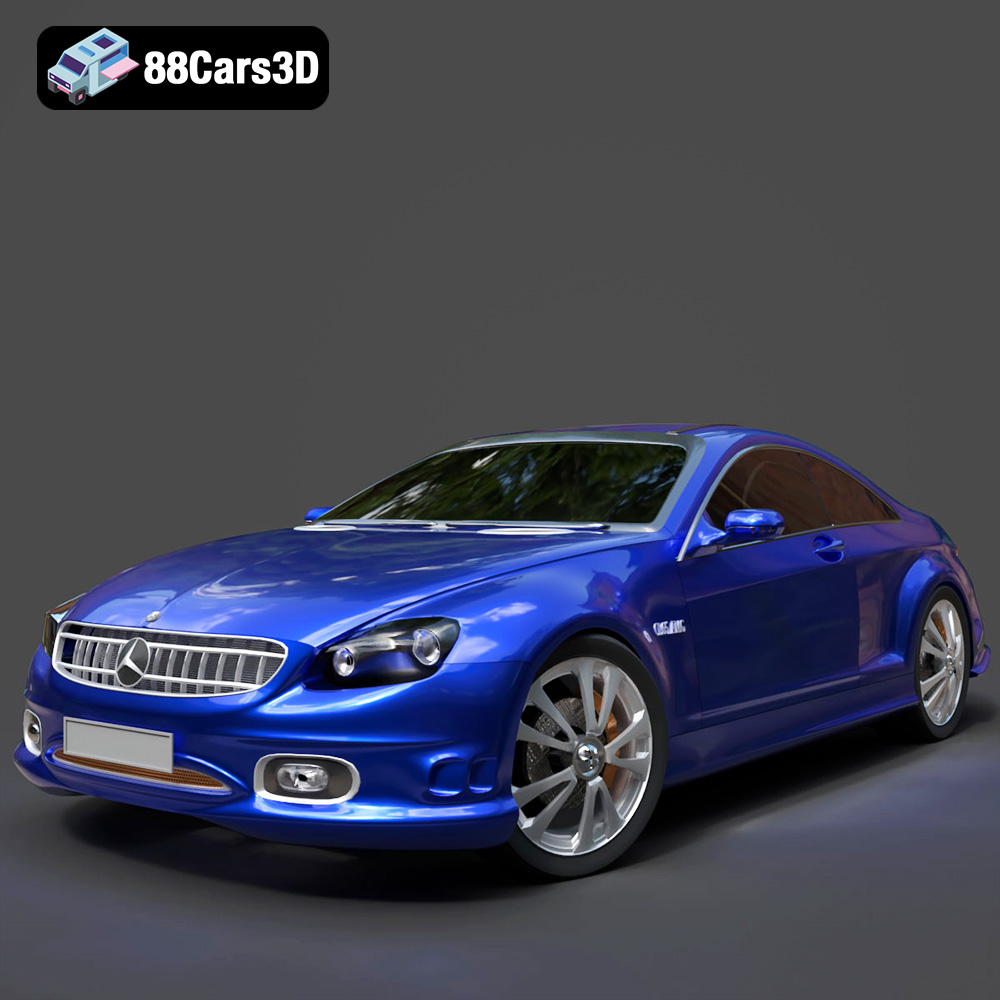
Mercedes-Benz CL6540-005 3D Model
Texture: Yes
Material: Yes
Download the Mercedes-Benz CL6540-005 3D Model featuring clean geometry, realistic detailing, and a fully modeled interior. Includes .blend, .fbx, .obj, .glb, .stl, .ply, .unreal, and .max formats for rendering, simulation, and game development.
Price: $38.99
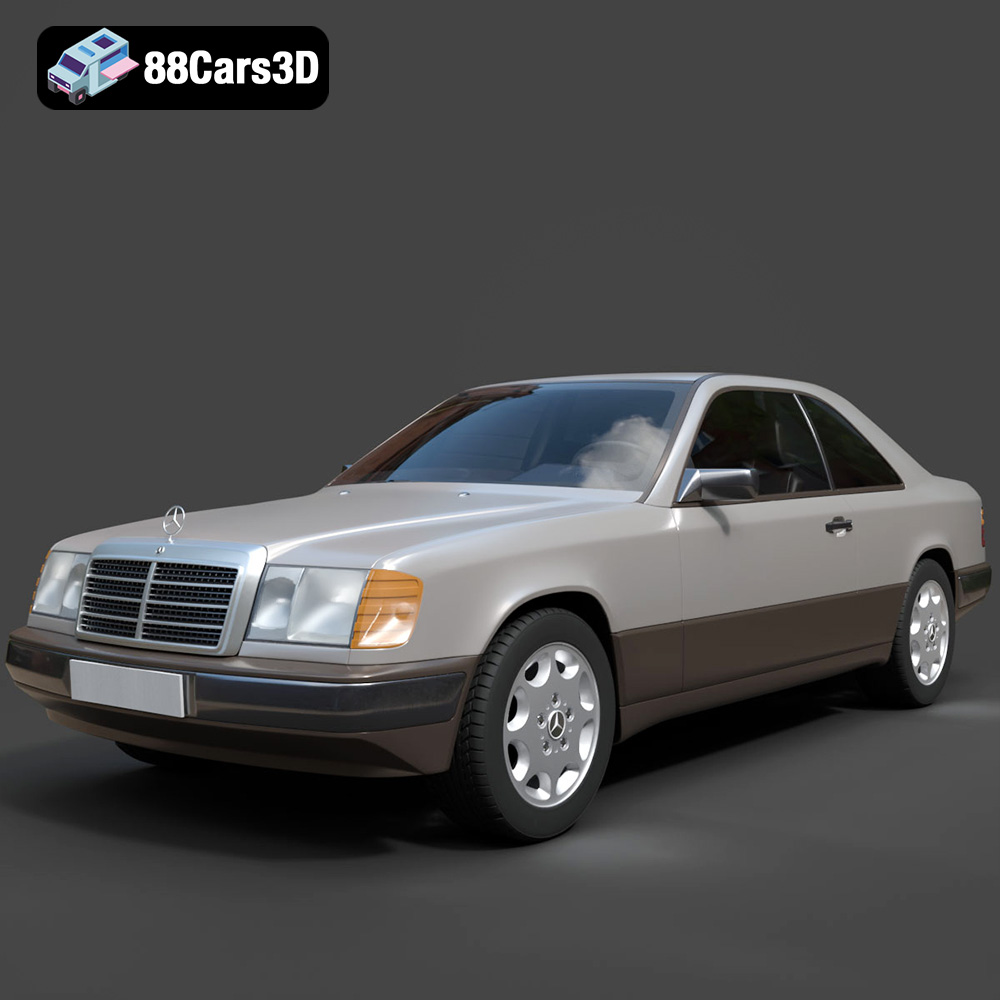
Mercedes E-Class w124 Coupe 3D Model
Texture: Yes
Material: Yes
Download the Mercedes E-Class w124 Coupe 3D Model featuring clean geometry, realistic detailing, and a fully modeled interior. Includes .blend, .fbx, .obj, .glb, .stl, .ply, .unreal, and .max formats for rendering, simulation, and game development.
Price: $38.99
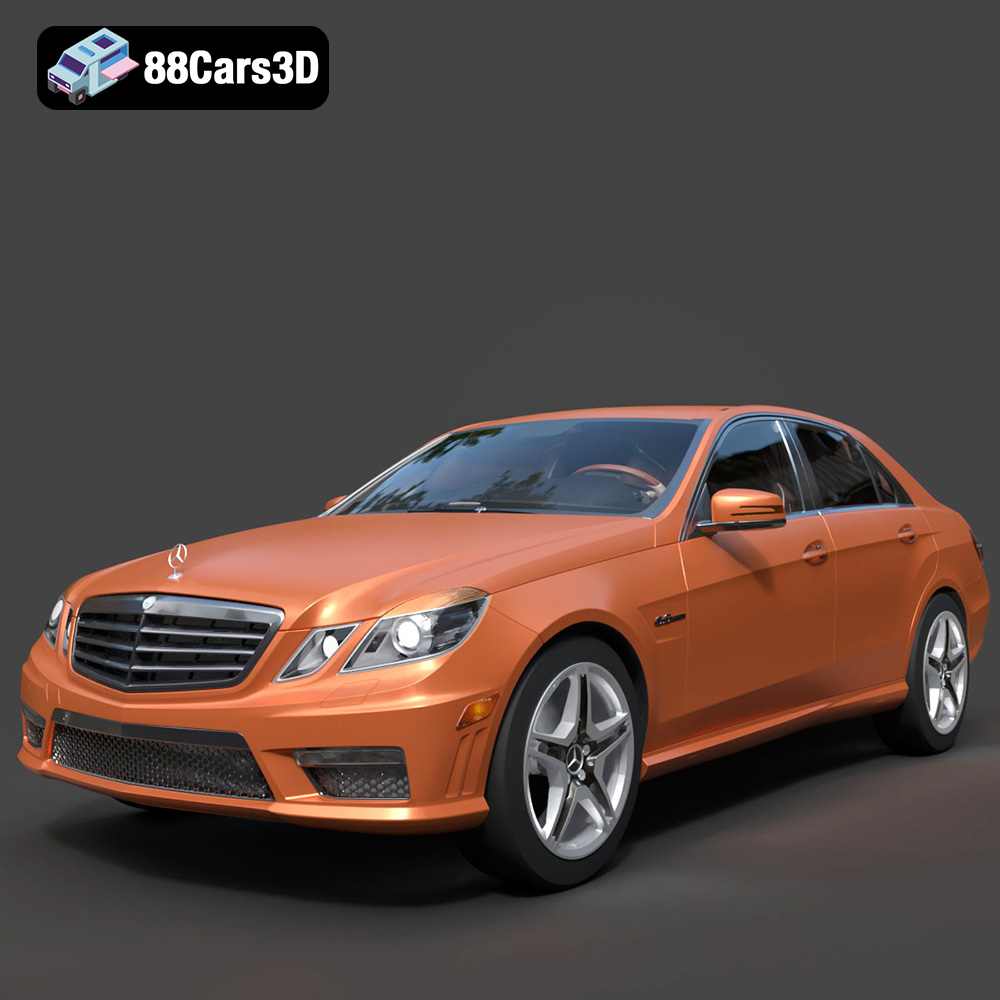
Mercedes-Benz E-Klasse 63 AMG 3D Model
Texture: Yes
Material: Yes
Download the Mercedes-Benz E-Klasse 63 AMG 3D Model featuring clean geometry, realistic detailing, and a fully modeled interior. Includes .blend, .fbx, .obj, .glb, .stl, .ply, .unreal, and .max formats for rendering, simulation, and game development.
Price: $38.99
