⚡ FLASH SALE: Get 60% OFF All Premium 3D & STL Models! ⚡
The gleam of a pristine car finish isn’t just about the color; it’s a complex interplay of light, depth, and micro-detail that can make a digital vehicle truly indistinguishable from its real-world counterpart. While standard PBR (Physically Based Rendering) workflows have revolutionized 3D graphics, achieving real-time photorealism for automotive paint in engines like Unreal Engine 5 often demands going a significant step further. A basic PBR setup, while accurate for many materials, frequently falls short of capturing the intricate layers and optical phenomena that define automotive clear coats, metallic flakes, and subtle imperfections. This article delves deep into crafting hyperrealistic automotive paint shaders in Unreal Engine 5, pushing beyond conventional PBR to unlock unparalleled visual fidelity for your vehicle rendering projects.
Whether you’re an automotive designer showcasing a new concept, a game developer striving for next-gen car assets, or a 3D artist aiming for cinematic quality, understanding the nuances of advanced material creation is paramount. We’ll explore the sophisticated techniques within the Unreal Engine material editor to simulate everything from sparkling metallic flake paint to subtle anisotropic reflections, ensuring your digital vehicles pop with breathtaking realism.
At its core, automotive paint is far more than a simple colored surface. It’s a meticulously engineered, multi-layered system designed for durability, protection, and, critically, aesthetic appeal. A typical modern car finish comprises several distinct layers, each contributing uniquely to the overall visual effect. Understanding these layers is the first step to simulating them accurately in a digital environment.
The foundational layer is often a primer, followed by a base coat that provides the primary color. On top of this, for many popular finishes, lies a layer containing metallic, pearl, or interference flakes suspended in a translucent binder. These flakes are crucial for the characteristic sparkle and color shift seen in many car paints. Finally, a thick, transparent clear coat material encapsulates and protects everything, providing gloss, depth, and UV resistance.
The standard PBR workflow, while highly effective for a vast range of materials, typically models a single surface with a single set of properties (base color, roughness, metallic, normal, etc.). This “single-layer” approach struggles to accurately represent the complex light interactions happening within and between the multiple layers of car paint. For instance, light penetrates the clear coat, interacts with the metallic flakes or base color below, and then reflects back through the clear coat again. This results in distinct reflections from both the clear coat’s surface and the underlying layers, each with its own roughness and specular response. A basic PBR setup cannot intrinsically differentiate these two separate reflective surfaces, leading to a flatter, less dynamic appearance that lacks true real-time photorealism.
The Unreal Engine material editor is a node-based powerhouse that provides the flexibility needed to build highly complex and physically accurate shaders. For automotive paint, we’re moving beyond simple inputs like Base Color and Roughness and diving into custom expressions, layered blending, and advanced mathematical operations.
Our goal is to simulate the distinct optical layers of car paint. This often involves blending multiple reflective lobes and manipulating properties like normals, roughness, and color at different stages of the shader graph. Key automotive shader nodes you’ll become intimately familiar with include:
When starting, consider a modular approach. Think of each physical layer of the car paint as a distinct “branch” in your material graph. You’ll likely have branches for the base color, the metallic flakes, and the clear coat, all eventually combined into the final material output. This structured thinking will prevent your graph from becoming an unmanageable tangle of wires.
The base coat provides the fundamental color of the vehicle, whether it’s a solid, flat hue or a more complex metallic or pearl finish. Simulating this layer accurately is critical before we add the dazzling effects of the clear coat.
Start with a simple Vector3 parameter for your base color. This will be the underlying pigment of the paint. Connect this to the Base Color input of your material. The roughness of this base layer is also important. Even beneath a perfectly smooth clear coat, the underlying pigment might have a slight perceived roughness, influencing how light scatters through the clear coat. Often, a very low roughness value (e.g., 0.1-0.2) is a good starting point for the base layer if it’s meant to be glossy, but you can always parameterize this for control.
This is where the shader truly begins to shine, quite literally. Metallic flake paint relies on tiny, reflective particles suspended within a translucent medium, usually above the base color but beneath the clear coat. These flakes catch and reflect light at specific angles, creating the signature sparkle and “flop” effect where the color or brightness changes depending on the viewing angle.
Accurately simulating these microscopic flakes presents a challenge because they are too small and numerous to model geometrically. Instead, we use a procedural or texture-based approach to simulate their collective reflection. Here’s a common technique:
By carefully controlling the size, density, reflection intensity, and Fresnel falloff of these simulated flakes, you can create a convincing metallic flake paint effect that dramatically enhances the real-time photorealism of your vehicle rendering.
The clear coat is arguably the most crucial component for achieving hyperrealistic automotive paint. It acts as a protective, highly reflective, and often transparent layer over the base and flake coats. Its properties dictate the overall glossiness, the sharpness of reflections, and the presence of subtle optical phenomena.
Unreal Engine 5 provides a dedicated “Clear Coat” input in its default PBR material model, which is a fantastic starting point. This input effectively adds a second specular lobe, allowing for a distinct layer of reflection on top of the base material. This is precisely what we need to simulate the clear coat. The base material (your combined base color and metallic flakes) will provide its own reflections, and the clear coat will add another, often sharper, reflection on top.
To utilize this, feed your desired clear coat roughness into the `ClearCoatRoughness` input and set `ClearCoat` to 1. The default material will then handle the double reflection automatically, mimicking how light reflects off the clear coat surface and also penetrates it to reflect off the underlying layers.
The `ClearCoatRoughness` input directly controls the perceived glossiness of the clear coat. A value close to 0 (e.g., 0.01-0.05) will result in a mirror-like finish, essential for new, polished paint. Slightly higher values can simulate microscopic dust, very light scratches, or a factory “orange peel” texture. Parameterize this value for easy adjustment.
While Unreal Engine’s standard PBR material inputs usually infer a dielectric IOR (Index of Refraction) for the clear coat automatically, understanding IOR is crucial. For materials like clear coat, the IOR determines how light bends and reflects. A typical value for automotive clear coats is around 1.5-1.6. If you’re building a more custom layered material using `Custom Expression` nodes or specific blending functions, you might need to manually input or derive the Fresnel effect based on this IOR for maximum physical accuracy.
One of the hallmarks of a truly realistic car paint shader is the presence of anisotropic reflections. Anisotropy describes reflections that stretch or smear in a particular direction, rather than appearing as perfectly circular highlights. This effect is common on brushed metals, hair, and, crucially, on highly polished surfaces like car paint where microscopic polishing marks or paint flow lines create subtle directional variations in the surface normal.
To achieve this in Unreal Engine:
Mastering anisotropic reflections will elevate your automotive shader nodes to a new level, capturing a subtle yet powerful detail often overlooked in less advanced setups.
While a pristine, perfectly clean car looks fantastic, true real-time photorealism often comes from the inclusion of subtle imperfections. These details break up the digital perfection, adding character and believability. However, realism must always be balanced with performance, especially for vehicle rendering in interactive experiences.
Even the cleanest car has micro-scratches, dust, or an ‘orange peel’ texture from the paint application process. These details are critical for breaking up overly smooth reflections and adding visual interest.
When applying imperfections, use Lerp nodes with masks to control their placement and intensity. Parameterize the intensity of these effects so you can easily dial them up or down depending on the desired level of wear and tear for your vehicle rendering scenario.
Advanced shaders, especially those with multiple layers, complex calculations, and numerous texture lookups, can quickly become performance heavy. It’s crucial to optimize without sacrificing visual fidelity.
The goal is to strike a balance. A high-end cinematic visualization might afford a more complex shader than a vehicle in a fast-paced game. Always profile your materials to identify bottlenecks.
Crafting a hyperrealistic automotive paint shader in Unreal Engine 5 is a journey that takes you far Beyond PBR‘s foundational concepts. We’ve deconstructed real-world paint layers, built up a complex material in the Unreal Engine material editor to simulate metallic flake paint and a robust clear coat material, and infused it with subtle yet powerful details like anisotropic reflections and surface imperfections. Each automotive shader nodes decision contributes to the final illusion of depth, sheen, and character.
However, even the most sophisticated shader won’t look its best without a holistic approach to your vehicle rendering. High-quality vehicle models are the canvas upon which these advanced shaders truly shine. Resources like 88cars3d.com offer an extensive collection of meticulously crafted 3D car models, providing the perfect foundation for your hyperrealistic projects. A detailed model with clean UVs and proper topology ensures that your elaborate shader effects render correctly and without artifacts.
Furthermore, realistic lighting and carefully tuned post-processing effects are indispensable companions to your advanced paint shader. Environmental reflections, HDR lighting, global illumination, screen space reflections, and even subtle chromatic aberration or bloom can significantly enhance the perception of real-time photorealism. It’s an iterative process of testing, refining, and re-evaluating your material in various lighting conditions to ensure it holds up.
Stepping Beyond PBR for automotive paint in Unreal Engine 5 is a challenging yet incredibly rewarding endeavor. By meticulously layering reflections, simulating intricate metallic flake paint, and implementing advanced features like anisotropic reflections within your clear coat material, you can achieve a level of real-time photorealism that was once the exclusive domain of offline renderers. The power of the Unreal Engine material editor, combined with a deep understanding of real-world materials, provides the tools to create truly breathtaking vehicle visualizations.
Embrace the complexity, experiment with different automotive shader nodes, and don’t be afraid to delve into custom expressions. The journey to hyperrealism is one of continuous refinement. Elevate your projects by starting with high-quality assets from 88cars3d.com and then pushing the boundaries of material artistry. The road to stunning vehicle rendering awaits!

Texture: Yes
Material: Yes
Download the Suzuki SX4-002 3D Model featuring clean geometry, realistic detailing, and a fully modeled interior. Includes .blend, .fbx, .obj, .glb, .stl, .ply, .unreal, and .max formats for rendering, simulation, and game development.
Price: $10

Texture: Yes
Material: Yes
Download the Tesla Model S 2024 3D Model featuring clean geometry, realistic detailing, and a fully modeled interior. Includes .blend, .fbx, .obj, .glb, .stl, .ply, .unreal, and .max formats for rendering, simulation, and game development.
Price: $10

Texture: Yes
Material: Yes
Download the Subaru Impreza WRX STi-002 3D Model featuring clean geometry, realistic detailing, and a fully modeled interior. Includes .blend, .fbx, .obj, .glb, .stl, .ply, .unreal, and .max formats for rendering, simulation, and game development.
Price: $10

Texture: Yes
Material: Yes
Download the Subaru Impreza WRX STi Sedan 3D Model featuring clean geometry, realistic detailing, and a fully modeled interior. Includes .blend, .fbx, .obj, .glb, .stl, .ply, .unreal, and .max formats for rendering, simulation, and game development.
Price: $10

Texture: Yes
Material: Yes
Download the Subaru Legacy 2009 3D Model featuring clean geometry, realistic detailing, and a fully modeled interior. Includes .blend, .fbx, .obj, .glb, .stl, .ply, .unreal, and .max formats for rendering, simulation, and game development.
Price: $10

Texture: Yes
Material: Yes
Download the Toyota Mark II (X100) 3D Model featuring clean geometry, realistic detailing, and a fully modeled interior. Includes .blend, .fbx, .obj, .glb, .stl, .ply, .unreal, and .max formats for rendering, simulation, and game development.
Price: $10

Texture: Yes
Material: Yes
Download the Toyota Corona 1985 3D Model featuring clean geometry, realistic detailing, and a fully modeled interior. Includes .blend, .fbx, .obj, .glb, .stl, .ply, .unreal, and .max formats for rendering, simulation, and game development.
Price: $10

Texture: Yes
Material: Yes
Download the Toyota Mark II X81 1990 3D Model featuring clean geometry, realistic detailing, and a fully modeled interior. Includes .blend, .fbx, .obj, .glb, .stl, .ply, .unreal, and .max formats for rendering, simulation, and game development.
Price: $10

Texture: Yes
Material: Yes
Download the Toyota iQ EV 2012 3D Model featuring clean geometry, realistic detailing, and a fully modeled interior. Includes .blend, .fbx, .obj, .glb, .stl, .ply, .unreal, and .max formats for rendering, simulation, and game development.
Price: $10

Texture: Yes
Material: Yes
Download the Toyota Aygo 2013 3D Model featuring clean geometry, realistic detailing, and a fully modeled interior. Includes .blend, .fbx, .obj, .glb, .stl, .ply, .unreal, and .max formats for rendering, simulation, and game development.
Price: $10

Texture: Yes
Material: Yes
Download the Toyota Crown S180 2005 3D Model featuring clean geometry, realistic detailing, and a fully modeled interior. Includes .blend, .fbx, .obj, .glb, .stl, .ply, .unreal, and .max formats for rendering, simulation, and game development.
Price: $10

Texture: Yes
Material: Yes
Download the Toyota Celica 2004 3D Model featuring clean geometry, realistic detailing, and a fully modeled interior. Includes .blend, .fbx, .obj, .glb, .stl, .ply, .unreal, and .max formats for rendering, simulation, and game development.
Price: $10

Texture: Yes
Material: Yes
Download the Toyota Corolla AE100 1992 3D Model featuring clean geometry, realistic detailing, and a fully modeled interior. Includes .blend, .fbx, .obj, .glb, .stl, .ply, .unreal, and .max formats for rendering, simulation, and game development.
Price: $10

Texture: Yes
Material: Yes
Download the Toyota Mark II X110 2000 3D Model featuring clean geometry, realistic detailing, and a fully modeled interior. Includes .blend, .fbx, .obj, .glb, .stl, .ply, .unreal, and .max formats for rendering, simulation, and game development.
Price: $10

Texture: Yes
Material: Yes
Download the Toyota Corolla 2020 3D Model featuring clean geometry, realistic detailing, and a fully modeled interior. Includes .blend, .fbx, .obj, .glb, .stl, .ply, .unreal, and .max formats for rendering, simulation, and game development.
Price: $10

Texture: Yes
Material: Yes
Download the Toyota Yaris 2020 3D Model featuring clean geometry, realistic detailing, and a fully modeled interior. Includes .blend, .fbx, .obj, .glb, .stl, .ply, .unreal, and .max formats for rendering, simulation, and game development.
Price: $9.9

Texture: Yes
Material: Yes
Download the Volkswagen Beetle 2012 3D Model featuring clean geometry, realistic detailing, and a fully modeled interior. Includes .blend, .fbx, .obj, .glb, .stl, .ply, .unreal, and .max formats for rendering, simulation, and game development.
Price: $9.9

Texture: Yes
Material: Yes
Download the Toyota Matrix 2005 3D Model featuring clean geometry, realistic detailing, and a fully modeled interior. Includes .blend, .fbx, .obj, .glb, .stl, .ply, .unreal, and .max formats for rendering, simulation, and game development.
Price: $9.9

Texture: Yes
Material: Yes
Download the Toyota Yaris Sedan 3D Model featuring clean geometry, realistic detailing, and a fully modeled interior. Includes .blend, .fbx, .obj, .glb, .stl, .ply, .unreal, and .max formats for rendering, simulation, and game development.
Price: $9.9

Texture: Yes
Material: Yes
Download the Volkswagen Golf R-004 2024 3D Model featuring clean geometry, realistic detailing, and a fully modeled interior. Includes .blend, .fbx, .obj, .glb, .stl, .ply, .unreal, and .max formats for rendering, simulation, and game development.
Price: $9.9

Texture: Yes
Material: Yes
Download the Volkswagen Golf 5 Door 2010 3D Model featuring clean geometry, realistic detailing, and a fully modeled interior. Includes .blend, .fbx, .obj, .glb, .stl, .ply, .unreal, and .max formats for rendering, simulation, and game development.
Price: $9.9

Texture: Yes
Material: Yes
Download the Toyota Premio 2010 3D Model featuring clean geometry, realistic detailing, and a fully modeled interior. Includes .blend, .fbx, .obj, .glb, .stl, .ply, .unreal, and .max formats for rendering, simulation, and game development.
Price: $9.9

Texture: Yes
Material: Yes
Download the Toyota Opa 2000 3D Model featuring clean geometry, realistic detailing, and a fully modeled interior. Includes .blend, .fbx, .obj, .glb, .stl, .ply, .unreal, and .max formats for rendering, simulation, and game development.
Price: $9.9

Texture: Yes
Material: Yes
Download the Volkswagen Polo 5 Door 2010 3D Model featuring clean geometry, realistic detailing, and a fully modeled interior. Includes .blend, .fbx, .obj, .glb, .stl, .ply, .unreal, and .max formats for rendering, simulation, and game development.
Price: $9.9

Texture: Yes
Material: Yes
Download the Toyota Prius 2024 3D Model featuring clean geometry, realistic detailing, and a fully modeled interior. Includes .blend, .fbx, .obj, .glb, .stl, .ply, .unreal, and .max formats for rendering, simulation, and game development.
Price: $9.9

Texture: Yes
Material: Yes
Download the Toyota Yaris 1999 3D Model featuring clean geometry, realistic detailing, and a fully modeled interior. Includes .blend, .fbx, .obj, .glb, .stl, .ply, .unreal, and .max formats for rendering, simulation, and game development.
Price: $9.9

Texture: Yes
Material: Yes
Download the Toyota Supra 2020 3D Model featuring clean geometry, realistic detailing, and a fully modeled interior. Includes .blend, .fbx, .obj, .glb, .stl, .ply, .unreal, and .max formats for rendering, simulation, and game development.
Price: $9.9

Texture: Yes
Material: Yes
Download the Volkswagen New Beetle 2000 3D Model featuring clean geometry, realistic detailing, and a fully modeled interior. Includes .blend, .fbx, .obj, .glb, .stl, .ply, .unreal, and .max formats for rendering, simulation, and game development.
Price: $14.99

Texture: Yes
Material: Yes
Download the Volkswagen Jetta 2005 3D Model featuring clean geometry, realistic detailing, and a fully modeled interior. Includes .blend, .fbx, .obj, .glb, .stl, .ply, .unreal, and .max formats for rendering, simulation, and game development.
Price: $18.99

Texture: Yes
Material: Yes
Download the Volkswagen Golf 3-Door 3D Model featuring clean geometry, realistic detailing, and a fully modeled interior. Includes .blend, .fbx, .obj, .glb, .stl, .ply, .unreal, and .max formats for rendering, simulation, and game development.
Price: $14.99

Texture: Yes
Material: Yes
Download the Volvo V70 2005 3D Model featuring clean geometry, realistic detailing, and a fully modeled interior. Includes .blend, .fbx, .obj, .glb, .stl, .ply, .unreal, and .max formats for rendering, simulation, and game development.
Price: $14.99

Texture: Yes
Material: Yes
Download the Volkswagen Bora 2004 3D Model featuring clean geometry, realistic detailing, and a fully modeled interior. Includes .blend, .fbx, .obj, .glb, .stl, .ply, .unreal, and .max formats for rendering, simulation, and game development.
Price: $14.99

Texture: Yes
Material: Yes
Download the Volkswagen Lupo 3D Model featuring clean geometry, realistic detailing, and a fully modeled interior. Includes .blend, .fbx, .obj, .glb, .stl, .ply, .unreal, and .max formats for rendering, simulation, and game development.
Price: $19.99

Texture: Yes
Material: Yes
Download the Volkswagen Passat B5 2000 3D Model featuring clean geometry, realistic detailing, and a fully modeled interior. Includes .blend, .fbx, .obj, .glb, .stl, .ply, .unreal, and .max formats for rendering, simulation, and game development.
Price: $19.99

Texture: Yes
Material: Yes
Download the Volkswagen Passat CC 3D Model featuring clean geometry, realistic detailing, and a fully modeled interior. Includes .blend, .fbx, .obj, .glb, .stl, .ply, .unreal, and .max formats for rendering, simulation, and game development.
Price: $19.99

Texture: Yes
Material: Yes
Download the Volkswagen Golf V 2006 3D Model featuring clean geometry, realistic detailing, and a fully modeled interior. Includes .blend, .fbx, .obj, .glb, .stl, .ply, .unreal, and .max formats for rendering, simulation, and game development.
Price: $19.99

Texture: Yes
Material: Yes
Download the Volvo S60 R-Design 3D Model featuring clean geometry, realistic detailing, and a fully modeled interior. Includes .blend, .fbx, .obj, .glb, .stl, .ply, .unreal, and .max formats for rendering, simulation, and game development.
Price: $19.99

Texture: Yes
Material: Yes
Download the Volkswagen Passat 2025 3D Model featuring clean geometry, realistic detailing, and a fully modeled interior. Includes .blend, .fbx, .obj, .glb, .stl, .ply, .unreal, and .max formats for rendering, simulation, and game development.
Price: $25.99

Texture: Yes
Material: Yes
Download the Volkswagen Passat Variant B6 2005 3D Model featuring clean geometry, realistic detailing, and a fully modeled interior. Includes .blend, .fbx, .obj, .glb, .stl, .ply, .unreal, and .max formats for rendering, simulation, and game development.
Price: $25.99

Texture: Yes
Material: Yes
Download the Volkswagen Phaeton W12 2004 3D Model featuring clean geometry, realistic detailing, and a fully modeled interior. Includes .blend, .fbx, .obj, .glb, .stl, .ply, .unreal, and .max formats for rendering, simulation, and game development.
Price: $25.99

Texture: Yes
Material: Yes
Download the Volkswagen Scirocco 2015 3D Model featuring clean geometry, realistic detailing, and a fully modeled interior. Includes .blend, .fbx, .obj, .glb, .stl, .ply, .unreal, and .max formats for rendering, simulation, and game development.
Price: $25.99

Texture: Yes
Material: Yes
Download the Volvo S60 2024 3D Model featuring clean geometry, realistic detailing, and a fully modeled interior. Includes .blend, .fbx, .obj, .glb, .stl, .ply, .unreal, and .max formats for rendering, simulation, and game development.
Price: $25.99

Texture: Yes
Material: Yes
Download the Volkswagen Polo 3D Model featuring clean geometry, realistic detailing, and a fully modeled interior. Includes .blend, .fbx, .obj, .glb, .stl, .ply, .unreal, and .max formats for rendering, simulation, and game development.
Price: $25.99

Texture: Yes
Material: Yes
Download the Volkswagen Golf 5-Doors 3D Model featuring clean geometry, realistic detailing, and a fully modeled interior. Includes .blend, .fbx, .obj, .glb, .stl, .ply, .unreal, and .max formats for rendering, simulation, and game development.
Price: $25.99

Texture: Yes
Material: Yes
Download the Volvo C70 T5 2000 3D Model featuring clean geometry, realistic detailing, and a fully modeled interior. Includes .blend, .fbx, .obj, .glb, .stl, .ply, .unreal, and .max formats for rendering, simulation, and game development.
Price: $23.99

Texture: Yes
Material: Yes
Download the Volvo S40 Sedan 2004 3D Model featuring clean geometry, realistic detailing, and a fully modeled interior. Includes .blend, .fbx, .obj, .glb, .stl, .ply, .unreal, and .max formats for rendering, simulation, and game development.
Price: $23.99

Texture: Yes
Material: Yes
Download the Volvo C30 BEV 2012 3D Model featuring clean geometry, realistic detailing, and a fully modeled interior. Includes .blend, .fbx, .obj, .glb, .stl, .ply, .unreal, and .max formats for rendering, simulation, and game development.
Price: $23.99

Texture: Yes
Material: Yes
Download the Volvo C70 1998 3D Model featuring clean geometry, realistic detailing, and a fully modeled interior. Includes .blend, .fbx, .obj, .glb, .stl, .ply, .unreal, and .max formats for rendering, simulation, and game development.
Price: $23.99

Texture: Yes
Material: Yes
Download the Mazda B-Series 3D Model featuring clean geometry, realistic detailing, and a fully modeled interior. Includes .blend, .fbx, .obj, .glb, .stl, .ply, .unreal, and .max formats for rendering, simulation, and game development.
Price: $23.99

Texture: Yes
Material: Yes
Download the Mercsedes Benz Z3-006 3D Model featuring clean geometry, realistic detailing, and a fully modeled interior. Includes .blend, .fbx, .obj, .glb, .stl, .ply, .unreal, and .max formats for rendering, simulation, and game development.
Price: $23.99

Texture: Yes
Material: Yes
Download the Mazda RX-7 3D Model featuring clean geometry, realistic detailing, and a fully modeled interior. Includes .blend, .fbx, .obj, .glb, .stl, .ply, .unreal, and .max formats for rendering, simulation, and game development.
Price: $23.99

Texture: Yes
Material: Yes
Download the Volvo VCC-003 3D Model featuring clean geometry, realistic detailing, and a fully modeled interior. Includes .blend, .fbx, .obj, .glb, .stl, .ply, .unreal, and .max formats for rendering, simulation, and game development.
Price: $23.99

Texture: Yes
Material: Yes
Download the Mercedes-Benz SLR McLaren 2005 3D Model featuring clean geometry, realistic detailing, and a fully modeled interior. Includes .blend, .fbx, .obj, .glb, .stl, .ply, .unreal, and .max formats for rendering, simulation, and game development.
Price: $23.99

Texture: Yes
Material: Yes
Download the GAZ 3110 Pickup 3D Model featuring clean geometry, realistic detailing, and a fully modeled interior. Includes .blend, .fbx, .obj, .glb, .stl, .ply, .unreal, and .max formats for rendering, simulation, and game development.
Price: $23.99

Texture: Yes
Material: Yes
Download the Mazda 626 GF 1997 3D Model featuring clean geometry, realistic detailing, and a fully modeled interior. Includes .blend, .fbx, .obj, .glb, .stl, .ply, .unreal, and .max formats for rendering, simulation, and game development.
Price: $23.99

Texture: Yes
Material: Yes
Download the Volvo S80 2011 3D Model featuring clean geometry, realistic detailing, and a fully modeled interior. Includes .blend, .fbx, .obj, .glb, .stl, .ply, .unreal, and .max formats for rendering, simulation, and game development.
Price: $23.99

Texture: Yes
Material: Yes
Download the Volkswagen Touran restyle-006 3D Model featuring clean geometry, realistic detailing, and a fully modeled interior. Includes .blend, .fbx, .obj, .glb, .stl, .ply, .unreal, and .max formats for rendering, simulation, and game development.
Price: $23.99

Texture: Yes
Material: Yes
Download the Skoda Octavia Scout 3D Model featuring clean geometry, realistic detailing, and a fully modeled interior. Includes .blend, .fbx, .obj, .glb, .stl, .ply, .unreal, and .max formats for rendering, simulation, and game development.
Price: $23.99

Texture: Yes
Material: Yes
Download the Volkswagen Golf V 2006 3D Model featuring clean geometry, realistic detailing, and a fully modeled interior. Includes .blend, .fbx, .obj, .glb, .stl, .ply, .unreal, and .max formats for rendering, simulation, and game development.
Price: $23.99

Texture: Yes
Material: Yes
Download the Mazda CX-7 3D Model featuring clean geometry, realistic detailing, and a fully modeled interior. Includes .blend, .fbx, .obj, .glb, .stl, .ply, .unreal, and .max formats for rendering, simulation, and game development.
Price: $23.99

Texture: Yes
Material: Yes
Download the Mazda Familia 3D Model featuring clean geometry, realistic detailing, and a fully modeled interior. Includes .blend, .fbx, .obj, .glb, .stl, .ply, .unreal, and .max formats for rendering, simulation, and game development.
Price: $23.99

Texture: Yes
Material: Yes
Download the GAS 21 3D Model featuring clean geometry, realistic detailing, and a fully modeled interior. Includes .blend, .fbx, .obj, .glb, .stl, .ply, .unreal, and .max formats for rendering, simulation, and game development.
Price: $23.99

Texture: Yes
Material: Yes
Download the Mercedes-Benz SL500 AMG (R129) 3D Model featuring clean geometry, realistic detailing, and a fully modeled interior. Includes .blend, .fbx, .obj, .glb, .stl, .ply, .unreal, and .max formats for rendering, simulation, and game development.
Price: $23.99

Texture: Yes
Material: Yes
Download the Mercedes-Benz S-Class W221 2005 3D Model featuring clean geometry, realistic detailing, and a fully modeled interior. Includes .blend, .fbx, .obj, .glb, .stl, .ply, .unreal, and .max formats for rendering, simulation, and game development.
Price: $23.99

Texture: Yes
Material: Yes
Download the Mercedes-Benz E-Class W212 2009 3D Model featuring clean geometry, realistic detailing, and a fully modeled interior. Includes .blend, .fbx, .obj, .glb, .stl, .ply, .unreal, and .max formats for rendering, simulation, and game development.
Price: $23.99

Texture: Yes
Material: Yes
Download the Mercedes-Benz E-class Estate S212 2009 3D Model featuring clean geometry, realistic detailing, and a fully modeled interior. Includes .blend, .fbx, .obj, .glb, .stl, .ply, .unreal, and .max formats for rendering, simulation, and game development.
Price: $23.99

Texture: Yes
Material: Yes
Download the Mercedes-Benz 190 W201 3D Model featuring clean geometry, realistic detailing, and a fully modeled interior. Includes .blend, .fbx, .obj, .glb, .stl, .ply, .unreal, and .max formats for rendering, simulation, and game development.
Price: $23.99

Texture: Yes
Material: Yes
Download the Mercedes-Benz C230 SportCoupé 2005 3D Model featuring clean geometry, realistic detailing, and a fully modeled interior. Includes .blend, .fbx, .obj, .glb, .stl, .ply, .unreal, and .max formats for rendering, simulation, and game development.
Price: $23.99

Texture: Yes
Material: Yes
Download the Mercedes-Benz SLK 3D Model featuring clean geometry, realistic detailing, and a fully modeled interior. Includes .blend, .fbx, .obj, .glb, .stl, .ply, .unreal, and .max formats for rendering, simulation, and game development.
Price: $23.99

Texture: Yes
Material: Yes
Download the Mercedes 600 SEC W140 1992 3D Model featuring clean geometry, realistic detailing, and a fully modeled interior. Includes .blend, .fbx, .obj, .glb, .stl, .ply, .unreal, and .max formats for rendering, simulation, and game development.
Price: $23.99

Texture: Yes
Material: Yes
Download the Mercedes S-Class 2010 3D Model featuring clean geometry, realistic detailing, and a fully modeled interior. Includes .blend, .fbx, .obj, .glb, .stl, .ply, .unreal, and .max formats for rendering, simulation, and game development.
Price: $23.99

Texture: Yes
Material: Yes
Download the McLaren MP4-12C-001 3D Model featuring clean geometry, realistic detailing, and a fully modeled interior. Includes .blend, .fbx, .obj, .glb, .stl, .ply, .unreal, and .max formats for rendering, simulation, and game development.
Price: $23.99

Texture: Yes
Material: Yes
Download the Mercedes-Benz SLK 350 2005 3D Model featuring clean geometry, realistic detailing, and a fully modeled interior. Includes .blend, .fbx, .obj, .glb, .stl, .ply, .unreal, and .max formats for rendering, simulation, and game development.
Price: $23.99

Texture: Yes
Material: Yes
Download the Mercedes-Benz SL 65 AMG 3D Model featuring clean geometry, realistic detailing, and a fully modeled interior. Includes .blend, .fbx, .obj, .glb, .stl, .ply, .unreal, and .max formats for rendering, simulation, and game development.
Price: $23.99

Texture: Yes
Material: Yes
Download the Mercedes-Benz S500 3D Model featuring clean geometry, realistic detailing, and a fully modeled interior. Includes .blend, .fbx, .obj, .glb, .stl, .ply, .unreal, and .max formats for rendering, simulation, and game development.
Price: $23.99

Texture: Yes
Material: Yes
Download the Mercedes-Benz S55 W220 AMG 1999 3D Model featuring clean geometry, realistic detailing, and a fully modeled interior. Includes .blend, .fbx, .obj, .glb, .stl, .ply, .unreal, and .max formats for rendering, simulation, and game development.
Price: $23.99

Texture: Yes
Material: Yes
Download the Mercedes-Benz CLA45 AMG 2017 3D Model featuring clean geometry, realistic detailing, and a fully modeled interior. Includes .blend, .fbx, .obj, .glb, .stl, .ply, .unreal, and .max formats for rendering, simulation, and game development.
Price: $38.99

Texture: Yes
Material: Yes
Download the Mercedes-Benz CL65 C215 AMG 3D Model featuring clean geometry, realistic detailing, and a fully modeled interior. Includes .blend, .fbx, .obj, .glb, .stl, .ply, .unreal, and .max formats for rendering, simulation, and game development.
Price: $23.99

Texture: Yes
Material: Yes
Download the Mercedes-Benz A45 2021 3D Model featuring clean geometry, realistic detailing, and a fully modeled interior. Includes .blend, .fbx, .obj, .glb, .stl, .ply, .unreal, and .max formats for rendering, simulation, and game development.
Price: $23.99

Texture: Yes
Material: Yes
Download the Mercedes-Benz 300SL 1955 3D Model featuring clean geometry, realistic detailing, and a fully modeled interior. Includes .blend, .fbx, .obj, .glb, .stl, .ply, .unreal, and .max formats for rendering, simulation, and game development.
Price: $23.99

Texture: Yes
Material: Yes
Download the Mercedes-Benz 190SL 1955 3D Model featuring clean geometry, realistic detailing, and a fully modeled interior. Includes .blend, .fbx, .obj, .glb, .stl, .ply, .unreal, and .max formats for rendering, simulation, and game development.
Price: $23.99

Texture: Yes
Material: Yes
Download the Mercedes-Benz W124 Brabus V12 3D Model featuring clean geometry, realistic detailing, and a fully modeled interior. Includes .blend, .fbx, .obj, .glb, .stl, .ply, .unreal, and .max formats for rendering, simulation, and game development.
Price: $23.99

Texture: Yes
Material: Yes
Download the Mercedes-Benz SLS AMG GT3-002 3D Model featuring clean geometry, realistic detailing, and a fully modeled interior. Includes .blend, .fbx, .obj, .glb, .stl, .ply, .unreal, and .max formats for rendering, simulation, and game development.
Price: $38.99

Texture: Yes
Material: Yes
Download the Mercedes-Benz C-Class-001 3D Model featuring clean geometry, realistic detailing, and a fully modeled interior. Includes .blend, .fbx, .obj, .glb, .stl, .ply, .unreal, and .max formats for rendering, simulation, and game development.
Price: $38.99

Texture: Yes
Material: Yes
Download the Mercedes-Benz B-Klasse 2023 3D Model featuring clean geometry, realistic detailing, and a fully modeled interior. Includes .blend, .fbx, .obj, .glb, .stl, .ply, .unreal, and .max formats for rendering, simulation, and game development.
Price: $38.99

Texture: Yes
Material: Yes
Download the Mercedes-Benz A-Klasse W168 3D Model featuring clean geometry, realistic detailing, and a fully modeled interior. Includes .blend, .fbx, .obj, .glb, .stl, .ply, .unreal, and .max formats for rendering, simulation, and game development.
Price: $38.99

Texture: Yes
Material: Yes
Download the Mercedes-Benz 500SL 2000 3D Model featuring clean geometry, realistic detailing, and a fully modeled interior. Includes .blend, .fbx, .obj, .glb, .stl, .ply, .unreal, and .max formats for rendering, simulation, and game development.
Price: $38.99

Texture: Yes
Material: Yes
Download the Mercedes-Benz 500SEC 3D Model featuring clean geometry, realistic detailing, and a fully modeled interior. Includes .blend, .fbx, .obj, .glb, .stl, .ply, .unreal, and .max formats for rendering, simulation, and game development.
Price: $38.99

Texture: Yes
Material: Yes
Download the Mercedes-Benz Citan 2025 3D Model featuring clean geometry, realistic detailing, and a fully modeled interior. Includes .blend, .fbx, .obj, .glb, .stl, .ply, .unreal, and .max formats for rendering, simulation, and game development.
Price: $38.99

Texture: Yes
Material: Yes
Download the Mercedes-Benz C63 AMG 2012 3D Model featuring clean geometry, realistic detailing, and a fully modeled interior. Includes .blend, .fbx, .obj, .glb, .stl, .ply, .unreal, and .max formats for rendering, simulation, and game development.
Price: $38.99

Texture: Yes
Material: Yes
Download the Mercedes-Benz E-Class S211 3D Model featuring clean geometry, realistic detailing, and a fully modeled interior. Includes .blend, .fbx, .obj, .glb, .stl, .ply, .unreal, and .max formats for rendering, simulation, and game development.
Price: $38.99

Texture: Yes
Material: Yes
Download the Mercedes-Benz CLS63 AMG (C218) 2014 3D Model featuring clean geometry, realistic detailing, and a fully modeled interior. Includes .blend, .fbx, .obj, .glb, .stl, .ply, .unreal, and .max formats for rendering, simulation, and game development.
Price: $38.99

Texture: Yes
Material: Yes
Download the Mercedes-Benz CLS-Klasse 3D Model featuring clean geometry, realistic detailing, and a fully modeled interior. Includes .blend, .fbx, .obj, .glb, .stl, .ply, .unreal, and .max formats for rendering, simulation, and game development.
Price: $38.99
Texture: Yes
Material: Yes
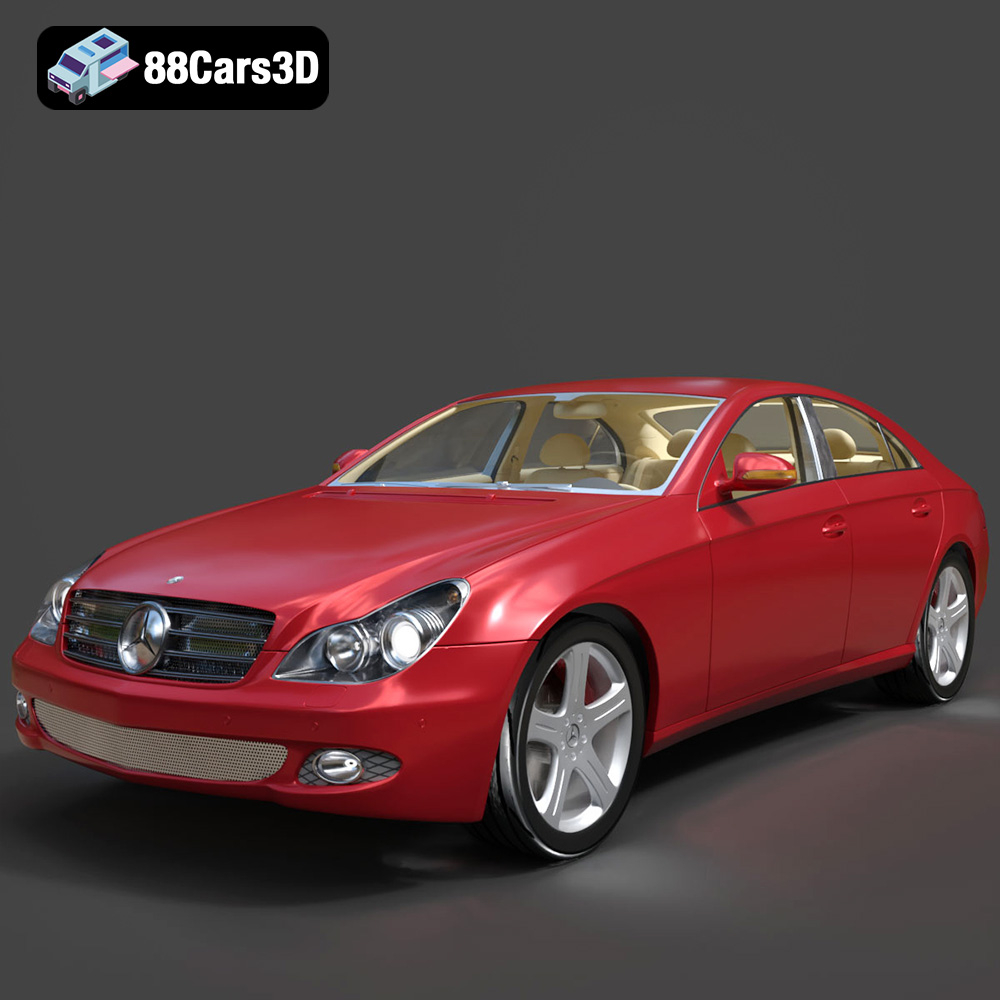
Download the Mercedes-Benz CLS 500 3D Model featuring clean geometry, realistic detailing, and a fully modeled interior. Includes .blend, .fbx, .obj, .glb, .stl, .ply, .unreal, and .max formats for rendering, simulation, and game development.
Price: $38.99

Texture: Yes
Material: Yes
Download the Mercedes-Benz CL-Klasse 2001 3D Model featuring clean geometry, realistic detailing, and a fully modeled interior. Includes .blend, .fbx, .obj, .glb, .stl, .ply, .unreal, and .max formats for rendering, simulation, and game development.
Price: $38.99
Texture: Yes
Material: Yes
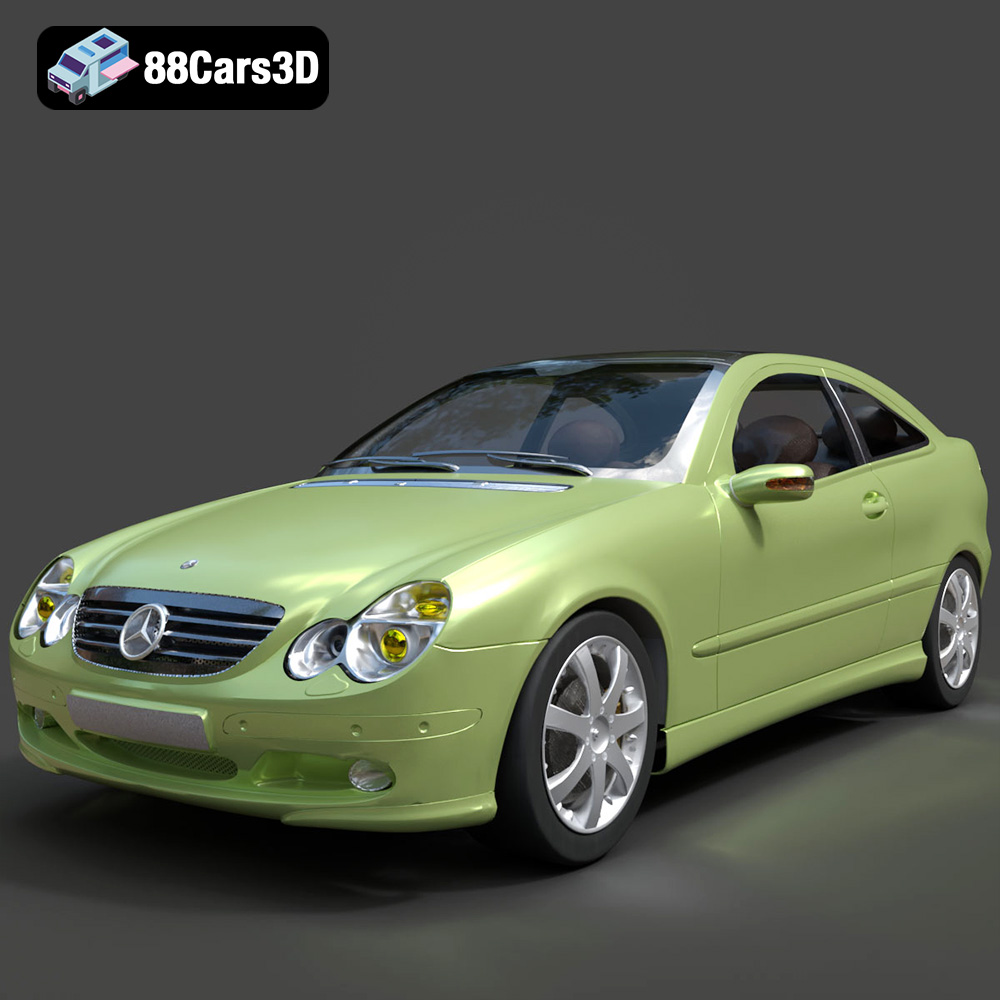
Download the Mercedes-Benz C-Klasse Sportcoupe 2000 3D Model featuring clean geometry, realistic detailing, and a fully modeled interior. Includes .blend, .fbx, .obj, .glb, .stl, .ply, .unreal, and .max formats for rendering, simulation, and game development.
Price: $38.99
Texture: Yes
Material: Yes
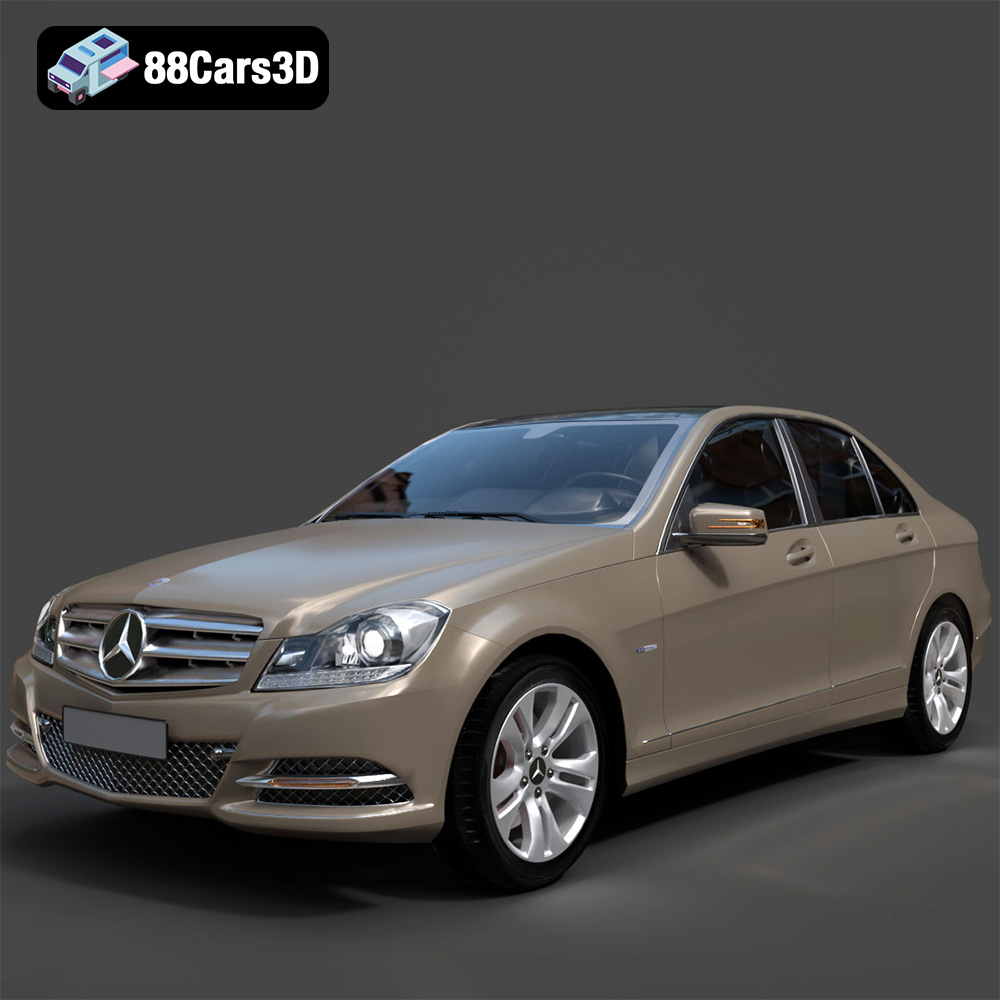
Download the Mercedes-Benz C-Klasse 204 2011 3D Model featuring clean geometry, realistic detailing, and a fully modeled interior. Includes .blend, .fbx, .obj, .glb, .stl, .ply, .unreal, and .max formats for rendering, simulation, and game development.
Price: $38.99
Texture: Yes
Material: Yes
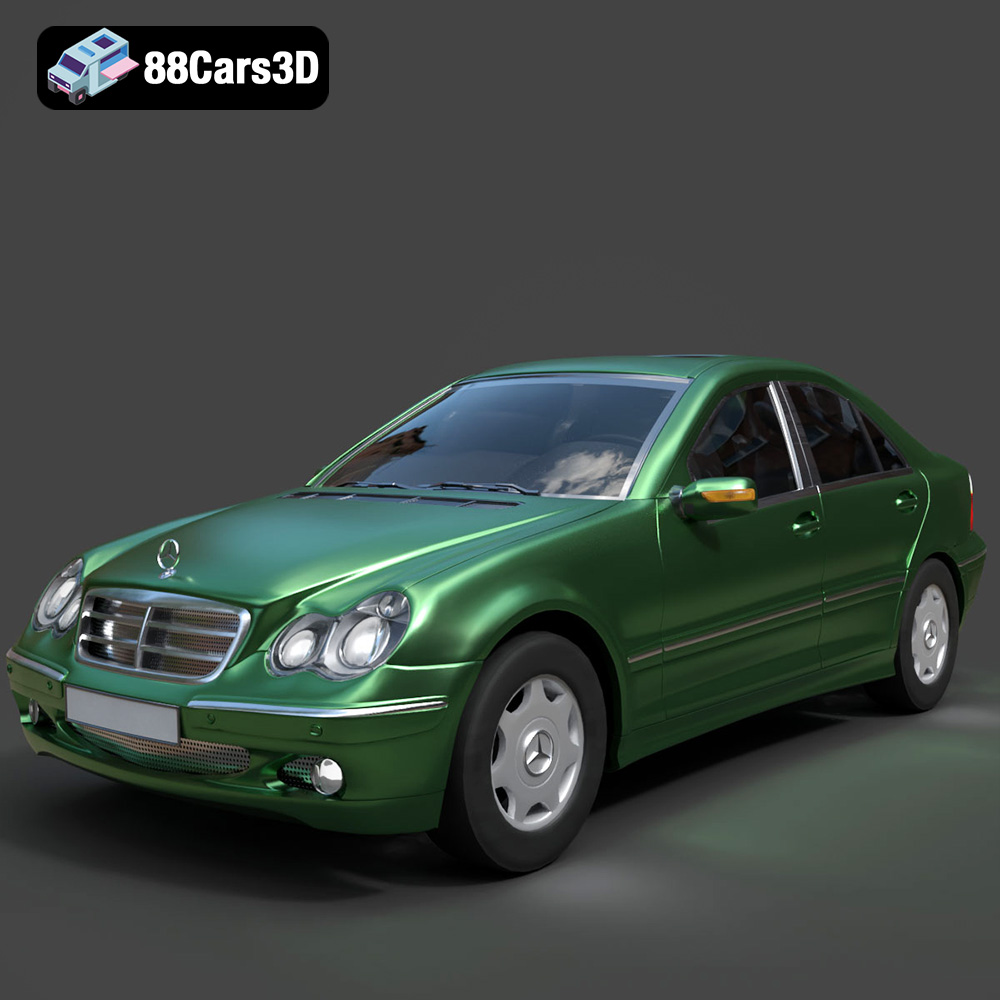
Download the Mercedes-Benz C-Class Sedan 3D Model featuring clean geometry, realistic detailing, and a fully modeled interior. Includes .blend, .fbx, .obj, .glb, .stl, .ply, .unreal, and .max formats for rendering, simulation, and game development.
Price: $38.99
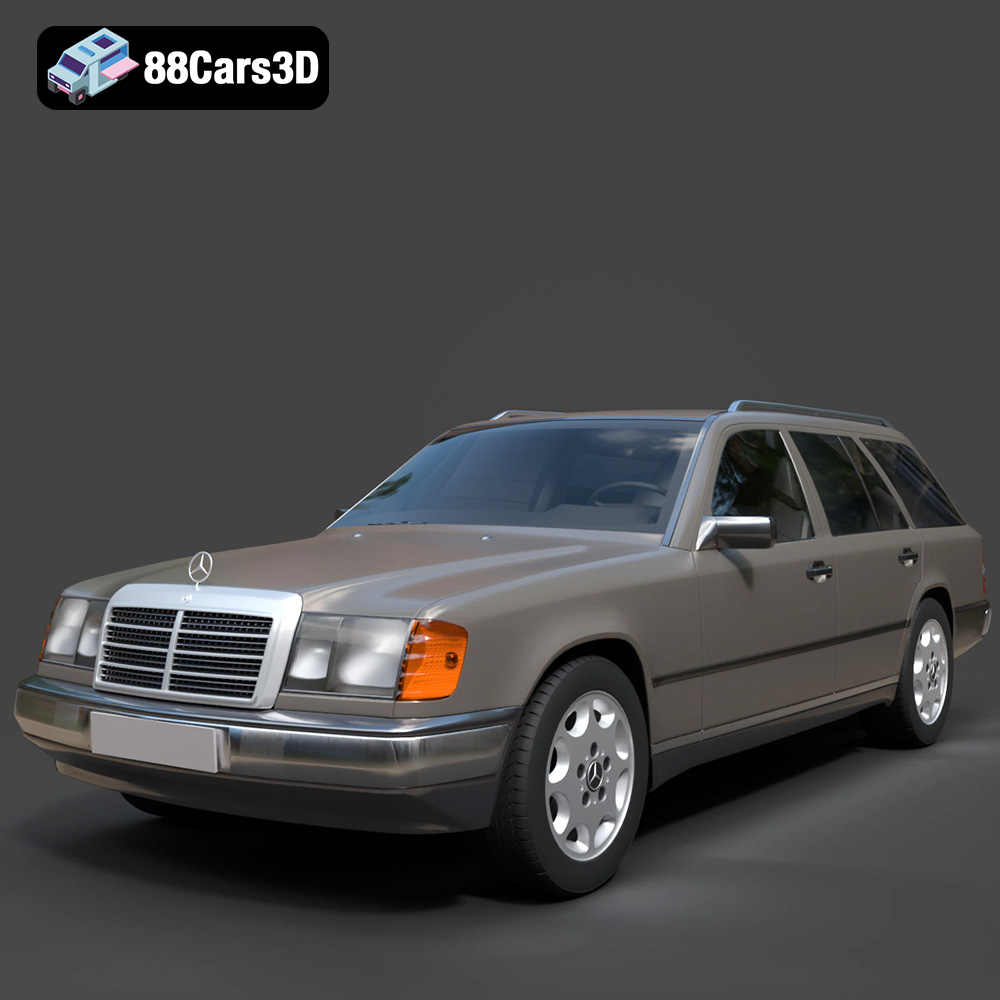
Texture: Yes
Material: Yes
Download the Mercedes E-Class w124 Kombi 3D Model featuring clean geometry, realistic detailing, and a fully modeled interior. Includes .blend, .fbx, .obj, .glb, .stl, .ply, .unreal, and .max formats for rendering, simulation, and game development.
Price: $38.99
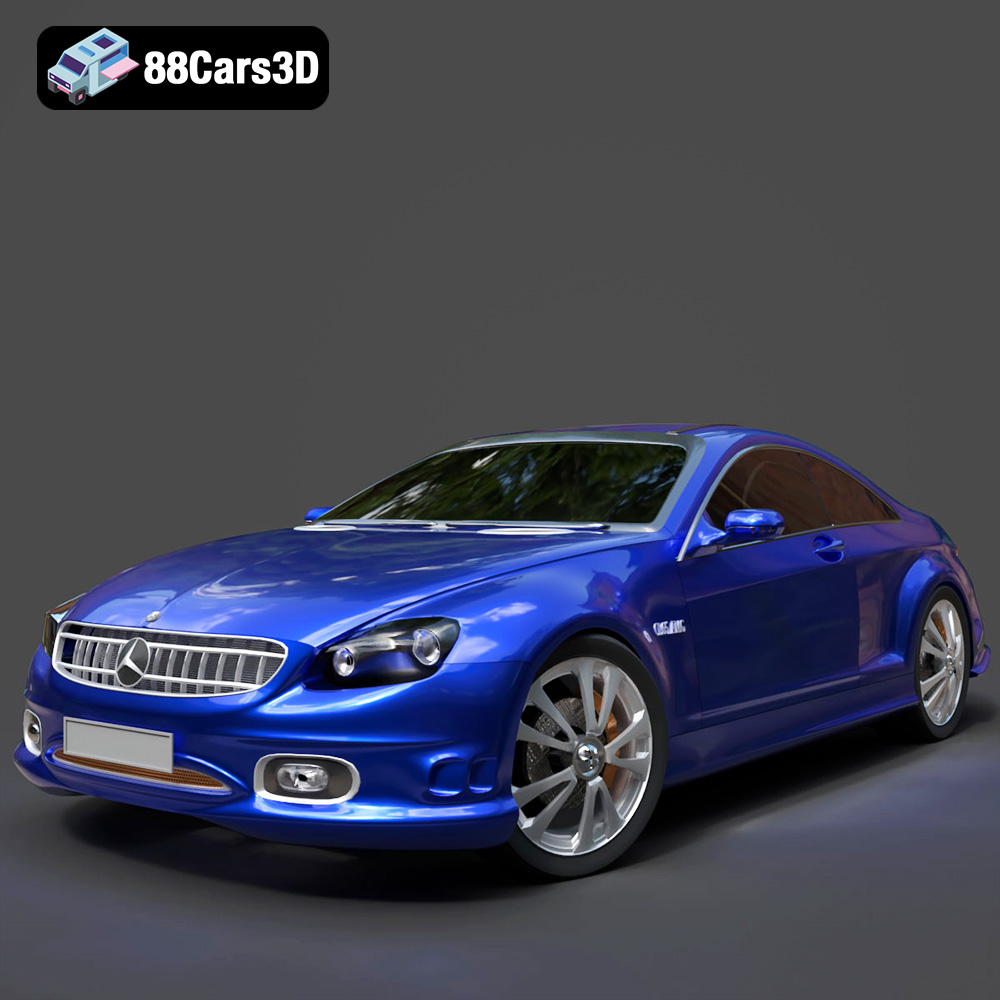
Texture: Yes
Material: Yes
Download the Mercedes-Benz CL6540-005 3D Model featuring clean geometry, realistic detailing, and a fully modeled interior. Includes .blend, .fbx, .obj, .glb, .stl, .ply, .unreal, and .max formats for rendering, simulation, and game development.
Price: $38.99