⚡ FLASH SALE: Get 60% OFF All Premium 3D & STL Models! ⚡
“`html
In the world of digital creation, few assets are as captivating and technically demanding as a high-quality 3D car model. From the gleaming, multi-layered paint of a supercar in a cinematic render to the battle-scarred chassis of a vehicle in a video game, 3D cars are a benchmark of skill and precision. They are versatile assets, crucial for everything from automotive design visualization and marketing configurators to virtual reality (VR) showrooms and 3D printing. Creating a truly convincing 3D car, however, involves a complex, multi-stage process that blends artistic vision with deep technical knowledge. It requires a mastery of clean topology, meticulous UV mapping, realistic material creation, and strategic optimization for the target platform.
This comprehensive guide is designed to navigate you through that entire pipeline. We will deconstruct the complete workflow, providing the technical insights and professional techniques you need to elevate your automotive projects. We will start with the absolute foundation—modeling and topology—and move through the critical stages of UV mapping, PBR texturing, and photorealistic rendering. Furthermore, we’ll dive into the specific optimization strategies required for real-time game engines like Unity and Unreal Engine, as well as the emerging frontiers of AR/VR and 3D printing. Whether you are a 3D artist aiming for hyperrealism, a game developer building immersive experiences, or a visualization professional, this article will equip you with the actionable knowledge to master the art and science of 3D car models.
The journey to a stunning 3D car begins with its digital skeleton: the mesh. The quality of the underlying geometry, or topology, is the single most important factor that will determine the final result. A model with clean, deliberate topology will render beautifully, deform predictably, and be a pleasure to texture. Conversely, a messy mesh with poor edge flow will result in shading artifacts, visible pinching, and countless headaches down the line. For automotive models, where smooth, continuous surfaces and perfect reflections are paramount, impeccable topology isn’t just a best practice—it’s a necessity. It’s the difference between a model that looks like a cheap toy and one that feels like a precision-engineered machine. When sourcing models from marketplaces such as 88cars3d.com, professionals always look for assets built on this solid foundation.
Automotive surfaces are defined by subtle, flowing curves and sharp, precise character lines. The topology must support these features. The primary rule is to use a quad-based workflow, meaning your model should be constructed almost entirely of four-sided polygons. Quads subdivide cleanly and predictably, which is essential when using modifiers like TurboSmooth in 3ds Max or Subdivision Surface in Blender. Triangles and especially n-gons (polygons with more than four sides) can cause pinching and shading errors on curved surfaces.
Edge flow refers to the way polygon edges are arranged to follow the natural contours and lines of the car. For a car body, edge loops should flow uninterrupted along the length of the vehicle, wrapping around features like wheel arches and window frames. This ensures that when the surface is subdivided, the resulting high-poly mesh maintains its intended shape and reflects light smoothly. To create sharp panel gaps or creases, you must use holding edges (also called support loops)—these are extra edge loops placed close to a hard edge to tighten the surface during subdivision, preventing an overly rounded or “blobby” look.
The required polygon count for a 3D car model is dictated entirely by its intended use. There is no one-size-fits-all number.
Once the model’s geometry is finalized, the next step is to create a 2D “blueprint” for applying textures: the UV map. UV mapping is the process of unwrapping the 3D mesh into a flat, 2D representation. Each polygon of the 3D model is laid out in a 2D space (the “UV space”), allowing a 2D image texture to be projected correctly onto the 3D surface. For a complex asset like a car, with its mix of large, flowing panels and small, intricate details, a strategic approach to UV mapping is essential for achieving professional-grade texturing results. Poorly planned UVs can lead to stretched textures, visible seams, and inconsistent resolution, undermining the realism of the model.
The core of UV unwrapping is defining seams. Seams are edges on the 3D model where the mesh will be “cut” to allow it to unfold flat. The goal is to place these seams in areas where they will be least noticeable. For a car model, common seam locations include:
Once seams are defined, the mesh is “unfolded” into UV islands. Each island should be relaxed to minimize stretching and distortion. A good way to check for this is to apply a UV checkerboard pattern to the model. If the squares on the pattern appear uniform in size and are not skewed, the unwrap is successful. Car bodies are often unwrapped in large, logical sections (e.g., hood, roof, doors, fenders) to maintain continuity.
Texel density is a crucial concept in UV mapping. It refers to the resolution of the texture (in pixels) relative to the size of the 3D model’s surface area. For a realistic result, the texel density should be consistent across the entire model. This means that a square inch of the car’s hood should have roughly the same number of texture pixels as a square inch of its door. Inconsistent texel density leads to some parts of the car looking sharp and detailed while others appear blurry and low-resolution.
To maximize detail, UV islands should be packed efficiently into the 0-1 UV space, leaving as little empty space as possible. For ultra-high-resolution assets, a single UV tile is often not enough. This is where UDIMs (U-Dimension) come in. The UDIM workflow allows you to spread UV islands across multiple UV tiles, with each tile corresponding to a separate texture map. This enables the use of extremely high-resolution textures (e.g., multiple 8K maps) for different parts of the car, which is common in film and high-end visualization projects.
With a perfectly unwrapped model, it’s time to create the materials that will bring it to life. Modern 3D rendering relies on Physically Based Rendering (PBR), a methodology for creating materials that accurately simulate how light interacts with real-world surfaces. A PBR workflow ensures that your 3D car model will look realistic and consistent across different lighting conditions and rendering engines. This is where the true artistry of texturing shines, from crafting a flawless multi-layered car paint shader to weathering a tire with convincing grime and wear.
The most common PBR workflow is the Metallic/Roughness workflow, which is used by engines like Unreal Engine and renderers like Blender’s Cycles. It relies on a set of texture maps that define the core properties of a surface:
These textures are created using software like Substance Painter, Mari, or even directly within tools like Blender and 3ds Max.
A convincing car paint material is one of the most complex shaders to create. Real-world car paint is not a single flat color; it’s a layered material. A typical PBR car paint shader network includes:
The interplay between these layers is what creates the deep, lustrous shine of a realistic automotive finish.
The interior of a car is just as important as the exterior for close-up shots and immersive experiences. This involves creating a wide variety of materials. For leather seats, you would use a detailed Albedo map, a Normal map to simulate the grain and wrinkles, and a carefully crafted Roughness map to show subtle wear and sheen. For dashboard plastics, the Roughness map is key to defining whether it’s a hard, shiny plastic or a soft, matte finish. Other materials like chrome trim, brushed aluminum, glass for the gauges, and emissive materials for dashboard lights all require their own unique PBR texture sets. High-quality asset providers often supply textures at 4K (4096×4096) or even 8K (8192×8192) resolution to ensure these details hold up under close scrutiny.
With a beautifully modeled and textured car, the final step in creating a stunning still image is the rendering process. This stage is akin to a professional photo shoot, where lighting, camera settings, and environment all play a critical role in shaping the final mood and quality of the image. The goal is to showcase the model in the best possible way, highlighting its form, materials, and details. A well-executed render can make a great model look spectacular, while poor lighting can make even the most detailed model appear flat and unconvincing.
There are two primary approaches to lighting a 3D car model:
Often, a hybrid approach is used, combining an HDRI for general reflections and ambient light with manual lights to add highlights and shape.
Modern render engines are incredibly powerful, but getting the best results requires understanding their key settings.
Regardless of the engine, setting up your camera with realistic depth of field (a shallow focal plane) can add a layer of photographic realism and help draw focus to specific parts of the car.
The raw render out of the 3D software is rarely the final image. Professional artists use post-processing to enhance and refine the render. This is done by rendering out multiple images called render passes or AOVs (Arbitrary Output Variables), such as a pass for just reflections, one for specular highlights, and one for ambient occlusion. These passes are then layered together in software like Adobe Photoshop or Foundry Nuke. This workflow gives you precise control to:
This final compositing stage is what separates a good render from a truly breathtaking, portfolio-worthy image.
Creating 3D car models for real-time applications like video games presents a different set of challenges compared to creating them for cinematic renders. In a game, every polygon and texture pixel impacts performance. The goal is to create a model that looks visually impressive while adhering to a strict performance budget to ensure the game runs smoothly at a high frame rate. This involves a specialized workflow focused on optimization, where the high-resolution “source” model is transformed into a lightweight, game-ready asset.
A game-ready car model starts with the high-poly, cinematic-quality version. This detailed model is then used as a reference to build a new, clean, low-polygon mesh over the top of it. This process is called retopology. The new low-poly mesh is designed to have the minimum number of polygons needed to represent the car’s silhouette and major forms accurately. All the fine surface details from the high-poly model—such as panel lines, bolts, vents, and emblems—are then “baked” into a series of texture maps, most importantly a Normal map. The normal map tricks the game engine’s lighting system into thinking the flat, low-poly surface has all the complex detail of the high-poly original, creating the illusion of high fidelity with a fraction of the performance cost. Other maps, like Ambient Occlusion and Curvature, are also baked to aid in the texturing process.
Beyond a low polygon count, several other techniques are crucial for game performance:
When exporting a car model for a game engine like Unity or Unreal Engine, a standardized process ensures compatibility. The most common file format is FBX, as it can contain the mesh, UVs, skeleton, and animations all in one file. A typical pre-export checklist includes:
Once imported into the engine, the PBR texture maps are plugged into the engine’s material editor to reconstruct the final look of the car.
The use of 3D car models extends beyond traditional rendering and gaming into rapidly growing fields like Augmented Reality (AR), Virtual Reality (VR), and 3D printing. Each of these applications has its own unique set of technical requirements and optimization challenges. Preparing a model for these platforms requires a specific workflow to ensure it performs well in a real-time mobile environment or can be successfully manufactured as a physical object. Platforms like 88cars3d.com are increasingly offering models optimized for these use cases, providing assets that are ready for these next-generation experiences.
AR and VR applications, especially those running on mobile devices or standalone headsets, operate under extremely tight performance constraints. A smooth, high-frame-rate experience is crucial to prevent motion sickness and maintain immersion. This means that 3D car models for AR/VR must be highly optimized.
The key is to use the low-poly/baking workflow to its full extent, preserving as much visual detail as possible in the texture maps while keeping the geometry extremely lean.
Preparing a 3D car model for 3D printing involves transforming a visual asset into a physically viable object. The process focuses on ensuring the mesh is “watertight” and has the structural integrity to be printed.
This preparation ensures that the digital design translates successfully into a tangible, high-quality physical model.
The creation of a professional-grade 3D car model is a journey that spans multiple disciplines, from the mathematical precision of polygonal modeling to the nuanced artistry of texturing and lighting. As we’ve explored, success hinges on building upon a solid foundation. It begins with immaculate, quad-based topology that respects the vehicle’s design language. It continues with strategic UV mapping that allows for detailed, distortion-free texturing. From there, the magic happens in the creation of realistic PBR materials and the careful orchestration of light and shadow in the final render. And for real-time applications, this entire process is underpinned by intelligent optimization, ensuring that visual fidelity is maintained without sacrificing performance.
Each stage of this pipeline is a craft in itself, but it is their masterful integration that produces a truly exceptional result. Whether your final goal is a stunning portfolio piece, an immersive game asset, an interactive AR experience, or a physical 3D print, the principles of quality and purpose-driven design remain the same. We encourage you to take these technical insights and apply them to your own projects. Experiment with different modeling techniques, dive deep into shader creation, and learn the specific demands of your target platform. By focusing on these core pillars of the 3D car creation process, you will be well on your way to mastering this challenging and rewarding art form.
“`

Texture: Yes
Material: Yes
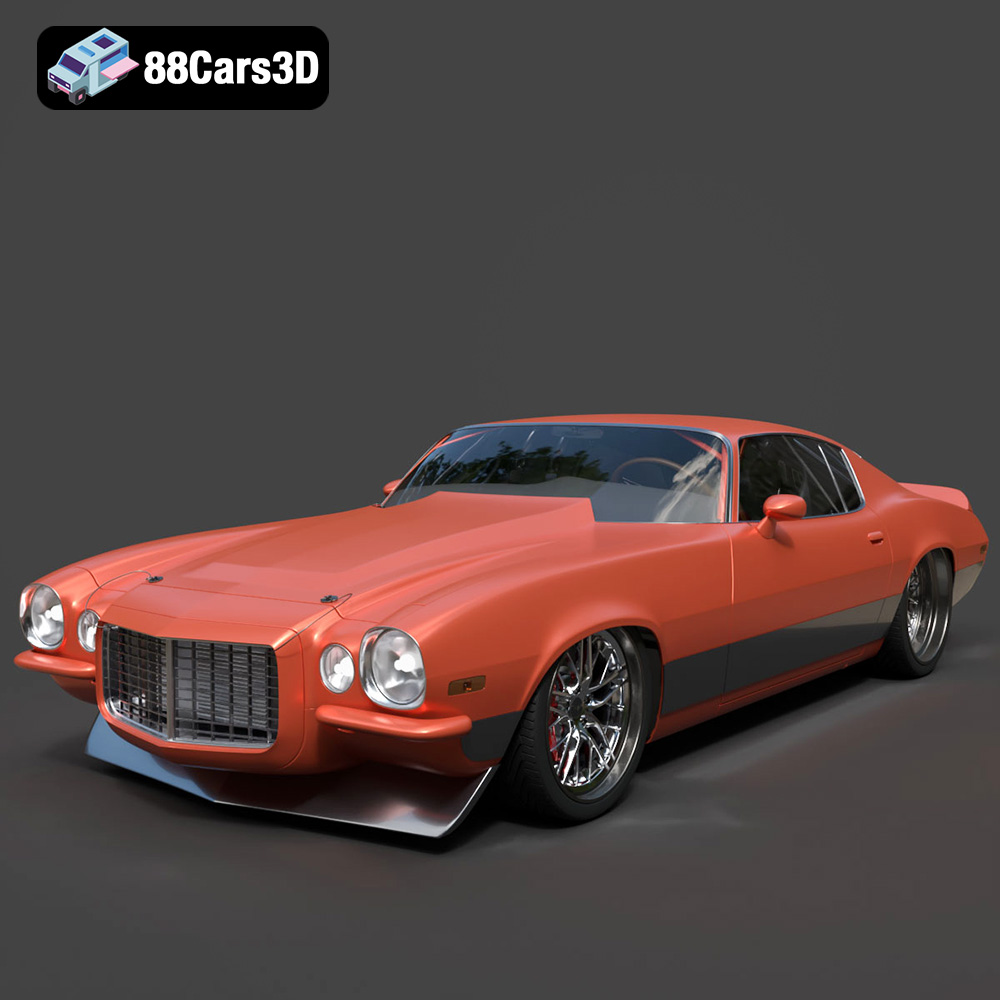
Download the Chevrolet Camaro 1970 3D Model featuring clean geometry, realistic detailing, and a fully modeled interior. Includes .blend, .fbx, .obj, .glb, .stl, .ply, .unreal, and .max formats for rendering, simulation, and game development.
Price: $10

Texture: Yes
Material: Yes
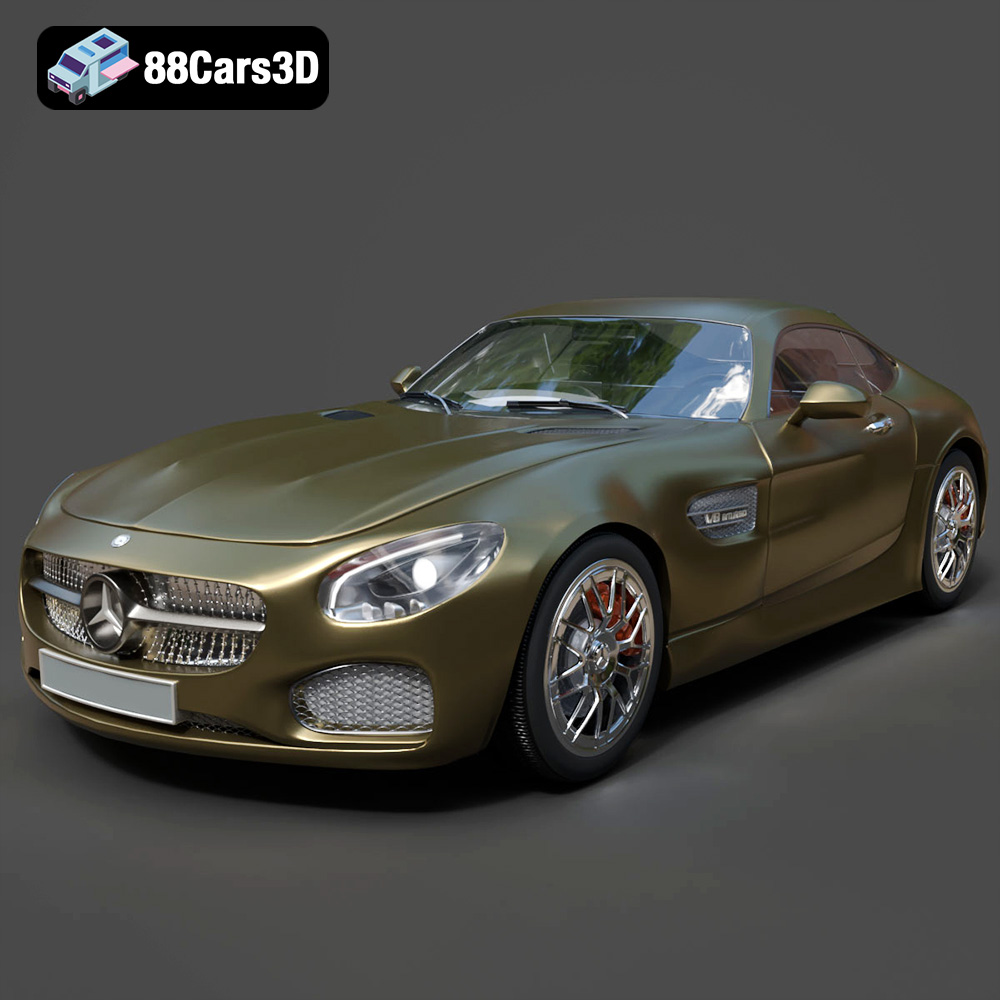
Download the Mercedes-AMG GT 2015 3D Model featuring clean geometry, realistic detailing, and a fully modeled interior. Includes .blend, .fbx, .obj, .glb, .stl, .ply, .unreal, and .max formats for rendering, simulation, and game development.
Price: $88.99

Texture: Yes
Material: Yes
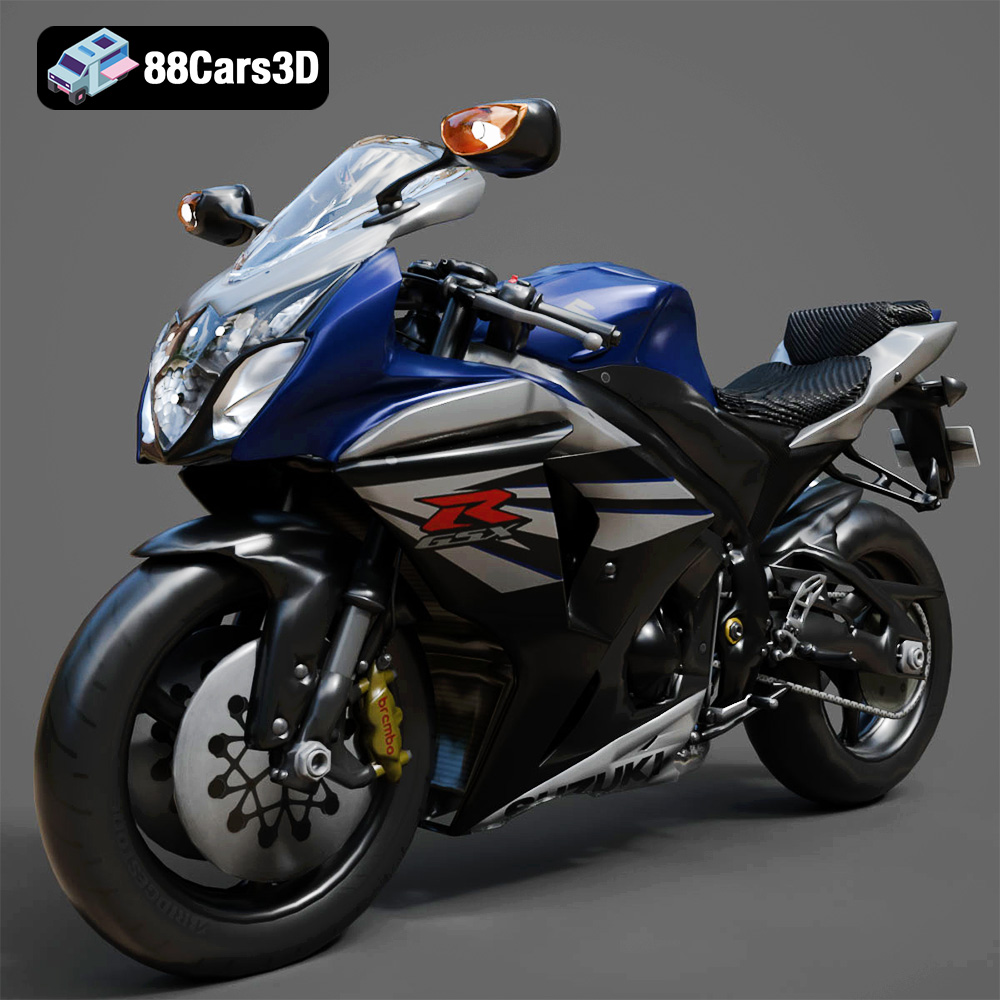
Download the Suzuki GSX-R 1000 3D Model featuring clean geometry, realistic detailing, and a fully modeled interior. Includes .blend, .fbx, .obj, .glb, .stl, .ply, .unreal, and .max formats for rendering, simulation, and game development.
Price: $10

**Meta Description:**
Texture: Yes
Material: Yes
Download the Toyota Crown Majesta 2009 3D Model with luxury detailing, clean topology, and a fully modeled interior. Available in .blend, .fbx, .obj, .glb, .stl, .ply, .unreal, and .max formats for rendering, simulation, and game development.
Price: $4.99

**Meta Description:**
Texture: Yes
Material: Yes
Download the Toyota AE86 Levin 1983 1987 3D Model featuring realistic exterior and interior detailing. Includes .blend, .fbx, .obj, .glb, .stl, .ply, .unreal, and .max formats for rendering, simulation, and game development.
Price: $9.99

Texture: Yes
Material: Yes
Download the Toyota Mark 2 2001 3D Model featuring clean geometry, realistic detailing, and a fully modeled interior. Includes .blend, .fbx, .obj, .glb, .stl, .ply, .unreal, and .max formats for rendering, simulation, and game development.
Price: $4.99

Texture: Yes
Material: Yes
Download the Toyota Celica 2000 3D Model featuring clean geometry, realistic detailing, and a fully modeled interior. Includes .blend, .fbx, .obj, .glb, .stl, .ply, .unreal, and .max formats for rendering, simulation, and game development.
Price: $4.99

Download the Toyota Camry US 2012 3D Model featuring clean geometry, realistic detailing, and a fully modeled interior. Includes .blend, .fbx, .obj, .glb, .stl, .ply, .unreal, and .max formats for rendering, simulation, and game development.
Price: $4.99

Texture: Yes
Material: Yes
Download the Toyota GT 86 2013 3D Model featuring clean geometry, realistic detailing, and a fully modeled interior. Includes .blend, .fbx, .obj, .glb, .stl, .ply, .unreal, and .max formats for rendering, simulation, and game development.
Price: $4.99

Texture: Yes
Material: Yes
Download the Toyota Mark X 2010 3D Model featuring clean geometry, realistic detailing, and a fully modeled interior. Includes .blend, .fbx, .obj, .glb, .stl, .ply, .unreal, and .max formats for rendering, simulation, and game development.
Price: $4.99