The Foundation: High-Quality 3D Car Models and Their Importance
The automotive world has always been at the forefront of innovation, driven by a relentless pursuit of speed, efficiency, and aesthetic appeal. Today, a new revolution is underway, not just on the assembly line, but in the digital realm and beyond. The convergence of high-quality 3D car models, advanced 3D printing technologies, and sophisticated automotive 3D design software is fundamentally transforming how vehicles are conceived, developed, customized, and even sold. From creating stunning visualizations for marketing campaigns to fabricating custom performance parts and experiencing vehicles in immersive AR/VR environments, the possibilities are vast and continually expanding.
This comprehensive guide delves into the intricate world where digital artistry meets engineering precision. We’ll explore the critical role of clean topology and realistic PBR materials, the practical applications of 3D printing for functional components, the intricacies of rendering workflows, and the crucial optimization techniques for interactive experiences like games and virtual reality. Whether you’re a seasoned 3D artist, an aspiring automotive designer, a game developer, or a student looking to master the craft, understanding these core concepts is paramount. Join us as we uncover the workflows, best practices, and challenges in leveraging 3D car models to drive innovation in the automotive industry.
The Foundation: High-Quality 3D Car Models and Their Importance
At the heart of any successful automotive visualization, simulation, or physical fabrication project lies a meticulously crafted 3D car model. A high-quality model is not merely a visually appealing asset; it’s a robust digital blueprint that serves as the backbone for every subsequent stage, from rendering breathtaking commercials to optimizing assets for real-time game engines or preparing for 3D printing. The emphasis here is on precision, efficiency, and adherence to industry best practices. Without a solid foundation, subsequent processes become riddled with complications, leading to wasted time, compromised quality, and increased costs.
When sourcing 3D car models, platforms like 88cars3d.com specialize in providing assets that meet rigorous standards. These models are designed to be production-ready, featuring clean topology, accurate dimensions, and carefully prepared UV layouts. Such attention to detail ensures that artists and developers can integrate these models seamlessly into their workflows without having to spend valuable time on extensive clean-up or rework. This foundational quality is what empowers complex operations like subdivision surfacing for cinematic renders, efficient retopology for game assets, or watertight mesh preparation for additive manufacturing.
Topology and Edge Flow for Automotive Accuracy
Topology refers to the arrangement of vertices, edges, and faces that form the surface of a 3D model. For automotive models, pristine topology is non-negotiable. Car bodies are characterized by smooth, continuous curves, sharp creases, and complex panel gaps. Good topology, primarily composed of quads (four-sided polygons), allows for smooth subdivision, enabling the model to retain its shape and details even at extremely high polycounts for close-up renders. Key principles include:
- All Quads: Minimizing triangles and N-gons prevents shading artifacts and makes mesh deformation predictable.
- Even Distribution: Polygons should be evenly spaced, especially on curved surfaces, to avoid pinching or stretching during subdivision.
- Edge Loops: Strategic placement of edge loops around areas of detail (like headlights, door seams, vents) provides control for adding sharpness or smoothing curves. They guide the flow of deformation and facilitate precise selections for texturing and material assignments.
- Poles: Vertices where five or more edges meet (poles) should be minimized and placed in less visible, flatter areas to avoid surface irregularities.
Achieving clean edge flow in automotive models requires an understanding of both the vehicle’s design intent and the underlying mathematical principles of curved surfaces. It’s a meticulous process often performed in software like 3ds Max, Blender, or Maya, where artists meticulously build the mesh, ensuring every curve flows naturally and every panel gap is crisply defined.
UV Mapping and PBR Materials for Photorealism
UV mapping is the process of flattening the 3D surface of a model into a 2D space, allowing 2D textures to be applied accurately. For complex surfaces like those found on cars, well-executed UV mapping is crucial for seamless texture application without stretching or distortion. Best practices include:
- Non-Overlapping UVs: Essential for baking maps (normal, ambient occlusion) and preventing texture bleeding.
- Consistent Texel Density: Ensuring texture resolution is uniform across all surfaces, preventing some areas from appearing blurry while others are sharp.
- Optimized UV Layout: Arranging UV islands efficiently within the 0-1 UV space to maximize texture usage and minimize wasted pixels, especially important for game assets or AR/VR.
Once UVs are laid out, Physically Based Rendering (PBR) materials come into play to achieve photorealism. PBR shaders simulate how light interacts with surfaces in the real world, producing highly accurate reflections, refractions, and diffuse lighting. Key PBR maps include:
- Albedo/Base Color: The inherent color of the surface without lighting information.
- Metallic: Defines whether a surface is metallic or dielectric.
- Roughness: Controls the microscopic surface irregularities, dictating how sharp or blurry reflections appear (e.g., shiny chrome vs. matte paint).
- Normal Map: Adds fine surface detail without increasing polygon count, simulating bumps and grooves.
- Ambient Occlusion (AO): Simulates soft shadows where surfaces are close together, enhancing perceived depth.
Crafting realistic car paint, chrome, glass, and rubber requires a deep understanding of PBR principles and material layering, often utilizing software like Substance Painter, Mari, or directly within render engines like Corona Renderer, V-Ray, Cycles, or Arnold.
From Digital to Physical: 3D Printing Automotive Parts
The ability to transform a digital 3D car model into a tangible physical object through 3D printing has revolutionized the automotive industry. What once took weeks or months for traditional manufacturing methods can now be achieved in hours or days, enabling rapid prototyping, custom part fabrication, and even the creation of functional components for concept cars or limited-run vehicles. This technology offers unparalleled design freedom, allowing engineers and designers to iterate quickly, test complex geometries, and produce lightweight, optimized structures that would be impossible with conventional manufacturing.
Beyond prototyping, 3D printing is increasingly used for end-use parts. This includes specialized tooling, jigs, and fixtures for assembly lines, as well as highly customized interior components, aerodynamic enhancements, or bespoke performance parts for high-end or classic vehicles. The potential for on-demand manufacturing reduces inventory costs, shortens supply chains, and opens doors to personalization previously unimaginable, moving beyond mass production towards hyper-customization.
Preparing 3D Models for Print: Mesh Integrity and Watertightness
Not every 3D car model is immediately ready for 3D printing. The mesh needs to be “watertight” or “manifold,” meaning it has no holes, internal geometry, or non-manifold edges. A perfectly closed volume is essential because 3D printers build layer by layer based on this volume. Any imperfections will result in printing errors or failed prints. Key preparation steps include:
- Mesh Repair: Identify and fix non-manifold geometry, duplicate faces, inverted normals, and open edges. Software like Meshmixer, Netfabb, or Blender’s 3D Print Toolbox offer robust tools for automated and manual mesh repair.
- Wall Thickness: Ensure all parts of the model have a sufficient wall thickness to be physically printed. Too thin, and the part will be fragile or won’t print at all.
- Scale and Units: Verify the model is scaled correctly to real-world dimensions and that units (mm, cm, inches) are consistent between the modeling software and the slicing software.
- Detail Level: Adjust the model’s polygon count to match the resolution capabilities of the chosen 3D printing technology. Overly dense meshes can increase processing time without adding perceptible detail, while overly sparse meshes might lose crucial features.
Once the model is prepared, it’s typically exported to an STL (StereoLithography) or OBJ format, which are standard for 3D printing, and then processed by a slicer software that generates the machine-specific G-code instructions.
Common 3D Printing Technologies and Materials for Automotive
The choice of 3D printing technology and material heavily depends on the desired application, part requirements, and budget. Several key technologies are prominent in automotive:
- FDM (Fused Deposition Modeling): Cost-effective and versatile, FDM uses thermoplastic filaments (ABS, PLA, PETG) to build parts layer by layer. Ideal for quick, low-cost prototypes, fixtures, and non-critical components.
- SLA (Stereolithography): Uses a UV laser to cure liquid resin into solid parts. Known for high detail, smooth surface finish, and isotropic properties. Perfect for aesthetic prototypes, concept models, and functional parts requiring high accuracy. Resins can mimic various properties, from rigid plastics to flexible elastomers.
- SLS (Selective Laser Sintering): Employs a laser to fuse powdered polymers (e.g., Nylon PA12) layer by layer. Produces strong, durable, and functional parts with excellent mechanical properties and complex geometries without needing support structures. Suitable for end-use components, interior parts, and robust prototypes.
- DMLS (Direct Metal Laser Sintering): A metal additive manufacturing process that fuses metal powders (aluminum, titanium, steel) with a laser. This technology is critical for producing lightweight, high-performance functional parts, complex engine components, and bespoke racing parts, offering superior strength-to-weight ratios.
Each technology offers a unique balance of cost, speed, material properties, and resolution, allowing automotive designers to choose the optimal solution for specific challenges.
Customization and Prototyping: The Automotive Design Revolution
The marriage of advanced 3D car models and sophisticated 3D printing capabilities has ignited an unparalleled revolution in automotive design. It has ushered in an era where customization is no longer an exclusive luxury but a tangible possibility for a wider audience, and where the iterative design cycle has been dramatically accelerated. This allows designers and engineers to transform abstract ideas into concrete forms with unprecedented speed and precision, fostering innovation at every stage of vehicle development.
From initial concept sketches to detailed aerodynamic testing and ergonomic studies, digital tools empower designers to explore a multitude of variations and receive instant feedback. This agility is crucial in an industry where speed to market and responsiveness to consumer demands are paramount. Whether it’s crafting unique body kits for aftermarket enthusiasts or optimizing vehicle performance through bespoke components, automotive 3D design is the linchpin enabling this transformation.
Iterative Design Workflows with CAD and 3D Modeling Software
Modern automotive design workflows are inherently iterative, involving continuous cycles of conceptualization, modeling, simulation, and refinement. This process typically begins with sketches or industrial design concepts, which are then translated into 3D using a combination of powerful software:
- CAD Software (e.g., CATIA, SolidWorks, Rhino 3D): Utilized for precision engineering, surfacing, and parametric design, ensuring dimensional accuracy and manufacturability of components. CAD is fundamental for creating the underlying structure and detailed mechanical parts.
- Organic 3D Modeling Software (e.g., Blender, Maya, 3ds Max): Employed for developing complex, aesthetic bodywork, interior styling, and detailing that requires a more artistic, less mathematically constrained approach. These tools excel at creating the fluid, organic shapes characteristic of modern car exteriors and luxurious interiors.
- Digital Sculpting (e.g., ZBrush, Mudbox): Used for adding highly intricate details, textures, or resolving complex surface transitions that might be difficult to achieve with traditional polygon modeling.
These tools work in concert, allowing designers to rapidly generate variations, test different styling cues, and make real-time adjustments. For instance, a designer might model a new spoiler in Rhino for its precise surfacing, then import it into Maya to integrate it seamlessly with a detailed car body, and finally use Keyshot or a render engine to visualize its impact on the vehicle’s overall aesthetics. This rapid iteration significantly reduces the time and cost associated with physical mock-ups, allowing more design options to be explored thoroughly.
Functional Prototyping vs. Aesthetic Visualization
A key distinction in the application of 3D car models and 3D printing is between functional prototyping and aesthetic visualization, though they often overlap:
- Functional Prototyping: This involves creating physical components designed to be tested for performance, fitment, ergonomics, and structural integrity. For example, 3D printing can produce intake manifolds for airflow testing, interior console mock-ups for ergonomic studies, or suspension components for initial stress analysis. These prototypes are crucial for validating designs before committing to expensive tooling for mass production. Materials like carbon fiber reinforced polymers or even metals via DMLS are often used here for their mechanical properties.
- Aesthetic Visualization: This focuses on the visual appeal and form of the vehicle. High-fidelity 3D car models are rendered into photorealistic images or animations to showcase design concepts, marketing materials, or investor presentations. While these models might be 3D printed for full-scale clay model replacements or presentation mock-ups, the primary goal is visual communication rather than mechanical testing. Here, surface finish and accurate material representation (e.g., flawless car paint, realistic reflections) are paramount.
Often, the same digital model might undergo different preparation processes for each purpose. A high-poly model for rendering might be simplified and made watertight for 3D printing a presentation model, or extensively optimized for a real-time AR experience. The flexibility offered by these digital tools allows designers to seamlessly transition between these different objectives, maximizing the value derived from each 3D car model.
Advanced Rendering and Visualization for Automotive Concepts
Beyond the functional aspects of design and prototyping, the ability to create breathtakingly realistic images and animations of 3D car models is indispensable for marketing, conceptualization, and showcasing automotive innovation. Advanced rendering workflows transform raw digital assets into cinematic masterpieces, communicating emotion, power, and elegance. This process involves a deep understanding of lighting, materials, camera techniques, and post-production, elevating a mere 3D model into a compelling visual narrative.
Photorealistic rendering not only sells concepts but also provides invaluable feedback to designers on how light interacts with surfaces, revealing subtle nuances in form and material that might be missed in a simpler viewport preview. Utilizing high-end render engines, artists can simulate real-world physics to achieve unparalleled visual fidelity, making virtual cars indistinguishable from their physical counterparts.
Lighting and Environment Setup for Studio and HDR Renders
Effective lighting is the single most critical factor in achieving photorealistic renders of 3D car models. It shapes the model, defines its contours, and highlights its materials. The approach to lighting varies significantly depending on whether the goal is a sterile studio shot or an integration into a real-world environment:
- Studio Lighting: Mimics controlled photography environments. This often involves a multi-point lighting setup (e.g., key light, fill light, rim light) to sculpt the car’s form and accent its lines. Softbox, umbrella, and strip lights are emulated using large, soft area lights in 3ds Max (Corona, V-Ray), Blender (Cycles), or Maya (Arnold). Backlights are crucial for defining the silhouette, while subtle reflections on the car’s glossy surfaces provide depth.
- HDRI (High Dynamic Range Image) Lighting: The most common and effective method for realistic environments. An HDRI is a 360-degree panoramic image containing a vast range of light information, which can be used to illuminate the scene and provide accurate reflections on reflective surfaces like car paint and chrome. By placing the car model within an HDRI environment (e.g., a bustling city street, a serene forest, or a studio with complex lighting), the lighting and reflections automatically match the chosen location, achieving instant realism. Adjusting the HDRI’s rotation and intensity allows for fine-tuning the mood and reflections.
- Physically Accurate Light Sources: Modern render engines rely on physically based lighting, meaning lights behave as they would in the real world (inverse square falloff, accurate color temperature). Using IES profiles (Illuminating Engineering Society photometric data) for actual light fixtures can add another layer of realism to interior or street lighting scenes.
The interplay of these lighting elements, combined with meticulously crafted PBR materials, brings the 3D car model to life, revealing every curve and highlight.
Post-Processing and Compositing for Cinematic Results
Raw renders, no matter how good, are rarely the final product. Post-processing and compositing are essential stages where the final image is refined, enhanced, and given a cinematic polish. This is where subtle imperfections are corrected, and visual effects are added to evoke a specific mood or professional quality. Software like Adobe Photoshop, After Effects, or DaVinci Resolve are standard tools for this process:
- Color Grading: Adjusting the overall color balance, saturation, and contrast to establish mood and ensure visual consistency. This can range from subtle corrections to dramatic stylistic changes.
- Depth of Field (DoF) and Motion Blur: Adding realistic camera effects to draw attention to specific areas (DoF) or convey speed (motion blur). These can be rendered directly from the 3D software (though often more flexible in post) or simulated using Z-depth and motion vector passes.
- Vignetting and Lens Distortion: Subtle effects that mimic real-world camera lenses, adding a touch of authenticity.
- Glare and Flares: Adding realistic lens flares, bloom, or glare from strong light sources enhances the visual impact.
- Compositing Render Passes: Advanced workflows involve rendering multiple passes (e.g., diffuse, reflection, specular, shadow, ambient occlusion, normal, Z-depth, alpha). These layers are then combined and manipulated in compositing software to gain granular control over every aspect of the final image. For instance, the reflection pass can be adjusted independently to fine-tune the glossiness of the car paint without re-rendering the entire scene.
- Adding Environmental Elements: Integrating background plates, weather effects (rain, fog), dust, or subtle atmospheric haze can significantly enhance the believability and narrative of the render.
Through meticulous post-processing, a well-rendered 3D car model transcends its digital origins, becoming a powerful visual asset capable of captivating audiences.
Optimizing 3D Car Models for Interactive Experiences (Games, AR/VR)
While cinematic renders prioritize visual fidelity above all else, 3D car models destined for interactive experiences like video games, augmented reality (AR), or virtual reality (VR) face a different, equally demanding set of requirements: real-time performance. Here, the challenge is to achieve compelling visuals while maintaining high frame rates and responsiveness across a range of hardware. Optimization is not just a best practice; it’s a critical necessity to ensure a smooth, immersive user experience.
This involves carefully managing polygon counts, optimizing textures, streamlining material setups, and employing smart culling techniques. A highly detailed 3D car model suitable for a movie might have millions of polygons and dozens of 4K textures, which would bring most game engines to a crawl. Therefore, a strategic approach to asset creation and preparation is paramount, often involving a dedicated game asset pipeline.
LODs and Draw Call Reduction for Game Engines (Unity, Unreal)
Two fundamental strategies for optimizing 3D car models in real-time environments are Level of Detail (LODs) and draw call reduction:
- Level of Detail (LODs): LODs are different versions of the same 3D model, each with a progressively lower polygon count. The game engine dynamically switches between these versions based on the object’s distance from the camera. A car up close might use a high-detail LOD0 (e.g., 50,000-100,000 polygons for a hero vehicle), while a car further away might switch to LOD1 (15,000-30,000 polys), and a distant car might use LOD2 (5,000-10,000 polys) or even a simplified billboard. This technique significantly reduces the computational load on the GPU without noticeable loss of detail from the player’s perspective. LODs can be created manually (retopologizing) or automatically using tools in Unity, Unreal Engine, or dedicated external software.
- Draw Call Reduction: A draw call is a command sent from the CPU to the GPU to render an object. Each draw call incurs overhead, and too many can bottleneck performance. Strategies to reduce draw calls for car models include:
- Texture Atlasing: Combining multiple smaller textures (e.g., tires, interior details, headlights) into a single larger texture map. This allows the engine to render multiple parts with one material and one draw call.
- Mesh Merging: Combining multiple small meshes into a single mesh where appropriate (e.g., merging all interior parts into one mesh) can reduce draw calls, although this must be balanced with the need for individual part deformation or destruction.
- Material Optimization: Reducing the number of unique materials used on a car model. Each material typically results in at least one draw call.
These techniques are crucial for maintaining target frame rates (e.g., 30-60 FPS) in complex scenes with many vehicles and environmental elements, common in racing games or open-world titles.
File Formats and Performance for AR/VR (GLB, USDZ)
AR/VR experiences present unique optimization challenges, especially on mobile devices, which have limited computational resources. Specific file formats and asset preparation techniques are crucial for delivering smooth, interactive experiences:
- GLB (glTF Binary): A highly efficient, single-file format that bundles the 3D model (mesh, UVs), PBR materials (albedo, roughness, metallic, normal maps), and animations into a compact package. GLB is widely supported across various AR/VR platforms and web browsers, making it ideal for web-based AR experiences (e.g., viewing a 3D car model directly on a product page via a smartphone). Its efficiency stems from its design for real-time rendering, minimizing parsing time and enabling fast loading.
- USDZ (Universal Scene Description Zip): Developed by Apple, USDZ is another excellent format for AR/VR, particularly for iOS and macOS devices. Similar to GLB, it’s a single-file format that efficiently packages 3D assets, materials, and animations. USDZ is deeply integrated with Apple’s ARKit, making it a go-to choice for developing AR applications for iPhones and iPads.
Beyond file formats, texture optimization is critical for AR/VR:
- Texture Compression: Using formats like PVRTC (PowerVR Texture Compression) or ASTC (Adaptive Scalable Texture Compression) reduces file size and GPU memory footprint without significant visual loss.
- Power-of-Two Resolutions: Textures often perform best when their dimensions are powers of two (e.g., 1024×1024, 2048×2048), which is a requirement for certain compression algorithms and mipmapping strategies.
By judiciously applying these optimization techniques, developers can deliver compelling and performant 3D car models that truly immerse users in virtual or augmented automotive worlds.
Maintaining Quality Across Diverse Workflows and Formats
In the highly collaborative and multi-disciplinary world of automotive design and visualization, 3D car models often journey through a myriad of software applications, file formats, and team members. From initial CAD development to final rendering, game integration, or 3D printing, maintaining the integrity, quality, and consistency of the digital asset is paramount. This necessitates a clear understanding of file format capabilities, robust conversion strategies, and effective collaboration tools to prevent data loss, minimize errors, and ensure a seamless workflow.
The challenge lies in the fact that different stages and disciplines require different data representations. A parametric CAD model designed for engineering might not be directly suitable for a polygon-based rendering pipeline without careful conversion. Similarly, a high-fidelity rendering model needs significant optimization for real-time applications. Mastering the transitions between these states, while preserving the core quality of the 3D car model, is a hallmark of professional production.
Understanding File Formats: FBX, OBJ, STEP, STL
Each 3D file format serves a specific purpose and has its own strengths and limitations. Knowing which format to use and when is crucial for efficient data exchange:
- FBX (Filmbox): Developed by Autodesk, FBX is a widely used proprietary format for 3D data exchange, particularly prevalent in animation, game development, and film VFX. It supports meshes, materials, textures, bones, skinning, and animations, making it an excellent choice for transferring rigged or animated 3D car models between applications like Maya, 3ds Max, Unity, and Unreal Engine. However, its proprietary nature can sometimes lead to compatibility quirks between different software versions.
- OBJ (Object): A universal, open-standard format for geometric data. OBJ files are excellent for transferring static mesh data (vertices, normals, UVs) between almost any 3D software. They are simple, widely supported, and robust for basic geometry, but do not inherently store animation, rigging, or advanced material properties, which typically require companion MTL (material) files and separate texture maps.
- STEP (Standard for the Exchange of Product model data): A standard ISO file format used for representing 3D product data in a structured, neutral format. STEP files are commonly used in CAD/CAM workflows (e.g., SolidWorks, CATIA, AutoCAD) for exchanging precise, parametric engineering data. They are invaluable for manufacturing and precise design work as they preserve exact geometry, but are not ideal for direct use in polygon-based rendering or game engines without conversion to a triangulated mesh.
- STL (StereoLithography): The de facto standard format for 3D printing. STL files represent a 3D model as a series of connected triangles, describing only the surface geometry of an object. It’s a simple, robust format for additive manufacturing, but lacks color, texture, or animation information. Models must be watertight and manifold for successful STL export for 3D printing.
Converting between these formats often requires careful attention to detail. For instance, converting a NURBS-based CAD model (STEP) to a polygon mesh (OBJ/FBX) requires triangulation and careful control over the polygon count to maintain surface smoothness while optimizing for rendering performance.
Collaboration and Version Control in Automotive Design
Automotive projects are inherently collaborative, involving large teams of designers, engineers, modelers, texture artists, and developers. Effective collaboration and robust version control are critical to manage complex 3D car models and prevent loss of work or conflicting changes:
- Asset Management Systems: Centralized repositories for all 3D assets, textures, and project files. These systems (e.g., Perforce for game development, ShotGrid for VFX, or cloud-based platforms) provide structured storage, access control, and metadata tagging, making it easy for teams to find, share, and manage assets.
- Version Control Software: Tools like Git (often with Git LFS for large files) track every change made to a file, allowing teams to revert to previous versions, merge different contributions, and identify who made specific modifications. This is indispensable for large projects where multiple artists might be working on different aspects of the same 3D car model simultaneously.
- Naming Conventions and Folder Structures: Establishing clear, consistent naming conventions for files and a logical folder hierarchy helps keep projects organized, especially when dealing with hundreds or thousands of assets for a single vehicle.
- Regular Backups: Implementing automated backup routines is fundamental to protect against data loss from hardware failures or human error.
By establishing these robust practices, teams can ensure that the quality and integrity of their 3D car models are maintained throughout their entire lifecycle, from initial concept to final deployment.
Conclusion
The journey from a conceptual sketch to a photorealistic render, a functional 3D printed part, or an interactive AR experience is a testament to the transformative power of 3D car models. We’ve explored the foundational importance of clean topology and realistic PBR materials, the revolutionary impact of 3D printing on rapid prototyping and custom fabrication, and the intricate processes of advanced rendering and real-time optimization. Each step, from meticulous UV mapping to strategic LOD creation, contributes to bringing automotive visions to life in both digital and physical realms.
As the automotive industry continues to embrace digital workflows and advanced manufacturing, the demand for high-quality 3D car models and skilled artists who can navigate these complex pipelines will only grow. Understanding file formats, mastering software-specific techniques, and adhering to industry best practices are no longer optional but essential for success. Whether you’re crafting a cutting-edge concept vehicle, developing an immersive racing game, or engineering a custom performance part, the principles outlined here provide a robust framework for your endeavors.
Embrace these powerful technologies to unlock new levels of creativity, efficiency, and innovation. Explore the vast possibilities of digital design, rapid prototyping, and immersive visualization. Platforms like 88cars3d.com provide an excellent starting point for sourcing professionally crafted 3D car models, allowing you to jumpstart your projects with assets built on these very principles. The future of automotive design is here, and it’s built in three dimensions.
Featured 3D Car Models
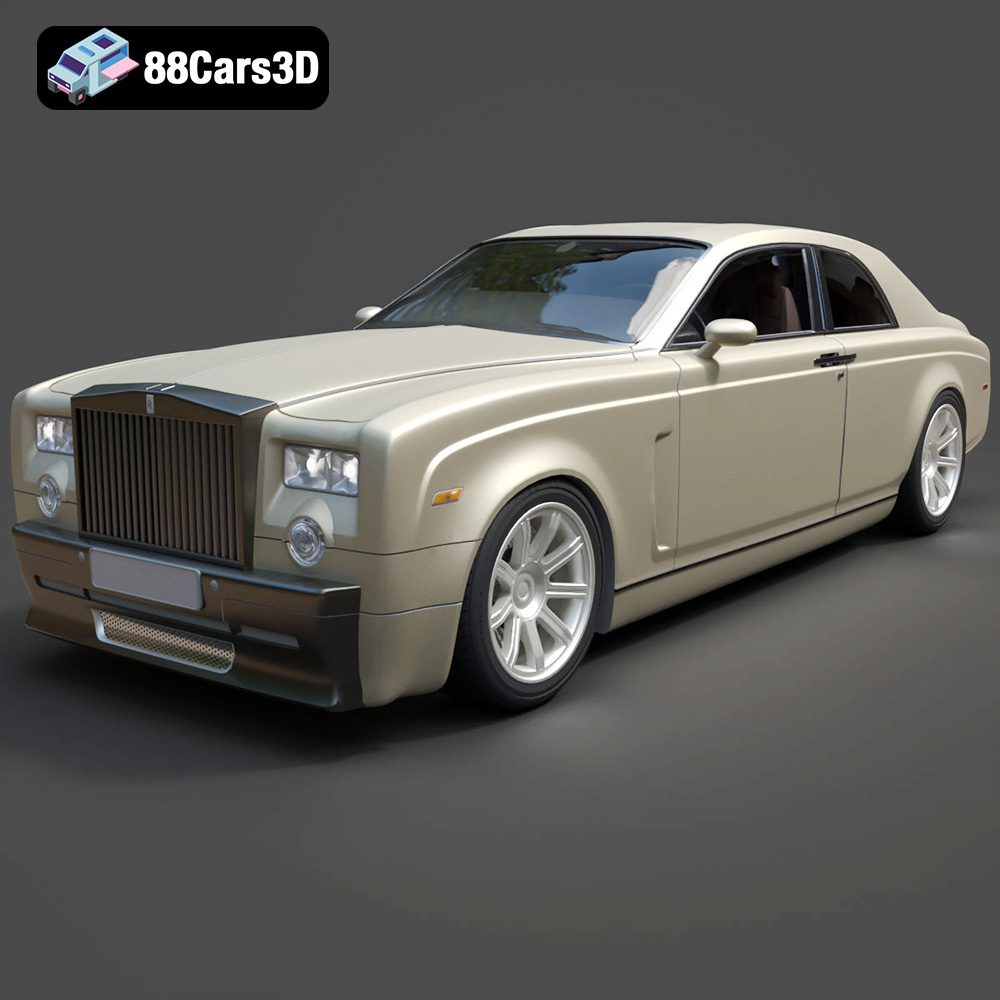
Rolls-Royce Phantom Coupe 3D Model
Texture: Yes
Material: Yes
Download the Rolls-Royce Phantom Coupe 3D Model featuring clean geometry, realistic detailing, and a fully modeled interior. Includes .blend, .fbx, .obj, .glb, .stl, .ply, .unreal, and .max formats for rendering, simulation, and game development.
Price: $6.99
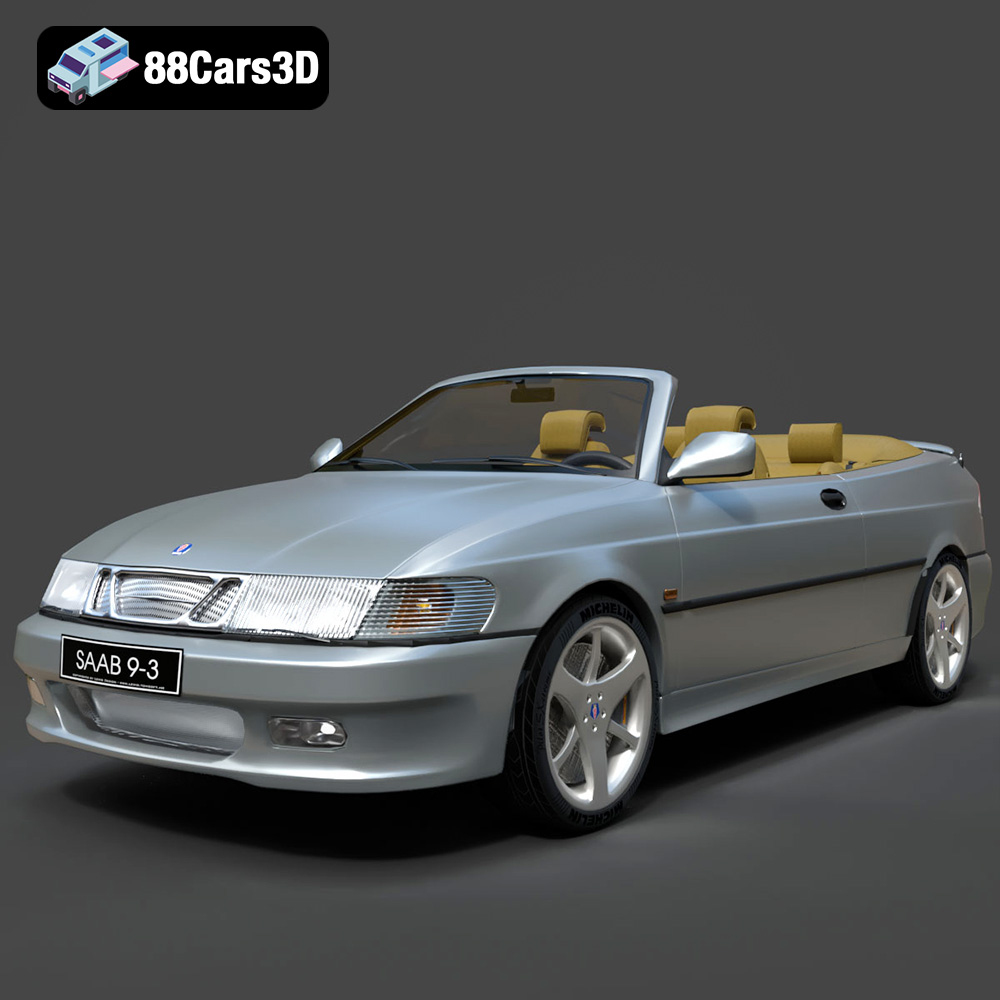
Saab 9-3 Convertible 2009 3D Model
Texture: Yes
Material: Yes
Download the Saab 9-3 Convertible 2009 3D Model featuring clean geometry, realistic detailing, and a fully modeled interior. Includes .blend, .fbx, .obj, .glb, .stl, .ply, .unreal, and .max formats for rendering, simulation, and game development.
Price: $6.99

Saab 9-3 2009 3D Model
Texture: Yes
Material: Yes
Download the Saab 9-3 2009 3D Model featuring clean geometry, realistic detailing, and a fully modeled interior. Includes .blend, .fbx, .obj, .glb, .stl, .ply, .unreal, and .max formats for rendering, simulation, and game development.
Price: $6.99

Saab 9-5 2009 3D Model
Texture: Yes
Material: Yes
Download the Saab 9-5 2009 3D Model featuring clean geometry, realistic detailing, and a fully modeled interior. Includes .blend, .fbx, .obj, .glb, .stl, .ply, .unreal, and .max formats for rendering, simulation, and game development.
Price: $6.99
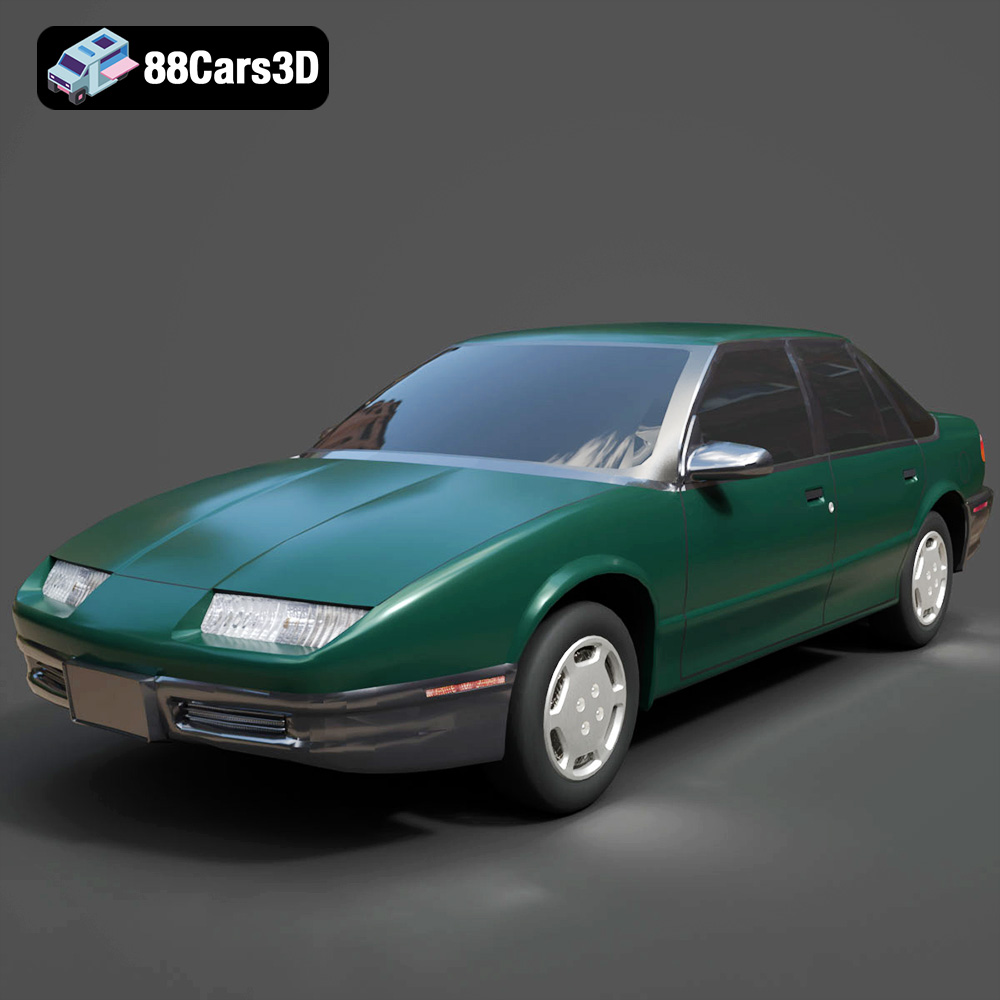
Saturn SL-009 3D Model
Texture: Yes
Material: Yes
Download the Saturn SL-009 3D Model featuring clean geometry, realistic detailing, and a fully modeled interior. Includes .blend, .fbx, .obj, .glb, .stl, .ply, .unreal, and .max formats for rendering, simulation, and game development.
Price: $6.99
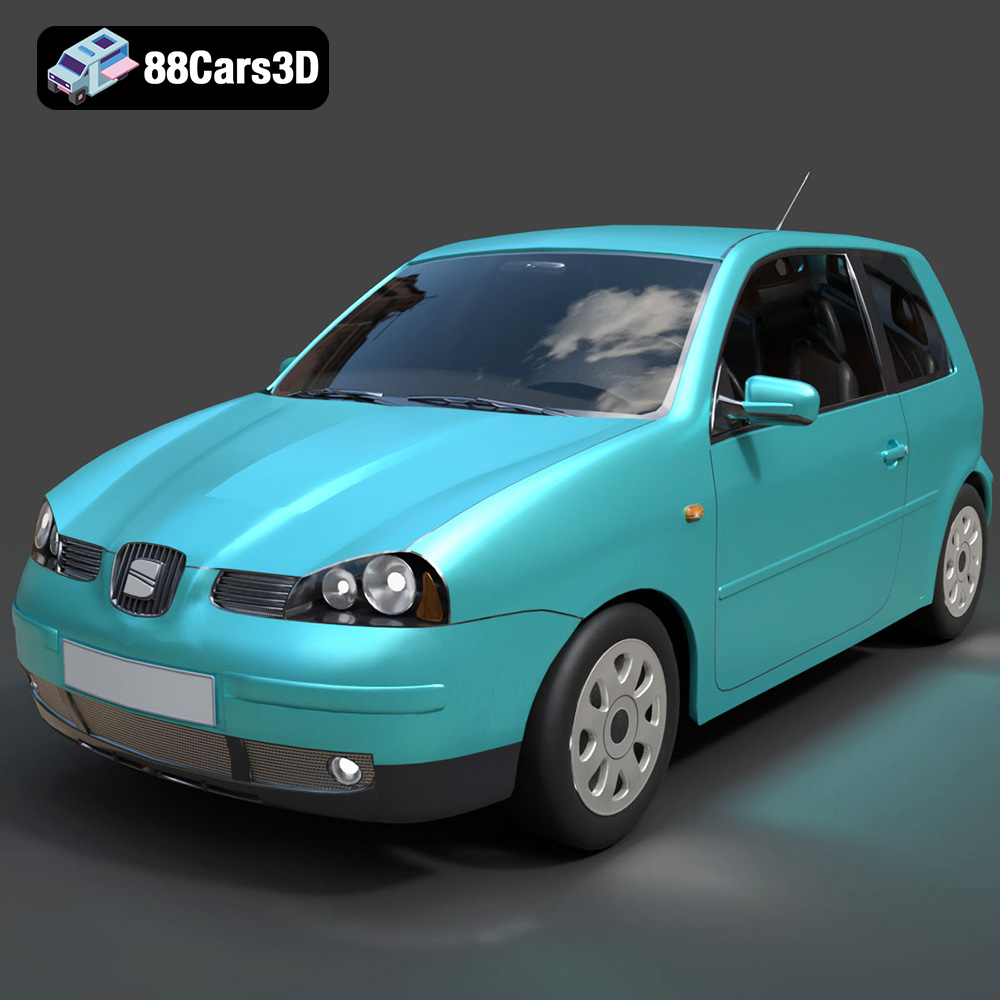
Seat Arosa 1997 3D Model
Texture: Yes
Material: Yes
Download the Seat Arosa 1997 3D Model featuring clean geometry, realistic detailing, and a fully modeled interior. Includes .blend, .fbx, .obj, .glb, .stl, .ply, .unreal, and .max formats for rendering, simulation, and game development.
Price: $6.99
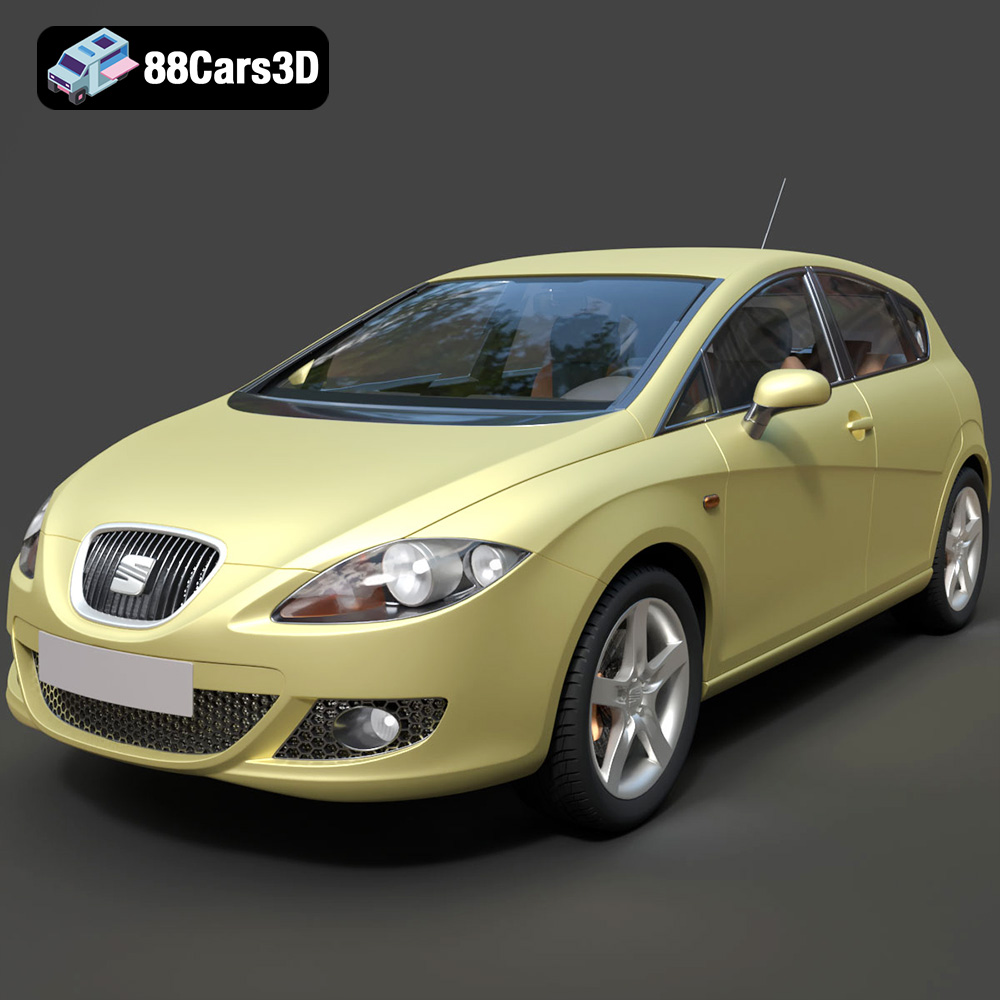
Seat Leon 2009 3D Model
Texture: Yes
Material: Yes
Download the Seat Leon 2009 3D Model featuring clean geometry, realistic detailing, and a fully modeled interior. Includes .blend, .fbx, .obj, .glb, .stl, .ply, .unreal, and .max formats for rendering, simulation, and game development.
Price: $6.99
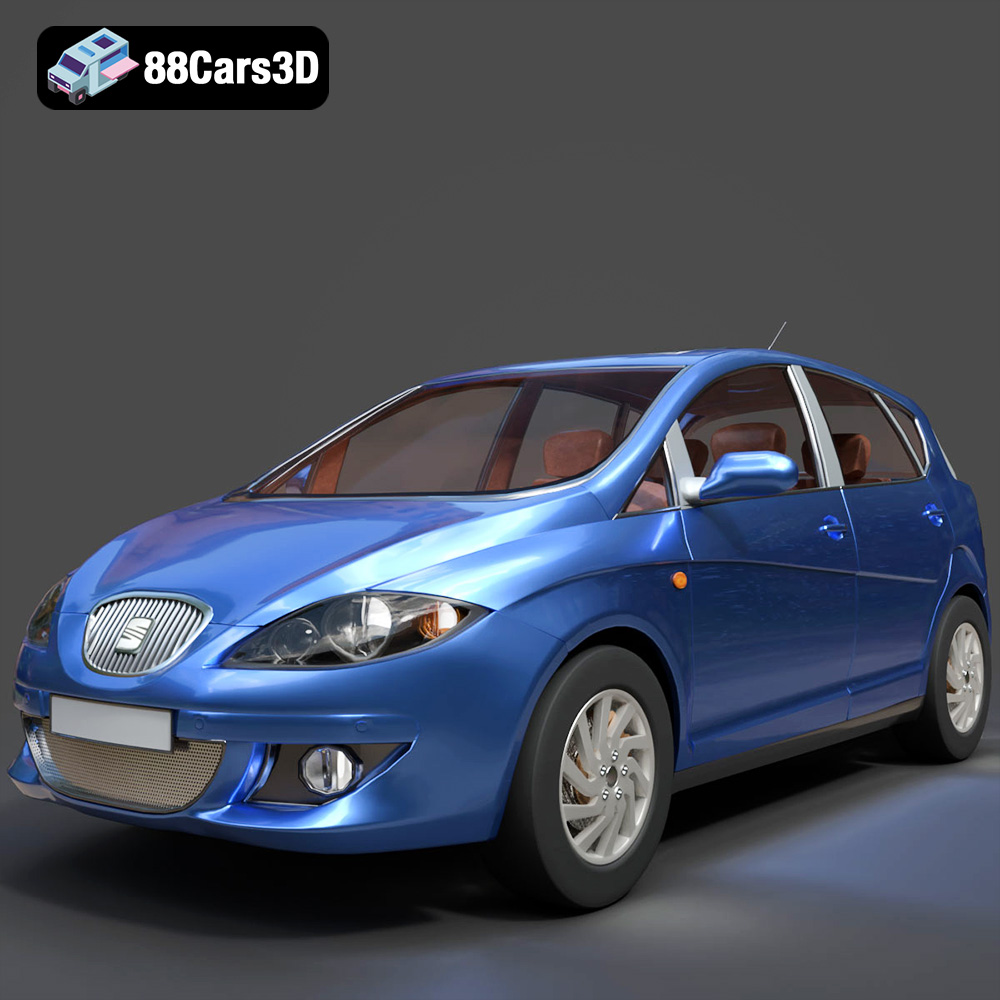
Seat Toledo 2009 3D Model
Texture: Yes
Material: Yes
Download the Seat Toledo 2009 3D Model featuring clean geometry, realistic detailing, and a fully modeled interior. Includes .blend, .fbx, .obj, .glb, .stl, .ply, .unreal, and .max formats for rendering, simulation, and game development.
Price: $6.99
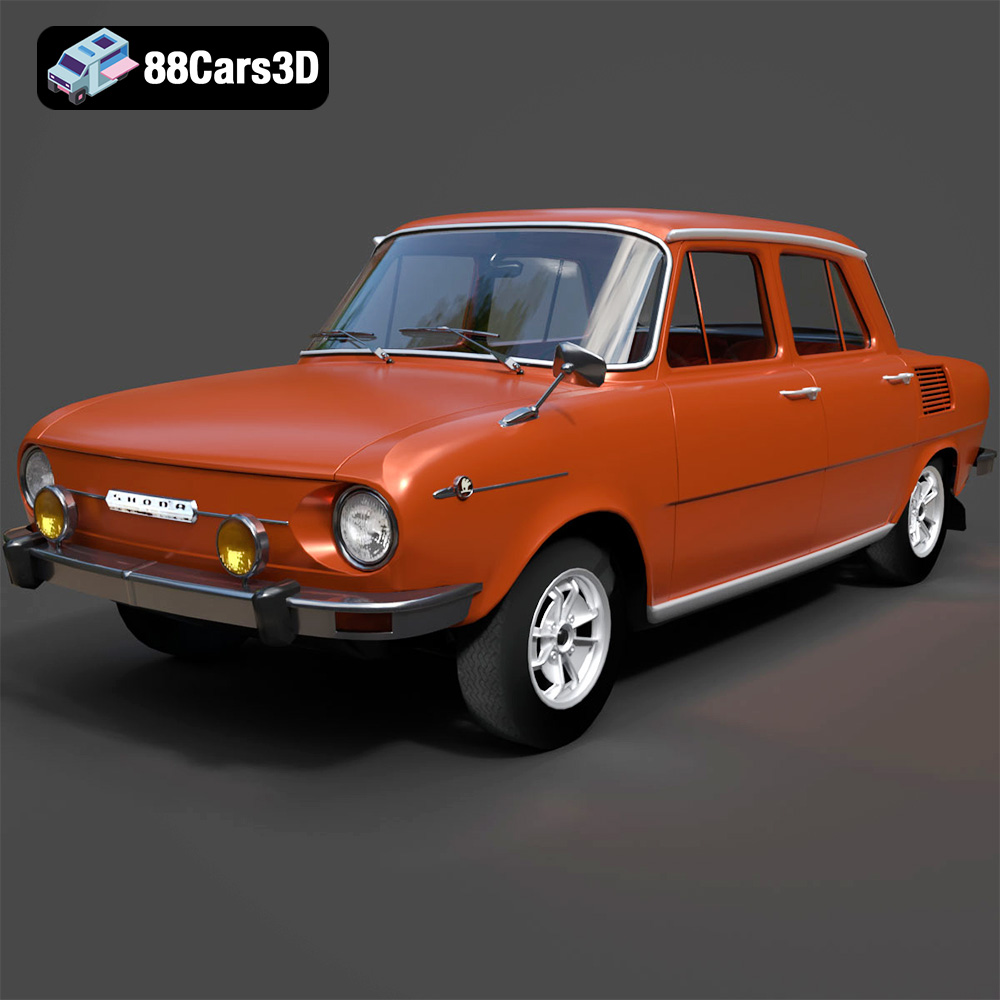
Skoda 100 L 1970 3D Model
Texture: Yes
Material: Yes
Download the Skoda 100 L 1970 3D Model featuring clean geometry, realistic detailing, and a fully modeled interior. Includes .blend, .fbx, .obj, .glb, .stl, .ply, .unreal, and .max formats for rendering, simulation, and game development.
Price: $6.99
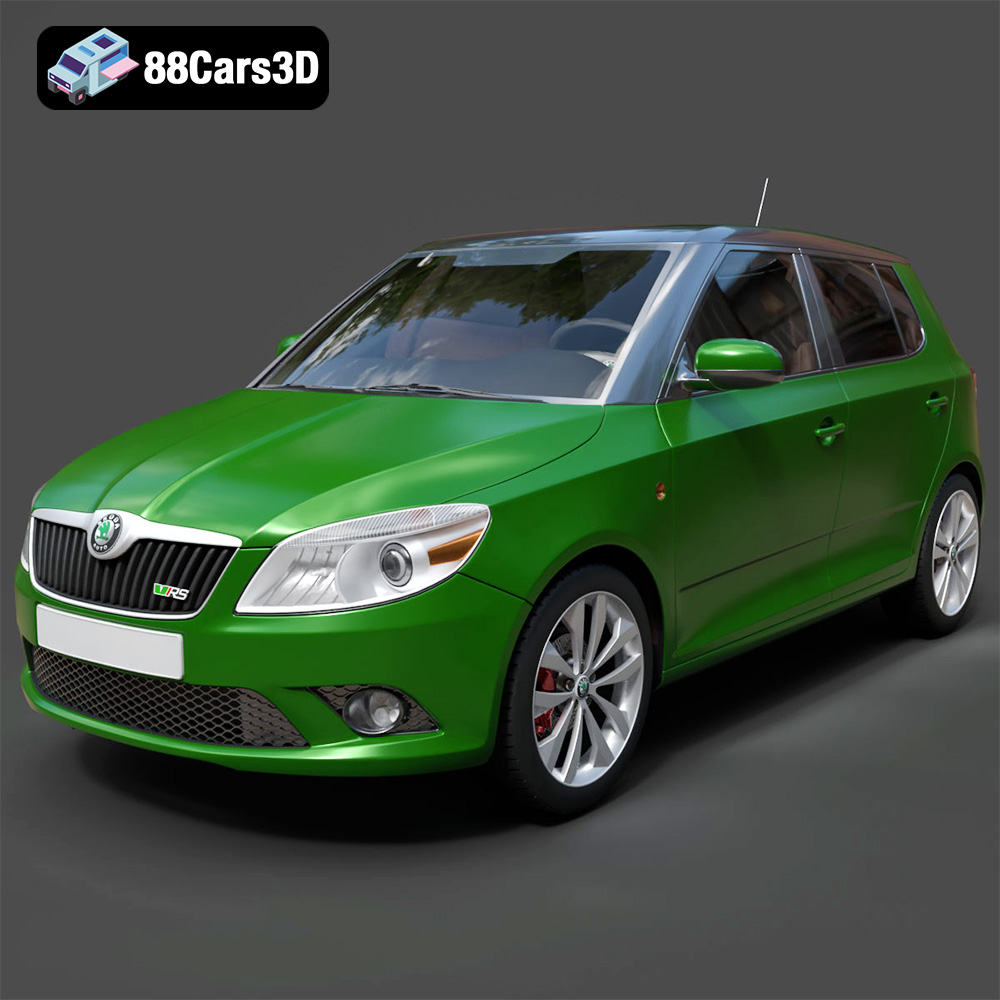
Skoda Fabia RS 2011 3D Model
Download the Skoda Fabia RS 2011 3D model, an accurately detailed vehicle asset perfect for game development, rendering, and AR/VR applications. Includes multiple formats for versatile use.
Price: $6.99
