The Foundation: Mastering 3D Car Model Topology and Edge Flow
The sleek lines, the mesmerizing reflections, the raw power encapsulated in a perfectly sculpted form – 3D automotive visualization captivates audiences across industries. From high-octane game environments and realistic architectural visualizations to cutting-edge AR/VR experiences and precision 3D printing, the demand for exceptionally crafted 3D car models is constant. However, transforming a concept into a photorealistic render or a seamlessly integrated game asset requires more than just artistic flair; it demands a deep understanding of technical workflows, optimization strategies, and industry best practices. This comprehensive guide will take you on an in-depth journey through the entire pipeline of creating, optimizing, and deploying 3D automotive models, equipping you with the knowledge to elevate your projects to professional standards. We’ll delve into everything from foundational topology and advanced PBR materials to intricate rendering setups and crucial game engine optimizations, ensuring your automotive rendering and visualization efforts stand out.
Whether you’re an aspiring 3D artist, a seasoned game developer, an automotive designer, or a visualization professional, mastering these techniques is paramount. We’ll explore the nuances that differentiate a good model from an exceptional one, focusing on details that impact both visual fidelity and real-time performance. Prepare to unlock the secrets behind crafting compelling game assets, stunning marketing visuals, and interactive experiences that truly resonate with your audience.
The Foundation: Mastering 3D Car Model Topology and Edge Flow
At the heart of every great 3D car model lies impeccable topology and intelligent edge flow. This isn’t merely an aesthetic concern; it dictates how your model deforms, how smooth your surfaces appear under subdivision, and ultimately, how well it renders and performs across different applications. For automotive models, the challenge is amplified by the need to accurately represent both sweeping curves and razor-sharp panel lines without introducing unwanted artifacts. Clean geometry is the bedrock for all subsequent stages, from UV mapping to animation and rendering. A well-constructed mesh will save countless hours in later stages, preventing pinching, creasing, and other visual imperfections that can derail a project.
Understanding how polygons distribute across the surface is critical. The goal is to maintain an even density of quadrilaterals (quads) to allow for predictable subdivision and consistent surface smoothing. This often involves careful planning of edge loops, which follow the natural contours and creases of the car body. These loops are essential for defining the overall shape and for controlling the flow of light across the surface, directly impacting reflections and highlights—a critical factor for realistic automotive renders. Neglecting this foundational stage often leads to frustrating issues down the line, requiring extensive re-modeling or complex workarounds.
Quadrilateral Dominance and Pole Management
The golden rule in polygonal modeling, especially for subdivision surfaces (e.g., in Maya’s Smooth Mesh, 3ds Max’s TurboSmooth, Blender’s Subdivision Surface modifier), is to use quads exclusively. While triangles can exist in flat, non-deforming areas, they should be avoided on curved surfaces or areas that will be subdivided, as they can lead to unpredictable smoothing and visible pinching. N-gons (polygons with more than four vertices) are generally a strict no-go for similar reasons, often causing shading anomalies and rendering issues. The ideal topology consists of continuous edge loops that flow along the natural curvature and deformation lines of the car.
Poles, vertices where more or less than four edges meet, are unavoidable but must be managed carefully. A 5-edge pole (a star) can cause pinching or dimpling, especially on curved surfaces, and should be placed in areas of minimal curvature or hidden along creases. A 3-edge pole (a T-junction) can also introduce issues but is often used effectively to terminate edge loops or control specific surface details. Strategic placement of poles, away from high-stress or highly visible areas, is key to maintaining a smooth, clean surface, which is paramount for showcasing the refined aesthetics of a car model.
Achieving Realistic Panel Gaps and Hard Surfaces
Accurate representation of panel gaps and crisp hard surfaces is what truly sells a 3D car model. There are several techniques to achieve this. One common approach is to model panel gaps as separate geometry, creating a slight recess between body panels. This provides true depth and allows light to interact realistically within the gap, offering the most convincing results. When doing this, ensure consistent width for all gaps across the vehicle. Another method involves using strategically placed support loops (or control edges) to tighten the edges of a surface before subdivision. These extra edge loops, placed very close to the edge you want to sharpen, ensure that the subdivision algorithm creates a crisp corner instead of a rounded one, mimicking the sharp edges of stamped metal.
In software like 3ds Max, Blender, or Maya, you can often use crease sets or specialized modifiers to achieve similar effects without adding as much geometry. However, for the highest fidelity, explicit geometric definition of hard edges and panel gaps is often preferred. Maintaining consistent curvature and surface tension across large, reflective panels is also crucial. Slight imperfections, often invisible on other models, become glaringly obvious on a car’s reflective paintwork, making precise vertex manipulation and consistent mesh density critical. For professionals, precision modeling tools and careful visual inspection under various lighting conditions are indispensable.
Texturing Excellence: UV Mapping and PBR Materials for Automotive Models
Once your model’s topology is solid, the next step is to give it a realistic skin. This involves meticulous UV mapping and the creation of compelling PBR materials. UV mapping translates the 3D surface of your car into a 2D space, allowing you to apply textures accurately. For complex automotive surfaces, this can be a daunting task due to the myriad of curves, sharp angles, and distinct material zones (body, glass, tires, interior). Poor UVs lead to stretched textures, visible seams, and difficulty in painting details, undermining even the best modeling efforts. PBR (Physically Based Rendering) materials, on the other hand, ensure that your car interacts with light in a physically accurate way, resulting in truly photorealistic renders that respond correctly to different lighting environments.
The combination of well-executed UVs and robust PBR workflows allows for incredible detail and realism. Imagine the subtle metallic flakes in car paint, the anisotropic reflections of brushed metal, or the intricate weave of carbon fiber—these are all achievable through a deep understanding of PBR principles. This stage often involves dedicated texturing software like Adobe Substance Painter or Mari, which streamline the process of applying and refining materials across complex UV layouts. The aim is not just to make the car look good, but to make it look like it truly exists in the physical world.
Strategic UV Unwrapping for Car Models
Effective UV unwrapping for automotive models involves several key strategies. Firstly, minimize distortion and stretching. Tools in 3ds Max, Blender, Maya, and ZBrush offer various unwrapping methods (planar, cylindrical, spherical, pelt mapping) that need to be applied judiciously to different parts of the car. The body panels, for instance, might benefit from a combination of planar and pelt mapping to lay them out flat with minimal stretching. Secondly, prioritize consistent texel density across all UV shells. This means that a texture pixel occupies roughly the same amount of surface area on the 3D model, regardless of which part it’s on. Inconsistent texel density leads to some areas appearing blurry while others are sharp, or vice-versa.
Thirdly, strategic seam placement is crucial. Seams should be hidden in less visible areas (e.g., under the car, along sharp creases, or where separate objects meet). For very high-resolution models, especially those intended for close-up renders, consider using Multi-Tile UVs (UDIMs). This technique allows you to spread the UVs for different parts of the car across multiple 0-1 UV space tiles, enabling exceptionally high texture resolutions without a single massive texture file. For example, the car body might occupy several UDIM tiles, while the wheels and interior have their own dedicated tiles. When sourcing models from marketplaces such as 88cars3d.com, checking for clean UVs and sensible UDIM layouts is an important consideration.
Crafting Photorealistic PBR Materials
Physically Based Rendering (PBR) revolutionizes how we create materials, focusing on real-world light interaction. The core PBR maps typically include: Albedo/Base Color (the intrinsic color without shading), Metallic (how metallic a surface is, 0 for dielectric, 1 for metal), Roughness (micro-surface detail affecting light scatter; 0 for perfectly smooth, 1 for rough), Normal Map (faking high-resolution detail through surface normals), and Ambient Occlusion (simulating soft shadows from indirect light). For automotive materials, these maps are combined in sophisticated ways.
- Car Paint: Often the most complex. It typically requires multiple layers: a base color, a metallic flake layer, and a clear coat. Advanced car paint shaders in Corona Render, V-Ray, Cycles, or Arnold allow for these layers, including parameters for clear coat thickness, refraction, and metallic flake size/density, often requiring an anisotropic sheen component.
- Chrome & Metals: High Metallic value, very low Roughness (for polished chrome). Brushed metals will have higher Roughness and an Anisotropic map to define the direction of the brushing.
- Rubber: Low Metallic, higher Roughness, and often a Normal Map for tire treads.
- Glass: Low Metallic, very low Roughness, high transmission (refraction), and often a subtle Normal Map for imperfections. Tinted glass requires careful adjustment of transmission color.
- Carbon Fiber: Achieved through intricate Normal and Roughness maps, often with an anisotropic component, to simulate the woven pattern and its distinctive reflections.
Software like Substance Painter excels at creating these PBR textures, allowing artists to paint directly on the 3D model, generating all necessary maps simultaneously. When developing your shader networks in 3ds Max (Corona/V-Ray), Blender (Cycles), or Maya (Arnold), understanding how these maps contribute to the final look is crucial for achieving truly believable results.
Bringing Cars to Life: Advanced Rendering Workflows
The moment of truth for any 3D car model is the render. This is where all the meticulous modeling, UV mapping, and PBR material work culminates in a stunning, photorealistic image. Advanced rendering workflows go beyond simply hitting the render button; they involve a deep understanding of lighting, camera composition, and render engine settings to evoke mood, highlight details, and showcase the vehicle in its best possible light. Whether you’re aiming for a sleek studio shot or a dynamic outdoor scene, the principles remain the same: control the light, define the reflections, and compose with intent.
Modern renderers like Corona, V-Ray, Cycles, and Arnold offer powerful tools to achieve astonishing realism. However, their true potential is unlocked by artists who understand how to manipulate light and shadow, manage global illumination, and optimize settings for both speed and quality. This section will explore strategies for dramatic lighting, renderer-specific techniques, and the importance of render elements for a robust post-processing pipeline. Achieving that “wow” factor often comes down to the subtle interplay of light and material properties, meticulously balanced in the render setup.
Lighting Setups for Dramatic Automotive Shots
Lighting is paramount in automotive rendering, as cars are essentially complex reflectors. The way light hits the surface defines the form, highlights the curves, and reveals the material properties. There are three primary approaches to lighting automotive models:
- HDRI (High Dynamic Range Image) Lighting: This is the quickest way to achieve realistic global illumination and reflections. An HDRI captures light information from a real-world environment, providing accurate ambient light, reflections, and sometimes even direct light. High-quality automotive HDRIs (studio, outdoor, industrial) are indispensable for producing believable results with minimal setup. They act as both light source and reflection environment.
- Studio Lighting: For controlled, stylized, or product-focused renders, studio lighting is ideal. This involves using virtual light sources (e.g., area lights, softboxes, strip lights in 3ds Max/Blender/Maya) to sculpt the car’s form. Key lights define the main illumination, fill lights soften shadows, and rim lights highlight edges for separation from the background. Experiment with light size, intensity, color, and falloff to achieve different moods. A classic setup might involve a large softbox from above/front, with two vertical strip lights on the sides to create dramatic reflections along the car’s body.
- Outdoor/Environmental Lighting: Replicating natural outdoor lighting requires a combination of a physically accurate Sun & Sky system (available in most renderers) and potentially an HDRI for ambient reflections. Consider time of day, cloud cover, and bounce light from the ground or surrounding objects. Placing reflectors or blockers in the scene can further refine the lighting.
For any setup, remember that reflections are as important as direct light. Ensure your environment, whether real or virtual, provides interesting shapes and contrasts for the car to reflect, enhancing its visual appeal.
Renderer-Specific Techniques (Corona, V-Ray, Cycles, Arnold)
While the principles of lighting and PBR are universal, each renderer has its own strengths and specific settings to master. All modern renderers utilize various Global Illumination (GI) engines (e.g., Irradiance Map, Brute Force, Light Cache, Path Tracing) that significantly impact render quality and time. Understanding when to use which engine and how to balance its settings (samples, bounces) is crucial for efficient rendering.
- Corona Render (3ds Max, Cinema 4D): Known for its ease of use and physically accurate results. Its interactive rendering provides instant feedback, making material and lighting adjustments very intuitive. Corona’s layered material system is excellent for complex car paint shaders with clear coats and metallic flakes. It excels at unbiased rendering, producing natural-looking light and shadows.
- V-Ray (3ds Max, Maya, SketchUp, Rhino): A production-proven workhorse, V-Ray offers incredible flexibility and speed. It combines biased and unbiased rendering methods. For car paint, its VRayCarPaintMtl or VRayBlendMtl allows for precise control over base, flake, and clear coat layers. V-Ray’s extensive render elements are vital for post-processing.
- Cycles (Blender): Blender’s integrated path-tracing renderer, Cycles, produces high-quality, physically accurate results. Its node-based material editor provides immense creative freedom for building complex car paint shaders, including volume scattering for headlight lenses or fog. Cycles also benefits from GPU rendering, significantly speeding up iterations.
- Arnold (Maya, 3ds Max, Houdini): A high-performance, unbiased Monte Carlo path tracer. Arnold is renowned for its robustness and ability to handle extremely complex scenes. Its Standard Surface shader is highly versatile for PBR materials, and its specialized car paint shader offers detailed controls for metallic flakes and clear coats.
Regardless of the renderer, leverage render elements or passes (e.g., diffuse, reflection, refraction, raw lighting, GI, ambient occlusion, depth) to give yourself maximum control in post-processing. Compositing these passes in software like Adobe Photoshop or Foundry Nuke allows you to fine-tune exposure, color, reflections, and add depth of field without re-rendering the entire image.
Performance for Play: Optimizing 3D Car Models for Game Engines
While high-polygon models and complex shaders are ideal for photorealistic renders, the real-time constraints of game engines demand a different approach. Game environments require models that are efficient to render, minimizing draw calls, memory usage, and computational overhead. The goal is to maintain visual fidelity while ensuring smooth frame rates across diverse hardware. This balance is a constant challenge, but mastering optimization techniques is essential for creating compelling and playable experiences in titles ranging from mobile racing games to AAA simulations.
Optimizing 3D car models for game engines involves a strategic reduction of polygon count, smart texture management, and careful consideration of how the model interacts with the game world. It’s not just about making the model “low-poly”; it’s about making it performant and scalable. Understanding the target platform’s limitations and applying intelligent compromises is key to delivering high-quality game assets that don’t bog down the engine.
LODs and Polygon Budgeting
One of the most critical optimization techniques for game assets is the implementation of Levels of Detail (LODs). LODs are simplified versions of your 3D model that are automatically swapped in by the game engine when the object is further away from the camera. This drastically reduces the polygon count of objects that don’t require high detail, saving significant processing power. A typical car model might have 3-5 LOD levels:
- LOD0 (High-Poly): Used for close-up shots, in-game cinematics, or when the player is inside the car. Polygon count can range from 80,000 to 300,000+ triangles, depending on the game’s budget and target platform.
- LOD1 (Medium-Poly): Used when the car is a short distance away. Polygon count typically 20,000 – 50,000 triangles.
- LOD2 (Low-Poly): For cars at a moderate distance. Polygon count 5,000 – 15,000 triangles.
- LOD3 (Very Low-Poly/Billboard): For cars far in the distance, or even replaced with a 2D billboard image for extreme distances. Polygon count under 2,000 triangles.
Creating LODs can be done manually by optimizing the mesh, or using automated tools like ProOptimizer in 3ds Max, Blender’s Decimate modifier, or integrated LOD tools in Unity/Unreal Engine. However, manual optimization often yields better results, preserving important silhouettes and details. Establishing a clear polygon budget for each asset and LOD level at the start of a project is crucial for managing performance targets.
Efficient Texturing and Material Strategies
Beyond polygon count, texture usage and material complexity are significant performance factors in game engines. Large texture files consume valuable memory, and too many separate materials increase draw calls (instructions the CPU sends to the GPU for rendering). To combat this:
- Texture Atlasing: Combine multiple smaller textures (e.g., textures for different interior components, bolts, badges) into a single, larger texture map. This reduces draw calls, as the engine can render multiple parts using one material and texture. While useful, it requires careful UV remapping.
- PBR Workflow in Game Engines: Unity (Standard, URP, HDRP) and Unreal Engine (Metallic/Roughness vs. Specular/Glossiness) fully support PBR materials. Use the most efficient PBR workflow for your engine. Optimize texture resolutions (e.g., 2K or 4K for main body, 1K for smaller details) and compress them appropriately (e.g., DXT1, DXT5, BC7).
- Baking Textures: A common workflow is to create a high-polygon model for detail and then bake its surface information (like normal maps, ambient occlusion, curvature, thickness) onto a low-polygon mesh. This allows the low-poly model to appear highly detailed without the heavy polygon count. Software like Substance Painter is excellent for this process.
- Material Instance Optimization: In engines like Unreal, create master materials and then derive material instances. This allows you to quickly adjust parameters (e.g., car paint color, roughness) without creating a new material, saving memory and compile time.
For high-quality game assets like those found on 88cars3d.com, these optimizations are already part of the package, ensuring they are game-ready right out of the box. Always test your assets in the target game engine to identify bottlenecks and ensure optimal performance.
Expanding Horizons: 3D Car Models for AR/VR and 3D Printing
The utility of high-quality 3D car models extends far beyond traditional rendering and game development. Augmented Reality (AR) and Virtual Reality (VR) platforms offer immersive new ways to experience vehicles, from interactive configurators to virtual test drives. Simultaneously, 3D printing provides the opportunity to bring digital designs into the physical world, creating tangible prototypes, collectibles, or educational models. Each of these applications presents unique technical requirements and optimization challenges that necessitate specific preparation workflows.
Leveraging 3D car models for AR/VR demands stringent performance optimization and specialized file formats to ensure smooth, real-time interactivity on diverse hardware, including mobile devices. For 3D printing, the focus shifts to mesh integrity, watertight geometry, and considerations for physical manufacturing constraints. Understanding these distinct pipelines allows artists and designers to maximize the versatility and impact of their 3D automotive assets across a broad spectrum of emerging technologies.
AR/VR Optimization and Interactivity
AR/VR experiences impose even stricter performance requirements than traditional games due to the need for high, stable frame rates (typically 90 FPS for VR to prevent motion sickness) and the limitations of mobile hardware for AR. Key optimization strategies include:
- Aggressive Polygon Reduction: Target polygon counts for AR/VR car models are significantly lower, often in the range of 10,000-50,000 triangles for the main car body, with aggressive LODs for distant objects. Every polygon counts.
- Efficient PBR Materials: Simplify shader complexity where possible. Use fewer, well-optimized textures. Texture atlasing is highly recommended to reduce draw calls. Some mobile AR platforms might prefer simpler PBR workflows (e.g., Metallic/Roughness) or even unlit materials for certain elements.
- Baked Lighting: For static elements or pre-defined environments, baking lighting into lightmaps can significantly reduce real-time lighting calculations, improving performance.
- Collision and Interactivity: Create optimized, simple collision meshes for physics interactions (e.g., driving simulations). For interactive elements (opening doors, changing colors), ensure proper rigging and scripting are in place, keeping in mind mobile performance.
- Specialized File Formats: For web-based AR/VR, formats like GLB (Binary glTF) and USDZ (Universal Scene Description Zip) are crucial. GLB is widely supported for web 3D and AR experiences on Android and desktop, embedding models, textures, and animations into a single file. USDZ is Apple’s proprietary format for AR Quick Look on iOS devices, offering similar functionality. Both are designed for efficient transmission and rendering of 3D scenes. Platforms like 88cars3d.com often provide models in these AR/VR-ready formats, simplifying deployment.
When developing for AR/VR, constant testing on the target device is essential to ensure a smooth, immersive experience.
Preparing Automotive Models for 3D Printing
Converting a 3D car model from a digital asset to a physical object via 3D printing requires a fundamental shift in technical considerations. The mesh needs to be prepared to adhere to physical manufacturing constraints, not just visual ones:
- Watertight Mesh: This is the most critical requirement. A 3D printable model must be a “manifold” mesh, meaning it has no holes, non-manifold edges, inverted normals, or self-intersecting geometry. Every edge must be shared by exactly two faces. Mesh repair tools in software like Meshmixer, Netfabb, Blender’s 3D Print Toolbox, or 3ds Max’s STL Check modifier are invaluable for identifying and fixing these issues.
- Wall Thickness: Ensure all parts of your model have sufficient wall thickness to be physically robust. Thin walls can break during printing or post-processing. Minimum thickness varies by printer technology and material (e.g., 0.8mm to 2mm is common).
- Scale and Units: Verify your model’s scale and units are correct for the intended print size. Exporting in millimeters is often standard.
- Detail Resolution: While game models might rely on normal maps for detail, 3D printing requires actual geometric detail. Consider how much detail can be physically resolved by the printer. For intricate details, ensure they have sufficient geometric depth.
- Supports: Overhanging parts of the model will require support structures during printing. Design your model to minimize large overhangs or consider how supports will be generated and removed.
- File Formats: The standard file formats for 3D printing are STL (Stereolithography) and OBJ. Some printers also support VRML for color printing. Always double-check your export settings for these formats to ensure proper unit scale and mesh integrity.
Pre-print analysis in slicer software (e.g., Cura, Simplify3D) will further help identify potential print issues before committing to a physical print. Preparing a model for 3D printing is a meticulous process, often requiring specialized knowledge of both 3D modeling and additive manufacturing.
Workflow Integration and Professional Best Practices
Beyond individual technical skills, a streamlined workflow and adherence to professional best practices are crucial for the efficient and successful completion of any 3D automotive project. This involves everything from organized file management and robust version control to ensuring cross-software compatibility and effectively troubleshooting common challenges. A well-structured pipeline not only enhances productivity but also facilitates collaboration, reduces errors, and ensures the longevity and reusability of your valuable 3D car models.
In the fast-paced world of 3D production, whether for film, games, or visualization, consistency and foresight are key. Adopting industry-standard practices helps mitigate risks, streamline asset hand-offs, and ensures that the final product meets the highest technical and artistic standards. By focusing on these overarching principles, artists and teams can navigate complex projects with greater confidence and deliver superior results every time.
File Management and Version Control
Disorganized files are a nightmare scenario. Adopt strict naming conventions for all your assets, files, and folders from the very beginning. For example, `carname_body_LOD0_v001.max`, `carname_wheel_texture_albedo.png`. Create a logical folder structure that separates scenes, models, textures, renders, and exported assets. This makes it easy to locate specific files and prevents accidental overwrites or misplacements. A typical structure might include: `ProjectName/Scenes/Modeling`, `ProjectName/Scenes/Texturing`, `ProjectName/Scenes/Rendering`, `ProjectName/Assets/Models`, `ProjectName/Assets/Textures`, `ProjectName/Exports`.
Version control is non-negotiable. Always save iteratively, incrementing your file versions (e.g., `_v001`, `_v002`). Never rely solely on auto-saves. For team environments, utilize dedicated version control systems like Git, Perforce, or specialized asset management systems (e.g., Shotgun, ftrack) to track changes, manage merges, and revert to previous states if necessary. Even for solo artists, a simple cloud-syncing service (Dropbox, Google Drive) with file versioning or a local Git repository can be a lifesaver, protecting against data loss and allowing for experimental changes without fear.
Cross-Software Compatibility and File Formats
The 3D pipeline often involves multiple software packages (e.g., modeling in Maya, texturing in Substance Painter, rendering in 3ds Max, importing into Unreal Engine). Therefore, understanding file formats and their implications for compatibility is paramount. The two most common interchange formats are:
- FBX (Filmbox): Developed by Autodesk, FBX is widely supported and can carry a rich amount of data, including geometry, UVs, PBR material assignments (though shaders usually need rebuilding), animation, cameras, and lights. It’s the industry standard for transferring animated models between applications and into game engines.
- OBJ (Wavefront Object): A simpler, widely compatible format primarily for geometry and UVs. It’s often used when you only need to transfer mesh data and don’t require complex scene information or animations. Materials are often defined in a separate .MTL file.
Newer formats like USD (Universal Scene Description), developed by Pixar, are gaining traction for their ability to manage complex scene graphs, layering, and non-destructive workflows across multiple applications. When exporting, always pay attention to settings like units (ensure consistency), Y-up/Z-up axis conversions, and scale factors. Materials often need to be re-created in the target application, but the baked texture maps (Albedo, Normal, Roughness, etc.) will transfer. Platforms like 88cars3d.com typically offer models in multiple industry-standard formats, simplifying integration into diverse pipelines.
Common Challenges and Solutions
Even seasoned professionals encounter hurdles. Here are a few common challenges in 3D automotive modeling and their solutions:
- Dealing with CAD Data: Automotive designs often start as NURBS CAD data. Converting this precise, mathematically defined surface data into polygon meshes for rendering or real-time can be challenging. Issues like dense meshes, non-manifold geometry, or bad normals are common. Solutions include using dedicated CAD-to-poly conversion tools (e.g., Fusion 360, Rhino, PolyTrans) with careful control over tessellation density, followed by extensive mesh cleanup and retopology.
- Maintaining Visual Consistency: When working on a series of assets or collaborating, ensuring consistent quality, scale, and PBR material responses across all models is vital. Establish style guides, use shared material libraries, and conduct regular review sessions to maintain consistency.
- Performance Bottlenecks: If a scene or game is running slow, systematically diagnose the problem. Is it polygon count, texture resolution, too many draw calls, complex shaders, or inefficient lighting? Use profiling tools in your game engine or renderer to pinpoint the exact culprit. Often, a combination of LODs, texture atlasing, and simplified shaders will resolve most issues.
- Iterative Design Feedback: Automotive projects often involve frequent design changes. Model your assets to be easily modifiable using non-destructive techniques (modifiers, procedural modeling, instances) where possible. Keep source files organized and use version control to track changes efficiently.
Conclusion
The journey through the world of 3D automotive modeling, rendering, and optimization is a testament to the intricate blend of art and science required to bring virtual vehicles to life. From the foundational precision of topology and UV mapping to the nuanced artistry of PBR materials and advanced lighting, every stage demands careful consideration and technical expertise. We’ve explored how to craft photorealistic renders with industry-leading engines like Corona, V-Ray, Cycles, and Arnold, and how to rigorously optimize these assets for demanding real-time environments in Unity and Unreal Engine. Furthermore, we’ve delved into the specific requirements for leveraging 3D car models in immersive AR/VR experiences and preparing them for tangible 3D printing.
Ultimately, achieving professional-grade results in automotive design and visualization is an ongoing process of learning, refining, and adapting to new technologies. By embracing best practices in workflow management, understanding the nuances of various file formats, and continuously honing your technical skills, you are well-equipped to tackle any creative challenge. For those seeking a head start, or simply looking for high-quality, pre-optimized assets that embody these very principles, exploring the extensive library of meticulously crafted 3D car models on 88cars3d.com can be an invaluable resource to accelerate your projects and elevate your visual storytelling. Dive in, experiment, and drive your creative visions forward!
Featured 3D Car Models
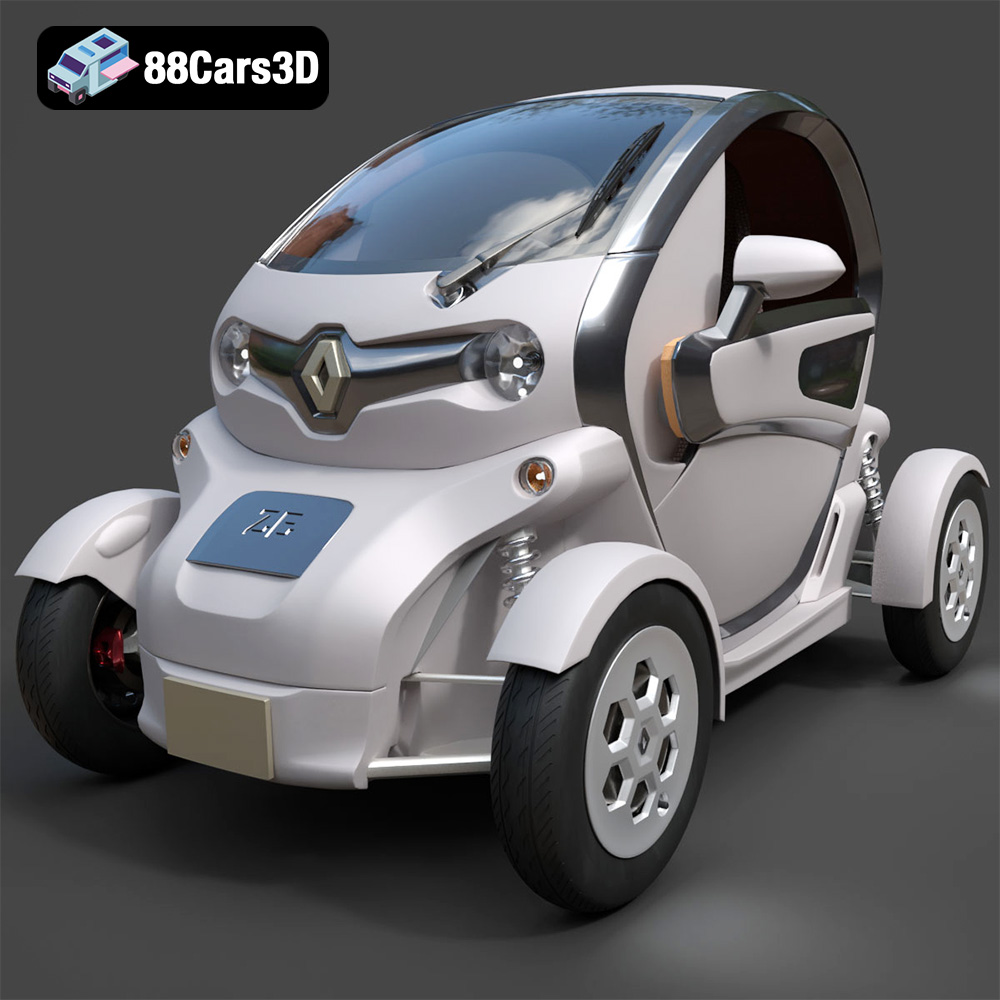
Renault Twizy ZE 3D Model
Texture: Yes
Material: Yes
Download the Renault Twizy ZE 3D Model featuring clean geometry, realistic detailing, and a fully modeled interior. Includes .blend, .fbx, .obj, .glb, .stl, .ply, .unreal, and .max formats for rendering, simulation, and game development.
Price: $4.99
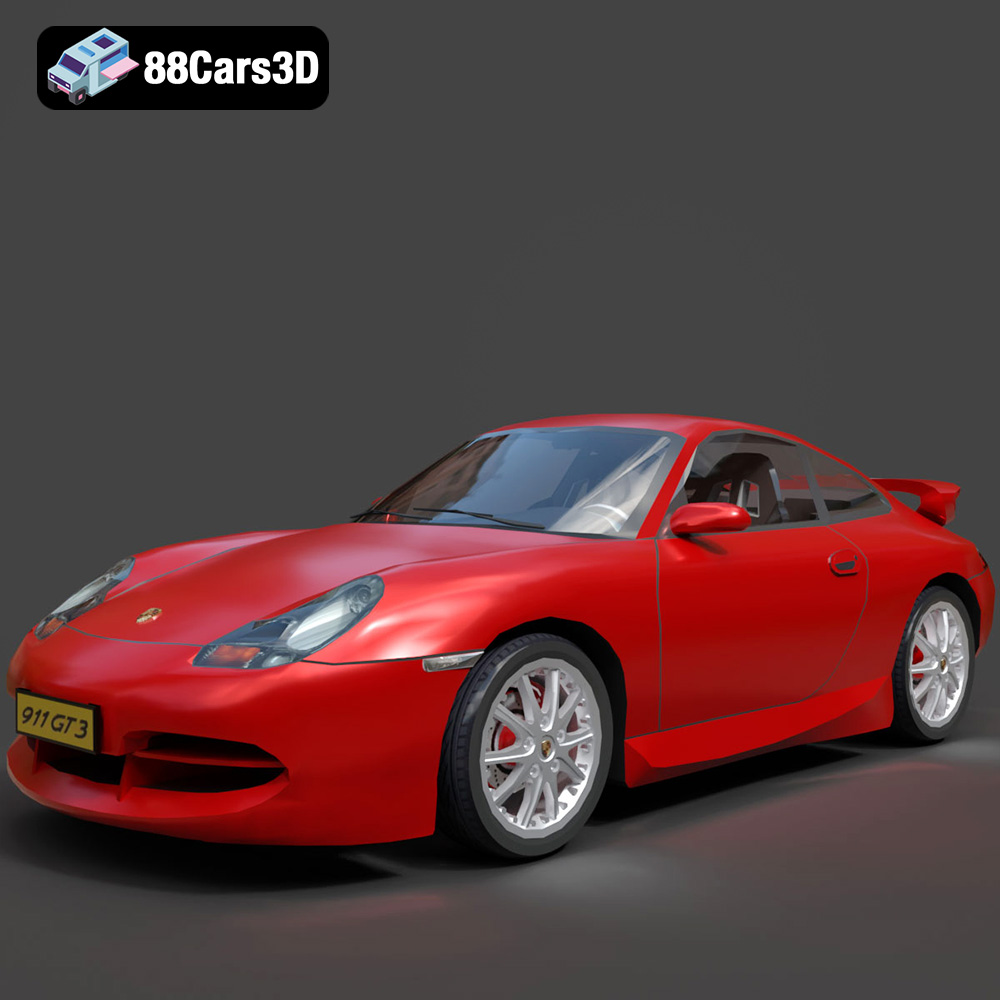
Porsche 911 GT3 3D Model
Texture: Yes
Material: Yes
Download the Porsche 911 GT3 3D Model featuring clean geometry, realistic detailing, and a fully modeled interior. Includes .blend, .fbx, .obj, .glb, .stl, .ply, .unreal, and .max formats for rendering, simulation, and game development.
Price: $4.99
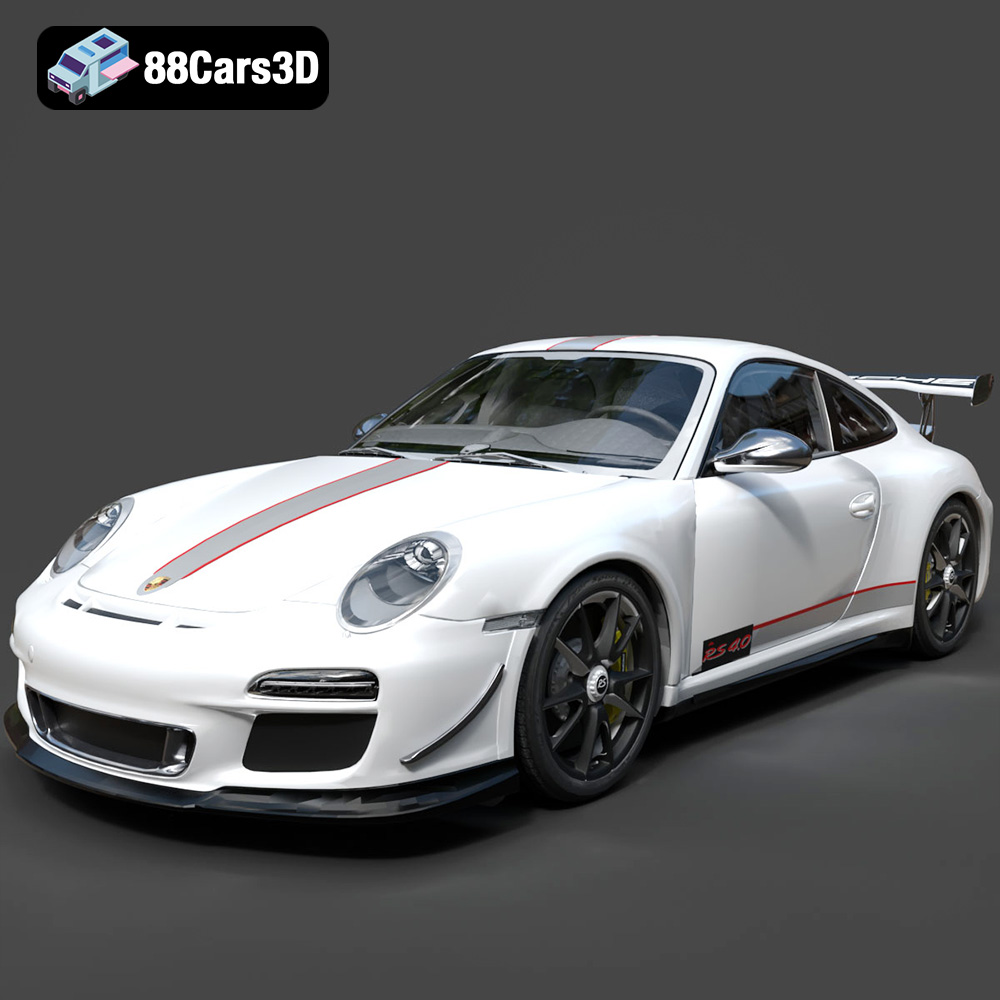
Porsche 911 997 GT3 RS 4.0 2011 3D Model
Texture: Yes
Material: Yes
Download the Porsche 911 997 GT3 RS 4.0 2011 3D Model featuring clean geometry, realistic detailing, and a fully modeled interior. Includes .blend, .fbx, .obj, .glb, .stl, .ply, .unreal, and .max formats for rendering, simulation, and game development.
Price: $4.99
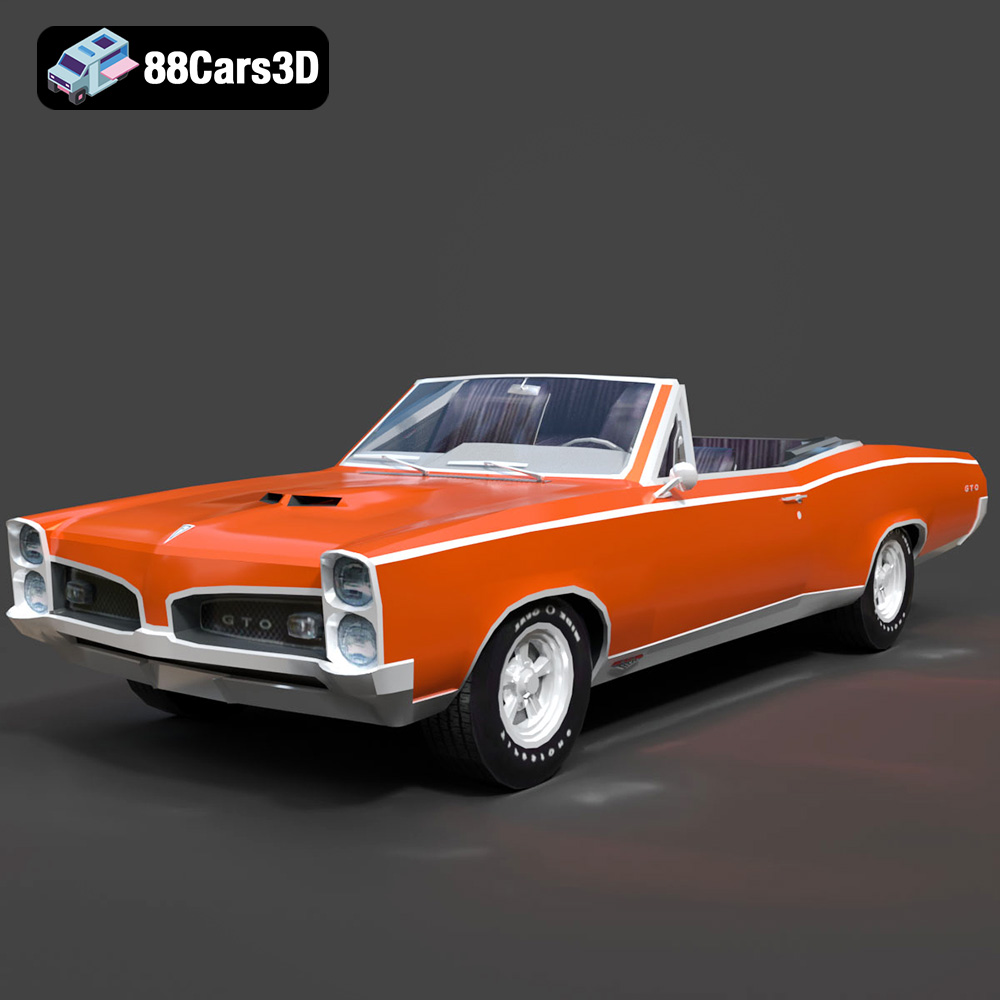
Pontiac GTO Cabrio 1967 3D Model
Texture: Yes
Material: Yes
Download the Pontiac GTO Cabrio 1967 3D Model featuring clean geometry, realistic detailing, and a fully modeled interior. Includes .blend, .fbx, .obj, .glb, .stl, .ply, .unreal, and .max formats for rendering, simulation, and game development.
Price: $4.99
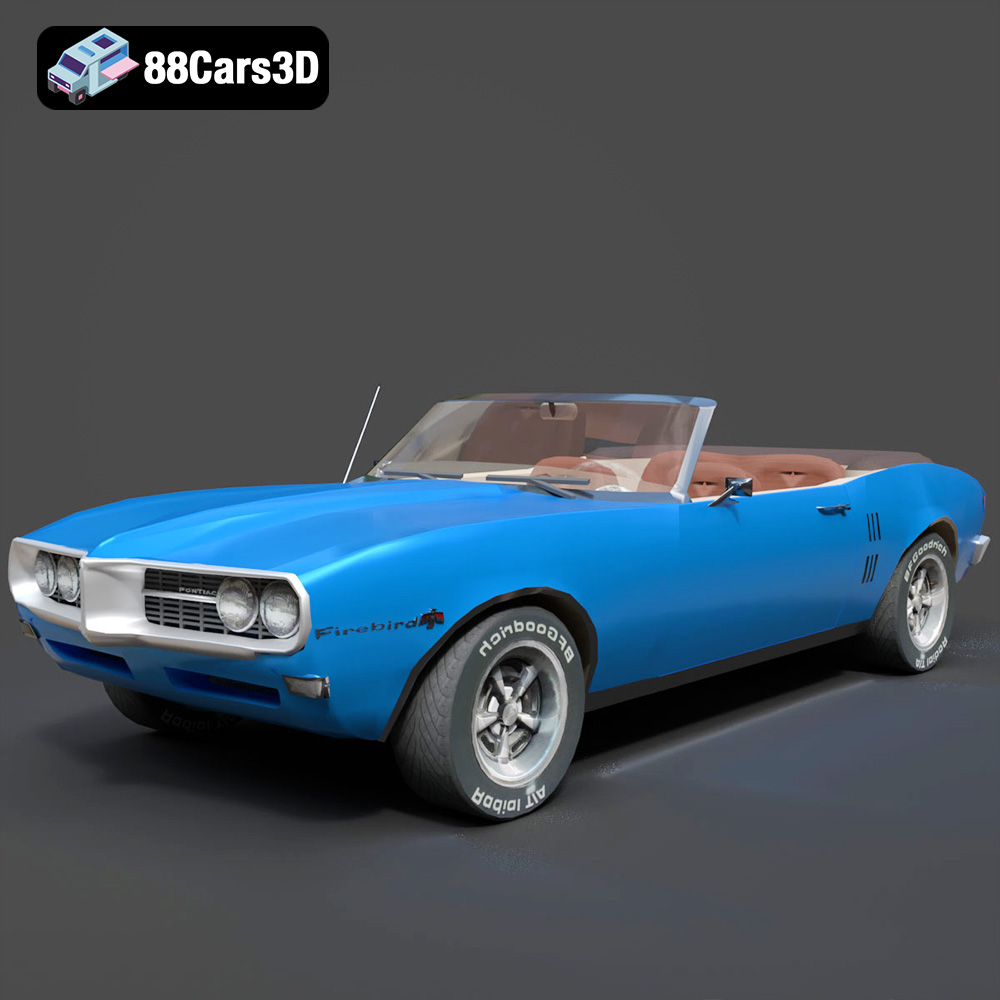
Pontiac Firebird Convertible 1968 3D Model
Texture: Yes
Material: Yes
Download the Pontiac Firebird Convertible 1968 3D Model featuring clean geometry, realistic detailing, and a fully modeled interior. Includes .blend, .fbx, .obj, .glb, .stl, .ply, .unreal, and .max formats for rendering, simulation, and game development.
Price: $4.99

Peugeot 508 2011 3D Model
Texture: Yes
Material: Yes
Download the Peugeot 508 2011 3D Model featuring clean geometry, realistic detailing, and a fully modeled interior. Includes .blend, .fbx, .obj, .glb, .stl, .ply, .unreal, and .max formats for rendering, simulation, and game development.
Price: $4.99
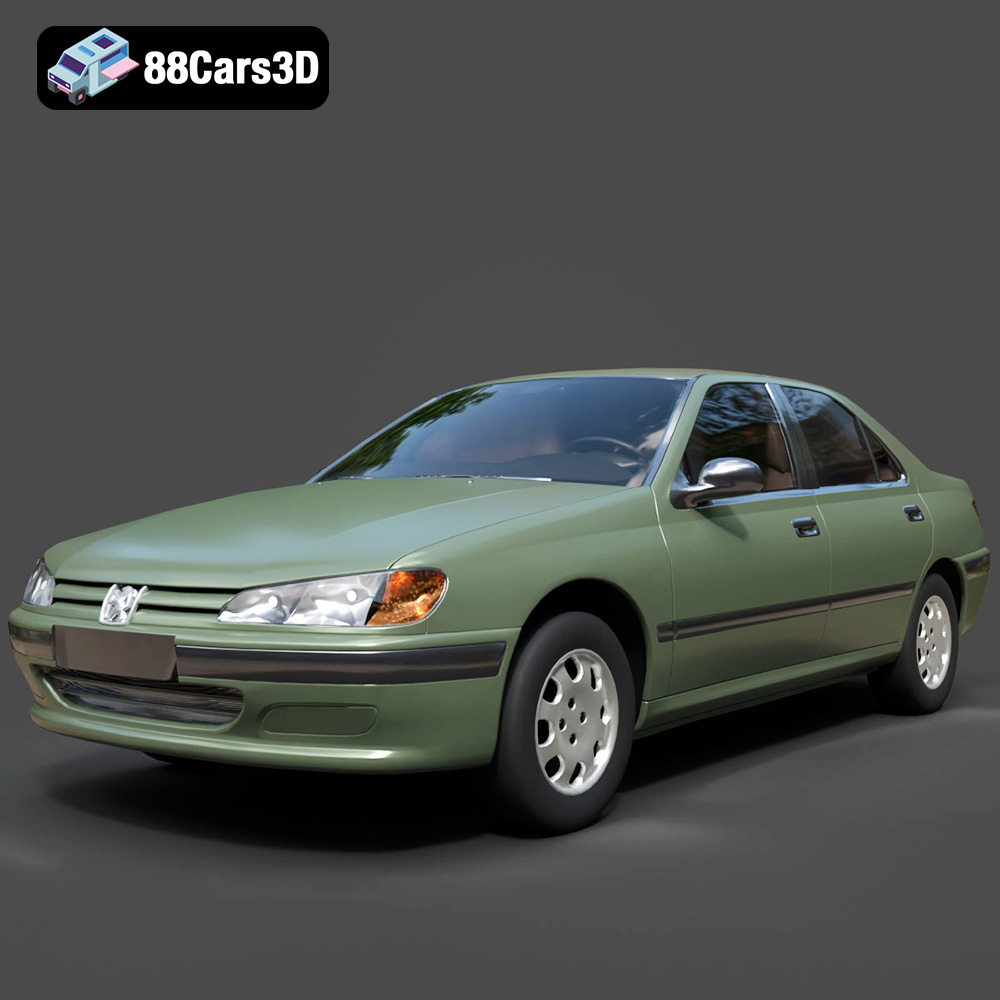
Peugeot 406 1996 3D Model
Texture: Yes
Material: Yes
Download the Peugeot 406 1996 3D Model featuring clean geometry, realistic detailing, and a fully modeled interior. Includes .blend, .fbx, .obj, .glb, .stl, .ply, .unreal, and .max formats for rendering, simulation, and game development.
Price: $10
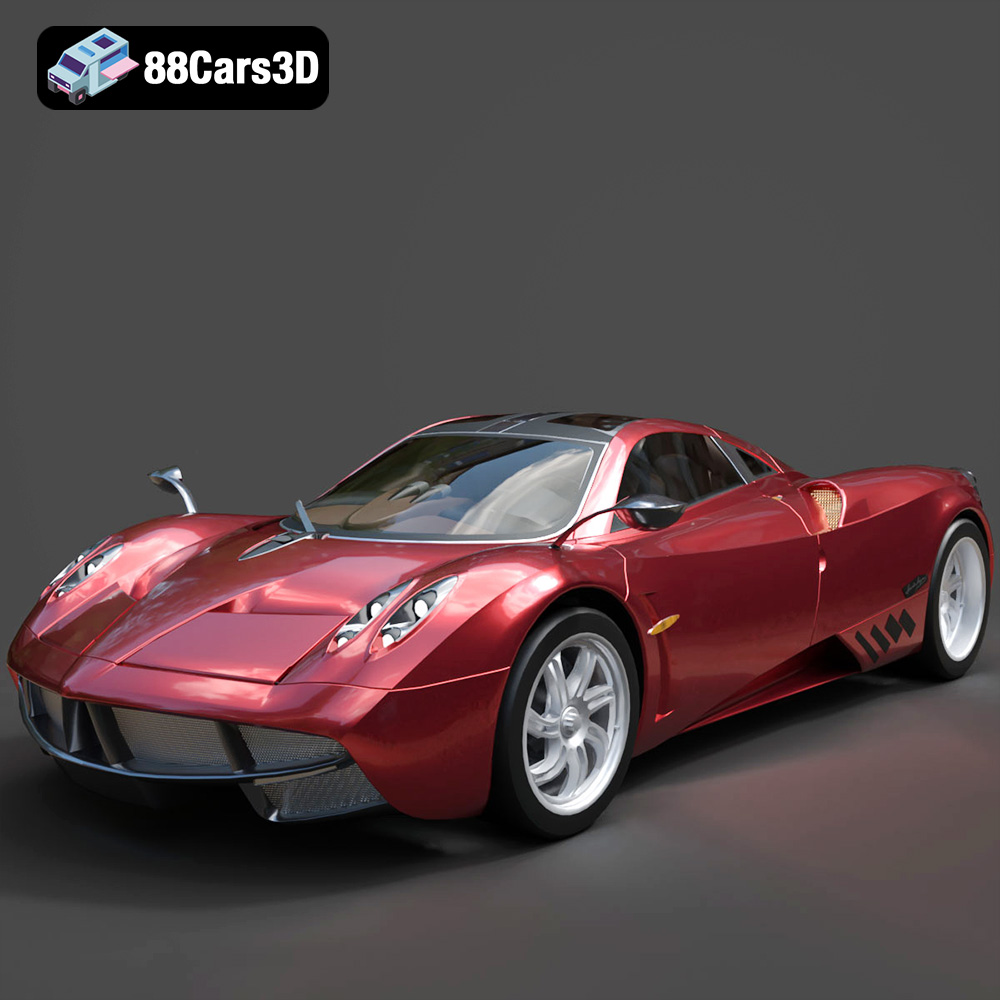
Pagani Huayra 2012 3D Model
Texture: Yes
Material: Yes
Download the Pagani Huayra 2012 3D Model featuring clean geometry, realistic detailing, and a fully modeled interior. Includes .blend, .fbx, .obj, .glb, .stl, .ply, .unreal, and .max formats for rendering, simulation, and game development.
Price: $10
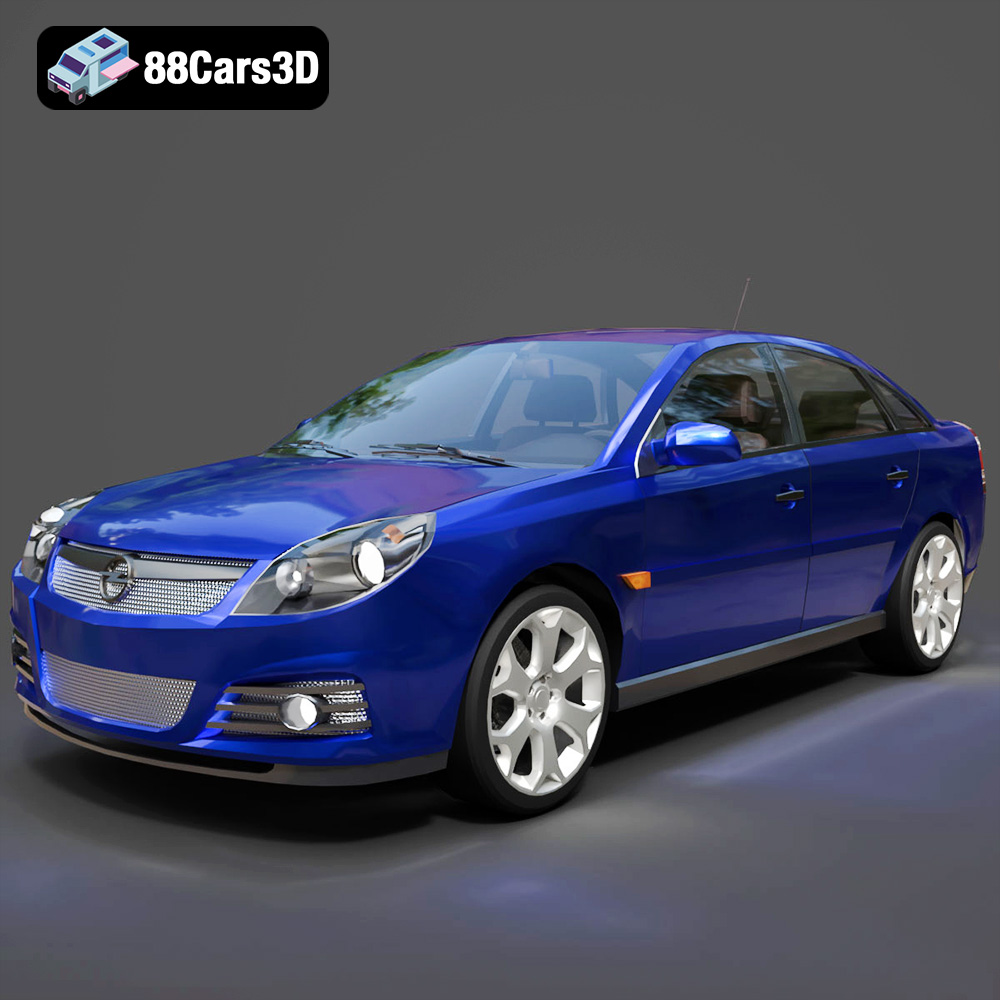
Opel Vectra C 2005 3D Model
Texture: Yes
Material: Yes
Download the Opel Vectra C 2005 3D Model featuring clean geometry, realistic detailing, and a fully modeled interior. Includes .blend, .fbx, .obj, .glb, .stl, .ply, .unreal, and .max formats for rendering, simulation, and game development.
Price: $10

Opel Insignia OPC 3D Model
Texture: Yes
Material: Yes
Download the Opel Insignia OPC 3D Model featuring clean geometry, realistic detailing, and a fully modeled interior. Includes .blend, .fbx, .obj, .glb, .stl, .ply, .unreal, and .max formats for rendering, simulation, and game development.
Price: $10
