⚡ FLASH SALE: Get 60% OFF All Premium 3D & STL Models! ⚡
The world of 3D visualization has undergone a dramatic transformation, pushing the boundaries of realism and interactive experiences. At the heart of this revolution, particularly in fields like automotive design, game development, and architectural visualization, lies the intricate art and science of creating compelling 3D car models. These aren’t just static images; they are meticulously crafted digital assets, brimming with detail, ready to be integrated into diverse projects from hyper-realistic renders to immersive AR/VR simulations. Understanding the technical nuances behind these models is paramount for any professional aiming for excellence.
This comprehensive guide will take you on an in-depth journey, dissecting the critical elements that define a truly high-quality 3D car model. We’ll explore everything from the foundational principles of clean topology and efficient UV mapping to the intricacies of PBR material creation, advanced rendering techniques, and crucial optimization strategies for real-time applications like games and AR/VR. Whether you’re a seasoned 3D artist, a game developer, an automotive designer, or a student eager to master the craft, this article will equip you with the knowledge and actionable insights to elevate your projects to the next level. Prepare to unlock the full potential of automotive 3D.
The journey to a photorealistic 3D car model begins long before any textures are applied or lights are set. It starts with the underlying mesh – its topology and edge flow. For automotive models, which are characterized by sleek curves, sharp creases, and complex surface details, impeccable topology is non-negotiable. It dictates how the model deforms, how light reflects off its surfaces, and how easily it can be textured and animated. A poorly modeled car, regardless of high-resolution textures or advanced shaders, will always fall short. The goal is to achieve a balance between detail and efficiency, creating a mesh that is both visually accurate and technically sound.
The industry standard for automotive modeling relies heavily on subdivision surface (SubD) modeling techniques. This means creating a relatively low-polygon base mesh using mostly quad polygons, which can then be smoothed and refined by a subdivision modifier (like TurboSmooth in 3ds Max or Subdivision Surface in Blender). This approach offers immense flexibility, allowing artists to make broad shape adjustments on a low-poly cage while still achieving perfectly smooth, high-resolution surfaces for rendering. However, the success of SubD modeling hinges entirely on a clean, intentional edge flow that accurately follows the curvature and creases of the vehicle’s body panels. Understanding where to add supporting edge loops to define sharp edges without introducing unwanted pinching or bumps is a critical skill.
Effective edge flow in automotive models means that polygon edges should ideally follow the natural lines of the car’s design, outlining panels, vents, headlights, and body lines. This isn’t just an aesthetic choice; it’s a functional one. Good edge flow ensures that when a subdivision modifier is applied, the surfaces smooth out beautifully without creating artifacts or distorting the original design intent. Specifically, around sharp edges, such as door seams or hood lines, you need to introduce “holding” or “support” edge loops very close to the primary edge. These loops prevent the subdivision surface from excessively rounding off the crisp details.
Using predominantly **quad polygons** is a fundamental best practice. While modern renderers and game engines can handle triangulated meshes, modeling in quads facilitates cleaner subdivision, easier selection, and more predictable deformation. Avoid N-gons (polygons with more than four vertices) as much as possible, as they can lead to unpredictable shading, triangulation issues, and difficulties in UV unwrapping. For high-quality, render-ready automotive models, like those found on platforms such as 88cars3d.com, you can expect meticulously crafted quad-based topology, often with a polycount in the hundreds of thousands or even millions of polygons after subdivision, ensuring every curve and detail is rendered with utmost precision.
The ideal polygon count for a 3D car model is not a fixed number; it’s entirely dependent on its intended application. A model destined for an ultra-high-fidelity cinematic render will have vastly different technical requirements than one optimized for a mobile game or an AR experience. For **photorealistic rendering and visualization**, where processing power is less constrained, high polycounts are desirable. A typical render-ready car model, after subdivision, might easily exceed 500,000 polygons and could go upwards of 2-5 million triangles for intricate details like interior components, engine bays, and chassis elements. This allows for incredibly smooth surfaces and the capture of minute design features.
Conversely, for **real-time applications** such as video games or interactive AR/VR experiences, performance is paramount. Here, aggressive optimization is key, and polycounts must be significantly lower to maintain high frame rates. A car model for a console game might target 50,000-150,000 triangles for a hero vehicle, while a mobile game or AR application might demand models in the 10,000-30,000 triangle range, often achieved through extensive use of Level of Detail (LOD) systems. Even for low-poly models, clean topology remains crucial, as it affects how normal maps and other texture details are applied, making the low-poly model appear much more detailed than its geometry suggests. Striking this balance between visual quality and performance is a cornerstone of professional 3D asset creation.
Once the geometric form of the car is perfected, the next critical step is to give it a realistic surface – its “skin.” This involves two closely related processes: UV mapping and texture creation. UV mapping is the process of flattening out the 3D surface of your model into a 2D space, much like unfolding a cardboard box. This 2D representation, known as a UV map or UV layout, is where your textures will be painted or projected. Without a well-executed UV map, even the most stunning textures will appear distorted, stretched, or misaligned on your model. Following UV mapping, the focus shifts to creating high-quality, physically based rendering (PBR) materials, which accurately simulate how light interacts with different real-world surfaces, from glossy paint to matte plastic and reflective chrome.
The complexity of a car’s surface – with its multiple panels, varying material types, and intricate details – demands a highly organized and strategic approach to UV mapping. Seamless transitions between different material zones, efficient use of texture space, and avoidance of seams in visually prominent areas are all crucial considerations. Furthermore, the advent of PBR workflows has revolutionized texturing, requiring a deep understanding of how various texture maps (Albedo, Normal, Roughness, Metallic, Ambient Occlusion, etc.) combine to define a material’s properties and interaction with light.
Creating efficient UV layouts for a car model is an art form in itself. The primary goal is to minimize distortion and stretching while maximizing texel density – the number of pixels per unit of surface area – across all surfaces. This ensures consistent texture resolution and prevents pixelation on larger panels. A common strategy for complex objects like cars is to break the model down into logical parts (e.g., hood, doors, fenders, roof, wheels, interior elements) and unwrap each independently. This allows for individual control and better organization within the UV space.
For professional-grade automotive models, using **UDIM workflows** is increasingly common. UDIMs (U-Dimension) allow artists to use multiple UV tiles (separate 0-1 UV spaces) within a single material, effectively overcoming the resolution limitations of a single texture map. This is particularly beneficial for large models like cars, where a single 4K or 8K texture might not provide sufficient detail across the entire vehicle. With UDIMs, different parts of the car can have their own 4K or 8K textures, enabling incredibly high fidelity across the entire surface. Tools like 3ds Max, Blender, Maya, and Substance Painter all support UDIM workflows. When creating seams, aim to place them in less visible areas, such as along panel gaps, under trim pieces, or in creases, to minimize their visual impact. A well-organized UV layout also simplifies the texturing process, making it easier to paint and apply materials accurately.
Physically Based Rendering (PBR) has become the gold standard for creating realistic materials in 3D. PBR shaders simulate the physical properties of real-world materials, ensuring that surfaces react correctly to light regardless of the lighting environment. This workflow typically involves several key texture maps:
* Albedo/Base Color: Defines the base color of the surface without any lighting information.
* Normal Map: Adds surface detail and bumps without increasing polygon count, faking intricate geometry.
* Roughness Map: Controls the microscopic surface irregularities, determining how shiny or matte a material appears. A low roughness value means a smooth, reflective surface, while a high value indicates a rough, diffuse surface.
* Metallic Map: Differentiates between metallic (1.0 white) and non-metallic (0.0 black) surfaces, guiding the renderer on how light should be absorbed or reflected.
* Ambient Occlusion (AO) Map: Simulates soft shadows where surfaces are close together, adding depth and realism.
For a car, the shader network can become quite complex, especially for the multi-layered car paint. A typical car paint shader in renderers like Corona, V-Ray, or Cycles might involve multiple clear coat layers, a metallic flake layer, and a base color, all with their own roughness and normal properties. Achieving the perfect balance for these maps and layers is crucial for capturing the distinct look of a vehicle’s finish, from its deep reflections to its subtle metallic glint. When sourcing 3D car models from marketplaces like 88cars3d.com, look for assets that come with well-structured PBR materials and high-resolution texture maps (typically 4K-8K) to ensure they are ready for professional rendering and look fantastic right out of the box.
Once the 3D car model is perfected with clean topology, detailed UVs, and stunning PBR materials, the final frontier for achieving photorealism is the rendering process. This stage involves setting up virtual lights, cameras, and environments within your 3D software to capture the scene, transforming your raw 3D data into a high-quality 2D image or animation. Automotive rendering is particularly demanding because cars, with their highly reflective surfaces and intricate curves, act like giant mirrors, reflecting their surroundings and revealing every nuance of the lighting setup. Achieving a professional automotive render requires a meticulous understanding of light principles, camera optics, and the specific capabilities of your chosen render engine.
The goal is not just to illuminate the car, but to tell a story, highlight design features, and evoke a specific mood or atmosphere. This often involves a combination of studio lighting techniques for clean, precise product shots and environmental lighting for more dynamic, real-world scenarios. Leveraging advanced renderers like Corona Renderer, V-Ray, Cycles, or Arnold, artists can simulate complex light interactions, global illumination, and sophisticated material properties to produce images indistinguishable from photographs.
Effective lighting is the single most critical factor in a compelling automotive render. For **studio renders**, the focus is on showcasing the vehicle’s form, lines, and surface quality in a controlled environment. Common techniques include:
* Three-Point Lighting: A classic setup using a key light (main illumination), fill light (softens shadows), and back light (separates subject from background).
* Large Softboxes/Area Lights: Simulating professional studio equipment, large area lights create broad, even reflections that accentuate the car’s curves without harsh hotspots.
* HDRI (High Dynamic Range Image) Lighting: A spherical image that captures an entire lighting environment (e.g., a studio interior, a sunny day, an overcast sky) and uses it to illuminate the scene and provide realistic reflections. HDRIs are indispensable for automotive rendering as they effortlessly provide complex, realistic lighting and reflections.
For **environment renders**, the goal is to integrate the car seamlessly into a real-world setting. This often involves:
* Matching Lighting: Ensuring the 3D car’s lighting intensity, color temperature, and direction match the photographic backplate or 3D environment.
* Shadow Catchers: Invisible planes in your scene that catch the car’s shadows, helping to ground it within the environment.
* Reflections: Utilizing HDRI environments that complement the background image, providing accurate and dynamic reflections on the car’s body. Often, a combination of a backdrop image, an HDRI for reflections/lighting, and specific area lights for highlights is used.
Each modern render engine offers powerful tools and unique strengths for automotive rendering:
* Corona Renderer (3ds Max, Cinema 4D): Renowned for its ease of use, speed, and photorealistic results with minimal setup. Corona’s physically accurate light solver and intuitive material system make it a favorite for architectural visualization and automotive rendering. Its light mix feature allows for real-time adjustments of individual lights post-render, offering incredible flexibility.
* V-Ray (3ds Max, Maya, SketchUp, Rhino, Cinema 4D): A long-standing industry standard, V-Ray is incredibly powerful and versatile, offering a vast array of features for ultimate control. It’s capable of complex global illumination and sophisticated material layering, making it suitable for high-end production pipelines. While it has a steeper learning curve than Corona, its extensive options allow for precise fine-tuning.
* Cycles (Blender): Blender’s integrated path tracer, Cycles, delivers impressive photorealistic results and is constantly evolving. It leverages CPU and GPU rendering, supporting PBR materials, subsurface scattering, and volumetric effects. Its deep integration within Blender makes it a powerful choice for artists using the open-source suite.
* Arnold (Maya, 3ds Max, Cinema 4D, Houdini): Primarily a CPU-based path tracer (though GPU rendering is available), Arnold is celebrated for its robust handling of complex scenes, production-quality results, and excellent integration with Maya. It’s often favored in film and VFX industries for its reliability and quality, making it an excellent choice for detailed automotive animations.
Regardless of the engine, mastering render settings – such as sampling rates, denoisers, and output formats – is key to achieving clean, noise-free images efficiently. Understanding how to utilize render passes (e.g., separate passes for diffuse, reflections, refractions, Z-depth) allows for greater control during the post-processing stage.
While photorealistic renders are crucial for marketing and visualization, a significant portion of the demand for 3D car models comes from the real-time sector: video games, interactive simulations, and immersive experiences. In these environments, the priority shifts from sheer polygon count to performance optimization. A game-ready 3D car model must strike a delicate balance between visual fidelity and the ability to render smoothly at high frame rates. This requires a different set of technical considerations and workflows compared to offline rendering. The goal is to maximize the perceived detail while minimizing the computational cost.
Game engines like Unity and Unreal Engine are incredibly powerful, but they have their limitations, especially when multiple complex objects, lighting, and physics simulations are involved. An unoptimized high-poly model can quickly bring a game to its knees, leading to stuttering frame rates and a poor user experience. Therefore, a professional game asset pipeline involves extensive preparation, including polygon reduction, intelligent texture management, and the implementation of systems that dynamically adjust the model’s complexity based on its distance from the camera.
**Level of Detail (LOD)** systems are indispensable for optimizing 3D car models in real-time environments. An LOD system involves creating multiple versions of the same model, each with a progressively lower polygon count. When the car is close to the camera, the highest detail (LOD0) model is rendered. As it moves further away, the engine automatically switches to a lower detail version (LOD1, LOD2, etc.). This significantly reduces the total polygon count being processed at any given time without a noticeable drop in visual quality for objects in the distance.
A typical LOD setup for a hero car asset might look like this:
* LOD0: 50,000 – 150,000 triangles (for close-up shots)
* LOD1: 15,000 – 40,000 triangles (mid-distance)
* LOD2: 5,000 – 10,000 triangles (far distance)
* LOD3: 1,000 – 3,000 triangles (very far, often just a silhouette)
Tools like PolyCruncher for 3ds Max or the Decimate modifier in Blender can assist in generating these lower LODs, though manual optimization is often required to maintain shape and silhouette integrity.
Another critical optimization is **draw call management**. A draw call is a command sent from the CPU to the GPU to render a set of triangles. Each material on a model typically generates at least one draw call. If a car model has 20 different materials (e.g., paint, glass, chrome, plastic, rubber, various interior parts), that’s 20 draw calls for a single car. In a scene with many cars, this quickly adds up and can bottleneck performance. Reducing draw calls is crucial, often achieved through texture atlasing and combining materials.
To mitigate high draw calls, two powerful techniques are employed: **Texture Atlasing** and **Material Instancing**.
* Texture Atlasing: This involves combining multiple smaller textures (e.g., for different interior parts, logos, or smaller trim pieces) into a single, larger texture map, known as a texture atlas. By placing all the UVs for these parts onto this single atlas, the model only needs one material to render these disparate elements, drastically reducing draw calls. For example, instead of separate materials for dashboard buttons, seat fabric, and steering wheel, these can all be mapped to different regions of one texture atlas and use a single material. While this adds complexity to the UV mapping and texturing process, the performance benefits in real-time environments are immense.
* Material Instancing: In game engines like Unity and Unreal Engine, material instances allow you to create variations of a base material (master material) without creating entirely new materials. You can change parameters like color, roughness, or even texture maps on an instance, while the core shader code remains the same. This allows artists to have, for instance, ten different car paint colors all based on one master car paint material, effectively reducing the number of unique shaders the engine needs to process and batching draw calls for similar materials.
When selecting 3D car models for game development from marketplaces like 88cars3d.com, prioritize models that offer clean, low-poly base meshes, well-structured LODs, and optimized PBR texture sets, ideally with atlas support, to ensure smooth integration and peak performance in your projects.
The utility of a high-quality 3D car model extends far beyond traditional rendering and game development. With advancements in technology, these digital assets are becoming increasingly vital for cutting-edge applications such as Augmented Reality (AR), Virtual Reality (VR), and 3D printing. Each of these fields presents unique technical challenges and opportunities, requiring specific preparation and optimization strategies to ensure the 3D models perform optimally and deliver the intended experience. Understanding these specialized workflows allows artists and developers to leverage their automotive 3D assets across a broader spectrum of innovative platforms.
From allowing users to virtually place a new car in their driveway using AR, to experiencing a fully interactive test drive in VR, or even physically holding a miniature prototype created via 3D printing, the versatility of a well-prepared 3D car model is immense. This expansion into new mediums means that professionals must not only master the creation of visually stunning models but also adapt them for diverse technical requirements, including file size, real-time performance, and mesh integrity for fabrication.
AR and VR environments are perhaps the most demanding when it comes to performance, often requiring even stricter optimization than traditional video games. For a smooth, nausea-free experience, a high, consistent frame rate (typically 60-90 frames per second per eye) is absolutely crucial. This means that 3D car models intended for AR/VR must be incredibly lean.
Key optimization strategies include:
* Aggressive LODs: Even more critical than in games, AR/VR models often require very low polycounts for their highest detail LODs, especially on mobile AR platforms where processing power is limited. A car model for mobile AR might need to be below 20,000 triangles.
* Baked Lighting: Instead of relying on real-time dynamic lighting, which is computationally expensive, baking lighting information directly into texture maps (like an Ambient Occlusion map or a combined light map) can significantly reduce GPU load. This means the lighting becomes static, but the performance gains are substantial.
* Simplified Shaders: Complex PBR shaders with multiple layers and intensive calculations can be simplified for AR/VR, focusing on essential maps like Albedo, Normal, and Roughness.
* Occlusion Culling: Hiding objects that are not within the camera’s view frustum or are occluded by other objects.
* Small File Sizes: Particularly for web-based AR (e.g., USDZ for Apple ARKit or GLB for Google ARCore), the total file size of the model and its textures must be kept to a minimum for quick loading times. Models under 5-10MB are often targeted.
Beyond optimization, interactivity is a core component of AR/VR. This might involve setting up animations for opening doors, turning wheels, or changing paint colors dynamically. Proper rigging (skeletal setup) of the car parts is necessary to facilitate these interactions, allowing users to explore the vehicle in ways not possible with static renders.
3D printing a car model presents a completely different set of technical challenges. Unlike rendering or real-time applications where the model remains digital, 3D printing requires a physically solid, “watertight” mesh. Any imperfections in the geometry can lead to printing failures.
Key considerations for 3D printing preparation:
* Watertight Mesh: The model must be a single, solid volume with no holes, inverted normals, or self-intersecting geometry. Every face must have a “inside” and “outside.” This means all surfaces must be manifold.
* Mesh Repair: Tools like Blender’s 3D Print Toolbox, Meshmixer, or Netfabb are invaluable for checking and repairing common mesh issues such as non-manifold edges, open boundaries, and intersecting faces.
* Wall Thickness: Ensure that all parts of the model have a sufficient wall thickness (e.g., at least 1-2mm) to be physically printable. Thin walls can break easily or may not be created by the printer.
* Resolution (Polycount): While not needing millions of polygons, a 3D print model needs sufficient detail to capture smooth curves. Too low poly, and the printed object will show facets; too high, and the file size becomes unmanageable for the printer’s slicer software. A balance is key.
* Boolean Operations: If combining multiple parts (e.g., wheels to the body), use precise Boolean operations to ensure a clean, merged mesh without internal geometry or overlapping faces.
* Scale and Units: Ensure the model is correctly scaled and exported in the desired units (mm, cm, inches) for the 3D printer.
* File Formats: Common file formats for 3D printing include STL (stereolithography), OBJ, and 3MF.
When sourcing models from a professional platform like 88cars3d.com, inquire about their suitability for 3D printing, or be prepared to perform your own mesh integrity checks and repairs. The quality of the base geometry is paramount for a successful physical reproduction.
In the fast-paced world of 3D production, an artist or studio rarely works in isolation with a single software application. Projects often involve multiple software packages for modeling, sculpting, texturing, rendering, and game engine integration. This necessitates a deep understanding of workflow integration and the nuances of various 3D file formats. The ability to seamlessly transfer assets between different applications, while preserving all their intricate data – geometry, UVs, materials, animations – is crucial for efficiency and maintaining quality.
The challenge lies in the fact that not all file formats are created equal, nor do they all support the same data types. Some are excellent for geometry transfer, others for animation, and a select few for web-based or AR/VR applications. Mastering the strengths and limitations of each format, and knowing how to prepare your 3D car models for optimal export and import, is a core competency for any professional. This includes considerations for data fidelity, file size, and compatibility across different pipelines, ensuring your models are truly versatile and production-ready.
Each common 3D file format serves a specific purpose in the industry:
* FBX (Filmbox): Developed by Autodesk, FBX is the de facto industry standard for exchanging 3D data between different software applications (e.g., 3ds Max, Maya, Blender, Unity, Unreal Engine). Its strength lies in its ability to store a wide range of data, including geometry, UVs, PBR materials (often converted or re-linked upon import), animations, rigging, cameras, and lights. It’s highly versatile and generally preferred for asset transfer, especially when animation is involved. When exporting FBX, careful attention must be paid to export settings like embedding media, triangulating geometry, and axis conversion.
* OBJ (Wavefront Object): A simpler and older format, OBJ is excellent for transferring pure geometric data and UVs. It’s widely supported across virtually all 3D software. However, it typically does not carry animation, rigging, or complex material information beyond basic color and texture map links (via an accompanying MTL file). It’s a reliable choice for static models, especially when you need a clean mesh without extra data.
* GLB (Binary glTF): GLB is the binary version of glTF (Graphics Language Transmission Format), designed as an efficient, interoperable, and compact format for 3D scenes and models. It is rapidly becoming the industry standard for web-based 3D, AR/VR, and game assets due to its small file size, PBR material support, and ability to embed all assets (geometry, textures, animations) into a single file. GLB is ideal for lightweight, interactive applications.
* USDZ (Universal Scene Description Zip): Developed by Apple and Pixar, USDZ is specifically optimized for AR experiences on Apple devices (iOS/iPadOS). It’s a compressed, unencrypted package that bundles USD files, textures, and animations into a single file. Like GLB, it’s designed for efficiency and PBR compatibility, making it the go-to format for bringing 3D content into Apple’s ARKit.
Choosing the correct file format depends on the destination and the type of data you need to transfer. A typical workflow might involve modeling in Blender/3ds Max, texturing in Substance Painter, exporting as FBX for Unity/Unreal, or as GLB/USDZ for web AR.
Even the most perfect 3D render can be elevated further through post-processing and compositing. This final stage involves taking the raw rendered image (or sequence of images) and enhancing it using 2D image manipulation software like Adobe Photoshop, Affinity Photo, or GIMP. The goal is to add that extra layer of polish that pushes the render from “good” to “stunning” and helps it blend seamlessly into its intended context.
Key post-processing techniques include:
* Color Correction and Grading: Adjusting hue, saturation, and luminance to achieve the desired mood and aesthetic.
* Exposure and Contrast Adjustment: Fine-tuning the brightness and dynamic range of the image.
* Adding Effects: Applying subtle bloom, glare, lens flares, depth of field (if not rendered directly), and chromatic aberration to mimic real-world camera optics.
* Vignetting: Darkening the edges of the image to draw attention to the center.
* Sharpening: Enhancing edge details to make the image appear crisper.
* Atmospheric Effects: Adding subtle haze, dust, or fog for environmental realism.
* Compositing Render Passes: If multiple render passes were generated (e.g., reflection pass, refraction pass, ambient occlusion pass), these can be precisely layered and adjusted in compositing software to gain granular control over the final look, enabling artists to tweak specific aspects of the lighting and materials without re-rendering the entire scene.
For renders integrated with photographic backplates, compositing is crucial for seamlessly blending the 3D car into the real-world environment. This involves matching lighting, shadows, reflections, and camera perspective, often using masking and adjustment layers to achieve perfect harmony between the rendered and photographic elements. This meticulous attention to detail in post-production is what truly differentiates a professional automotive visualization.
The creation and application of high-fidelity 3D car models represent a pinnacle of technical artistry in the digital realm. From the foundational precision of clean topology and efficient UV mapping to the intricate dance of PBR material creation, advanced rendering, and demanding real-time optimization, every stage requires a blend of technical expertise and creative vision. We’ve explored how immaculate edge flow is crucial for subdivision surfaces, why polygon counts fluctuate drastically across applications, and how PBR materials bring physical accuracy to every surface.
Furthermore, we’ve delved into the specifics of advanced rendering workflows using industry-standard engines, the critical optimizations required for game development and immersive AR/VR experiences, and the unique challenges of preparing models for 3D printing. Understanding file format versatility—from FBX for robust pipeline integration to GLB and USDZ for the web and AR—is no longer a luxury but a necessity for seamless project execution. Finally, the transformative power of post-processing and compositing stands as the ultimate act of polish, turning great renders into truly breathtaking visuals.
Embracing these detailed technical insights is essential for anyone looking to excel in the competitive fields of automotive design, game asset development, or visualization. The demand for high-quality, versatile 3D car models continues to grow, driving innovation and pushing the boundaries of what’s possible. By mastering these principles, you not only elevate your own projects but also contribute to the ever-evolving landscape of digital automotive realism. When seeking premium assets that embody these best practices, consider exploring platforms like 88cars3d.com, where quality and technical excellence are paramount.
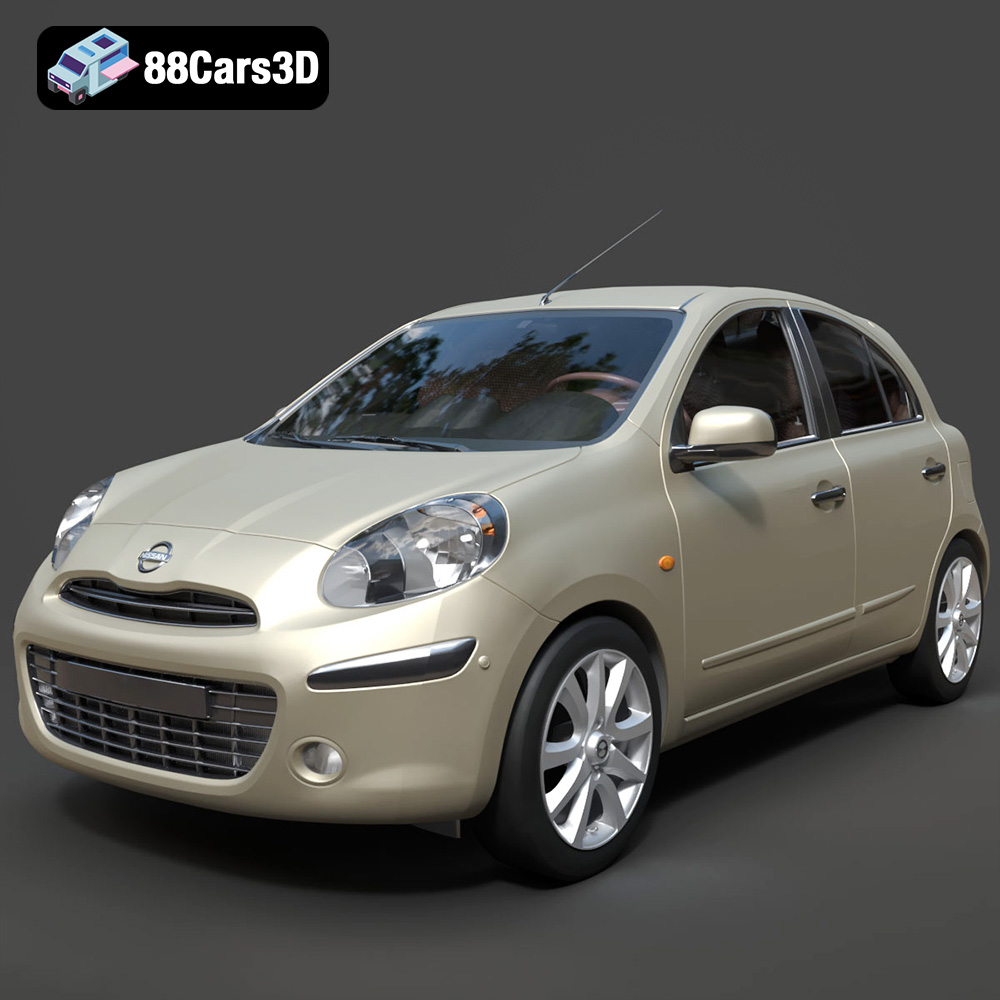
Texture: Yes
Material: Yes
Download the Nissan Micra 2010 3D Model featuring clean geometry, realistic detailing, and a fully modeled interior. Includes .blend, .fbx, .obj, .glb, .stl, .ply, .unreal, and .max formats for rendering, simulation, and game development.
Price: $4.99
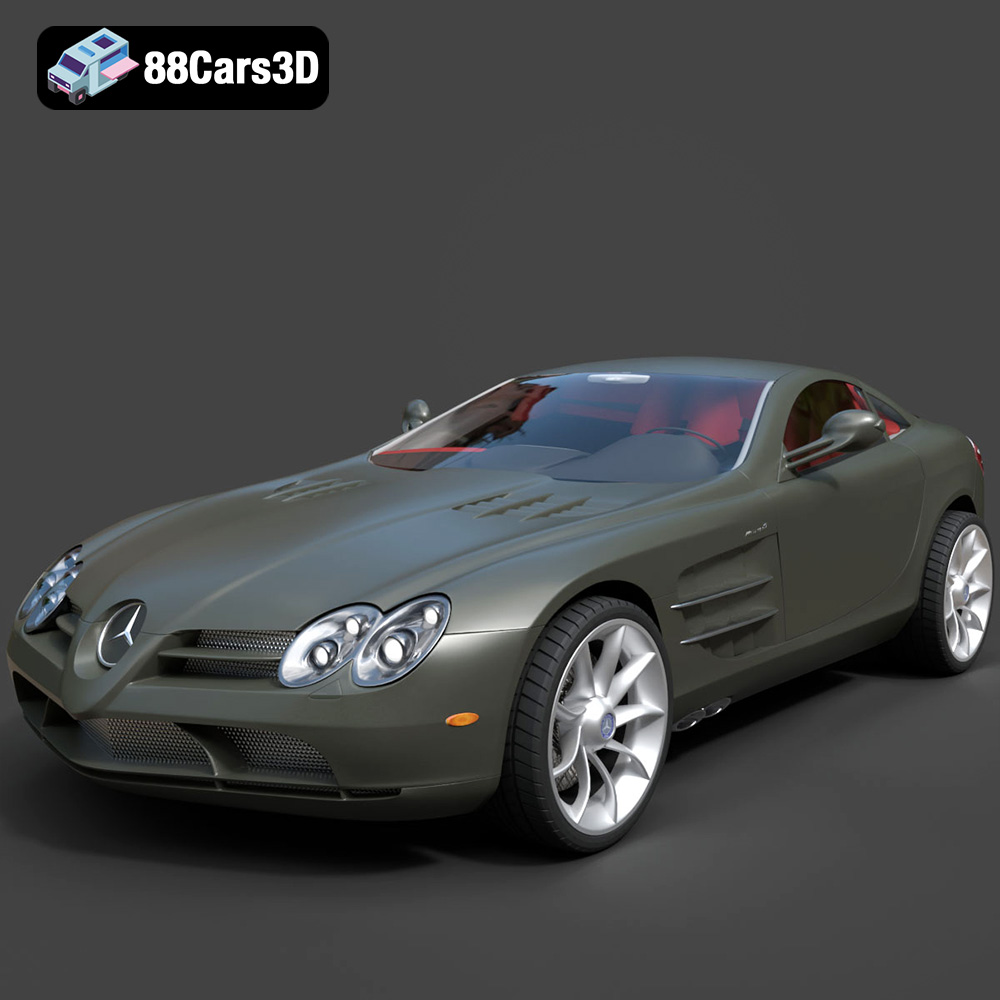
Texture: Yes
Material: Yes
Download the Mercedes-Benz SLR McLaren 3D Model featuring clean geometry, realistic detailing, and a fully modeled interior. Includes .blend, .fbx, .obj, .glb, .stl, .ply, .unreal, and .max formats for rendering, simulation, and game development.
Price: $4.99
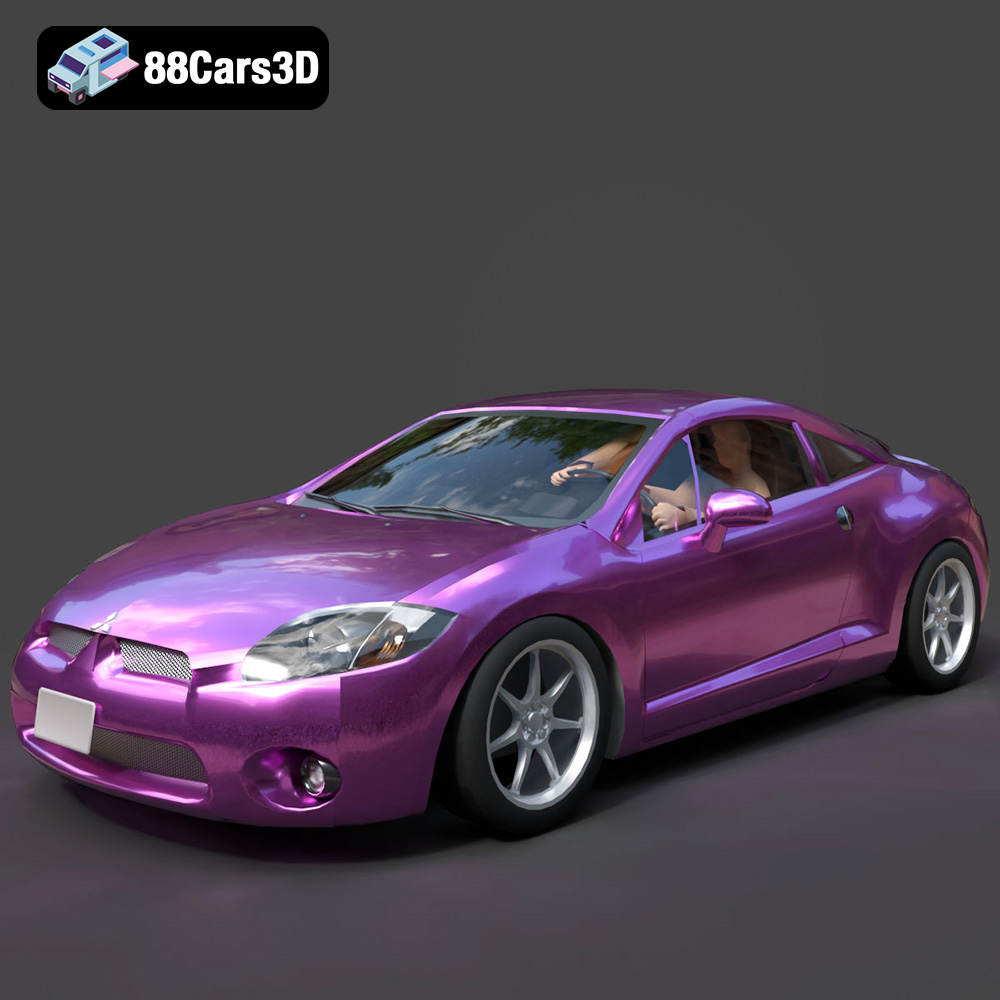
Texture: Yes
Material: Yes
Download the Mitsubishi Eclipse GT 2001 3D Model featuring clean geometry, realistic detailing, and a fully modeled interior. Includes .blend, .fbx, .obj, .glb, .stl, .ply, .unreal, and .max formats for rendering, simulation, and game development.
Price: $4.99
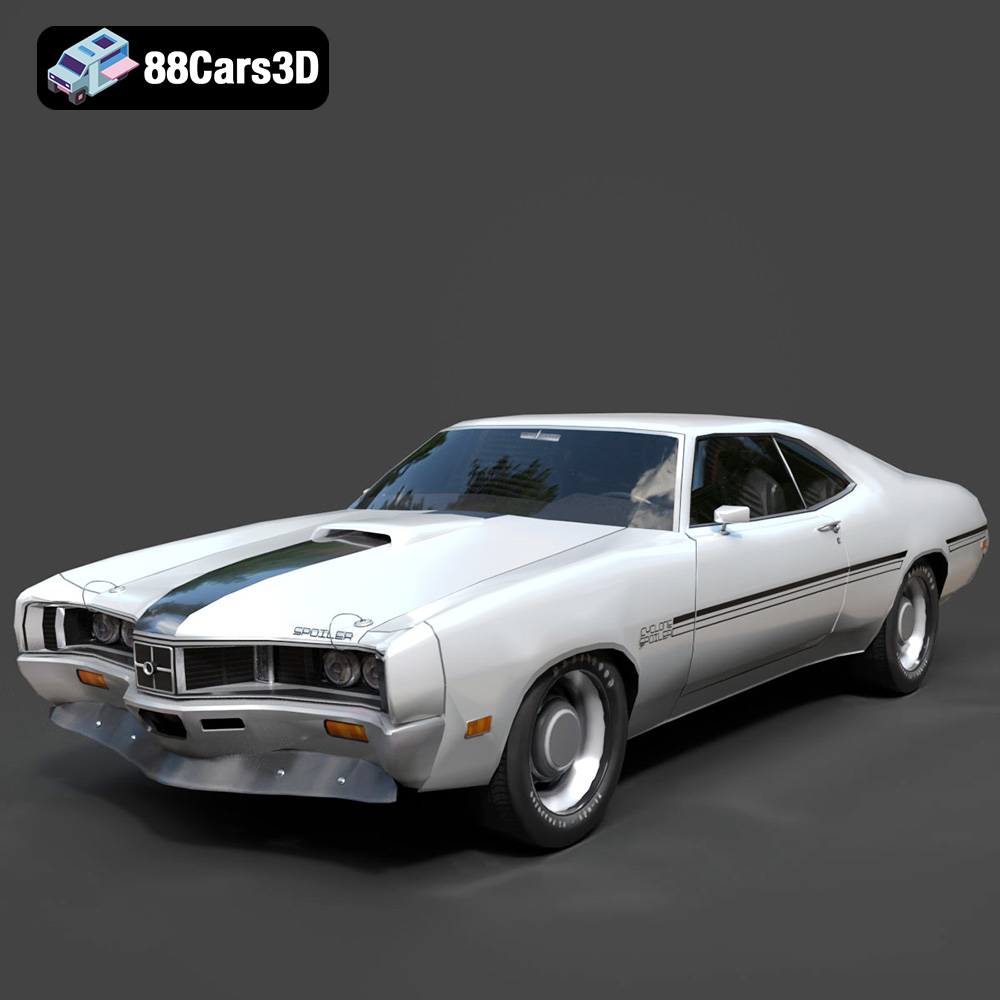
Texture: Yes
Material: Yes
Download the Mercury Cyclone Spoiler 1970 3D Model featuring clean geometry, realistic detailing, and a fully modeled interior. Includes .blend, .fbx, .obj, .glb, .stl, .ply, .unreal, and .max formats for rendering, simulation, and game development.
Price: $4.99
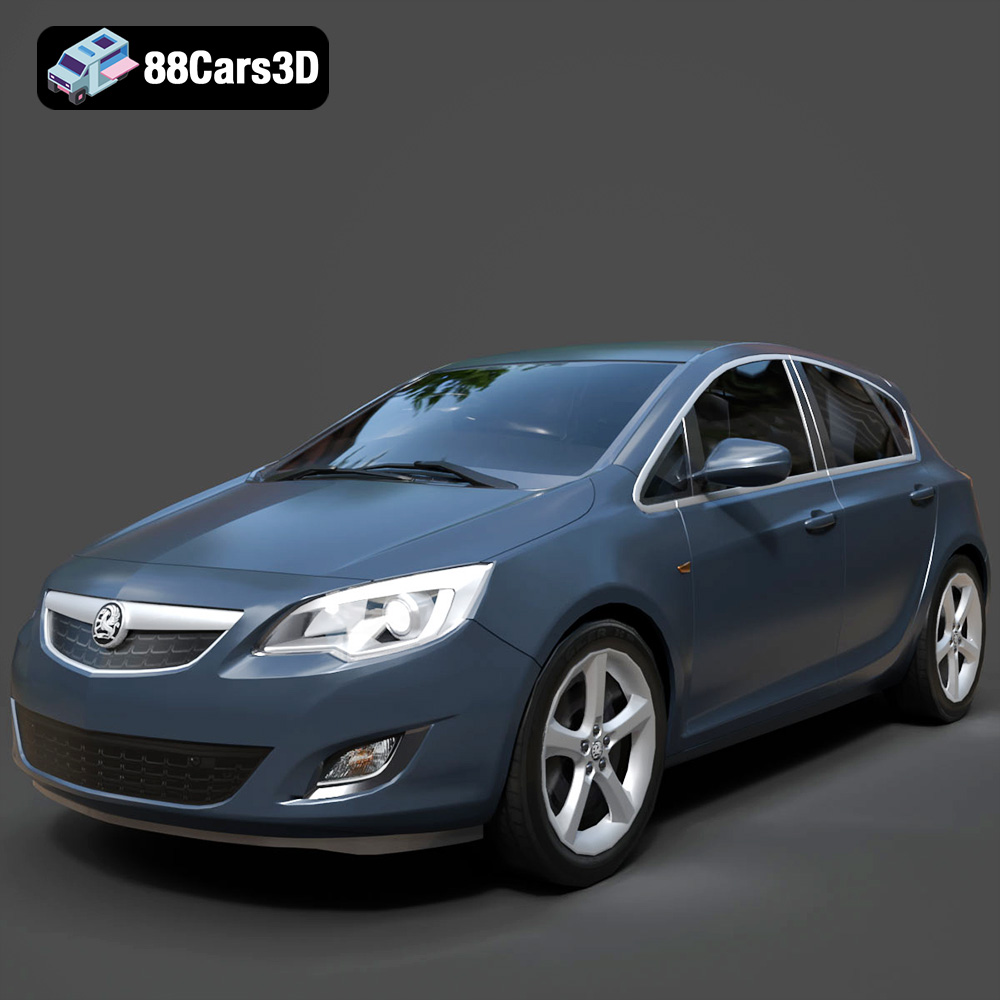
Texture: Yes
Material: Yes
Download the Opel Astra 3D Model featuring clean geometry, realistic detailing, and a fully modeled interior. Includes .blend, .fbx, .obj, .glb, .stl, .ply, .unreal, and .max formats for rendering, simulation, and game development.
Price: $4.99
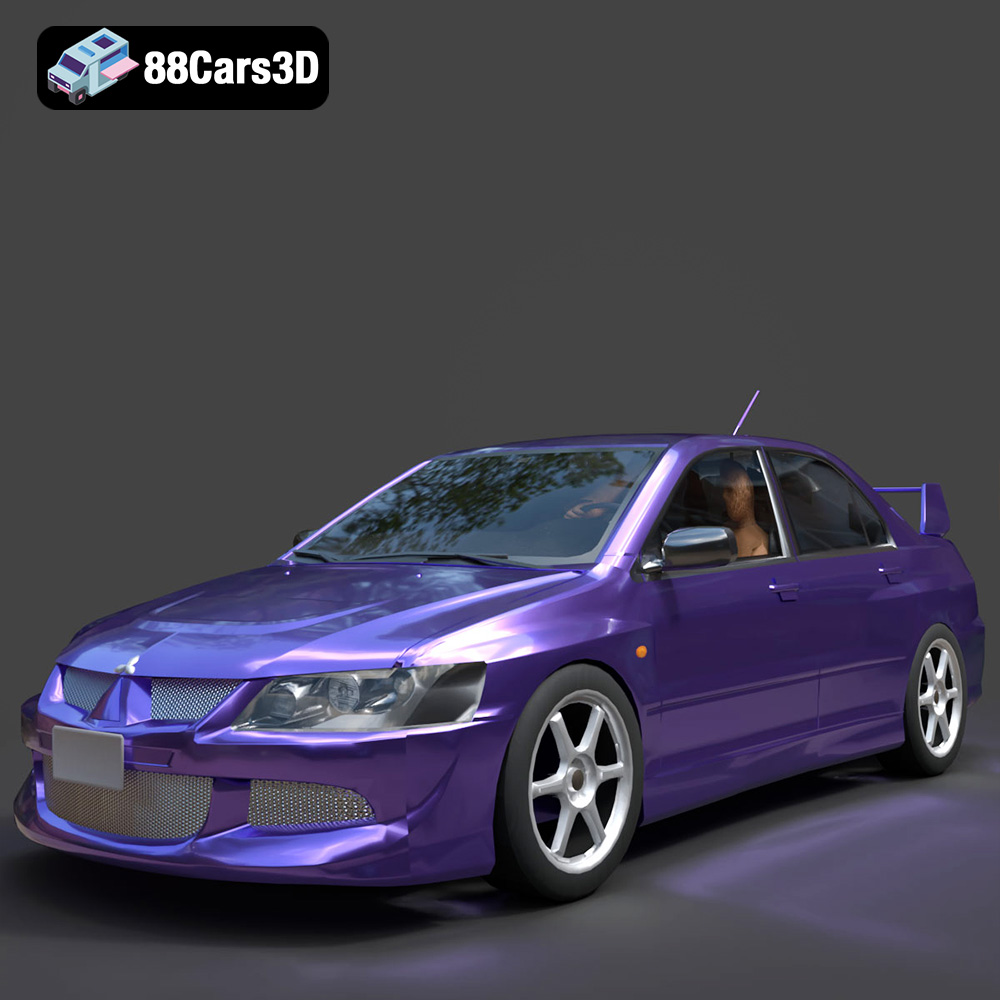
Texture: Yes
Material: Yes
Download the Mitsubishi Lancer Evolution VIII 3D Model featuring clean geometry, realistic detailing, and a fully modeled interior. Includes .blend, .fbx, .obj, .glb, .stl, .ply, .unreal, and .max formats for rendering, simulation, and game development.
Price: $4.99
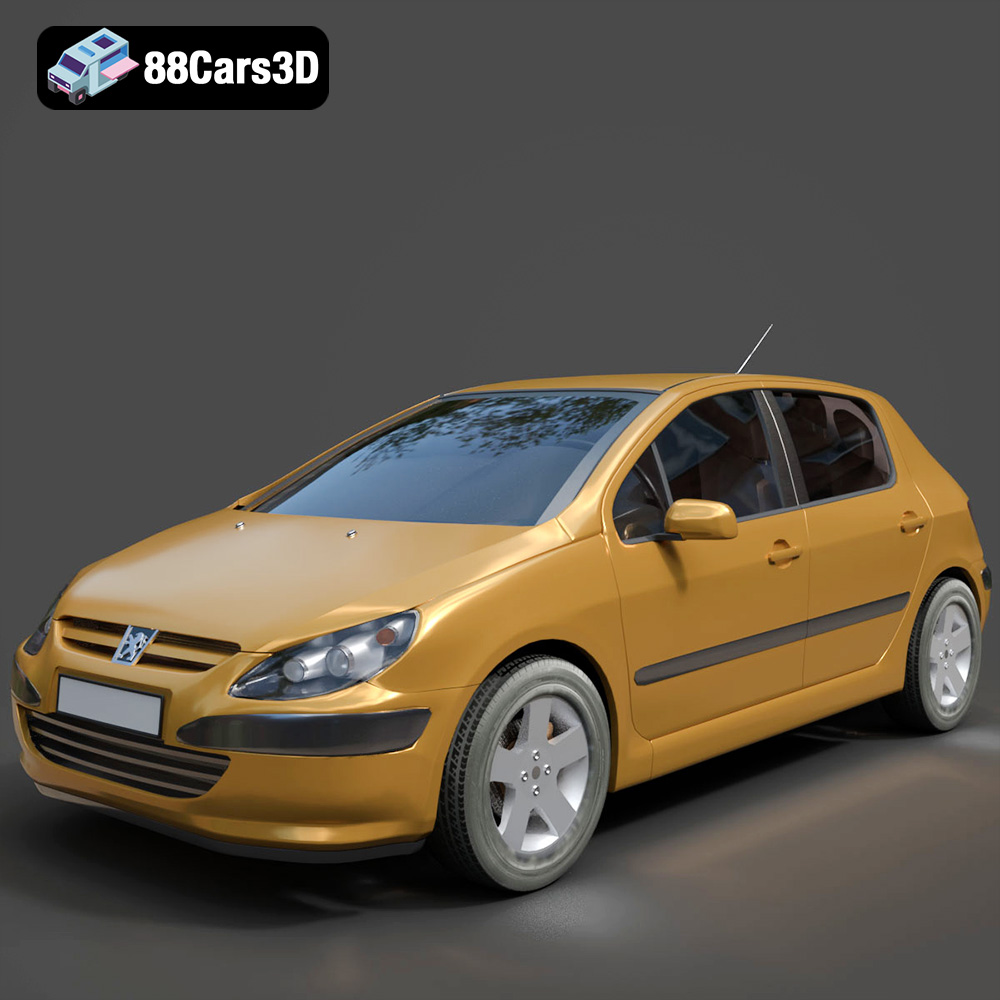
Texture: Yes
Material: Yes
Download the Peugeot 307 3D Model featuring clean geometry, realistic detailing, and a fully modeled interior. Includes .blend, .fbx, .obj, .glb, .stl, .ply, .unreal, and .max formats for rendering, simulation, and game development.
Price: $4.99
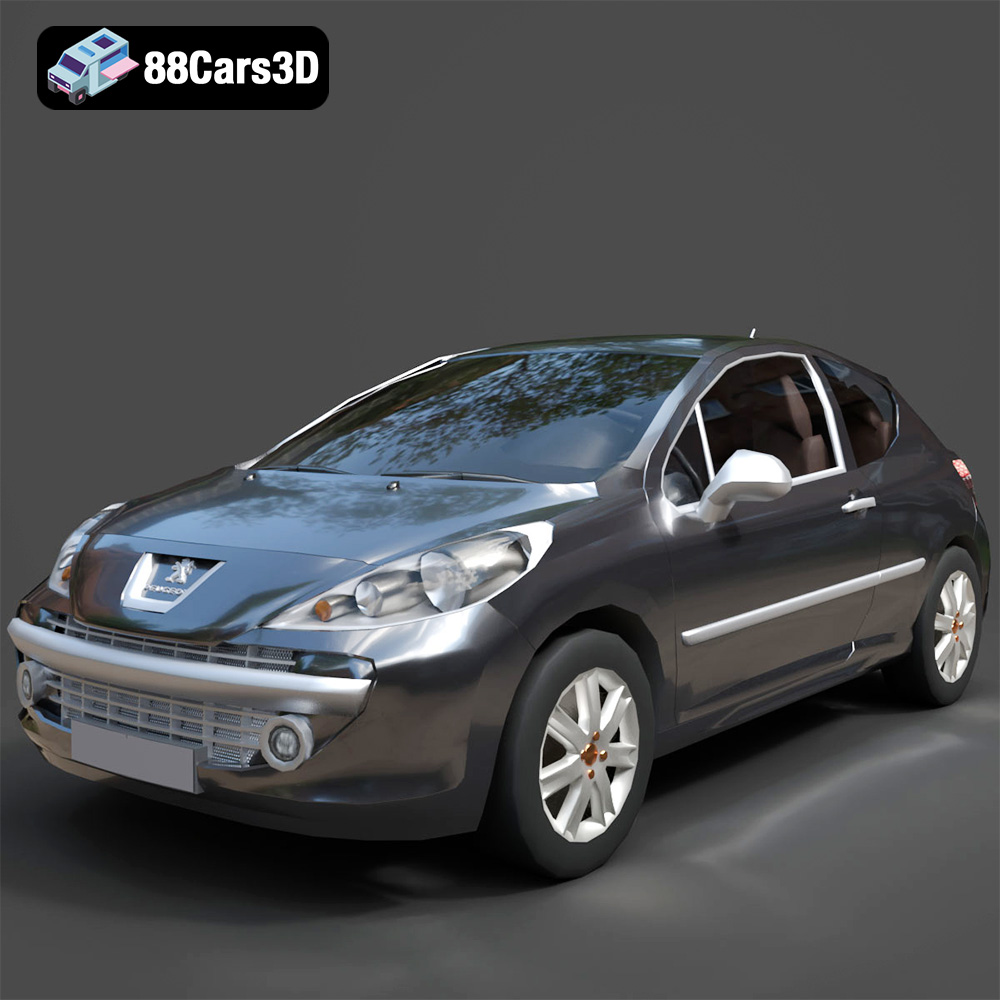
Texture: Yes
Material: Yes
Download the Peugeot 207 3D Model featuring clean geometry, realistic detailing, and a fully modeled interior. Includes .blend, .fbx, .obj, .glb, .stl, .ply, .unreal, and .max formats for rendering, simulation, and game development.
Price: $4.99
Texture: Yes
Material: Yes
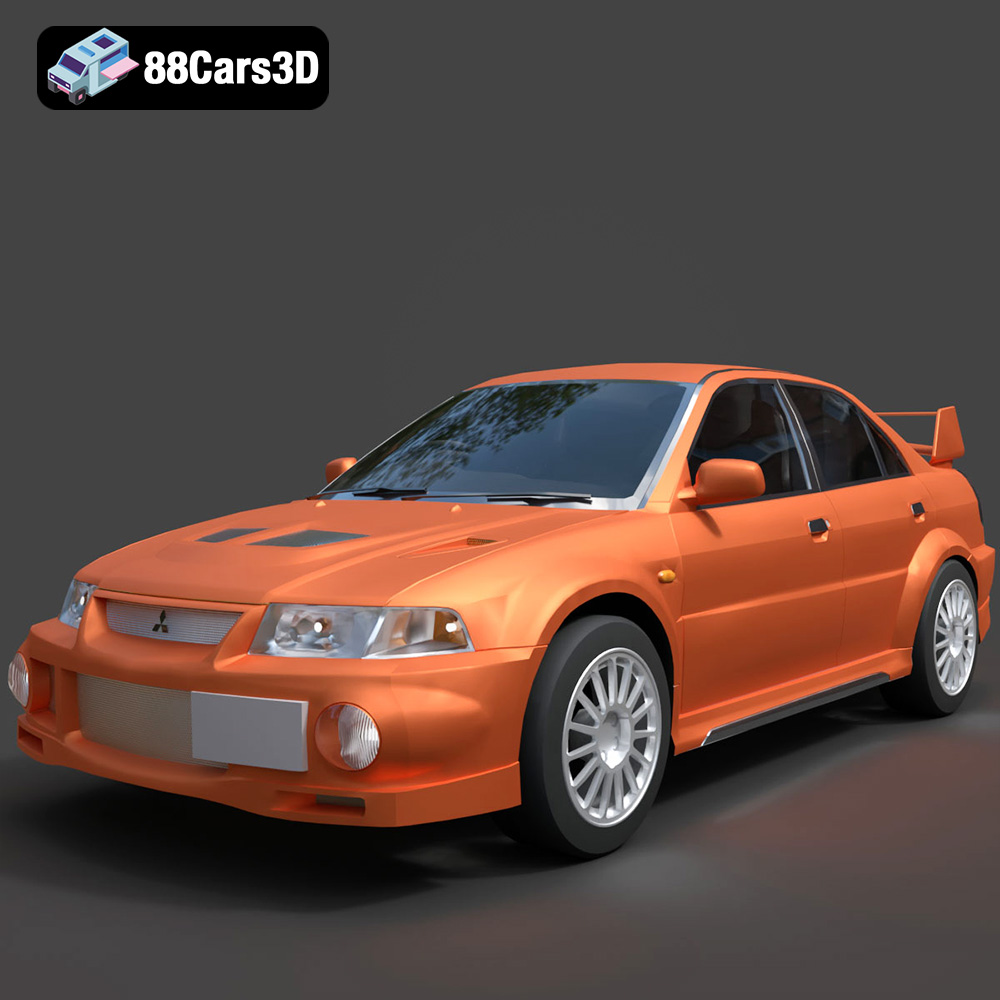
Download the Mitsubishi Lancer Evolution VI 3D Model featuring clean geometry, realistic detailing, and a fully modeled interior. Includes .blend, .fbx, .obj, .glb, .stl, .ply, .unreal, and .max formats for rendering, simulation, and game development.
Price: $4.99
Texture: Yes
Material: Yes
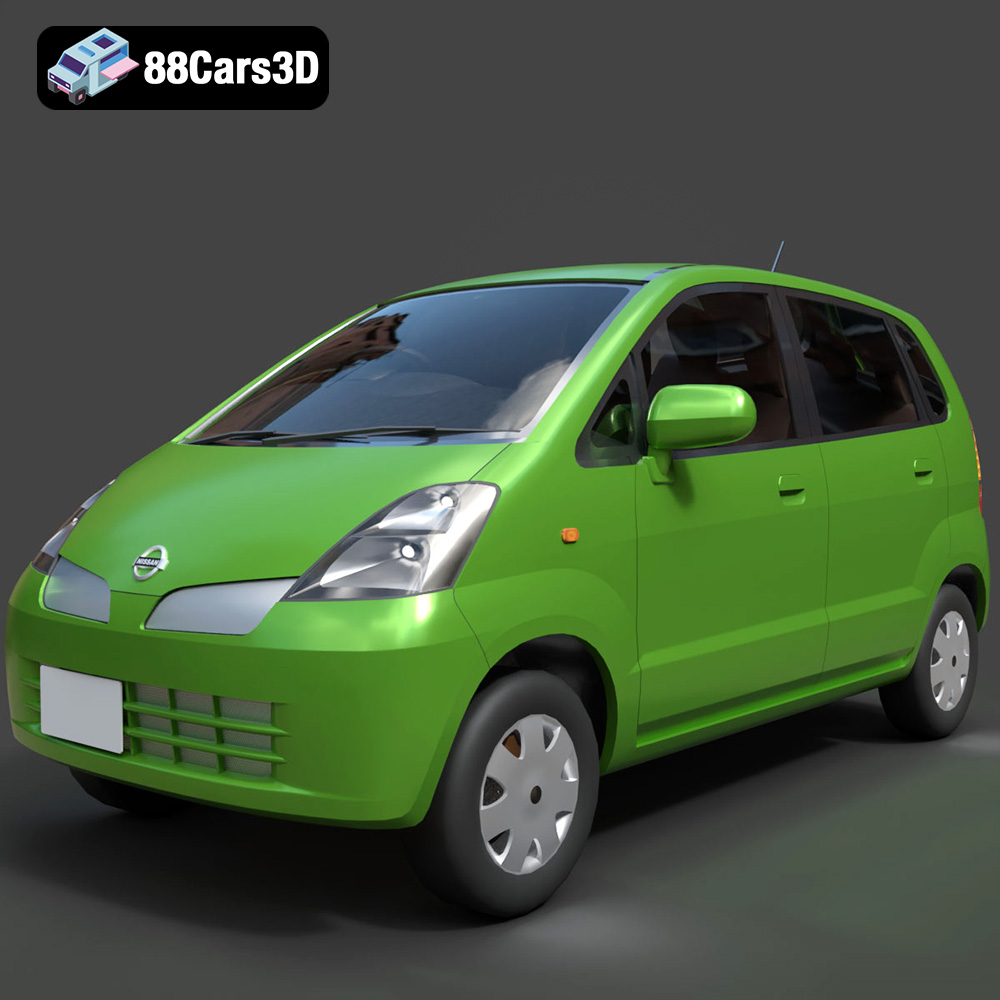
Download the Nissan Moco 007 3D Model featuring clean geometry, realistic detailing, and a fully modeled interior. Includes .blend, .fbx, .obj, .glb, .stl, .ply, .unreal, and .max formats for rendering, simulation, and game development.
Price: $4.99