⚡ FLASH SALE: Get 60% OFF All Premium 3D & STL Models! ⚡
In the vast landscape of 3D visualization and real-time graphics, 3D car models stand as some of the most intricate and demanding assets to create and optimize. From blockbuster video games and cinematic automotive advertisements to cutting-edge AR/VR experiences and precise industrial design visualizations, high-quality vehicle assets are indispensable. Their complexity, stemming from their sleek surfaces, intricate mechanical components, and reflective materials, presents unique challenges and opportunities for 3D artists and developers alike.
This comprehensive guide delves into the technical bedrock of creating, optimizing, and deploying 3D car models across various applications. Whether you’re an aspiring 3D artist, a game developer seeking performance gains, an automotive designer exploring new concepts, or a visualization professional aiming for unparalleled realism, understanding these principles is paramount. We will navigate the critical aspects of topology, UV mapping, PBR materials, advanced rendering workflows, and crucial game engine optimization techniques. Furthermore, we’ll explore the unique requirements for AR/VR, 3D printing, and professional visualization. By the end of this journey, you’ll possess a robust understanding of how to achieve excellence with your automotive rendering and real-time projects, leveraging industry best practices and powerful tools.
The foundation of any exceptional 3D car model lies in its topology – the arrangement of polygons (faces, edges, and vertices) that define its surface. For automotive models, clean, efficient, and purposeful topology is not just good practice; it’s critical for achieving smooth, accurate reflections and efficient deformation. Poor topology can lead to artifacts like pinching, unwanted creasing, or a “lumpy” appearance, especially when using subdivision surfaces or during animation. The goal is to create a mesh that faithfully represents the car’s intricate curves and sharp lines while remaining manageable in terms of polygon count.
Industry standard dictates a primarily quad-based (four-sided polygon) workflow for organic and smooth surfaces. Quads are ideal for subdivision modeling because they distribute additional polygons evenly, leading to predictable and smooth results. Triangles (three-sided polygons) should be avoided in areas that will be heavily deformed or subdivided, though they can be strategically placed in flat, non-deforming regions or on very low-poly models for game optimization. N-gons (polygons with more than four sides) are generally a red flag and should be eliminated entirely from production models, as they can cause unpredictable shading, errors during subdivision, and issues with UV mapping.
When modeling a car, begin with a low-polygon block-out to establish the overall silhouette and proportions. Then, progressively add detail by creating edge loops and extrusions that follow the natural contours and design lines of the vehicle. This includes the major body panels, wheel arches, window frames, and air intakes. Think of the car’s surface as a series of flowing lines that direct light and define form. Each edge should serve a purpose, either to define a sharp crease, control a curve, or support a smooth transition. Tools like 3ds Max’s Graphite Modeling Tools, Blender’s advanced modeling toolset, or Maya’s Quad Draw allow for precise control over polygon placement and flow. A typical high-quality 3D car model designed for rendering might range from 150,000 to 500,000 polygons, depending on the level of detail and whether it’s meant for close-up shots.
Edge flow is particularly critical for car bodies because of their highly reflective surfaces. Incorrect edge flow can break reflections, making the surface appear dented or uneven. Edges should flow along the major axes of curvature, defining the peaks and valleys of panels. For sharp creases, like those found around door seams or panel gaps, introduce two or three closely spaced edge loops to “hold” the sharpness when subdivision modifiers (like Turbosmooth in 3ds Max or Subdivision Surface in Blender/Maya) are applied. These “support loops” prevent the sharp edges from becoming overly rounded. Always scrutinize your model with a reflective material and an HDRI environment to identify and correct any imperfections in the surface. This technique allows for a relatively low-poly base mesh to be subdivided into a high-resolution, perfectly smooth surface suitable for stunning automotive rendering. A meticulous approach to topology ensures that the expensive 3D car models you acquire from marketplaces like 88cars3d.com maintain their pristine quality.
Once your 3D car model’s topology is solid, the next crucial step is UV mapping. UVs are essential for applying 2D textures to a 3D surface, essentially “unwrapping” the 3D model into a flat 2D space. Without proper UVs, textures will stretch, distort, or fail to appear correctly. For automotive models, which feature a wide array of materials like paint, glass, chrome, rubber, and plastics, a well-executed UV layout is paramount for achieving realism and efficiency.
The primary goal of UV mapping for cars is to minimize distortion, maximize texel density (the number of texture pixels per unit of surface area), and prevent overlapping UV islands. Each distinct material should ideally have its own dedicated UV space or be organized logically within a UV atlas. Complex surfaces, such as the curved body panels, require careful unwrapping to avoid stretching, which can distort patterns or normal map details. Hard edges and seams on the model typically serve as natural breaks for UV seams, but strategic placement is key to hiding them effectively in the final render.
For a car body, planar mapping from different views (top, side, front, back) followed by a “relax” operation can be effective in software like 3ds Max or Maya. Blender’s Smart UV Project or Seam-based unwrapping offers similar control. The key is to define seams along logical breaks, such as where one panel meets another, or along sharp creases that would naturally conceal a seam. For intricate parts like wheels, brake calipers, or engine components, cylindrical or box mapping might be a more appropriate starting point. Always visually check your UVs using a checkerboard pattern texture. If the squares appear stretched or compressed in any area, it indicates distortion that needs to be corrected. Maintaining consistent texel density across all major parts ensures that textures appear equally sharp, whether it’s a door panel or a small emblem. For high-resolution renders, texture resolutions of 4K or even 8K are common for large body panels, while smaller details might use 2K or 1K.
To optimize for diverse applications, especially game assets, it’s common to organize multiple smaller parts into a single UV atlas. This involves arranging various UV islands (e.g., dashboard, seats, steering wheel) onto one large texture sheet. This approach reduces the number of materials and draw calls in game engines, significantly improving performance. When creating an atlas, ensure there’s adequate padding (empty pixel space) between UV islands to prevent texture bleeding, which can occur during mipmapping or compression. For parts that are mirrored (like tires or side mirrors), it’s efficient to only UV map one side and mirror the geometry and UVs, allowing both instances to share the same texture space, further optimizing texture memory. This meticulous approach to UV mapping ensures that the beauty of your 3D car models translates perfectly into stunning visualizations and smooth real-time experiences, whether you’re creating the UVs yourself or utilizing meticulously prepared assets from sources like 88cars3d.com.
Photorealistic rendering of cars hinges almost entirely on the quality of their materials. Physically Based Rendering (PBR) has become the industry standard for creating materials that react to light in a physically accurate way, resulting in incredibly convincing and consistent results across different lighting environments. Understanding PBR principles and how to construct robust shader networks is critical for achieving professional-grade automotive rendering.
PBR workflows revolve around the concept of energy conservation and the interaction of light with surfaces. The two most common PBR workflows are Metallic-Roughness and Specular-Glossiness. While both aim for physical accuracy, they define surface properties differently. Metallic-Roughness is often favored in game engines and increasingly in offline renderers due to its intuitive nature, using maps for Base Color (Albedo), Metallic, Roughness, and Normal. Specular-Glossiness uses Diffuse, Specular, and Glossiness maps.
In the Metallic-Roughness workflow, the Metallic map defines whether a surface is a metal (white value) or a dielectric/non-metal (black value). The Roughness map controls the micro-surface detail, influencing how light scatters – a low roughness value means a smooth, shiny surface (like polished chrome), while a high value results in a dull, diffuse surface (like matte plastic). The Base Color provides the color for dielectric materials and the reflective color for metallic materials. For car paint, a complex material, the Base Color is crucial. For materials like glass, a specific PBR shader with accurate Index of Refraction (IOR) values is required. For rubber tires, a low metallic value with varying roughness and a detailed normal map depicting tread patterns will achieve realism. Texture resolutions here are also vital; 4K or 8K textures for primary PBR maps ensure fine details are visible in close-up renders. Tools like Substance Painter and Mari are indispensable for creating these high-quality PBR textures, allowing artists to paint directly onto the 3D model.
Car paint is a multi-layered material, typically consisting of a base coat (color), a metallic flake layer, and a clear coat (a highly reflective, transparent layer). Replicating this in a PBR shader often involves blending multiple layers or using specific car paint shaders available in renderers like Corona Renderer, V-Ray, Cycles, or Arnold. The clear coat material is particularly important, requiring accurate IOR values (around 1.5) and a slight amount of roughness to simulate microscopic imperfections. The metallic flake effect can be achieved using a noise texture or a dedicated flake map, often controlled by parameters like flake size, density, and color. For other materials, a detailed understanding of their real-world properties is key. Chrome requires a full metallic value with very low roughness. Glass needs transparency, refraction, and reflection, with a correct IOR (approx. 1.5-1.8 for standard glass). Rubber and plastics benefit from subtle normal map details, slight roughness variations, and often a subtle subsurface scattering effect for softer plastics. Investing time in developing a robust library of PBR materials is crucial for any artist regularly working with 3D car models.
Once your 3D car model is meticulously crafted with perfect topology, UVs, and PBR materials, the next step is to bring it to life through high-fidelity rendering. This process involves setting up the scene, lighting, cameras, and choosing the right renderer to produce stunning visual output. The goal is to create images that are indistinguishable from real-world photography, showcasing every detail of the vehicle with breathtaking realism.
Each renderer – be it Corona Renderer, V-Ray, Cycles, or Arnold – has its own strengths and nuances, but the core principles of scene setup remain consistent. A successful rendering workflow begins with establishing an appropriate environment. For cars, this often means using High Dynamic Range Images (HDRIs) for realistic global illumination and reflections. HDRIs provide both illumination and a background, making them incredibly efficient for achieving natural lighting scenarios. Beyond HDRIs, supplementary lighting (area lights, spot lights) can be used to emphasize specific details, highlight contours, or create dramatic effects.
Lighting is the soul of any render. For automotive models, soft, diffuse lighting often works best to showcase the car’s curves and reflections without harsh shadows. A three-point lighting setup (key, fill, back light) is a classic starting point, complemented by HDRIs. Experiment with different HDRI environments – studios, outdoor scenes, urban landscapes – to see how they interact with the car’s reflective surfaces. Pay attention to how highlights (specular reflections) travel across the car body; they are crucial for defining form. Cameras should mimic real-world photography. Use realistic focal lengths (e.g., 50mm to 100mm for most shots, wider for dynamic angles). Implement depth of field to draw attention to specific areas and create a cinematic feel. Consider camera angles that emphasize the car’s design, power, or elegance. A low camera angle can make a car appear more imposing, while a higher angle might reveal more of its interior or roofline. Motion blur can add dynamism to a car that appears to be in motion.
Professional automotive rendering rarely ends with a single beauty render. Instead, artists render multiple passes (or AOV – Arbitrary Output Variables) that are then composited in software like Adobe Photoshop or Foundry Nuke. Common render passes include:
Compositing these passes provides immense control over the final image, allowing artists to fine-tune reflections, adjust lighting intensity, change material properties, and add effects without re-rendering the entire scene. This iterative process is crucial for achieving the nuanced perfection seen in professional automotive advertisements and product visualizations. Platforms like 88cars3d.com often provide models pre-optimized for various rendering engines, simplifying this process significantly.
While offline rendering aims for photorealism without strict performance constraints, game assets for real-time engines like Unity and Unreal Engine demand aggressive optimization. The goal is to achieve visual fidelity while maintaining high frame rates, which is especially challenging for complex assets like 3D car models. Balancing visual quality with performance is an art form, requiring a deep understanding of engine limitations and optimization techniques.
Key optimization strategies focus on reducing draw calls, polygon count, and texture memory usage. Each of these directly impacts rendering performance. A draw call occurs every time the GPU needs to render an object or a distinct material, so minimizing them is crucial. Polygon counts must be tailored to the target platform (mobile, console, PC) and the object’s importance and proximity to the camera. Texture memory can be a bottleneck, particularly on mobile devices or for large numbers of unique vehicles.
Levels of Detail (LODs) are indispensable for game-ready 3D car models. An LOD system involves creating multiple versions of the same model, each with a progressively lower polygon count. When the car is close to the camera, the highest detail LOD (LOD0) is used. As it moves further away, the engine automatically switches to a lower detail version (LOD1, LOD2, etc.). This significantly reduces the processing load on distant objects without a noticeable drop in visual quality. Typically, an LOD0 might have 80,000-150,000 polygons for a hero vehicle, while LOD1 could be 30,000-50,000, and LOD2 as low as 10,000-20,000. Automated tools like ProOptimizer in 3ds Max, Blender’s Decimate modifier, or Simplygon can generate LODs, but manual cleanup is often required to maintain shape and UV integrity. Beyond LODs, aggressive polygon reduction for internal components (engine, chassis) that are rarely seen can save thousands of polygons. Removing or simplifying back-facing polygons on elements like dashboards (if the camera never goes behind them) is another simple yet effective strategy.
Texture optimization involves several techniques. Texture atlasing, as discussed in UV mapping, consolidates multiple smaller textures into one larger texture sheet, reducing draw calls by allowing many mesh parts to share a single material. Using appropriate compression formats (e.g., DXT for desktop, ETC/PVRTC for mobile) and mipmapping (pre-generated smaller versions of textures for distant objects) further saves memory. Game engines use specialized collision meshes, which are simplified versions of the car’s geometry designed solely for physics calculations. These should be as low-poly as possible, typically using convex hulls or primitive shapes (boxes, capsules) that approximate the car’s form. This prevents complex geometry from bogging down the physics engine. When exporting 3D car models for game engines, use formats like FBX or GLB, ensuring proper scaling, pivot points, and embedded textures. Each engine has specific import settings, so understanding the nuances of Unity or Unreal Engine’s import pipeline is vital for a smooth transition from your DCC (Digital Content Creation) tool to the game world.
The utility of 3D car models extends far beyond traditional rendering. They are pivotal assets in emerging technologies like Augmented Reality (AR) and Virtual Reality (VR), crucial for rapid prototyping through 3D printing, and fundamental to professional architectural and product visualization. Each of these applications imposes unique requirements and optimization considerations that differ significantly from those for offline rendering or even conventional game development.
For AR/VR, real-time performance is paramount, but often with even stricter constraints than traditional games due to the need for high frame rates (e.g., 90 FPS) to prevent motion sickness and maintain immersion. 3D printing, on the other hand, cares less about polygon count and more about watertight meshes and physical dimensions. Visualization, encompassing everything from automotive configurators to complex urban planning, can span the entire spectrum of fidelity and performance demands.
AR/VR applications for 3D car models demand extreme optimization. This means aggressive LODs, simplified PBR materials (often using baked lighting or fewer texture maps), and careful management of draw calls. Complex shader networks suitable for offline rendering must be converted or simplified to run efficiently on mobile AR devices or VR headsets. Transparency, reflections, and advanced lighting effects need to be handled carefully to avoid performance bottlenecks. For instance, real-time reflections can be replaced with baked reflection probes or simplified cube maps. Ambient occlusion might be baked into the diffuse texture. The geometric complexity of the car must be severely reduced, often aiming for poly counts well below those for high-end PC games, especially for mobile AR. Export formats like GLB (for Android and web AR) and USDZ (for Apple ARKit) are standard, as they package geometry, materials, and animations into a single, efficient file. Ensuring models are correctly scaled to real-world units is also vital for believable AR/VR experiences, where virtual objects interact convincingly with the physical environment.
3D printing requires a fundamentally different approach. The mesh must be “watertight” or manifold, meaning it has no holes, non-manifold edges, or inverted normals. Every edge must be shared by exactly two faces, forming a completely enclosed volume. Issues like self-intersecting geometry or zero-thickness walls will lead to printing errors. Software like Blender’s 3D Print Toolbox, Meshmixer, or Netfabb are invaluable for analyzing and repairing meshes. Unlike real-time assets, the specific polygon count is less critical, but excessive polygons can lead to large file sizes and slow slicing times. Scale is also crucial; the model must be prepared in the desired real-world size. Wall thickness is another key consideration: car bodies must have sufficient thickness (e.g., 2mm-5mm depending on material and printer) to be structurally sound once printed. Internal components that won’t be visible can be removed entirely to save material. For complex assemblies, it’s often necessary to separate the car into distinct, interlocking parts, considering how they will be assembled after printing. High-quality 3D car models from marketplaces like 88cars3d.com often come with clean meshes that are easier to adapt for 3D printing by simply ensuring manifold geometry and appropriate scaling.
The journey of a 3D car model doesn’t end with its intrinsic qualities. Its ultimate visual impact is profoundly shaped by the environment it inhabits, the light that illuminates it, and the post-production magic applied to its rendered output. These external factors are as crucial as the model itself in creating compelling automotive rendering and visualization.
A well-lit scene can transform an ordinary model into a masterpiece, emphasizing its design, material properties, and mood. Similarly, a thoughtfully constructed environment provides context and scale, grounding the car in a believable setting. Finally, post-processing techniques, borrowed from photography and film, add that last layer of polish, pushing renders from good to extraordinary.
Lighting a 3D car model is a delicate balance. High Dynamic Range Images (HDRIs) are often the cornerstone, providing realistic ambient light, reflections, and a background. An HDRI of a studio, an overcast sky, or a sunset can instantly set the mood and dictate the quality of reflections on the car’s body. However, HDRIs alone may not be enough. Custom lighting setups, often involving large area lights or softboxes, are frequently employed to add specific highlights, shape contours, or introduce dramatic shadows. For instance, long, narrow area lights positioned above and to the sides of the car can create beautiful, sweeping reflections that emphasize the vehicle’s form. Rim lights from the back can help separate the car from its background, giving it depth. Experiment with different light temperatures and colors to evoke specific emotions – cool blues for a futuristic feel, warm yellows for a luxurious evening shot. The interplay of direct light, bounce light, and indirect illumination is what ultimately defines the realism and photographic quality of your automotive rendering.
Post-processing is where the rendered image truly comes to life. Using software like Adobe Photoshop, Affinity Photo, or Blackmagic DaVinci Resolve, artists can make a myriad of adjustments that elevate the render’s quality. This includes:
These techniques, often applied using render passes for maximum control, allow artists to emulate the look and feel of professional photography. Mastering post-processing is an indispensable skill that can significantly improve the final presentation of any 3D car model, transforming raw renders into captivating visual narratives.
The journey from a basic concept to a fully realized, photorealistic or game-ready 3D car model is a complex yet incredibly rewarding endeavor. We’ve traversed the critical stages, from the foundational importance of clean topology and intelligent UV mapping to the nuanced art of creating physically accurate PBR materials. We’ve explored advanced automotive rendering workflows, delved into the intricacies of game engine optimization, and discussed the specialized demands of applications like AR/VR and 3D printing. Finally, we emphasized the transformative power of strategic lighting, environments, and post-processing in delivering visually stunning results.
Achieving excellence in 3D car models requires a combination of technical mastery, artistic vision, and a commitment to best practices. Whether you’re aiming for cinematic realism, interactive experiences, or functional prototypes, a solid understanding of these principles is your most valuable asset. The investment in high-quality assets pays dividends across all industries, from film and advertising to interactive media and product design. As you embark on your next project, remember the interconnectedness of these stages – a strong foundation in modeling and UVs simplifies texturing, which in turn elevates rendering and optimizes for real-time performance.
For those seeking a head start or requiring top-tier assets, platforms like 88cars3d.com offer a curated selection of professionally crafted 3D car models, complete with clean topology, realistic PBR materials, and optimized UVs, ready for your next big project. By applying the knowledge shared in this guide, you’ll be well-equipped to leverage these assets to their full potential, pushing the boundaries of what’s possible in automotive rendering and visualization. Keep learning, keep experimenting, and continue to drive innovation in the exciting world of 3D.
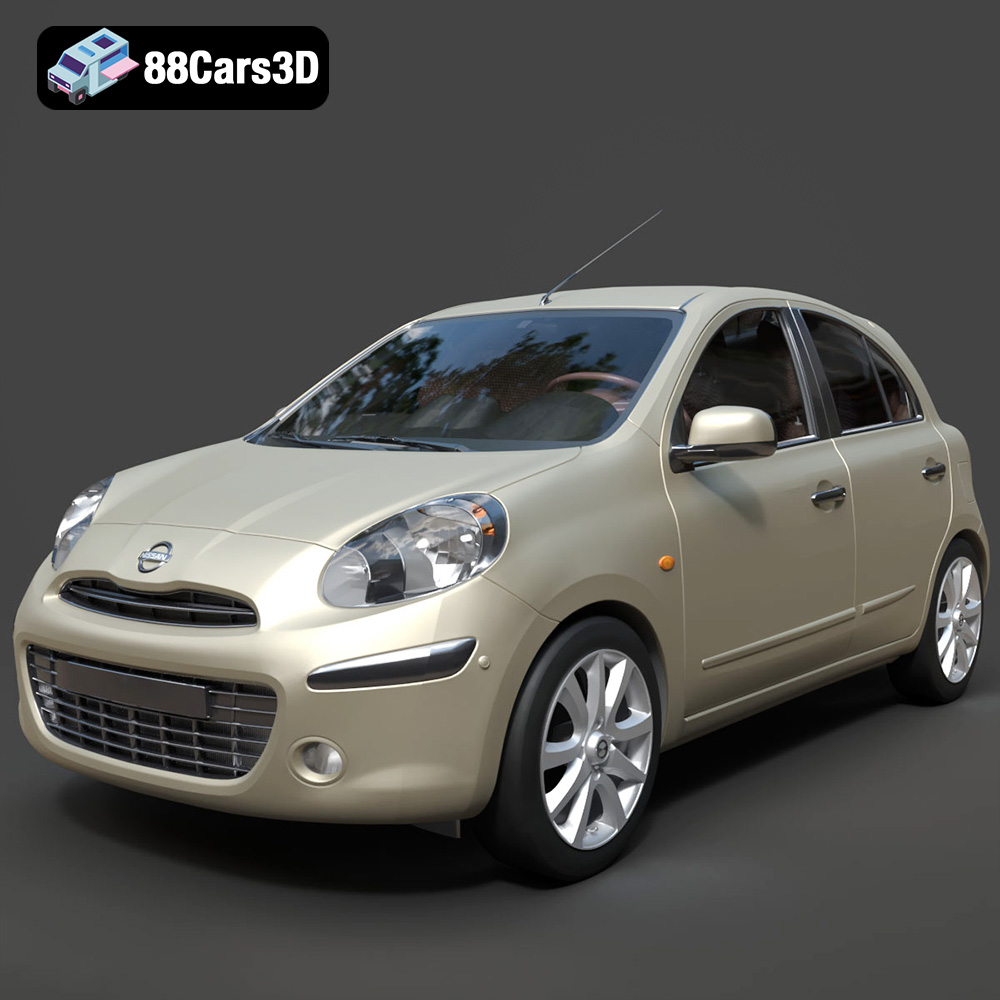
Texture: Yes
Material: Yes
Download the Nissan Micra 2010 3D Model featuring clean geometry, realistic detailing, and a fully modeled interior. Includes .blend, .fbx, .obj, .glb, .stl, .ply, .unreal, and .max formats for rendering, simulation, and game development.
Price: $4.99
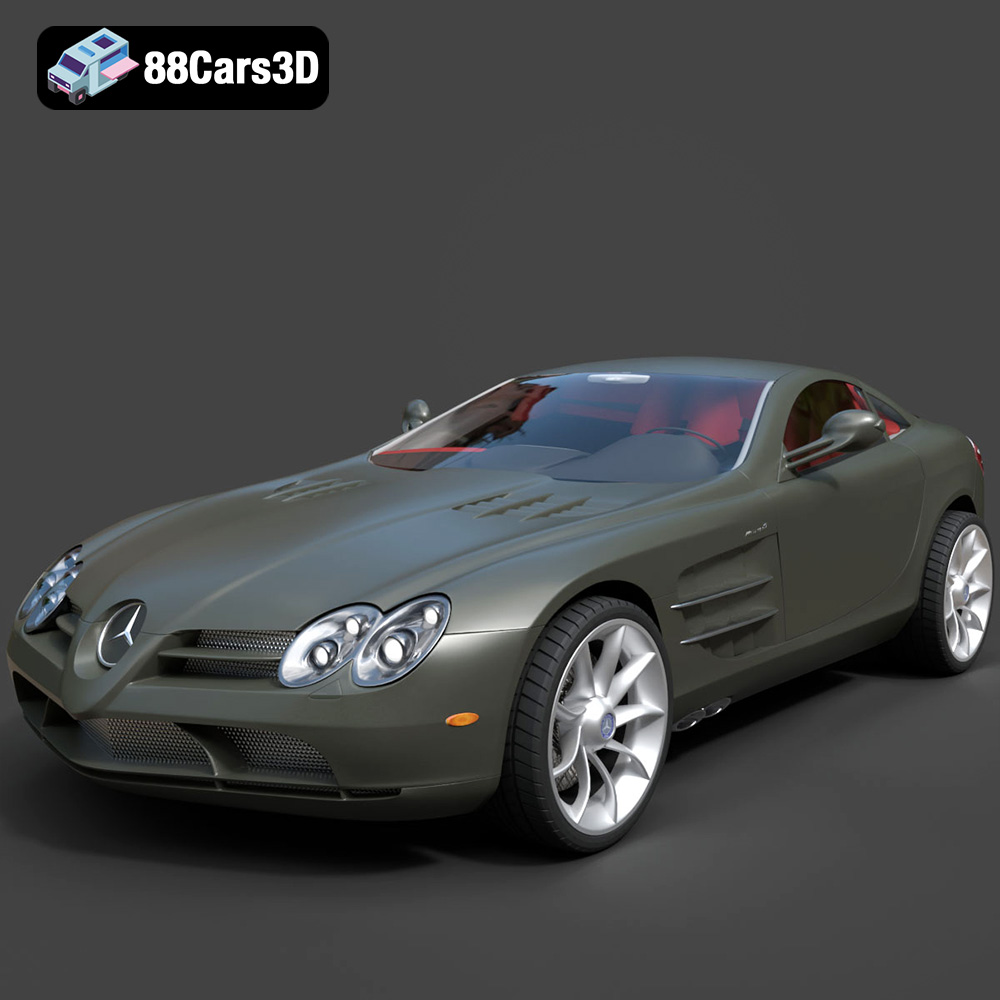
Texture: Yes
Material: Yes
Download the Mercedes-Benz SLR McLaren 3D Model featuring clean geometry, realistic detailing, and a fully modeled interior. Includes .blend, .fbx, .obj, .glb, .stl, .ply, .unreal, and .max formats for rendering, simulation, and game development.
Price: $4.99
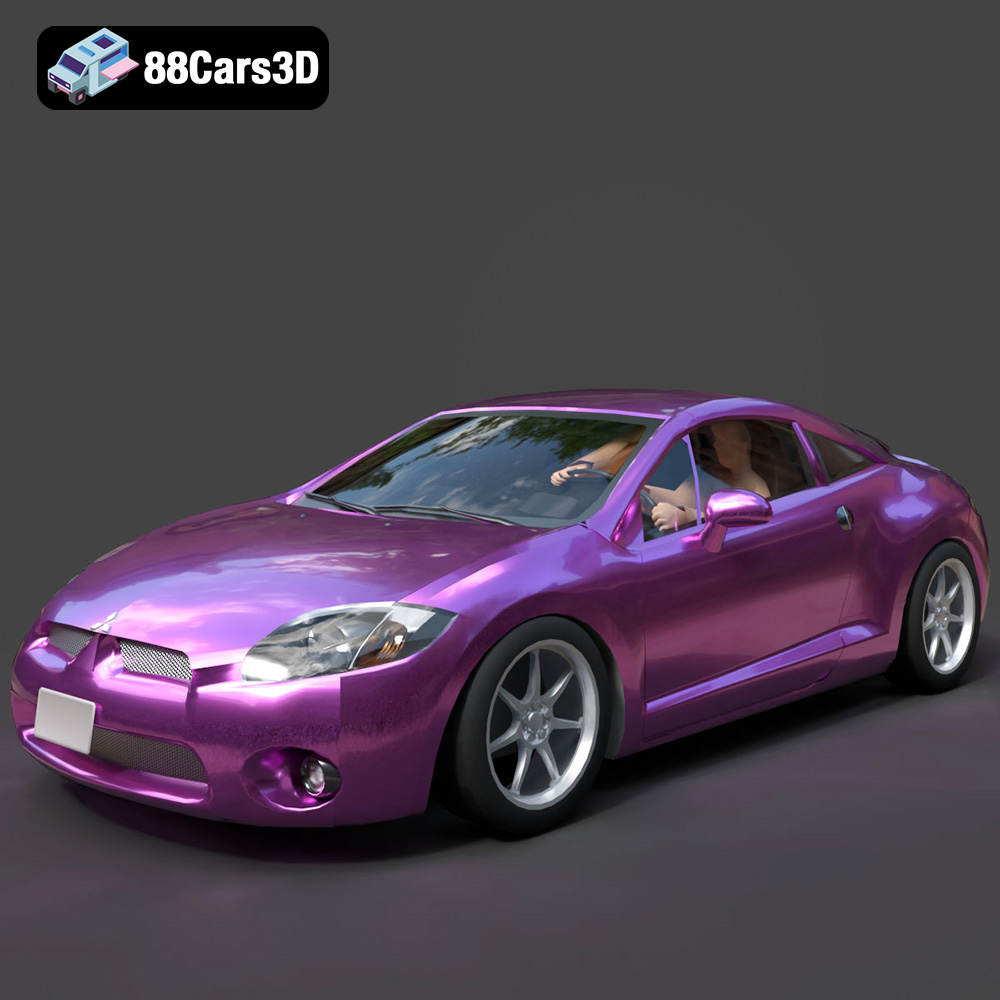
Texture: Yes
Material: Yes
Download the Mitsubishi Eclipse GT 2001 3D Model featuring clean geometry, realistic detailing, and a fully modeled interior. Includes .blend, .fbx, .obj, .glb, .stl, .ply, .unreal, and .max formats for rendering, simulation, and game development.
Price: $4.99
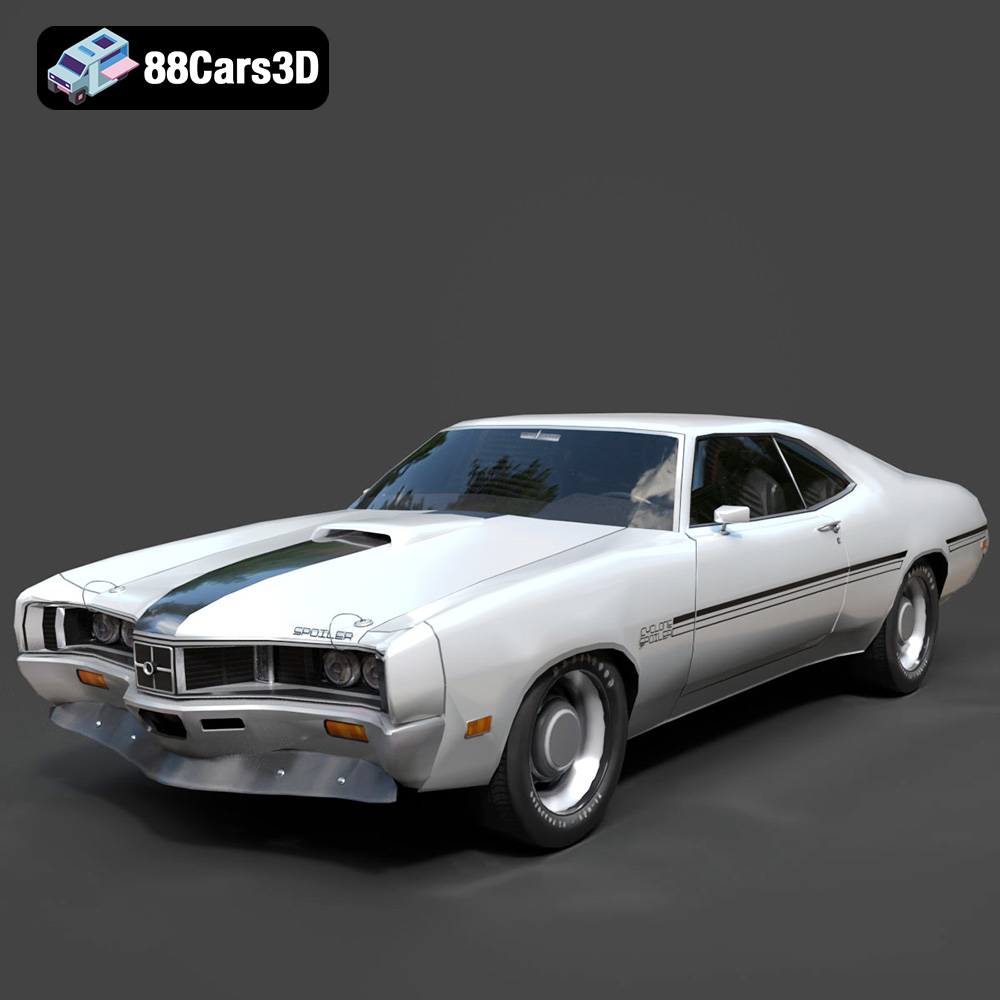
Texture: Yes
Material: Yes
Download the Mercury Cyclone Spoiler 1970 3D Model featuring clean geometry, realistic detailing, and a fully modeled interior. Includes .blend, .fbx, .obj, .glb, .stl, .ply, .unreal, and .max formats for rendering, simulation, and game development.
Price: $4.99
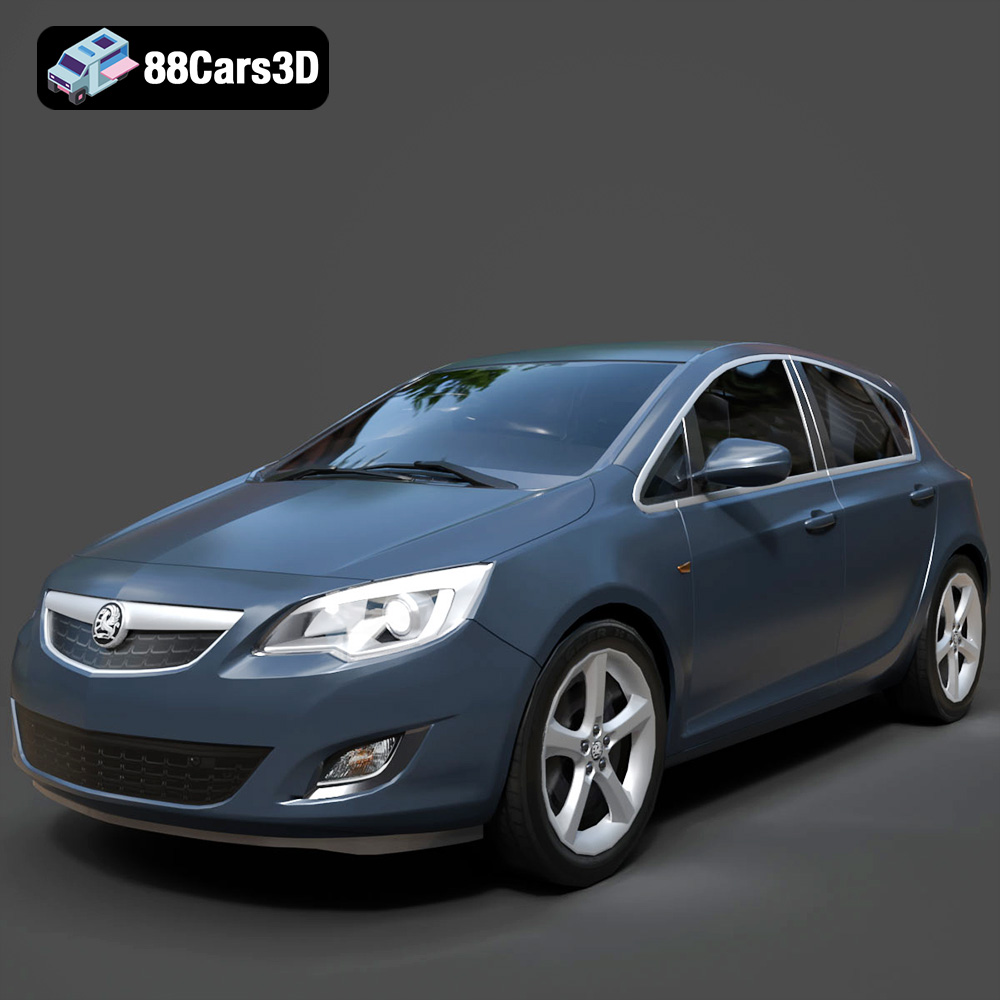
Texture: Yes
Material: Yes
Download the Opel Astra 3D Model featuring clean geometry, realistic detailing, and a fully modeled interior. Includes .blend, .fbx, .obj, .glb, .stl, .ply, .unreal, and .max formats for rendering, simulation, and game development.
Price: $4.99
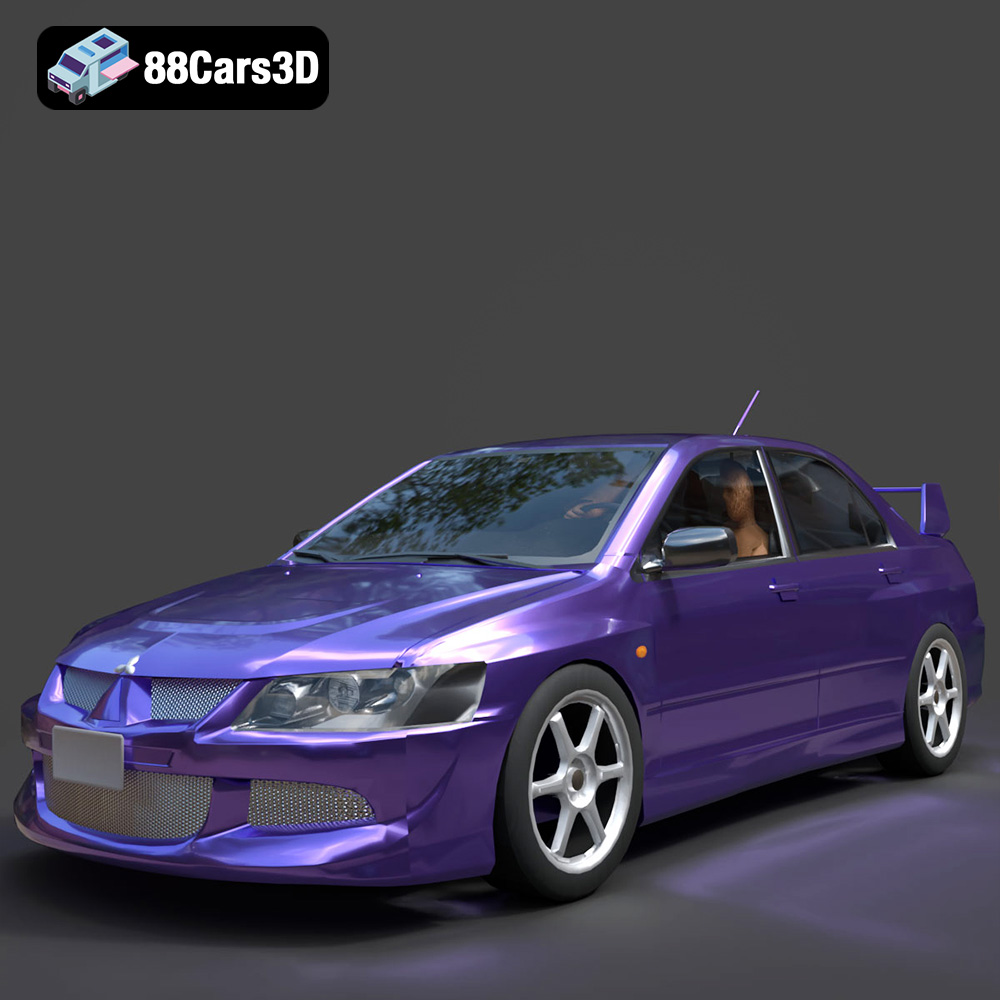
Texture: Yes
Material: Yes
Download the Mitsubishi Lancer Evolution VIII 3D Model featuring clean geometry, realistic detailing, and a fully modeled interior. Includes .blend, .fbx, .obj, .glb, .stl, .ply, .unreal, and .max formats for rendering, simulation, and game development.
Price: $4.99
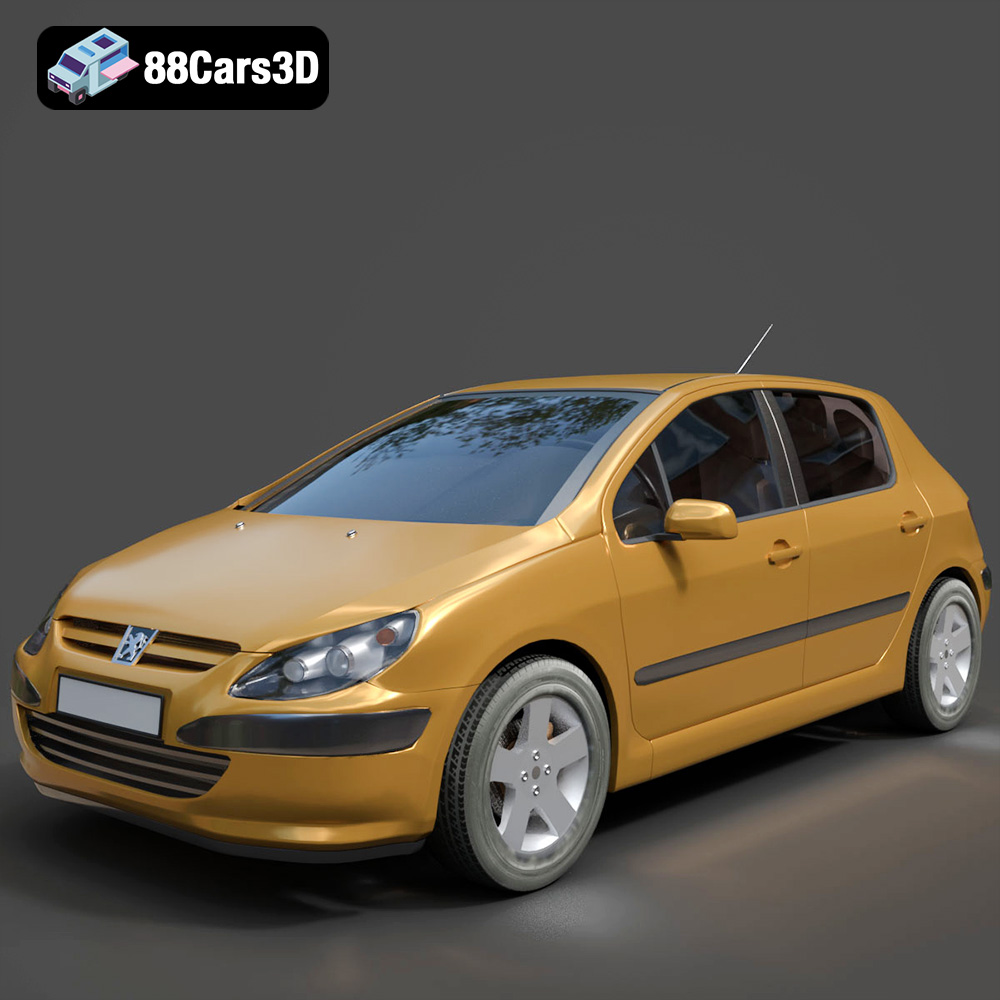
Texture: Yes
Material: Yes
Download the Peugeot 307 3D Model featuring clean geometry, realistic detailing, and a fully modeled interior. Includes .blend, .fbx, .obj, .glb, .stl, .ply, .unreal, and .max formats for rendering, simulation, and game development.
Price: $4.99
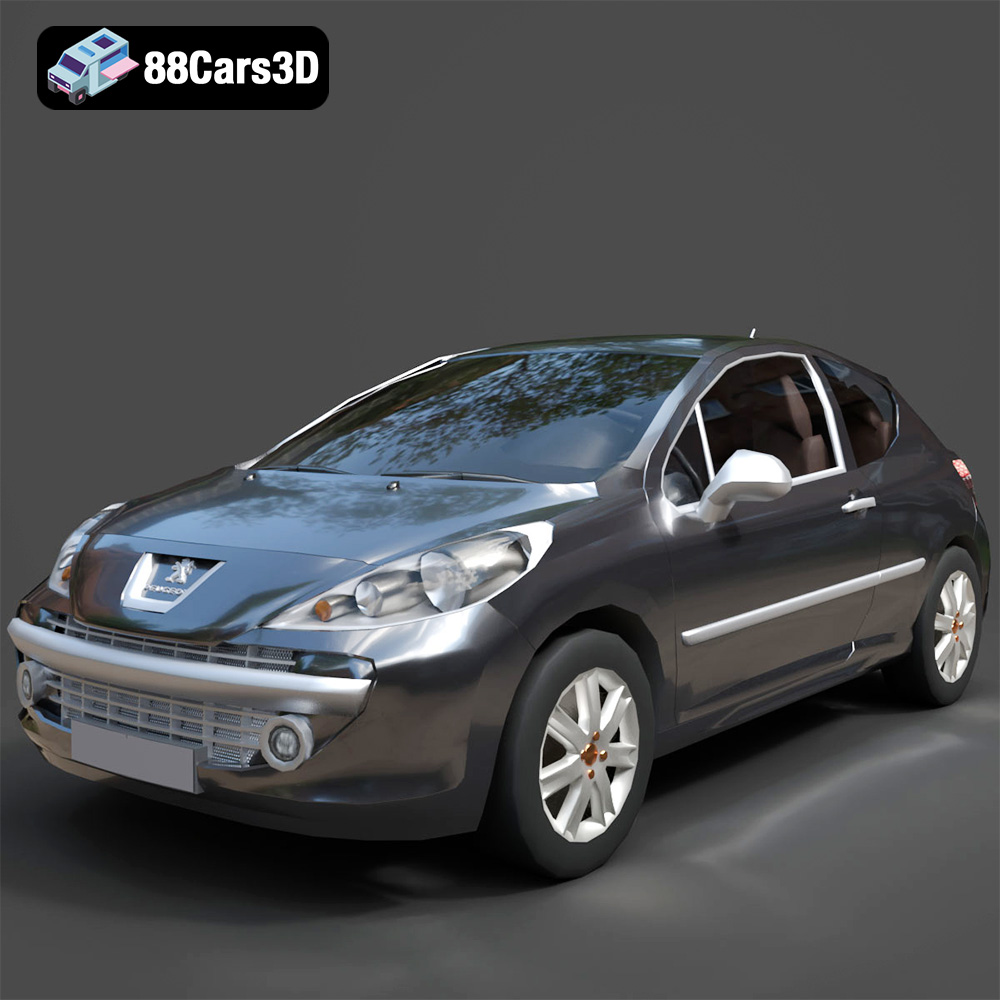
Texture: Yes
Material: Yes
Download the Peugeot 207 3D Model featuring clean geometry, realistic detailing, and a fully modeled interior. Includes .blend, .fbx, .obj, .glb, .stl, .ply, .unreal, and .max formats for rendering, simulation, and game development.
Price: $4.99
Texture: Yes
Material: Yes
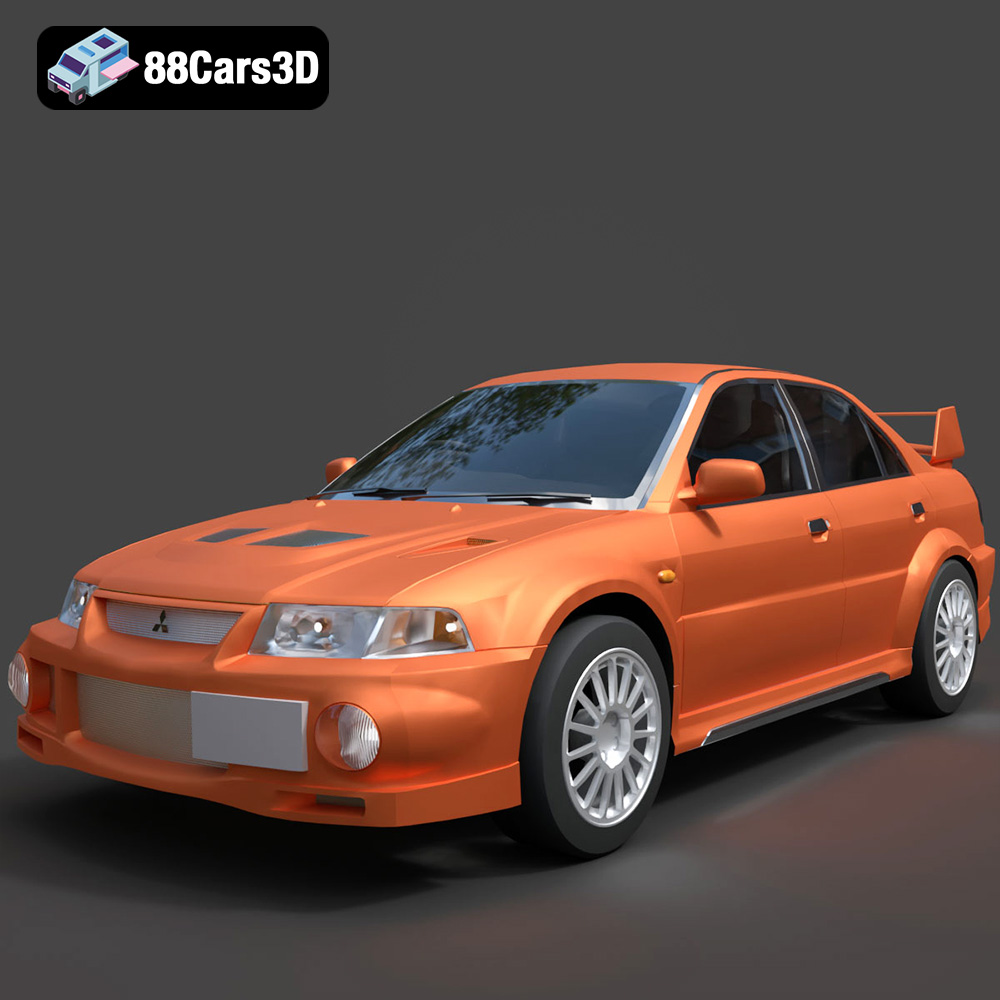
Download the Mitsubishi Lancer Evolution VI 3D Model featuring clean geometry, realistic detailing, and a fully modeled interior. Includes .blend, .fbx, .obj, .glb, .stl, .ply, .unreal, and .max formats for rendering, simulation, and game development.
Price: $4.99
Texture: Yes
Material: Yes
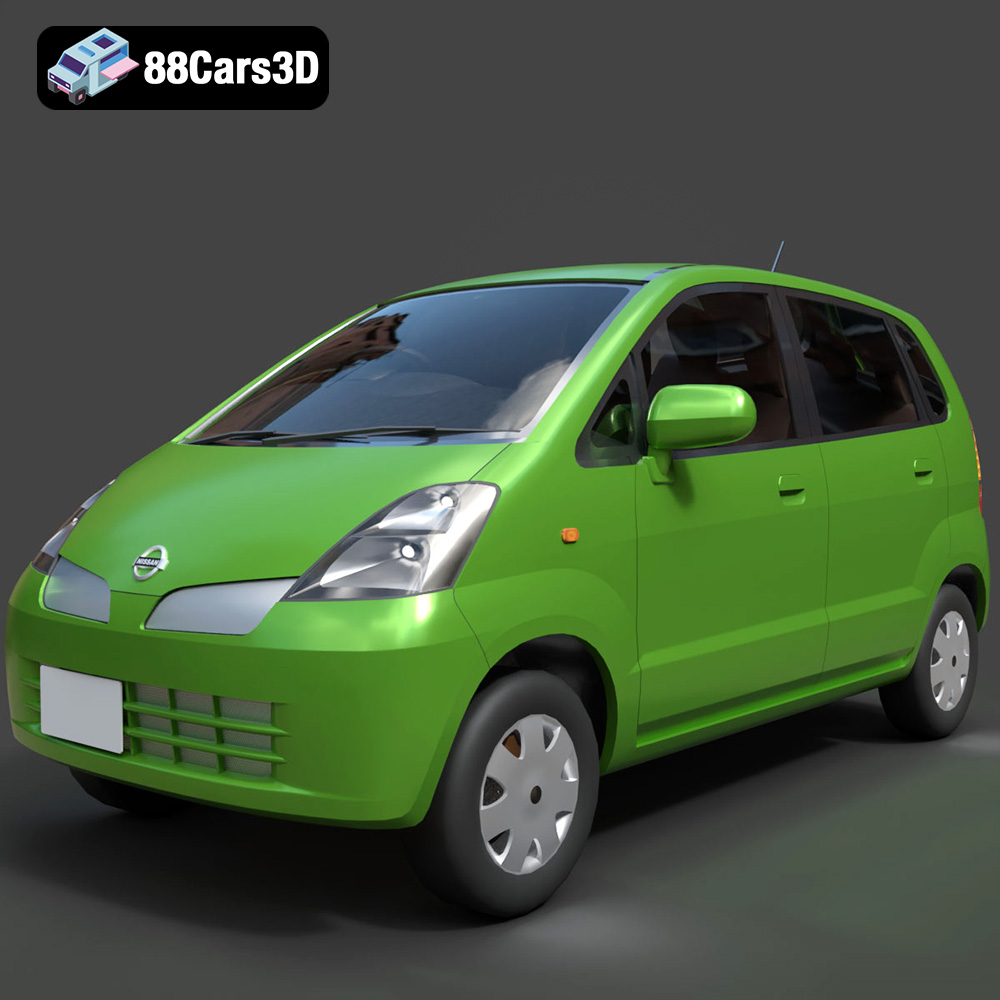
Download the Nissan Moco 007 3D Model featuring clean geometry, realistic detailing, and a fully modeled interior. Includes .blend, .fbx, .obj, .glb, .stl, .ply, .unreal, and .max formats for rendering, simulation, and game development.
Price: $4.99