The Quest for Automotive Photorealism in Real-Time with Unreal Engine 5
The Quest for Automotive Photorealism in Real-Time with Unreal Engine 5
The pursuit of photorealism in real-time applications has long been the holy grail for 3D artists and developers. For automotive visualization and game development, this challenge is particularly acute. High-detail CAD models, often boasting millions of polygons and intricate surfaces, must be seamlessly translated into an optimized, performant asset within a real-time engine like Unreal Engine 5, all while maintaining their stunning visual fidelity.
This fidelity gap—the chasm between offline render quality and real-time performance—requires a meticulous blend of artistic skill and technical know-how. Developers are tasked with optimizing every facet of an automotive asset, from its underlying mesh structure to its complex material properties and lighting interactions. It’s about achieving breathtaking visuals without crippling the frame rate.
At 88cars3d.com, we understand the demand for high-quality, optimized automotive models. This guide will deep dive into the essential strategies and techniques within Unreal Engine 5 to transform even the most complex automotive designs into real-time masterpieces. We’ll explore how to harness UE5’s powerful features while meticulously managing real-time rendering performance.
The Foundation of Performance: Strategic Asset Optimization
Before an automotive asset even touches Unreal Engine 5, its foundation must be robust and optimized. Source models, whether from CAD software, subdivision modeling, or photogrammetry, often carry an exorbitant polygon count unsuitable for real-time applications. Strategic asset optimization begins here, focusing on reducing complexity while preserving visual integrity.
Effective polygon reduction is not just about making a model lighter; it’s about making it smarter. This involves techniques that preserve the silhouette and key details of the vehicle while removing unnecessary geometric information. The goal is to achieve a balance between visual quality and efficient processing by the GPU.
Mesh Decimation vs. Retopology
Two primary approaches for reducing polygon count are mesh decimation and retopology. Each has its place in the Unreal Engine automotive workflow:
- Mesh Decimation: This automated process intelligently reduces the number of polygons in a mesh while trying to maintain its overall shape and features. Tools found in software like ZBrush, Blender, or dedicated decimation plugins analyze the mesh and remove polygons in areas of low curvature, preserving detail in sharper edges and corners. It’s excellent for quickly generating different Level of Detail (LOD) stages or for initial cleanup of dense scan data.
- Retopology: Unlike decimation, retopology involves rebuilding the mesh with a clean, quad-based topology specifically designed for animation, deformation, and real-time rendering. This manual or semi-manual process creates an optimized low-polygon mesh that perfectly encapsulates the high-detail original. Retopology is crucial for hero assets that require precise deformation or where clean UV unwrapping is paramount, as it provides greater control over edge flow and polygon distribution.
For high-detail automotive assets, a combination is often ideal. Decimation might be used for quick initial reduction, followed by targeted manual retopology for critical areas like car body panels or wheel wells that demand perfect surface quality and efficient UVs.
Crafting Efficient UV Maps for Game Engines
UV unwrapping for game engines is an art in itself. Proper UVs are critical for high-quality texture mapping and efficient real-time rendering performance. Poorly laid out UVs can lead to texture stretching, visible seams, and wasted texture space, negatively impacting visual fidelity and GPU memory usage.
- Minimize Overlap: Ensure UV islands do not overlap, especially for static mesh lighting in Unreal Engine, to prevent artifacts and incorrect lightmaps. If using packed texture atlases, minor overlap might be acceptable for non-lightmap UVs, but generally, unique UV space is preferred.
- Maximize Space Utilization: Pack UV islands tightly within the 0-1 UV space. The more efficiently the space is used, the higher the texel density (texture resolution per unit of surface area) will be for a given texture size, leading to sharper details.
- Consistent Texel Density: Strive for a relatively consistent texel density across the entire model. This prevents certain parts from looking blurry while others are sharp. However, for less visible areas or small components, a lower texel density can be acceptable to save texture space.
- Strategic Seams: Place seams in less visible areas, such as along natural breaks in the geometry or hidden edges. This minimizes their visual impact on the final textured model.
Well-executed UVs are the canvas upon which your detailed textures will shine, ensuring that your automotive PBR materials are displayed with maximum clarity.
Mastering Texture Baking for Visual Fidelity
Texture baking is a cornerstone technique for transferring high-frequency details from a high-polygon source model onto a low-polygon game-ready mesh. This process creates maps that simulate the intricate geometry and lighting interactions, making a simplified mesh appear complex.
- Normal Maps: These are indispensable for faking high-resolution surface detail like scratches, panel gaps, and intricate vents without adding polygons. They modify how light interacts with the surface normals, making a flat surface appear bumpy or detailed.
- Ambient Occlusion (AO) Maps: AO maps simulate soft shadows caused by ambient light being blocked by nearby geometry, adding depth and realism. Baking an AO map from your high-poly model provides a more accurate representation than screen-space AO methods alone.
- Curvature Maps: These maps highlight convex and concave areas, useful for adding edge wear, dirt accumulation, or subtle material variations to automotive PBR materials in a non-destructive way.
- Height/Displacement Maps: While less common for real-time car bodies due to performance, they can be used for very subtle surface variations or for assets that might be tessellated (though Nanite often offers a better solution for high detail).
By baking these maps, you effectively “project” the complexity of your original model onto an optimized mesh, drastically improving real-time rendering performance while maintaining a high level of visual detail.
Implementing a Smart Hierarchy: Level of Detail (LOD) Strategies
Even with excellent base optimization, a single, highly detailed mesh is rarely efficient enough for all viewing distances in a real-time environment. This is where Level of Detail (LOD) strategies become critical. LODs are simplified versions of a mesh that are swapped in and out based on the camera’s distance from the object, significantly reducing the polygon count of objects further away from the viewer.
Properly implementing LODs is crucial for scalable real-time rendering performance, especially in expansive environments with multiple vehicles or detailed interiors. It ensures that the GPU isn’t wasting processing power on details that are imperceptible from a distance.
Manual vs. Automatic LOD Generation
Unreal Engine 5 provides robust tools for managing LODs, offering both automated and manual control:
- Automatic LOD Generation: UE5 can automatically generate LODs for static meshes based on a percentage reduction or a target triangle count. This is a quick way to create initial LODs for many assets. You can set specific screen size thresholds at which each LOD will activate. While convenient, automatic generation might sometimes produce less-than-optimal results for complex automotive geometry, especially for areas where silhouette integrity is crucial.
- Manual LOD Generation: For hero automotive assets, manual LOD creation offers superior control. This involves creating each LOD mesh externally in your 3D software using techniques like mesh decimation, targeted retopology, or even simplified models. These manually created LODs are then imported into Unreal Engine and assigned to their respective LOD slots. This approach ensures that critical details are preserved at appropriate distances and that visual popping or degradation is minimized.
When working with high-detail automotive models, combining these methods is often best. Start with automatic LODs for most components and then manually refine or replace critical LODs (LOD0, LOD1) for the main body, wheels, and interior, where visual quality is paramount.
Culling and Occlusion for Further Optimization
Beyond LODs, culling and occlusion techniques further enhance real-time rendering performance by ensuring that only visible geometry is processed:
- Frustum Culling: Unreal Engine automatically performs frustum culling, meaning objects outside the camera’s view frustum (the visible cone) are not rendered. This is a fundamental optimization that helps manage the overall scene complexity.
- Occlusion Culling: This technique prevents objects from being rendered if they are hidden behind other, closer objects. UE5’s hardware occlusion queries identify hidden geometry, dramatically reducing the number of draw calls and rendered polygons in complex scenes, such as a car in a detailed garage or urban environment. Ensure your meshes are appropriately broken down for effective occlusion; a single large mesh might occlude less than a collection of smaller, strategically placed objects.
- Distance Culling: Similar to LODs but simpler, distance culling completely removes objects from rendering once they exceed a certain distance from the camera. This is particularly useful for very small or less important objects that would be imperceptible at far distances anyway, such as minor props in an automotive scene.
By effectively combining LODs with culling and occlusion, you can manage the complexity of entire automotive scenes, ensuring high real-time rendering performance even with many detailed assets.
Unreal Engine 5’s Power Tools: Nanite for Unprecedented Detail
Unreal Engine 5 introduced Nanite, a virtualized micropolygon geometry system that fundamentally changes how high-detail assets are handled in real-time. For automotive models, which are inherently complex, Nanite offers revolutionary benefits, allowing artists to import assets with virtually unlimited polygon counts without traditional LOD constraints or performance concerns.
Nanite intelligently streams and processes only the necessary detail based on screen resolution and camera distance. This means you can bring in incredibly high-fidelity models, like those found on 88cars3d.com, directly into UE5 without aggressive mesh decimation or complex manual LOD setups, freeing artists to focus on artistic quality rather than polygon budgets.
Understanding Nanite’s Workflow for Automotive Assets
Implementing Nanite for your Unreal Engine automotive workflow is straightforward, yet it has specific considerations:
- Import High-Poly Mesh: Import your original high-polygon automotive model directly into Unreal Engine 5. This could be a CAD export, a subdivision surface model, or a highly detailed sculpt.
- Enable Nanite: In the Static Mesh Editor, simply enable the “Nanite Support” checkbox. UE5 will then process the mesh, creating a Nanite-enabled version. This might take some time for extremely dense meshes.
- Material Setup: Nanite meshes use standard Unreal Engine materials. You can apply your automotive PBR materials directly. Nanite handles the geometry; materials handle the surface properties.
- Performance and Memory: While Nanite eliminates traditional polygon count bottlenecks, it’s not without overhead. Nanite meshes can consume significant disk space and GPU memory (for its internal data structures). However, the incredible reduction in draw calls and geometric complexity usually far outweighs these costs, leading to massive improvements in real-time rendering performance.
The beauty of Nanite is that it largely automates the optimization for geometry, allowing you to maintain incredible detail across entire automotive scenes without the tedious manual labor associated with traditional polygon reduction.
When to Use Nanite (and When Not To)
While Nanite is transformative, it’s not a silver bullet for every asset:
- Use Nanite for:
- Main Car Body and Chassis: These are usually the most complex parts and benefit most from Nanite’s ability to handle high-polygon counts effortlessly.
- Complex Interiors: Dashboards, intricate seats, and other detailed interior components can be Nanite-enabled to preserve their realism.
- Wheels and Brake Assemblies: These often have many small, intricate parts that are perfect candidates for Nanite.
- Environmental Elements: Background buildings, detailed props, or even complex road surfaces around the car can benefit from Nanite, especially in automotive configurators or detailed showcases.
- Consider Alternatives for:
- Deforming Meshes: Currently, Nanite does not support skeletal animation or vertex deformation. Any parts of the car that deform (e.g., suspension, opening doors that are animated) should remain non-Nanite, or be separate Nanite pieces that are then moved/rotated.
- Transparent or Translucent Meshes: Nanite does not currently support materials with true transparency or translucency (e.g., windows, headlights, glass). These must remain traditional meshes.
- Foliage: While possible, Nanite might not always be the most optimal solution for dense foliage; UE5’s traditional foliage system often provides better performance due to specific optimizations.
- Very Small, Highly Instanced Objects: For tiny objects that appear hundreds or thousands of times (e.g., small screws), traditional instanced meshes might still be more efficient than Nanite if they are below a certain screen pixel threshold.
By selectively applying Nanite, you can leverage its power where it matters most, achieving incredible visual detail for your automotive assets while maintaining excellent real-time rendering performance.
Achieving Visual Brilliance: Automotive PBR Materials and Lighting
The geometry provides the shape, but materials and lighting deliver the soul of a photorealistic automotive asset. Unreal Engine 5’s Physically Based Rendering (PBR) system and Lumen global illumination are paramount for creating truly stunning vehicle visualizations.
Automotive surfaces are notoriously challenging due to their highly reflective and often multi-layered nature (paint, clear coat, metal flake). Crafting realistic automotive PBR materials requires a deep understanding of how light interacts with different types of surfaces.
Crafting Realistic Automotive PBR Materials
PBR materials ensure that your car models react realistically to light, regardless of the lighting environment. For automotive assets, several key material properties need careful attention:
- Base Color (Albedo): This map defines the diffuse color of the surface, with no lighting information. For cars, this would be the underlying paint color.
- Metallic: A binary (0 or 1) value indicating if a surface is metallic. Car paint is complex; the base color layer might be metallic, but the clear coat is dielectric (non-metallic). Chrome trim and exposed metal parts will have a Metallic value of 1.
- Roughness: Controls the microscopic surface irregularities, influencing how light reflects. A perfectly smooth surface (0 roughness) will have mirror-like reflections, while a rough surface (1 roughness) will scatter light diffusely. Automotive clear coats are often very smooth, leading to sharp reflections, but can have subtle variations.
- Normal Map: As discussed, this fakes high-frequency surface detail, crucial for fine panel lines, subtle surface imperfections, and textured plastics.
- Clear Coat: Unreal Engine’s standard material provides a dedicated “Clear Coat” input, essential for realistic car paint. This allows you to stack a translucent, reflective layer on top of your base material, mimicking the clear coat on real vehicles. You can control its roughness and normal map independently.
- Anisotropy: Certain metallic materials, like brushed aluminum or some types of car paint, exhibit anisotropic reflections (reflections that stretch in one direction). Unreal Engine supports this, adding another layer of realism.
The interplay of these properties, especially the clear coat layer, is what brings automotive paint to life, showcasing the unique specular highlights and reflections that define a vehicle’s aesthetic. High-quality PBR textures are available at 88cars3d.com to kickstart your material creation.
Leveraging Material Instances for Efficiency
Once you’ve created a master material for, say, car paint, using material instances is critical for efficiency and flexibility. A master material contains all the complex logic and nodes, while instances are lightweight versions that inherit this logic but allow artists to easily change parameters like base color, roughness, or normal map intensity.
- Rapid Iteration: Quickly create variations of car paint colors or interior trims without compiling new shaders. This is invaluable for automotive configurators or design visualization.
- Reduced Draw Calls: While material instances don’t technically reduce draw calls for unique meshes, they streamline the rendering pipeline by allowing the GPU to use the same compiled shader code with different parameters, leading to better real-time rendering performance.
- Organization: Keep your project clean and manageable by centralizing shader logic in master materials and distributing variations through instances.
Illuminating with Lumen: Real-Time Global Illumination
Lumen, Unreal Engine 5’s fully dynamic global illumination and reflections system, is a game-changer for automotive visualization. Traditional real-time lighting often relied on baked lightmaps or screen-space effects, which had limitations. Lumen provides bounce lighting, soft shadows, and accurate reflections that react in real-time to changes in lighting or geometry, bringing unparalleled realism.
- Dynamic Lighting: Change the time of day, move light sources, or even animate opening doors, and Lumen will instantly update the global illumination. This is perfect for showcasing automotive assets in different environments or lighting conditions without re-baking.
- Realistic Reflections: Lumen contributes significantly to realistic reflections, crucial for shiny car surfaces. It captures the environment and bounced light accurately, creating convincing reflections on paint, chrome, and glass.
- Performance Considerations: While powerful, Lumen is also computationally intensive. Optimize your scenes by reducing unnecessary light bounces, managing scene complexity, and adjusting Lumen quality settings to balance visual fidelity with real-time rendering performance. Pay attention to reflection captures for very specific reflective surfaces.
The combination of meticulously crafted automotive PBR materials and Lumen’s dynamic global illumination creates an environment where automotive assets can truly shine, achieving a level of photorealism previously thought impossible in real-time.
Establishing a Robust Unreal Engine Automotive Workflow
Bringing all these techniques together requires a systematic approach. A streamlined Unreal Engine automotive workflow ensures consistency, efficiency, and ultimately, high-fidelity results. From the initial CAD model to the final interactive experience, each step is critical.
From CAD to UE5: A Step-by-Step Approach
A typical workflow for high-detail automotive assets might look like this:
- Source Model Preparation (CAD/DCC):
- Data Import & Cleanup: Import CAD data into your preferred 3D DCC application (e.g., 3ds Max, Maya, Blender). Clean up geometry, remove internal components not needed for visualization, and unify normals.
- Initial Mesh Decimation/Retopology: Perform initial polygon reduction on non-critical parts. For hero parts, plan for more detailed retopology. Aim for an optimized base mesh that still captures the vehicle’s form.
- UV Unwrapping: Create clean, efficient UV unwrapping for all parts, ensuring minimal stretching and optimal texel density. Focus on UV unwrapping for game engines.
- Texturing and Baking:
- High-Poly Detailing (Optional): If you need finer details not present in the CAD, sculpt them onto a high-poly version of your mesh.
- Texture Baking: Bake normal maps, ambient occlusion maps, and any other necessary maps from your high-poly mesh (or original CAD data if it has sufficient detail) onto your optimized low-poly mesh.
- PBR Texture Creation: Create or acquire automotive PBR materials and textures (Base Color, Metallic, Roughness, Normal, etc.).
- Unreal Engine Import & Setup:
- Import Meshes: Import your optimized meshes into UE5. Enable Nanite for appropriate parts (body, wheels, detailed interior components). Keep transparent parts and deformable elements as standard meshes.
- LOD Setup: Configure Level of Detail (LOD) settings for non-Nanite meshes, ensuring smooth transitions and performance.
- Material Creation: Develop master materials for common automotive surfaces (car paint, glass, chrome, rubber, plastic) and create material instances for variations. Apply your automotive PBR materials.
- Lighting & Environment: Set up your lighting using Lumen for global illumination, adding directional lights, skylights, and reflection captures as needed. Integrate HDRI environments for realistic lighting scenarios.
- Optimization & Iteration:
- Profiling: Continuously profile your scene using UE5’s built-in tools (Stat GPU, Stat RHI) to identify performance bottlenecks.
- Refine Materials & Lights: Adjust material parameters and lighting settings to balance visual fidelity and real-time rendering performance.
- Test & Evaluate: Test your asset in various scenarios and on target hardware to ensure it meets performance and quality targets.
Common Pitfalls and How to Avoid Them
- Ignoring Polygon Count: Believing Nanite makes all optimization unnecessary is a mistake. While it handles geometry brilliantly, overly complex non-Nanite meshes or excessive unique meshes will still impact performance.
- Poor UV Layouts: Hasty UV unwrapping for game engines leads to texture stretching, visible seams, and inefficient texture packing, resulting in blurry or inconsistent details. Invest time in clean UVs.
- Inconsistent Texel Density: Mixing wildly different texel densities makes your asset look uneven. Aim for consistency or strategic variation where appropriate.
- Over-reliance on Baked Maps: While essential, don’t use baked maps where dynamic solutions (like procedural wear based on curvature) might be more flexible or efficient.
- Unoptimized Materials: Overly complex material graphs with unnecessary calculations or too many texture samples can quickly become performance bottlenecks. Use material instances and optimize shader complexity.
- Neglecting LODs for Non-Nanite Meshes: Every non-Nanite mesh should have appropriate LODs to manage its performance impact at various distances.
Advanced Tips for Next-Level Performance and Fidelity
- Decal Workflows: Use decals for small details, dirt, or scratches on the car body. They are efficient and non-destructive.
- Custom Collision Meshes: For complex shapes, simplified custom collision meshes are far more performant than using the visual mesh for collision.
- GPU Instancing: For repeated static elements (e.g., bolts, rivets), ensure they are instanced where possible to reduce draw calls.
- Modular Approach: Break the car into logical, interchangeable parts (body, doors, hood, wheels). This allows for easier customization, animation, and more efficient culling.
- Post-Processing: Leverage UE5’s robust post-processing effects (color grading, bloom, depth of field, vignette, TAAU for upscaling) to enhance realism, but use them judiciously to avoid performance hits.
- Profiling with Insights: Use Unreal Insights for in-depth performance analysis to pinpoint exact bottlenecks in your rendering pipeline.
Conclusion: Driving Towards Automotive Realism
Achieving photorealistic automotive assets with optimal real-time rendering performance in Unreal Engine 5 is a multifaceted endeavor. It demands a holistic approach, starting from meticulously optimized geometry and UVs, progressing through intelligent Level of Detail strategies, and leveraging UE5’s groundbreaking features like Nanite and Lumen.
By mastering mesh decimation, understanding UV unwrapping for game engines, and crafting exquisite automotive PBR materials, you can transform high-detail source models into real-time masterpieces. The Unreal Engine automotive workflow is a blend of technical precision and artistic vision, ultimately enabling breathtaking interactive experiences.
Ready to accelerate your automotive projects? Explore the vast collection of high-quality, pre-optimized 3D models at 88cars3d.com to give your Unreal Engine 5 projects the unparalleled visual fidelity they deserve.
Featured 3D Car Models

Suzuki SX4-002 3D Model
Texture: Yes
Material: Yes
Download the Suzuki SX4-002 3D Model featuring clean geometry, realistic detailing, and a fully modeled interior. Includes .blend, .fbx, .obj, .glb, .stl, .ply, .unreal, and .max formats for rendering, simulation, and game development.
Price: $10

Tesla Model S 2024 3D Model
Texture: Yes
Material: Yes
Download the Tesla Model S 2024 3D Model featuring clean geometry, realistic detailing, and a fully modeled interior. Includes .blend, .fbx, .obj, .glb, .stl, .ply, .unreal, and .max formats for rendering, simulation, and game development.
Price: $10

Toyota Mark II (X100) 1998 3D Model
Texture: Yes
Material: Yes
Download the Toyota Mark II (X100) 3D Model featuring clean geometry, realistic detailing, and a fully modeled interior. Includes .blend, .fbx, .obj, .glb, .stl, .ply, .unreal, and .max formats for rendering, simulation, and game development.
Price: $10

Toyota Corona 1985 3D Model
Texture: Yes
Material: Yes
Download the Toyota Corona 1985 3D Model featuring clean geometry, realistic detailing, and a fully modeled interior. Includes .blend, .fbx, .obj, .glb, .stl, .ply, .unreal, and .max formats for rendering, simulation, and game development.
Price: $10

Toyota Mark II X81 1990 3D Model
Texture: Yes
Material: Yes
Download the Toyota Mark II X81 1990 3D Model featuring clean geometry, realistic detailing, and a fully modeled interior. Includes .blend, .fbx, .obj, .glb, .stl, .ply, .unreal, and .max formats for rendering, simulation, and game development.
Price: $10

Toyota iQ EV 2012 3D Model
Texture: Yes
Material: Yes
Download the Toyota iQ EV 2012 3D Model featuring clean geometry, realistic detailing, and a fully modeled interior. Includes .blend, .fbx, .obj, .glb, .stl, .ply, .unreal, and .max formats for rendering, simulation, and game development.
Price: $10

Toyota Aygo 2013 3D Model
Texture: Yes
Material: Yes
Download the Toyota Aygo 2013 3D Model featuring clean geometry, realistic detailing, and a fully modeled interior. Includes .blend, .fbx, .obj, .glb, .stl, .ply, .unreal, and .max formats for rendering, simulation, and game development.
Price: $10

Toyota Crown S180 2005 3D Model
Texture: Yes
Material: Yes
Download the Toyota Crown S180 2005 3D Model featuring clean geometry, realistic detailing, and a fully modeled interior. Includes .blend, .fbx, .obj, .glb, .stl, .ply, .unreal, and .max formats for rendering, simulation, and game development.
Price: $10

Toyota Celica 2004 3D Model
Texture: Yes
Material: Yes
Download the Toyota Celica 2004 3D Model featuring clean geometry, realistic detailing, and a fully modeled interior. Includes .blend, .fbx, .obj, .glb, .stl, .ply, .unreal, and .max formats for rendering, simulation, and game development.
Price: $10

Toyota Corolla AE100 1992 3D Model
Texture: Yes
Material: Yes
Download the Toyota Corolla AE100 1992 3D Model featuring clean geometry, realistic detailing, and a fully modeled interior. Includes .blend, .fbx, .obj, .glb, .stl, .ply, .unreal, and .max formats for rendering, simulation, and game development.
Price: $10

Toyota Mark II X110 2000 3D Model
Texture: Yes
Material: Yes
Download the Toyota Mark II X110 2000 3D Model featuring clean geometry, realistic detailing, and a fully modeled interior. Includes .blend, .fbx, .obj, .glb, .stl, .ply, .unreal, and .max formats for rendering, simulation, and game development.
Price: $10

Toyota Corolla 2020 3D Model
Texture: Yes
Material: Yes
Download the Toyota Corolla 2020 3D Model featuring clean geometry, realistic detailing, and a fully modeled interior. Includes .blend, .fbx, .obj, .glb, .stl, .ply, .unreal, and .max formats for rendering, simulation, and game development.
Price: $10

Toyota Yaris 2020 3D Model
Texture: Yes
Material: Yes
Download the Toyota Yaris 2020 3D Model featuring clean geometry, realistic detailing, and a fully modeled interior. Includes .blend, .fbx, .obj, .glb, .stl, .ply, .unreal, and .max formats for rendering, simulation, and game development.
Price: $9.9

Volkswagen Beetle 2012 3D Model
Texture: Yes
Material: Yes
Download the Volkswagen Beetle 2012 3D Model featuring clean geometry, realistic detailing, and a fully modeled interior. Includes .blend, .fbx, .obj, .glb, .stl, .ply, .unreal, and .max formats for rendering, simulation, and game development.
Price: $9.9

Toyota Matrix 2005 3D Model
Texture: Yes
Material: Yes
Download the Toyota Matrix 2005 3D Model featuring clean geometry, realistic detailing, and a fully modeled interior. Includes .blend, .fbx, .obj, .glb, .stl, .ply, .unreal, and .max formats for rendering, simulation, and game development.
Price: $9.9

Toyota Yaris Sedan 3D Model
Texture: Yes
Material: Yes
Download the Toyota Yaris Sedan 3D Model featuring clean geometry, realistic detailing, and a fully modeled interior. Includes .blend, .fbx, .obj, .glb, .stl, .ply, .unreal, and .max formats for rendering, simulation, and game development.
Price: $9.9

Volkswagen Golf R-004 2024 3D Model
Texture: Yes
Material: Yes
Download the Volkswagen Golf R-004 2024 3D Model featuring clean geometry, realistic detailing, and a fully modeled interior. Includes .blend, .fbx, .obj, .glb, .stl, .ply, .unreal, and .max formats for rendering, simulation, and game development.
Price: $9.9

Volkswagen Golf 5 Door 2010 3D Model
Texture: Yes
Material: Yes
Download the Volkswagen Golf 5 Door 2010 3D Model featuring clean geometry, realistic detailing, and a fully modeled interior. Includes .blend, .fbx, .obj, .glb, .stl, .ply, .unreal, and .max formats for rendering, simulation, and game development.
Price: $9.9

Toyota Premio 2010 3D Model
Texture: Yes
Material: Yes
Download the Toyota Premio 2010 3D Model featuring clean geometry, realistic detailing, and a fully modeled interior. Includes .blend, .fbx, .obj, .glb, .stl, .ply, .unreal, and .max formats for rendering, simulation, and game development.
Price: $9.9

Toyota Opa 2000 3D Model
Texture: Yes
Material: Yes
Download the Toyota Opa 2000 3D Model featuring clean geometry, realistic detailing, and a fully modeled interior. Includes .blend, .fbx, .obj, .glb, .stl, .ply, .unreal, and .max formats for rendering, simulation, and game development.
Price: $9.9

Volkswagen Polo 5 Door 2010 3D Model
Texture: Yes
Material: Yes
Download the Volkswagen Polo 5 Door 2010 3D Model featuring clean geometry, realistic detailing, and a fully modeled interior. Includes .blend, .fbx, .obj, .glb, .stl, .ply, .unreal, and .max formats for rendering, simulation, and game development.
Price: $9.9

Toyota Prius 2024 3D Model
Texture: Yes
Material: Yes
Download the Toyota Prius 2024 3D Model featuring clean geometry, realistic detailing, and a fully modeled interior. Includes .blend, .fbx, .obj, .glb, .stl, .ply, .unreal, and .max formats for rendering, simulation, and game development.
Price: $9.9

Toyota Yaris 1999 3D Model
Texture: Yes
Material: Yes
Download the Toyota Yaris 1999 3D Model featuring clean geometry, realistic detailing, and a fully modeled interior. Includes .blend, .fbx, .obj, .glb, .stl, .ply, .unreal, and .max formats for rendering, simulation, and game development.
Price: $9.9

Toyota Supra 2020 3D Model
Texture: Yes
Material: Yes
Download the Toyota Supra 2020 3D Model featuring clean geometry, realistic detailing, and a fully modeled interior. Includes .blend, .fbx, .obj, .glb, .stl, .ply, .unreal, and .max formats for rendering, simulation, and game development.
Price: $9.9

Volkswagen New Beetle 2000 3D Model
Texture: Yes
Material: Yes
Download the Volkswagen New Beetle 2000 3D Model featuring clean geometry, realistic detailing, and a fully modeled interior. Includes .blend, .fbx, .obj, .glb, .stl, .ply, .unreal, and .max formats for rendering, simulation, and game development.
Price: $14.99

Volkswagen Jetta 2005 3D Model
Texture: Yes
Material: Yes
Download the Volkswagen Jetta 2005 3D Model featuring clean geometry, realistic detailing, and a fully modeled interior. Includes .blend, .fbx, .obj, .glb, .stl, .ply, .unreal, and .max formats for rendering, simulation, and game development.
Price: $18.99

Volkswagen Golf 3-Door 3D Model
Texture: Yes
Material: Yes
Download the Volkswagen Golf 3-Door 3D Model featuring clean geometry, realistic detailing, and a fully modeled interior. Includes .blend, .fbx, .obj, .glb, .stl, .ply, .unreal, and .max formats for rendering, simulation, and game development.
Price: $14.99

Volvo V70 2005 3D Model
Texture: Yes
Material: Yes
Download the Volvo V70 2005 3D Model featuring clean geometry, realistic detailing, and a fully modeled interior. Includes .blend, .fbx, .obj, .glb, .stl, .ply, .unreal, and .max formats for rendering, simulation, and game development.
Price: $14.99

Volkswagen Bora 2004 3D Model
Texture: Yes
Material: Yes
Download the Volkswagen Bora 2004 3D Model featuring clean geometry, realistic detailing, and a fully modeled interior. Includes .blend, .fbx, .obj, .glb, .stl, .ply, .unreal, and .max formats for rendering, simulation, and game development.
Price: $14.99

Volkswagen Lupo 3D Model
Texture: Yes
Material: Yes
Download the Volkswagen Lupo 3D Model featuring clean geometry, realistic detailing, and a fully modeled interior. Includes .blend, .fbx, .obj, .glb, .stl, .ply, .unreal, and .max formats for rendering, simulation, and game development.
Price: $19.99

Volkswagen Passat B5 2000 3D Model
Texture: Yes
Material: Yes
Download the Volkswagen Passat B5 2000 3D Model featuring clean geometry, realistic detailing, and a fully modeled interior. Includes .blend, .fbx, .obj, .glb, .stl, .ply, .unreal, and .max formats for rendering, simulation, and game development.
Price: $19.99

Volkswagen Passat CC 3D Model
Texture: Yes
Material: Yes
Download the Volkswagen Passat CC 3D Model featuring clean geometry, realistic detailing, and a fully modeled interior. Includes .blend, .fbx, .obj, .glb, .stl, .ply, .unreal, and .max formats for rendering, simulation, and game development.
Price: $19.99

Volkswagen Golf V 2006 3D Model
Texture: Yes
Material: Yes
Download the Volkswagen Golf V 2006 3D Model featuring clean geometry, realistic detailing, and a fully modeled interior. Includes .blend, .fbx, .obj, .glb, .stl, .ply, .unreal, and .max formats for rendering, simulation, and game development.
Price: $19.99

Volvo S60 R-Design 2024 3D Model
Texture: Yes
Material: Yes
Download the Volvo S60 R-Design 3D Model featuring clean geometry, realistic detailing, and a fully modeled interior. Includes .blend, .fbx, .obj, .glb, .stl, .ply, .unreal, and .max formats for rendering, simulation, and game development.
Price: $19.99

Volkswagen Passat 2025 3D Model
Texture: Yes
Material: Yes
Download the Volkswagen Passat 2025 3D Model featuring clean geometry, realistic detailing, and a fully modeled interior. Includes .blend, .fbx, .obj, .glb, .stl, .ply, .unreal, and .max formats for rendering, simulation, and game development.
Price: $25.99

Volkswagen Passat Variant B6 2005 3D Model
Texture: Yes
Material: Yes
Download the Volkswagen Passat Variant B6 2005 3D Model featuring clean geometry, realistic detailing, and a fully modeled interior. Includes .blend, .fbx, .obj, .glb, .stl, .ply, .unreal, and .max formats for rendering, simulation, and game development.
Price: $25.99

Volkswagen Phaeton W12 2004 3D Model
Texture: Yes
Material: Yes
Download the Volkswagen Phaeton W12 2004 3D Model featuring clean geometry, realistic detailing, and a fully modeled interior. Includes .blend, .fbx, .obj, .glb, .stl, .ply, .unreal, and .max formats for rendering, simulation, and game development.
Price: $25.99

Volkswagen Scirocco 2015 3D Model
Texture: Yes
Material: Yes
Download the Volkswagen Scirocco 2015 3D Model featuring clean geometry, realistic detailing, and a fully modeled interior. Includes .blend, .fbx, .obj, .glb, .stl, .ply, .unreal, and .max formats for rendering, simulation, and game development.
Price: $25.99

Volvo S60 2024 3D Model
Texture: Yes
Material: Yes
Download the Volvo S60 2024 3D Model featuring clean geometry, realistic detailing, and a fully modeled interior. Includes .blend, .fbx, .obj, .glb, .stl, .ply, .unreal, and .max formats for rendering, simulation, and game development.
Price: $25.99

Volkswagen Polo 3D Model
Texture: Yes
Material: Yes
Download the Volkswagen Polo 3D Model featuring clean geometry, realistic detailing, and a fully modeled interior. Includes .blend, .fbx, .obj, .glb, .stl, .ply, .unreal, and .max formats for rendering, simulation, and game development.
Price: $25.99

Volkswagen Golf 5-Doors 2018 3D Model
Texture: Yes
Material: Yes
Download the Volkswagen Golf 5-Doors 3D Model featuring clean geometry, realistic detailing, and a fully modeled interior. Includes .blend, .fbx, .obj, .glb, .stl, .ply, .unreal, and .max formats for rendering, simulation, and game development.
Price: $25.99

Volvo C70 T5 2000 3D Model
Texture: Yes
Material: Yes
Download the Volvo C70 T5 2000 3D Model featuring clean geometry, realistic detailing, and a fully modeled interior. Includes .blend, .fbx, .obj, .glb, .stl, .ply, .unreal, and .max formats for rendering, simulation, and game development.
Price: $23.99

Volvo S40 Sedan 2004 3D Model
Texture: Yes
Material: Yes
Download the Volvo S40 Sedan 2004 3D Model featuring clean geometry, realistic detailing, and a fully modeled interior. Includes .blend, .fbx, .obj, .glb, .stl, .ply, .unreal, and .max formats for rendering, simulation, and game development.
Price: $23.99

Volvo C30 BEV 2012 3D Model
Texture: Yes
Material: Yes
Download the Volvo C30 BEV 2012 3D Model featuring clean geometry, realistic detailing, and a fully modeled interior. Includes .blend, .fbx, .obj, .glb, .stl, .ply, .unreal, and .max formats for rendering, simulation, and game development.
Price: $23.99

Volvo C70 1998 3D Model
Texture: Yes
Material: Yes
Download the Volvo C70 1998 3D Model featuring clean geometry, realistic detailing, and a fully modeled interior. Includes .blend, .fbx, .obj, .glb, .stl, .ply, .unreal, and .max formats for rendering, simulation, and game development.
Price: $23.99

Mazda B-Series 3D Model
Texture: Yes
Material: Yes
Download the Mazda B-Series 3D Model featuring clean geometry, realistic detailing, and a fully modeled interior. Includes .blend, .fbx, .obj, .glb, .stl, .ply, .unreal, and .max formats for rendering, simulation, and game development.
Price: $23.99

Mercsedes Benz Z3-006 3D Model
Texture: Yes
Material: Yes
Download the Mercsedes Benz Z3-006 3D Model featuring clean geometry, realistic detailing, and a fully modeled interior. Includes .blend, .fbx, .obj, .glb, .stl, .ply, .unreal, and .max formats for rendering, simulation, and game development.
Price: $23.99

Mazda RX-7 3D Model
Texture: Yes
Material: Yes
Download the Mazda RX-7 3D Model featuring clean geometry, realistic detailing, and a fully modeled interior. Includes .blend, .fbx, .obj, .glb, .stl, .ply, .unreal, and .max formats for rendering, simulation, and game development.
Price: $23.99

Volvo VCC-003 3D Model
Texture: Yes
Material: Yes
Download the Volvo VCC-003 3D Model featuring clean geometry, realistic detailing, and a fully modeled interior. Includes .blend, .fbx, .obj, .glb, .stl, .ply, .unreal, and .max formats for rendering, simulation, and game development.
Price: $23.99

Mercedes-Benz SLR McLaren 2005 3D Model
Texture: Yes
Material: Yes
Download the Mercedes-Benz SLR McLaren 2005 3D Model featuring clean geometry, realistic detailing, and a fully modeled interior. Includes .blend, .fbx, .obj, .glb, .stl, .ply, .unreal, and .max formats for rendering, simulation, and game development.
Price: $23.99

GAZ 3110 Pickup 2000 3D Model
Texture: Yes
Material: Yes
Download the GAZ 3110 Pickup 3D Model featuring clean geometry, realistic detailing, and a fully modeled interior. Includes .blend, .fbx, .obj, .glb, .stl, .ply, .unreal, and .max formats for rendering, simulation, and game development.
Price: $23.99

Mazda 626 GF 1997 3D Model
Texture: Yes
Material: Yes
Download the Mazda 626 GF 1997 3D Model featuring clean geometry, realistic detailing, and a fully modeled interior. Includes .blend, .fbx, .obj, .glb, .stl, .ply, .unreal, and .max formats for rendering, simulation, and game development.
Price: $23.99

Volvo S80 2011 3D Model
Texture: Yes
Material: Yes
Download the Volvo S80 2011 3D Model featuring clean geometry, realistic detailing, and a fully modeled interior. Includes .blend, .fbx, .obj, .glb, .stl, .ply, .unreal, and .max formats for rendering, simulation, and game development.
Price: $23.99

Volkswagen Touran restyle-006 3D Model
Texture: Yes
Material: Yes
Download the Volkswagen Touran restyle-006 3D Model featuring clean geometry, realistic detailing, and a fully modeled interior. Includes .blend, .fbx, .obj, .glb, .stl, .ply, .unreal, and .max formats for rendering, simulation, and game development.
Price: $23.99

Skoda Octavia Scout 3D Model
Texture: Yes
Material: Yes
Download the Skoda Octavia Scout 3D Model featuring clean geometry, realistic detailing, and a fully modeled interior. Includes .blend, .fbx, .obj, .glb, .stl, .ply, .unreal, and .max formats for rendering, simulation, and game development.
Price: $23.99

Volkswagen Golf V 2006 3D Model
Texture: Yes
Material: Yes
Download the Volkswagen Golf V 2006 3D Model featuring clean geometry, realistic detailing, and a fully modeled interior. Includes .blend, .fbx, .obj, .glb, .stl, .ply, .unreal, and .max formats for rendering, simulation, and game development.
Price: $23.99

Mazda CX-7 3D Model
Texture: Yes
Material: Yes
Download the Mazda CX-7 3D Model featuring clean geometry, realistic detailing, and a fully modeled interior. Includes .blend, .fbx, .obj, .glb, .stl, .ply, .unreal, and .max formats for rendering, simulation, and game development.
Price: $23.99

Mazda Familia 3D Model
Texture: Yes
Material: Yes
Download the Mazda Familia 3D Model featuring clean geometry, realistic detailing, and a fully modeled interior. Includes .blend, .fbx, .obj, .glb, .stl, .ply, .unreal, and .max formats for rendering, simulation, and game development.
Price: $23.99

GAS 21 3D Model
Texture: Yes
Material: Yes
Download the GAS 21 3D Model featuring clean geometry, realistic detailing, and a fully modeled interior. Includes .blend, .fbx, .obj, .glb, .stl, .ply, .unreal, and .max formats for rendering, simulation, and game development.
Price: $23.99

Mercedes-Benz SL500 AMG (R129) 3D Model
Texture: Yes
Material: Yes
Download the Mercedes-Benz SL500 AMG (R129) 3D Model featuring clean geometry, realistic detailing, and a fully modeled interior. Includes .blend, .fbx, .obj, .glb, .stl, .ply, .unreal, and .max formats for rendering, simulation, and game development.
Price: $23.99

Mercedes-Benz S-Class W221 2005 3D Model
Texture: Yes
Material: Yes
Download the Mercedes-Benz S-Class W221 2005 3D Model featuring clean geometry, realistic detailing, and a fully modeled interior. Includes .blend, .fbx, .obj, .glb, .stl, .ply, .unreal, and .max formats for rendering, simulation, and game development.
Price: $23.99

Mercedes-Benz E-Class W212 2009 3D Model
Texture: Yes
Material: Yes
Download the Mercedes-Benz E-Class W212 2009 3D Model featuring clean geometry, realistic detailing, and a fully modeled interior. Includes .blend, .fbx, .obj, .glb, .stl, .ply, .unreal, and .max formats for rendering, simulation, and game development.
Price: $23.99

Mercedes-Benz E-class Estate S212 2009 3D Model
Texture: Yes
Material: Yes
Download the Mercedes-Benz E-class Estate S212 2009 3D Model featuring clean geometry, realistic detailing, and a fully modeled interior. Includes .blend, .fbx, .obj, .glb, .stl, .ply, .unreal, and .max formats for rendering, simulation, and game development.
Price: $23.99

Mercedes-Benz 190 W201 3D Model
Texture: Yes
Material: Yes
Download the Mercedes-Benz 190 W201 3D Model featuring clean geometry, realistic detailing, and a fully modeled interior. Includes .blend, .fbx, .obj, .glb, .stl, .ply, .unreal, and .max formats for rendering, simulation, and game development.
Price: $23.99

Mercedes-Benz C230 SportCoupé 2005 3D Model
Texture: Yes
Material: Yes
Download the Mercedes-Benz C230 SportCoupé 2005 3D Model featuring clean geometry, realistic detailing, and a fully modeled interior. Includes .blend, .fbx, .obj, .glb, .stl, .ply, .unreal, and .max formats for rendering, simulation, and game development.
Price: $23.99

Mercedes-Benz SLK 3D Model
Texture: Yes
Material: Yes
Download the Mercedes-Benz SLK 3D Model featuring clean geometry, realistic detailing, and a fully modeled interior. Includes .blend, .fbx, .obj, .glb, .stl, .ply, .unreal, and .max formats for rendering, simulation, and game development.
Price: $23.99

Mercedes 600 SEC W140 1992 3D Model
Texture: Yes
Material: Yes
Download the Mercedes 600 SEC W140 1992 3D Model featuring clean geometry, realistic detailing, and a fully modeled interior. Includes .blend, .fbx, .obj, .glb, .stl, .ply, .unreal, and .max formats for rendering, simulation, and game development.
Price: $23.99

Mercedes S-Class 2010 3D Model
Texture: Yes
Material: Yes
Download the Mercedes S-Class 2010 3D Model featuring clean geometry, realistic detailing, and a fully modeled interior. Includes .blend, .fbx, .obj, .glb, .stl, .ply, .unreal, and .max formats for rendering, simulation, and game development.
Price: $23.99

McLaren MP4-12C-001 3D Model
Texture: Yes
Material: Yes
Download the McLaren MP4-12C-001 3D Model featuring clean geometry, realistic detailing, and a fully modeled interior. Includes .blend, .fbx, .obj, .glb, .stl, .ply, .unreal, and .max formats for rendering, simulation, and game development.
Price: $23.99

Mercedes-Benz SLK 350 2005 3D Model
Texture: Yes
Material: Yes
Download the Mercedes-Benz SLK 350 2005 3D Model featuring clean geometry, realistic detailing, and a fully modeled interior. Includes .blend, .fbx, .obj, .glb, .stl, .ply, .unreal, and .max formats for rendering, simulation, and game development.
Price: $23.99

Mercedes-Benz SL 65 AMG 3D Model
Texture: Yes
Material: Yes
Download the Mercedes-Benz SL 65 AMG 3D Model featuring clean geometry, realistic detailing, and a fully modeled interior. Includes .blend, .fbx, .obj, .glb, .stl, .ply, .unreal, and .max formats for rendering, simulation, and game development.
Price: $23.99

Mercedes-Benz S500 3D Model
Texture: Yes
Material: Yes
Download the Mercedes-Benz S500 3D Model featuring clean geometry, realistic detailing, and a fully modeled interior. Includes .blend, .fbx, .obj, .glb, .stl, .ply, .unreal, and .max formats for rendering, simulation, and game development.
Price: $23.99

Mercedes-Benz S55 W220 AMG 1999 3D Model
Texture: Yes
Material: Yes
Download the Mercedes-Benz S55 W220 AMG 1999 3D Model featuring clean geometry, realistic detailing, and a fully modeled interior. Includes .blend, .fbx, .obj, .glb, .stl, .ply, .unreal, and .max formats for rendering, simulation, and game development.
Price: $23.99

Mercedes-Benz CLA45 AMG 2017 3D Model
Texture: Yes
Material: Yes
Download the Mercedes-Benz CLA45 AMG 2017 3D Model featuring clean geometry, realistic detailing, and a fully modeled interior. Includes .blend, .fbx, .obj, .glb, .stl, .ply, .unreal, and .max formats for rendering, simulation, and game development.
Price: $38.99

Mercedes-Benz CL65 C215 AMG 3D Model
Texture: Yes
Material: Yes
Download the Mercedes-Benz CL65 C215 AMG 3D Model featuring clean geometry, realistic detailing, and a fully modeled interior. Includes .blend, .fbx, .obj, .glb, .stl, .ply, .unreal, and .max formats for rendering, simulation, and game development.
Price: $23.99

Mercedes-Benz A45 2021 3D Model
Texture: Yes
Material: Yes
Download the Mercedes-Benz A45 2021 3D Model featuring clean geometry, realistic detailing, and a fully modeled interior. Includes .blend, .fbx, .obj, .glb, .stl, .ply, .unreal, and .max formats for rendering, simulation, and game development.
Price: $23.99

Mercedes-Benz 300SL 1955 3D Model
Texture: Yes
Material: Yes
Download the Mercedes-Benz 300SL 1955 3D Model featuring clean geometry, realistic detailing, and a fully modeled interior. Includes .blend, .fbx, .obj, .glb, .stl, .ply, .unreal, and .max formats for rendering, simulation, and game development.
Price: $23.99

Mercedes-Benz 190SL 1955 3D Model
Texture: Yes
Material: Yes
Download the Mercedes-Benz 190SL 1955 3D Model featuring clean geometry, realistic detailing, and a fully modeled interior. Includes .blend, .fbx, .obj, .glb, .stl, .ply, .unreal, and .max formats for rendering, simulation, and game development.
Price: $23.99

Mercedes-Benz W124 Brabus V12 3D Model
Texture: Yes
Material: Yes
Download the Mercedes-Benz W124 Brabus V12 3D Model featuring clean geometry, realistic detailing, and a fully modeled interior. Includes .blend, .fbx, .obj, .glb, .stl, .ply, .unreal, and .max formats for rendering, simulation, and game development.
Price: $23.99

Mercedes-Benz SLS AMG GT3-002 3D Model
Texture: Yes
Material: Yes
Download the Mercedes-Benz SLS AMG GT3-002 3D Model featuring clean geometry, realistic detailing, and a fully modeled interior. Includes .blend, .fbx, .obj, .glb, .stl, .ply, .unreal, and .max formats for rendering, simulation, and game development.
Price: $38.99

Mercedes-Benz C-Class-001 3D Model
Texture: Yes
Material: Yes
Download the Mercedes-Benz C-Class-001 3D Model featuring clean geometry, realistic detailing, and a fully modeled interior. Includes .blend, .fbx, .obj, .glb, .stl, .ply, .unreal, and .max formats for rendering, simulation, and game development.
Price: $38.99

Mercedes-Benz B-Klasse 2023 3D Model
Texture: Yes
Material: Yes
Download the Mercedes-Benz B-Klasse 2023 3D Model featuring clean geometry, realistic detailing, and a fully modeled interior. Includes .blend, .fbx, .obj, .glb, .stl, .ply, .unreal, and .max formats for rendering, simulation, and game development.
Price: $38.99

Mercedes-Benz A-Klasse W168 3D Model
Texture: Yes
Material: Yes
Download the Mercedes-Benz A-Klasse W168 3D Model featuring clean geometry, realistic detailing, and a fully modeled interior. Includes .blend, .fbx, .obj, .glb, .stl, .ply, .unreal, and .max formats for rendering, simulation, and game development.
Price: $38.99

Mercedes-Benz 500SL 2000 3D Model
Texture: Yes
Material: Yes
Download the Mercedes-Benz 500SL 2000 3D Model featuring clean geometry, realistic detailing, and a fully modeled interior. Includes .blend, .fbx, .obj, .glb, .stl, .ply, .unreal, and .max formats for rendering, simulation, and game development.
Price: $38.99

Mercedes-Benz 500SEC 3D Model
Texture: Yes
Material: Yes
Download the Mercedes-Benz 500SEC 3D Model featuring clean geometry, realistic detailing, and a fully modeled interior. Includes .blend, .fbx, .obj, .glb, .stl, .ply, .unreal, and .max formats for rendering, simulation, and game development.
Price: $38.99

Mercedes-Benz Citan 2025 3D Model
Texture: Yes
Material: Yes
Download the Mercedes-Benz Citan 2025 3D Model featuring clean geometry, realistic detailing, and a fully modeled interior. Includes .blend, .fbx, .obj, .glb, .stl, .ply, .unreal, and .max formats for rendering, simulation, and game development.
Price: $38.99

Mercedes-Benz C63 AMG 2012 3D Model
Texture: Yes
Material: Yes
Download the Mercedes-Benz C63 AMG 2012 3D Model featuring clean geometry, realistic detailing, and a fully modeled interior. Includes .blend, .fbx, .obj, .glb, .stl, .ply, .unreal, and .max formats for rendering, simulation, and game development.
Price: $38.99

Mercedes-Benz E-Class S211 3D Model
Texture: Yes
Material: Yes
Download the Mercedes-Benz E-Class S211 3D Model featuring clean geometry, realistic detailing, and a fully modeled interior. Includes .blend, .fbx, .obj, .glb, .stl, .ply, .unreal, and .max formats for rendering, simulation, and game development.
Price: $38.99

Mercedes-Benz CLS63 AMG (C218) 2014 3D Model
Texture: Yes
Material: Yes
Download the Mercedes-Benz CLS63 AMG (C218) 2014 3D Model featuring clean geometry, realistic detailing, and a fully modeled interior. Includes .blend, .fbx, .obj, .glb, .stl, .ply, .unreal, and .max formats for rendering, simulation, and game development.
Price: $38.99

Mercedes-Benz CLS-Klasse 3D Model
Texture: Yes
Material: Yes
Download the Mercedes-Benz CLS-Klasse 3D Model featuring clean geometry, realistic detailing, and a fully modeled interior. Includes .blend, .fbx, .obj, .glb, .stl, .ply, .unreal, and .max formats for rendering, simulation, and game development.
Price: $38.99
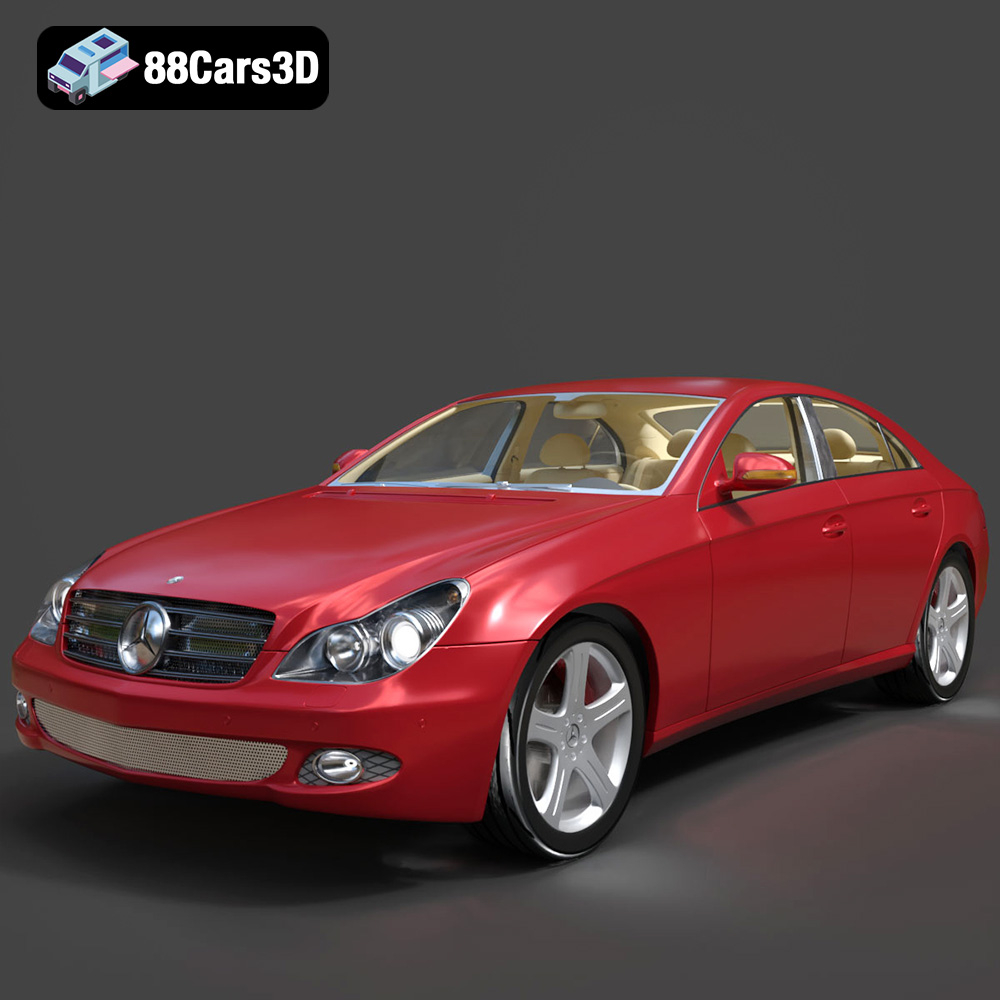
Mercedes-Benz CLS 500 3D Model
Texture: Yes
Material: Yes
Download the Mercedes-Benz CLS 500 3D Model featuring clean geometry, realistic detailing, and a fully modeled interior. Includes .blend, .fbx, .obj, .glb, .stl, .ply, .unreal, and .max formats for rendering, simulation, and game development.
Price: $38.99

Mercedes-Benz CL-Klasse 2001 3D Model
Texture: Yes
Material: Yes
Download the Mercedes-Benz CL-Klasse 2001 3D Model featuring clean geometry, realistic detailing, and a fully modeled interior. Includes .blend, .fbx, .obj, .glb, .stl, .ply, .unreal, and .max formats for rendering, simulation, and game development.
Price: $38.99
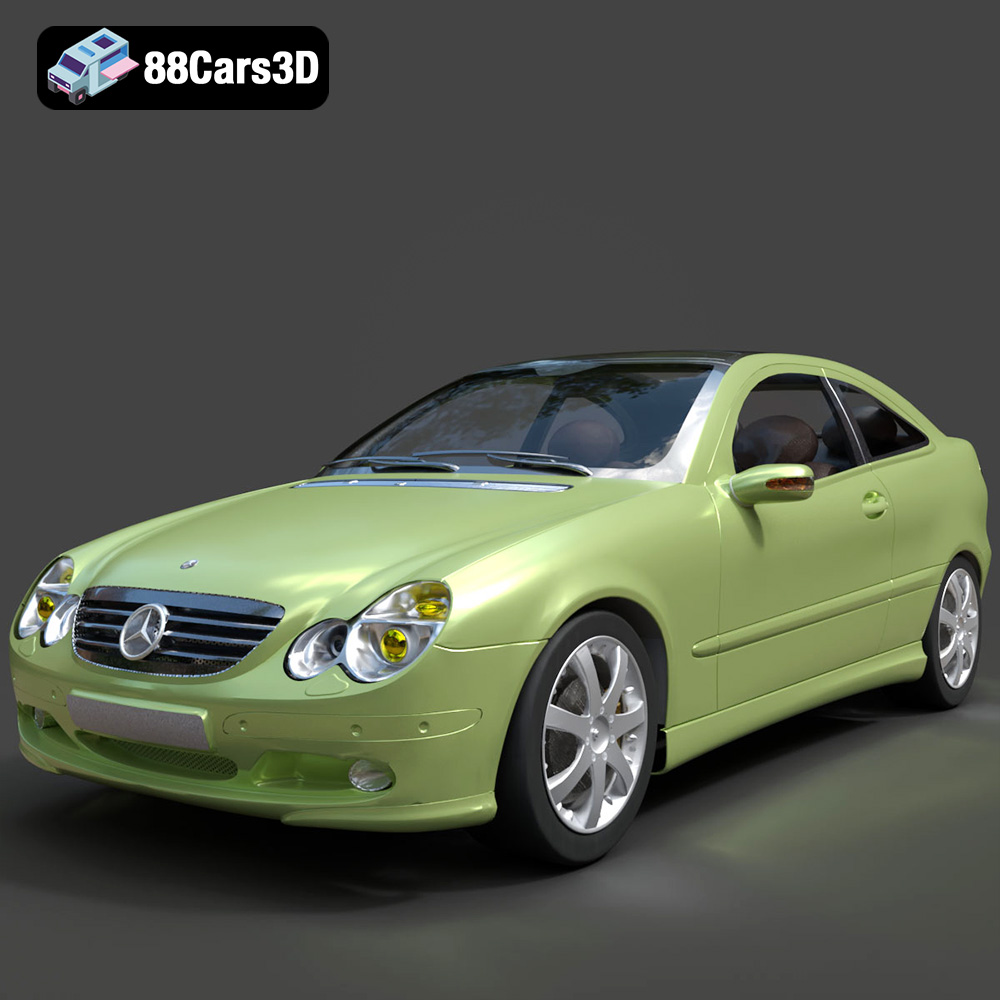
Mercedes-Benz C-Klasse Sportcoupe 2000 3D Model
Texture: Yes
Material: Yes
Download the Mercedes-Benz C-Klasse Sportcoupe 2000 3D Model featuring clean geometry, realistic detailing, and a fully modeled interior. Includes .blend, .fbx, .obj, .glb, .stl, .ply, .unreal, and .max formats for rendering, simulation, and game development.
Price: $38.99
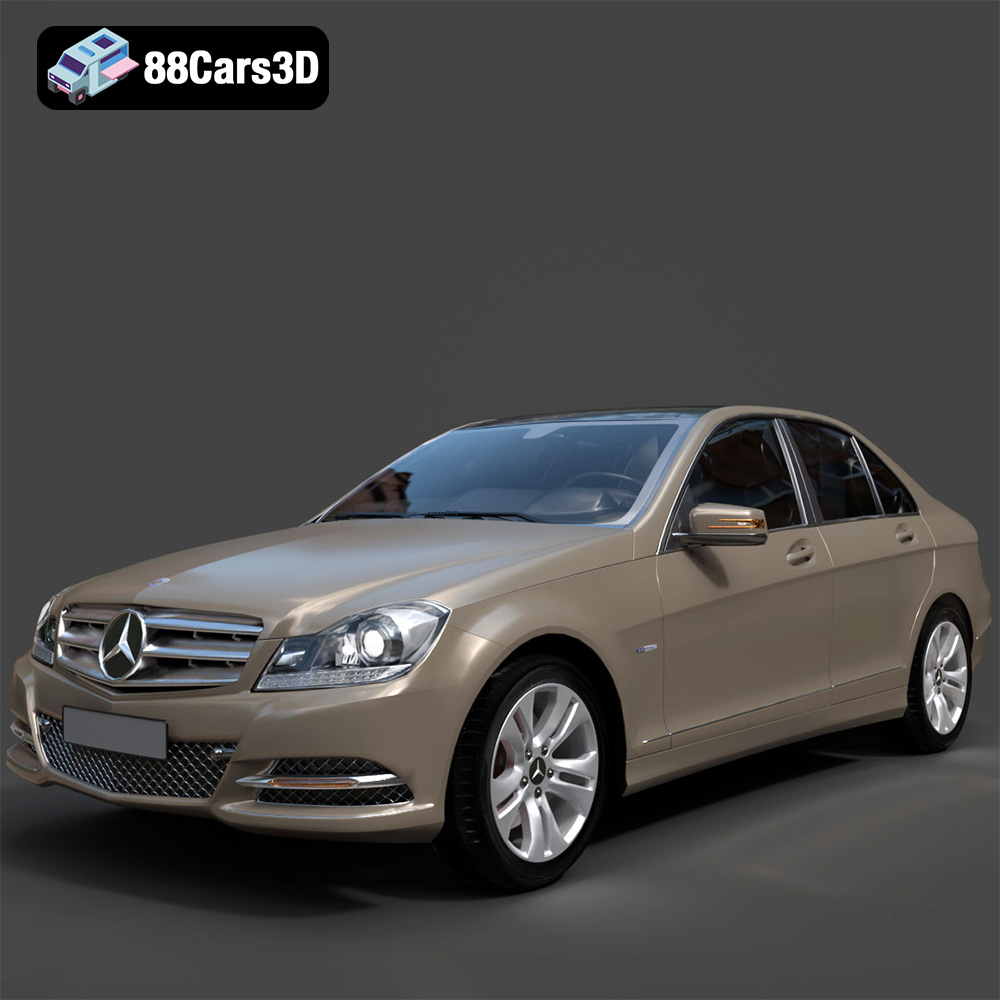
Mercedes-Benz C-Klasse 204 2011 3D Model
Texture: Yes
Material: Yes
Download the Mercedes-Benz C-Klasse 204 2011 3D Model featuring clean geometry, realistic detailing, and a fully modeled interior. Includes .blend, .fbx, .obj, .glb, .stl, .ply, .unreal, and .max formats for rendering, simulation, and game development.
Price: $38.99
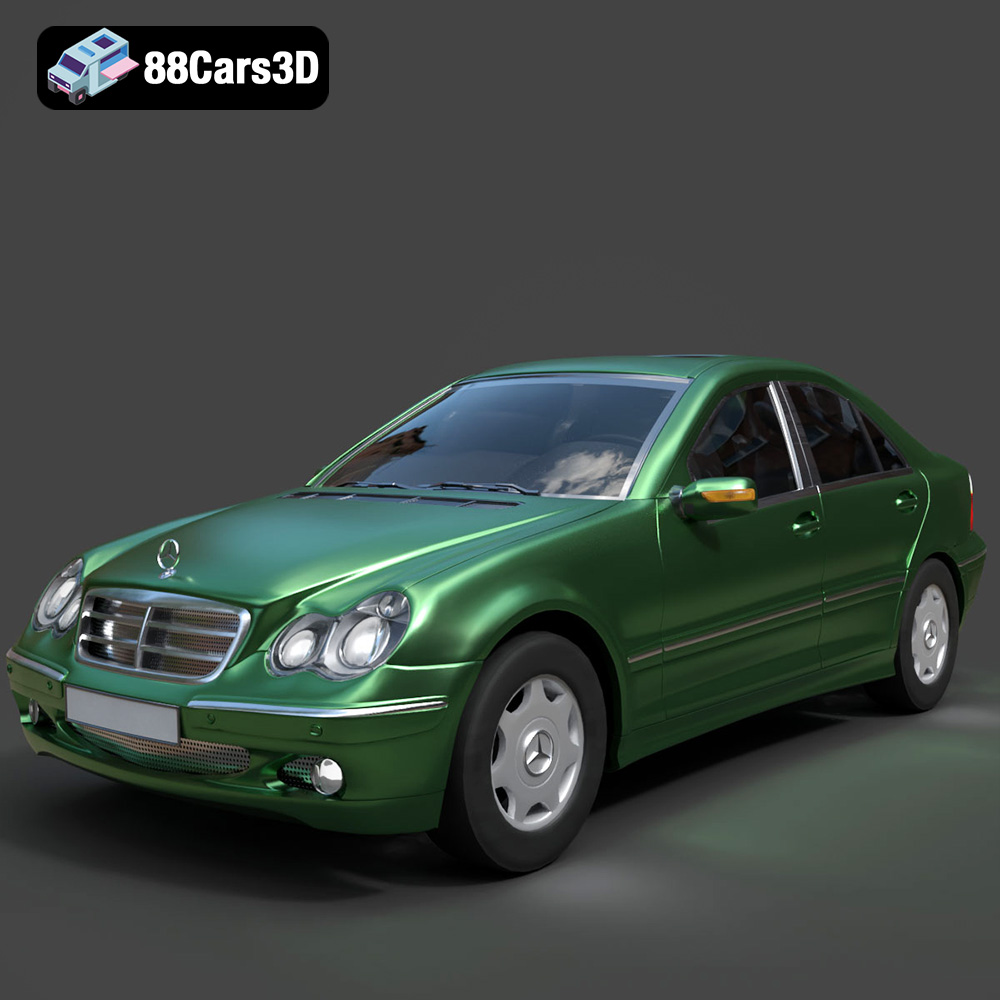
Mercedes-Benz C-Class Sedan 2000 3D Model
Texture: Yes
Material: Yes
Download the Mercedes-Benz C-Class Sedan 3D Model featuring clean geometry, realistic detailing, and a fully modeled interior. Includes .blend, .fbx, .obj, .glb, .stl, .ply, .unreal, and .max formats for rendering, simulation, and game development.
Price: $38.99
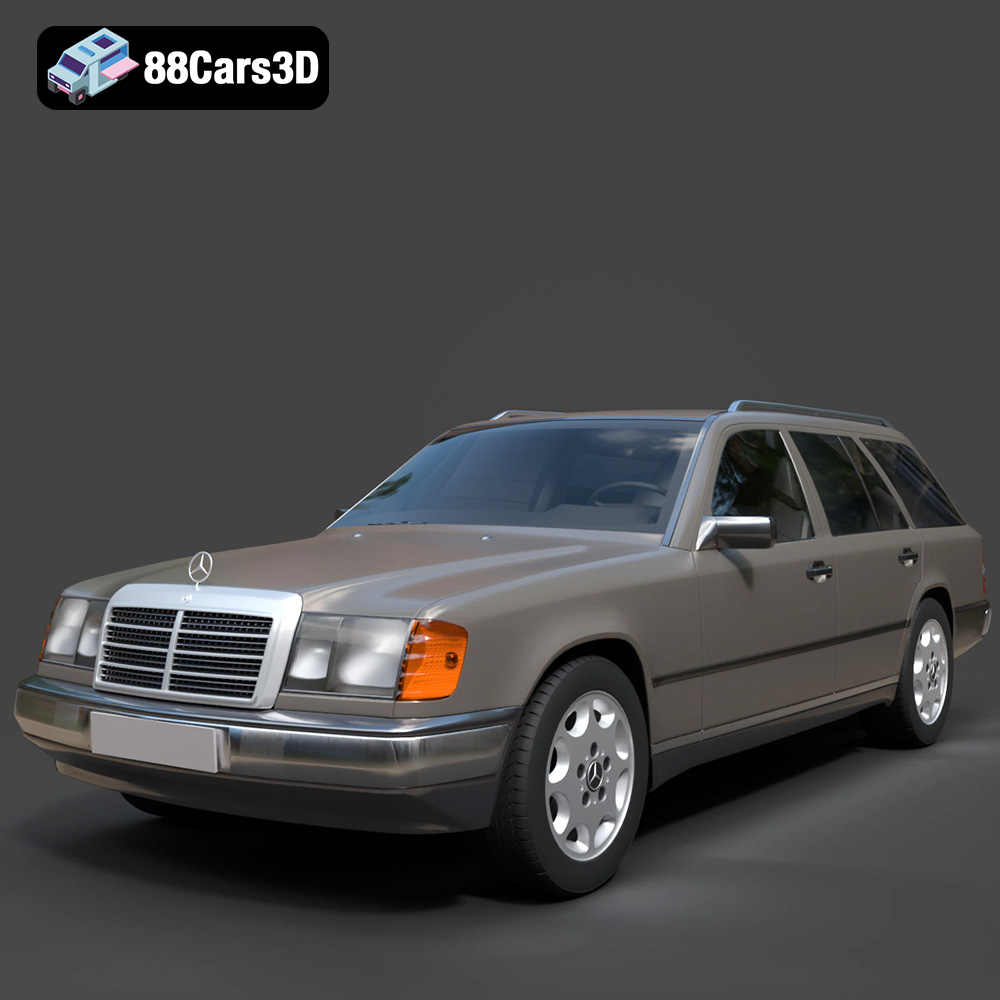
Mercedes E-Class w124 Kombi 3D Model
Texture: Yes
Material: Yes
Download the Mercedes E-Class w124 Kombi 3D Model featuring clean geometry, realistic detailing, and a fully modeled interior. Includes .blend, .fbx, .obj, .glb, .stl, .ply, .unreal, and .max formats for rendering, simulation, and game development.
Price: $38.99
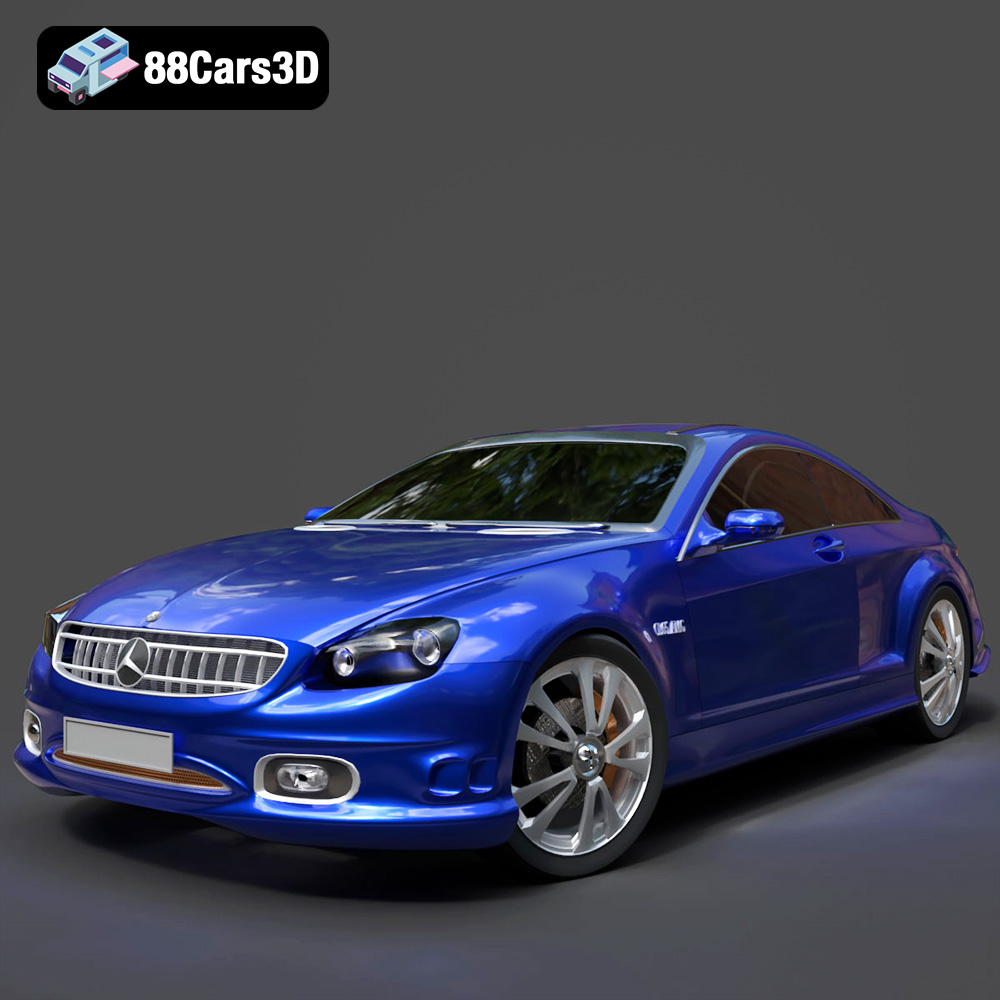
Mercedes-Benz CL6540-005 3D Model
Texture: Yes
Material: Yes
Download the Mercedes-Benz CL6540-005 3D Model featuring clean geometry, realistic detailing, and a fully modeled interior. Includes .blend, .fbx, .obj, .glb, .stl, .ply, .unreal, and .max formats for rendering, simulation, and game development.
Price: $38.99
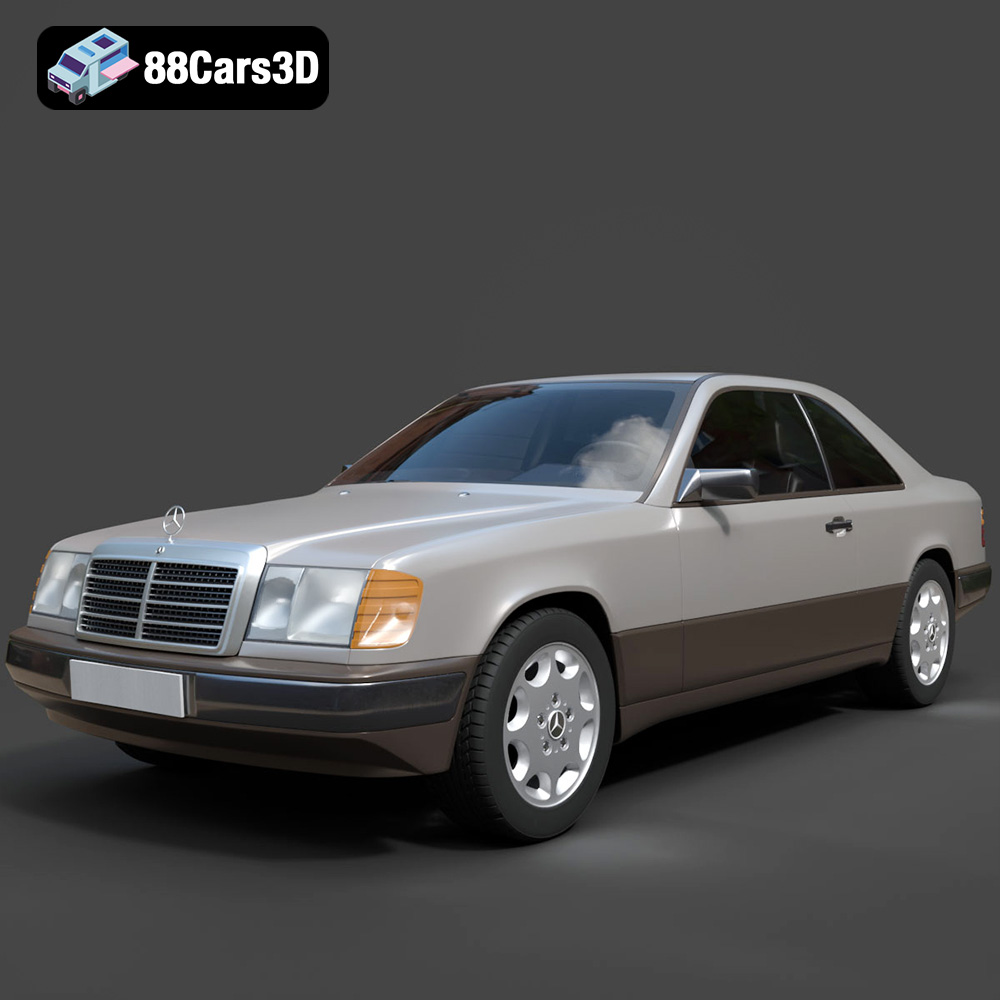
Mercedes E-Class w124 Coupe 3D Model
Texture: Yes
Material: Yes
Download the Mercedes E-Class w124 Coupe 3D Model featuring clean geometry, realistic detailing, and a fully modeled interior. Includes .blend, .fbx, .obj, .glb, .stl, .ply, .unreal, and .max formats for rendering, simulation, and game development.
Price: $38.99
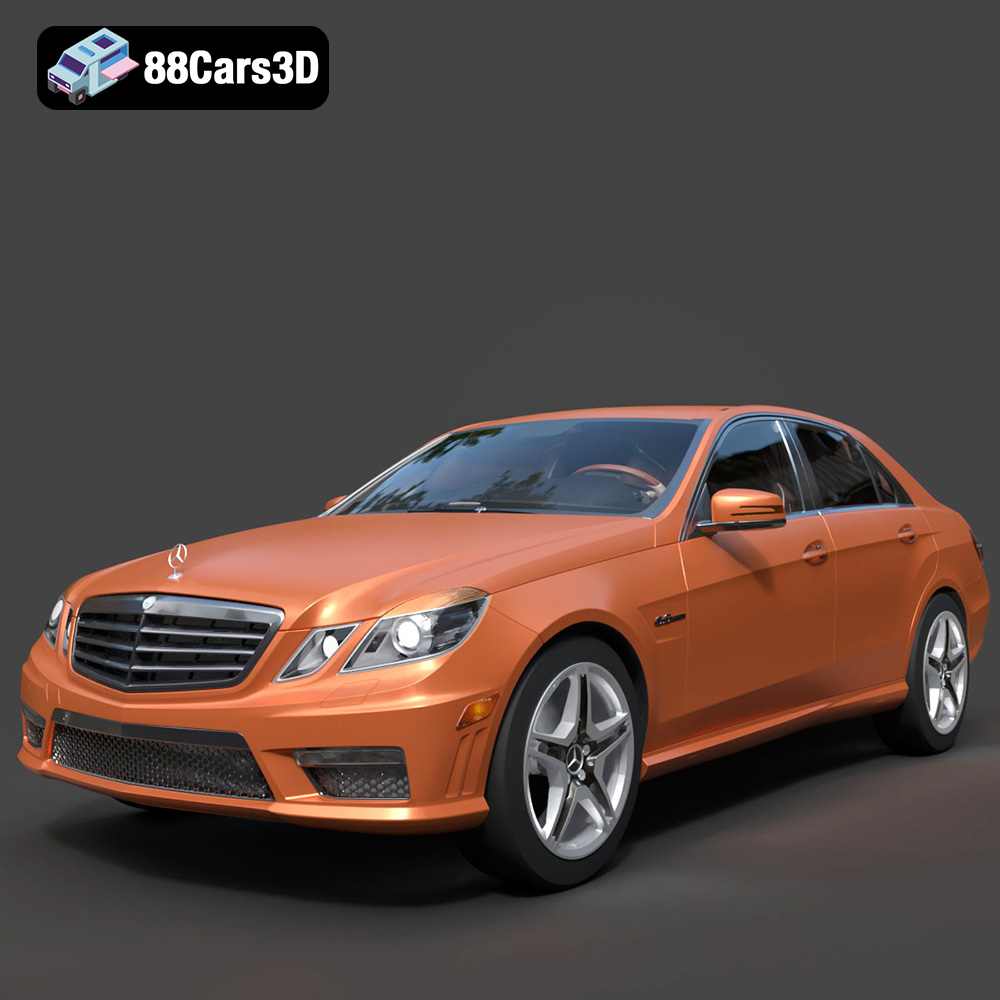
Mercedes-Benz E-Klasse 63 AMG 3D Model
Texture: Yes
Material: Yes
Download the Mercedes-Benz E-Klasse 63 AMG 3D Model featuring clean geometry, realistic detailing, and a fully modeled interior. Includes .blend, .fbx, .obj, .glb, .stl, .ply, .unreal, and .max formats for rendering, simulation, and game development.
Price: $38.99
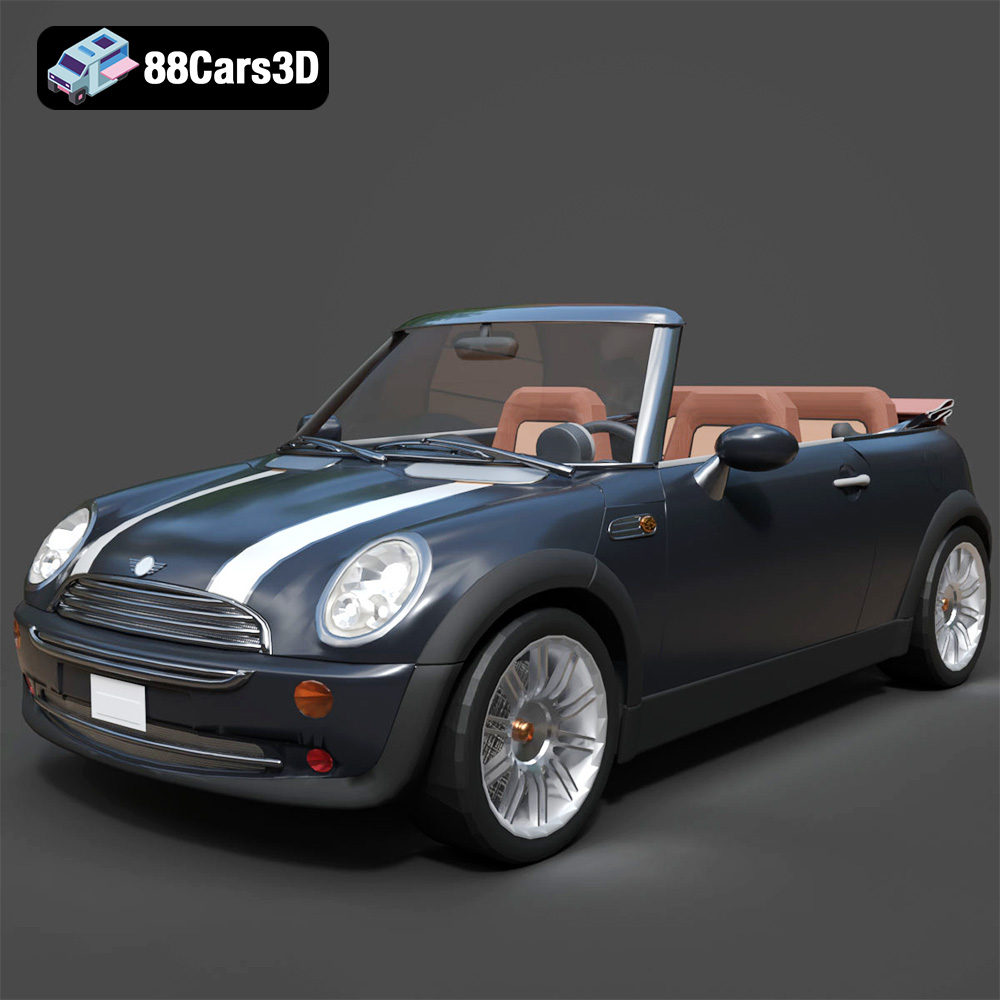
Mini Cabrio 2025 3D Model
Texture: Yes
Material: Yes
Download the Mini Cabrio 2025 3D Model featuring clean geometry, realistic detailing, and a fully modeled interior. Includes .blend, .fbx, .obj, .glb, .stl, .ply, .unreal, and .max formats for rendering, simulation, and game development.
Price: $38.99
