Unreal Engine 5 Photorealism: Mastering High-End 3D Automotive Models for Cinematic Renders
Unreal Engine 5 Photorealism: Mastering High-End 3D Automotive Models for Cinematic Renders
The quest for photorealism in digital automotive visualization has always pushed the boundaries of technology. For years, achieving truly breathtaking, cinematic quality renders required offline renderers with excruciatingly long render times. Today, however, Unreal Engine 5 stands as a revolutionary platform, empowering artists and designers to create stunning, interactive, and fully photorealistic automotive experiences in real-time. But translating high-end 3D automotive models into these hyperrealistic scenes, especially for film-quality output, presents a unique set of challenges.
This deep dive will guide you through the essential techniques and best practices to unlock Unreal Engine 5’s full potential for automotive visualization. We’ll explore how to leverage its cutting-edge features – from intelligent geometry management to advanced lighting and post-processing – ensuring your high-poly car models shine with unparalleled realism. Whether you’re an automotive designer, a game developer, or a 3D artist aiming for top-tier cinematic vehicle rendering UE5, mastering these workflows is key to creating unforgettable visuals.
The Foundation: Importing and Preparing High-Poly Car Models
The journey to photorealistic automotive renders begins with a meticulously crafted 3D model. Sourcing high-quality assets, like those found at 88cars3d.com, provides a solid foundation. Once you have your detailed model, proper preparation and import are crucial for Unreal Engine 5’s advanced features to work their magic.
Initial import considerations include ensuring correct scale and units, typically handled via FBX export from your modeling software. It’s vital that your geometry is clean, with proper UV unwrapping for texture application, and sensible material assignments for ease of setup within UE5.
Leveraging Nanite for Unprecedented Detail
One of Unreal Engine 5’s most groundbreaking features is Nanite virtualized geometry. This technology fundamentally changes how high-poly models are handled, allowing artists to import film-quality assets with millions or even billions of polygons without the traditional performance bottlenecks. For high-poly car model optimization, Nanite is a game-changer.
To enable Nanite, simply select your static mesh in the Content Browser, right-click, and choose “Nanite” > “Enable Nanite.” Unreal Engine 5 automatically processes the mesh, creating a highly optimized, streaming representation. This means your intricate car body panels, detailed engine components, and complex interior elements can all retain their geometric fidelity, contributing immensely to realistic automotive visualization Unreal projects.
While Nanite excels with opaque, static meshes, certain types of geometry might not be ideal candidates. Meshes with extensive transparency (like windshields or complex glass elements) or those requiring deformation (such as flexible tire sidewalls in a simulation) may still perform better as standard static meshes. However, for the vast majority of a high-end automotive model, Nanite is your go-to for preserving detail and boosting performance.
Mastering the Unreal Engine 5 PBR Workflow for Automotive Materials
Achieving convincing photorealism hinges heavily on realistic materials. Unreal Engine 5’s Physically Based Rendering (PBR) workflow is designed to accurately simulate how light interacts with surfaces in the real world. Understanding and correctly implementing the Unreal Engine 5 PBR workflow is paramount for your automotive models.
Every material in a PBR setup relies on several key texture maps: Base Color (albedo), Metallic, Roughness, Normal, and optionally Ambient Occlusion (AO). These maps tell the engine about the inherent color of the surface, whether it’s a metal or dielectric, how smooth or rough it is, and its fine surface details.
Crafting Realistic Car Paint Shaders
Car paint is one of the most complex materials to replicate due to its layered nature and unique metallic flake properties. A typical automotive paint shader involves multiple layers: a base coat (color and metallic flakes), and a clear coat (glossy, reflective protection).
Start by creating a master material that incorporates these layers. The Base Color map defines the primary hue. The Metallic map determines if the surface is a metal (white) or not (black); for car paint, the base coat will have metallic properties, while the clear coat will be non-metallic. The Roughness map is crucial: a very low roughness value (darker shades) for the clear coat simulates its mirror-like shine, while the base coat might have slightly higher roughness to scatter light from its metallic flakes.
For anisotropic reflections, often seen on brushed metals or specific car paint finishes, consider using specialized shader nodes or texture maps that direct reflections in a particular direction. This adds another layer of realism to your automotive visualization Unreal projects, mimicking how light stretches across curved, brushed surfaces.
Detailing Interiors and Tires
Beyond the exterior, the interior and tires demand equal attention to detail. Leather, plastic, and fabric materials require specific PBR setups. For leather, use a Base Color that captures its hue, a slightly higher Roughness map to simulate its texture and subtle imperfections, and a Normal map for its fine grain. Plastics might vary in roughness from matte to semi-gloss, often requiring subtle Normal maps for injection molding lines.
Tires are another critical component. A robust tire shader will leverage a dark Base Color, a moderate to high Roughness value (depending on wear and compound), and an extremely detailed Normal or even Displacement map to accurately represent the tread patterns. Worn tires will also benefit from localized roughness variations and subtle dust accumulation. Focusing on these nuanced material details contributes significantly to the overall realism of your cinematic vehicle rendering UE5 scenes.
Illuminating Your Scene: Lumen, HDRI, and Real-Time Ray Tracing
Lighting is the ultimate sculptor of photorealism. Without accurate and dynamic illumination, even the most detailed models and materials will fall flat. Unreal Engine 5 offers a powerful suite of lighting tools, including Lumen, HDRI environments, and real-time ray tracing, to bring your automotive scenes to life.
Optimizing Lumen Global Illumination Setup
Lumen is Unreal Engine 5’s dynamic global illumination and reflection system. It calculates indirect lighting bounces and reflections in real-time, drastically reducing the need for traditional light baking. For automotive visualization Unreal, Lumen provides incredibly realistic ambient light and color bleed that reacts instantly to changes in the scene.
To optimize your Lumen global illumination setup, navigate to Project Settings > Engine > Rendering and ensure “Global Illumination” and “Reflections” are set to “Lumen.” Within your Post Process Volume, you can further fine-tune Lumen settings. Experiment with “Final Gather Quality” and “Software Ray Tracing Quality” to balance visual fidelity with performance. Higher settings will yield more accurate indirect lighting but come at a performance cost. For cinematic renders, pushing these values typically provides superior results.
Ensure your scene has a proper light source – a directional light for the sun, and perhaps skylight for ambient light – as Lumen primarily calculates the bounces from these initial sources.
Harnessing HDRI Lighting Automotive Environments
High Dynamic Range Images (HDRIs) are indispensable for realistic outdoor and studio lighting. An HDRI captures a full 360-degree panoramic image with a vast range of light intensities, which Unreal Engine 5 can use to illuminate your scene. This provides incredibly natural and coherent lighting, complete with realistic reflections on your car’s glossy surfaces.
To use HDRI lighting automotive, import a high-quality HDRI texture into your project. Then, in your level, drag in an “HDRI Backdrop” actor. Assign your imported HDRI texture to it. This will create a background environment and simultaneously light your scene with its captured light information. For even more control, you can also use a “Sky Light” actor and assign the HDRI texture to its “Source Cubemap.”
Properly orienting your HDRI is critical. Rotate the HDRI Backdrop or Sky Light to match the desired sun direction from your directional light, ensuring shadows cast correctly and reflections align with the environment. This creates a cohesive and believable lighting setup for your cinematic vehicle rendering UE5 projects.
Elevating Realism with Real-Time Ray Tracing Cars
For the ultimate in visual fidelity, enabling hardware-accelerated real-time ray tracing in Unreal Engine 5 is essential. Ray tracing provides incredibly accurate reflections, shadows, ambient occlusion, and global illumination that are computationally intensive but visually stunning. When rendering real-time ray tracing cars, the difference is immediately apparent.
To activate ray tracing, go to Project Settings > Engine > Rendering and enable “Ray Tracing.” You may also need to restart the engine. Once enabled, adjust the ray tracing settings within your Post Process Volume for reflections, shadows, and ambient occlusion. Ray-traced reflections, in particular, are transformative for metallic and glossy car surfaces, accurately reflecting the surrounding environment with physically correct behavior.
For transparent materials like glass, headlights, and tail lights, ray tracing significantly improves their realism by correctly simulating refraction and internal reflections. While ray tracing demands powerful hardware, for high-end cinematic output, the visual benefits are well worth the investment, pushing your automotive visualization Unreal projects to new heights.
Cinematic Camera and Post-Processing for a Film-Quality Finish
A photorealistic render isn’t just about the assets and lighting; it’s also about how you present them. Mastering cinematic camera techniques and applying intelligent post-processing can transform a great render into a truly film-quality image.
Crafting Dynamic Shots with the Cine Camera Actor
The Cine Camera Actor in Unreal Engine 5 is designed to mimic real-world film cameras, offering controls for focal length, aperture (depth of field), and filmback settings. These controls are crucial for achieving that authentic cinematic look in your cinematic vehicle rendering UE5.
* Focal Length: Experiment with different focal lengths to control perspective distortion. Wider lenses (e.g., 20-35mm) exaggerate perspective, making cars look powerful and dynamic, while longer lenses (e.g., 85mm-135mm) compress perspective, ideal for close-ups and more intimate shots.
* Aperture (f-stop): Adjusting the aperture controls the depth of field. A lower f-stop (e.g., f/2.8) creates a shallow depth of field, blurring the background and drawing focus to your car, while a higher f-stop (e.g., f/11) keeps more of the scene in focus.
* Filmback: Match your filmback settings to common cinematic formats for a professional aspect ratio and field of view.
Beyond technical settings, apply cinematic composition principles like the rule of thirds, leading lines, and dynamic angles to create visually engaging and impactful shots.
Fine-Tuning with Post-Process Volume
The Post Process Volume is your final stop for color grading and visual effects, allowing you to fine-tune the look of your render without altering individual assets. This is where you apply the polish that elevates your automotive visualization Unreal projects.
Key settings to adjust include:
* Exposure: Ensure your scene is neither over- nor underexposed.
* Color Grading: Adjust white balance, color saturation, contrast, and apply tints to achieve a specific mood or aesthetic. Look-Up Tables (LUTs) can also be used for quick and consistent color grading.
* Bloom: Adds a soft glow to bright areas, simulating light scattering in a camera lens. Use sparingly to avoid an overblown look.
* Lens Flares and Dirt Mask: These add subtle imperfections and optical effects, enhancing realism.
* Vignette: Darkens the edges of the frame, subtly drawing attention to the center.
* Film Grain & Chromatic Aberration: Used lightly, these can add a tactile, filmic quality to your renders.
Remember, less is often more with post-processing. The goal is to enhance, not overpower, the natural beauty of your high-end 3D automotive models.
Workflow Optimization and Performance for High-End Automotive Assets
Working with high-fidelity automotive models and complex Unreal Engine 5 features can be demanding. An optimized workflow and attention to performance are critical to maintaining productivity and achieving smooth real-time performance, even for cinematic renders.
Efficient Asset Integration and Management
A well-organized project is a performant project. Establish clear naming conventions for all your assets (meshes, materials, textures, blueprints) and maintain a logical folder structure. This makes it easy to navigate, update, and collaborate on your projects.
For integrating complex CAD data, Unreal Engine’s Datasmith plugin is invaluable. It efficiently imports entire scenes, including geometry, materials, and hierarchies, from various CAD and DCC applications, significantly streamlining the process of getting high-quality models into UE5. Remember that resources like 88cars3d.com provide models specifically optimized for integration, helping you jump straight into rendering.
Performance Best Practices
Even with Nanite and Lumen, understanding performance bottlenecks is important. Unreal Engine’s profiling tools like `Stat GPU` and `Stat RHI` (accessed via the console by pressing `~`) provide detailed information on where your GPU and CPU time is being spent.
While Nanite handles geometry effectively, for non-Nanite meshes or assets further away, consider implementing Levels of Detail (LODs). This swaps out high-polygon meshes for lower-polygon versions at a distance, saving render resources. Though Lumen reduces the need for baked lighting, for static elements in environments, lightmaps can still offer minor performance advantages if meticulously managed.
Finally, utilize culling volumes and distance fields. Culling volumes prevent the engine from rendering geometry outside a specific area, while distance fields provide efficient ambient occlusion and global illumination for static objects. These small optimizations cumulatively contribute to a smoother experience, especially when dealing with multiple high-poly car model optimization efforts in complex environments.
Conclusion
Unreal Engine 5 has truly democratized photorealism, bringing cinematic-quality automotive visualization Unreal projects within reach for artists, designers, and developers alike. By mastering the Unreal Engine 5 PBR workflow, leveraging Nanite virtualized geometry, optimizing Lumen global illumination setup, and harnessing the power of HDRI lighting automotive scenes and real-time ray tracing cars, you can transform high-end 3D automotive models into breathtaking cinematic renders.
The journey to photorealism is a blend of technical expertise and artistic vision. Experiment with these techniques, push the boundaries of what’s possible, and watch your automotive designs come to life with unparalleled realism. To kickstart your next cinematic vehicle rendering UE5 project with top-tier assets, explore the extensive collection of high-quality 3D automotive models available at 88cars3d.com. Your next masterpiece awaits!
Featured 3D Car Models

Suzuki SX4-002 3D Model
Texture: Yes
Material: Yes
Download the Suzuki SX4-002 3D Model featuring clean geometry, realistic detailing, and a fully modeled interior. Includes .blend, .fbx, .obj, .glb, .stl, .ply, .unreal, and .max formats for rendering, simulation, and game development.
Price: $10

Tesla Model S 2024 3D Model
Texture: Yes
Material: Yes
Download the Tesla Model S 2024 3D Model featuring clean geometry, realistic detailing, and a fully modeled interior. Includes .blend, .fbx, .obj, .glb, .stl, .ply, .unreal, and .max formats for rendering, simulation, and game development.
Price: $10

Subaru Impreza WRX STi-002 3D Model
Texture: Yes
Material: Yes
Download the Subaru Impreza WRX STi-002 3D Model featuring clean geometry, realistic detailing, and a fully modeled interior. Includes .blend, .fbx, .obj, .glb, .stl, .ply, .unreal, and .max formats for rendering, simulation, and game development.
Price: $10

Toyota Mark II (X100) 1998 3D Model
Texture: Yes
Material: Yes
Download the Toyota Mark II (X100) 3D Model featuring clean geometry, realistic detailing, and a fully modeled interior. Includes .blend, .fbx, .obj, .glb, .stl, .ply, .unreal, and .max formats for rendering, simulation, and game development.
Price: $10

Toyota Corona 1985 3D Model
Texture: Yes
Material: Yes
Download the Toyota Corona 1985 3D Model featuring clean geometry, realistic detailing, and a fully modeled interior. Includes .blend, .fbx, .obj, .glb, .stl, .ply, .unreal, and .max formats for rendering, simulation, and game development.
Price: $10

Toyota Mark II X81 1990 3D Model
Texture: Yes
Material: Yes
Download the Toyota Mark II X81 1990 3D Model featuring clean geometry, realistic detailing, and a fully modeled interior. Includes .blend, .fbx, .obj, .glb, .stl, .ply, .unreal, and .max formats for rendering, simulation, and game development.
Price: $10

Toyota iQ EV 2012 3D Model
Texture: Yes
Material: Yes
Download the Toyota iQ EV 2012 3D Model featuring clean geometry, realistic detailing, and a fully modeled interior. Includes .blend, .fbx, .obj, .glb, .stl, .ply, .unreal, and .max formats for rendering, simulation, and game development.
Price: $10

Toyota Aygo 2013 3D Model
Texture: Yes
Material: Yes
Download the Toyota Aygo 2013 3D Model featuring clean geometry, realistic detailing, and a fully modeled interior. Includes .blend, .fbx, .obj, .glb, .stl, .ply, .unreal, and .max formats for rendering, simulation, and game development.
Price: $10

Toyota Crown S180 2005 3D Model
Texture: Yes
Material: Yes
Download the Toyota Crown S180 2005 3D Model featuring clean geometry, realistic detailing, and a fully modeled interior. Includes .blend, .fbx, .obj, .glb, .stl, .ply, .unreal, and .max formats for rendering, simulation, and game development.
Price: $10

Toyota Celica 2004 3D Model
Texture: Yes
Material: Yes
Download the Toyota Celica 2004 3D Model featuring clean geometry, realistic detailing, and a fully modeled interior. Includes .blend, .fbx, .obj, .glb, .stl, .ply, .unreal, and .max formats for rendering, simulation, and game development.
Price: $10

Toyota Corolla AE100 1992 3D Model
Texture: Yes
Material: Yes
Download the Toyota Corolla AE100 1992 3D Model featuring clean geometry, realistic detailing, and a fully modeled interior. Includes .blend, .fbx, .obj, .glb, .stl, .ply, .unreal, and .max formats for rendering, simulation, and game development.
Price: $10

Toyota Mark II X110 2000 3D Model
Texture: Yes
Material: Yes
Download the Toyota Mark II X110 2000 3D Model featuring clean geometry, realistic detailing, and a fully modeled interior. Includes .blend, .fbx, .obj, .glb, .stl, .ply, .unreal, and .max formats for rendering, simulation, and game development.
Price: $10

Toyota Corolla 2020 3D Model
Texture: Yes
Material: Yes
Download the Toyota Corolla 2020 3D Model featuring clean geometry, realistic detailing, and a fully modeled interior. Includes .blend, .fbx, .obj, .glb, .stl, .ply, .unreal, and .max formats for rendering, simulation, and game development.
Price: $10

Toyota Yaris 2020 3D Model
Texture: Yes
Material: Yes
Download the Toyota Yaris 2020 3D Model featuring clean geometry, realistic detailing, and a fully modeled interior. Includes .blend, .fbx, .obj, .glb, .stl, .ply, .unreal, and .max formats for rendering, simulation, and game development.
Price: $9.9

Volkswagen Beetle 2012 3D Model
Texture: Yes
Material: Yes
Download the Volkswagen Beetle 2012 3D Model featuring clean geometry, realistic detailing, and a fully modeled interior. Includes .blend, .fbx, .obj, .glb, .stl, .ply, .unreal, and .max formats for rendering, simulation, and game development.
Price: $9.9

Toyota Matrix 2005 3D Model
Texture: Yes
Material: Yes
Download the Toyota Matrix 2005 3D Model featuring clean geometry, realistic detailing, and a fully modeled interior. Includes .blend, .fbx, .obj, .glb, .stl, .ply, .unreal, and .max formats for rendering, simulation, and game development.
Price: $9.9

Toyota Yaris Sedan 3D Model
Texture: Yes
Material: Yes
Download the Toyota Yaris Sedan 3D Model featuring clean geometry, realistic detailing, and a fully modeled interior. Includes .blend, .fbx, .obj, .glb, .stl, .ply, .unreal, and .max formats for rendering, simulation, and game development.
Price: $9.9

Volkswagen Golf R-004 2024 3D Model
Texture: Yes
Material: Yes
Download the Volkswagen Golf R-004 2024 3D Model featuring clean geometry, realistic detailing, and a fully modeled interior. Includes .blend, .fbx, .obj, .glb, .stl, .ply, .unreal, and .max formats for rendering, simulation, and game development.
Price: $9.9

Volkswagen Golf 5 Door 2010 3D Model
Texture: Yes
Material: Yes
Download the Volkswagen Golf 5 Door 2010 3D Model featuring clean geometry, realistic detailing, and a fully modeled interior. Includes .blend, .fbx, .obj, .glb, .stl, .ply, .unreal, and .max formats for rendering, simulation, and game development.
Price: $9.9

Toyota Premio 2010 3D Model
Texture: Yes
Material: Yes
Download the Toyota Premio 2010 3D Model featuring clean geometry, realistic detailing, and a fully modeled interior. Includes .blend, .fbx, .obj, .glb, .stl, .ply, .unreal, and .max formats for rendering, simulation, and game development.
Price: $9.9

Toyota Opa 2000 3D Model
Texture: Yes
Material: Yes
Download the Toyota Opa 2000 3D Model featuring clean geometry, realistic detailing, and a fully modeled interior. Includes .blend, .fbx, .obj, .glb, .stl, .ply, .unreal, and .max formats for rendering, simulation, and game development.
Price: $9.9

Volkswagen Polo 5 Door 2010 3D Model
Texture: Yes
Material: Yes
Download the Volkswagen Polo 5 Door 2010 3D Model featuring clean geometry, realistic detailing, and a fully modeled interior. Includes .blend, .fbx, .obj, .glb, .stl, .ply, .unreal, and .max formats for rendering, simulation, and game development.
Price: $9.9

Toyota Prius 2024 3D Model
Texture: Yes
Material: Yes
Download the Toyota Prius 2024 3D Model featuring clean geometry, realistic detailing, and a fully modeled interior. Includes .blend, .fbx, .obj, .glb, .stl, .ply, .unreal, and .max formats for rendering, simulation, and game development.
Price: $9.9

Toyota Yaris 1999 3D Model
Texture: Yes
Material: Yes
Download the Toyota Yaris 1999 3D Model featuring clean geometry, realistic detailing, and a fully modeled interior. Includes .blend, .fbx, .obj, .glb, .stl, .ply, .unreal, and .max formats for rendering, simulation, and game development.
Price: $9.9

Toyota Supra 2020 3D Model
Texture: Yes
Material: Yes
Download the Toyota Supra 2020 3D Model featuring clean geometry, realistic detailing, and a fully modeled interior. Includes .blend, .fbx, .obj, .glb, .stl, .ply, .unreal, and .max formats for rendering, simulation, and game development.
Price: $9.9

Volkswagen New Beetle 2000 3D Model
Texture: Yes
Material: Yes
Download the Volkswagen New Beetle 2000 3D Model featuring clean geometry, realistic detailing, and a fully modeled interior. Includes .blend, .fbx, .obj, .glb, .stl, .ply, .unreal, and .max formats for rendering, simulation, and game development.
Price: $14.99

Volkswagen Jetta 2005 3D Model
Texture: Yes
Material: Yes
Download the Volkswagen Jetta 2005 3D Model featuring clean geometry, realistic detailing, and a fully modeled interior. Includes .blend, .fbx, .obj, .glb, .stl, .ply, .unreal, and .max formats for rendering, simulation, and game development.
Price: $18.99

Volkswagen Golf 3-Door 3D Model
Texture: Yes
Material: Yes
Download the Volkswagen Golf 3-Door 3D Model featuring clean geometry, realistic detailing, and a fully modeled interior. Includes .blend, .fbx, .obj, .glb, .stl, .ply, .unreal, and .max formats for rendering, simulation, and game development.
Price: $14.99

Volvo V70 2005 3D Model
Texture: Yes
Material: Yes
Download the Volvo V70 2005 3D Model featuring clean geometry, realistic detailing, and a fully modeled interior. Includes .blend, .fbx, .obj, .glb, .stl, .ply, .unreal, and .max formats for rendering, simulation, and game development.
Price: $14.99

Volkswagen Bora 2004 3D Model
Texture: Yes
Material: Yes
Download the Volkswagen Bora 2004 3D Model featuring clean geometry, realistic detailing, and a fully modeled interior. Includes .blend, .fbx, .obj, .glb, .stl, .ply, .unreal, and .max formats for rendering, simulation, and game development.
Price: $14.99

Volkswagen Lupo 3D Model
Texture: Yes
Material: Yes
Download the Volkswagen Lupo 3D Model featuring clean geometry, realistic detailing, and a fully modeled interior. Includes .blend, .fbx, .obj, .glb, .stl, .ply, .unreal, and .max formats for rendering, simulation, and game development.
Price: $19.99

Volkswagen Passat B5 2000 3D Model
Texture: Yes
Material: Yes
Download the Volkswagen Passat B5 2000 3D Model featuring clean geometry, realistic detailing, and a fully modeled interior. Includes .blend, .fbx, .obj, .glb, .stl, .ply, .unreal, and .max formats for rendering, simulation, and game development.
Price: $19.99

Volkswagen Passat CC 3D Model
Texture: Yes
Material: Yes
Download the Volkswagen Passat CC 3D Model featuring clean geometry, realistic detailing, and a fully modeled interior. Includes .blend, .fbx, .obj, .glb, .stl, .ply, .unreal, and .max formats for rendering, simulation, and game development.
Price: $19.99

Volkswagen Golf V 2006 3D Model
Texture: Yes
Material: Yes
Download the Volkswagen Golf V 2006 3D Model featuring clean geometry, realistic detailing, and a fully modeled interior. Includes .blend, .fbx, .obj, .glb, .stl, .ply, .unreal, and .max formats for rendering, simulation, and game development.
Price: $19.99

Volvo S60 R-Design 2024 3D Model
Texture: Yes
Material: Yes
Download the Volvo S60 R-Design 3D Model featuring clean geometry, realistic detailing, and a fully modeled interior. Includes .blend, .fbx, .obj, .glb, .stl, .ply, .unreal, and .max formats for rendering, simulation, and game development.
Price: $19.99

Volkswagen Passat 2025 3D Model
Texture: Yes
Material: Yes
Download the Volkswagen Passat 2025 3D Model featuring clean geometry, realistic detailing, and a fully modeled interior. Includes .blend, .fbx, .obj, .glb, .stl, .ply, .unreal, and .max formats for rendering, simulation, and game development.
Price: $25.99

Volkswagen Passat Variant B6 2005 3D Model
Texture: Yes
Material: Yes
Download the Volkswagen Passat Variant B6 2005 3D Model featuring clean geometry, realistic detailing, and a fully modeled interior. Includes .blend, .fbx, .obj, .glb, .stl, .ply, .unreal, and .max formats for rendering, simulation, and game development.
Price: $25.99

Volkswagen Phaeton W12 2004 3D Model
Texture: Yes
Material: Yes
Download the Volkswagen Phaeton W12 2004 3D Model featuring clean geometry, realistic detailing, and a fully modeled interior. Includes .blend, .fbx, .obj, .glb, .stl, .ply, .unreal, and .max formats for rendering, simulation, and game development.
Price: $25.99

Volkswagen Scirocco 2015 3D Model
Texture: Yes
Material: Yes
Download the Volkswagen Scirocco 2015 3D Model featuring clean geometry, realistic detailing, and a fully modeled interior. Includes .blend, .fbx, .obj, .glb, .stl, .ply, .unreal, and .max formats for rendering, simulation, and game development.
Price: $25.99

Volvo S60 2024 3D Model
Texture: Yes
Material: Yes
Download the Volvo S60 2024 3D Model featuring clean geometry, realistic detailing, and a fully modeled interior. Includes .blend, .fbx, .obj, .glb, .stl, .ply, .unreal, and .max formats for rendering, simulation, and game development.
Price: $25.99

Volkswagen Polo 3D Model
Texture: Yes
Material: Yes
Download the Volkswagen Polo 3D Model featuring clean geometry, realistic detailing, and a fully modeled interior. Includes .blend, .fbx, .obj, .glb, .stl, .ply, .unreal, and .max formats for rendering, simulation, and game development.
Price: $25.99

Volkswagen Golf 5-Doors 2018 3D Model
Texture: Yes
Material: Yes
Download the Volkswagen Golf 5-Doors 3D Model featuring clean geometry, realistic detailing, and a fully modeled interior. Includes .blend, .fbx, .obj, .glb, .stl, .ply, .unreal, and .max formats for rendering, simulation, and game development.
Price: $25.99

Volvo C70 T5 2000 3D Model
Texture: Yes
Material: Yes
Download the Volvo C70 T5 2000 3D Model featuring clean geometry, realistic detailing, and a fully modeled interior. Includes .blend, .fbx, .obj, .glb, .stl, .ply, .unreal, and .max formats for rendering, simulation, and game development.
Price: $23.99

Volvo S40 Sedan 2004 3D Model
Texture: Yes
Material: Yes
Download the Volvo S40 Sedan 2004 3D Model featuring clean geometry, realistic detailing, and a fully modeled interior. Includes .blend, .fbx, .obj, .glb, .stl, .ply, .unreal, and .max formats for rendering, simulation, and game development.
Price: $23.99

Volvo C30 BEV 2012 3D Model
Texture: Yes
Material: Yes
Download the Volvo C30 BEV 2012 3D Model featuring clean geometry, realistic detailing, and a fully modeled interior. Includes .blend, .fbx, .obj, .glb, .stl, .ply, .unreal, and .max formats for rendering, simulation, and game development.
Price: $23.99

Volvo C70 1998 3D Model
Texture: Yes
Material: Yes
Download the Volvo C70 1998 3D Model featuring clean geometry, realistic detailing, and a fully modeled interior. Includes .blend, .fbx, .obj, .glb, .stl, .ply, .unreal, and .max formats for rendering, simulation, and game development.
Price: $23.99

Mazda B-Series 3D Model
Texture: Yes
Material: Yes
Download the Mazda B-Series 3D Model featuring clean geometry, realistic detailing, and a fully modeled interior. Includes .blend, .fbx, .obj, .glb, .stl, .ply, .unreal, and .max formats for rendering, simulation, and game development.
Price: $23.99

Mercsedes Benz Z3-006 3D Model
Texture: Yes
Material: Yes
Download the Mercsedes Benz Z3-006 3D Model featuring clean geometry, realistic detailing, and a fully modeled interior. Includes .blend, .fbx, .obj, .glb, .stl, .ply, .unreal, and .max formats for rendering, simulation, and game development.
Price: $23.99

Mazda RX-7 3D Model
Texture: Yes
Material: Yes
Download the Mazda RX-7 3D Model featuring clean geometry, realistic detailing, and a fully modeled interior. Includes .blend, .fbx, .obj, .glb, .stl, .ply, .unreal, and .max formats for rendering, simulation, and game development.
Price: $23.99

Volvo VCC-003 3D Model
Texture: Yes
Material: Yes
Download the Volvo VCC-003 3D Model featuring clean geometry, realistic detailing, and a fully modeled interior. Includes .blend, .fbx, .obj, .glb, .stl, .ply, .unreal, and .max formats for rendering, simulation, and game development.
Price: $23.99

Mercedes-Benz SLR McLaren 2005 3D Model
Texture: Yes
Material: Yes
Download the Mercedes-Benz SLR McLaren 2005 3D Model featuring clean geometry, realistic detailing, and a fully modeled interior. Includes .blend, .fbx, .obj, .glb, .stl, .ply, .unreal, and .max formats for rendering, simulation, and game development.
Price: $23.99

GAZ 3110 Pickup 2000 3D Model
Texture: Yes
Material: Yes
Download the GAZ 3110 Pickup 3D Model featuring clean geometry, realistic detailing, and a fully modeled interior. Includes .blend, .fbx, .obj, .glb, .stl, .ply, .unreal, and .max formats for rendering, simulation, and game development.
Price: $23.99

Mazda 626 GF 1997 3D Model
Texture: Yes
Material: Yes
Download the Mazda 626 GF 1997 3D Model featuring clean geometry, realistic detailing, and a fully modeled interior. Includes .blend, .fbx, .obj, .glb, .stl, .ply, .unreal, and .max formats for rendering, simulation, and game development.
Price: $23.99

Volvo S80 2011 3D Model
Texture: Yes
Material: Yes
Download the Volvo S80 2011 3D Model featuring clean geometry, realistic detailing, and a fully modeled interior. Includes .blend, .fbx, .obj, .glb, .stl, .ply, .unreal, and .max formats for rendering, simulation, and game development.
Price: $23.99

Volkswagen Touran restyle-006 3D Model
Texture: Yes
Material: Yes
Download the Volkswagen Touran restyle-006 3D Model featuring clean geometry, realistic detailing, and a fully modeled interior. Includes .blend, .fbx, .obj, .glb, .stl, .ply, .unreal, and .max formats for rendering, simulation, and game development.
Price: $23.99

Skoda Octavia Scout 3D Model
Texture: Yes
Material: Yes
Download the Skoda Octavia Scout 3D Model featuring clean geometry, realistic detailing, and a fully modeled interior. Includes .blend, .fbx, .obj, .glb, .stl, .ply, .unreal, and .max formats for rendering, simulation, and game development.
Price: $23.99

Volkswagen Golf V 2006 3D Model
Texture: Yes
Material: Yes
Download the Volkswagen Golf V 2006 3D Model featuring clean geometry, realistic detailing, and a fully modeled interior. Includes .blend, .fbx, .obj, .glb, .stl, .ply, .unreal, and .max formats for rendering, simulation, and game development.
Price: $23.99

Mazda CX-7 3D Model
Texture: Yes
Material: Yes
Download the Mazda CX-7 3D Model featuring clean geometry, realistic detailing, and a fully modeled interior. Includes .blend, .fbx, .obj, .glb, .stl, .ply, .unreal, and .max formats for rendering, simulation, and game development.
Price: $23.99

Mazda Familia 3D Model
Texture: Yes
Material: Yes
Download the Mazda Familia 3D Model featuring clean geometry, realistic detailing, and a fully modeled interior. Includes .blend, .fbx, .obj, .glb, .stl, .ply, .unreal, and .max formats for rendering, simulation, and game development.
Price: $23.99

GAS 21 3D Model
Texture: Yes
Material: Yes
Download the GAS 21 3D Model featuring clean geometry, realistic detailing, and a fully modeled interior. Includes .blend, .fbx, .obj, .glb, .stl, .ply, .unreal, and .max formats for rendering, simulation, and game development.
Price: $23.99

Mercedes-Benz SL500 AMG (R129) 3D Model
Texture: Yes
Material: Yes
Download the Mercedes-Benz SL500 AMG (R129) 3D Model featuring clean geometry, realistic detailing, and a fully modeled interior. Includes .blend, .fbx, .obj, .glb, .stl, .ply, .unreal, and .max formats for rendering, simulation, and game development.
Price: $23.99

Mercedes-Benz S-Class W221 2005 3D Model
Texture: Yes
Material: Yes
Download the Mercedes-Benz S-Class W221 2005 3D Model featuring clean geometry, realistic detailing, and a fully modeled interior. Includes .blend, .fbx, .obj, .glb, .stl, .ply, .unreal, and .max formats for rendering, simulation, and game development.
Price: $23.99

Mercedes-Benz E-Class W212 2009 3D Model
Texture: Yes
Material: Yes
Download the Mercedes-Benz E-Class W212 2009 3D Model featuring clean geometry, realistic detailing, and a fully modeled interior. Includes .blend, .fbx, .obj, .glb, .stl, .ply, .unreal, and .max formats for rendering, simulation, and game development.
Price: $23.99

Mercedes-Benz E-class Estate S212 2009 3D Model
Texture: Yes
Material: Yes
Download the Mercedes-Benz E-class Estate S212 2009 3D Model featuring clean geometry, realistic detailing, and a fully modeled interior. Includes .blend, .fbx, .obj, .glb, .stl, .ply, .unreal, and .max formats for rendering, simulation, and game development.
Price: $23.99

Mercedes-Benz 190 W201 3D Model
Texture: Yes
Material: Yes
Download the Mercedes-Benz 190 W201 3D Model featuring clean geometry, realistic detailing, and a fully modeled interior. Includes .blend, .fbx, .obj, .glb, .stl, .ply, .unreal, and .max formats for rendering, simulation, and game development.
Price: $23.99

Mercedes-Benz C230 SportCoupé 2005 3D Model
Texture: Yes
Material: Yes
Download the Mercedes-Benz C230 SportCoupé 2005 3D Model featuring clean geometry, realistic detailing, and a fully modeled interior. Includes .blend, .fbx, .obj, .glb, .stl, .ply, .unreal, and .max formats for rendering, simulation, and game development.
Price: $23.99

Mercedes-Benz SLK 3D Model
Texture: Yes
Material: Yes
Download the Mercedes-Benz SLK 3D Model featuring clean geometry, realistic detailing, and a fully modeled interior. Includes .blend, .fbx, .obj, .glb, .stl, .ply, .unreal, and .max formats for rendering, simulation, and game development.
Price: $23.99

Mercedes 600 SEC W140 1992 3D Model
Texture: Yes
Material: Yes
Download the Mercedes 600 SEC W140 1992 3D Model featuring clean geometry, realistic detailing, and a fully modeled interior. Includes .blend, .fbx, .obj, .glb, .stl, .ply, .unreal, and .max formats for rendering, simulation, and game development.
Price: $23.99

Mercedes S-Class 2010 3D Model
Texture: Yes
Material: Yes
Download the Mercedes S-Class 2010 3D Model featuring clean geometry, realistic detailing, and a fully modeled interior. Includes .blend, .fbx, .obj, .glb, .stl, .ply, .unreal, and .max formats for rendering, simulation, and game development.
Price: $23.99

McLaren MP4-12C-001 3D Model
Texture: Yes
Material: Yes
Download the McLaren MP4-12C-001 3D Model featuring clean geometry, realistic detailing, and a fully modeled interior. Includes .blend, .fbx, .obj, .glb, .stl, .ply, .unreal, and .max formats for rendering, simulation, and game development.
Price: $23.99

Mercedes-Benz SLK 350 2005 3D Model
Texture: Yes
Material: Yes
Download the Mercedes-Benz SLK 350 2005 3D Model featuring clean geometry, realistic detailing, and a fully modeled interior. Includes .blend, .fbx, .obj, .glb, .stl, .ply, .unreal, and .max formats for rendering, simulation, and game development.
Price: $23.99

Mercedes-Benz SL 65 AMG 3D Model
Texture: Yes
Material: Yes
Download the Mercedes-Benz SL 65 AMG 3D Model featuring clean geometry, realistic detailing, and a fully modeled interior. Includes .blend, .fbx, .obj, .glb, .stl, .ply, .unreal, and .max formats for rendering, simulation, and game development.
Price: $23.99

Mercedes-Benz S500 3D Model
Texture: Yes
Material: Yes
Download the Mercedes-Benz S500 3D Model featuring clean geometry, realistic detailing, and a fully modeled interior. Includes .blend, .fbx, .obj, .glb, .stl, .ply, .unreal, and .max formats for rendering, simulation, and game development.
Price: $23.99

Mercedes-Benz S55 W220 AMG 1999 3D Model
Texture: Yes
Material: Yes
Download the Mercedes-Benz S55 W220 AMG 1999 3D Model featuring clean geometry, realistic detailing, and a fully modeled interior. Includes .blend, .fbx, .obj, .glb, .stl, .ply, .unreal, and .max formats for rendering, simulation, and game development.
Price: $23.99

Mercedes-Benz CLA45 AMG 2017 3D Model
Texture: Yes
Material: Yes
Download the Mercedes-Benz CLA45 AMG 2017 3D Model featuring clean geometry, realistic detailing, and a fully modeled interior. Includes .blend, .fbx, .obj, .glb, .stl, .ply, .unreal, and .max formats for rendering, simulation, and game development.
Price: $38.99

Mercedes-Benz CL65 C215 AMG 3D Model
Texture: Yes
Material: Yes
Download the Mercedes-Benz CL65 C215 AMG 3D Model featuring clean geometry, realistic detailing, and a fully modeled interior. Includes .blend, .fbx, .obj, .glb, .stl, .ply, .unreal, and .max formats for rendering, simulation, and game development.
Price: $23.99

Mercedes-Benz A45 2021 3D Model
Texture: Yes
Material: Yes
Download the Mercedes-Benz A45 2021 3D Model featuring clean geometry, realistic detailing, and a fully modeled interior. Includes .blend, .fbx, .obj, .glb, .stl, .ply, .unreal, and .max formats for rendering, simulation, and game development.
Price: $23.99

Mercedes-Benz 300SL 1955 3D Model
Texture: Yes
Material: Yes
Download the Mercedes-Benz 300SL 1955 3D Model featuring clean geometry, realistic detailing, and a fully modeled interior. Includes .blend, .fbx, .obj, .glb, .stl, .ply, .unreal, and .max formats for rendering, simulation, and game development.
Price: $23.99

Mercedes-Benz 190SL 1955 3D Model
Texture: Yes
Material: Yes
Download the Mercedes-Benz 190SL 1955 3D Model featuring clean geometry, realistic detailing, and a fully modeled interior. Includes .blend, .fbx, .obj, .glb, .stl, .ply, .unreal, and .max formats for rendering, simulation, and game development.
Price: $23.99

Mercedes-Benz W124 Brabus V12 3D Model
Texture: Yes
Material: Yes
Download the Mercedes-Benz W124 Brabus V12 3D Model featuring clean geometry, realistic detailing, and a fully modeled interior. Includes .blend, .fbx, .obj, .glb, .stl, .ply, .unreal, and .max formats for rendering, simulation, and game development.
Price: $23.99

Mercedes-Benz SLS AMG GT3-002 3D Model
Texture: Yes
Material: Yes
Download the Mercedes-Benz SLS AMG GT3-002 3D Model featuring clean geometry, realistic detailing, and a fully modeled interior. Includes .blend, .fbx, .obj, .glb, .stl, .ply, .unreal, and .max formats for rendering, simulation, and game development.
Price: $38.99

Mercedes-Benz C-Class-001 3D Model
Texture: Yes
Material: Yes
Download the Mercedes-Benz C-Class-001 3D Model featuring clean geometry, realistic detailing, and a fully modeled interior. Includes .blend, .fbx, .obj, .glb, .stl, .ply, .unreal, and .max formats for rendering, simulation, and game development.
Price: $38.99

Mercedes-Benz B-Klasse 2023 3D Model
Texture: Yes
Material: Yes
Download the Mercedes-Benz B-Klasse 2023 3D Model featuring clean geometry, realistic detailing, and a fully modeled interior. Includes .blend, .fbx, .obj, .glb, .stl, .ply, .unreal, and .max formats for rendering, simulation, and game development.
Price: $38.99

Mercedes-Benz A-Klasse W168 3D Model
Texture: Yes
Material: Yes
Download the Mercedes-Benz A-Klasse W168 3D Model featuring clean geometry, realistic detailing, and a fully modeled interior. Includes .blend, .fbx, .obj, .glb, .stl, .ply, .unreal, and .max formats for rendering, simulation, and game development.
Price: $38.99

Mercedes-Benz 500SL 2000 3D Model
Texture: Yes
Material: Yes
Download the Mercedes-Benz 500SL 2000 3D Model featuring clean geometry, realistic detailing, and a fully modeled interior. Includes .blend, .fbx, .obj, .glb, .stl, .ply, .unreal, and .max formats for rendering, simulation, and game development.
Price: $38.99

Mercedes-Benz 500SEC 3D Model
Texture: Yes
Material: Yes
Download the Mercedes-Benz 500SEC 3D Model featuring clean geometry, realistic detailing, and a fully modeled interior. Includes .blend, .fbx, .obj, .glb, .stl, .ply, .unreal, and .max formats for rendering, simulation, and game development.
Price: $38.99

Mercedes-Benz Citan 2025 3D Model
Texture: Yes
Material: Yes
Download the Mercedes-Benz Citan 2025 3D Model featuring clean geometry, realistic detailing, and a fully modeled interior. Includes .blend, .fbx, .obj, .glb, .stl, .ply, .unreal, and .max formats for rendering, simulation, and game development.
Price: $38.99

Mercedes-Benz C63 AMG 2012 3D Model
Texture: Yes
Material: Yes
Download the Mercedes-Benz C63 AMG 2012 3D Model featuring clean geometry, realistic detailing, and a fully modeled interior. Includes .blend, .fbx, .obj, .glb, .stl, .ply, .unreal, and .max formats for rendering, simulation, and game development.
Price: $38.99

Mercedes-Benz E-Class S211 3D Model
Texture: Yes
Material: Yes
Download the Mercedes-Benz E-Class S211 3D Model featuring clean geometry, realistic detailing, and a fully modeled interior. Includes .blend, .fbx, .obj, .glb, .stl, .ply, .unreal, and .max formats for rendering, simulation, and game development.
Price: $38.99

Mercedes-Benz CLS63 AMG (C218) 2014 3D Model
Texture: Yes
Material: Yes
Download the Mercedes-Benz CLS63 AMG (C218) 2014 3D Model featuring clean geometry, realistic detailing, and a fully modeled interior. Includes .blend, .fbx, .obj, .glb, .stl, .ply, .unreal, and .max formats for rendering, simulation, and game development.
Price: $38.99

Mercedes-Benz CLS-Klasse 3D Model
Texture: Yes
Material: Yes
Download the Mercedes-Benz CLS-Klasse 3D Model featuring clean geometry, realistic detailing, and a fully modeled interior. Includes .blend, .fbx, .obj, .glb, .stl, .ply, .unreal, and .max formats for rendering, simulation, and game development.
Price: $38.99
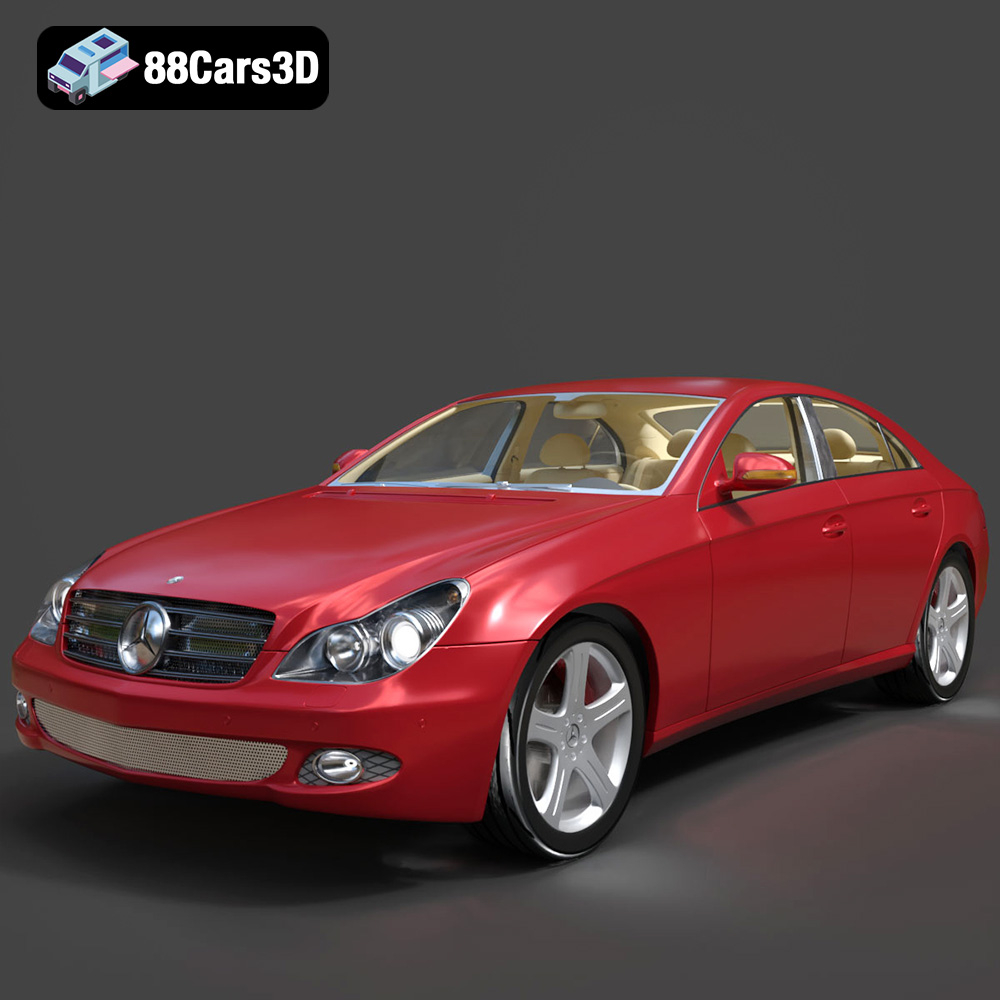
Mercedes-Benz CLS 500 3D Model
Texture: Yes
Material: Yes
Download the Mercedes-Benz CLS 500 3D Model featuring clean geometry, realistic detailing, and a fully modeled interior. Includes .blend, .fbx, .obj, .glb, .stl, .ply, .unreal, and .max formats for rendering, simulation, and game development.
Price: $38.99

Mercedes-Benz CL-Klasse 2001 3D Model
Texture: Yes
Material: Yes
Download the Mercedes-Benz CL-Klasse 2001 3D Model featuring clean geometry, realistic detailing, and a fully modeled interior. Includes .blend, .fbx, .obj, .glb, .stl, .ply, .unreal, and .max formats for rendering, simulation, and game development.
Price: $38.99
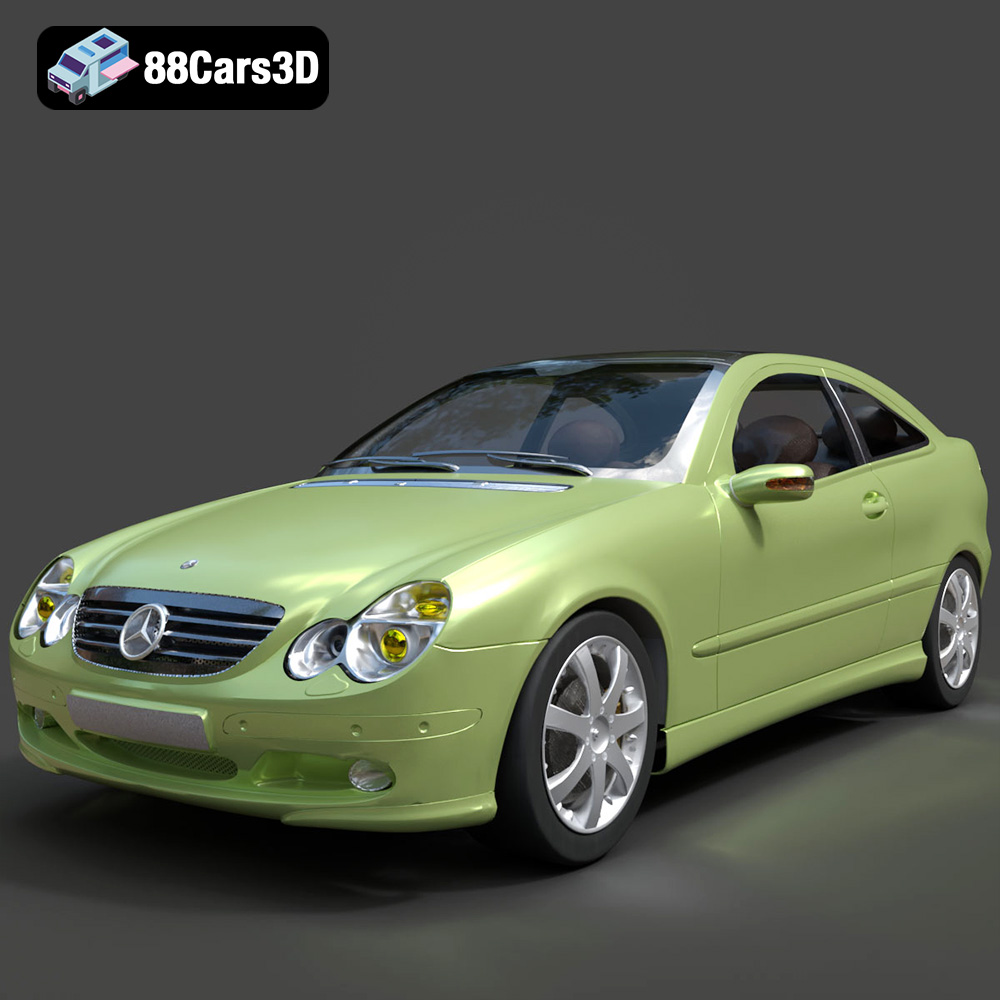
Mercedes-Benz C-Klasse Sportcoupe 2000 3D Model
Texture: Yes
Material: Yes
Download the Mercedes-Benz C-Klasse Sportcoupe 2000 3D Model featuring clean geometry, realistic detailing, and a fully modeled interior. Includes .blend, .fbx, .obj, .glb, .stl, .ply, .unreal, and .max formats for rendering, simulation, and game development.
Price: $38.99
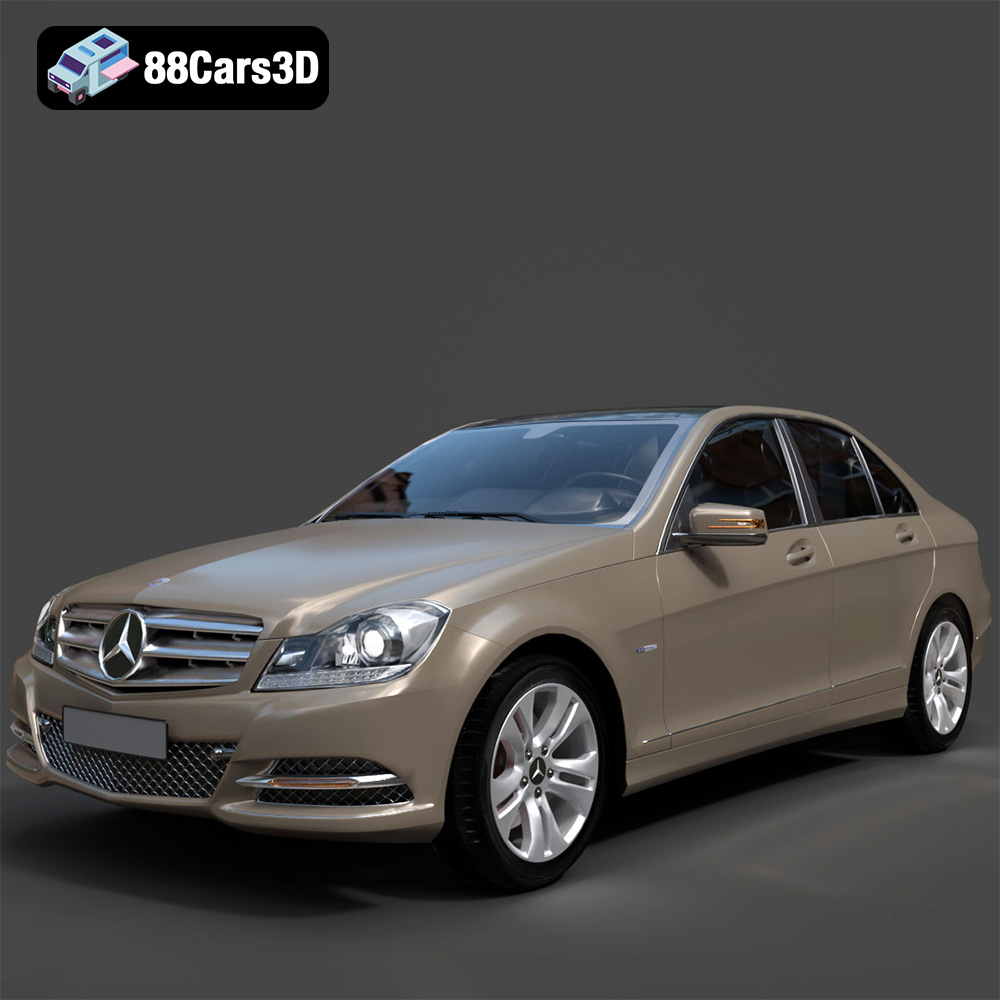
Mercedes-Benz C-Klasse 204 2011 3D Model
Texture: Yes
Material: Yes
Download the Mercedes-Benz C-Klasse 204 2011 3D Model featuring clean geometry, realistic detailing, and a fully modeled interior. Includes .blend, .fbx, .obj, .glb, .stl, .ply, .unreal, and .max formats for rendering, simulation, and game development.
Price: $38.99
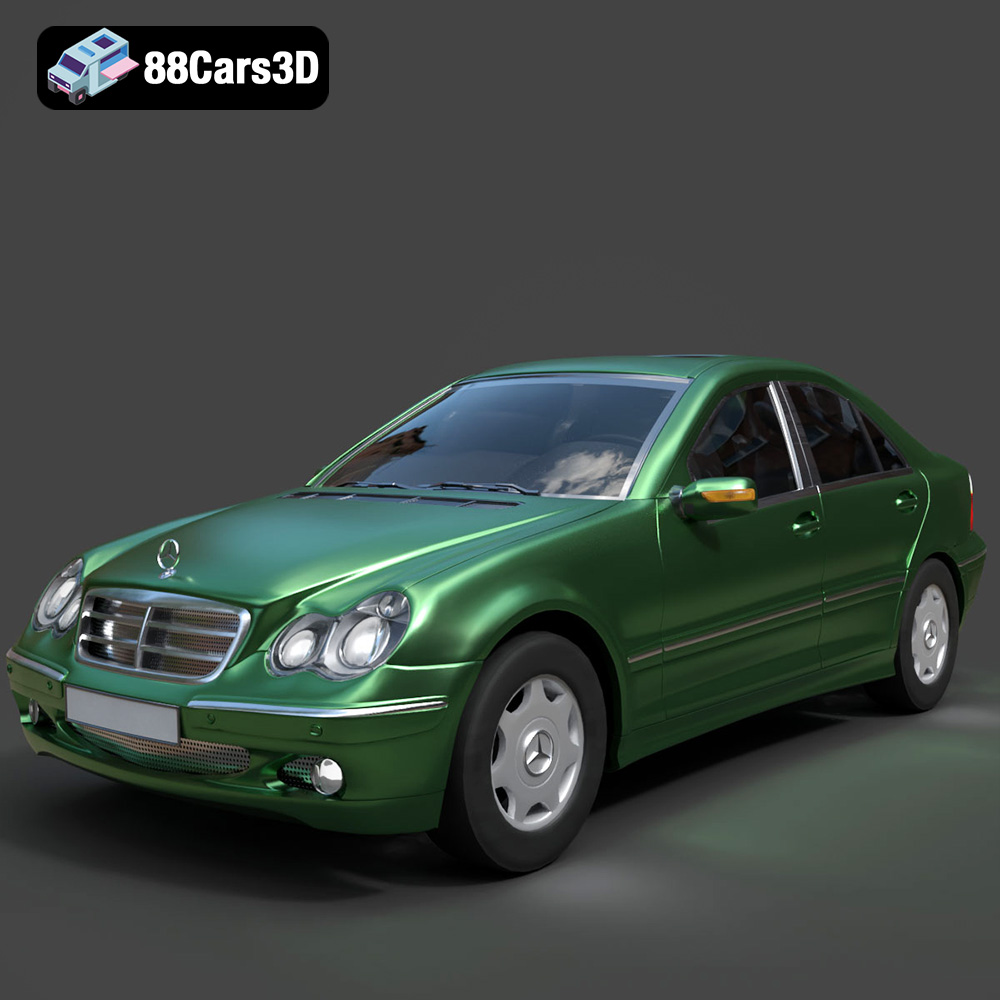
Mercedes-Benz C-Class Sedan 2000 3D Model
Texture: Yes
Material: Yes
Download the Mercedes-Benz C-Class Sedan 3D Model featuring clean geometry, realistic detailing, and a fully modeled interior. Includes .blend, .fbx, .obj, .glb, .stl, .ply, .unreal, and .max formats for rendering, simulation, and game development.
Price: $38.99
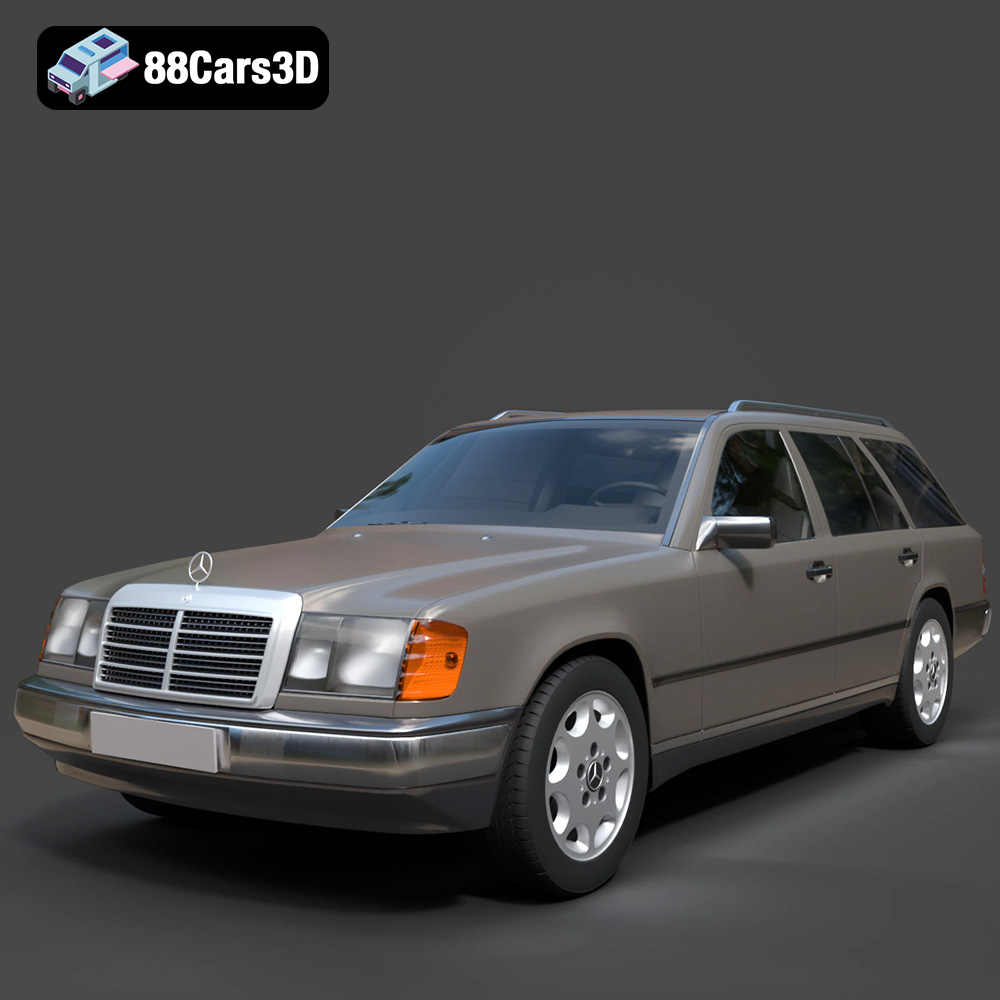
Mercedes E-Class w124 Kombi 3D Model
Texture: Yes
Material: Yes
Download the Mercedes E-Class w124 Kombi 3D Model featuring clean geometry, realistic detailing, and a fully modeled interior. Includes .blend, .fbx, .obj, .glb, .stl, .ply, .unreal, and .max formats for rendering, simulation, and game development.
Price: $38.99
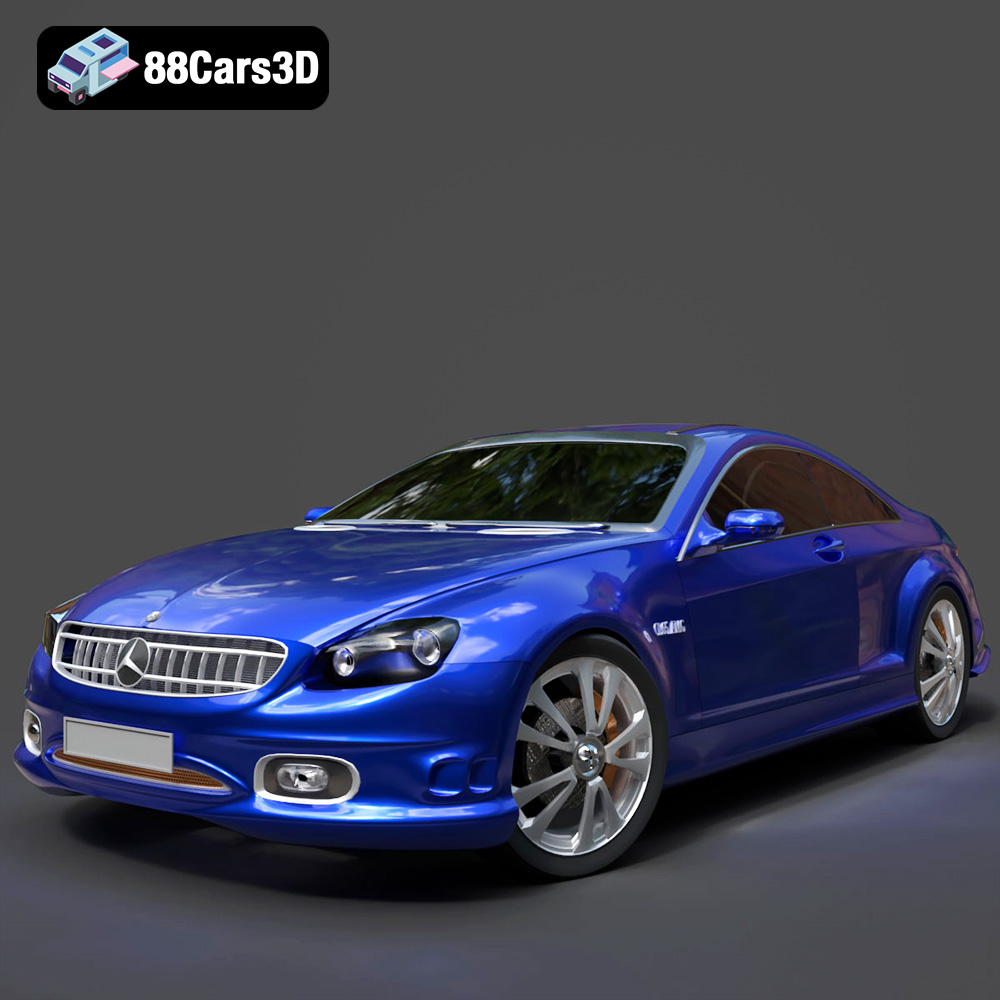
Mercedes-Benz CL6540-005 3D Model
Texture: Yes
Material: Yes
Download the Mercedes-Benz CL6540-005 3D Model featuring clean geometry, realistic detailing, and a fully modeled interior. Includes .blend, .fbx, .obj, .glb, .stl, .ply, .unreal, and .max formats for rendering, simulation, and game development.
Price: $38.99
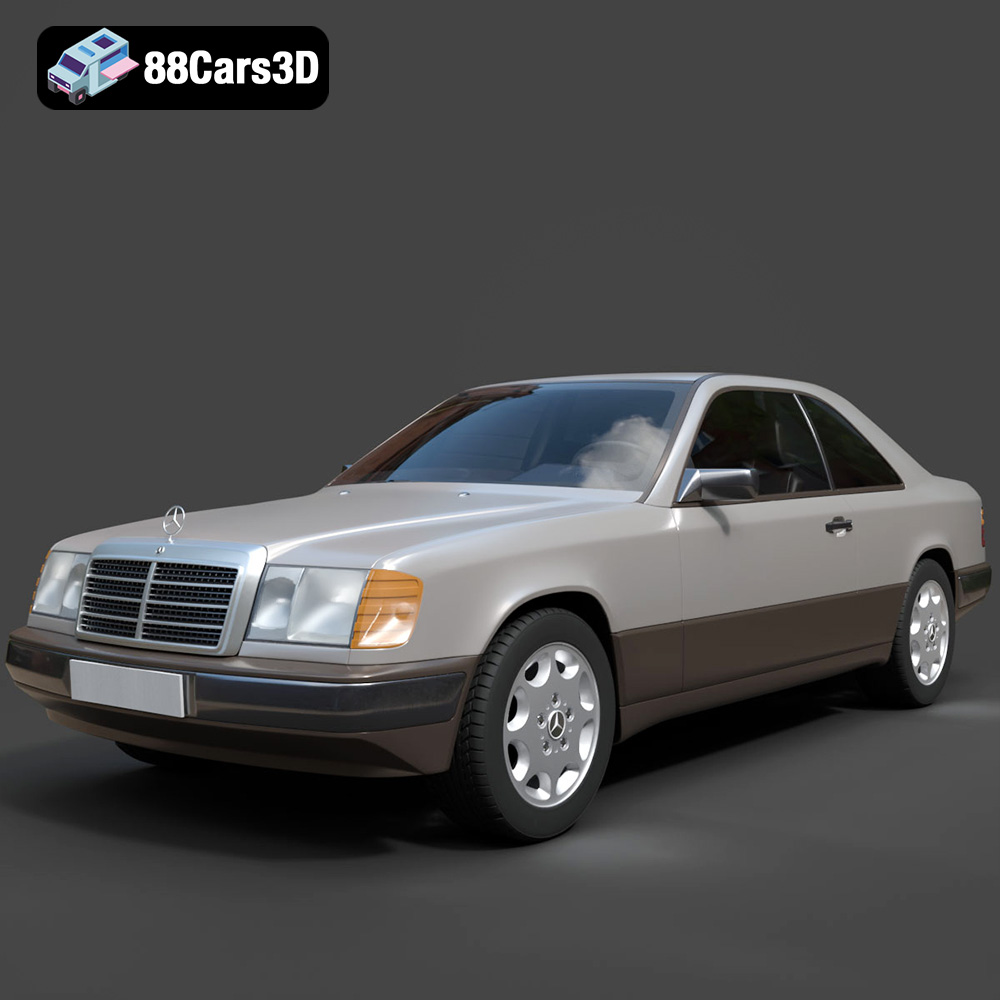
Mercedes E-Class w124 Coupe 3D Model
Texture: Yes
Material: Yes
Download the Mercedes E-Class w124 Coupe 3D Model featuring clean geometry, realistic detailing, and a fully modeled interior. Includes .blend, .fbx, .obj, .glb, .stl, .ply, .unreal, and .max formats for rendering, simulation, and game development.
Price: $38.99
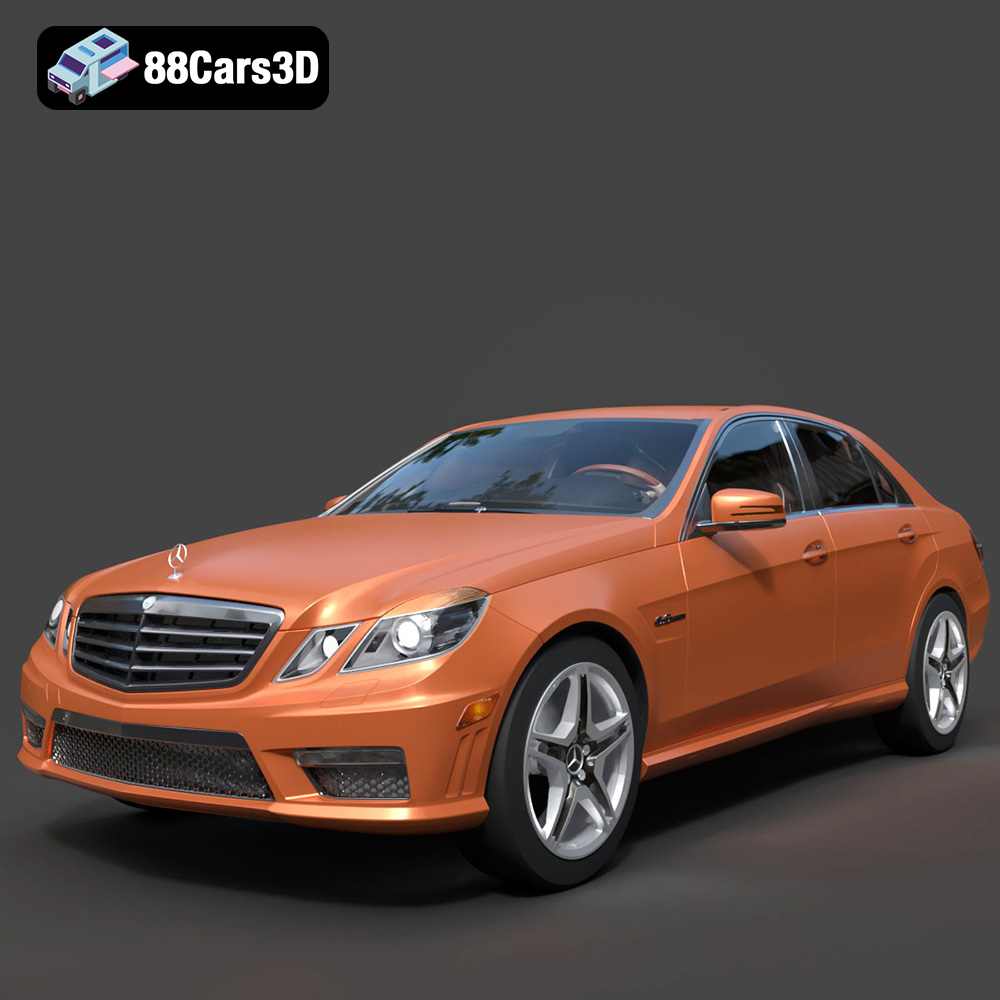
Mercedes-Benz E-Klasse 63 AMG 3D Model
Texture: Yes
Material: Yes
Download the Mercedes-Benz E-Klasse 63 AMG 3D Model featuring clean geometry, realistic detailing, and a fully modeled interior. Includes .blend, .fbx, .obj, .glb, .stl, .ply, .unreal, and .max formats for rendering, simulation, and game development.
Price: $38.99
