Get 20% OFF All Premium 3D & STL Models!

The journey of a 3D car model from a simple wireframe to a stunning, photorealistic render or an interactive game asset is a masterful blend of art and science. It’s a process that demands precision, technical knowledge, and a keen eye for detail. Whether you’re an automotive designer visualizing a new concept, a VFX artist integrating a vehicle into a cinematic shot, or a game developer building an immersive racing experience, understanding the complete pipeline is crucial. In this comprehensive guide, we will dissect the entire workflow, from the foundational principles of clean topology to the advanced nuances of rendering, real-time optimization, and preparing models for emerging technologies like AR/VR and 3D printing. We’ll explore the industry-standard techniques used by professionals to transform a collection of polygons into a digital masterpiece that looks, feels, and performs exactly as intended. Prepare to dive deep into the technical intricacies of UV mapping, PBR material creation, and lighting, unlocking the secrets to achieving breathtaking realism in your automotive visualization projects.
Everything in 3D visualization starts with the mesh. The quality of your final render or real-time asset is directly tied to the quality of the underlying geometry. For automotive models, with their blend of sweeping curves and sharp, manufactured edges, topology isn’t just a technical requirement—it’s the very DNA of the model. Good topology ensures predictable subdivision, clean reflections, and efficient deformation. The industry standard is to work with a quad-based workflow, meaning the mesh is constructed primarily of four-sided polygons. Quads subdivide smoothly and are easier to manage when creating complex edge loops, making them far superior to triangles (tris) or N-gons (polygons with more than four sides) for the primary surfaces of a car body. When you source professional 3D car models from marketplaces like 88cars3d.com, you’ll notice this meticulous attention to clean, quad-based geometry, which is a hallmark of a high-quality asset.
The flow of your polygons, or “edge flow,” dictates how light reflects off the surface. On a car, this is paramount. The long, flowing highlight lines that define a vehicle’s shape are a direct result of clean, parallel edge loops that follow the main contours of the body panels. Any pinching, chaotic intersections, or unevenly spaced edges will immediately manifest as wobbles and distortions in the reflections, shattering the illusion of realism. When modeling, think like a car designer. Trace the primary character lines with your edge loops first. Use these as your guide to fill in the larger, smoother surfaces. Tools like 3ds Max’s “Swift Loop” or Blender’s “Loop Cut and Slide” are indispensable for adding and controlling this flow. Remember that the density of the polygons should correspond to the curvature of the surface—tighter curves require more polygons to hold their shape, while large, flat areas like the roof or hood can be much less dense.
Most high-fidelity automotive models are created using subdivision surface modeling. This technique allows artists to work with a relatively low-polygon “control cage” that is easy to manipulate, while the software generates a smooth, high-resolution surface at render time (using modifiers like 3ds Max’s TurboSmooth or Blender’s Subdivision Surface). The key challenge is maintaining the sharp, crisp edges of panel gaps, headlights, and trim. This is achieved by adding “support” or “holding” edges. These are extra edge loops placed very close to the edges you want to keep sharp. The closer the support loop is to the main edge, the tighter the resulting crease will be after subdivision. A common mistake is to add too many or place them inconsistently, resulting in a soft or “bubbly” look. A good rule of thumb is to use two or three support loops to define a hard edge, ensuring a clean transition from the sharp corner to the curved surface.
Once your model is built, you need a way to apply 2D textures to its 3D surface. This is where UV mapping comes in. The process involves “unwrapping” the 3D mesh into a 2D representation, called a UV map, which serves as a guide for texture placement. For a complex object like a car, with its countless individual parts, materials, and decals, a strategic approach to UV mapping is essential for both realism and performance. Poorly planned UVs can lead to stretched textures, visible seams, and inefficient use of texture memory, especially in game assets and real-time applications. A clean UV layout is just as important as clean topology; it is the technical canvas upon which your material artistry will be painted.
Before you start unwrapping, you need a plan. The first concept to grasp is texel density—the number of texture pixels per unit of 3D space. To maintain consistent detail across the entire model, every part should have a similar texel density. A door handle should not have a higher resolution texture than the door it’s attached to. Tools in Blender and plugins for 3ds Max/Maya can help you visualize and unify texel density across different UV shells. The second part of the plan is seam placement. Seams are the edges where the UV map is cut. You must hide these seams in inconspicuous places: along hard edges, panel gaps, or on the underside of the car. For example, when unwrapping a car door, place the seams along the natural panel edges where they will be least noticeable.
There are several methods for unwrapping. For large, relatively flat parts like a car hood or roof, a simple Planar Projection is often sufficient. For cylindrical parts like exhaust pipes or suspension components, a Cylindrical Projection works best. For the most complex organic shapes, you’ll rely on peeling algorithms like Blender’s “Unwrap” or 3ds Max’s “Pelt” mapping. For extremely high-detail models used in film and photorealistic automotive rendering, a single UV tile (0 to 1 space) is often not enough to provide the required texture resolution. This is where the UDIM (U-Dimension) workflow comes in. UDIM allows you to spread your UV shells across multiple UV tiles. This means you can assign an entire 4K texture to just the car’s body, another 4K texture to the interior, and another to the chassis, all within a single object. This provides immense detail without having to manage unwieldy 16K or 32K textures.
With a perfectly modeled and unwrapped car, the next step is to breathe life into it with realistic materials. The modern standard for this is the Physically Based Rendering (PBR) workflow. PBR aims to simulate how light interacts with materials in the real world, resulting in more accurate and consistent visuals across different lighting conditions. A PBR material is typically defined by a set of texture maps, such as Albedo (base color), Roughness (which controls how diffuse or sharp reflections are), Metallic (defining if a surface is a metal or a dielectric/non-metal), and Normal (adding fine surface detail). Creating convincing automotive materials—from the complex flakes in metallic paint to the subtle imperfections on a leather seat—is an art form in itself.
A car’s paint is one of the most complex materials to replicate digitally. It’s not a single, simple layer. A realistic car paint shader typically consists of three main components built within the material editor of your software (like the Corona Material in 3ds Max or Blender’s Principled BSDF node):
By layering these components, you can achieve a depth and realism that is impossible with a single-layer material.
Beyond the paint, a car features a wide array of materials that require careful attention:
Modeling and texturing create the asset, but lighting and rendering create the final image. This is where your digital car is placed into a virtual environment and “photographed” by the render engine. The goal of automotive rendering is often to emulate a professional car photoshoot, whether in a pristine studio or a dynamic outdoor location. Your choice of render engine (such as Corona, V-Ray, Blender’s Cycles, or Arnold) and lighting setup will define the mood, highlight the car’s design, and ultimately determine the photorealism of the final shot. High-quality rendering is a computationally intensive process, but the results can be indistinguishable from reality.
There are two primary approaches to lighting a 3D car model:
Often, a hybrid approach is used, where an HDRI provides the base ambient light and realistic reflections, and additional manual lights are added to further sculpt the car and add dramatic highlights.
To get a clean, crisp final image, you need to configure your render settings properly. Pay attention to sampling/noise threshold settings—lower thresholds produce cleaner images but take longer to render. Modern render engines have excellent denoising tools that can clean up residual noise, significantly reducing render times. A crucial professional workflow is to render in passes, also known as Render Elements or AOVs (Arbitrary Output Variables). This means rendering out separate images for different components of the final picture, such as:
These passes are then composited together in software like Adobe Photoshop or Foundry Nuke, giving you immense flexibility to adjust colors, brightness, and reflections without having to re-render the entire image.
Using a 3D car model in a game engine like Unreal Engine or Unity introduces a new set of challenges centered around one critical factor: performance. Unlike pre-rendered images that can take minutes or hours per frame, a game must render the scene in real-time, typically at 30, 60, or even 120 frames per second. This requires a ruthless focus on optimization. A high-poly model designed for cinematic rendering, which might have over a million polygons, would instantly cripple a game’s performance. The process of converting a high-detail model into a nimble, efficient game asset is a specialized skill that balances visual quality with performance budgets.
The first step is reducing the polygon count. A “hero” car model that the player will drive might have a budget of 100,000 to 300,000 polygons, while background traffic cars might be under 20,000. This reduction is not just about randomly deleting polygons. It’s a careful process of retaining the car’s silhouette and important details while removing unnecessary edge loops on flatter surfaces. To further optimize performance, games use Levels of Detail (LODs). This involves creating multiple versions of the same model at decreasing levels of detail:
The game engine automatically switches between these LODs based on the car’s distance from the camera, dramatically reducing the number of polygons that need to be rendered at any given time.
Another major performance bottleneck in game engines is the number of draw calls. A draw call is a command from the CPU to the GPU to draw an object. Each object with a unique material generates at least one draw call. A car model with 50 different materials can be very expensive. The solution is to consolidate materials wherever possible. Instead of having separate materials for every little piece of chrome trim, try to use a single chrome material for all of them. An even more powerful technique is texture atlasing. This involves combining the UVs of multiple, separate parts onto a single UV layout and using one shared texture map. For example, all the interior dashboard components could be unwrapped together to share a single material and texture set, reducing dozens of draw calls to just one. Many professional 3D car models designed for gaming come with pre-optimized materials and LODs to streamline this process.
The utility of high-quality 3D car models now extends far beyond traditional screens. Augmented Reality (AR) product configurators, Virtual Reality (VR) driving simulators, and physical 3D printing for prototyping all rely on well-prepared 3D assets. Each of these applications has its own unique set of technical requirements and optimization strategies. Preparing a model for AR on a mobile phone is very different from preparing it for a high-resolution resin 3D printer. Understanding these differences is key to successfully deploying your automotive models across these exciting new platforms.
For AR and VR applications, especially those running on mobile devices or standalone headsets, performance is even more critical than in traditional PC gaming. The polygon count and texture memory budgets are much stricter. A typical target for a mobile AR car model might be under 50,000 polygons with a single 2K texture atlas. File format is also crucial. The two dominant formats for web and mobile 3D are GLB (the binary form of glTF) and USDZ (developed by Apple). These formats are designed to be compact and efficient, packaging the model, textures, and material information into a single file. When optimizing, focus on:
This ensures the model loads quickly and runs smoothly, providing a seamless user experience.
Preparing a model for 3D printing is an entirely different discipline. Here, visual fidelity is replaced by the need for physical integrity. The mesh must be a single, solid, “watertight” volume. This means there can be no holes, no overlapping faces, and no non-manifold geometry (e.g., edges shared by more than two faces). The entire car must be converted into a single, contiguous shell. Details like the interior might be removed, and parts like side mirrors and spoilers must be properly merged with the car body to ensure they don’t break off during printing. Tools like Meshmixer or the 3D-Print Toolbox add-on in Blender can help you identify and fix these issues. You also need to consider wall thickness—every part of the model must have a minimum thickness to be physically printable. The final, repaired mesh is typically exported as an STL or OBJ file, ready to be sent to the 3D printer’s slicer software. As you can see, a great model for rendering might be a terrible model for printing without significant preparation.
The journey from a blank viewport to a photorealistic automotive render or a high-performance game asset is a testament to the incredible synergy between artistic vision and technical execution. We’ve seen how a foundation of clean, purposeful topology is essential for achieving the elegant reflections that define a car’s form. We’ve explored how strategic UV mapping and the layered complexity of PBR materials transform a sterile mesh into a believable digital object. From the controlled environment of a virtual photo studio to the unforgiving performance constraints of real-time engines, each application demands a unique approach to lighting, rendering, and optimization. Whether you are aiming for cinematic automotive rendering, interactive game assets, or tangible 3D prints, the core principles remain the same: attention to detail, a deep understanding of the underlying technology, and a methodical workflow. The next time you see a stunning car configurator online or race a hypercar in a video game, you’ll have a much deeper appreciation for the immense skill and effort that went into its creation. We encourage you to apply these techniques to your own projects, experiment with different workflows, and continue pushing the boundaries of what’s possible in the world of automotive visualization.
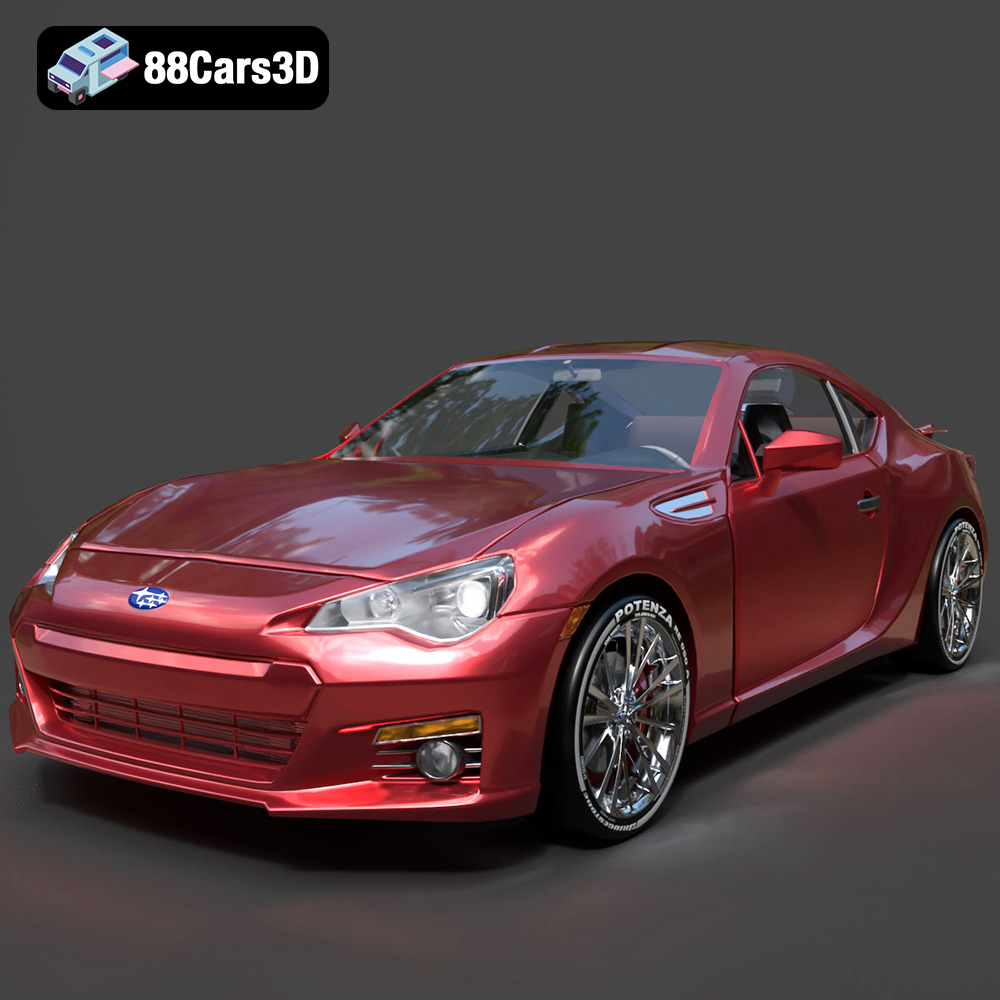
Texture: Yes
Material: Yes
Download the Subaru BRZ 2025 3D Model featuring clean geometry, realistic detailing, and a fully modeled interior. Includes .blend, .fbx, .obj, .glb, .stl, .ply, .unreal, and .max formats for rendering, simulation, and game development.
Price: $10

Texture: Yes
Material: Yes
Download the Subaru Impreza Sport Wagon 3D Model featuring clean geometry, realistic detailing, and a fully modeled interior. Includes .blend, .fbx, .obj, .glb, .stl, .ply, .unreal, and .max formats for rendering, simulation, and game development.
Price: $10

Texture: Yes
Material: Yes
Download the Skoda Octavia A7 2017 3D Model featuring clean geometry, realistic detailing, and a fully modeled interior. Includes .blend, .fbx, .obj, .glb, .stl, .ply, .unreal, and .max formats for rendering, simulation, and game development.
Price: $10

Texture: Yes
Material: Yes
Download the Suzuki SX4-002 3D Model featuring clean geometry, realistic detailing, and a fully modeled interior. Includes .blend, .fbx, .obj, .glb, .stl, .ply, .unreal, and .max formats for rendering, simulation, and game development.
Price: $10

Texture: Yes
Material: Yes
Download the Tesla Model S 2024 3D Model featuring clean geometry, realistic detailing, and a fully modeled interior. Includes .blend, .fbx, .obj, .glb, .stl, .ply, .unreal, and .max formats for rendering, simulation, and game development.
Price: $10

Texture: Yes
Material: Yes
Download the Subaru Impreza WRX STi-002 3D Model featuring clean geometry, realistic detailing, and a fully modeled interior. Includes .blend, .fbx, .obj, .glb, .stl, .ply, .unreal, and .max formats for rendering, simulation, and game development.
Price: $10

Texture: Yes
Material: Yes
Download the Subaru Impreza WRX STi Sedan 3D Model featuring clean geometry, realistic detailing, and a fully modeled interior. Includes .blend, .fbx, .obj, .glb, .stl, .ply, .unreal, and .max formats for rendering, simulation, and game development.
Price: $10

Texture: Yes
Material: Yes
Download the Subaru Legacy 2009 3D Model featuring clean geometry, realistic detailing, and a fully modeled interior. Includes .blend, .fbx, .obj, .glb, .stl, .ply, .unreal, and .max formats for rendering, simulation, and game development.
Price: $10

Texture: Yes
Material: Yes
Download the Suzuki Swift 2024 3D Model featuring clean geometry, realistic detailing, and a fully modeled interior. Includes .blend, .fbx, .obj, .glb, .stl, .ply, .unreal, and .max formats for rendering, simulation, and game development.
Price: $10

Texture: Yes
Material: Yes
Download the Suzuki Liana Sedan 2004 3D Model featuring clean geometry, realistic detailing, and a fully modeled interior. Includes .blend, .fbx, .obj, .glb, .stl, .ply, .unreal, and .max formats for rendering, simulation, and game development.
Price: $10

