Get 50% OFF All Premium 3D & STL Models!

“`html
The pursuit of perfection in 3D printed car models is an ongoing journey for hobbyists, collectors, and automotive enthusiasts alike. While the intricate details and iconic shapes of a classic car can be beautifully captured by modern 3D printers, achieving a truly smooth, professional finish often presents a significant challenge. Layer lines, surface imperfections, and visible support marks can detract from the overall aesthetic, transforming a potential masterpiece into a mere prototype. This comprehensive guide will delve deep into the technical nuances of preparing your STL files and optimizing your 3D printing process to achieve those coveted smooth surfaces on your printable car models. We’ll explore everything from fundamental STL file preparation and slicing strategies to advanced printer settings and post-processing techniques. By understanding the interplay between your digital model, your printer’s capabilities, and your chosen materials, you’ll be well on your way to creating 3D printed automotive replicas that rival their real-world counterparts in visual appeal.
Before a single layer is printed, the quality of your STL file is paramount. This ubiquitous file format represents a 3D model as a mesh of triangular facets, and its underlying structure directly impacts the smoothness of the final print. Even the most advanced printer and meticulous slicing cannot overcome fundamental flaws in the mesh. For car models, which often feature flowing curves and subtle aerodynamic lines, the resolution and integrity of the STL are critical. Poorly tessellated models or those with non-manifold geometry will translate directly into visible stepping or gaps in your prints, regardless of your 3D printer settings.
The density of triangles in an STL file determines its resolution. A low-resolution STL will have fewer, larger triangles, resulting in a faceted appearance, especially on curved surfaces. Conversely, a very high-resolution STL can contain millions of triangles, leading to incredibly smooth curves but also creating massive file sizes that can strain slicing software and increase processing times. For printable car models, a balance is key. Aim for a resolution that captures the subtle contours without becoming unwieldy. Many 3D modeling and CAD programs allow you to control the tessellation level when exporting to STL. For platforms like 88cars3d.com, where models are specifically prepared for 3D printing, the STL files are typically optimized for a good balance of detail and file size, often exporting at resolutions that yield excellent results with standard slicer settings. If you are working with your own models or modifying existing ones, using software like Meshmixer or Blender to refine the mesh density before export is a crucial step. Tools like “Smooth” or “Decimate” in Meshmixer can help reduce polygon count while preserving essential details, or increase it in areas needing more refinement.
A manifold mesh, often referred to as a “watertight” model, is essential for successful 3D printing. This means that every edge in the mesh connects exactly two faces, with no holes, internal faces, or self-intersecting geometry. Non-manifold geometry can confuse slicing software, leading to errors during toolpath generation, gaps in the print, or incomplete layers. Automotive models, with their complex internal structures and overlapping surfaces, are particularly susceptible to these issues. Before sending your file to the slicer, it’s best practice to perform a mesh repair. Software like Netfabb, Meshmixer, or even built-in tools within slicers like Cura or PrusaSlicer can automatically detect and often repair these issues. Common repairs include filling holes, removing duplicate faces, and making edges manifold. A thorough visual inspection of the repaired model in your slicer is also recommended.
While STL is the de facto standard for 3D printing, it’s worth noting its limitations. STL is purely geometric and does not store color or texture information. Other formats like OBJ and FBX are more versatile and can store this additional data, which might be relevant if you plan on painting your models or using them for rendering. However, for direct 3D printing, the STL format is almost universally supported. When downloading models from marketplaces such as 88cars3d.com, you are almost guaranteed to receive STL files, as this is the industry standard for distributing printable models. Ensure your chosen software can import and export STL correctly, and always save your work in a native format (like .blend for Blender, .3mf for newer slicers, or .step/.iges for CAD) before exporting the final STL for printing to retain editability.
The slicer is the bridge between your digital STL file and your physical 3D printer. Its settings dictate how the printer interprets the model, layer by layer. Optimizing slicing parameters is arguably the most impactful way to achieve smooth surfaces on your 3D printed car models. This involves a delicate balancing act between print speed, layer height, cooling, and extrusion control. Understanding how each setting affects the surface finish allows you to fine-tune your slicer for the best possible outcome. Remember, there’s no single “magic” setting; the optimal configuration often depends on your specific printer, material, and the complexity of the car model you are printing.
Layer height is the most direct determinant of vertical surface smoothness. It defines the thickness of each deposited layer of filament. For FDM printing, common layer heights range from 0.1mm to 0.3mm. A smaller layer height (e.g., 0.1mm or 0.12mm) will result in significantly smoother vertical surfaces and more gradual curves, as the “stair-stepping” effect is minimized. However, printing at lower layer heights drastically increases print time. For example, printing a 100mm tall model at 0.1mm layer height will take approximately three times longer than printing at 0.3mm. The trade-off is clear: unparalleled surface finish versus extended print duration. For critical showpiece models or areas with significant vertical curves, reducing the layer height to 0.08mm or 0.1mm is highly recommended. For less critical parts or faster prototyping, 0.2mm might suffice.
Printing too fast can lead to a host of surface quality issues, including ringing (ghosting), under-extrusion, and poor layer adhesion, all of which detract from smoothness. Slower print speeds allow the filament more time to melt and fuse properly with the previous layer, leading to a more cohesive and smoother finish. For achieving the best surface quality, reducing the outer wall print speed is crucial. A setting of 20-40 mm/s for outer walls is often a good starting point. Similarly, acceleration and jerk settings control how quickly the print head changes direction. High acceleration can cause vibrations and introduce artifacts. Dialing these down, especially for the outer perimeter moves, can significantly improve surface smoothness. Experiment with reducing these values in your slicer, often found under “Advanced” or “Speed” settings, to see tangible improvements.
Proper cooling is essential for achieving sharp details and smooth overhangs, which are abundant on car models. Adequate cooling solidifies the deposited plastic quickly, preventing sagging and preserving the intended geometry. For most materials like PLA, a fan speed of 100% is generally optimal after the first few layers. However, some materials, like ABS, require less aggressive cooling to prevent warping and improve layer adhesion. Resin printers inherently have excellent cooling due to the nature of the curing process, but it’s still a factor in how accurately the light projects and cures the resin. Ensure your printer’s cooling fan is functioning correctly and that the settings in your slicer are appropriate for the material you are using. Insufficient cooling can lead to melted details and warped surfaces, ruining the smooth finish you are aiming for.
FDM (Fused Deposition Modeling) printing is the most accessible form of 3D printing, but achieving mirror-like smooth surfaces requires careful attention to its inherent characteristics. The layered nature of FDM printing inherently leaves visible lines. However, through meticulous calibration, precise 3D printer settings, and thoughtful process management, these lines can be minimized to an almost imperceptible level. This section focuses on the specific adjustments and techniques that can elevate your FDM prints from good to exceptional, making your printable car models truly stand out.
A perfect first layer is the bedrock of a successful print. Poor first-layer adhesion, whether too squished or not squished enough, can lead to warping, elephant’s foot (where the base of the print is wider than intended), and uneven surfaces. For car models, this is particularly important for the base, wheel arches, and any parts that sit directly on the build plate. Calibrate your Z-offset meticulously. The ideal first layer should be slightly squished, creating a smooth, continuous surface with no visible gaps between extrusion lines. Using a brim can help improve adhesion for models with small footprints or those prone to warping. Materials like PLA and PETG typically adhere well to glass beds with standard adhesion aids like glue stick or specialized surfaces. Ensure your build plate is clean before every print; even minor amounts of grease or dust can compromise adhesion.
Accurate extrusion is critical for consistent surface quality. If your printer over-extrudes, you’ll get blobs and rough surfaces. If it under-extrudes, you’ll see gaps and weak layers. Calibrating your extruder’s E-steps ensures that the printer pushes out the correct amount of filament for a given command. This is typically done by marking a length of filament, commanding the extruder to feed a specific amount (e.g., 100mm), and measuring the actual amount fed. Adjust the E-steps value in your printer’s firmware accordingly. Beyond E-steps, the “Flow Rate” or “Extrusion Multiplier” setting in your slicer allows for fine-tuning. A flow rate of 100% is a starting point, but you might need to adjust it slightly (e.g., 95-102%) based on your specific filament and printer combination to achieve a perfect surface finish without over-extrusion.
For smooth exterior surfaces, the outer walls of your model are what matter most. Ensure your slicer is set up to print at least two or three outer walls (perimeters). This creates a solid shell that masks any infill patterns and provides a more robust surface. The infill percentage and pattern themselves have less impact on the exterior smoothness, but can affect overall print strength and time. For display models, a low infill percentage (e.g., 10-15%) with a pattern like “gyroid” or “cubic” is usually sufficient. High infill densities are unnecessary for surface quality and only increase print time and material consumption. Consider using the “Vase Mode” or “Spiralize Outer Contour” feature in your slicer for single-walled objects or parts where a continuous spiral extrusion can create an incredibly smooth, seamless surface, though this is often not suitable for complex car models with multiple parts.
Resin 3D printing, also known as SLA (Stereolithography) or DLP (Digital Light Processing), offers a distinct advantage when it comes to achieving exceptionally smooth surfaces, especially for intricate automotive details. Unlike FDM’s layer-by-layer extrusion, resin printing cures liquid photopolymer resin layer by layer using UV light. This process inherently produces much finer detail and significantly smoother surfaces, often requiring minimal post-processing to achieve a near-injection molded finish. For collectors and those demanding the highest fidelity in their printable car models, resin printing is often the preferred technology.
In resin printing, “layer height” refers to the thickness of the cured layer (typically 0.025mm to 0.1mm). While this still contributes to surface smoothness, the XY resolution (the pixel size of the UV light source on the build plate) plays an equally, if not more, significant role. Higher XY resolution means smaller pixels, allowing for finer details and smoother curves. Printers with higher resolution displays (e.g., 4K or 8K screens) can resolve incredibly fine features. When slicing resin prints, you’ll set both the layer height and exposure time. Lower layer heights (e.g., 0.05mm) will provide a smoother finish than higher ones (e.g., 0.1mm), but at the cost of increased print time. However, the difference in smoothness between 0.05mm and 0.025mm might be less noticeable than the impact of XY resolution.
Support structures are crucial in resin printing to prevent prints from detaching from the build plate and to adequately support overhangs and islands. However, the contact points between supports and the model can leave small blemishes (support marks) on the surface after removal. For car models, which often have delicate mirrors, spoilers, and undercarriages, careful support placement is key. Use smaller, finer supports (often called “fine” or “contact” supports) where possible, and strategically position them on less visible areas of the model. Many resin slicers (like ChiTuBox, Lychee Slicer, or PreForm) offer features to adjust support tip size, density, and angle. Consider enabling “anti-aliasing” settings, which smooth the edges of pixels on the resin print, further reducing the visibility of layer lines and support marks.
The type of resin you use can impact surface finish and post-processing ease. Standard resins offer a good balance of properties and affordability. Tough resins are more durable but can sometimes be more prone to retaining support marks. Flexible resins are specialized and may not be suitable for rigid car models. When selecting resin, consider its viscosity and curing properties. Follow the manufacturer’s recommendations for exposure times carefully. Over-curing can lead to brittle parts and potentially distorted details, while under-curing results in prints that are not fully hardened and may warp. Proper curing after washing (using a UV curing station) is also essential for achieving the final desired surface hardness and appearance.
Beyond standard slicing and printer settings, several advanced techniques and rigorous file preparation workflows can elevate the surface quality of your 3D printed car models. These methods often involve more complex software and a deeper understanding of mesh manipulation and printing processes, but the results can be exceptionally rewarding, achieving finishes that are nearly indistinguishable from professionally manufactured parts.
For ultimate control over surface smoothness, particularly on complex organic shapes like car bodies, using advanced 3D modeling software like Blender or ZBrush can be invaluable. These programs allow for mesh sculpting, where you can directly manipulate vertices, edges, and faces to refine surfaces. Tools like “Smooth Shading” in Blender, or various sculpting brushes, can be used to soften sharp edges, remove minor imperfections, and ensure consistent curvature. Be mindful of the polygon count; excessive smoothing can sometimes lead to a loss of fine details. Always work on a duplicated copy of your model and use these smoothing techniques judiciously to enhance, rather than alter, the original design’s intent. Ensure that after any sculpting or smoothing, the mesh remains manifold and watertight before exporting to STL.
When printing larger car models on a resin printer, hollowing the model is a common practice to save on resin and reduce print time. However, this introduces the risk of suction forces during print removal, which can lead to print failures or damage. Proper placement of drain holes is crucial. These holes allow uncured resin inside the hollowed model to escape, minimizing suction. The size and number of drain holes should be sufficient to allow resin flow but not so large that they compromise the structural integrity or are easily visible. Position them strategically on the bottom surfaces of the model or in areas that will be less noticeable after assembly or post-processing.
The orientation of your model on the build plate significantly impacts surface quality, especially for FDM prints. For FDM, orienting the model so that the most critical visual surfaces (like the car’s hood, roof, or doors) are facing upwards and are not heavily reliant on supports can yield a smoother finish. If curves are oriented parallel to the build plate, they will appear smoother. Conversely, curves oriented vertically will exhibit more pronounced layer lines. For resin prints, orientation is crucial for managing suction forces and support placement. Often, orienting the model at a slight angle (e.g., 15-45 degrees) can reduce the surface area of each layer exposed to suction, minimizing the risk of detachment and reducing the severity of support marks.
Even with meticulous slicing and printing, some level of post-processing is often required to achieve that truly showroom-quality smooth finish on your 3D printed car models. This stage transforms a raw print into a polished masterpiece, ready for display or further customization. The techniques employed range from simple manual labor to more advanced methods, depending on the desired outcome and the material used.
Careful support removal is the first step. For FDM prints, use pliers, flush cutters, or hobby knives to gently remove supports. For resin prints, supports are often easier to remove but can leave small nubs. Patience is key to avoid damaging the model. After support removal, sanding is the primary method for smoothing surfaces. Start with a coarser grit sandpaper (e.g., 120-220 grit) to remove layer lines and support marks, gradually moving to finer grits (e.g., 400, 800, 1200, and even higher for a mirror finish). For FDM prints, applying a filler primer and sanding between coats can fill in layer lines effectively. For resin prints, sanding is usually sufficient, but some users opt for filling larger blemishes with modeling putty or specialized fillers.
For FDM prints made from materials like ABS, vapor smoothing can produce incredibly smooth, almost injection-molded finishes. This involves exposing the print to the vapor of a solvent (like acetone for ABS) in a controlled environment. The vapor melts the outermost layer of the plastic, allowing surface tension to smooth out the layer lines. **Caution:** This process requires strict safety precautions, including proper ventilation and protective gear, as the solvents used are flammable and their fumes are hazardous. It’s a powerful technique but demands respect and careful execution. PLA and PETG are generally not amenable to vapor smoothing.
Once sanded smooth, applying a primer is an excellent way to reveal any remaining imperfections and prepare the surface for paint. Choose a primer suitable for plastic. After priming, a light sanding with very fine grit sandpaper (e.g., 1000-2000 grit) can create a perfect surface for painting. Painting techniques vary from airbrushing for a professional finish to spray cans for hobbyists. Multiple thin coats are always better than one thick coat. Clear coats can then be applied to protect the paint and add gloss or a matte finish, depending on your desired aesthetic. For intricate details on car models, fine brushes are essential for painting small elements like headlights, grilles, and trim.
Achieving flawlessly smooth surfaces on your 3D printed car models is a multi-faceted endeavor that begins with the digital file and extends through meticulous slicing, precise printing, and careful post-processing. By understanding the technical details of STL file structure, optimizing your slicer settings for layer height and speed, mastering the nuances of FDM or resin printing, and employing effective post-processing techniques, you can elevate your creations to a new level of realism and quality. Platforms like 88cars3d.com provide a fantastic starting point with their range of high-quality, print-ready STL files, allowing you to focus your efforts on perfecting the printing process itself. Embrace the experimentation, learn from each print, and soon you’ll be creating automotive replicas that are not only accurate in form but also stunning in their surface finish.
“`
Texture: Yes
Material: Yes
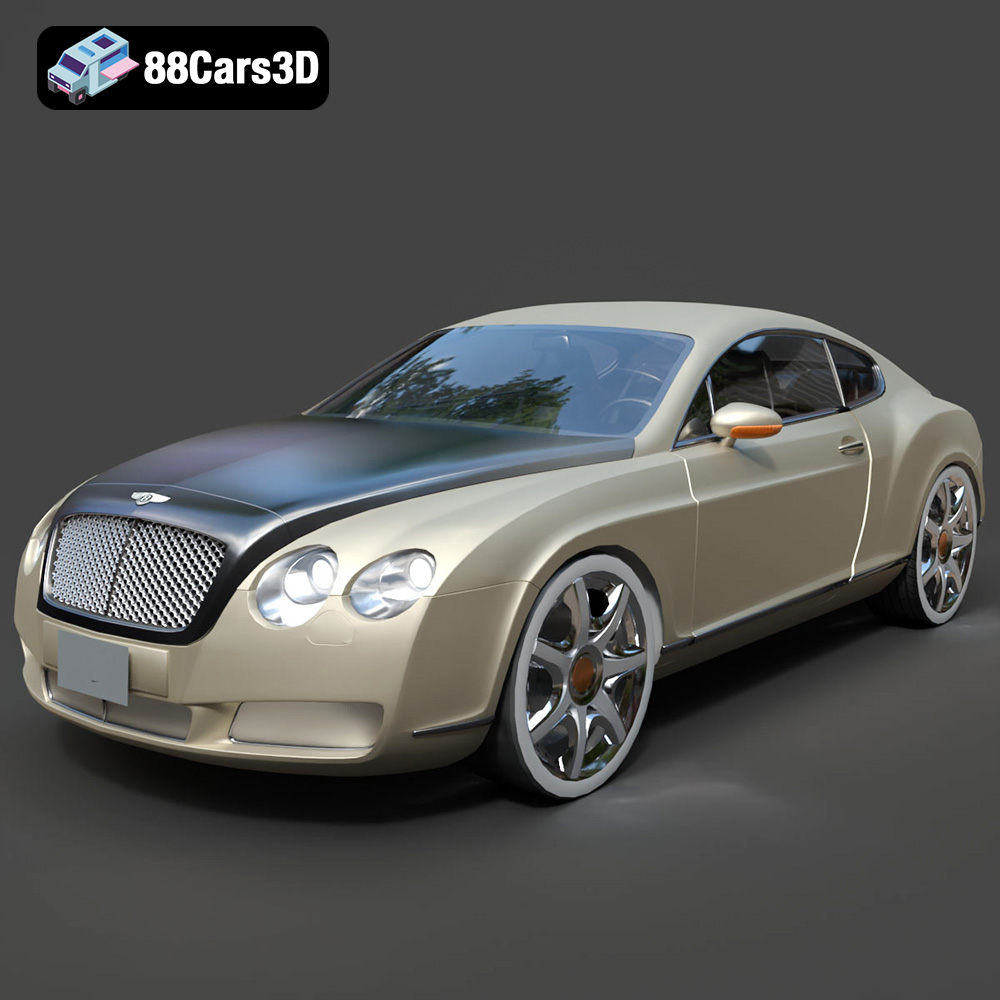
Download the Bentley Continental GT-002 3D Model featuring a luxurious grand touring design and high-quality details. Includes .blend, .fbx, .obj, .glb, .stl, .ply, .unreal, and .max formats for rendering, simulation, and game development.
Price: $20.79

Texture: Yes
Material: Yes
Download the Audi R8 2006 3D Model featuring a sleek sports car design with detailed exterior and interior. Includes .blend, .fbx, .obj, .glb, .stl, .ply, .unreal, and .max formats for rendering, simulation, and game development.
Price: $20.79

Texture: Yes
Material: Yes
Download the Audi Q7 3D Model featuring a detailed exterior and a refined interior. Includes .blend, .fbx, .obj, .glb, .stl, .ply, .unreal, and .max formats for rendering, simulation, and game development.
Price: $20.79
Texture: Yes
Material: Yes
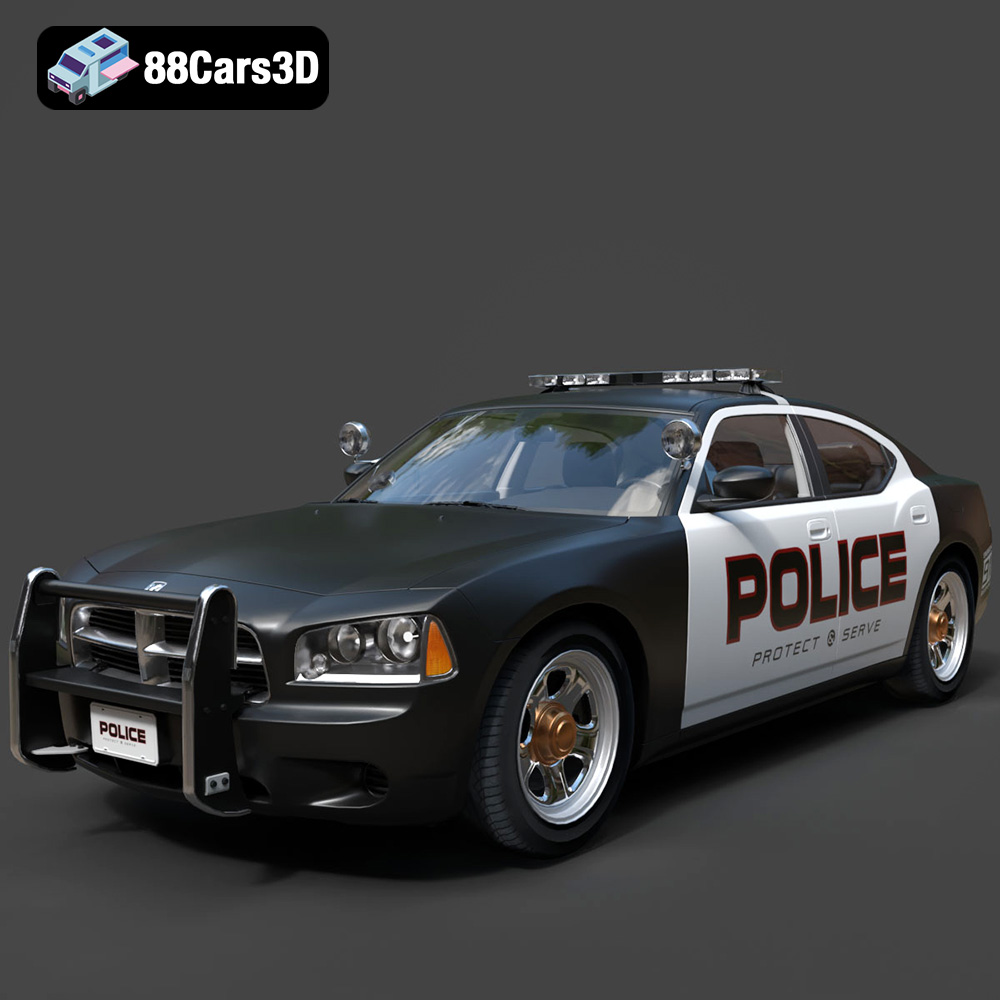
Download the Aston Martin Police US 911 -005 3D Model featuring a high-fidelity exterior with police livery, detailed interior, and accurate proportions. Includes .blend, .fbx, .obj, .glb, .stl, .ply, .unreal, and .max formats for rendering, simulation, and game development.
Price: $10.79

Texture: Yes
Material: Yes
Download the Toyota MRS-007 3D Model featuring clean geometry, realistic detailing, and a fully modeled interior. Includes .blend, .fbx, .obj, .glb, .stl, .ply, .unreal, and .max formats for rendering, simulation, and game development.
Price: $10

Texture: Yes
Material: Yes
Download the Porsche 911 Turbo S 2024 3D Model featuring clean geometry, realistic detailing, and a fully modeled interior. Includes .blend, .fbx, .obj, .glb, .stl, .ply, .unreal, and .max formats for rendering, simulation, and game development.
Price: $20

Texture: Yes
Material: Yes
Download the Pontiac Solstice 2009 3D Model featuring clean geometry, realistic detailing, and a fully modeled interior. Includes .blend, .fbx, .obj, .glb, .stl, .ply, .unreal, and .max formats for rendering, simulation, and game development.
Price: $10

Texture: Yes
Material: Yes
Download the Mini Cooper Countryman 2025 3D Model featuring clean geometry, realistic detailing, and a fully modeled interior. Includes .blend, .fbx, .obj, .glb, .stl, .ply, .unreal, and .max formats for rendering, simulation, and game development.
Price: $29.9

Texture: Yes
Material: Yes
Download the Mercedes C Classe 2012 3D Model featuring clean geometry, realistic detailing, and a fully modeled interior. Includes .blend, .fbx, .obj, .glb, .stl, .ply, .unreal, and .max formats for rendering, simulation, and game development.
Price: $19.9

Texture: Yes
Material: Yes
Download the Mercedes-Benz S65 AMG 2018 3D Model featuring clean geometry, realistic detailing, and a fully modeled interior. Includes .blend, .fbx, .obj, .glb, .stl, .ply, .unreal, and .max formats for rendering, simulation, and game development.
Price: $19.9

