Unleashing the Power of Unreal Engine for Automotive Visualization: A Complete Guide for 3D Car Models
The automotive industry is in a constant state of innovation, not just in vehicle design and engineering, but also in how cars are presented, visualized, and experienced. From concept design and marketing campaigns to interactive configurators and immersive VR showcases, the demand for high-fidelity, real-time visualization is soaring. This is where Unreal Engine steps in, offering an unparalleled toolkit for creating stunning, photorealistic automotive experiences that blur the lines between virtual and reality.
Unreal Engine provides a robust, real-time platform that empowers artists and developers to render incredibly detailed 3D car models with breathtaking accuracy, dynamic lighting, and interactive capabilities. Whether you’re a game developer aiming for authentic vehicle physics, an automotive designer visualizing a new prototype, or a marketing professional crafting a compelling virtual showroom, understanding the core workflows within Unreal Engine is crucial. This comprehensive guide will walk you through the essential steps and advanced techniques, leveraging features like Nanite, Lumen, and Blueprint, to transform your 3D car models into captivating real-time experiences. We’ll explore everything from project setup and material creation to performance optimization and interactive configurators, ensuring you have the knowledge to push the boundaries of automotive visualization.
Setting the Stage: Unreal Engine Project Setup for Automotive Excellence
Embarking on an automotive visualization project in Unreal Engine begins with a solid foundation. Proper project setup ensures optimal performance, visual quality, and access to the necessary tools for rendering high-fidelity 3D car models. Neglecting these initial steps can lead to performance bottlenecks or visual compromises down the line.
Project Templates and Initial Configuration
When creating a new project, selecting the right template can streamline your workflow significantly. For automotive visualization, starting with a Blank project offers the most flexibility, allowing you to build your scene from scratch. Alternatively, the “Archviz” or “Games” templates can provide useful starting assets and settings, though they might require some cleanup. Once you’ve chosen a template, it’s critical to enable key rendering features that are indispensable for photorealistic automotive scenes:
- Lumen Global Illumination and Reflections: Navigate to Project Settings > Rendering and enable “Lumen Global Illumination” and “Lumen Reflections.” Lumen provides dynamic, real-time indirect lighting and reflections, which are essential for accurately simulating light bouncing off metallic car surfaces and interacting with the environment.
- Nanite Virtualized Geometry: Also under Project Settings > Rendering, enable “Nanite.” Nanite allows Unreal Engine to efficiently render highly detailed meshes with millions of polygons in real-time without traditional LOD management complexities. This is a game-changer for importing intricate 3D car models with all their high-resolution details.
- Ray Tracing (Optional but Recommended): For the absolute highest visual fidelity, especially for static renders or high-end workstations, enable “Hardware Ray Tracing” in the same Rendering section. This offers physically accurate shadows, reflections, and global illumination, though it comes with a higher performance cost. For most real-time interactive experiences, Lumen often provides a superb balance of quality and performance.
After enabling these features, restart the engine for changes to take effect. It’s also wise to set a target frame rate in Project Settings > General Settings > Frame Rate to ensure consistent performance testing.
Essential Project Settings for Automotive
Beyond the core rendering features, several other project settings are crucial for automotive visualization:
- Post-Processing Defaults: In the Rendering section, adjust the default Post-Processing settings. Things like Exposure (set to Manual for precise control), Anti-Aliasing (TAA or TSR for smooth edges), and Film Tone Mapper can drastically impact the final look. Consider disabling Auto Exposure for more predictable lighting.
- Color Management: For accurate color reproduction, ensure your project is using ACES (Academy Color Encoding System) or a similar industry-standard color space if your source assets are prepared with it. This maintains color consistency across different display devices and ensures your car’s paint colors appear as intended.
- World Settings: In the World Settings panel (Window > World Settings), you can configure default physics, game mode, and importantly, enable “Force no precomputed lighting” if you are relying entirely on Lumen and dynamic lighting, preventing conflicts with older static lighting systems.
- Engine Scalability Settings: For development and testing, be mindful of your editor’s scalability settings (Settings > Engine Scalability Settings). While you want to develop with high settings to see the true fidelity, remember that end-users might have varying hardware. Optimizing for scalability is key for broad accessibility.
By meticulously configuring these project settings from the outset, you create a robust and optimized environment, ready to welcome your high-quality 3D car models and showcase them in their best light. For more in-depth information on Unreal Engine’s rendering features, consult the official documentation at https://dev.epicgames.com/community/unreal-engine/learning.
Importing and Optimizing 3D Car Models: From Asset to Engine
The foundation of any compelling automotive visualization is the quality of its 3D car model. Even the most advanced rendering features of Unreal Engine cannot compensate for a poorly prepared asset. Sourcing high-quality models and understanding the import and optimization process are paramount for achieving photorealistic results and smooth real-time performance.
Best Practices for Model Preparation
Before importing your 3D car model into Unreal Engine, ensuring it meets certain standards will save countless hours of troubleshooting. Platforms like 88cars3d.com offer optimized models specifically designed for Unreal Engine, featuring clean topology, proper UV mapping, and realistic material setups. When preparing or sourcing models, consider these best practices:
- Clean Topology: Models should have clean, quad-based topology with minimal n-gons or overlapping faces. This is crucial for proper subdivision, deformation, and consistent shading.
- Optimized Polygon Count: While Nanite allows for high polygon counts, it’s still beneficial to start with a reasonably optimized mesh. A well-modeled car might range from 150,000 to several million polygons for its high-detail version. Nanite handles this efficiently, but excessive, unnecessary geometry can still impact performance or export times.
- Proper UV Mapping: Ensure all parts of the car (body, interior, tires, glass) have clean, non-overlapping UV maps for texture application. Multiple UV channels might be needed: one for diffuse/normal maps, another for lightmaps (if using baked lighting), and potentially a third for custom effects or decals.
- Real-World Scale: Models should be built to real-world scale (e.g., centimeters in Unreal Engine). Inconsistent scaling can lead to issues with lighting, physics, and interaction.
- Material IDs and Naming Conventions: Organize your model with clear material IDs and logical naming conventions for meshes (e.g., “Car_Body,” “Wheel_FL,” “Interior_Seats”). This simplifies material assignment and hierarchy management within Unreal Engine.
The Import Process: FBX, USD, and DataSmith Workflows
Unreal Engine supports various file formats for importing 3D models, each with its strengths:
- FBX (Filmbox): The most common format, supporting meshes, animations, skeletal data, and basic material information. For car models, export individual components (body, wheels, interior) as separate FBX files or as a single FBX with a clean hierarchy. During import, ensure you select “Combine Meshes” if it’s a single static mesh, or “Skeletal Mesh” if it includes rigged parts for animation. Crucially, enable “Build Adjacency Buffer” for better normal recalculation and “Convert Scene Unit” if your DCC software uses different units than Unreal.
- USD (Universal Scene Description) and USDZ: USD is rapidly gaining traction as an open standard for interchange, especially in virtual production and collaborative pipelines. It supports geometry, materials, animations, and scene composition. Unreal Engine’s native USD importer (enabled via a plugin) can bring in complex scenes while preserving hierarchy and metadata. USDZ is a single-file, compressed version ideal for AR/VR applications.
- Datasmith: For CAD data or complex scene imports from applications like 3ds Max, Maya, Revit, or SketchUp Pro, Datasmith is the preferred workflow. It’s specifically designed to transfer entire scenes, including geometry, hierarchies, lights, cameras, and PBR materials, into Unreal Engine with high fidelity. Datasmith ensures that complex assemblies, like detailed car models, maintain their structure and material assignments, greatly simplifying the preparation process. Install the Datasmith plugin for your DCC application and then use the Datasmith importer in Unreal Engine.
After importing, always inspect the model in Unreal Engine’s Static Mesh Editor. Check normals, UVs, and ensure the pivot point is correctly placed, especially for components that will be animated or interacted with (e.g., wheel centers, door hinges).
Leveraging Nanite for High-Fidelity Geometry
Once your high-polygon 3D car models are imported, Nanite becomes your best friend. For models with millions of triangles, enabling Nanite is a simple yet powerful step. In the Static Mesh Editor, locate the “Nanite Settings” section and check “Enable Nanite Support.”
Benefits of Nanite for Car Models:
- Extreme Detail: Render models with incredibly high polygon counts (e.g., detailed engines, intricate interiors) without significant performance overhead. Nanite intelligently streams and renders only the necessary geometry based on screen size, drastically reducing draw calls.
- Simplified Workflow: Eliminates the need for manual Level of Detail (LOD) creation for most static meshes, freeing artists to focus on high-fidelity modeling.
- Consistent Visuals: Ensures that your car models look consistently detailed regardless of camera distance, as Nanite handles the streaming of appropriate geometric resolution dynamically.
While Nanite is excellent, remember it currently works best with static meshes. For animated components or skeletal meshes (like a character getting into a car), traditional LODs might still be necessary. However, for the car’s body, chassis, and many interior parts, Nanite is a revolutionary tool for achieving unparalleled visual fidelity in real-time. Make sure to consult the official Unreal Engine documentation on Nanite for the latest best practices: https://dev.epicgames.com/community/unreal-engine/learning.
Crafting Photorealistic Materials: The Art of PBR in Unreal Engine
A high-quality 3D car model truly comes to life through its materials. Achieving photorealism in automotive visualization hinges on correctly implementing Physically Based Rendering (PBR) principles within Unreal Engine’s Material Editor. This involves accurately simulating how light interacts with various surfaces, from glossy paints to reflective chrome and textured rubber.
Understanding PBR Workflow for Automotive Surfaces
PBR is a methodology that aims to simulate the physical properties of materials accurately, leading to more believable and consistent lighting under various conditions. For automotive surfaces, key PBR parameters include:
- Base Color (Albedo): This map defines the diffuse color of the surface without any lighting information. For car paint, this would be the pure color. For rubber, it’s a dark grey/black.
- Metallic: A grayscale map indicating whether a surface is metallic (white, value 1) or dielectric/non-metallic (black, value 0). Car paint is generally non-metallic (dielectric) but often has metallic flakes, which is handled with more advanced material setups. Chrome and bare metals are metallic.
- Roughness: A grayscale map defining the smoothness or roughness of a surface. Lower values (darker) mean a smoother, more reflective surface (e.g., polished chrome, clear coat car paint). Higher values (lighter) mean a rougher, more diffuse surface (e.g., matte plastic, tire rubber). This is crucial for distinguishing between different finishes.
- Normal Map: A tangent-space normal map adds fine surface detail without increasing polygon count. It simulates bumps, scratches, or textures (like tire treads) by modifying how light interacts with the surface normals.
- Ambient Occlusion (AO): A grayscale map that simulates subtle self-shadowing in crevices and corners, enhancing depth and realism. While Lumen provides real-time ambient occlusion, incorporating an AO map into your material can add further fidelity.
When applying these principles to a car, think about each component: the car body’s clear coat, the metallic flakes within the paint, the satin finish of interior plastics, the rough texture of tire rubber, and the highly reflective surfaces of chrome accents or glass. Each requires a distinct combination of these PBR parameters.
Advanced Material Editor Techniques
Unreal Engine’s Material Editor is a node-based system that allows for highly complex and realistic material creation. For automotive applications, several advanced techniques are vital:
- Clear Coat Materials: Car paint is typically not a simple metallic surface; it’s a dielectric clear coat over a metallic base layer. Unreal Engine 4.23+ introduced a dedicated “Clear Coat” input in the main material node, which simulates this effect beautifully. Set your base material (metallic flakes) and then feed a separate Roughness value and a ‘1’ (fully opaque) into the Clear Coat and Clear Coat Roughness inputs, respectively, to create a convincing car paint finish. You can also drive the Clear Coat property with a mask to have varying paint types on different areas.
- Anisotropy: Some materials, like brushed metal or certain types of car interiors, exhibit anisotropic reflections (reflections stretching in a particular direction). You can simulate this using the Anisotropy and Anisotropy Direction inputs in the material. This is particularly effective for components like engine parts or specific trim pieces.
- Layered Materials: For complex surfaces with multiple properties (e.g., dusty car paint, mud splatters over a clean car body, or worn leather seats), layered materials are incredibly powerful. You can blend multiple material functions or entire materials using masks, allowing for intricate surface degradation and detail without creating separate meshes. This system promotes reusability and efficiency.
- Custom Shading Models: For highly specialized effects, you can explore Custom Shading Models, though this requires deeper knowledge of HLSL. For example, some custom car paint shaders might replicate very specific metallic flake patterns or multi-layer interference effects.
- Texture Resolutions: For a photorealistic car, aim for high-resolution textures. Body paint and major components should use 4K or even 8K textures for fine details. Smaller components like bolts or interior buttons might suffice with 1K or 2K. Ensure textures are efficiently packed (e.g., Ambient Occlusion, Roughness, Metallic into a single RGB channel texture) to save memory.
Remember that the quality of your textures is as important as your material graph. Using high-resolution, unbiased PBR textures from libraries or created through photogrammetry will significantly elevate the realism of your car models. Proper material setup is the bridge between a great 3D model and a breathtaking real-time render.
Dynamic Lighting and Reflections: Illuminating Your Automotive Scenes
Lighting is arguably the most critical component in achieving photorealism in any real-time scene, and automotive visualization is no exception. The interplay of light, shadow, and reflection defines the character and realism of a 3D car model, highlighting its curves, materials, and form. Unreal Engine provides a powerful array of lighting tools, with Lumen leading the charge for dynamic, high-fidelity results.
Mastering Lumen: Real-Time Global Illumination and Reflections
Lumen is Unreal Engine’s groundbreaking real-time global illumination and reflections system. For automotive visualization, Lumen offers unprecedented realism and flexibility:
- Real-Time GI: Lumen dynamically calculates how light bounces off surfaces, illuminating indirect areas and providing soft, natural shadows. This is crucial for a car’s interior, where light enters through windows and reflects off various surfaces, creating complex, subtle lighting.
- Accurate Reflections: Lumen provides high-quality, real-time reflections for both metallic and non-metallic surfaces, essential for rendering the highly reflective surfaces of a car body, chrome accents, and glass. The reflections accurately capture the environment, other cars, and light sources, making the car feel truly integrated into its surroundings.
- Dynamic Scenes: Unlike baked lighting solutions, Lumen adapts instantly to changes in light sources, geometry, and materials. This is vital for interactive configurators where paint colors change, doors open, or cars move within a scene.
Setting up Lumen: As mentioned in Project Setup, enable Lumen Global Illumination and Reflections in Project Settings > Rendering. For your scene, ensure you have a Post-Process Volume covering your entire level. In its details panel, under “Global Illumination,” set “Method” to “Lumen.” Do the same for “Reflections.” Adjust the Lumen quality settings (e.g., “Max Traces,” “Samples Per Pixel”) for a balance between visual fidelity and performance. Consider using a Skylight with “Real Time Capture” enabled to capture ambient lighting from an HDRI or Sky Atmosphere for convincing environmental reflections.
Traditional Lighting Approaches and HDRI Backdrops
While Lumen handles global illumination, it often works in conjunction with traditional light sources to define direct lighting and specific effects:
- Directional Light: Simulates the sun, providing strong, parallel light rays and sharp shadows. Adjust its rotation to control the time of day and the angle at which light hits the car, influencing reflections and highlights.
- Sky Light: Captures the distant environment’s lighting information. When combined with an HDRI (High Dynamic Range Image) map, it provides realistic ambient light and reflections. Import an HDRI into Unreal Engine, convert it to a Cubemap, and assign it to the Skylight’s Cubemap texture. This is foundational for realistic car reflections, as the environment is mirrored in the paintwork.
- Sky Atmosphere: For outdoor scenes, the Sky Atmosphere component creates a physically accurate sky, dynamically reacting to the Directional Light’s position. It produces realistic volumetric scattering, adding depth and realism to your environment.
- Spot Lights & Rect Lights: Useful for specific accents, such as headlights, interior dome lights, or to highlight particular features of the car in a studio setup. Rect Lights are excellent for simulating studio softboxes or large light panels for controlled automotive photography.
- Post-Process Volume for Final Touches: After setting up your lighting, fine-tune the overall look with a Post-Process Volume. Adjust settings like Exposure (manual is often best for control), White Balance, Color Grading, Vignette, Bloom (subtly for bright reflections), and Depth of Field to give your renders a cinematic quality. For car renders, a shallow depth of field can often draw attention to the vehicle.
Balancing these lighting elements is an art. Experiment with different light intensities, colors, and positions to find the perfect setup that showcases your 3D car model’s design and materials effectively. Remember to consider the context of your scene – a showroom, an outdoor environment, or a cinematic sequence – as each will demand a tailored lighting approach.
Interactive Experiences and Configurators: Bringing Cars to Life with Blueprint
Static renders, while beautiful, only scratch the surface of Unreal Engine’s potential for automotive visualization. The ability to create interactive experiences – from dynamic camera tours to full-fledged car configurators – sets Unreal Engine apart. This interactivity is primarily driven by Blueprint Visual Scripting, Unreal Engine’s powerful node-based scripting system that requires no coding knowledge.
Blueprint Fundamentals for Automotive Interactivity
Blueprint allows artists and designers to implement complex logic and interactivity without writing a single line of C++. For automotive projects, common interactive elements include:
- Camera Controls: Allow users to freely orbit around the car, zoom in on details, or switch between predefined camera angles (e.g., exterior view, interior view). You can achieve this by using “Add Controller Yaw/Pitch Input” for orbit and adjusting the camera’s Spring Arm length for zoom.
- Changing Car Colors/Materials: This is a core feature of any car configurator. You can create an array of material instances (one for each paint color) and then use Blueprint to swap them dynamically on the car body when a button is pressed or a UI element is clicked.
- Opening Doors, Hood, Trunk: By creating separate meshes for these parts during modeling and importing them with a proper hierarchy, you can use Blueprint to animate their rotation or translation based on user input. For example, a “Play Timeline” node can smoothly interpolate the door’s rotation over time.
- Activating Lights: Toggle headlights, taillights, or interior lights on and off. This can be done by enabling/disabling the visibility of light components or by switching between different emissive material instances for the light covers.
The workflow typically involves creating an “Actor Blueprint” for your car, where all these interactive elements are managed. Within this Blueprint, you define events (e.g., key presses, UI clicks) and connect them to logic nodes that perform actions (e.g., set material, play animation, change camera). For a deeper dive into Blueprint, Epic Games provides extensive learning resources on their official documentation: https://dev.epicgames.com/community/unreal-engine/learning.
Building an Interactive Car Configurator
A full-fledged car configurator is an essential tool for automotive marketing and sales. Blueprint makes it feasible to create sophisticated configurators with numerous options:
- UI Integration (UMG): Design user interfaces (buttons, sliders, dropdowns) using Unreal Motion Graphics (UMG) Widgets. These widgets can then call events within your car’s Blueprint to trigger changes. For example, a color swatch in UMG can trigger a custom event in the car Blueprint that swaps the car’s paint material.
- Material Swaps for Paint and Interior: Create master materials for car paint (including clear coat, metallic flakes, etc.) and then generate multiple material instances from them, each with different base colors or roughness values. Store these material instances in arrays within your Blueprint. When a user selects an option, use a “Set Material” node to apply the corresponding instance to the car body.
- Asset Visibility Toggles for Wheels & Accessories: Import different wheel designs, spoilers, or other accessories as separate Static Meshes. In Blueprint, you can create arrays of these meshes and use “Set Visibility” nodes to show or hide them, allowing users to customize their build. Ensure proper snapping and alignment logic is implemented if parts are swapped.
- Option Logic and Dependencies: Implement logic that handles dependencies between options (e.g., if a certain trim level is selected, only specific wheel options are available). This can be done with simple branch nodes and boolean variables within Blueprint.
The modularity of Blueprint allows for scaling the complexity of your configurator. Start with basic material swaps and camera controls, then gradually add more sophisticated features, managing all interactions within your car’s central Blueprint.
Physics Simulation and Vehicle Dynamics
For game development or realistic driving simulations, Unreal Engine offers robust physics capabilities, particularly the Chaos Vehicle System. This system allows for:
- Realistic Vehicle Movement: Configure vehicle characteristics like engine power, gear ratios, suspension, and tire friction to simulate real-world driving physics.
- Collision Detection: Integrate collision meshes with your car model so it interacts realistically with the environment and other objects.
- Interactive Elements: Combine physics with Blueprint to create interactive dashboards, working gauges, or even destructible car parts.
Setting up a Chaos Vehicle involves creating a “Chaos Vehicle Pawn” Blueprint, assigning your car’s skeletal mesh, and then configuring the engine, wheels, and suspension parameters in detail. This provides a deep level of control over how your vehicle handles, making it ideal for racing games, simulators, or interactive driving experiences where realism is paramount.
Performance Optimization and Delivery: Polishing Your Automotive Project
Creating stunning visuals in Unreal Engine is only half the battle; ensuring your automotive visualization runs smoothly on target hardware is equally crucial. Optimization is an ongoing process that impacts everything from asset creation to final project packaging. For interactive experiences, maintaining a high and stable frame rate is key to user satisfaction.
Level of Detail (LOD) and Impostors for Scalability
While Nanite minimizes the need for manual LODs for static meshes, other assets and components still benefit from traditional LOD management:
- Manual LODs for Non-Nanite Meshes: For skeletal meshes (e.g., characters interacting with the car) or very specific static meshes where Nanite might not be ideal (like UI elements in 3D space), manually creating LODs is essential. Each LOD is a simplified version of the mesh, with fewer polygons and potentially lower-resolution textures, automatically swapped based on screen size or distance. Unreal Engine can generate LODs automatically, but manual creation often yields better results.
- Impostors: For very distant objects (e.g., cars in the far background of a virtual city), impostors can be used. An impostor is a 2D billboard that represents a 3D object from a distance, drastically reducing rendering cost. While not typically used for the primary car model itself, it’s a valuable technique for populating expansive automotive environments.
Proper LOD setup ensures that objects only render with the detail necessary for their current view distance, saving GPU resources and improving overall performance.
Culling, Instancing, and Draw Call Reduction
Beyond geometry, other factors significantly impact performance:
- Occlusion Culling: Unreal Engine automatically prevents rendering objects that are hidden behind other objects. Ensure your scene geometry is well-defined to facilitate efficient culling. Manually placed “Occlusion Volumes” can further assist in complex environments.
- Frustum Culling: Objects outside the camera’s view frustum are not rendered. Optimize your camera’s field of view and scene layout to make the most of this.
- Instancing: When you have multiple identical objects (e.g., many identical bolts on an engine, multiple identical car models in a showroom), using “Instanced Static Meshes” or the “Hierarchical Instanced Static Mesh” component can dramatically reduce draw calls. Instead of sending unique draw calls for each instance, the engine can render them all in one go, significantly boosting performance. This is particularly useful for populating a scene with multiple versions of a car or its smaller components.
- Material Optimization: Complex materials with many instructions can be costly. Aim for efficient material graphs, use texture packing (e.g., combining AO, Roughness, Metallic into a single texture’s RGB channels), and reuse material instances where possible.
- Texture Streaming: Enable texture streaming in Project Settings > Rendering to ensure textures are loaded at appropriate resolutions based on camera distance, saving VRAM.
Profiling your project using Unreal Engine’s built-in tools (like the Stat commands: `stat fps`, `stat unit`, `stat rhi`, `stat gpu`) is crucial. This helps identify bottlenecks – whether they are CPU-bound (draw calls, game thread) or GPU-bound (shaders, post-processing, overdraw) – allowing you to target your optimization efforts effectively.
Packaging for Various Platforms
The final step is to package your project for its target platform. Unreal Engine supports a wide range of platforms, from desktop PCs to AR/VR devices and even web browsers (via Pixel Streaming).
- Desktop (PC/Mac): Standard packaging generates an executable application. Ensure you test on various hardware configurations, as performance can vary widely.
- AR/VR Optimization: For AR (e.g., iOS, Android) and VR (e.g., Oculus, SteamVR), performance requirements are much stricter, often demanding 90+ FPS per eye. This necessitates aggressive optimization:
- Lower polygon counts for non-Nanite meshes.
- Reduced texture resolutions.
- Simplified materials and lighting (e.g., baked lighting or mobile-optimized Lumen for VR).
- Strict draw call budgets.
- Use forward rendering and multi-view rendering paths.
- For AR applications featuring 3D car models, like those seen on platforms supporting USDZ for quick AR previews, the focus is on lightweight, highly optimized assets that load quickly on mobile devices.
- Web (Pixel Streaming): Pixel Streaming allows you to render your Unreal Engine application on a powerful server and stream the pixel output to a web browser on any device. This is ideal for high-fidelity car configurators or interactive demos that need to be accessible via a web link without requiring users to download a large application. While performance on the client-side is mostly dependent on network speed, the server still needs to render the scene efficiently.
Always perform thorough QA and performance testing on your target platforms to ensure a smooth and engaging user experience, especially when showcasing the intricate details of your 3D car models.
Advanced Automotive Workflows: Beyond the Basics
With a solid understanding of importing, material creation, lighting, and basic interactivity, you’re ready to explore more advanced workflows that truly push the boundaries of automotive visualization in Unreal Engine. These techniques cater to high-end marketing, virtual production, and immersive experiences.
Cinematic Storytelling with Sequencer
Unreal Engine’s Sequencer is a powerful non-linear cinematic editor that allows you to craft stunning animations and cinematic sequences for your automotive projects. It’s an indispensable tool for marketing materials, virtual tours, and engaging presentations.
- Camera Animation: Create dynamic camera paths, cuts, and cinematic moves to highlight the car’s design. Sequencer provides full control over camera properties like focal length, aperture, and depth of field, enabling you to achieve professional-grade cinematography.
- Vehicle Movement Paths: Animate your car along complex spline paths, complete with realistic acceleration, braking, and steering. You can keyframe individual components like wheels and suspension to react to the path.
- Material & Light Animation: Animate material parameters (e.g., paint color changes over time, emissive lights fading on/off) or light properties (intensity, color, position) to create dynamic scene transitions or special effects.
- Post-Process Effects: Control post-process volume settings over time to create mood shifts, stylistic looks, or focus changes within your cinematic.
- Audio Integration: Sync sound effects, music, and voiceovers to your visual sequences to enhance immersion.
Sequencer acts like a timeline in a traditional video editor, allowing you to layer animation tracks for every element in your scene, making it perfect for creating polished virtual commercials or product showcases for your 3D car models.
Virtual Production and LED Wall Workflows
Virtual production, especially with LED walls, is revolutionizing how automotive advertisements and films are made. Unreal Engine is at the forefront of this revolution:
- Real-Time Backgrounds: Instead of green screens, high-resolution LED walls display real-time Unreal Engine environments behind a physical car. This eliminates post-production keying and allows for interactive lighting from the virtual environment to naturally spill onto the physical vehicle.
- In-Camera VFX: The virtual background is rendered with correct parallax and perspective from the camera’s viewpoint, creating seamless integration between the physical car and the digital environment, all captured “in-camera.”
- NDisplay: Unreal Engine’s nDisplay system is crucial for driving multiple LED panels and synchronized outputs from a single Unreal project. It ensures a consistent, high-fidelity experience across a large, curved LED volume.
- Live Compositing: For live-action shoots, elements like rain, dust, or other atmospheric effects can be added in real-time within Unreal Engine and composited with the physical car, giving directors unprecedented creative control on set.
This workflow offers immense benefits in flexibility, cost savings, and the ability to iterate rapidly on visual ideas without needing to relocate physical vehicles to different exotic locations.
AR/VR Optimization for Immersive Automotive Applications
Immersive technologies like Augmented Reality (AR) and Virtual Reality (VR) are transforming how consumers experience and interact with cars before they’re even built. Unreal Engine is a leading platform for developing these experiences.
- AR Car Viewers: Develop AR applications (e.g., for iOS or Android) that allow users to place a virtual 3D car model into their real-world environment via their smartphone or tablet camera. This requires optimized, lightweight models and careful use of mobile rendering features. The USDZ format, often supported by platforms for quick AR previews, is highly relevant here, providing single-file, optimized assets for mobile deployment.
- VR Showrooms and Test Drives: Create fully immersive VR experiences where users can explore car interiors, customize features, and even “test drive” a vehicle in a virtual environment. This demands rigorous optimization to maintain high frame rates (typically 90 FPS) to prevent motion sickness.
- Performance Strategies: As mentioned in optimization, for AR/VR, prioritize:
- Aggressive LODs for all meshes.
- Reduced texture resolutions and efficient material graphs.
- Forward rendering and instanced stereo rendering for VR.
- Baked lighting where possible, or highly optimized dynamic lighting.
- Strict draw call management and minimal overdraw.
- Interaction Design for VR: Design intuitive VR interactions (e.g., gaze-based menus, hand controllers) for changing car colors, opening doors, or interacting with the dashboard.
AR/VR applications for automotive allow for unparalleled engagement, letting customers truly connect with a vehicle’s design and features in a highly personal and memorable way.
Conclusion
Unreal Engine has firmly established itself as the premier real-time platform for automotive visualization, offering an unparalleled blend of photorealistic rendering capabilities, robust interactivity, and powerful optimization tools. From the initial project setup and meticulous material creation using PBR principles to leveraging groundbreaking features like Nanite for high-fidelity models and Lumen for dynamic global illumination, Unreal Engine empowers artists and developers to bring their 3D car models to life with breathtaking realism.
Whether you’re crafting an interactive car configurator with Blueprint, producing cinematic marketing content with Sequencer, or pushing the boundaries of virtual production and immersive AR/VR experiences, the workflows within Unreal Engine provide the flexibility and power needed to meet diverse industry demands. By mastering these techniques and sourcing high-quality assets – like the meticulously prepared 3D car models found on marketplaces such as 88cars3d.com – you can create compelling, high-performance visualizations that truly resonate with audiences and drive innovation in the automotive sector.
The journey into advanced automotive visualization with Unreal Engine is continuous, with new features and best practices emerging regularly. Embrace experimentation, leverage the comprehensive resources provided by Epic Games, and continue to refine your skills. The automotive industry is ready for your vision, and Unreal Engine is the vehicle to make it a reality.
Featured 3D Car Models
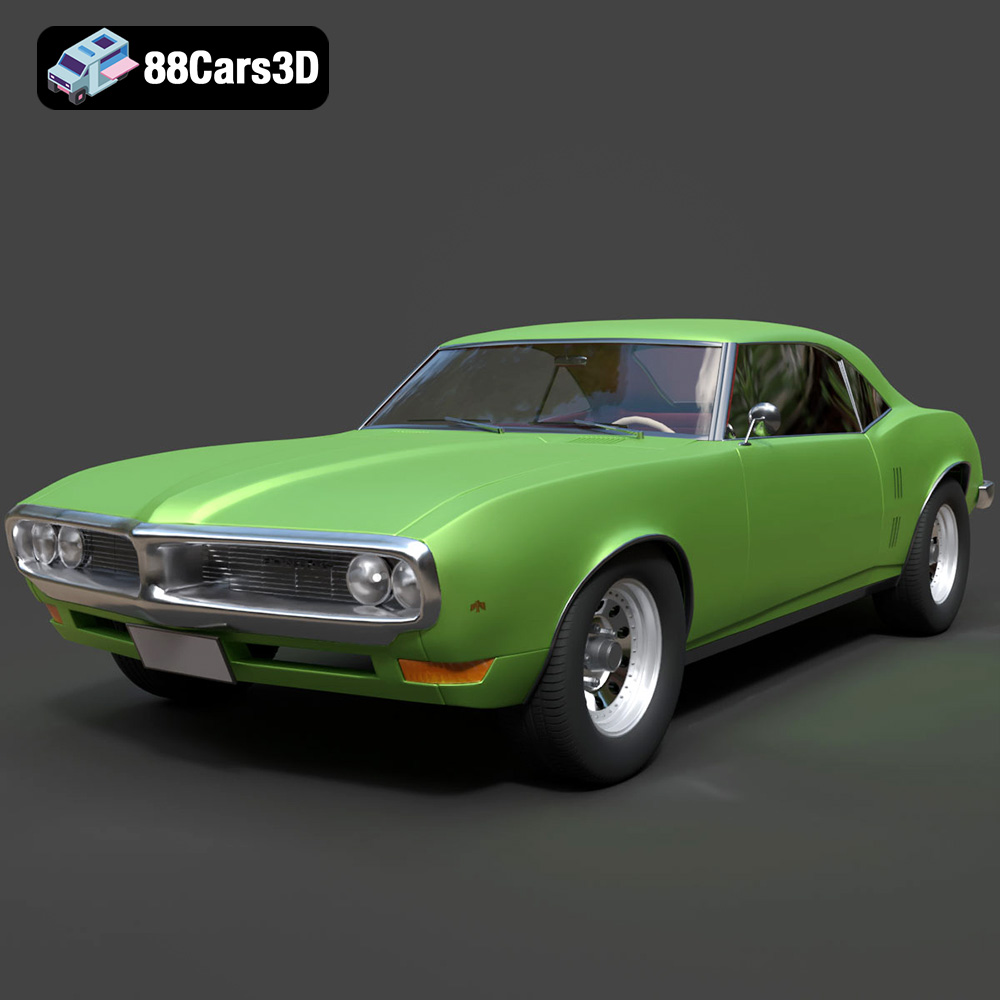
Texture: Yes
Material: Yes
Download the Pontiac Firebird 1998 3D Model featuring clean geometry, realistic detailing, and a fully modeled interior. Includes .blend, .fbx, .obj, .glb, .stl, .ply, .unreal, and .max formats for rendering, simulation, and game development.
Price: $10
View Product

Texture: Yes
Material: Yes
Download the Opel Astra 2008 3D Model featuring clean geometry, realistic detailing, and a fully modeled interior. Includes .blend, .fbx, .obj, .glb, .stl, .ply, .unreal, and .max formats for rendering, simulation, and game development.
Price: $10
View Product

Texture: Yes
Material: Yes
Download the Mercedes Benz Joaquin-007 3D Model featuring clean geometry, realistic detailing, and a fully modeled interior. Includes .blend, .fbx, .obj, .glb, .stl, .ply, .unreal, and .max formats for rendering, simulation, and game development.
Price: $19.99
View Product
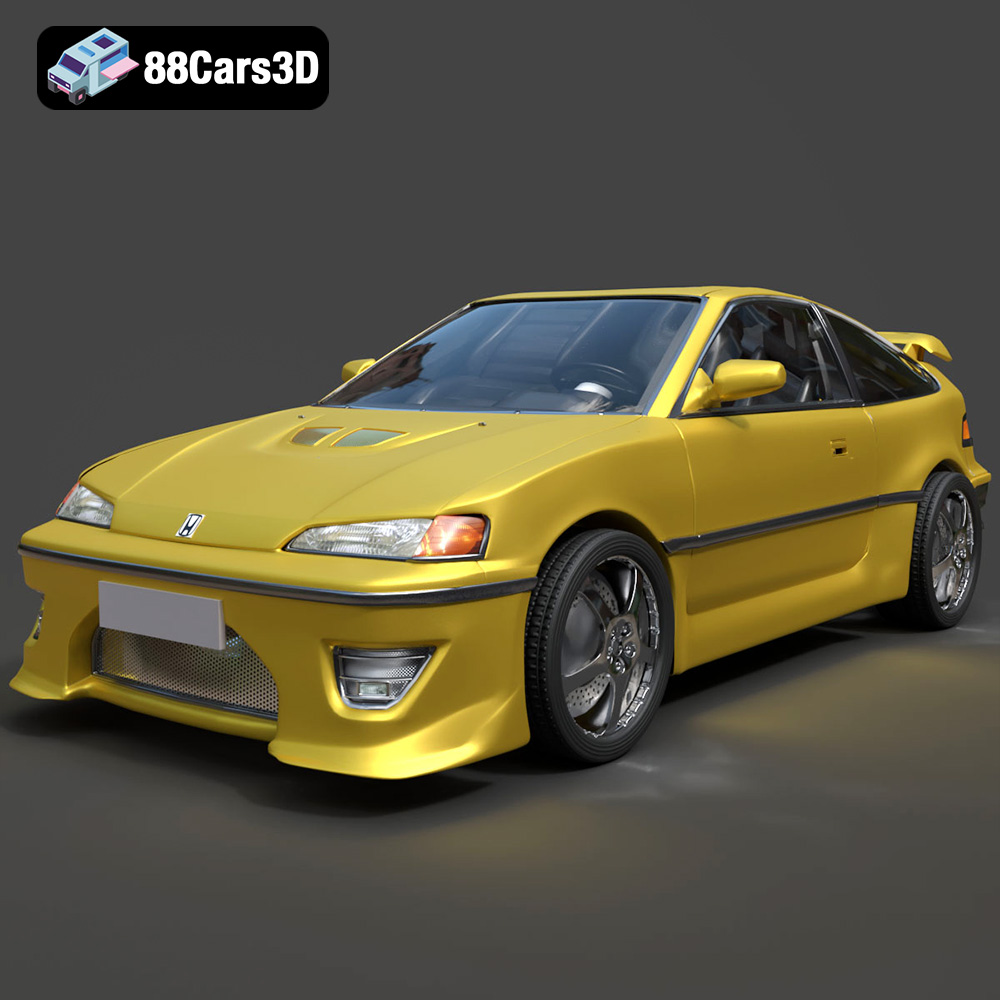
Texture: Yes
Material: Yes
Download the Honda CRX 1980 3D Model featuring clean geometry, realistic detailing, and a fully modeled interior. Includes .blend, .fbx, .obj, .glb, .stl, .ply, .unreal, and .max formats for rendering, simulation, and game development.
Price: $11.99
View Product
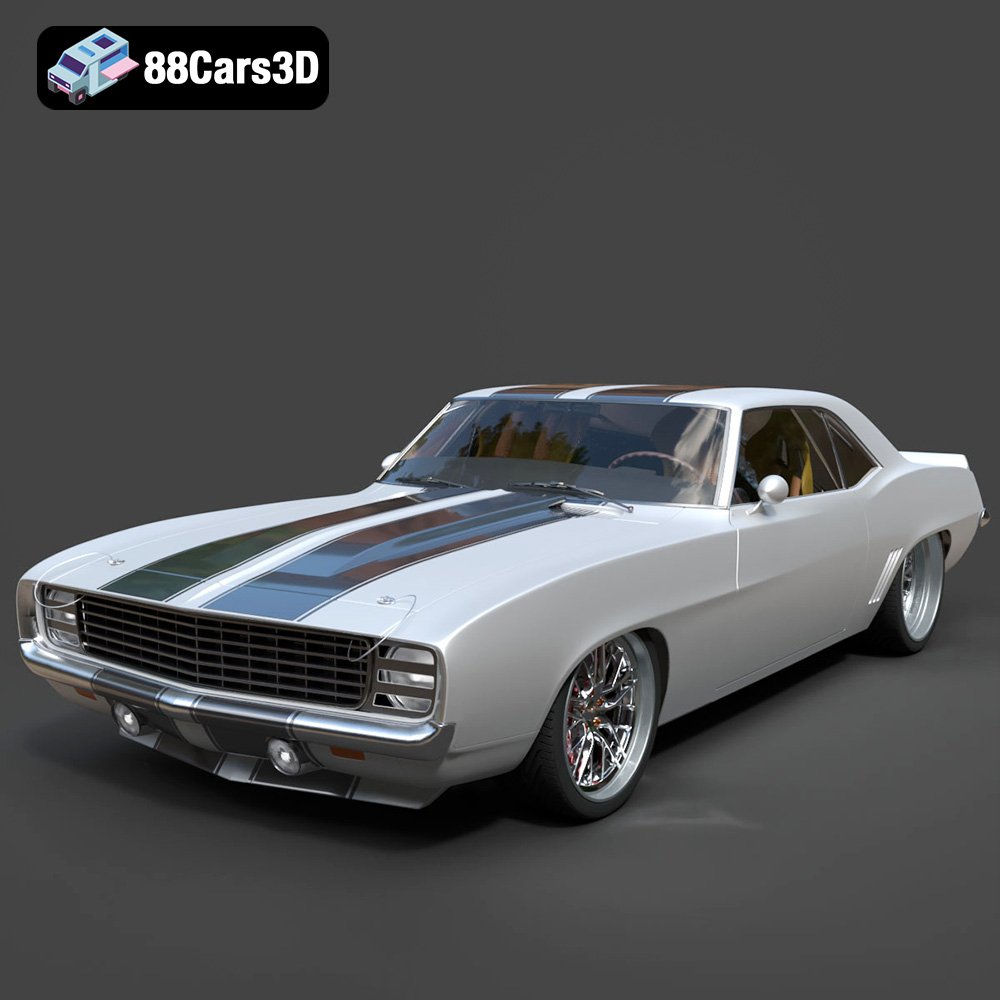
Texture: Yes
Material: Yes
Download the Chevrolet Camaro 69 Pro-007 3D Model featuring classic muscle car design and custom performance aesthetics. Includes .blend, .fbx, .obj, .glb, .stl, .ply, .unreal, and .max formats for rendering, simulation, and game development.
Price: $20.79
View Product

Texture: Yes
Material: Yes
Download the Honda Fit 2008 3D Model featuring a compact, versatile design with detailed exterior and interior components. Includes .blend, .fbx, .obj, .glb, .stl, .ply, .unreal, and .max formats for rendering, simulation, and game development.
Price: $10.79
View Product
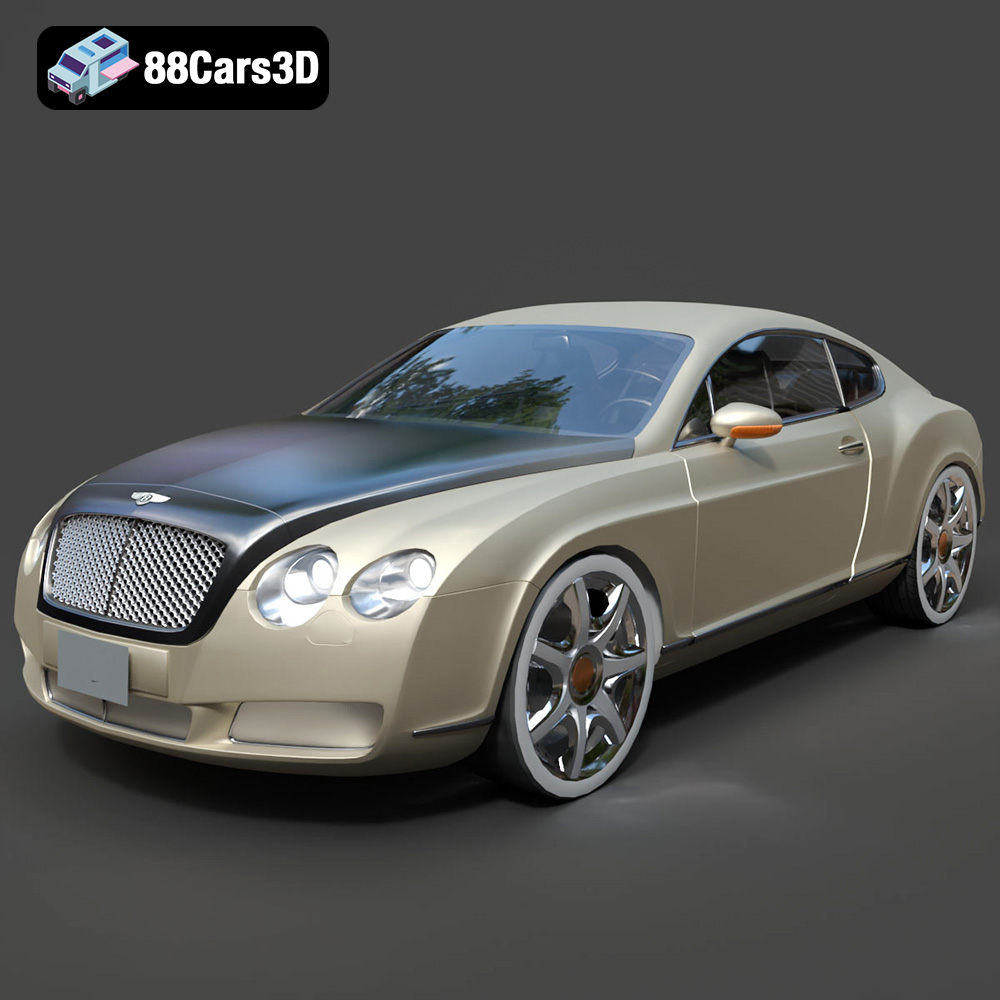
Texture: Yes
Material: Yes
Download the Bentley Continental GT-002 3D Model featuring a luxurious grand touring design and high-quality details. Includes .blend, .fbx, .obj, .glb, .stl, .ply, .unreal, and .max formats for rendering, simulation, and game development.
Price: $20.79
View Product

Texture: Yes
Material: Yes
Download the Audi R8 2006 3D Model featuring a sleek sports car design with detailed exterior and interior. Includes .blend, .fbx, .obj, .glb, .stl, .ply, .unreal, and .max formats for rendering, simulation, and game development.
Price: $20.79
View Product
Texture: Yes
Material: Yes
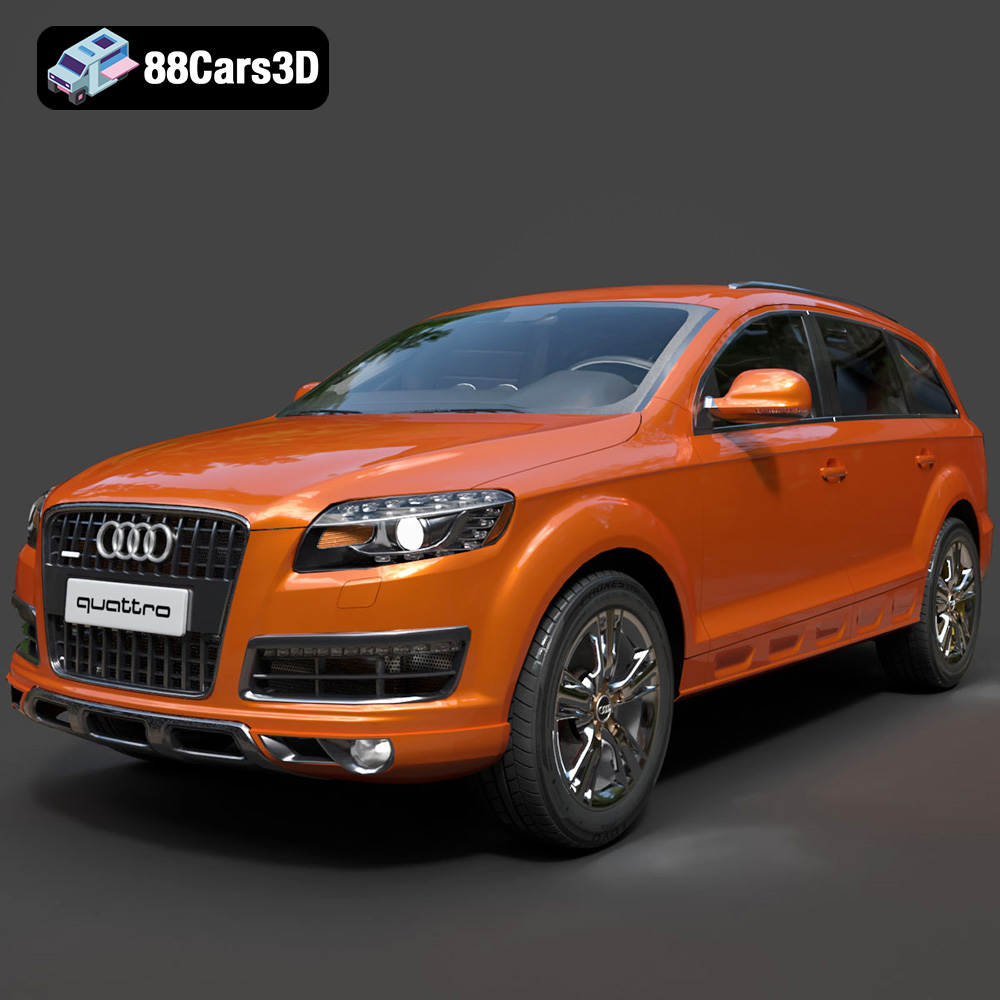
Download the Audi Q7 3D Model featuring a detailed exterior and a refined interior. Includes .blend, .fbx, .obj, .glb, .stl, .ply, .unreal, and .max formats for rendering, simulation, and game development.
Price: $20.79
View Product
Texture: Yes
Material: Yes
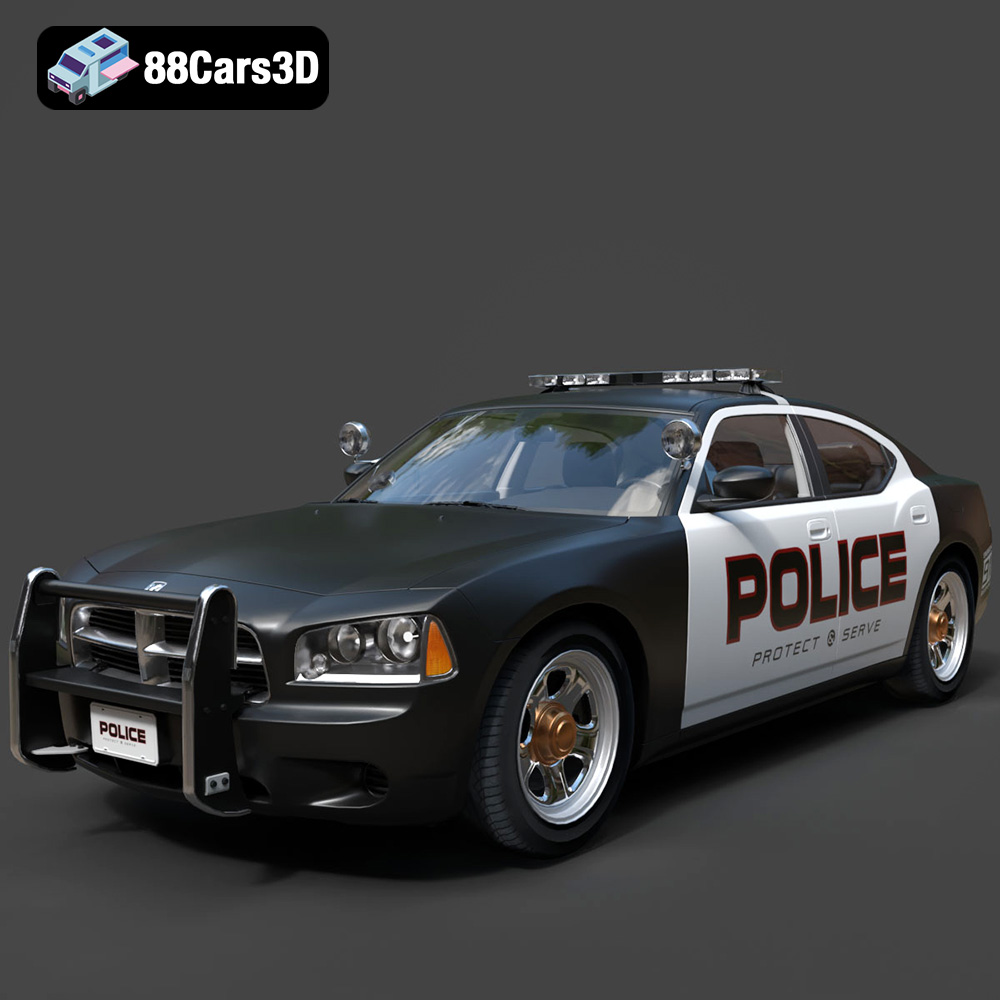
Download the Aston Martin Police US 911 -005 3D Model featuring a high-fidelity exterior with police livery, detailed interior, and accurate proportions. Includes .blend, .fbx, .obj, .glb, .stl, .ply, .unreal, and .max formats for rendering, simulation, and game development.
Price: $10.79
View Product


