

In the dynamic realm of real-time rendering, speed, efficiency, and stunning visuals are paramount. For professionals working with Unreal Engine in fields like automotive visualization, game development, and architectural walkthroughs, the demand for rich, detailed, and rapidly iterable environments is ever-increasing. Manually placing every tree, rock, or debris element across vast landscapes or intricate scenes is not only time-consuming but also stifles creativity and iteration.
Enter Procedural Content Generation (PCG) in Unreal Engine – a game-changing tool that empowers artists and developers to create complex, data-driven environments with unparalleled efficiency. PCG leverages a node-based graph system, allowing you to define rules and parameters for asset placement, distribution, and transformation. This non-destructive workflow revolutionizes how we approach world-building, enabling rapid prototyping, consistent quality, and dynamic adaptability.
This comprehensive guide will delve deep into the world of PCG, exploring its core principles, practical implementation, and advanced techniques. We’ll cover everything from setting up your first PCG graph to integrating it with Unreal Engine’s cutting-edge features like Nanite and Lumen, optimizing performance, and leveraging it for breathtaking automotive visualizations. Whether you’re a game developer looking to populate an open world, an automotive artist crafting an immersive virtual showroom for a high-fidelity 3D car model from 88cars3d.com, or an architect bringing designs to life, mastering PCG will undoubtedly elevate your Unreal Engine projects.
The Power of PCG: Unleashing Procedural Content Generation in Unreal Engine
Procedural Content Generation (PCG) represents a fundamental shift in how we approach environment design within Unreal Engine. Instead of the laborious process of hand-placing thousands of static meshes, PCG allows you to define a set of rules and parameters that govern the distribution, density, and attributes of objects across your scene. This methodology isn’t just about automation; it’s about intelligent, data-driven content creation that is highly adaptable and non-destructive. Imagine needing to populate an entire forest or an urban street with debris – PCG can achieve this in minutes, not days, while maintaining artistic control.
The core philosophy behind PCG is to provide artists with powerful tools that abstract away the complexity of mass asset placement, freeing them to focus on the overall artistic vision and iterative design. By defining a “recipe” for content generation, rather than baking it into the scene, PCG enables dynamic changes. You can tweak a single parameter, and the entire generated environment updates instantly, offering unprecedented flexibility for everything from large-scale open worlds to intricate detail passes around a featured vehicle. This iterative speed is invaluable in fast-paced production environments, allowing for quick experimentation with different looks and densities without committing to a destructive workflow.
What is PCG and Why Does it Matter?
At its heart, PCG in Unreal Engine is a visual scripting system, similar to Blueprints, specifically designed for scattering assets and manipulating environments. It operates by generating a series of “points” – conceptual locations in space – and then using these points to spawn actors, instances, or even manipulate landscape data. Each point can carry various attributes, such as rotation, scale, density, or custom data, which are then used by subsequent nodes in the graph to influence the final output.
The significance of PCG extends across various industries:
- Game Development: Rapidly populate vast open worlds with foliage, rocks, buildings, and environmental details, ensuring consistency and reducing manual effort. This accelerates level design and iteration cycles significantly.
- Automotive Visualization: Create realistic or stylized environments for showcasing 3D car models. Whether it’s a sprawling desert for an off-road vehicle or a sleek urban backdrop for a sports car, PCG can generate detailed and varied settings. Platforms like 88cars3d.com provide the high-fidelity car models; PCG provides the world around them.
- Virtual Production: Generate dynamic, real-time backgrounds for LED walls or virtual sets, allowing for quick scene changes and variations without pre-baking.
- Architectural Visualization: Populate surrounding landscapes with trees, shrubs, and street furniture, adding context and realism to architectural renders and walkthroughs.
The non-destructive nature means you can always go back and adjust parameters without having to start over, making it an incredibly robust tool for complex projects.
Core Components of a PCG Graph
A PCG graph is a network of interconnected nodes, each performing a specific operation on a set of input points or data. Understanding these core components is key to leveraging PCG effectively:
- PCG Points: These are the fundamental units of a PCG graph. A point is essentially a data structure containing a location (Vector), rotation (Quaternion), scale (Vector), density (Float), and an arbitrary set of attributes. PCG operations typically generate, filter, transform, or consume these points.
- PCG Nodes: Each node represents an operation, ranging from sampling a landscape, generating noise, filtering points based on density, transforming point attributes, or spawning static meshes. Nodes have input and output pins that connect to pass point data along the graph.
- PCG Graph Asset: This is the primary asset you create in Unreal Engine. It encapsulates the entire network of nodes and logic for your procedural generation.
- PCG Volume/Actor: To execute a PCG graph in your level, you place a PCG Volume or a PCG Actor. This defines the spatial bounds within which the graph will operate and allows you to expose parameters to control the generation directly in the scene.
- Attributes: These are custom data fields associated with each point. Attributes are incredibly powerful, allowing you to store information like material variants, specific mesh indices, or even user-defined tags that influence subsequent nodes. For example, a point might have an attribute “TreeType” that dictates whether a pine or oak tree is spawned.
By understanding how these elements interact, you can begin to design sophisticated procedural systems that bring your virtual worlds to life.
Setting Up Your First PCG Graph and Basic Placement
Getting started with PCG in Unreal Engine is a straightforward process that lays the groundwork for more complex environmental designs. Before diving into intricate node networks, it’s crucial to understand the initial setup and how to perform basic asset placement. This foundational knowledge will empower you to quickly prototype environments, populate simple scenes, and begin to appreciate the speed and flexibility that PCG offers. The immediate payoff of seeing a multitude of assets automatically placed according to your rules is incredibly satisfying and highlights PCG’s potential.
The initial steps involve enabling the necessary plugin, creating your first PCG Graph asset, and then placing it in your level. From there, you’ll learn how to sample the environment to generate points and then use those points to spawn static meshes. This basic pipeline forms the core of almost every PCG graph, regardless of its complexity. Mastery of these fundamental operations is essential before exploring advanced techniques or integrating with other Unreal Engine systems. Keep in mind that for detailed step-by-step instructions and further learning, the official Unreal Engine documentation at https://dev.epicgames.com/community/unreal-engine/learning is an excellent resource.
Enabling the PCG Plugin and Creating a New Graph
Before you can harness the power of PCG, you need to ensure the plugin is enabled in your Unreal Engine project:
- Go to
Edit > Pluginsin the Unreal Editor. - Search for “PCG” and enable the “Procedural Content Generation” plugin.
- Restart the editor when prompted.
Once enabled, you can create your first PCG Graph asset:
- In the Content Browser, right-click and select
Miscellaneous > PCG Graph. - Name your graph, for example,
PCG_MyFirstForest. - Double-click the asset to open the PCG Editor, which is where you’ll build your procedural logic.
To use this graph in your level, drag and drop the PCG_MyFirstForest asset from the Content Browser directly into your viewport. This will create a PCG Volume in your scene. By default, the PCG Volume determines the bounds of your generation, but you can also use a PCG Actor for more granular control over where the generation occurs. For now, a PCG Volume is perfect for broad-area generation. You can resize this volume to define the area where your procedural content will be generated. The PCG Volume also has a “Generate” button in its Details panel, allowing you to manually trigger the generation process.
Generating Points and Spawning Static Meshes
With your PCG Graph open in the editor and a PCG Volume in your level, let’s create a simple forest:
- Sample the Environment: In your PCG Graph, right-click and add a
Landscape Spline Samplernode or aGet Bounding Boxnode if you don’t have a landscape. For a basic start, let’s assume a flat plane or landscape. AGet Bounding Boxnode outputs points within the bounds of a specified actor (like the PCG Volume itself). - Define Density: Connect the output of your sampler node to a
Density Noisenode. This node introduces procedural variation to the density of points, making the distribution more organic. You can adjust parameters likeFrequencyandStrengthto control the spread. - Filter Points (Optional but Recommended): Add a
Self Pruningnode after theDensity Noise. This node helps prevent points from spawning too close to each other, reducing overlapping assets and improving visual quality. Configure theRadiusto control the minimum distance between points. - Spawn Static Meshes: Finally, add a
Static Mesh Spawnernode. Connect the output of yourSelf Pruningnode to its input. In theStatic Mesh Spawnernode’s details panel, under “Mesh Entries,” add elements and assign some static meshes (e.g., various tree models or rocks). You can also set aWeightfor each mesh to control its probability of spawning. - Review and Generate: Save your PCG Graph. Select your PCG Volume in the level and click the “Generate” button in the Details panel. You should now see your static meshes populating the area defined by the volume, distributed according to your graph’s rules. Experiment with the parameters of each node (e.g., density, pruning radius, mesh weights) and regenerate to see immediate results.
This simple setup demonstrates the core loop: generate points, process them, and then use them to spawn assets. This flexible framework can be expanded upon to create incredibly rich and diverse environments for your 3D car models or game levels.
Mastering Core PCG Nodes for Complex Environments
Once you’ve grasped the basics of generating and spawning assets with PCG, the next step is to delve into the rich library of core nodes that enable the creation of truly complex and believable environments. The power of PCG lies in its modularity; by combining different nodes, you can sculpt landscapes, distribute assets with intricate patterns, and ensure visual consistency across vast areas. This section will guide you through essential nodes for filtering, transforming, and blending point data, offering the building blocks for sophisticated procedural scenes. For instance, creating a scenic drive for an 88cars3d.com sports car might require specific vegetation density along the road edge and sparse distribution further away, a task perfectly suited for advanced node manipulation.
A deep understanding of these nodes allows for fine-grained control over your procedural output. You can sculpt landscapes with erosion effects, define specific biomes, or ensure that only certain types of foliage appear on particular terrain slopes. This level of artistic control, combined with the speed of procedural generation, is what makes PCG such a potent tool. Learning to chain these nodes effectively is akin to learning a new visual programming language, where each node performs a specific, powerful operation on your environmental data.
Filtering and Transforming Points
Controlling where and how assets are placed is crucial for realistic environments. PCG offers a variety of nodes to filter and transform your points:
- Density Noise: As seen in the basic setup, this node applies a noise function to point densities. By adjusting
Frequency,Lacunarity,Gain, andOctaves, you can create organic, patchy distributions for foliage, rocks, or even urban clusters. It’s excellent for breaking up monotonous patterns. - Self Pruning: This essential node removes points that are too close to each other, preventing asset overlap and improving visual quality. You can specify a
Radiusto control the minimum distance between spawned items. This is particularly important for large, distinct assets like trees or buildings. - Filter by Density: Allows you to remove points below or above a certain density threshold. This can be used to create clearings or dense clusters, or to separate areas for different types of asset spawning.
- Transform Points: This node is incredibly versatile. It allows you to modify the position, rotation, and scale of points. You can apply random offsets, rotations within a specified range (e.g., +/- 180 degrees for trees), or non-uniform scaling to add natural variation. Use the
Noise Min/Maxvalues for dynamic transformations. - Filter by Surface Normal: Perfect for restricting asset placement to specific slopes. For example, you might only want to place trees on flatter ground and rocks on steeper inclines. You can define a
Min Dot Productwith the Up Vector to control the slope angle. - Filter by Bounds: Filters points based on whether they are inside or outside a specified bounding box, sphere, or even another PCG Volume. Useful for creating clearings or exclusion zones.
By chaining these nodes, you can precisely control the final placement of your assets. For example, you might generate points over a large area, then filter out points on steep slopes, apply density noise, and finally prune them before spawning your meshes, ensuring a natural distribution.
Blending and Layering Different Elements
Real-world environments are rarely homogenous. They are a rich tapestry of different biomes, material types, and asset distributions. PCG excels at blending and layering these elements:
- Difference, Union, Intersection: These set operation nodes are powerful for combining or subtracting point sets.
- Union: Combines two sets of points. Useful for merging different types of generation.
- Difference: Removes points from one set that are also present in another. Excellent for creating clearings around roads, buildings, or specific areas of interest. For instance, ensuring foliage doesn’t spawn inside a virtual car showroom.
- Intersection: Only keeps points that are common to both sets. Useful for placing specific assets only where two conditions overlap.
- Landscape Layer Sampler: This crucial node allows you to sample specific landscape layers (e.g., “Grass,” “Rock,” “Mud”) and output points only where those layers are painted. This enables you to directly correlate your procedural asset distribution with your landscape materials. You can then route these points to different
Static Mesh Spawnernodes to place grass on grass layers, rocks on rock layers, etc. This ensures visual harmony between your terrain and scattered assets. - Attribute Merge: When working with multiple streams of points, you might want to combine attributes from different sources onto a single set of points. This node allows you to do just that, creating richer data-driven generation.
By strategically using these blending and layering nodes, you can achieve sophisticated environmental effects. Imagine using a Difference node to prevent foliage from spawning within a driving path designed for your 88cars3d.com vehicle, while using a Landscape Layer Sampler to ensure specific flora only appears on designated ground cover. This level of control opens up vast possibilities for detailed and believable world creation.
Advanced PCG Workflows and Customization
Beyond the core nodes, PCG offers profound avenues for customization and integration with other Unreal Engine systems. True mastery of PCG involves not just scattering assets, but also making that scattering dynamic, data-driven, and highly tailored to specific project needs. This includes using Blueprints to expose parameters and react to game logic, leveraging point attributes for intelligent asset selection, and even extending PCG with custom code. These advanced workflows push the boundaries of what’s possible, allowing for environments that evolve and adapt in real-time or through user interaction, adding significant value to interactive experiences or virtual production setups.
The ability to extend and customize PCG means you’re not limited by the out-of-the-box node set. You can craft bespoke solutions for unique challenges, making PCG an incredibly flexible and powerful tool. This is particularly valuable for projects demanding unique environmental responses, such as a virtual automotive configurator where the surrounding environment changes based on vehicle customization, or a game with dynamic weather systems impacting asset distribution. By exploring these advanced techniques, you can unlock the full potential of procedural content generation in Unreal Engine.
Using Blueprints to Drive PCG Graphs
Integrating PCG with Blueprint allows for an incredible level of dynamism and interactivity. You can expose any parameter from your PCG graph to a Blueprint, enabling real-time modification of your procedural environment:
- Expose Parameters: In your PCG Graph, select a node (e.g.,
Density Noise). In the Details panel, find the parameter you want to expose (e.g.,Density Noise > Scale). Click the small pin icon next to the parameter name and select “Expose as Pin” or “Expose as Property.” - Access in Blueprint: Create a new Blueprint Actor. Add a “PCG Component” to this Blueprint. In the Details panel of the PCG Component, assign your PCG Graph asset. You will now see the exposed parameters from your PCG graph appear in the PCG Component’s details.
- Dynamic Control: You can now use Blueprint logic to modify these exposed parameters. For example, on a
BeginPlayevent, you could set the “Density” parameter of aDensity Noisenode based on a game variable. Or, in an automotive configurator, a UI button for “Summer Environment” could set specific density and mesh parameters for warm-weather foliage, while a “Winter Environment” button would adjust for snow-covered assets and barren trees.
This approach allows for a “smart” environment that reacts to gameplay events, user input, or cinematic sequences, offering a highly interactive and engaging experience. Imagine driving an 88cars3d.com vehicle through an environment that dynamically changes season or weather effects based on your choices within the scene.
Leveraging Attributes for Data-Driven Generation
PCG points are not just locations; they are data containers. The ability to manipulate and leverage these “attributes” is fundamental to creating sophisticated, data-driven procedural systems:
- Set Attribute Node: Use this node to add new attributes to points or modify existing ones. For instance, you could set an attribute called “BiomeType” to “Forest” for points in one area and “Desert” for points in another.
- Attribute to Parameter: This node allows you to convert an attribute’s value into a parameter for a subsequent node. For example, if you have a “TreeHeight” attribute on your points, you can use
Attribute to Parameterto drive the Z-scale of the meshes spawned by aStatic Mesh Spawner, resulting in varying tree heights. - Filter by Attribute: Filters points based on the value of a specific attribute. You could use this to only spawn “Oak” trees where the “BiomeType” attribute is “Forest,” or only “Cactus” where it’s “Desert.”
- Get Actor Property: Allows you to sample properties from actors in your scene and apply them as attributes to PCG points. For example, getting the material type of the ground beneath a point and using that to dictate which foliage to spawn.
By effectively using attributes, you can create highly detailed environmental variations from a single PCG graph, allowing for context-sensitive generation that responds intelligently to its surroundings or predefined data sets. This is crucial for creating convincing and diverse environments without needing dozens of separate PCG graphs.
Custom PCG Nodes and Scripting
For truly unique requirements, PCG offers the flexibility to create your own custom nodes, either through C++ or Python scripting:
- C++ Custom Nodes: If you need highly optimized, complex logic or direct engine access, creating a C++ PCG node is the way to go. This involves extending the
UPCGNodeclass and implementing your custom logic, often leveraging Unreal Engine’s core math and data structures. This is ideal for things like custom physics-based scattering or advanced terrain manipulation algorithms. - Python Scripting: For prototyping custom logic or performing complex data transformations on points, Python scripting offers a faster iteration cycle. You can create a
PCG Scriptingnode in your graph and write Python code that manipulates the incoming point data, adds attributes, or even generates new points. This is excellent for specific filtering needs or integrating with external data sources.
While requiring programming knowledge, custom nodes unlock an entirely new level of control, allowing developers to extend PCG beyond its built-in capabilities to meet virtually any procedural content generation need, cementing PCG as an open and extensible platform.
Integrating PCG with Unreal Engine’s Cutting-Edge Features
Unreal Engine is renowned for its suite of advanced rendering and simulation technologies, and PCG is designed to work hand-in-hand with them. To truly create next-generation environments, it’s essential to understand how PCG-generated content interacts with features like Nanite, Lumen, and Niagara. This synergy allows for the creation of incredibly detailed, performant, and dynamic worlds that previously would have been unattainable or prohibitively expensive in terms of development time. When you’re showcasing a high-fidelity 3D car model from 88cars3d.com, the surrounding environment generated by PCG and enhanced by these features will elevate the realism and immersion significantly.
Leveraging these features together means that your procedural environments are not just static asset dumps, but integral parts of a fully realized, responsive, and visually stunning interactive experience. From handling millions of polygons with ease to casting realistic global illumination and simulating dynamic particle effects, PCG’s integration with Unreal Engine’s core technologies is a cornerstone of modern real-time content creation.
PCG and Nanite: Handling High-Poly Environments
Nanite, Unreal Engine’s virtualized micropolygon geometry system, is a game-changer for high-fidelity assets, and it pairs perfectly with PCG:
- Efficiency with Detail: PCG can be used to scatter millions of instances of Nanite-enabled static meshes across vast landscapes. Because Nanite efficiently streams and renders only the necessary detail, you can use incredibly high-polygon source meshes (e.g., detailed photogrammetry scans of rocks and trees) without crippling performance.
- Workflow: When you set up your
Static Mesh Spawnerin PCG, simply ensure that the static meshes you are assigning have Nanite enabled in their asset details. PCG will then spawn these meshes, and Nanite will handle the rendering optimization automatically. - Performance Benefits: This combination allows for unprecedented environmental detail. Artists can use hero-quality assets for even background elements, as Nanite intelligently culls and simplifies geometry at a granular level, dramatically reducing draw calls and memory footprint, making it ideal for cinematic shots involving intricate 88cars3d.com car models within hyper-realistic environments.
The synergy between PCG and Nanite means you no longer have to compromise between environmental scale and geometric detail, opening up possibilities for truly immersive virtual worlds.
Lighting PCG-Generated Scenes with Lumen
Lumen, Unreal Engine’s fully dynamic global illumination and reflections system, ensures that PCG-generated environments are beautifully lit and interact realistically with the scene’s lighting:
- Dynamic Global Illumination: Lumen calculates diffuse interreflection with infinite bounces and indirect specular reflection, allowing PCG-generated foliage, rocks, and buildings to correctly absorb and reflect light from their surroundings. This means a tree spawned by PCG will properly bounce green light onto the ground and other nearby assets.
- Reflections: Lumen also handles dynamic reflections, so your PCG-scattered water puddles or reflective surfaces will accurately mirror the surrounding environment, even if that environment was procedurally generated. This is vital for realism, especially in automotive visualization where reflections on vehicle paintwork are critical.
- No Pre-baking: Since Lumen is fully dynamic, you don’t need to bake lighting for your PCG-generated assets. Any changes you make to the PCG graph or the scene’s lighting (e.g., time of day changes via Sequencer or Blueprint) will update instantly and correctly with Lumen.
To ensure optimal Lumen performance with PCG assets, ensure your materials are set up for proper PBR (Physically Based Rendering) and that your assets have appropriate lightmap UVs (though Lumen reduces the reliance on static lightmaps, good UVs are still beneficial for some scenarios). The combination of PCG and Lumen creates environments that are not only vast and detailed but also exquisitely lit.
Animating with Sequencer and Niagara
PCG’s generative power can be integrated with Unreal Engine’s cinematic and particle systems for dynamic and immersive experiences:
- Sequencer for Dynamic Environments: You can expose PCG graph parameters to Blueprints, and then drive those Blueprint parameters via Sequencer. This allows you to animate environmental changes over time, such as a forest growing, seasons changing, or debris accumulating in a scene. Imagine a cinematic where the environment around an 88cars3d.com car model transitions from pristine to desolate, entirely controlled through Sequencer-driven PCG parameters.
- Niagara for Dynamic Effects: PCG can be used to define spawn locations for Niagara particle systems. For instance, you could use PCG points to precisely place smoke emitters for a burning village, or create a scattering of dust particle emitters across a desert floor. You can also pass attributes from PCG points directly into Niagara systems to influence particle behavior (e.g., particle color based on surface material).
- Procedural Landscapes with Dynamic Elements: Combine PCG for static elements like trees and rocks with Niagara for dynamic elements like falling leaves, flowing rivers, or wind effects. This layering creates a truly living, breathing world.
This integration brings PCG content to life, allowing for compelling narratives, interactive demonstrations, and visually spectacular real-time productions that leverage the best of Unreal Engine’s capabilities.
Performance Optimization and Best Practices for PCG
While PCG offers incredible efficiency in content generation, large-scale procedural environments can still be performance-intensive if not managed correctly. Optimizing your PCG graphs and the assets they generate is crucial for maintaining high frame rates and ensuring a smooth user experience, whether for a game, a virtual production, or a high-fidelity automotive visualization project. A poorly optimized PCG graph can lead to long generation times, stuttering, or even crashes, negating the benefits of proceduralism. By following best practices, you can ensure your PCG-driven worlds are both stunning and performant.
Efficient PCG usage involves a multi-faceted approach, encompassing careful graph design, intelligent asset preparation, and leveraging Unreal Engine’s broader optimization tools. This section will guide you through key strategies to keep your PCG environments running smoothly, ensuring that your detailed 3D car models from 88cars3d.com are showcased in a beautifully crafted yet highly optimized world.
Optimizing PCG Graph Execution
The way your PCG graph is constructed directly impacts its generation time and runtime performance:
- Order of Operations: Design your graph efficiently. Perform broad filtering and culling operations early in the graph to reduce the number of points processed by subsequent, more intensive nodes. For example, filter by landscape layer or bounds before applying complex noise or self-pruning.
- Caching: For parts of your graph that are computationally expensive but don’t change frequently, use the “Cache” option on the node. This will store the output of the node, preventing it from being re-calculated every time the graph regenerates, significantly speeding up iteration. This is particularly useful for landscape sampling or complex filtering.
- Isolate for Debugging: When working on complex graphs, use the “Isolate” function on a node (right-click on node > Isolate) to only process that part of the graph. This helps in debugging and understanding the output of specific nodes without waiting for the entire graph to regenerate.
- Reduce Point Count: The number of points generated and processed is a primary factor in performance. Use density multipliers, aggressive filtering, and judicious pruning to keep the point count as low as necessary while still achieving the desired visual density.
- Use Pre-baked Static Mesh Actors for “Hero” Elements: While PCG is great for mass scattering, for very specific, hand-placed “hero” assets (e.g., a unique tree in the foreground of an automotive shot), consider placing them manually and using PCG exclusion zones around them. This avoids unnecessary procedural overhead for unique elements.
A well-structured and thoughtfully optimized PCG graph is the foundation of a performant procedural environment.
Asset Optimization for PCG
The assets spawned by PCG are just as important as the graph itself in terms of performance:
- LODs (Levels of Detail): Ensure all static meshes spawned by PCG have proper LODs configured. This allows Unreal Engine to swap out high-detail meshes for lower-detail versions as the camera moves further away, drastically reducing polygon counts and draw calls. Aim for 3-5 LOD levels for most environmental assets.
- Texture Resolution and Atlases: Use appropriate texture resolutions. For distant foliage or small rocks, 512×512 or 1024×1024 might suffice. Consider using texture atlases (combining multiple smaller textures into one larger texture) to reduce draw calls, especially for groups of small assets.
- Efficient Material Instances: Create material instances for variations instead of entirely new materials. This allows you to change parameters like color, roughness, or normal strength without incurring the full cost of a unique material, which is vital when spawning thousands of unique-looking assets.
- Nanite: As discussed, enabling Nanite for high-poly meshes is paramount. This drastically reduces the overhead of complex geometry.
- Collision Complexity: For background environmental elements, consider setting collision to “No Collision” or “BlockAllDynamic” for performance. Complex per-poly collision on thousands of meshes is extremely expensive. Use simple collision primitives (boxes, spheres, capsules) where collision is truly needed.
Optimized assets complement an optimized PCG graph, leading to superior overall performance.
Practical Tips for Large-Scale PCG Scenes
When creating vast open worlds or extremely detailed environments, additional strategies are needed:
- World Partition: For truly massive levels, enable World Partition. PCG integrates well with World Partition, allowing you to generate content for streamed cells. This ensures only relevant portions of your procedural environment are loaded at any given time, significantly reducing memory footprint and loading times.
- Data Layers: Use Data Layers to organize your PCG volumes and generated content. You can toggle data layers on and off, allowing you to selectively load or unload different environmental setups (e.g., different biomes, seasonal variations, or debug overlays) without modifying the base level.
- Runtime Generation: For highly dynamic or user-driven content, consider triggering PCG graphs at runtime via Blueprint. This allows you to generate or modify environments on the fly, though it requires careful management of performance impact.
- Build Iteratively: Don’t try to build your entire complex environment in one go. Start with a simple base, optimize it, then add layers of complexity (e.g., primary trees, then secondary foliage, then small rocks/debris). Test performance at each stage.
By implementing these optimization strategies, you can confidently build expansive and visually rich environments that maintain excellent performance, creating a captivating backdrop for any high-detail model, like the premium automotive assets found on 88cars3d.com.
Real-World Applications and Future Potential
The true measure of any powerful tool lies in its practical application across diverse industries. PCG in Unreal Engine is not just a theoretical concept; it’s a proven solution that is actively revolutionizing how professionals approach content creation. From crafting hyper-realistic automotive visualization scenes to building expansive open-world games and dynamic virtual production sets, PCG’s capabilities extend far beyond simple asset scattering. Its ability to generate vast, detailed, and adaptable environments makes it an indispensable tool for anyone pushing the boundaries of real-time rendering.
The future potential of PCG is immense, promising even greater levels of automation, artistic control, and integration with emerging technologies. As workflows become more data-driven and the demand for interactive, high-fidelity experiences grows, PCG will continue to evolve as a cornerstone of content creation in Unreal Engine. Understanding these real-world applications not only demonstrates PCG’s versatility but also inspires new ways to leverage its power in your own projects, especially when combined with high-quality assets like the 3D car models available on platforms such as 88cars3d.com.
Crafting Dynamic Automotive Visualization Scenes
Automotive visualization demands impeccable detail and compelling presentation. PCG offers a powerful way to create diverse and dynamic backdrops for showcasing vehicles:
- Virtual Showrooms and Test Drives: Rapidly generate varied environments – from sleek urban streets to rugged off-road tracks – that complement the vehicle’s aesthetic and intended use. A single PCG graph can be parameterized to create multiple “showroom themes” (e.g., desert, forest, city).
- Marketing Renders and Cinematics: Produce stunning, high-resolution renders and cinematic sequences with rich environmental detail. PCG ensures consistency and enables quick iteration on environmental mood and density. For instance, generating a bustling street scene complete with cars, pedestrians, and urban clutter around a hero vehicle.
- Interactive Configurators: Integrate PCG with Blueprint-driven automotive configurators. As a user customizes a car, the surrounding environment can dynamically change (e.g., a “sport” package might load a racetrack environment, while an “off-road” package loads a mountainous terrain).
- Material-Driven Placement: Use landscape material layers to drive the placement of specific ground cover, ensuring realistic interactions between the car’s tires and the terrain for simulation purposes.
PCG dramatically reduces the manual effort involved in crafting these complex scenes, allowing automotive artists to focus on the vehicle itself and the overall visual storytelling.
Game Level Design and Rapid Prototyping
For game developers, PCG is a transformative tool for world-building and iteration:
- Populating Open Worlds: Generate vast, seamless open worlds with natural distributions of foliage, rocks, and environmental props. This includes creating biomes, forests, deserts, and even ruins or procedural settlements.
- Rapid Prototyping: Quickly block out and populate level designs to test gameplay mechanics, scale, and visual flow. Artists can rapidly iterate on environmental layouts without committing to permanent asset placements, testing multiple variations of a level in a fraction of the time.
- Performance Optimization: By generating instanced meshes with LODs and Nanite support, PCG helps maintain high frame rates in large, detailed game environments.
- Intricate Environmental Puzzles: PCG can be used to procedurally generate obstacle courses, mazes, or specific environmental challenges that adapt based on player progress or difficulty settings.
PCG empowers level designers to create more expansive and detailed worlds faster, providing a richer experience for players.
Virtual Production and Immersive Experiences
The intersection of PCG with virtual production and AR/VR applications is particularly exciting:
- Dynamic LED Wall Backdrops: For LED volume stages, PCG can generate real-time, high-fidelity backgrounds that react to camera movement and lighting changes. This allows for unparalleled flexibility in virtual sets, enabling filmmakers to change environments on the fly.
- Interactive Virtual Showrooms: Create fully immersive AR/VR experiences where users can explore 3D car models from 88cars3d.com within dynamic, interactive environments. PCG ensures that these environments are rich in detail while remaining performant enough for real-time VR rendering.
- Real-time Environment Generation: In broadcast or live events, PCG can be used to generate specific environmental elements or even entire scenes in real-time, responding to audience input or live data feeds.
The ability of PCG to create detailed, adaptable environments quickly makes it invaluable for virtual production pipelines and the development of cutting-edge immersive experiences.
Conclusion
Procedural Content Generation (PCG) in Unreal Engine is more than just a tool; it’s a paradigm shift in how we approach world-building. By embracing its node-based, non-destructive workflow, artists and developers can unlock unprecedented levels of efficiency, creativity, and dynamism in their projects. We’ve explored everything from the fundamental setup of a PCG graph to mastering advanced nodes, integrating with Unreal Engine’s cutting-edge features like Nanite and Lumen, and optimizing performance for complex scenes. The ability to quickly generate, iterate, and adapt detailed environments is a game-changer for anyone working in real-time rendering.
Whether you’re crafting vast open worlds for games, designing immersive virtual showrooms for high-fidelity 3D car models from 88cars3d.com, or building dynamic backdrops for virtual production, PCG offers the power and flexibility to bring your visions to life with speed and precision. Its seamless integration with Unreal Engine’s ecosystem, combined with careful optimization strategies, ensures that your procedural environments are not only visually stunning but also performant and robust.
The journey with PCG is one of continuous learning and experimentation. We encourage you to delve deeper, explore its extensive node library, and push the boundaries of what’s possible. Start by experimenting with basic setups, then gradually introduce complexity, leverage Blueprints for interactivity, and explore attributes for data-driven generation. The more you experiment, the more you’ll discover the immense potential PCG holds for streamlining your workflows and elevating the quality of your Unreal Engine projects. The future of content creation is procedural, and with PCG, you’re equipped to be at its forefront.
Featured 3D Car Models

Cadillac CTS-V Coupe 3D Model
Meta Description:
Texture: Yes
Material: Yes
Download the Cadillac CTS-V Coupe 3D Model featuring detailed exterior styling and realistic interior structure. Includes .blend, .fbx, .obj, .glb, .stl, .ply, .unreal, and .max formats for rendering, simulation, AR VR, and game development.
Price: $13.9
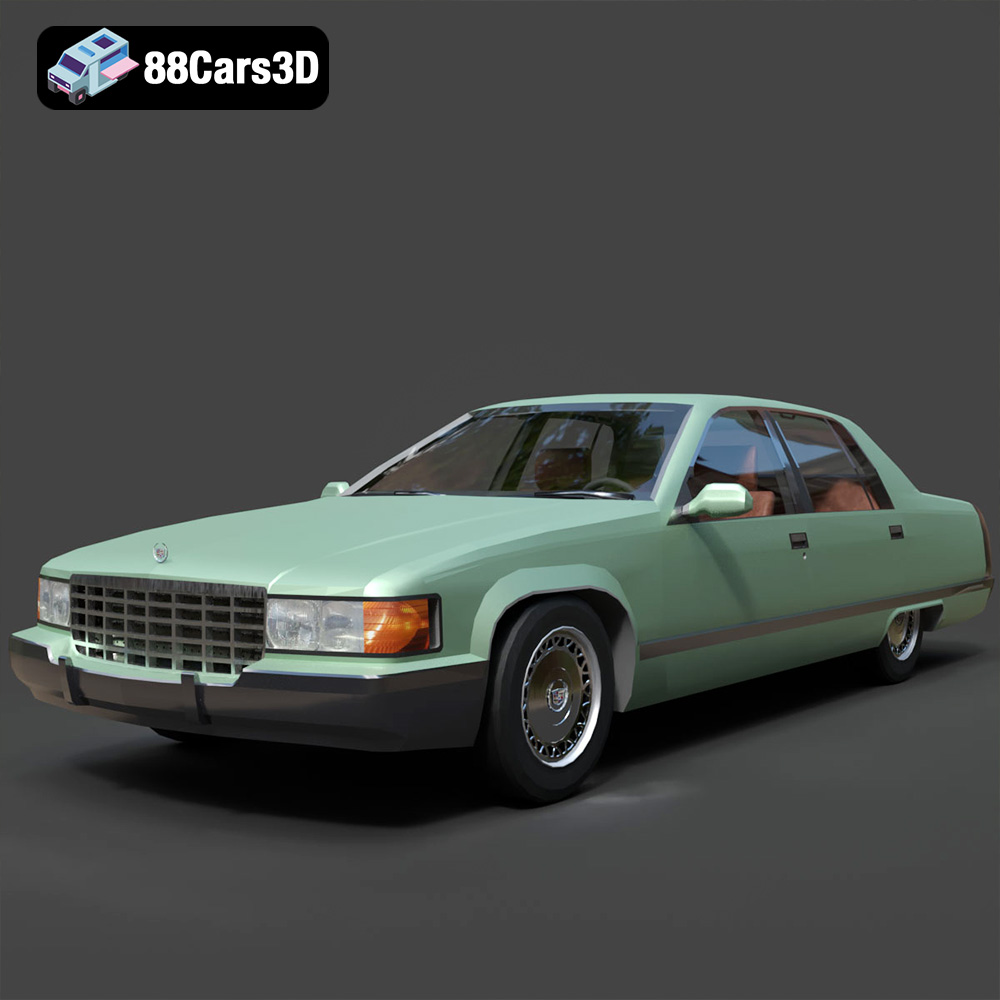
Cadillac Fleetwood Brougham 3D Model
Texture: Yes
Material: Yes
Download the Cadillac Fleetwood Brougham 3D Model featuring its iconic classic luxury design and detailed exterior and interior. Includes .blend, .fbx, .obj, .glb, .stl, .ply, .unreal, and .max formats for rendering, simulation, and game development.
Price: $10.79

Cadillac Eldorado 1968 3D Model
Texture: Yes
Material: Yes
Download the Cadillac Eldorado 1968 3D Model featuring its iconic elongated body, distinctive chrome accents, and luxurious interior. Includes .blend, .fbx, .obj, .glb, .stl, .ply, .unreal, and .max formats for rendering, simulation, and game development.
Price: $20.79

Cadillac CTS SW 2010 3D Model
Texture: Yes
Material: Yes
Download the Cadillac CTS SW 2010 3D Model featuring a detailed exterior, functional interior elements, and realistic materials. Includes .blend, .fbx, .obj, .glb, .stl, .ply, .unreal, and .max formats for rendering, simulation, and game development.
Price: $10.79
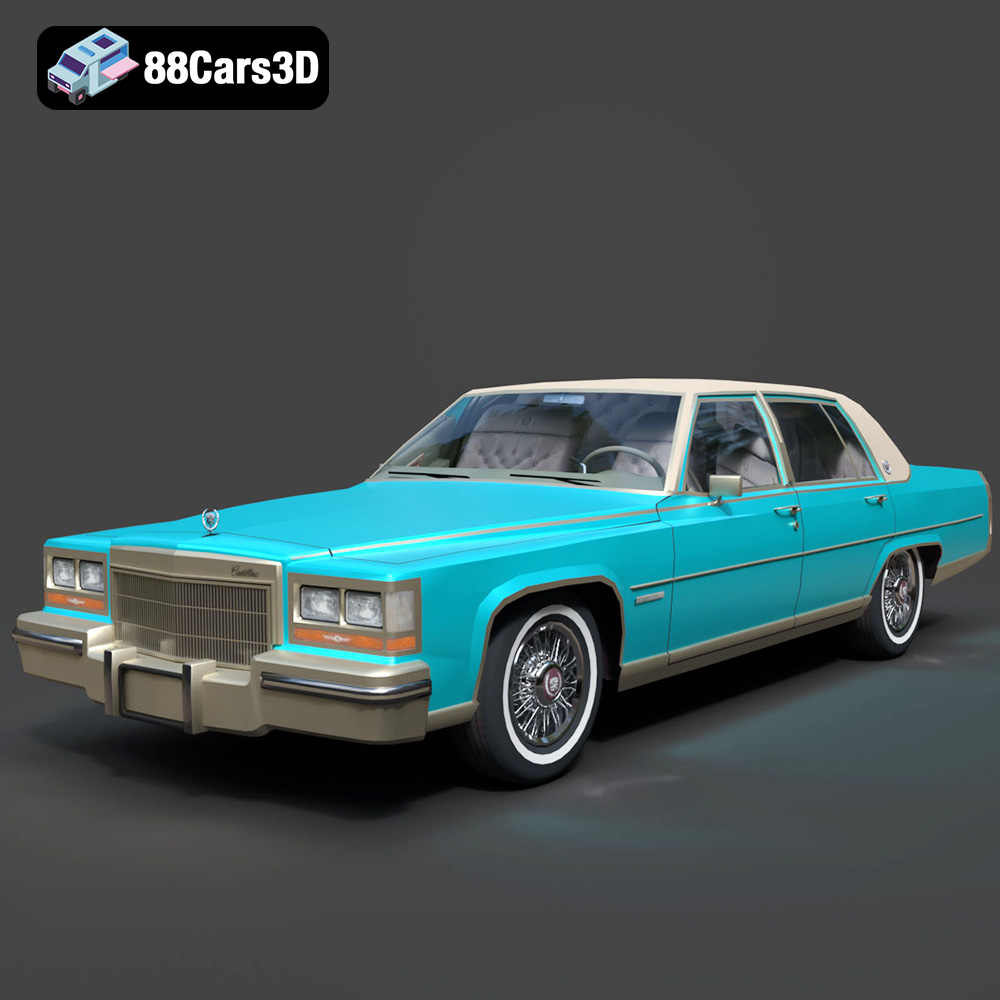
Cadillac Fleetwood Brougham 1985 3D Model
Texture: Yes
Material: Yes
Download the Cadillac Fleetwood Brougham 1985 3D Model featuring its iconic classic luxury design and detailed craftsmanship. Includes .blend, .fbx, .obj, .glb, .stl, .ply, .unreal, and .max formats for rendering, simulation, and game development.
Price: $10.79

Cadillac Eldorado 1978 3D Model
Texture: Yes
Material: Yes
Download the Cadillac Eldorado 1978 3D Model featuring accurately modeled exterior, detailed interior, and period-correct aesthetics. Includes .blend, .fbx, .obj, .glb, .stl, .ply, .unreal, and .max formats for rendering, simulation, and game development.
Price: $10.79
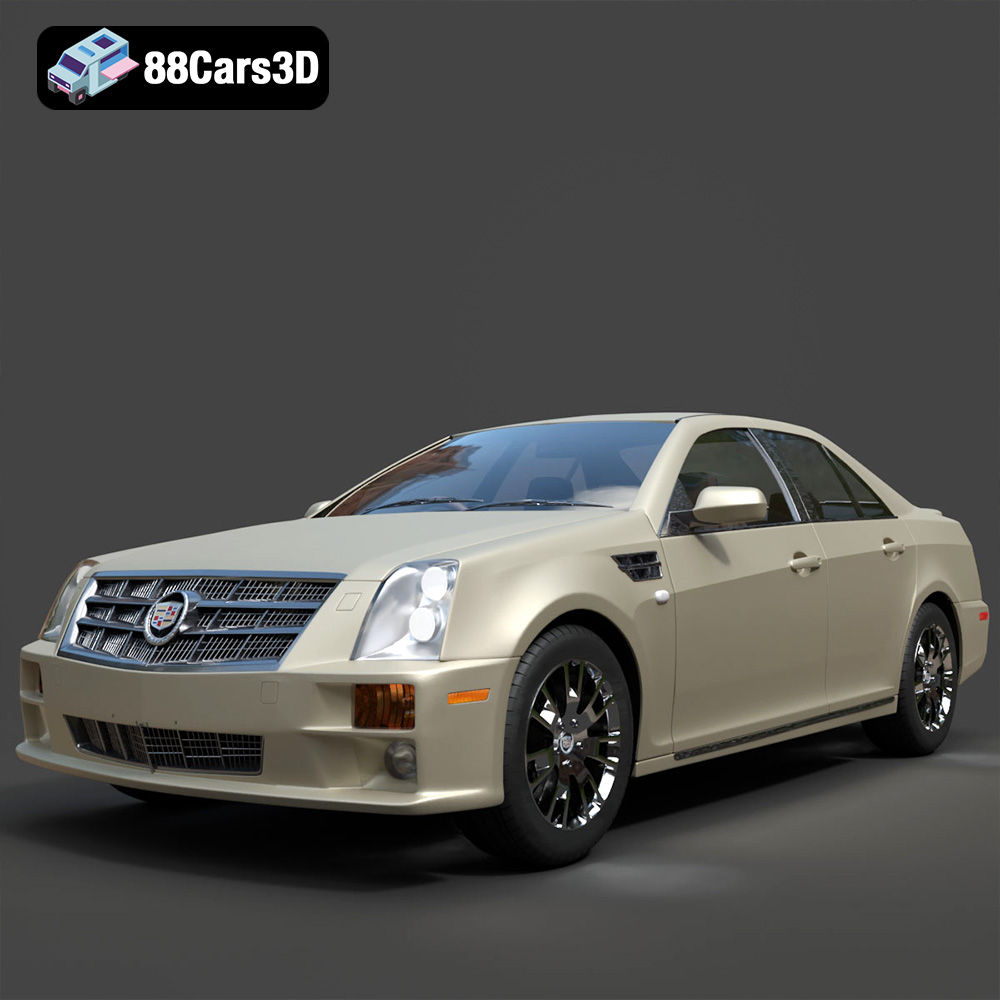
Cadillac STS-005 3D Model
Texture: Yes
Material: Yes
Download the Cadillac STS-005 3D Model featuring a detailed exterior and interior. Includes .blend, .fbx, .obj, .glb, .stl, .ply, .unreal, and .max formats for rendering, simulation, and game development.
Price: $22.79
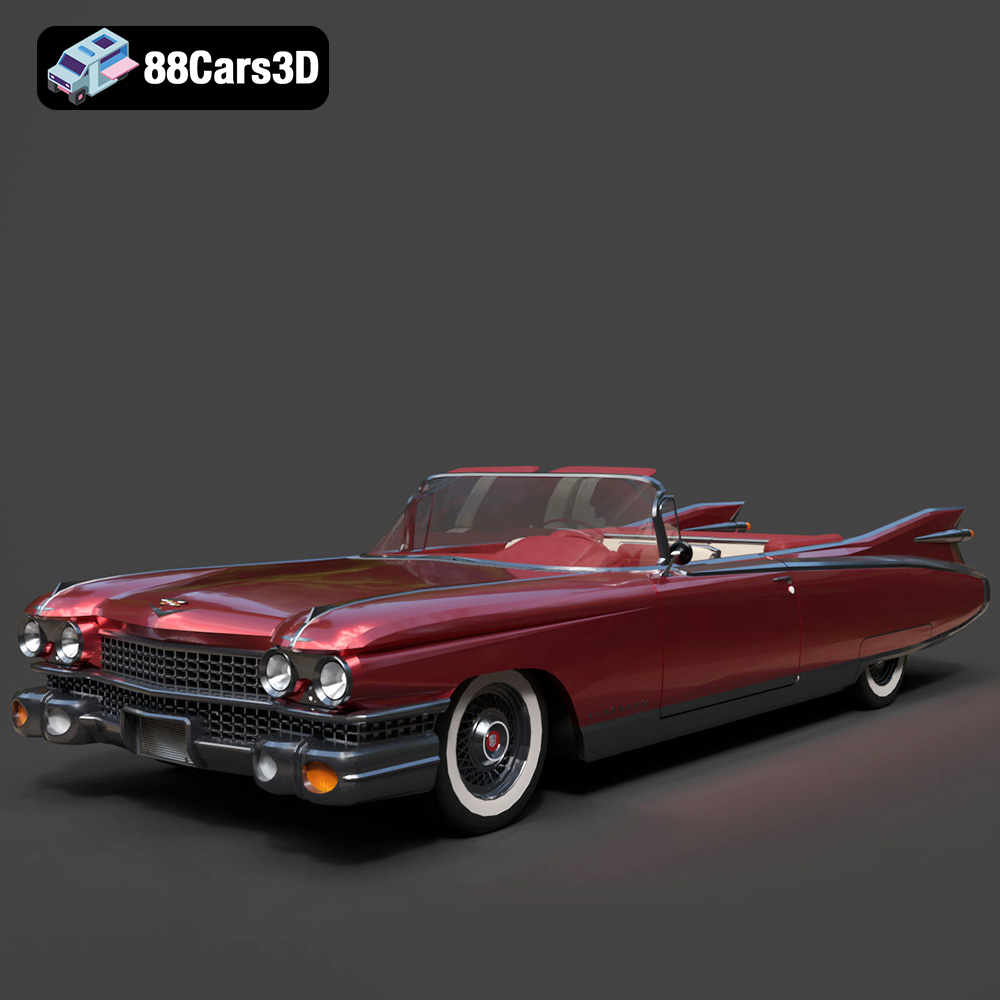
Cadillac Eldorado Convertible (1959) 3D Model
Texture: Yes
Material: Yes
Download the Cadillac Eldorado Convertible (1959) 3D Model featuring iconic fins, luxurious chrome details, and a classic vintage design. Includes .blend, .fbx, .obj, .glb, .stl, .ply, .unreal, and .max formats for rendering, simulation, and game development.
Price: $20.79

Cadillac DTS-005 3D Model
Texture: Yes
Material: Yes
Download the Cadillac DTS-005 3D Model featuring its iconic luxury design, detailed interior, and realistic exterior. Includes .blend, .fbx, .obj, .glb, .stl, .ply, .unreal, and .max formats for rendering, simulation, and game development.
Price: $10.79

Buick LeSabre 1998 3D Model
Texture: Yes
Material: Yes
Download the Buick LeSabre 1998 3D Model featuring a classic American full-size sedan design. Includes .blend, .fbx, .obj, .glb, .stl, .ply, .unreal, and .max formats for rendering, simulation, and game development.
Price: $10.79
