

The landscape of 3D content creation and real-time rendering has been fundamentally transformed by Unreal Engine 5. At the heart of this revolution lies Nanite, a virtualized geometry system that empowers artists and developers to import and render incredibly detailed 3D assets with unprecedented efficiency. For industries like automotive visualization, game development, and architectural rendering, where visual fidelity is paramount, Nanite is a game-changer. It redefines what’s possible, allowing for cinematic-quality models to run smoothly in real-time environments.
For professionals seeking to push the boundaries of realism in their Unreal Engine projects, understanding Nanite is no longer optional – it’s essential. This comprehensive guide will explore how Nanite technology integrates with and elevates the use of high-quality 3D car models, particularly those sourced from marketplaces like 88cars3d.com. We’ll dive into the technical intricacies, workflows, and best practices for leveraging Nanite to create stunning, interactive automotive experiences. From project setup and model optimization to material creation, lighting, and interactive Blueprint scripting, prepare to unlock the full potential of Unreal Engine 5 with Nanite.
The Nanite Revolution: A Paradigm Shift for High-Fidelity 3D Assets
Unreal Engine 5’s Nanite virtualized geometry system represents a monumental leap forward in how 3D assets are handled in real-time engines. Traditionally, artists spent countless hours painstakingly optimizing models – reducing polygon counts, baking normal maps, and meticulously creating Levels of Detail (LODs) – all to ensure smooth performance. Nanite liberates artists from these constraints, allowing them to import source meshes with millions or even billions of polygons directly into the engine, maintaining incredible detail without the crippling performance overhead previously associated with high-density geometry. This is particularly impactful for automotive visualization, where every curve, seam, and reflection contributes to the perceived realism of a vehicle.
Nanite fundamentally re-engineers the rendering pipeline. Instead of processing individual triangles, it operates on a cluster-based system, intelligently streaming and rendering only the detail that is visible and necessary for each frame. This means that a microscopic detail on a car’s grille will only be rendered when the camera is close enough to perceive it, vastly reducing the amount of data processed at any given time. This efficiency allows for environments filled with an unprecedented level of geometric complexity, transforming the visual fidelity achievable in real-time applications.
Understanding Virtualized Geometry and Micro-Polygon Rendering
At its core, Nanite works by importing static meshes, converting their geometry into a proprietary internal format composed of hierarchical clusters of triangles. During runtime, it then culls and streams these clusters on demand, dynamically rendering only the necessary micro-polygons for the current view. Imagine a car model with five million polygons; with traditional methods, rendering that entire mesh would be prohibitive. Nanite, however, can intelligently determine that only a fraction of those polygons are relevant to the current camera view and resolution, and it renders only those. This process is entirely automatic, scaling geometric detail seamlessly without traditional LODs, draw calls, or complex memory management concerns typically associated with high-poly assets.
This virtualized geometry approach significantly reduces draw calls, which are a common bottleneck in real-time rendering. By aggregating thousands of tiny clusters into a single draw call, Nanite offloads the CPU, allowing it to focus on other tasks like gameplay logic or physics simulations. The result is a dramatically improved frame rate and the ability to populate scenes with far more detailed assets than ever before. This innovative rendering method is crucial for delivering the kind of pixel-perfect detail demanded by modern automotive visualization projects, ensuring that every rivet, panel gap, and reflection is rendered with impeccable precision.
Why Nanite Matters for High-Fidelity Automotive Models
For automotive visualization and game development focusing on vehicles, Nanite is a paradigm shift. Car models, especially those designed for high-end rendering, are inherently complex. They feature intricate chassis, detailed interiors, precise panel gaps, and often require fine mesh detail to accurately capture subtle reflections and highlights. Previously, achieving this level of detail in real-time meant compromising on polygon count, leading to tedious manual optimization processes or visible sacrifices in visual fidelity.
With Nanite, artists can directly import source CAD data or high-poly sculpts without aggressive decimation. This means the visual integrity of the original design is preserved, eliminating the need to compromise on geometric detail for performance. Car models from platforms like 88cars3d.com, which are already designed with clean topology and high detail, become ideal candidates for Nanite. The system effortlessly handles their polygon density, allowing designers to focus on artistic expression and material realism rather than technical geometry constraints. This enables the creation of incredibly photorealistic cars that run smoothly within interactive experiences, configurators, or cinematic sequences, truly blurring the line between real-time and offline renders.
Integrating High-Quality Car Models into Unreal Engine with Nanite
Bringing a high-fidelity 3D car model into Unreal Engine 5 and leveraging Nanite effectively requires a structured approach. While Nanite significantly reduces the burden of traditional polygon optimization, preparing your source asset and configuring Unreal Engine correctly are still crucial steps to ensure optimal performance and visual quality. The goal is to maximize Nanite’s benefits while maintaining an efficient overall project pipeline. Models sourced from reputable marketplaces like 88cars3d.com are typically well-prepared, featuring clean topology, proper UV mapping, and PBR-ready materials, making them ideal for a seamless Nanite integration.
Preparing Your 3D Car Model for Nanite Import
Even with Nanite, a well-structured source model forms the foundation of a successful integration. While polygon count is less of a concern, certain aspects of your 3D car model should still be considered:
- Clean Geometry: Ensure your model has clean, manifold geometry without non-planar faces or inverted normals. While Nanite is robust, a clean mesh always yields better results and reduces potential errors.
- UV Mapping: Proper UV unwrapping is essential for applying PBR textures accurately. Each mesh component (body, wheels, interior, glass) should have its own UV space to prevent texture stretching or distortion. Consider using multiple UV channels for different material layers (e.g., base color, decals, ambient occlusion).
- Material IDs: Assign distinct material IDs to different parts of the car. This allows you to apply separate materials in Unreal Engine, enabling advanced customization and realistic material layering (e.g., metallic paint, rubber, chrome, leather).
- Modular Structure: For complex vehicles, it’s often beneficial to separate components into individual meshes (e.g., body, doors, hood, wheels, calipers, interior elements). This allows for greater flexibility in terms of material application, interaction, and even partial Nanite exclusion if certain parts require non-Nanite features like WPO or complex physics.
Models from 88cars3d.com are typically provided in formats like FBX or USD, already optimized for game engine compatibility, often with pre-separated parts and clean UVs, making this preparation stage much smoother.
Step-by-Step Nanite Mesh Setup in Unreal Engine 5
Once your 3D car model is prepared, importing it into Unreal Engine 5 and enabling Nanite is straightforward:
- Import the Model: Drag your FBX or USD file directly into the Content Browser, or use the “Import” button. In the import dialog, ensure “Build Nanite” is checked. This is the crucial step. You can also specify other import settings like importing materials and textures. For more details on import settings, refer to the official Unreal Engine documentation.
- Nanite Mesh Status: After importing, open your static mesh asset. In the Details panel, under “Nanite Settings,” you should see “Enable Nanite” checked. You can toggle this on or off even after import. There’s also a “Preserve Area” setting which helps maintain geometric detail during simplification for very distant views.
- Material Assignment: Apply your PBR materials to the imported mesh. If you imported materials, they might already be assigned. Otherwise, drag and drop materials onto the mesh slots in the Static Mesh Editor.
- Placement in Scene: Drag your Nanite-enabled car model from the Content Browser into your level. Observe the immediate visual fidelity – even at close distances, the geometric detail remains exceptionally high, while performance stays smooth.
Pro Tip: Use the “Nanite Visualization” modes (e.g., Overview, Triangles, Clusters) in the viewport (found under the ‘Show’ menu > ‘Nanite’) to understand how Nanite is processing your mesh. This is invaluable for debugging and confirming Nanite is working as expected.
Essential Project Settings for Optimal Nanite Performance
While Nanite handles geometry efficiently, configuring your Unreal Engine project correctly can further enhance performance and visual quality, especially when paired with other UE5 features:
- Lumen Global Illumination: Ensure Lumen is enabled in your project settings (Edit > Project Settings > Engine > Rendering). Lumen works seamlessly with Nanite meshes, providing highly realistic global illumination and reflections, which are critical for believable automotive materials.
- Virtual Shadow Maps (VSM): Also found in Rendering Project Settings, enable Virtual Shadow Maps. VSMs are designed to handle the extremely high geometric detail that Nanite provides, producing incredibly crisp and accurate shadows without the performance hit of traditional shadow maps at such resolutions.
- Post-Processing Volume: Add a Post-Process Volume to your scene and configure it. Key settings for automotive visualization include Screen Space Reflections (though Lumen handles primary reflections), Ambient Occlusion, Bloom, and Color Grading to achieve a cinematic look. Ensure ‘Infinite Extent (Unbound)’ is checked for scene-wide effect.
- Forward Shading Renderer (for AR/VR): If targeting AR/VR, consider enabling the Forward Shading Renderer (Project Settings > Engine > Rendering). While it has some limitations, it can offer better performance for transparent materials and lower latency, which is crucial for immersive experiences. Note that some Lumen features might behave differently with forward shading.
Properly setting up these core rendering features ensures that your Nanite-enabled car models not only render efficiently but also achieve the highest possible visual fidelity within your Unreal Engine project.
Achieving Photorealism: Materials, Lighting, and Visual Effects with Nanite-enabled Cars
Nanite lays the geometric foundation for incredible realism, but it’s the interplay of sophisticated PBR materials, dynamic real-time lighting, and precise post-processing that truly elevates an automotive scene to photorealistic levels. With the ability to render incredibly detailed geometry, the quality of your materials and lighting becomes even more critical, as every subtle reflection and surface imperfection is now visible. Unreal Engine 5 provides an unparalleled suite of tools to achieve this, from its powerful Material Editor to the revolutionary Lumen and Virtual Shadow Maps.
Crafting PBR Materials for Automotive Excellence
Physically Based Rendering (PBR) materials are the backbone of photorealism. For automotive models, precision in material definition is paramount. A car’s paint, chrome accents, glass, rubber tires, and interior leather all react to light differently, and PBR accurately simulates these interactions. In Unreal Engine’s Material Editor, you’ll typically work with parameters like:
- Base Color: Defines the diffuse color of the surface. For car paint, this often includes subtle color variations and metallic flakes.
- Metallic: A binary value (0 or 1) indicating if a material is metallic or dielectric. Car paint is dielectric with metallic flakes, while chrome is fully metallic.
- Roughness: Controls the microscopic surface irregularities that scatter light. A highly polished car paint or chrome will have very low roughness, resulting in sharp reflections. Matte surfaces will have higher roughness.
- Specular: Often left at default (0.5 for dielectrics) but can be adjusted for specific materials.
- Normal Map: Provides fine surface detail without adding actual geometry, crucial for subtle imperfections, stitching on leather, or tire treads.
- Clear Coat: Unique to automotive paint, this layer simulates the transparent protective coating. Unreal Engine provides a dedicated ‘Clear Coat’ input in the material node for realistic layered reflections.
Combine these with advanced material functions for things like iridescent paint effects, carbon fiber weaves, or complex headlight glass for truly stunning results. Always aim for texture resolutions that match the intended display quality (e.g., 4K or 8K for primary car body textures) and compress them appropriately within Unreal Engine.
Dynamic Real-time Lighting with Lumen and Virtual Shadow Maps
Unreal Engine 5’s lighting systems, Lumen Global Illumination and Virtual Shadow Maps (VSM), are perfect companions for Nanite-enabled car models. Lumen delivers dynamic global illumination and reflections in real-time, meaning light bounces around your scene and off your highly detailed car models in a physically accurate manner. This results in incredibly realistic ambient lighting, soft shadows, and vibrant reflections that dynamically adapt to changes in the environment or light sources. For automotive studios, this means real-time visual exploration of designs under various lighting conditions without pre-baking or lengthy render times.
- Lumen Setup: Ensure Lumen is enabled in Project Settings > Rendering. Use an HDRI Sky Sphere or a combination of Directional Light (for sunlight), Sky Light (for ambient sky light captured from the HDRI), and Rect Lights/Spot Lights (for studio lighting or car headlights).
- Virtual Shadow Maps: VSMs resolve the extremely fine shadows cast by Nanite meshes. They provide unprecedented detail and accuracy, eliminating the typical aliasing and pixelation issues found with traditional shadow maps. Enable VSMs in Project Settings > Rendering for all your dynamic lights.
- Reflections: Lumen handles screen-space reflections and software ray-traced reflections. For static and highly reflective surfaces like car paint, consider adding Reflection Captures or planar reflections for specific areas to enhance fidelity where Lumen might not cover. However, Lumen’s default behavior is often sufficient for stunning results.
Experiment with different light temperatures, intensities, and environmental HDRIs to showcase your 88cars3d.com car models in their best light, from sunny outdoor scenes to dramatic studio presentations.
Post-Processing and Cinematic Touches for Automotive Rendering
After your materials and lighting are in place, post-processing is the final layer that transforms a good render into a stunning one. A well-configured Post-Process Volume allows you to fine-tune the final image, adding cinematic effects and polishing the visual presentation:
- Color Grading: Adjust exposure, contrast, saturation, and tint to set the mood and enhance realism. Use Lookup Tables (LUTs) for specific filmic looks.
- Bloom: Simulates light scattering from bright areas, creating a subtle glow around headlights or chrome reflections. Keep it subtle to avoid over-exaggeration.
- Ambient Occlusion (AO): Adds subtle contact shadows where surfaces meet, enhancing depth and realism. Screen Space Ambient Occlusion (SSAO) is a good starting point, but Lumen’s AO is often superior.
- Lens Effects: Add subtle Vignette, Chromatic Aberration, or Dirt Mask effects to emulate a real camera lens.
- Sharpening: Can bring out fine details in textures and geometry, but use sparingly.
- Motion Blur: Essential for cinematic camera movements or fast-moving vehicles to add a sense of speed. Use the ‘Per Object Motion Blur’ for accurate blurring of moving parts like wheels.
These post-processing effects, when applied judiciously, can dramatically enhance the perceived quality and realism of your Nanite-enabled car models, making them indistinguishable from professional photography.
Beyond Static Renders: Interactive Automotive Experiences with Nanite
The true power of Unreal Engine 5, especially when combined with Nanite, extends far beyond static renders. It empowers developers to create dynamic, interactive experiences that were once limited to offline rendering pipelines. For the automotive industry, this means interactive configurators, virtual showrooms, realistic driving simulations, and cutting-edge virtual production environments. Nanite ensures that even in these interactive scenarios, the visual fidelity of the vehicles remains uncompromised, allowing users to explore every detail with stunning realism.
Building Interactive Car Configurators with Blueprint
Interactive car configurators are a cornerstone of modern automotive marketing and design review. Users can change paint colors, wheel designs, interior trim, and even toggle accessories in real-time. Unreal Engine’s Blueprint visual scripting system is the ideal tool for building these dynamic experiences without writing a single line of C++ code.
- Material Swapping: Create an array of materials for different paint colors, wheel finishes, or interior fabrics. Use Blueprint to detect user input (e.g., button click, UI slider) and dynamically swap the material instances on the relevant car mesh components. For car paint, you might swap instances of a master material that exposes parameters for color, metallic flake, and roughness.
- Component Visibility: For changing wheels or adding accessories (like roof racks), use Blueprint to toggle the visibility of static mesh components. For instance, clicking a “Sport Wheels” button could hide the default wheels and show the sport wheel meshes.
- Camera Control: Implement smooth camera transitions between different viewpoints (e.g., exterior, interior, engine bay). Blueprint can be used to set target camera locations and blend between them using interpolation functions.
- User Interface (UMG): Design intuitive UI elements using Unreal Motion Graphics (UMG) Widgets. Buttons, sliders, and dropdown menus can be hooked up to your Blueprint logic to drive material changes and component visibility.
With Nanite handling the high-poly models from 88cars3d.com, your configurator will offer seamless, detailed visual feedback, allowing customers to truly visualize their dream vehicle.
Nanite in Virtual Production and XR Applications
Nanite’s efficiency in handling high-fidelity geometry makes it invaluable for virtual production workflows and extended reality (XR) applications like AR and VR. In virtual production, which combines real-world actors and sets with virtual environments displayed on LED walls, Nanite allows for extremely detailed digital sets and vehicles that blend seamlessly with physical elements. The ability to push billions of polygons in real-time means filmmakers can achieve cinematic quality environments without offline rendering.
- LED Wall Integration: When using Unreal Engine for LED wall virtual production, Nanite ensures that the digital assets, including highly detailed car models, maintain their fidelity even when viewed up close on large screens. This provides realistic parallax and depth, enhancing immersion for both actors and viewers.
- AR/VR Optimization: For AR/VR experiences, performance is paramount to prevent motion sickness. While Nanite improves geometric efficiency, further optimizations are often needed. Consider the target device’s capabilities. For mobile AR/VR, use aggressive texture compression, optimize material complexity, and minimize the number of dynamic lights. While Nanite is a boon for geometry, draw calls for materials and transparencies still matter. For transparent materials like car glass, ensure they don’t overlap excessively, as this can be a performance hit in forward-rendered VR.
- Digital Twins: Nanite enables the creation of highly accurate digital twins of vehicles, allowing engineers and designers to review prototypes in AR/VR with unprecedented detail, interacting with and inspecting components as if they were physically present.
These applications underscore Nanite’s role in creating immersive, highly detailed real-time experiences across various cutting-edge technologies.
Cinematic Storytelling with Sequencer and Nanite-powered Vehicles
Unreal Engine’s Sequencer is a powerful non-linear editor for creating cinematic sequences, animations, and interactive cutscenes. With Nanite-enabled car models, Sequencer transforms into a virtual film studio, allowing you to produce broadcast-quality automotive commercials, product reveals, or dramatic chase scenes with incredible ease and visual fidelity.
- Camera Animation: Use Sequencer to create complex camera paths, keyframing positions, rotations, and focal lengths. Combine with Cine Camera Actors for realistic depth of field and lens effects.
- Vehicle Animation: Animate car doors opening, wheels spinning, or suspensions reacting to terrain. While Nanite itself doesn’t directly handle skeletal meshes with complex deformations, individual static mesh components (like doors, wheels) can be animated via transform tracks within Sequencer. For full vehicle physics and animation, integrate with Chaos Physics or external animation data.
- Lighting Changes: Keyframe light intensity, color, and position over time to create dramatic lighting shifts or time-of-day transitions within your cinematic.
- Material Parameter Changes: Animate material parameters, such as car paint color, roughness, or clear coat intensity, to highlight design features or create dynamic visual effects.
- Post-Process Effects: Keyframe post-process volume settings like bloom, exposure, or color grading to control the mood and visual style of your cinematic shots.
By leveraging Sequencer with Nanite’s high-fidelity asset rendering, you can create breathtaking automotive cinematics faster and more interactively than ever before, pushing the boundaries of real-time storytelling.
Performance Optimization and Best Practices with Nanite in Automotive Projects
While Nanite significantly eases the burden of geometric optimization, understanding its nuances and combining it with other best practices is key to maintaining peak performance in complex automotive projects. Nanite is a powerful tool, but it’s not a magic bullet for all performance challenges. A holistic approach to optimization, encompassing materials, textures, lighting, and non-Nanite assets, is crucial for delivering a smooth and visually stunning experience.
Understanding Nanite Performance Metrics and Debugging
To effectively optimize, you need to understand how Nanite is performing. Unreal Engine provides several visualization and debugging tools:
- Nanite Stats: Open the console (~) and type
r.Nanite.Stats 1. This overlays detailed statistics in the viewport, showing the number of Nanite triangles rendered, clusters drawn, and memory usage. Monitor these values to identify potential bottlenecks. - Nanite Visualization Modes: In the viewport’s ‘Show’ menu, navigate to ‘Nanite’ and explore modes like ‘Overview’, ‘Triangles’, ‘Clusters’, and ‘Hierarchy’. These modes visually represent how Nanite is processing your meshes, helping you identify areas of high density or inefficient culling. For example, ‘Triangles’ will show the exact triangles being rendered for the current view, demonstrating Nanite’s dynamic scaling.
- ProfileGPU: Use the
ProfileGPUcommand (console) to get a detailed breakdown of GPU timings. Look for Nanite-related passes (e.g., ‘NaniteBasePass’) to understand their contribution to frame time. This can help isolate if Nanite itself is the bottleneck or if other rendering passes are more demanding.
Remember that Nanite optimizes geometry, but complex materials with many instructions, high-resolution textures, or numerous non-Nanite actors can still impact performance. For in-depth performance analysis, the official Unreal Engine documentation on profiling and optimization provides extensive guidance.
Complementary Optimization Strategies (Non-Nanite Assets, Textures)
Even with Nanite, certain elements in your automotive scene will still benefit from traditional optimization techniques:
- Non-Nanite Meshes: Not all meshes can or should be Nanite-enabled. Skeletal meshes (for character animation or complex dynamic car parts like flexible suspension components) and meshes with World Position Offset (WPO) or complex pixel-shader driven transparency will not currently benefit from Nanite’s virtualized geometry. For these, traditional LODs and poly reduction remain critical. Keep their polygon counts as low as visually acceptable.
- Texture Optimization: Large texture sizes are a primary source of memory usage and GPU bandwidth consumption.
- Compression: Utilize Unreal Engine’s texture compression settings (e.g., BC7 for high quality, BC5 for normal maps, DXTC for others).
- Streaming: Ensure texture streaming is enabled and configured correctly in project settings and individual texture assets to only load necessary mip levels.
- Resolution: Use appropriate texture resolutions. A distant background building doesn’t need 8K textures. However, for core automotive models from 88cars3d.com, high-resolution textures (4K-8K) are often justified due to the camera’s proximity and the need for fine detail.
- Material Complexity: Complex materials with many nodes, heavy math operations, or multiple texture samples can be expensive. Optimize by:
- Material Instances: Create Material Instances from master materials, allowing you to change parameters without recompiling shaders.
- Texture Atlas: Combine smaller textures into a single larger atlas to reduce draw calls.
- Instruction Count: Monitor the instruction count in the Material Editor. Simplify logic where possible.
- Lighting Optimization: While Lumen and VSMs are powerful, they still have a performance cost.
- Dynamic vs. Static Lights: Minimize dynamic lights where possible. For static elements, consider baked lighting if Lumen’s dynamic features aren’t strictly required, though Lumen is generally preferred for automotive.
- Light Count: Reduce the number of overlapping dynamic lights impacting the same area.
Overcoming Nanite’s Current Limitations for Automotive Assets
While Nanite is revolutionary, it does have some current limitations that are important to consider for automotive projects:
- Skeletal Meshes: Nanite does not currently support skeletal meshes, meaning animated characters or deformable vehicle components (like advanced suspension systems with complex rigs) cannot directly leverage Nanite. For these, traditional LODs and optimized polygon counts are necessary. You can, however, use Nanite for the static parts of a vehicle while only the articulated components are traditional meshes.
- World Position Offset (WPO) and Vertex Animation: Meshes using WPO for effects like subtle wind animation on foliage or vertex animation for flowing water cannot be Nanite-enabled. For elements that need these effects around your car, keep them as traditional meshes.
- Translucency: Nanite currently does not support translucent materials (like highly transparent glass that refracts light). For clear car glass, you’ll need to use a traditional mesh. However, masked materials (e.g., alpha clip for meshes with holes) work fine. Be mindful of transparent material draw order and overdraw, as they can be performance-heavy.
- Custom Depth and Stencil: Features that rely on the Custom Depth or Stencil buffer (e.g., custom outlines, selection highlighting) may not function as expected with Nanite meshes. Workarounds might involve rendering a duplicate non-Nanite mesh for these effects or using alternative post-processing methods.
By understanding these limitations, you can make informed decisions about which parts of your automotive assets from 88cars3d.com to enable Nanite on, and where to apply traditional optimization techniques, ensuring a balanced and high-performing real-time experience.
Conclusion
Unreal Engine 5’s Nanite technology has irrevocably changed the landscape of 3D content creation, especially for high-fidelity applications like automotive visualization. By eliminating the traditional constraints of polygon count, Nanite empowers artists and developers to work with cinematic-quality 3D car models directly, streamlining workflows and enabling unprecedented levels of detail in real-time environments. From dynamic configurators and immersive virtual production sets to stunning cinematic sequences, Nanite stands as a cornerstone of modern automotive rendering.
The journey through Nanite’s core principles, integration workflows, and optimization strategies reveals a powerful ecosystem that, when combined with high-quality assets such as those available on 88cars3d.com, allows for the creation of truly photorealistic and interactive experiences. While Nanite handles the geometry, mastering PBR materials, dynamic lighting with Lumen, and smart post-processing remain critical skills for achieving visual excellence. Understanding Nanite’s capabilities and its current limitations ensures that you can leverage this revolutionary technology effectively, building robust and high-performing projects.
The future of automotive visualization in Unreal Engine 5 is one of boundless creativity and unparalleled realism. Embrace Nanite, refine your material and lighting pipelines, and explore the interactive possibilities with Blueprint and Sequencer. Start building your next-generation automotive experiences today, powered by the fidelity of Nanite and the robust assets from 88cars3d.com, and push the boundaries of real-time rendering further than ever before.
Featured 3D Car Models
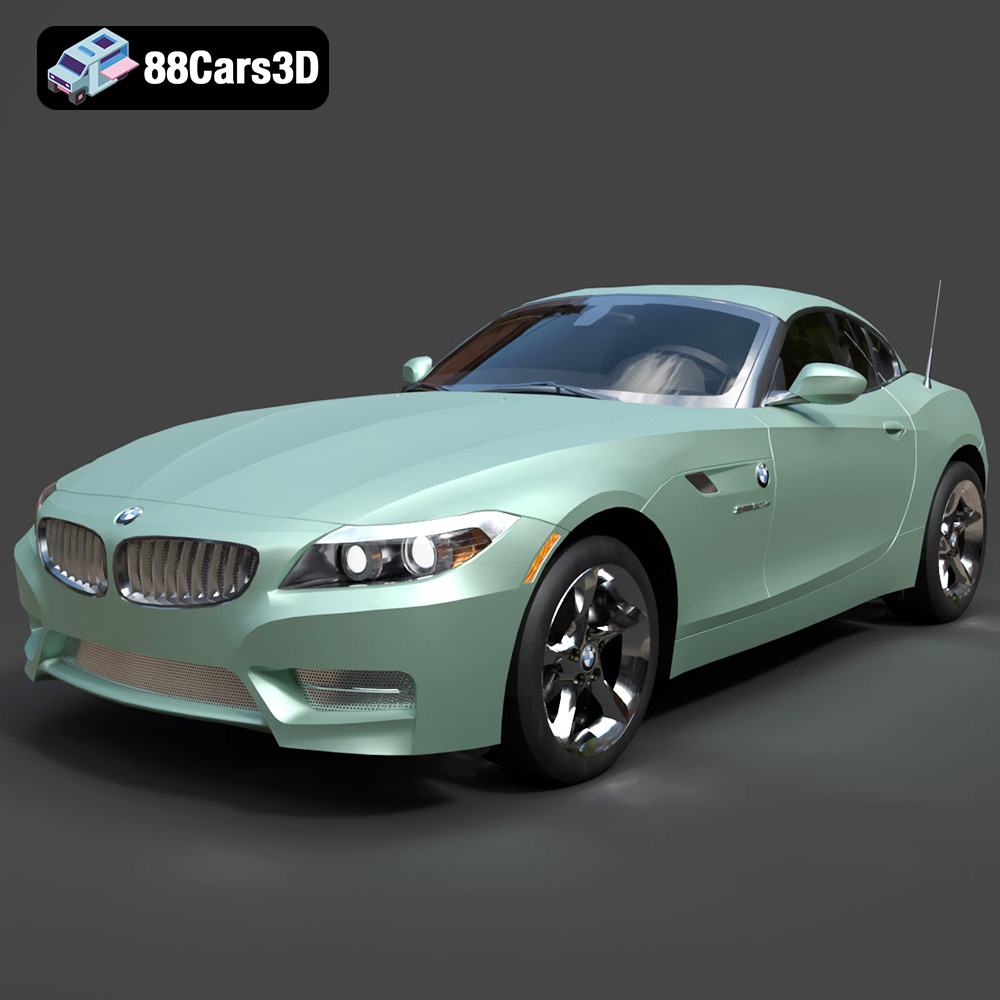
BMW Z4 Roadster E89 2012 3D Model
Texture: Yes
Material: Yes
Download the BMW Z4 Roadster E89 3D Model featuring clean geometry, realistic detailing, and a fully modeled interior. Includes .blend, .fbx, .obj, .glb, .stl, .ply, .unreal, and .max formats for rendering, simulation, and game development.
Price: $13.99

BMW Z4 E85 2005 3D Model
Texture: Yes
Material: Yes
Download the BMW Z4 E85 3D Model featuring clean geometry, realistic detailing, and a fully modeled interior. Includes .blend, .fbx, .obj, .glb, .stl, .ply, .unreal, and .max formats for rendering, simulation, and game development.
Price: $13.99

BMW M3 2024 3D Model
Texture: Yes
Material: Yes
Download the BMW M3 2024 3D Model featuring clean geometry, realistic detailing, and a fully modeled interior. Includes .blend, .fbx, .obj, .glb, .stl, .ply, .unreal, and .max formats for rendering, simulation, and game development.
Price: $13.99
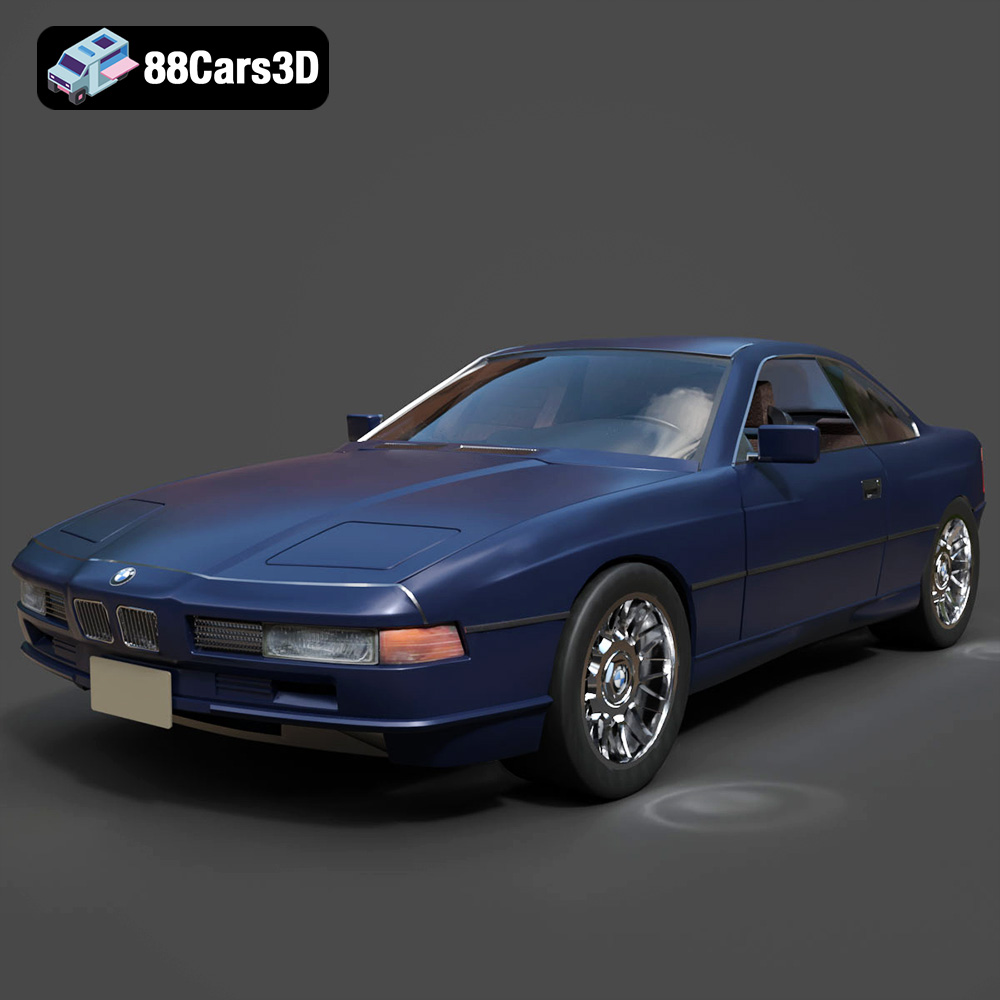
BMW 850i Coupe 1990 3D Model
Texture: Yes
Material: Yes
Download the BMW 850i Coupe 1990 3D Model featuring clean geometry, realistic detailing, and a fully modeled interior. Includes .blend, .fbx, .obj, .glb, .stl, .ply, .unreal, and .max formats for rendering, simulation, and game development.
Price: $13.99
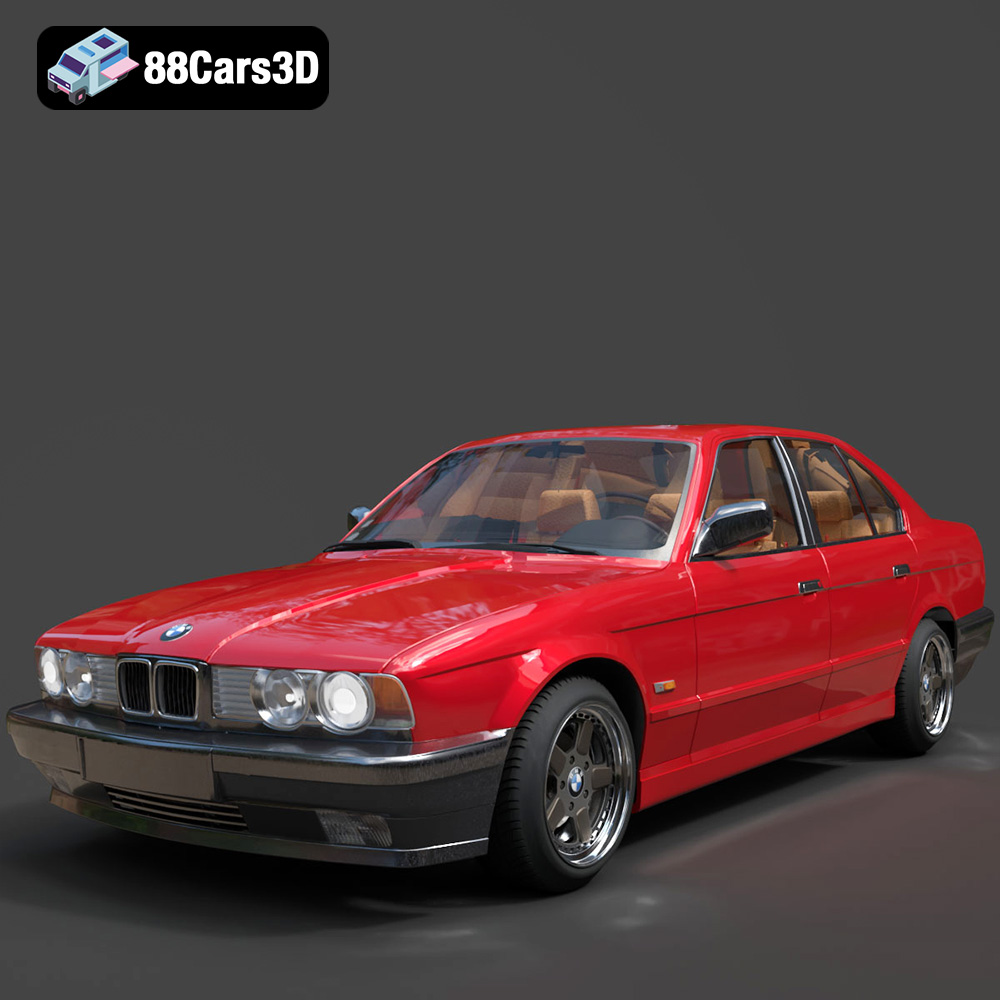
BMW 525i E34 1993 3D Model
Texture: Yes
Material: Yes
Download the BMW 525i E34 1993 3D Model featuring clean geometry, realistic detailing, and a fully modeled interior. Includes .blend, .fbx, .obj, .glb, .stl, .ply, .unreal, and .max formats for rendering, simulation, and game development.
Price: $12.99

BMW 7 Series 2016 3D Model
Texture: Yes
Material: Yes
Download the BMW 7 Series 2016 3D Model featuring luxurious design, detailed interior, and accurate exterior. Includes .blend, .fbx, .obj, .glb, .stl, .ply, .unreal, and .max formats for rendering, simulation, and game development.
Price: $10.79
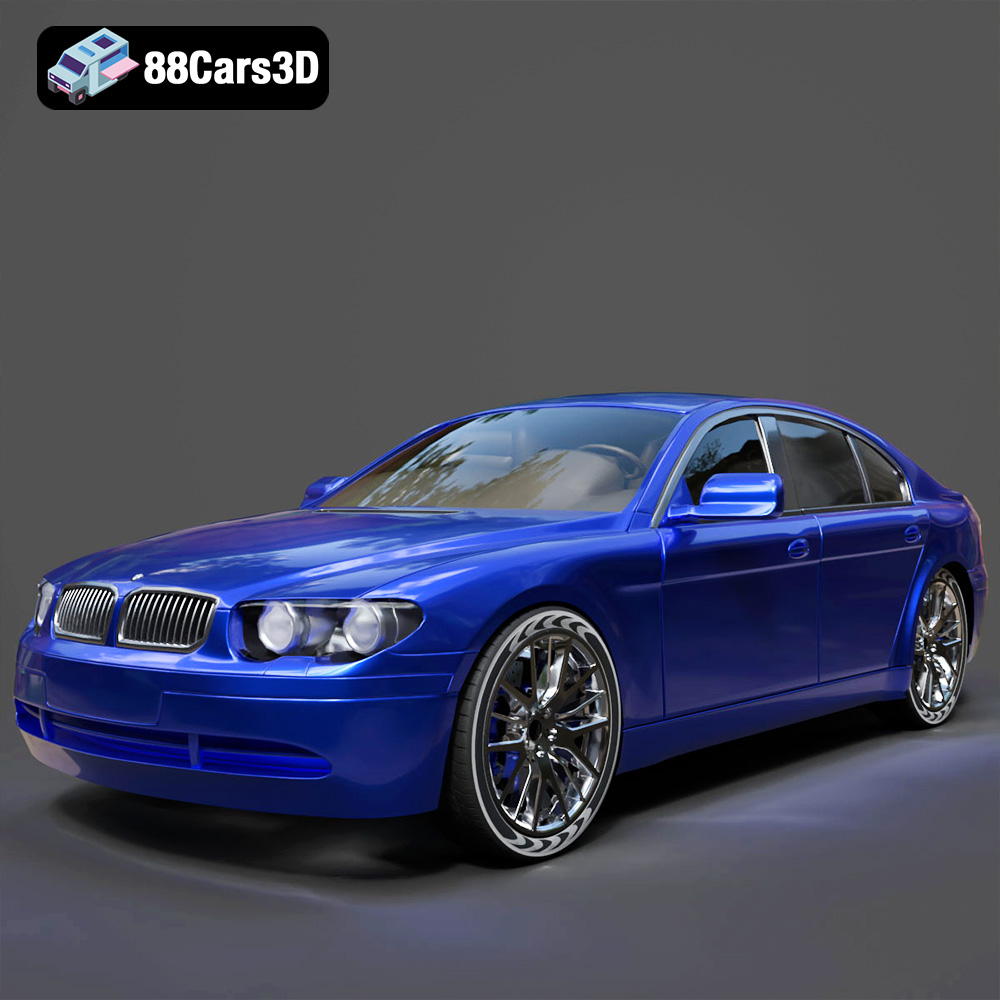
BMW 7 Series 30th Anniversary 3D Model
Texture: Yes
Material: Yes
Download the BMW 7 Series 30th Anniversary 3D Model featuring a meticulously crafted exterior, detailed interior, and realistic wheels. Includes .blend, .fbx, .obj, .glb, .stl, .ply, .unreal, and .max formats for rendering, simulation, and game development.
Price: $35.79

BMW 7-Series F02 3D Model
Texture: Yes
Material: Yes
Download the BMW 7-Series F02 3D Model featuring a detailed exterior and interior, optimized for rendering and animation. Includes .blend, .fbx, .obj, .glb, .stl, .ply, .unreal, and .max formats for rendering, simulation, and game development.
Price: $10.79
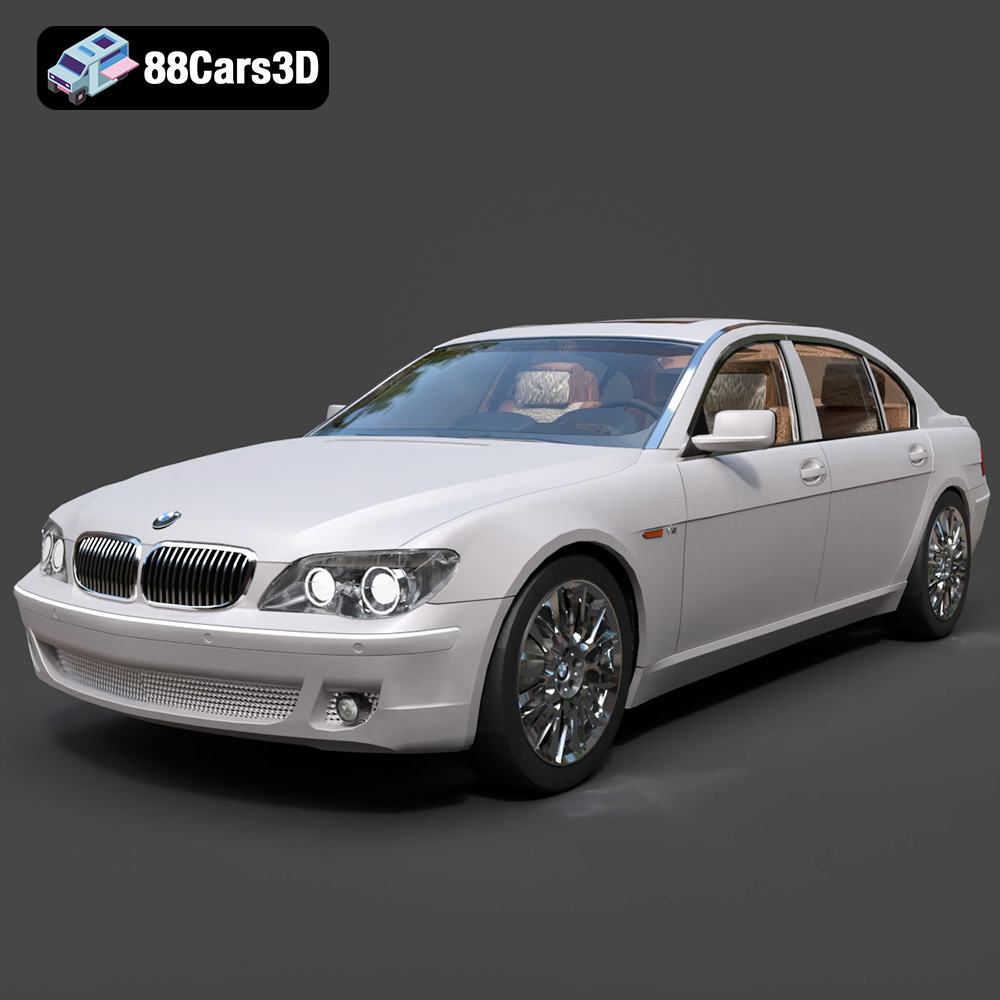
BMW 760Li E66 2005 3D Model
Texture: Yes
Material: Yes
Download the BMW 760Li E66 2005 3D Model featuring a detailed exterior, refined interior, and robust chassis. Includes .blend, .fbx, .obj, .glb, .stl, .ply, .unreal, and .max formats for rendering, simulation, and game development.
Price: $10.79
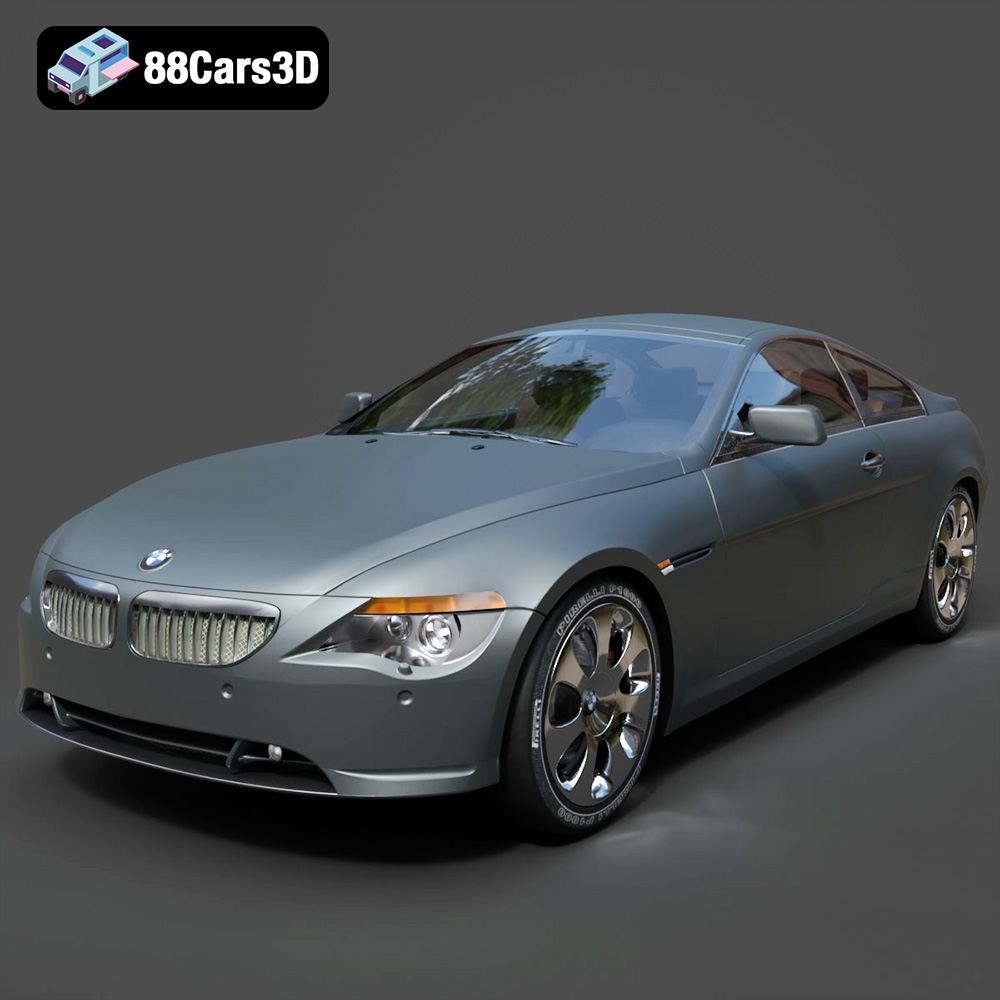
BMW 6 Series 3D Model
Texture: Yes
Material: Yes
Download the BMW 6 Series 3D Model featuring precisely modeled body panels, detailed interior, and authentic wheels. Includes .blend, .fbx, .obj, .glb, .stl, .ply, .unreal, and .max formats for rendering, simulation, and game development.
Price: $10.79
