

The world of automotive design, visualization, and game development has been revolutionized by real-time rendering engines. Among these, Unreal Engine stands as a titan, offering unparalleled visual fidelity, robust tools, and incredible interactivity that were once the exclusive domain of offline renderers. For anyone looking to create breathtaking automotive experiences, from interactive configurators to cinematic showcases or cutting-edge games, mastering Unreal Engine is an essential step.
This comprehensive guide is designed for beginners embarking on their journey with Unreal Engine, specifically tailored for working with high-quality 3D car models. We’ll demystify the initial setup, walk through the process of importing and optimizing professional-grade assets (like those found on 88cars3d.com), and delve into the core techniques for crafting stunning automotive visualization projects. From physically based materials and dynamic lighting to interactive Blueprint scripting and performance optimization, you’ll gain the foundational knowledge to transform your visions into captivating real-time experiences.
Setting Up Your Unreal Engine Project for Automotive Excellence
Embarking on any Unreal Engine project begins with a solid foundation. For automotive visualization, the initial setup can significantly impact your workflow and the ultimate quality of your renders. Understanding how to correctly configure your project is paramount to harnessing Unreal Engine’s power for stunning vehicular scenes.
Choosing the Right Template and Initial Configuration
When you first launch Unreal Engine, you’re presented with a choice of project templates. For automotive work, the “Blank” or “Architecture, Engineering, and Construction (AEC)” templates are excellent starting points. The “Blank” template offers the most flexibility with minimal pre-configured content, allowing you to build everything from scratch. The “AEC” template, however, comes with some architectural assets and lighting setups that can be adapted for car showrooms or environments, and often has pre-configured post-processing volumes suitable for high-fidelity visualization.
Crucially, ensure you select “Blueprint” for the project type and “Desktop/Console” for the target platform. For quality settings, always opt for “Maximum Quality” to unlock all rendering features necessary for high-fidelity visuals. Ray Tracing can be enabled from the start if your hardware supports it, providing superior reflections and global illumination, though we’ll primarily focus on Lumen for beginner-friendly real-time global illumination. Remember to give your project a descriptive name and choose a logical save location. This initial configuration lays the groundwork for a streamlined development process, ensuring your project is ready to handle the demands of detailed 3D car models and complex lighting scenarios.
Essential Project Settings for High-Fidelity Rendering
Once your project is created, a dive into the Project Settings is crucial for optimizing your automotive visualizations. Navigate to Edit > Project Settings. Here are some key areas to configure:
- Rendering:
- Lumen Global Illumination and Reflections: Ensure these are enabled under the Global Illumination and Reflections categories. Lumen is Unreal Engine’s real-time global illumination and reflection system, essential for realistic lighting in automotive scenes. It provides dynamic bounce lighting and reflections without complex light baking.
- Nanite: Enable Nanite support. This virtualized geometry system is a game-changer for high-poly 3D car models, allowing you to import millions of polygons without significant performance loss. We’ll explore this in more detail later.
- Ray Tracing: If your GPU supports it, enable Hardware Ray Tracing under the Ray Tracing section for even more accurate reflections, shadows, and ambient occlusion, complementing Lumen beautifully.
- Post Processing: Familiarize yourself with settings like Motion Blur, Bloom, and Ambient Occlusion. While useful, some require careful balancing for photorealistic results.
- Input: If you plan on adding interactive elements or custom camera controls, this is where you’ll define your input actions and axes.
- Maps & Modes: Set your default editor and game maps. This ensures your preferred level loads automatically.
These settings form the technical backbone of your project, dictating how Unreal Engine renders your environment and assets. Getting them right from the outset prevents headaches down the line and ensures you’re leveraging Unreal Engine’s most powerful features for your automotive visualization needs.
Understanding Content Browser and Project Structure
The Content Browser is your primary interface for managing all assets within your Unreal Engine project. It’s where you’ll import, organize, and interact with your 3D car models, materials, textures, blueprints, and more. A well-organized Content Browser is critical for efficient workflow, especially when dealing with the numerous assets involved in a complex automotive scene.
Establish a logical folder structure from the beginning. A common practice is to create top-level folders such as “Vehicles,” “Environments,” “Materials,” “Textures,” “Blueprints,” and “Maps.” Within “Vehicles,” you might have subfolders for individual car models, each containing its meshes, textures, and associated materials. For instance, a structure might look like: Content/Vehicles/SportsCar_01/Meshes, Content/Vehicles/SportsCar_01/Materials, Content/Vehicles/SportsCar_01/Textures.
Naming conventions are equally important. Be consistent and descriptive. Use prefixes like “SM_” for Static Meshes, “T_” for Textures, “M_” for Materials, and “BP_” for Blueprints. For example, a car body mesh might be named SM_SportsCar_Body, its texture T_SportsCar_Body_Albedo, and its material M_SportsCar_Paint. This systematic approach not only makes assets easy to find but also improves team collaboration if you’re working with others. Maintaining a clean and intuitive project structure will save you countless hours and prevent frustration as your automotive projects grow in complexity.
Importing and Optimizing 3D Car Models from 88cars3d.com
Once your Unreal Engine project is configured, the next crucial step is bringing your high-quality 3D car models into the engine. Platforms like 88cars3d.com offer meticulously crafted models, and understanding the proper import and optimization techniques ensures you can fully leverage their detail and fidelity within your real-time projects.
The Import Process: FBX, USD, and Data Prep
Unreal Engine supports various 3D file formats, with FBX and USD (Universal Scene Description) being the most common for automotive assets. When you download a model from a marketplace such as 88cars3d.com, it will typically come in one of these formats, often with associated textures. The import process is straightforward:
- Open the Content Browser: Navigate to your designated “Vehicles” folder.
- Import Button: Click the “Add” button or drag and drop your FBX/USD file directly into the Content Browser.
- Import Options: A dialog box will appear. Here are key settings:
- Skeletal Mesh / Static Mesh: For car models, you’ll primarily be importing Static Meshes. If the model includes a rigged chassis or wheel setup, it might come as a Skeletal Mesh, but individual components are usually Static.
- Combine Meshes: Decide whether to combine all meshes into one or import them separately. For complex car models, importing parts separately (body, wheels, interior, etc.) offers greater flexibility for material assignments and animation.
- Material Import Method: Choose “Do Not Create Materials” if you plan to create your PBR materials from scratch in Unreal Engine, or “Create New Materials” if the FBX contains basic material definitions you wish to use as a starting point.
- Texture Import: Ensure “Import Textures” is checked if you want to bring in embedded textures.
- Normals and Tangents: Always select “Import Normals and Tangents” to ensure proper shading.
- Data Prep (for complex USD scenes): For very large or complex scenes using USD, Unreal Engine’s Data Prep tools can be invaluable. This feature allows you to automate asset optimization, cleanup, and restructuring during import, which is particularly useful for CAD data or highly detailed automotive assemblies. Data Prep recipes can clean up geometry, merge actors, and assign materials based on specific criteria, saving significant time.
After importing, you’ll see your meshes, textures, and potentially some basic materials appear in your Content Browser. It’s now time to optimize them for real-time performance.
Initial Optimization: Static Mesh Settings and LODs
Even with high-quality game assets, optimization is key for smooth real-time performance. After importing your car meshes, double-click each Static Mesh asset in the Content Browser to open its editor. Here, you’ll find critical settings for optimization:
- General Settings:
- Build Scale: Ensure this matches your project’s scale (Unreal Engine typically uses 1 unit = 1 cm).
- Collision: For static elements like a parked car, simplified collision (e.g., “Use Complex as Simple” for accurate collision, or “Box” for performance) is usually sufficient. For driveable cars, more advanced collision setups or physics assets are needed.
- LODs (Levels of Detail): This is one of the most vital optimization techniques for any asset, especially detailed 3D car models. LODs allow Unreal Engine to automatically swap out a high-detail mesh for a simpler version when the object is far from the camera, drastically improving performance without noticeable visual degradation.
- Generating LODs: In the Static Mesh Editor, under the “LOD Settings” panel, you can use the “Generate LODs” option. Unreal Engine can automatically generate simplified meshes based on a target triangle count or screen size. Aim for 3-5 LOD levels (e.g., LOD0: full detail, LOD1: 50% reduction, LOD2: 75% reduction, LOD3: 90% reduction, etc.).
- Manual LODs: For critical assets, providing custom, hand-optimized LOD meshes from your 3D modeling software offers the best quality and performance. These can be imported and assigned to specific LOD slots.
- Lightmap Resolution: For static lighting scenarios, ensure your car meshes have appropriate lightmap UVs and a sufficient lightmap resolution (e.g., 64, 128, or 256). This dictates the quality of baked lighting and shadows on your model. However, with Lumen, lightmaps are less critical for dynamic lighting.
Properly configured LODs ensure that your detailed models only render at their full complexity when necessary, maintaining high visual fidelity while keeping frame rates robust, crucial for any interactive automotive visualization.
Leveraging Nanite for High-Fidelity Automotive Assets
Nanite is Unreal Engine’s virtualized geometry system, a groundbreaking feature that fundamentally changes how artists work with incredibly high-fidelity assets. For 3D car models, Nanite is a game-changer. It allows you to import models with millions or even billions of polygons directly into Unreal Engine, without the traditional performance penalties associated with high poly counts.
When you enable Nanite for a Static Mesh, Unreal Engine converts its geometry into a specialized internal format. At runtime, Nanite intelligently streams and renders only the necessary detail, pixel by pixel, based on the camera’s distance and screen space. This means you can use highly detailed CAD models, photogrammetry scans, or subdivision surface models at their native resolution, preserving intricate details like sharp edges, smooth curves, and tiny panel gaps – all essential for photorealistic automotive rendering.
To enable Nanite for an imported car mesh:
- Open the Static Mesh Editor for your desired mesh.
- In the “Details” panel, under the “Nanite Settings” section, check the “Enable Nanite Support” box.
- You can adjust settings like “Fallback Relative Error” to control the detail level of the generated proxy meshes for fallback rendering (though typically the default is fine).
With Nanite, the traditional headache of meticulously creating LODs for every single high-poly mesh is largely mitigated, though simple LODs for very distant objects or non-Nanite compatible features (like masked materials) might still be beneficial. Nanite streamlines the asset pipeline, allowing artists to focus on detail and quality rather than aggressive polygon reduction, truly elevating the potential of automotive visualization in real-time.
Crafting Realistic PBR Materials and Textures
Realistic materials are the cornerstone of compelling automotive visualization. In Unreal Engine, this is achieved through Physically Based Rendering (PBR), a methodology that simulates how light interacts with surfaces in the real world. Mastering PBR materials is essential to make your 3D car models shine with true-to-life reflections, colors, and textures.
The Fundamentals of Physically Based Rendering (PBR)
PBR is an approach to shading and rendering that provides a more accurate representation of how light behaves when interacting with surfaces. Rather than simply setting a color, PBR materials define physical properties that dictate how light is reflected or absorbed. The core PBR textures you’ll work with are:
- Albedo/Base Color: This texture defines the diffuse color of the surface without any lighting information. It should represent the true color of the material.
- Normal Map: Provides high-frequency surface detail (bumps, scratches, panel lines) by faking geometric detail through altering surface normals, giving the illusion of depth without adding actual polygons.
- Roughness Map: Controls the microscopic surface irregularities. A low roughness value means a smooth, highly reflective surface (like polished chrome), while a high value results in a rough, matte surface (like unpainted plastic).
- Metallic Map: Differentiates between dielectric (non-metal) and metallic surfaces. Pure metals will have a value of 1 (white), while non-metals will be 0 (black). Hybrid materials can fall in between.
- Ambient Occlusion (AO) Map: Simulates soft shadows where objects are occluded, like crevices or corners, adding depth and realism.
In Unreal Engine’s Material Editor, you’ll connect these texture maps to the corresponding inputs of the main Material node (Base Color, Normal, Roughness, Metallic, Ambient Occlusion). Understanding how each map contributes to the final appearance is crucial for creating convincing car paints, leathers, glass, and metals. The PBR workflow ensures that your materials look consistent and realistic under various lighting conditions, making them ideal for dynamic real-time rendering.
Building Car Paint and Interior Materials in the Material Editor
The Unreal Engine Material Editor is a node-based interface where you construct your PBR materials. For automotive projects, two types of materials deserve special attention: car paint and interior surfaces.
Car Paint Material:
Creating realistic car paint involves several layers and parameters. A typical car paint material often includes:
- Base Color: A solid color parameter or an Albedo texture for custom paints.
- Metallic: Set to a high value (close to 1) for metallic flake paints.
- Roughness: A very low value (e.g., 0.1-0.2) for glossy clear coat.
- Clear Coat: Unreal Engine has a dedicated “Clear Coat” input on the Material node. This allows you to simulate a separate reflective layer on top of the base paint, crucial for realism. Connect a scalar parameter or texture to the “Clear Coat” and “Clear Coat Roughness” inputs.
- Flakes: For metallic or pearl paints, you can simulate metallic flakes using a custom normal map and potentially a masking texture for controlled visibility. This adds subtle sparkle and depth.
Combine these with a normal map for subtle surface imperfections, and you’ll achieve a highly realistic automotive paint finish. Experiment with scalar parameters for color, metallic, and roughness to create a wide range of paint variations dynamically, perfect for an automotive configurator.
Interior Materials:
Interior materials require a different approach, focusing on diverse textures like leather, fabric, plastic, and carbon fiber. Each will have its own set of PBR textures (Albedo, Normal, Roughness, Metallic, AO). For instance:
- Leather: Typically features a detailed normal map for stitching and grain, with mid-range roughness for a semi-matte finish.
- Fabric: Often uses a detailed normal map and a higher roughness value to simulate textile weave.
- Plastic: Can vary widely from highly reflective to matte, controlled by roughness and potentially metallic values (for certain types of plastics).
- Carbon Fiber: Requires a complex normal map for the weave pattern, a low roughness value for the clear coat, and potentially a very subtle metallic value.
Always ensure your texture resolutions (e.g., 2K or 4K for close-up details) are appropriate for the detail level required, considering the performance impact. With a careful approach to PBR, your 3D car models will achieve unparalleled realism.
Advanced Material Techniques: Clear Coat, Flakes, and Decals
Beyond the basics, several advanced material techniques can elevate your automotive renders from good to stunning:
- Advanced Clear Coat Systems: While the basic Clear Coat input is powerful, you can extend it by using a Material Function or custom HLSL code to implement more sophisticated clear coat models that account for multiple reflection layers, anisotropic reflections, or iridescent effects. This level of detail is paramount for high-end automotive visualization.
- Metallic Flakes and Pearlescent Effects: Achieving convincing metallic or pearlescent car paint often involves specialized normal maps and texture masks. You can create a micro-normal map containing flake patterns, which is then blended with the main normal map and controlled by parameters in your material. This technique, when combined with a subtle Fresnel effect and a touch of metallic, dramatically enhances the realism of the paint.
- Decals and Branding: For logos, stripes, or other graphical elements, Decal Actors are an efficient way to project materials onto existing geometry without altering the original mesh. Create a separate translucent or masked PBR material for your decals, then drag a Decal Actor into your scene and apply the material. Position and scale it to wrap around the car surface. This non-destructive method is perfect for adding branding, racing stripes, or warning labels to your 3D car models.
- Glass and Transparency: Realistic car glass requires careful attention to transparency, reflections, and refraction. Use a Translucent or Opaque material (for screen space reflections) with high metallic and low roughness values, and consider adding a subtle normal map for imperfections. For more advanced refraction, enable “Refraction” in your material’s settings, but be mindful of the performance cost of true refraction.
These advanced techniques, while requiring a deeper understanding of the Material Editor, are what truly differentiate professional real-time rendering from basic visualizations. Experimentation and reference to real-world automotive photography will be your best guides.
Mastering Real-Time Lighting for Automotive Scenes
Lighting is arguably the most critical element in bringing your 3D car models to life. In Unreal Engine, dynamic, real-time lighting solutions offer unprecedented flexibility and realism. This section will guide you through setting up compelling lighting, from global illumination with Lumen to studio-quality setups and final post-processing touches.
Dynamic Global Illumination with Lumen
Lumen is Unreal Engine’s revolutionary real-time global illumination and reflections system, providing dynamic indirect lighting without the need for lightmaps or pre-baked lighting. For automotive visualization, Lumen is a game-changer, allowing your 3D car models to interact realistically with their environment and vice-versa, dynamically responding to changes in light sources or the car’s position.
To ensure Lumen is active, verify that “Lumen Global Illumination” and “Lumen Reflections” are enabled in your Project Settings under the Rendering section. Within your level, ensure you have a Post Process Volume placed and set to “unbound” (or resized to encompass your scene). Inside the Post Process Volume, you can further tweak Lumen’s settings, such as “Global Illumination Method” and “Reflections Method” to Lumen. You can also adjust properties like “Lumen Scene Lighting Quality” and “Final Gather Lighting Quality” for visual fidelity vs. performance tradeoffs.
Lumen works best with surfaces that reflect light. It simulates how light bounces off surfaces, illuminating darker areas naturally. This is essential for showcasing the intricate details and materials of your 3D car models, ensuring that interior spaces or shadowed areas under the car receive realistic ambient light. When using Lumen, traditional static light baking becomes largely unnecessary, allowing for fully dynamic scenes and iterative lighting adjustments in real-time.
Setting Up Studio-Quality Lighting: HDRI and Light Sources
Achieving studio-quality lighting for your automotive scenes involves a combination of High Dynamic Range Image (HDRI) backgrounds and strategic placement of artificial light sources.
- HDRI Environment:
- An HDRI (High Dynamic Range Image) is often the first step in creating realistic ambient lighting. It provides a full 360-degree panoramic image that not only serves as a background but also emits light into your scene, mimicking real-world lighting conditions (e.g., a studio, an outdoor environment, a cloudy sky).
- Import a high-quality HDRI texture (e.g., .hdr or .exr format) into your Content Browser.
- Drag an “HDRI Backdrop” Actor into your scene, or create a Sky Atmosphere and connect your HDRI to a Sky Light. The Sky Light captures the incoming light from the HDRI and applies it as ambient illumination and reflections. Adjust its intensity and rotation to find the best angle for your car model.
- Artificial Light Sources:
- Directional Light: Simulates distant light sources like the sun. Essential for strong, parallel shadows. Adjust its rotation and intensity.
- Rect Light (Area Light): Ideal for soft, studio-style illumination. Place these strategically around your car to highlight contours, create dramatic reflections, and simulate softboxes. Adjust their dimensions and intensity for desired spread and brightness.
- Spot Light: Use for focused illumination, such as interior lighting or highlighting specific details on the car.
- Point Light: Useful for general fill light or small light sources within the scene.
Experiment with different light setups. Use Rect Lights with soft falloffs to create appealing reflections along the car’s body panels. Backlights can define the car’s silhouette, while fill lights prevent overly dark shadows. Remember that every light source contributes to the final look, and balancing their intensities and colors is key to a professional presentation of your game assets.
Post-Processing for Cinematic Visuals
Post-processing is the final layer of visual refinement that can transform your automotive scene from raw render to cinematic masterpiece. A Post Process Volume placed in your scene (and set to “unbound” or covering your entire area) provides access to a wealth of effects:
- Exposure: Adjusts the overall brightness of the scene. Auto Exposure can be fine-tuned or disabled for manual control.
- Color Grading: Crucial for establishing mood and consistency. Use the “Color Grading” panel to adjust global tints, saturation, contrast, and apply Lookup Tables (LUTs) for specific cinematic looks.
- Bloom: Creates a glow around bright areas, simulating lens effects. Use sparingly to avoid over-blown highlights, but it can enhance the realism of headlights or reflective surfaces.
- Vignette: Darkens the edges of the screen, drawing focus to the center.
- Lens Flares: Adds optical artifacts from bright light sources.
- Screen Space Reflections (SSR): Provides additional reflections for objects that are visible on screen, complementing Lumen reflections.
- Ambient Occlusion (SSAO): Enhances contact shadows and crevices, adding depth.
- Depth of Field (DOF): Blurs foreground or background elements, mimicking real camera lenses and focusing the viewer’s attention on the car. This is particularly effective for cinematic shots or product showcases.
- Sharpen: Can help make your render appear crisper, but use with caution to avoid artifacts.
By carefully adjusting these post-processing effects, you can achieve a professional, polished look for your automotive visualization projects, mimicking the high production values seen in commercials and game cinematics. Always work iteratively, making small adjustments and comparing the results to your reference images.
Bringing Cars to Life with Interactivity and Cinematics
Unreal Engine excels not only in visual fidelity but also in creating dynamic, interactive experiences and stunning cinematic sequences. For automotive visualization, this means enabling users to customize cars in real-time or producing breathtaking promotional videos.
Blueprint Scripting for Interactive Automotive Configurators
Blueprint Visual Scripting is Unreal Engine’s powerful node-based scripting system that allows you to create complex game logic and interactive experiences without writing a single line of code. For an automotive configurator, Blueprints are indispensable. You can enable users to change car colors, swap wheel designs, open doors, or even cycle through interior trims dynamically.
Here’s a simplified workflow for a color configurator:
- Material Instance Constants: For your car paint material, create a Material Instance Constant (MIC). This allows you to expose parameters (like Base Color, Roughness, Metallic) that can be changed at runtime without recompiling the base material.
- Blueprint Actor: Create a new Blueprint Actor (e.g.,
BP_CarConfigurator). This Actor will house the logic for your configurator. - Event Graph Logic:
- Add your 3D car model (or its component meshes) to this Blueprint.
- When the game starts (Event BeginPlay), get a reference to the car’s paint material and create a dynamic material instance from it. Store this instance in a variable.
- Create custom events (e.g., “ChangeRedPaint,” “ChangeBluePaint”) or a function that takes a Color parameter.
- When these events are called (e.g., by a UI button press), use the “Set Vector Parameter Value” node on your dynamic material instance to update the “Base Color” parameter of the car paint.
- For swapping parts (like wheels), you can use “Set Static Mesh” nodes on a component, changing it from one wheel mesh to another based on user selection.
- User Interface (UMG): Design simple UI widgets (buttons) using Unreal Motion Graphics (UMG). Link these buttons to your Blueprint events, allowing users to interact with the configurator.
This approach allows for highly interactive demonstrations, letting clients or customers explore different car options in real-time, greatly enhancing the value of your automotive visualization projects.
Creating Stunning Cinematics with Sequencer
Sequencer is Unreal Engine’s non-linear cinematic editing tool, similar to video editing software, but operating directly within the engine. It allows you to create high-quality cinematics, animations, and camera tracks for your 3D car models, perfect for promotional videos or in-game cutscenes.
The workflow typically involves:
- Create a New Sequence: From the “Cinematics” menu, select “Add Level Sequence.” This creates a new asset and opens the Sequencer editor.
- Add Actors: Drag your 3D car model, camera, lights, and any other relevant actors from the Outliner into Sequencer. Each actor will get its own track.
- Animate Properties:
- Camera Track: Create a Cine Camera Actor, add it to Sequencer, and animate its “Transform” property to create dynamic camera movements around the car. You can also animate its focal length, aperture (for depth of field), and other cinematic settings.
- Car Animation: Animate the car’s transformation for movement, or specific parts like doors opening/closing. For subtle realism, you can add small physics-based animations to components using Blueprints or dedicated physics assets if the car is rigged.
- Material Parameters: You can animate material parameters, such as changing the car paint color over time, or making parts glow.
- Lighting Changes: Animate light intensities, colors, or positions for dramatic effect.
- Keyframing: Use the auto-keyframe feature or manually set keyframes on the timeline to record property changes over time.
- Render Output: Once your sequence is complete, use the “Render Movie” feature (Movie Render Queue for high-quality outputs) to export your cinematic as an image sequence or video file, ready for post-production or direct sharing.
Sequencer is a powerful tool for crafting compelling narratives and showcasing the beauty of your 3D car models with professional-grade cinematics, leveraging all the visual fidelity Unreal Engine has to offer.
Implementing Basic Vehicle Physics and Animation
While complex vehicle dynamics are often handled by dedicated plugins or advanced Blueprints, beginners can implement basic physics and animation for a more dynamic presentation of their game assets.
- Physics Assets: For simple suspension or wheel rotation, ensure your car model has a Physics Asset (PhAT). This defines how rigid bodies (like wheels) interact with the main chassis. You can then use physics constraints to simulate suspension movement.
- Vehicle Blueprint (Chaos Vehicles): For driveable cars, Unreal Engine 5 uses the Chaos Vehicle system. You can create a new Blueprint class based on
VehiclePawnand configure its engine, transmission, and wheel setups. This is more involved but provides realistic driving physics. - Simple Animations:
- Wheel Rotation: In a Blueprint, you can create a simple ‘tick’ event that rotates the wheels based on the car’s forward movement or a constant speed.
- Door Opening: Create individual Static Meshes for doors. In a Blueprint, use a “Set Relative Rotation” node driven by a timeline to smoothly animate the doors opening and closing when a user interacts (e.g., clicks on the door).
- Suspension Compression: You can use a Line Trace (or other collision detection) from the wheel to the ground to determine suspension compression and drive a small Z-axis offset for each wheel.
These basic physics and animation techniques add a layer of realism and interactivity, making your automotive visualization projects more engaging, whether for game development or interactive configurators.
Performance Optimization and Advanced Considerations
Achieving stunning visuals in real-time, especially with highly detailed 3D car models, requires constant vigilance over performance. This section will cover key optimization strategies and introduce advanced considerations for specific workflows like AR/VR and virtual production.
Strategies for Real-Time Performance: LODs, Culling, and GPU Optimization
Even with powerful features like Nanite, smart optimization is crucial for maintaining smooth frame rates, particularly for projects targeting lower-spec hardware or interactive experiences. Here are essential strategies:
- Levels of Detail (LODs): Reiterate the importance of LODs for non-Nanite meshes (such as certain architectural elements, foliage, or older assets). Manually review and refine auto-generated LODs to ensure visual quality doesn’t degrade too much at distance.
- Culling:
- Frustum Culling: Unreal Engine automatically culls (doesn’t render) objects outside the camera’s view frustum. Ensure your scene isn’t rendering unnecessary geometry behind the camera.
- Occlusion Culling: Objects hidden behind other opaque objects are also culled. Optimize your scene layout to maximize this effect.
- Distance Culling: Manually set “Min Draw Distance” and “Max Draw Distance” for individual Static Mesh components in their details panel to completely hide objects beyond a certain range, especially small details.
- Texture Optimization:
- Texture Streaming: Ensure texture streaming is enabled in your project settings. This loads lower-resolution versions of textures first, then higher-res ones as the camera gets closer, reducing VRAM usage.
- MipMaps: All textures should have MipMaps generated.
- Compression: Use appropriate texture compression settings (e.g., BC7 for high quality, DXT1/5 for smaller file sizes) depending on the texture type and platform.
- Resolution: Use only the necessary texture resolution. A hidden asset doesn’t need 4K textures.
- Material Complexity: Complex materials with many instructions can be performance bottlenecks. Use Material Instances to reuse base materials, and keep instruction counts as low as possible for frequently rendered materials like car paint. The “Shader Complexity” view mode (Alt+8) can help identify expensive materials.
- Lighting Optimization: While Lumen is powerful, it has a performance cost. Balance its quality settings in the Post Process Volume. Use fewer dynamic lights where possible, favoring a Sky Light and a Directional Light for ambient and sun. Avoid complex light functions if not strictly necessary.
- GPU Profiling: Use the Unreal Engine’s built-in profilers (
stat gpu,stat unit,profilegpucommands in the console) to identify performance bottlenecks. This allows you to target specific areas for optimization, ensuring your real-time rendering is efficient.
Regular profiling and iterative optimization are key to delivering high-performance automotive visualization experiences, especially when dealing with incredibly detailed 3D car models from marketplaces like 88cars3d.com.
Preparing for AR/VR and Virtual Production Workflows
Unreal Engine is at the forefront of AR/VR and Virtual Production, offering exciting possibilities for automotive applications. However, these workflows introduce specific optimization challenges and requirements.
AR/VR Optimization:
For augmented reality (AR) and virtual reality (VR) experiences, maintaining a rock-solid high frame rate (e.g., 90 FPS or higher) is non-negotiable to prevent motion sickness. This demands even more aggressive optimization:
- Poly Count: Even with Nanite, for mobile VR/AR, aggressively optimize poly counts and use efficient LODs. Nanite currently has limitations on some mobile platforms.
- Draw Calls: Minimize draw calls by combining meshes (where appropriate) and using efficient instancing.
- Material Simplicity: Simplify materials. Avoid complex shaders, transparent materials, or excessive post-processing effects.
- Forward Shading: Consider using the “Forward Shading” renderer (Project Settings > Rendering) for VR, which can be more efficient than deferred shading for some scenarios, especially with MSAA.
- Stereo Instancing: Ensure “Instanced Stereo” is enabled for VR (Project Settings > VR), which renders both eyes in a single pass, improving performance.
- Scalability: Implement robust scalability settings, allowing users to adjust quality based on their device’s performance.
Virtual Production (LED Wall) Workflows:
For cinematic virtual production using LED walls, the primary concerns are rendering at extremely high resolutions (often multiple 4K feeds simultaneously) and maintaining perfect synchronization. Key considerations include:
- NVIDIA nDisplay: Unreal Engine’s nDisplay system is central to virtual production. It manages rendering across multiple displays (LED panels) from a single or cluster of machines.
- High Performance Hardware: This workflow demands top-tier GPUs and CPUs.
- Content Optimization: While Nanite helps, the sheer pixel count means every optimization strategy must be pushed to its limit.
- Color Management: Accurate color calibration across all LED panels and cameras is critical for seamless integration.
These advanced workflows push the boundaries of real-time rendering, and meticulous planning and optimization are crucial for success with high-quality game assets like those you source for automotive projects.
Troubleshooting Common Issues and Best Practices
As you delve deeper into Unreal Engine, you’ll inevitably encounter challenges. Knowing how to troubleshoot and adhering to best practices can save significant time and frustration.
Common Issues & Solutions:
- Black/Incorrectly Shaded Meshes:
- Check Normal Maps: Ensure they are correctly imported (typically green channel flipped from some DCCs) and connected.
- Lightmap UVs: If using baked lighting, verify your meshes have valid, non-overlapping lightmap UVs (usually UV Channel 1).
- Material Assignment: Double-check that materials are correctly applied to the mesh sections.
- Lumen/Ray Tracing: Ensure these are enabled in Project Settings and Post Process Volume if you expect dynamic global illumination.
- Low Frame Rate:
- Profiling: Use
stat gpuandprofilegputo identify bottlenecks (GPU vs. CPU, materials, draw calls, shadows). - LODs/Nanite: Verify LODs are working or Nanite is enabled for high-poly meshes.
- Texture Resolutions: Reduce resolutions for distant or less critical assets.
- Lighting: Reduce dynamic lights, simplify shadows.
- Profiling: Use
- Pixelated or Blurry Textures:
- MipMaps: Ensure MipMaps are generated.
- Streaming: Check texture streaming settings.
- Texture Resolution: Verify the texture resolution is appropriate for its screen size.
- Anisotropy: Increase anisotropic filtering in texture settings or quality settings.
Best Practices:
- Version Control: Use a version control system (like Git or Perforce) from day one. This protects your work and allows easy collaboration.
- Consistent Naming Conventions: As discussed, this is paramount for project organization.
- Modular Assets: Design your 3D car models and environments with modularity in mind. This allows for easier reuse and iteration.
- Reference Material: Always use high-quality reference images and real-world examples for your lighting, materials, and overall aesthetics.
- Iterate and Experiment: Unreal Engine is built for iteration. Don’t be afraid to try different approaches to lighting, materials, or Blueprints.
- Stay Updated: The engine evolves rapidly. Keep an eye on Unreal Engine updates and community tutorials to leverage new features and best practices. The official Unreal Engine learning portal is an invaluable resource for this.
By understanding these common pitfalls and adopting professional best practices, you’ll navigate your Unreal Engine journey more smoothly and consistently produce high-quality automotive visualization projects.
Conclusion
You’ve now taken significant strides into the powerful world of Unreal Engine for automotive visualization. From setting up your project and importing high-quality 3D car models from resources like 88cars3d.com, to crafting photorealistic PBR materials, mastering real-time lighting with Lumen, and creating interactive experiences with Blueprint, you have a solid foundation.
Unreal Engine provides an unparalleled platform for bringing automotive concepts to life, whether for cinematic showcases, interactive configurators, cutting-edge games, or immersive AR/VR experiences. The combination of advanced features like Nanite, Lumen, and Sequencer, coupled with a robust optimization pipeline, empowers artists and developers to achieve stunning visual fidelity and performance in real-time.
The journey doesn’t end here; Unreal Engine is a vast and continuously evolving tool. We encourage you to continue experimenting, exploring advanced topics, and honing your skills. Utilize the vast community resources and the official Unreal Engine documentation. The power to create breathtaking real-time rendering experiences is now at your fingertips. Start building your next automotive masterpiece today!
Featured 3D Car Models
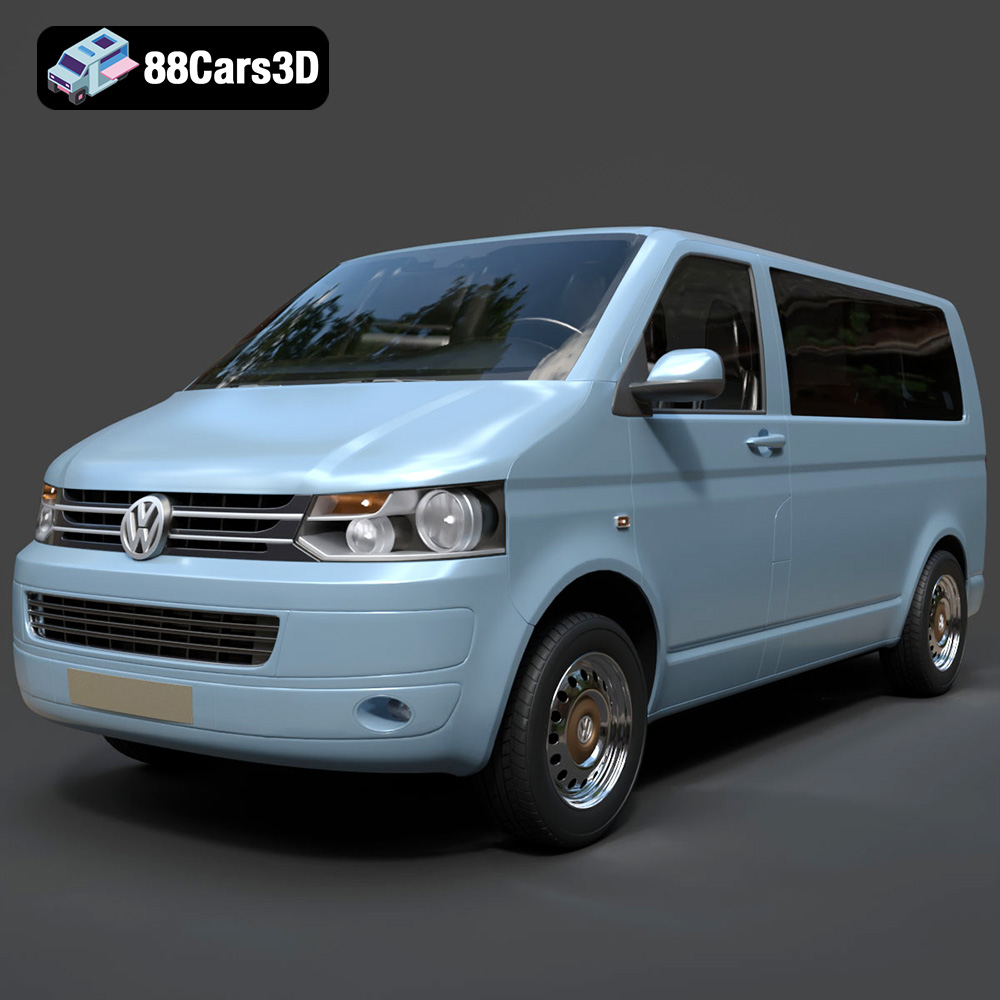
Volkswagen Transporter T5 FL 2010 3D Model
Texture: Yes
Material: Yes
Download the Volkswagen Transporter T5 FL 2010 3D Model featuring clean geometry, realistic detailing, and a fully modeled interior. Includes .blend, .fbx, .obj, .glb, .stl, .ply, .unreal, and .max formats for rendering, simulation, and game development.
Price: $22.99
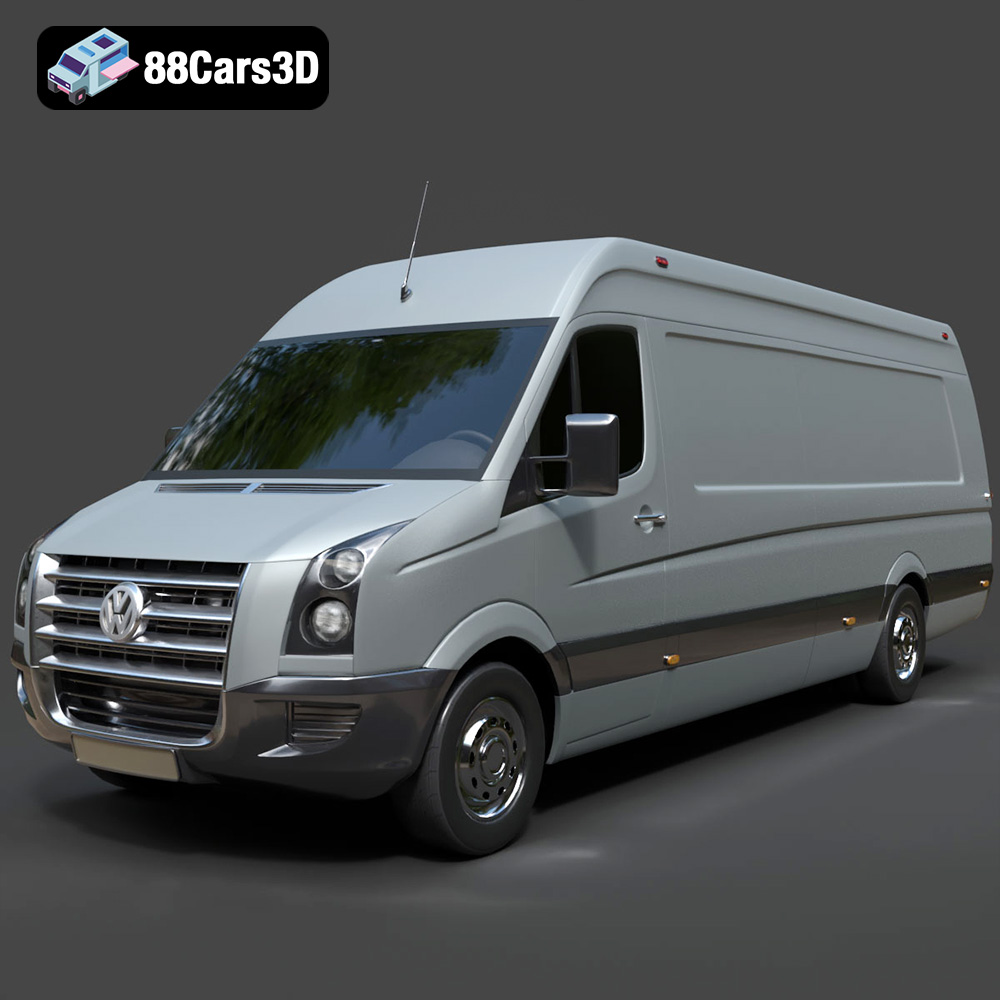
Volkswagen Crafter 2020 3D Model
Texture: Yes
Material: Yes
Download the Volkswagen Crafter 2020 3D Model featuring clean geometry, realistic detailing, and a fully modeled interior. Includes .blend, .fbx, .obj, .glb, .stl, .ply, .unreal, and .max formats for rendering, simulation, and game development.
Price: $22.99
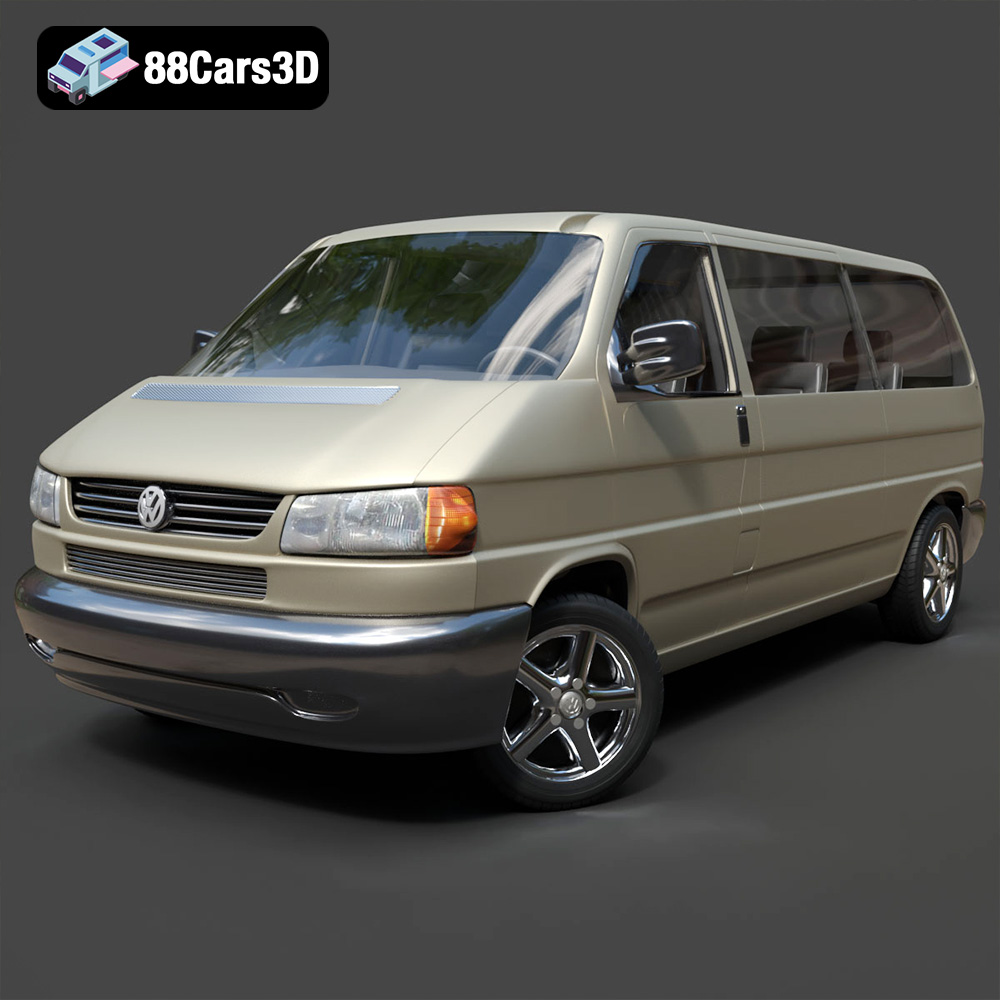
Volkswagen Caravelle 2020 3D Model
Texture: Yes
Material: Yes
Download the Volkswagen Caravelle 3D Model featuring a detailed exterior, functional interior, and optimized topology. Includes .blend, .fbx, .obj, .glb, .stl, .ply, .unreal, and .max formats for rendering, simulation, and game development.
Price: $23.99
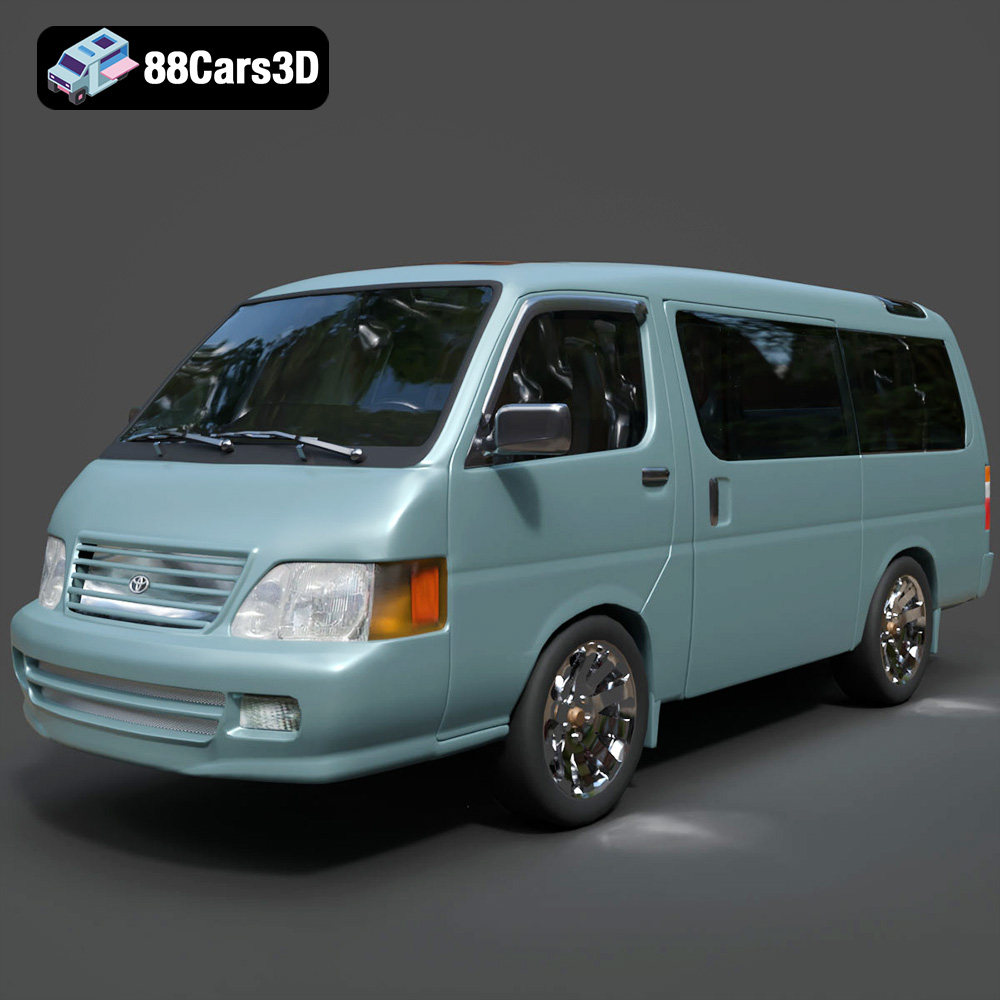
Toyota Hiace 3D Model
Texture: Yes
Material: Yes
Download the Toyota Hiace 3D Model featuring versatile design and detailed exterior. Includes .blend, .fbx, .obj, .glb, .stl, .ply, .unreal, and .max formats for rendering, simulation, and game development.
Price: $21.99
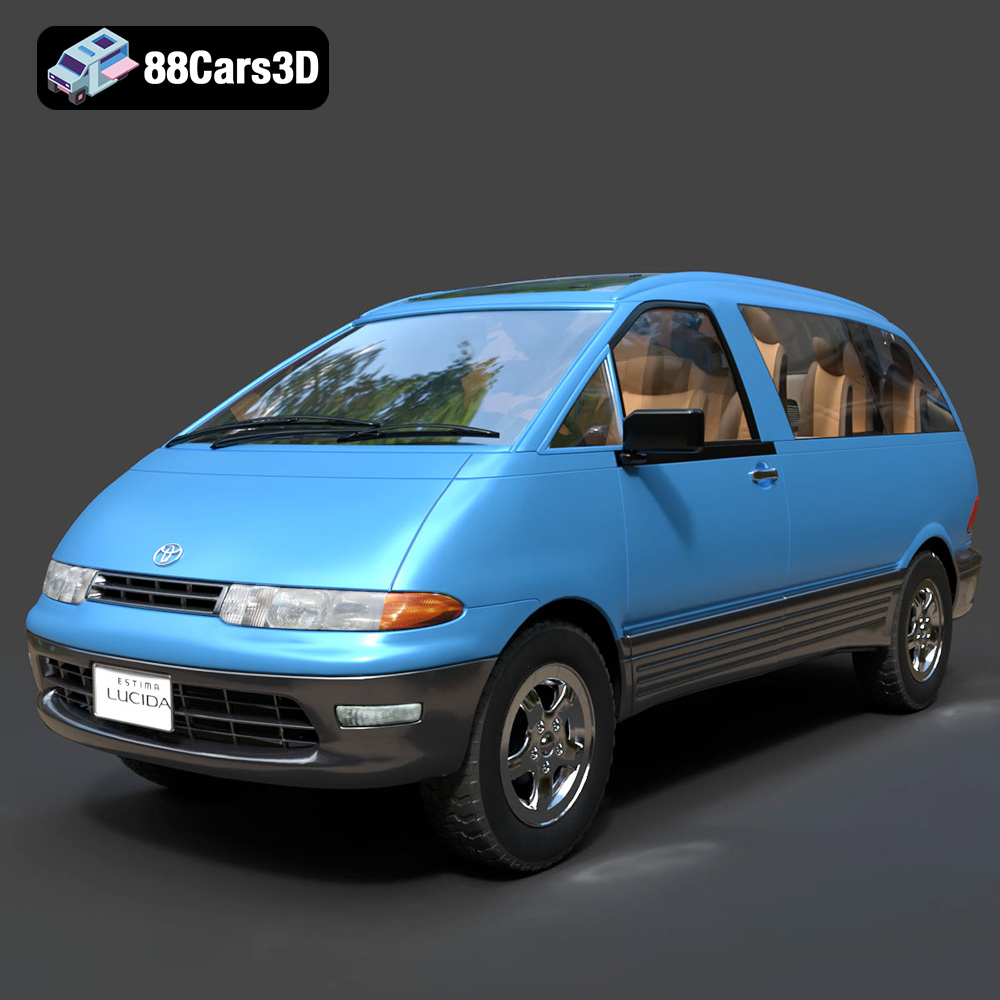
Toyota Estima Lucida 3D Model
Texture: Yes
Material: Yes
Download the Toyota Estima Lucida 3D Model featuring its iconic compact MPV design, versatile interior, and accurate exterior details. Includes .blend, .fbx, .obj, .glb, .stl, .ply, .unreal, and .max formats for rendering, simulation, and game development.
Price: $24.99

Toyota Alphard 3D Model
Texture: Yes
Material: Yes
Download the Toyota Alphard 3D Model featuring a detailed luxury minivan design with an accurate exterior and interior. Includes .blend, .fbx, .obj, .glb, .stl, .ply, .unreal, and .max formats for rendering, simulation, and game development.
Price: $21.99
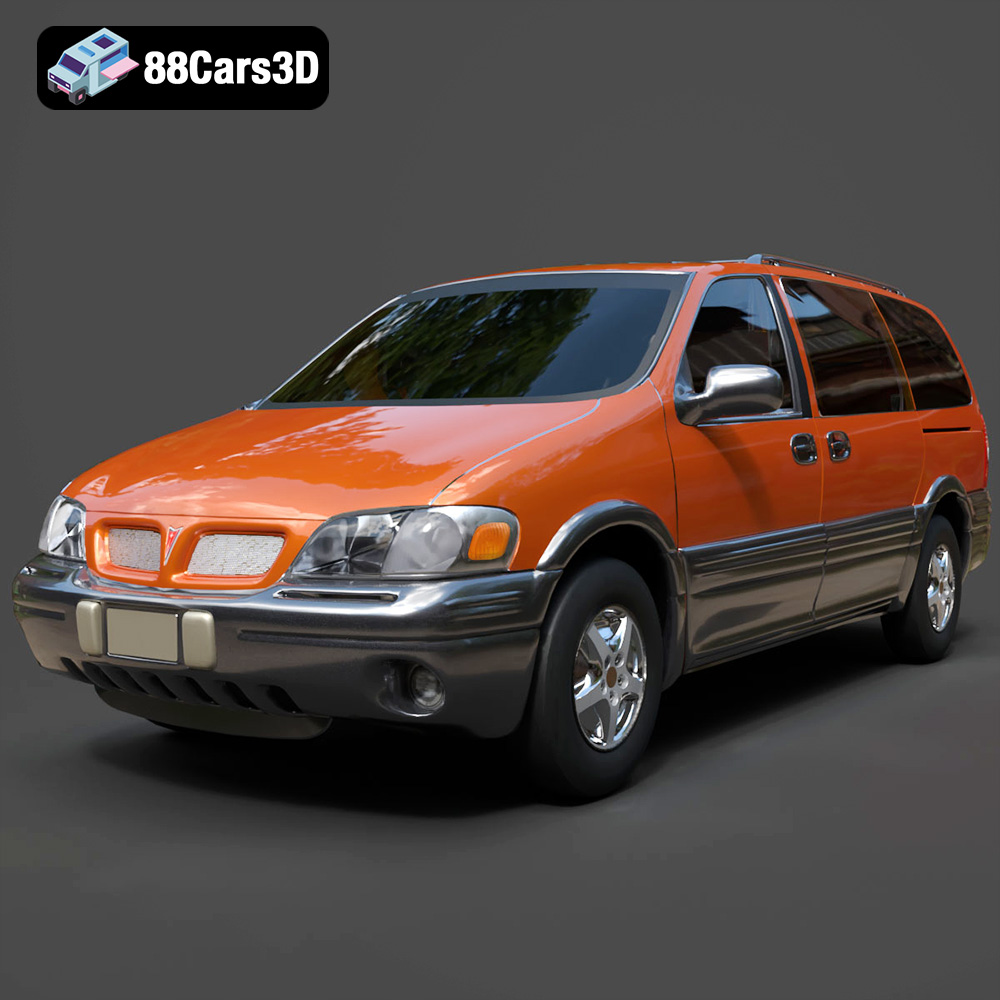
Pontiac Montana 1998 3D Model
Texture: Yes
Material: Yes
Download the Pontiac Montana 1998 3D Model featuring a detailed exterior, functional interior, and optimized mesh. Includes .blend, .fbx, .obj, .glb, .stl, .ply, .unreal, and .max formats for rendering, simulation, and game development.
Price: $21.99
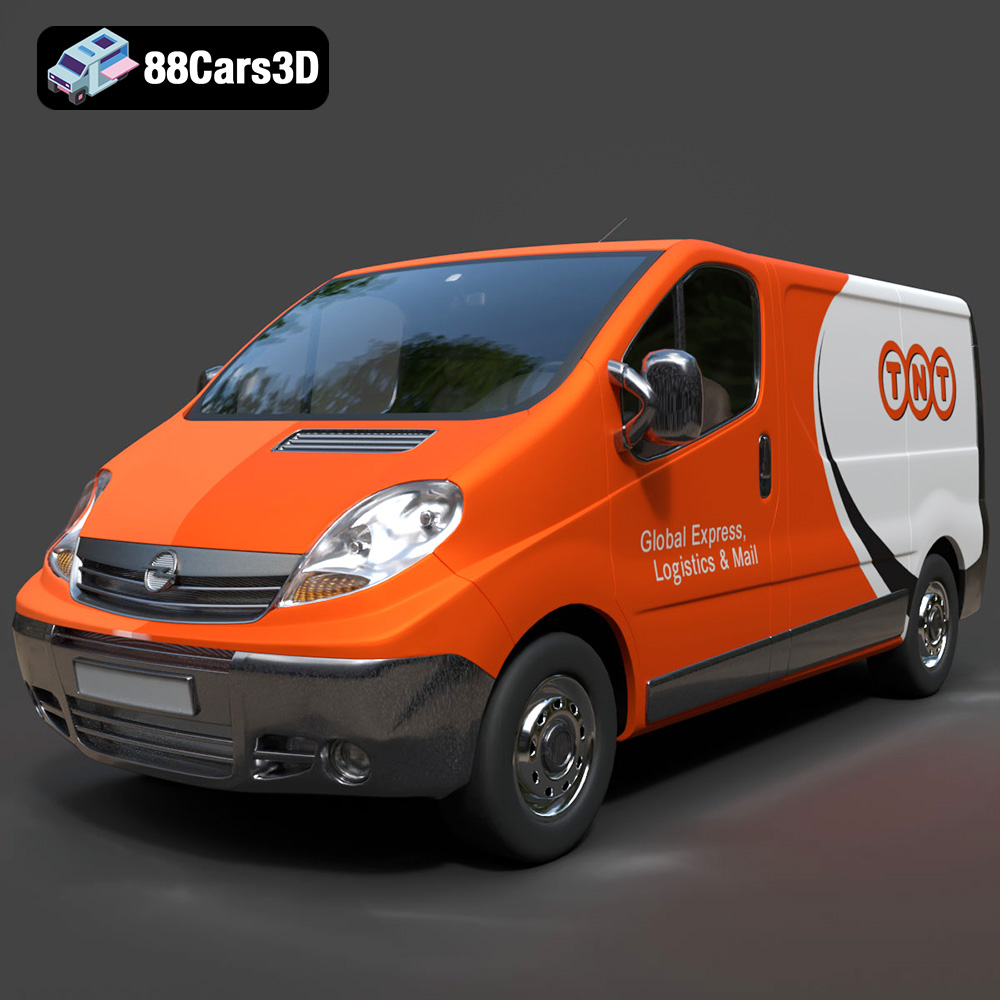
Opel Vivaro 3D Model
Texture: Yes
Material: Yes
Download the Opel Vivaro 3D Model featuring a versatile commercial van design with balanced detailing. Includes .blend, .fbx, .obj, .glb, .stl, .ply, .unreal, and .max formats for rendering, simulation, and game development.
Price: $21.99
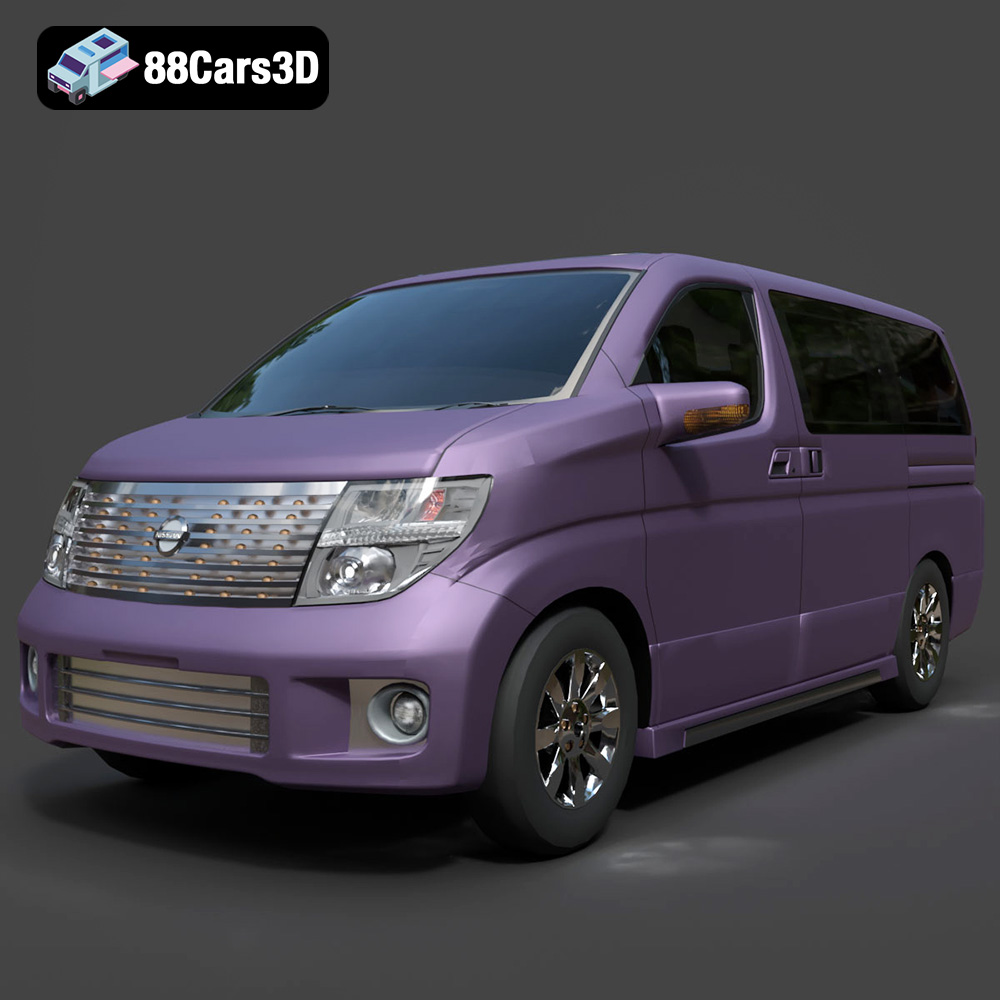
Nissan Elgrand 3D Model
Texture: Yes
Material: Yes
Download the Nissan Elgrand 3D Model featuring a versatile minivan design. Includes .blend, .fbx, .obj, .glb, .stl, .ply, .unreal, and .max formats for rendering, simulation, and game development.
Price: $21.99
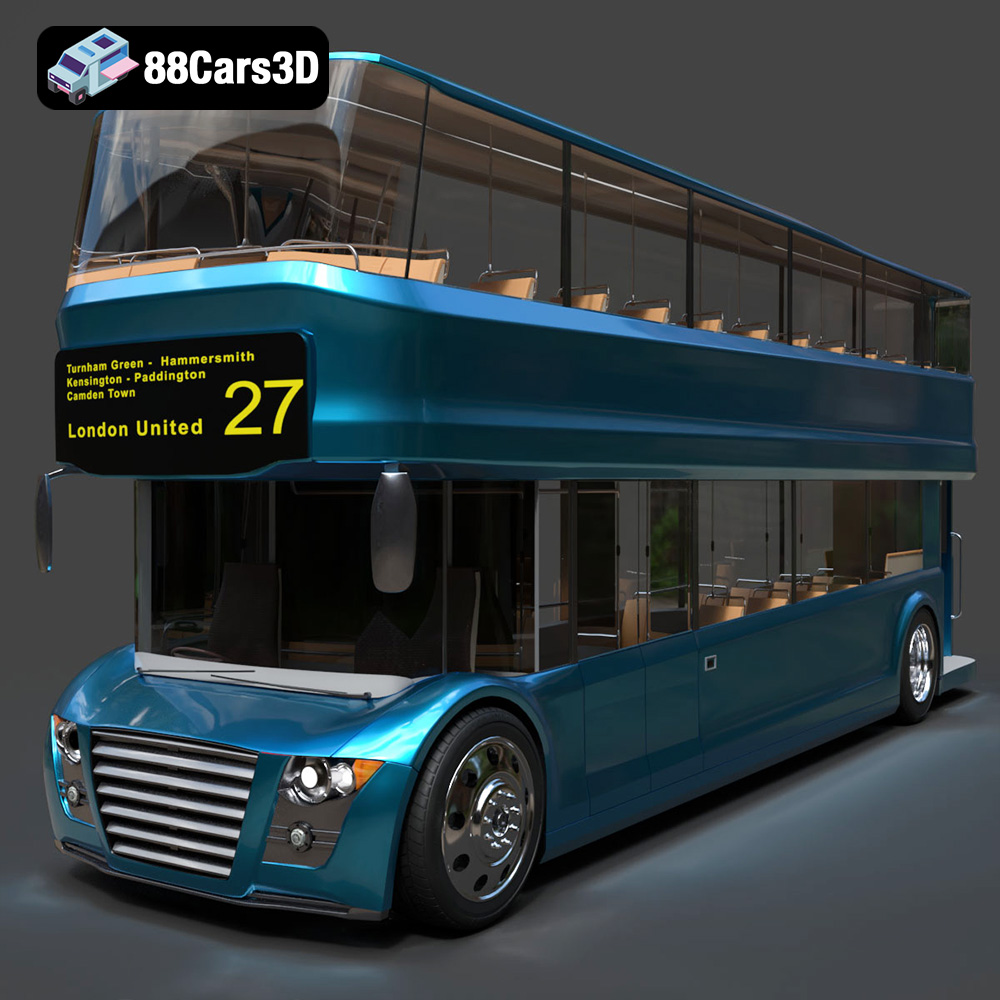
New Bus For London 3D Model
Texture: Yes
Material: Yes
Download the New Bus For London 3D Model featuring a detailed exterior and interior, optimized for rendering and animation. Includes .blend, .fbx, .obj, .glb, .stl, .ply, .unreal, and .max formats for rendering, simulation, and game development.
Price: $21.99
