

In the vibrant world of 3D modeling and visualization, where every shade, highlight, and shadow contributes to the realism of a scene, color accuracy is paramount. For automotive designers, game developers, and visualization professionals creating stunning 3D car models, achieving true-to-life colors is not just an artistic choice but a technical imperative. Yet, many artists grapple with renders that appear washed out, oversaturated, or simply different from what they envisioned, often due to a misunderstanding of color management. This struggle is particularly pronounced when dealing with the vast dynamic range inherent in realistic lighting and reflections, such as those found on a polished car body.
This comprehensive guide delves into the crucial concepts of color management within Blender, focusing on the transformative power of Filmic and its successor, AgX. We’ll demystify why colors behave the way they do on different displays, explore Blender’s sophisticated color management system, and provide actionable insights into leveraging Filmic and AgX to produce breathtakingly realistic automotive renders and visually consistent game assets. By the end of this article, you’ll possess the knowledge to confidently control your colors, ensuring your stunning 3D car models shine with unparalleled fidelity across all platforms.
Before diving into Blender-specific solutions, it’s vital to grasp why color management is not merely an optional setting but a fundamental pillar of professional 3D artistry. Imagine painstakingly crafting a magnificent 3D car model, applying exquisite PBR materials, and setting up a perfect lighting scenario, only to find the final render looks dull or oversaturated on your screen compared to your vision. This disconnect often stems from the inherent complexities of how digital colors are captured, processed, and displayed.
Our eyes perceive a vast spectrum of light intensities, far greater than what most digital displays can faithfully reproduce. This discrepancy leads to a phenomenon known as “dynamic range compression,” where bright highlights lose detail and dark shadows become crushed. Without proper color management, renderers struggle to translate the massive range of light values calculated in the 3D scene into the limited range of your display, resulting in clipped highlights (areas that are pure white with no detail) and flattened shadows (areas that are pure black). This issue is particularly critical when aiming for photorealism, as accurate light response is key to conveying the true essence of materials like car paint, chrome, and glass.
Color management provides a standardized framework to handle these transformations, ensuring that colors remain consistent and accurate from your 3D software through rendering, compositing, and final display. It’s about establishing a common language for color across diverse devices, guaranteeing that the vibrant red of your sports car model appears the same on your monitor as it does on a client’s screen or in a game engine.
To understand why color management is crucial, we must first confront the concepts of gamut, gamma, and the inherent limitations of display technology. Gamut refers to the range of colors a device can produce or capture. Different devices (cameras, monitors, printers) have different gamuts, meaning they can reproduce varying sets of colors. When you move an image between devices with different gamuts without proper conversion, colors can shift, become desaturated, or appear inaccurate.
Gamma, on the other hand, describes the non-linear relationship between the numerical value of a pixel and its perceived brightness. Human vision doesn’t perceive light linearly; we’re more sensitive to changes in darker tones than in brighter ones. To account for this, displays apply a gamma curve (typically around 2.2 for sRGB monitors) to the linear light values from a rendering engine. If your renderer outputs linear data and your display expects gamma-corrected data without a proper conversion, your image will look too dark. Conversely, if your renderer applies a gamma correction that is then re-applied by the display, your image will look too bright and washed out.
Most consumer monitors are designed to display images in the sRGB color space, which has a relatively narrow dynamic range. Modern 3D rendering, however, simulates light in a physically accurate, high-dynamic-range (HDR) manner. The challenge lies in compressing this vast HDR data into the limited sRGB range of your display without losing critical detail or introducing unwanted visual artifacts. This is where tools like Filmic and AgX become indispensable.
A cornerstone of accurate color management in 3D rendering is the linear workflow. In the real world, light behaves linearly; doubling the amount of light doubles the brightness. However, as discussed, images are often stored and displayed non-linearly (gamma-corrected) to optimize for human perception and display technology. A linear workflow ensures that all lighting calculations, material interactions, and blending operations within your 3D renderer occur in a linear light space, mirroring physical reality.
When you use textures, especially diffuse maps, they are typically saved in an sRGB color space (i.e., gamma-corrected). For these textures to interact correctly with linear light calculations in the scene, they must first be “de-gamma-corrected” back into linear space by the renderer. Similarly, textures that represent linear data, such as normal maps, displacement maps, or roughness maps (often referred to as “utility data”), should be explicitly marked as ‘Non-Color Data’ so that Blender does not apply any unwanted gamma correction to them. By operating in a linear light space for all scene calculations, we prevent “double gamma correction” and ensure that light behaves predictably and physically accurately. The final image is then tone-mapped and gamma-corrected for display, which is where Filmic and AgX come into play.
Blender, like other professional 3D software, incorporates a robust color management system designed to simplify the complex task of maintaining color accuracy. You can access these critical settings in the Properties Editor under the Scene tab, specifically within the Color Management panel. This panel serves as your central hub for dictating how Blender interprets and displays colors, from your source textures to your final rendered output.
By default, Blender is configured for a linear workflow, with its internal rendering engine (Cycles and Eevee) performing calculations in a high-dynamic-range linear color space. However, this internal linearity needs to be translated into a viewable format for your monitor, which typically operates in the sRGB color space. The Color Management panel offers crucial controls for this translation, allowing you to control the ‘View Transform,’ ‘Look,’ ‘Exposure,’ and ‘Gamma,’ among other settings. Understanding these controls is key to unlocking the full potential of your renders, especially for detailed subjects like 3D car models where subtle reflections and material responses are critical to realism. For more in-depth information on these settings, the official Blender 4.4 documentation on Color Management is an excellent resource.
At the heart of Blender’s color management is the concept of a Scene Linear working space. This is the color space in which all rendering calculations are performed, designed to be physically accurate with an infinite dynamic range. When you render an image, Blender generates this raw, high-dynamic-range data.
However, your textures and other image inputs come in various color spaces. Blender allows you to specify the Color Space for each image texture node. For most color textures (e.g., diffuse maps, albedo maps), you should leave the Color Space set to sRGB. This tells Blender to automatically convert the texture from sRGB to the linear Scene Linear space before using it in calculations. For non-color data, such as normal maps, roughness maps, metallic maps, displacement maps, or alpha masks, it is absolutely critical to set their Color Space to Non-Color Data. This ensures that no unwanted gamma correction is applied to these maps, preserving their integrity as linear data representing surface properties.
The View Transform setting is arguably the most impactful control for how your renders appear. It dictates how Blender takes the raw Scene Linear data and transforms it for display on your monitor. The default ‘Standard’ View Transform performs a basic sRGB gamma correction, which often leads to clipped highlights and a generally flat appearance, particularly in scenes with bright light sources or highly reflective surfaces like those on a car. This is where ‘Filmic’ and ‘AgX’ step in as game-changers. Beyond the View Transform, the ‘Look’ setting provides further artistic control, applying specific tonal adjustments on top of your chosen View Transform, allowing you to fine-tune contrast and saturation without altering the underlying linear data.
Blender’s sophisticated color management capabilities are powered by OpenColorIO (OCIO), an open-source color management system developed by Sony Pictures Imageworks. OCIO provides a robust, production-ready framework for maintaining consistent color across diverse applications and pipelines. It essentially acts as the engine behind Blender’s Color Management panel, providing the underlying profiles and transforms that enable accurate color conversions.
By utilizing OCIO, Blender can support a wide range of color spaces and transforms, making it compatible with industry-standard workflows. This means that if you’re working on a project that involves multiple software packages—say, modeling a car in Blender, texturing in Substance Painter, and compositing in Nuke—OCIO ensures that the colors you see in Blender will translate predictably to other OCIO-compliant applications. This interoperability is crucial for collaborative projects and for maintaining visual integrity across different stages of a production pipeline. The flexibility of OCIO also allows for the integration of custom color configurations, such as ACES (Academy Color Encoding System), which is becoming increasingly popular in high-end visual effects and animation for its extremely wide gamut and scene-referred linear working space. This foundation allows Blender to deliver professional-grade color accuracy, essential for showcasing intricate details of high-quality assets found on platforms like 88cars3d.com.
For many years, 3D artists struggled with the limitations of the default sRGB view transform. While physically accurate in its direct application, it often resulted in renders that looked “digital” – characterized by harsh transitions from light to dark, blown-out highlights lacking detail, and murky, crushed shadows. This was particularly frustrating when trying to achieve photographic realism, especially for complex surfaces like those found on 3D car models with their intricate reflections and high dynamic range highlights. The introduction of Filmic Blender marked a significant paradigm shift, offering a more nuanced and “cinematic” approach to tone mapping that greatly enhanced the aesthetic quality of renders.
Filmic is not a color space in itself, but a View Transform that intelligently compresses the high dynamic range of your scene’s linear light data into the limited sRGB gamut of your display in a perceptually pleasing way. It uses a logarithmic tone mapping curve, similar to how photographic film reacts to light, hence its name. This allows Filmic to retain significantly more detail in both the bright highlights and the deep shadows, providing a smoother, more natural rolloff from light to dark. Instead of clipping bright areas to pure white, Filmic gracefully desaturates them towards white, preserving hue and luminance information that would otherwise be lost. This results in a much more organic and photographic look, making it an indispensable tool for anyone aiming for professional-grade automotive rendering.
The default ‘Standard’ sRGB View Transform in Blender applies a straightforward inverse gamma correction to linear scene data. While mathematically correct for display, this approach has a critical flaw: it assumes that your display has the dynamic range to represent the full extent of your scene’s light values. In reality, most sRGB monitors can only display a finite range of brightness. When the light values in your scene exceed this range (which happens very easily with realistic light sources), the ‘Standard’ transform simply clips them, resulting in pure white areas with no discernible detail. Similarly, very dark areas can be clipped to pure black.
Consider a glossy car paint material reflecting a bright sun or an intense studio light. With the ‘Standard’ transform, the reflections in the brightest areas would likely blow out to a uniform white blob, losing all the subtle color and shape information. Filmic addresses this by employing a non-linear compression. It maps the extremely wide range of light values from your render (potentially thousands of stops of exposure) into the much narrower range of your sRGB display (typically around 8 stops). This compression isn’t simply a blunt chop; it’s a sophisticated curve that preserves more detail in the extremes. Specifically, it protects highlights by smoothly desaturating them towards white rather than clipping them, maintaining the visual integrity of colors even at very high intensities. This preservation of detail in reflections and highlights is paramount for showcasing the intricate designs and luxurious finishes of 3D car models.
Implementing Filmic in your Blender workflow is straightforward but incredibly impactful. Navigate to the Properties Editor > Scene > Color Management panel. Under ‘View Transform,’ switch from ‘Standard’ to ‘Filmic.’ You will immediately notice a difference in your viewport and renders, often appearing less harsh and more natural.
Beyond the base Filmic transform, you have access to a range of ‘Looks‘ which are pre-configured tonal adjustments designed to further enhance the aesthetic. These ‘Looks’ apply an additional curve on top of the Filmic transform, offering different contrast levels and stylistic choices. Common ‘Looks’ include:
Experimenting with these ‘Looks’ is crucial for finding the right mood and impact for your automotive renders. For instance, a ‘High Contrast’ look might beautifully accentuate the sharp lines and reflections of a sports car, while a ‘Medium Contrast’ might be better suited for a more understated studio render. Remember, these ‘Looks’ are non-destructive and only affect the display; your underlying render data remains in high-dynamic-range linear space, providing maximum flexibility for post-processing in applications like Photoshop or Nuke when working with EXR or OpenEXR files. This ability to capture and manipulate such a wide range of light is vital for creating truly professional visualization.
While Filmic brought a much-needed improvement to Blender’s tone mapping, the pursuit of even greater realism and accuracy continued. The photographic community and rendering experts noticed certain nuances in Filmic’s behavior, particularly when dealing with extremely bright light sources. This led to the development of AgX, a newer View Transform that builds upon Filmic’s principles but introduces further refinements to achieve an even more natural and perceptually accurate representation of high dynamic range scenes. AgX aims to address some of the subtle limitations of Filmic, pushing the boundaries of what is possible in automotive rendering and visualization.
AgX, standing for “Another Great eXposure,” is a result of meticulous research into how light behaves and how cameras perceive it, especially when pushed to their limits. It was designed to offer a “truer” representation of light, characterized by an even softer rolloff in highlights and a more neutral handling of colors in very bright regions. For artists working on detailed 3D car models, where the subtle nuances of paint reflectivity, chrome glints, and headlight flares are critical, AgX provides an unprecedented level of fidelity. It ensures that extreme highlights, instead of desaturating towards white with a slight yellow or green tint (a known characteristic of Filmic), instead gracefully desaturate towards a more neutral, spectral white, mirroring how light truly behaves.
Despite its significant advantages, Filmic did exhibit some specific characteristics that AgX sought to refine. One common observation with Filmic, particularly in very intense highlights, was a tendency for colors to desaturate with a slight hue shift. Bright reds might lean towards yellow, and blues could shift towards cyan before becoming pure white. While often subtle, this could sometimes detract from the absolute color accuracy, especially when replicating specific real-world materials or brand colors on automotive designs.
AgX directly tackles this challenge by employing a more sophisticated tone mapping curve that minimizes these unwanted hue shifts. It maintains color neutrality throughout the entire dynamic range, ensuring that even extremely bright areas desaturate towards a purer white without introducing artificial color casts. This means that the vibrant metallic flake of a car paint will retain its intended hue even in the brightest specular reflections. Furthermore, AgX offers an even gentler rolloff in the highlights, allowing for greater detail preservation in overexposed areas. This results in a more film-like and organic appearance, where the transition from light to dark feels incredibly smooth and natural, making it an excellent choice for achieving photorealistic PBR materials on your vehicle models.
To experience the enhanced realism of AgX, you’ll first need to ensure you have a Blender version that supports it (Blender 3.6 and later typically include AgX as part of the default OCIO configuration). Similar to Filmic, you’ll find AgX in the Properties Editor > Scene > Color Management panel. Simply change your ‘View Transform’ from ‘Filmic’ to ‘AgX‘.
Upon switching, you might immediately notice that your scene appears slightly less contrasty than with Filmic, and highlights seem to retain even more detail, with a cleaner desaturation. AgX also comes with its own set of ‘Looks’ which, similar to Filmic’s, allow for further artistic control over contrast and overall tonal response. Common AgX ‘Looks’ include:
When working on automotive rendering, AgX’s ability to handle extreme reflections and bright light sources with such grace is a huge advantage. It prevents clipping in challenging areas like chrome trim, headlights, and highly reflective paint, allowing the subtle material nuances to truly shine. For instance, the intricate reflections on a car’s windshield or the intricate patterns in a carbon fiber weave will be rendered with exceptional clarity and color accuracy. As with any View Transform, it’s recommended to adjust your scene’s lighting and exposure with AgX enabled, as it provides the most accurate representation of your final output. This meticulous approach to color ensures that models sourced from or developed for platforms like 88cars3d.com meet the highest standards of visual quality.
Applying color management principles effectively is where theory translates into stunning visuals. For those specializing in 3D car models, whether for high-end cinematic renders or optimized game assets, a disciplined workflow is essential. Proper color management ensures that the effort put into modeling, UV mapping, and creating PBR materials is fully realized in the final output, preventing countless hours of frustrating adjustments later on. This section will guide you through setting up Blender for optimal color fidelity in your automotive projects and discuss critical considerations for exporting assets with consistent color for various applications, including AR/VR and traditional game development.
Achieving photorealistic automotive rendering begins with a solid color management foundation in Blender. Here’s a step-by-step workflow:
The journey of a 3D car model often extends beyond static renders into interactive environments like game engines or AR/VR applications. Maintaining color consistency during this transition is crucial for ensuring your assets look as intended. Game engines like Unity and Unreal Engine also employ their own color management systems, and understanding the interplay is key.
While Filmic and AgX provide excellent default solutions for color management in Blender, the journey towards absolute color fidelity often involves more advanced considerations. Understanding these can elevate your automotive rendering to professional-grade levels, especially when dealing with complex pipelines, specific client requirements, or troubleshooting unexpected color shifts. This section delves into integrating ACES workflows and common pitfalls that artists encounter, offering solutions to maintain consistent and accurate color throughout your projects.
The Academy Color Encoding System (ACES) is an industry-standard, free, open, device-independent color management system that is rapidly gaining traction in high-end film, television, and animation production. ACES offers an extremely wide color gamut and a scene-referred linear working space, designed to preserve the full spectral and dynamic range of imagery from creation to archive. For artists creating ultra-realistic 3D car models for feature films or advanced visualization, integrating an ACES workflow into Blender can offer unparalleled color accuracy and interoperability across a complex pipeline.
Implementing ACES in Blender typically involves replacing Blender’s default OCIO configuration with an ACES OCIO configuration. This custom configuration provides the necessary ACES color spaces and transforms (like ACEScg for the rendering space, and various ODTs – Output Device Transforms – for display). Once enabled, your Blender scene would operate within the ACEScg color space, and your textures would be converted into ACEScg upon import. This ensures that every stage of your creative process is rooted in a robust, industry-standard color science. The primary advantage of ACES is its ability to future-proof your assets and ensure absolute consistency, regardless of the display technology or delivery platform. However, it requires a deeper understanding of color science and a commitment to maintaining an ACES-compliant pipeline across all software. While not strictly necessary for every project, for the highest stakes visualization and film work, ACES represents the pinnacle of color management, providing a framework where the subtle metallic flake of a car paint or the specific hue of a brand logo is preserved with extreme precision.
Even with advanced color management systems, artists can still encounter issues. Here are some common pitfalls and how to navigate them:
By diligently avoiding these common pitfalls and embracing the full potential of Blender’s color management system, artists can consistently produce visually stunning and color-accurate automotive renders and game assets, ensuring that the incredible detail found in high-quality models from platforms like 88cars3d.com translates perfectly to any screen or medium.
Navigating the intricate world of color management might seem daunting at first, but for any 3D artist committed to excellence, particularly those specializing in photorealistic 3D car models and compelling automotive rendering, it is an indispensable skill. We’ve journeyed from understanding the fundamental challenges of display limitations and gamma to harnessing the advanced capabilities of Blender’s color management system, including the transformative View Transforms of Filmic and AgX. These tools are not just technical checkboxes; they are the keys to unlocking a higher level of realism and visual consistency in your work.
By adopting a disciplined linear workflow, correctly assigning color spaces to your textures, and thoughtfully utilizing Filmic or AgX, you gain unprecedented control over the dynamic range and tonal qualities of your renders. This ensures that the intricate reflections on a car’s metallic paint, the subtle textures of its interior, and the vibrant hues of its bodywork are reproduced with unparalleled fidelity, translating your artistic vision into stunning reality. Whether you’re creating assets for a cutting-edge game, a high-fidelity AR/VR experience, or a client visualization, robust color management guarantees your work stands out.
The journey to mastering color management is ongoing, but with the insights and workflows discussed here, you are well-equipped to elevate your projects. Experiment with different ‘Looks,’ understand the subtle differences between Filmic and AgX, and always prioritize correct texture color space assignment. By integrating these practices, your 3D car models will not only look phenomenal in Blender but will maintain their visual integrity across all stages of production and on every display. For those seeking to start with high-quality foundational assets, remember that platforms like 88cars3d.com offer meticulously crafted 3D car models that are ideal for immediate integration into your expertly color-managed projects.
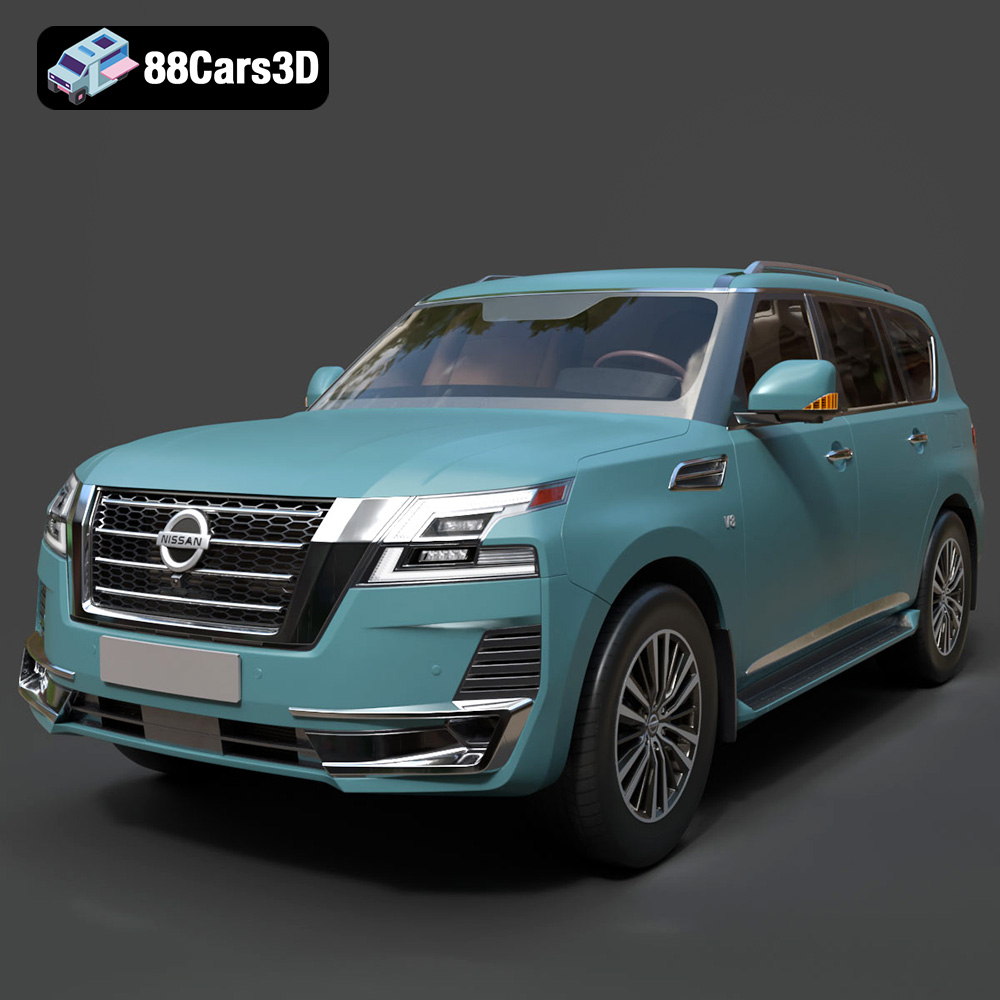
Texture: Yes | Material: Yes
Download the highly detailed, game-ready Nissan Patrol 2021 3D Model. Features signature V-motion grille, realistic exterior detailing, and a fully rendered luxury interior. Includes .blend, .fbx, .obj, .glb, .stl, .ply, .unreal, and .max formats for game development, AR/VR, and rendering.
Price: $297.99
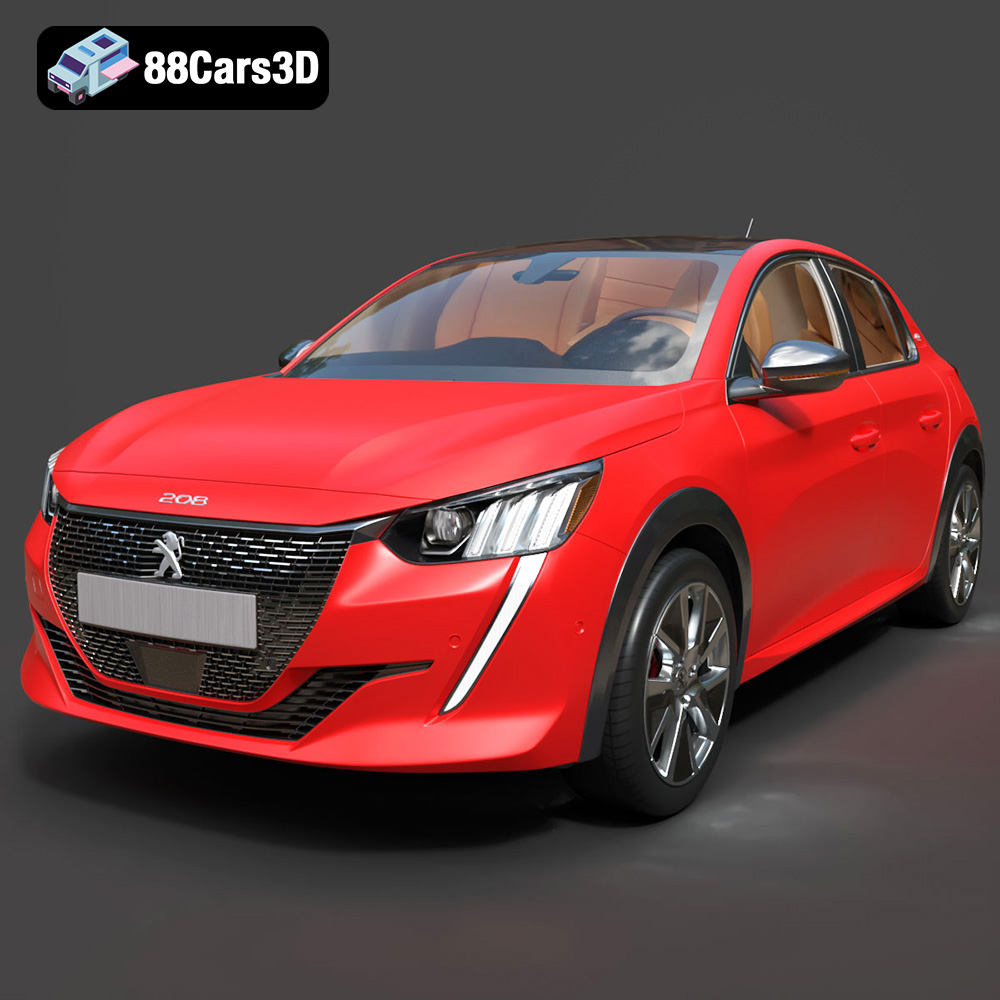
Texture: Yes | Material: Yes
Download the highly detailed, game-ready Peugeot e-208 2020 3D Model. Features 3-claw LED lighting, dynamic body geometry, and a fully detailed i-Cockpit interior. Includes .blend, .fbx, .obj, .glb, .stl, .ply, .unreal, and .max formats for game development, AR/VR, and rendering.
Price: $224.00
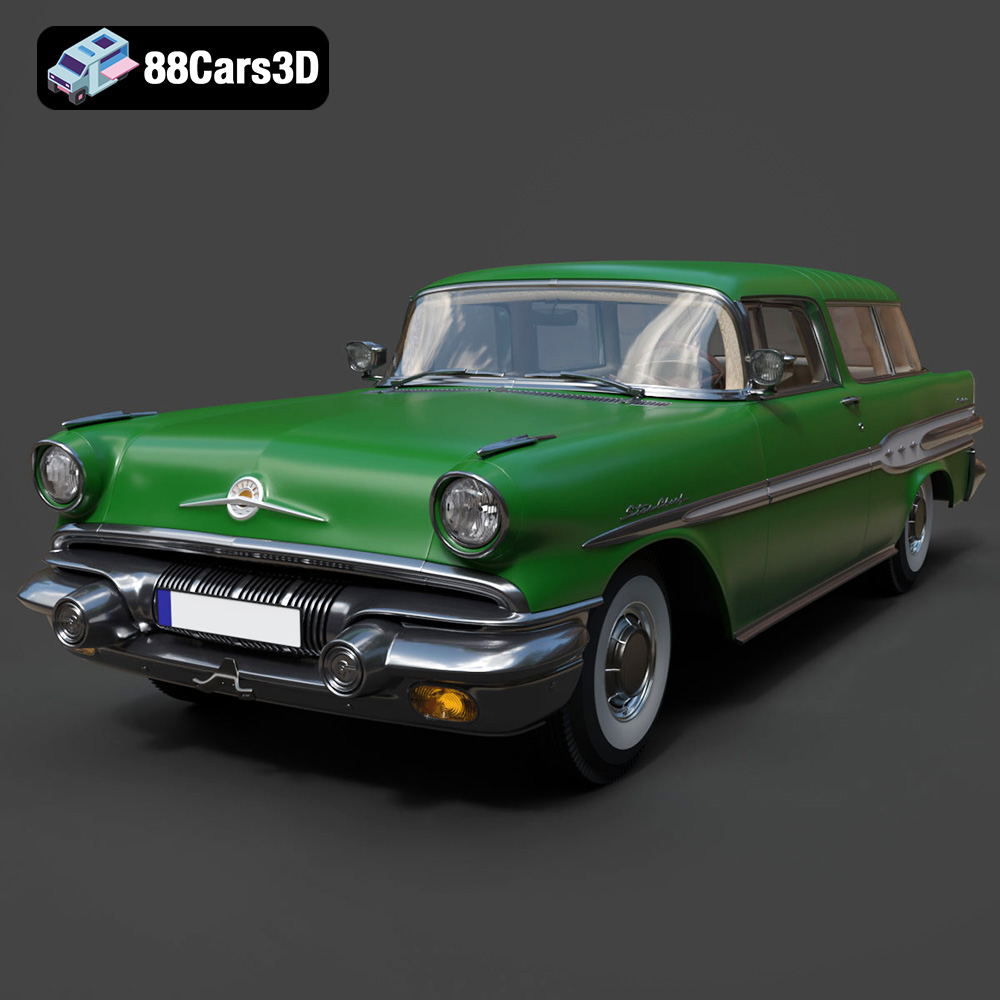
Texture: Yes | Material: Yes
Download the highly detailed, game-ready Pontiac Star Chief Custom Safari 2-door 1957 3D Model. Features classic 1950s two-door wagon bodywork, iconic chrome tail fins, and realistic interior detailing. Includes .blend, .fbx, .obj, .glb, .stl, .ply, .unreal, and .max formats for game development, AR/VR, and rendering.
Price: $203.50
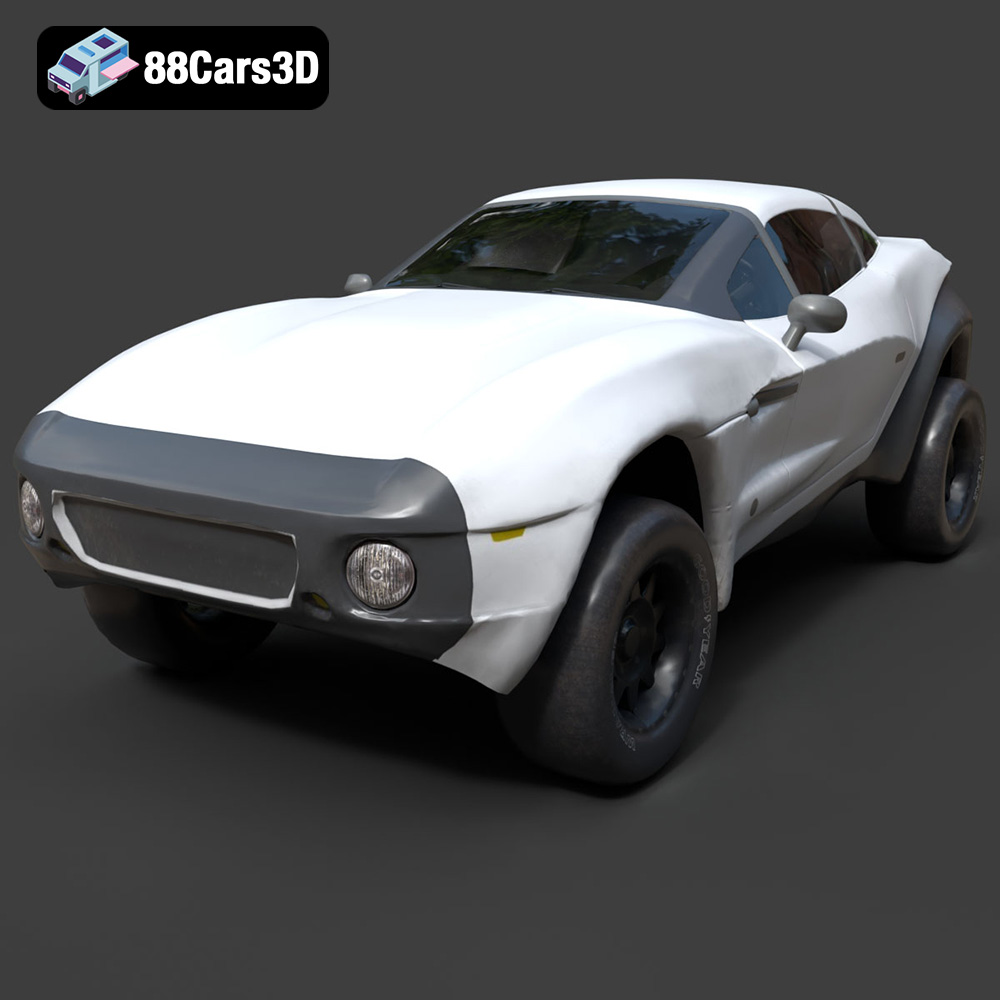
Texture: Yes | Material: Yes
Download the highly detailed, game-ready Local Motors Rally Fighter 3D Model. Features aggressive off-road long-travel suspension, detailed interior cockpit, and high-clearance body styling. Includes .blend, .fbx, .obj, .glb, .stl, .ply, .unreal, and .max formats for game development, AR/VR, and rendering.
Price: $99.99
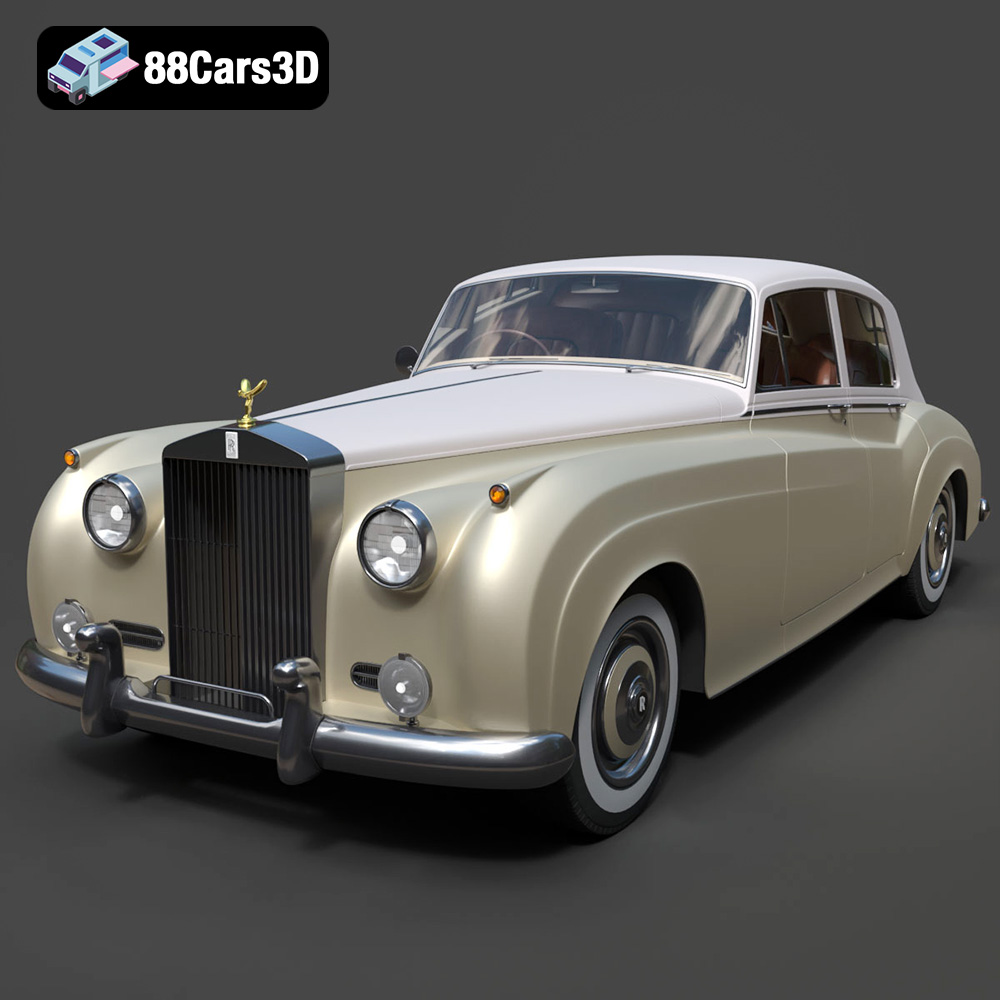
Texture: Yes | Material: Yes
Download the highly detailed, game-ready Rolls-Royce Silver Cloud II 1959 3D Model. Features classic chrome radiator grille, iconic Spirit of Ecstasy ornament, and elegant two-tone bodylines. Includes .blend, .fbx, .obj, .glb, .stl, .ply, .unreal, and .max formats for game development, AR/VR, and rendering.
Price: $201.00

Texture: Yes | Material: Yes
Download the highly detailed, game-ready Tactical Drone 3D Model. Features rugged military chassis, multi-rotor propulsion, and integrated optical sensor array. Includes .blend, .fbx, .obj, .glb, .stl, .ply, .unreal, and .max formats for game development, AR/VR, and rendering.
Price: $99.99

Texture: Yes | Material: Yes
Download the highly detailed, game-ready Tesla Model S Plaid 2023 3D Model. Features ultra-sleek aerodynamic proportions, distinctive Yoke interior layout, and realistic lighting graphics. Includes .blend, .fbx, .obj, .glb, .stl, .ply, .unreal, and .max formats for game development, AR/VR, and rendering.
Price: $120.50
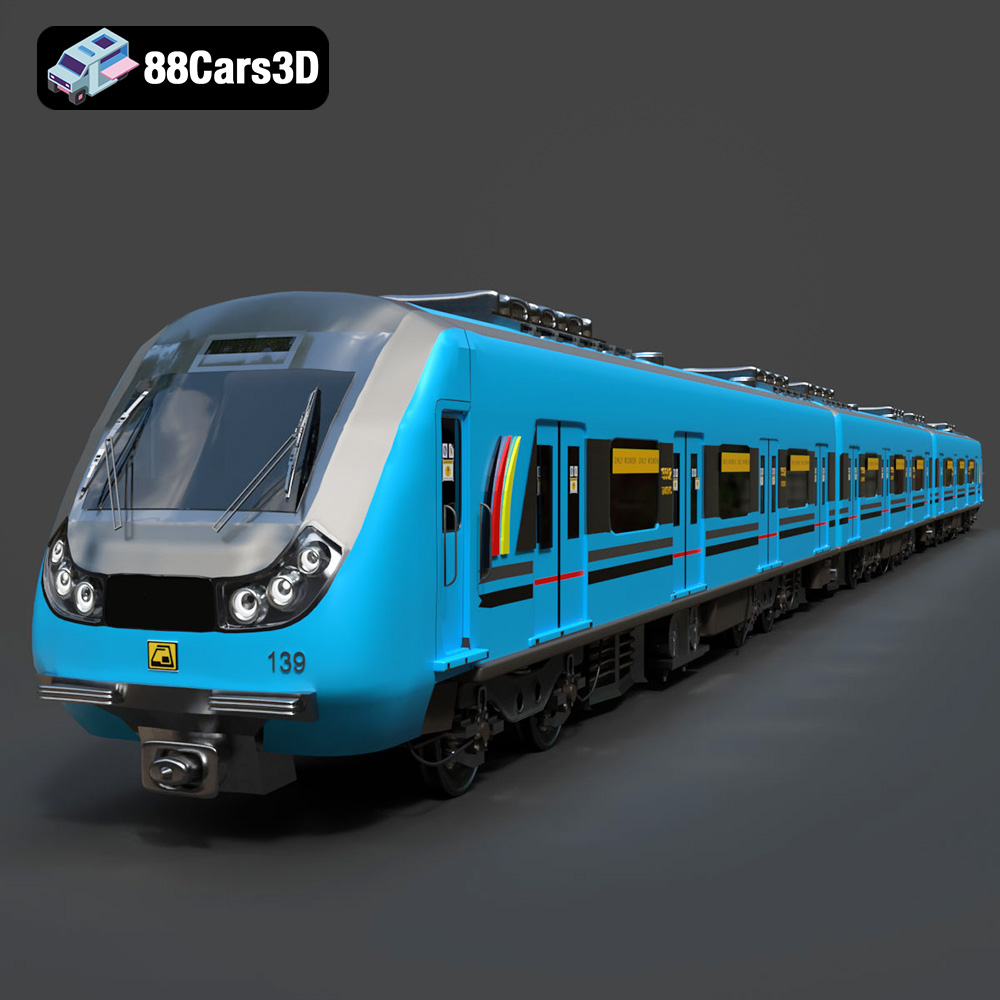
Texture: Yes | Material: Yes
Download the highly detailed, game-ready Metro Tran 2016 3D Model. Features modern aerodynamic bodywork, detailed passenger interior, and realistic bogie assemblies. Includes .blend, .fbx, .obj, .glb, .stl, .ply, .unreal, and .max formats for game development, AR/VR, and rendering.
Price: $203.99
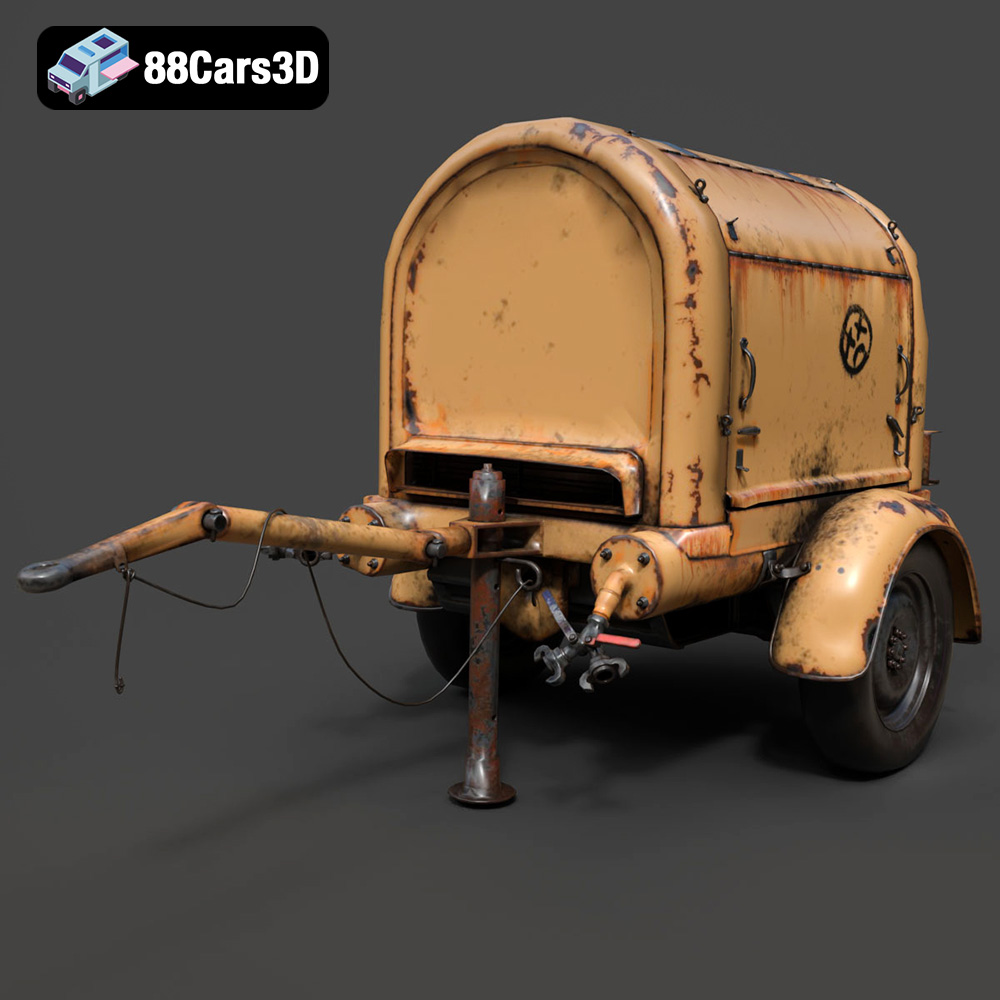
Texture: Yes | Material: Yes
Download the highly detailed, game-ready Diesel Air Compressor 3D Model. Features rugged towable chassis, detailed diesel engine housing, and realistic mechanical components. Includes .blend, .fbx, .obj, .glb, .stl, .ply, .unreal, and .max formats for game development, AR/VR, and rendering.
Price: $99.99
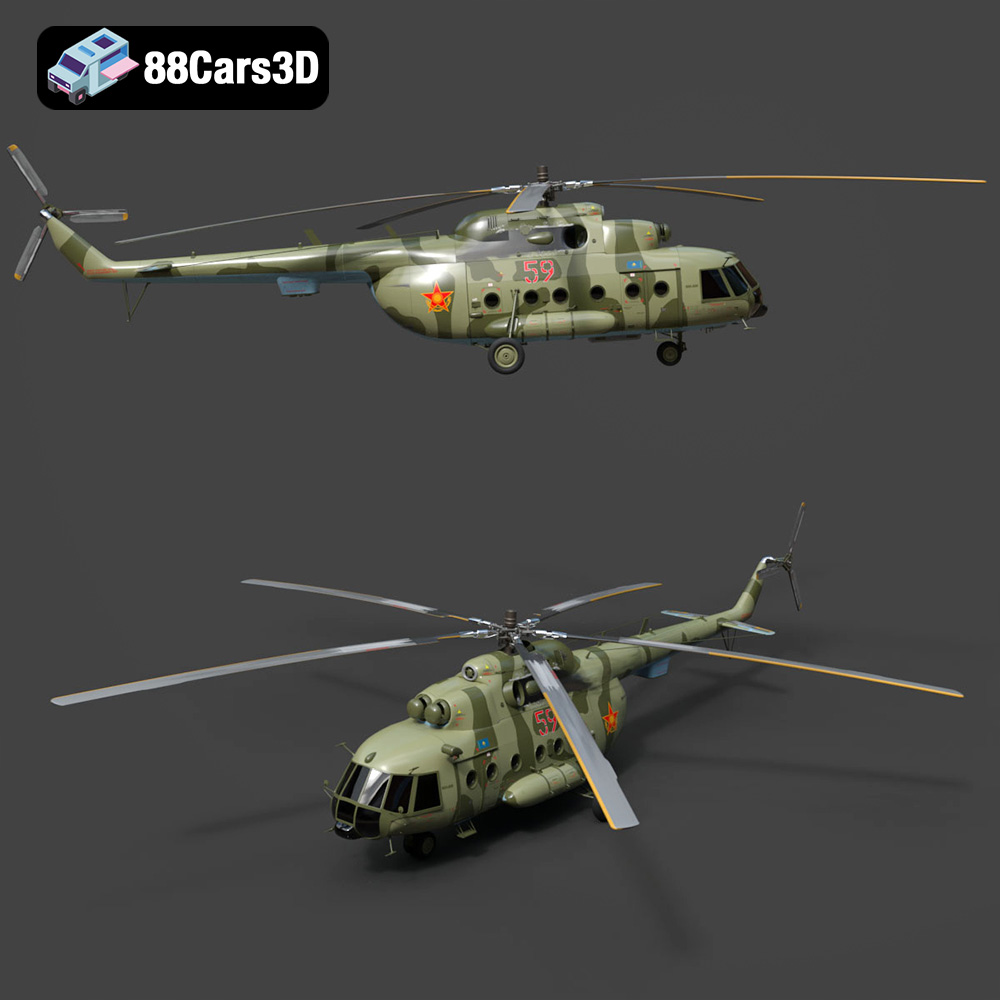
Texture: Yes | Material: Yes
Download the highly detailed, game-ready Mil Mi-8 Military Helicopter 3D Model. Features authentic five-blade main rotor assembly, detailed military camouflage textures, and realistic airframe geometry. Includes .blend, .fbx, .obj, .glb, .stl, .ply, .unreal, and .max formats for game development, AR/VR, and rendering.
Price: $109.99
