

In the high-octane world of game development, realistic and high-performance 3D car models are crucial for creating immersive experiences. Whether you’re crafting a sprawling open-world racer, a detailed architectural visualization, or an interactive AR/VR experience, the quality and optimization of your automotive assets can make or break the final product. While stunning visual fidelity is often the primary goal, equally important is ensuring these complex models perform seamlessly within the constraints of real-time game engines like Unity and Unreal Engine. Without proper optimization, even the most beautiful car model can cripple frame rates, leading to a frustrating user experience.
This comprehensive guide delves into the intricate process of optimizing 3D car models specifically for game engines, using Blender as our primary modeling and preparation tool. We’ll explore critical techniques from foundational topology to advanced engine-specific optimizations, ensuring your assets are not only visually spectacular but also incredibly efficient. By understanding and implementing these strategies, you’ll be able to create game-ready automotive assets that uphold visual standards while maintaining optimal performance, ready for any project, from indie titles to AAA productions. Prepare to transform your high-poly masterpieces into streamlined, responsive game-engine powerhouses.
The journey to an optimized 3D car model begins with its fundamental structure: topology. Good topology isn’t just about making a model look pretty; it’s about creating a clean, efficient mesh that performs well in real-time environments, deforms predictably, and shades smoothly. For automotive models, which are characterized by complex curves, sharp edges, and large, smooth surfaces, establishing impeccable topology is paramount. A clean mesh is a game developer’s best friend, minimizing errors, simplifying UV mapping, and reducing processing overhead in the engine.
When modeling a car for a game engine, the goal is often to strike a balance between visual fidelity and polygon count. While photorealistic renders might demand millions of polygons, game engines require a much more conservative approach. The sweet spot usually involves using just enough polygons to define the silhouette and major surface details without introducing unnecessary density. This careful management of polygon distribution ensures that GPU resources are allocated efficiently, drawing only what is truly necessary for the visual representation at various distances.
Every game engine and target platform has a specific polygon budget. A model designed for mobile AR/VR might have a budget of tens of thousands of polygons, while a high-end PC title could accommodate hundreds of thousands for a hero vehicle. Understanding this budget early in the modeling process is crucial. For a typical game-ready car, aim for a base mesh (without interiors or excessive small details) in the range of 50,000 to 150,000 triangles. This range allows for good visual detail while remaining manageable for most modern game engines.
Density refers to how polygons are distributed across the mesh. Flat surfaces, like the roof or side panels, require fewer polygons than highly curved areas, such as wheel arches, headlights, or spoilers. Using Blender’s mesh editing tools, you can strategically add or remove edge loops and faces to control this density. Techniques like subdivision surface modeling (applied non-destructively and then carefully optimized or baked down for export) are excellent for achieving smooth surfaces, but the final output for games must be a rationalized, triangulated mesh. It’s often beneficial to work with quads in Blender for easier editing and then convert to triangles on export, as game engines primarily render triangles. Remember to keep an eye on areas prone to “pinching” or “creasing” due to overly dense or sparse topology, which can lead to unsightly shading artifacts.
Edge flow dictates how polygons are connected and how they “flow” across the surface of your model. For automotive models, good edge flow is critical for two main reasons: smooth shading and predictable deformation. Car surfaces are characterized by subtle curves and reflections, and incorrect edge flow can lead to “faceting” or “lumpy” appearances even with smooth shading enabled. Edges should follow the natural contours and lines of the vehicle, defining creases, panel gaps, and stylistic elements with precision.
Furthermore, if parts of your car model are intended to deform (e.g., suspension components, doors opening, or even damage systems), optimized edge flow ensures these animations look natural. Edges should converge and diverge logically, supporting the geometry’s movement without causing stretching or tearing. In Blender, using tools like the Bevel modifier for crisp edges and carefully managing edge loops around panel lines are essential. Always ensure that supporting edge loops are present to hold sharp edges when subdividing or smoothing, but for game models, these supporting loops should be as close as possible to the primary edge to minimize unnecessary polygon count. Prioritize quads during modeling for cleaner edge flow and then triangulate efficiently upon export.
Once your car model’s topology is solid, the next crucial step for game engine readiness is UV mapping. UV mapping is the process of flattening your 3D model’s surface into a 2D space, allowing you to apply textures. For 3D car models, this can be particularly challenging due to their complex, often organic, and highly curved surfaces. Efficient UV mapping is vital not only for ensuring textures look correct but also for optimizing performance by minimizing draw calls and maximizing texture resolution.
A well-planned UV layout minimizes stretching, utilizes the 0-1 UV space efficiently, and groups related elements to reduce texture fetches. Poor UVs, on the other hand, can lead to blurry textures, noticeable seams, and wasted texture memory. The goal is to create a clean, organized UV map that maximizes texel density while keeping the number of UV islands (separate pieces of the flattened mesh) to a manageable level.
Unwrapping a complex object like a car requires a strategic approach. Instead of a single, monolithic unwrap, it’s often best to break the car down into logical components. This means separating the main body, hood, doors, trunk, wheels, interior, and smaller details like headlights and mirrors into their own UV islands or even separate materials/texture sets. This modular approach makes the unwrapping process more manageable and allows for more focused texel density control.
For large, relatively flat or smoothly curved surfaces like the car body, projection unwrapping (e.g., cylinder or planar projection, followed by relaxation) or smart UV project in Blender can provide a good starting point. However, manual refinement is almost always necessary. Use Blender’s Seam marking tools judiciously. Place seams in areas that are less visible or where natural breaks in the geometry occur, such as along panel lines, under the car, or at the edges of separate components. The goal is to minimize visible texture stretching and reduce the number of texture seams that need to be blended in the engine. For cylindrical parts like wheels, a simple cylindrical unwrap often works best, while smaller, distinct objects can be efficiently packed using Blender’s automatic packing features.
Texel density refers to the number of texture pixels per unit of 3D space. Maintaining a consistent texel density across your model is crucial for preventing some areas from looking blurry while others appear excessively sharp. For automotive models, achieving consistent texel density means that a section of the car, regardless of its size, will have the same level of texture detail per square centimeter. In Blender, you can use addons or manually scale UV islands to achieve this consistency, often by making the largest or most important parts of the car (like the main body) the reference for density.
UV pack efficiency relates to how tightly your UV islands are arranged within the 0-1 UV space. Wasted space means wasted texture memory. Utilize the maximum available area without overlapping UV islands. Blender’s UV packing algorithms (like “Pack Islands”) can be a good starting point, but manual adjustments are often needed to optimize further. Consider rotating islands to fit better into gaps and minimizing the padding between islands. For high-quality 3D car models on platforms like 88cars3d.com, you’ll often find meticulously crafted UV layouts that demonstrate excellent texel density and packing, indicating the professional standard expected for game-ready assets.
Photorealistic rendering in games relies heavily on Physically Based Rendering (PBR) materials. PBR materials accurately simulate how light interacts with surfaces, providing a consistent and believable look under various lighting conditions. For 3D car models, PBR is essential for achieving the distinct sheen of automotive paint, the reflectivity of chrome, and the subtle variations of interior fabrics. Crafting these materials correctly in Blender and then preparing them for export to a game engine is a critical optimization step, as inefficient material setups can quickly become a performance bottleneck.
PBR workflows utilize specific texture maps (Albedo/Base Color, Metallic, Roughness, Normal, Ambient Occlusion) to define a material’s properties. Understanding how these maps interact and how to generate them efficiently is key to creating stunning yet performant visuals. The goal is to maximize visual quality while minimizing the number and resolution of textures, and the complexity of shader networks within the game engine.
In Blender, you’ll primarily work with the Principled BSDF shader, which is a PBR-compliant shader. When creating your car’s materials, focus on generating accurate texture maps that can be directly consumed by game engines. For instance:
Keep your shader networks in Blender clean and organized. Avoid overly complex node setups that rely on many procedural textures, as these are often difficult to translate directly into game engines. Instead, aim to bake complex Blender materials down into the standard PBR texture maps that game engines expect. This is a vital step for optimization and compatibility.
Texture baking is the process of transferring detailed surface information from one mesh (often a high-poly, sculpted model) to texture maps that can be applied to a simpler, lower-poly mesh. This is particularly important for 3D car models where intricate details like panel lines, bolts, and small vents can be baked into a normal map, allowing the game mesh to remain low in polygon count while retaining visual fidelity.
In Blender, you can use the Cycles renderer’s baking capabilities to generate Normal, AO, and even combined PBR maps from your high-poly model to your game-ready low-poly model. When baking, ensure your low-poly mesh has a good cage (an extruded version of the low-poly mesh) to avoid projection errors. After baking, optimize your texture resolutions. While 4K (4096×4096) or even 8K textures might be used for hero assets on high-end platforms, 2K (2048×2048) or 1K (1024×1024) are more common for game models, with smaller details sometimes using 512×512 or 256×256. Using texture atlases – combining multiple smaller textures into one larger texture – is an excellent way to reduce draw calls and improve rendering performance, especially for a collection of small car parts or interior elements.
Consider using texture compression formats supported by game engines (e.g., BC1-BC7 for desktop, ETC2 for mobile) to further reduce memory footprint. Experiment with different resolutions and compression settings to find the sweet spot between visual quality and performance. When sourcing models from marketplaces such as 88cars3d.com, check the provided texture resolutions and formats to ensure they align with your project’s performance targets.
Even with pristine topology and efficient PBR materials, a 3D car model can still bog down a game engine if further optimizations aren’t applied. This section focuses on a range of techniques, initiated in Blender but primarily managed within the game engine, to ensure your automotive assets run smoothly across various platforms. These strategies are vital for maintaining high frame rates and a responsive user experience, particularly in scenarios with multiple vehicles or complex environments.
The core philosophy behind game engine optimization is to reduce the amount of data the GPU has to process and the number of instructions the CPU has to issue. This involves clever tricks to display less detail when it’s not needed, avoid rendering hidden objects, and consolidate rendering operations.
Level of Detail (LODs) is perhaps one of the most critical optimization techniques for complex assets like 3D car models. LODs allow you to display simpler versions of your model when it’s further away from the camera, progressively increasing detail as the camera approaches. This dramatically reduces polygon count and draw calls for distant objects, freeing up resources for closer, more important elements.
For a typical car model, you might create 3-4 LOD levels:
In Blender, you can generate LODs by duplicating your high-poly model and using modifiers like Decimate or manually simplifying the mesh. When using Decimate, be mindful of how it affects topology and UVs, ensuring that critical features are preserved and UV seams don’t get distorted. Many professional pipelines involve manual reduction and cleanup for each LOD to ensure the best visual transition. Export each LOD as a separate mesh, and most game engines (Unity, Unreal) have built-in LOD Group components to manage these transitions automatically.
Draw calls are instructions from the CPU to the GPU to render a batch of triangles. Each draw call carries overhead, and too many can bottleneck performance. For a 3D car model, having many separate meshes (e.g., individual bolts, separate headlight pieces, multiple interior objects) can lead to a high number of draw calls, even if the total polygon count is low. Strategies to reduce draw calls include:
Occlusion Culling is another vital engine-side optimization. It prevents the engine from rendering objects that are completely hidden behind other geometry from the camera’s perspective. For a car model, parts of the engine or interior might be occluded by the body panels, saving rendering time. While Blender doesn’t directly handle occlusion culling, designing your models with clear, watertight geometry helps game engines process culling effectively. Ensure there are no large, invisible gaps where the culling system might “see through” your model incorrectly.
Mobile platforms and AR/VR headsets have significantly stricter performance budgets than traditional PCs or consoles. Optimizing 3D car models for these environments requires even more aggressive strategies:
When preparing models in Blender for these platforms, the focus shifts even more towards efficiency. Use a clean, minimal mesh and ensure all unnecessary data (like extra UV channels, vertex colors not being used, or modifiers that haven’t been applied) is stripped away before export. This meticulous approach ensures that even complex automotive rendering can run smoothly on resource-constrained devices.
The culmination of all your optimization efforts in Blender leads to the crucial stage of exporting your 3D car model and integrating it into your chosen game engine. This process requires careful attention to file formats, scale, pivot points, and import settings to ensure the model behaves as expected and retains all its visual properties. Incorrect export or import settings can negate all the prior optimization work, leading to visual glitches or performance issues.
Understanding the nuances of different file formats and how game engines interpret them is key to a smooth transition. Both Unity and Unreal Engine have specific preferences and best practices for importing assets created in external 3D software.
The choice of file format is critical for preserving your model’s data (geometry, UVs, materials, animations) during the export process.
For platforms like 88cars3d.com, you’ll often find models provided in FBX, OBJ, and sometimes GLB, catering to a wide range of uses, from traditional rendering to game asset development.
Regardless of the file format, some common best practices apply when preparing assets for Unity and Unreal Engine:
Upon importing into Unity or Unreal, review the import settings carefully. For FBX, ensure you’re importing correct LODs, materials, and potentially custom collision meshes. In Unreal, ensure you check “Combine Meshes” if desired, and correctly assign physics assets. In Unity, set up your LOD Groups, and ensure materials are correctly assigned and PBR texture maps are linked to the appropriate slots in the engine’s shader.
Beyond the core optimization techniques, a few advanced considerations can push your 3D car models from merely functional to truly outstanding in a game engine. These tips focus on fine-tuning visual fidelity and enhancing interaction without compromising the meticulously optimized performance you’ve worked hard to achieve. They often involve engine-side configurations, but careful preparation in Blender can significantly streamline their implementation.
The goal here is to leverage the game engine’s capabilities to their fullest, creating a sense of realism and immersion that captivates players, all while keeping the rendering pipeline lean and efficient.
Proper lighting is paramount for making 3D car models look believable within a game environment. Even the most perfectly textured and optimized car will look flat without dynamic and accurate lighting. Game engines utilize various lighting techniques, and preparing your car model to interact seamlessly with them is crucial:
A well-lit scene with properly configured reflection probes will elevate your automotive rendering to new heights, making the car feel truly integrated rather than simply placed in the environment.
For interactive game experiences, your 3D car model needs appropriate collision detection. Using the high-poly visual mesh for collisions is extremely inefficient and will quickly degrade performance, especially in physics simulations. Instead, dedicated, simplified collision meshes are used:
By using optimized collision meshes, you ensure that complex physics simulations, such as vehicle deformation or interactions with the environment, run smoothly without taxing the CPU with unnecessary calculations. This attention to detail in collision setup is just as vital as visual optimization for creating truly immersive and performant vehicle gameplay.
Optimizing 3D car models for game engines is a multifaceted discipline that demands a blend of artistic skill and technical proficiency. From meticulously crafting clean topology in Blender to carefully preparing PBR materials, implementing intelligent LODs, and choosing the right export formats, every step plays a crucial role in delivering a high-performance, visually stunning automotive asset. This guide has journeyed through the essential workflows, technical specifications, and industry best practices that empower you to transform complex, high-fidelity car designs into game-ready assets capable of driving immersive experiences.
Remember, the core principle is always about balance: achieving maximum visual impact with minimum performance overhead. By understanding polygon budgets, mastering UV layouts, generating efficient PBR textures, and leveraging game engine optimization techniques like LODs and occlusion culling, you gain the power to create assets that perform flawlessly across diverse platforms, from high-end PCs to mobile AR/VR devices. Whether you’re a seasoned game developer, an automotive designer transitioning into real-time visualization, or a student aspiring to create breathtaking virtual vehicles, these strategies are your roadmap to success.
Embrace these techniques, experiment with different approaches, and always prioritize testing your assets within the target game engine. The commitment to optimization not only improves the player experience but also establishes your work as professional, efficient, and forward-thinking. Platforms like 88cars3d.com exemplify the standard for high-quality, optimized 3D car models, demonstrating what’s achievable with careful planning and execution. Armed with this knowledge, you are now well-equipped to drive your game asset development to the next level, creating virtual vehicles that are as performant as they are beautiful.
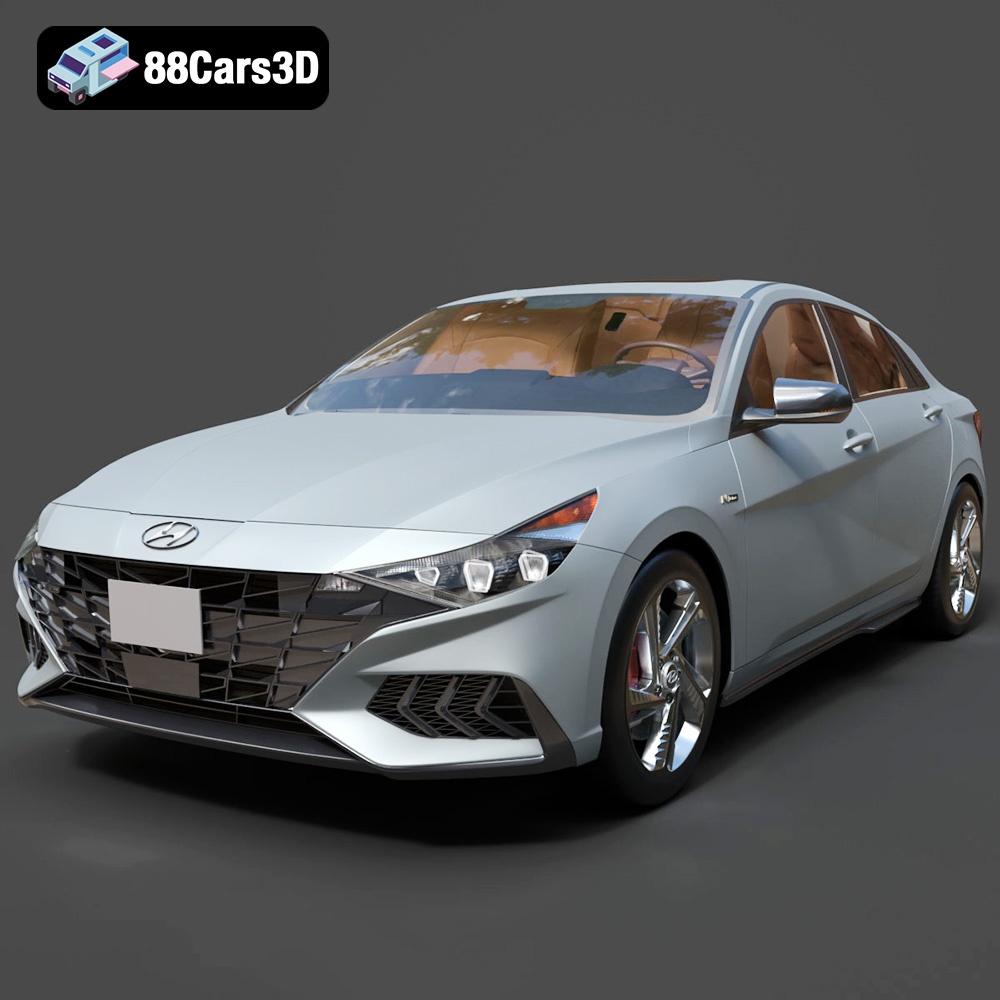
Texture: Yes | Material: Yes
Download the highly detailed, game-ready Hyundai Elantra N Line 2021 3D Model. Features aggressive N Line body styling, parametric jewel grille, and sport interior details. Includes .blend, .fbx, .obj, .glb, .stl, .ply, .unreal, and .max formats for game development, AR/VR, and rendering.
Price: $226.00
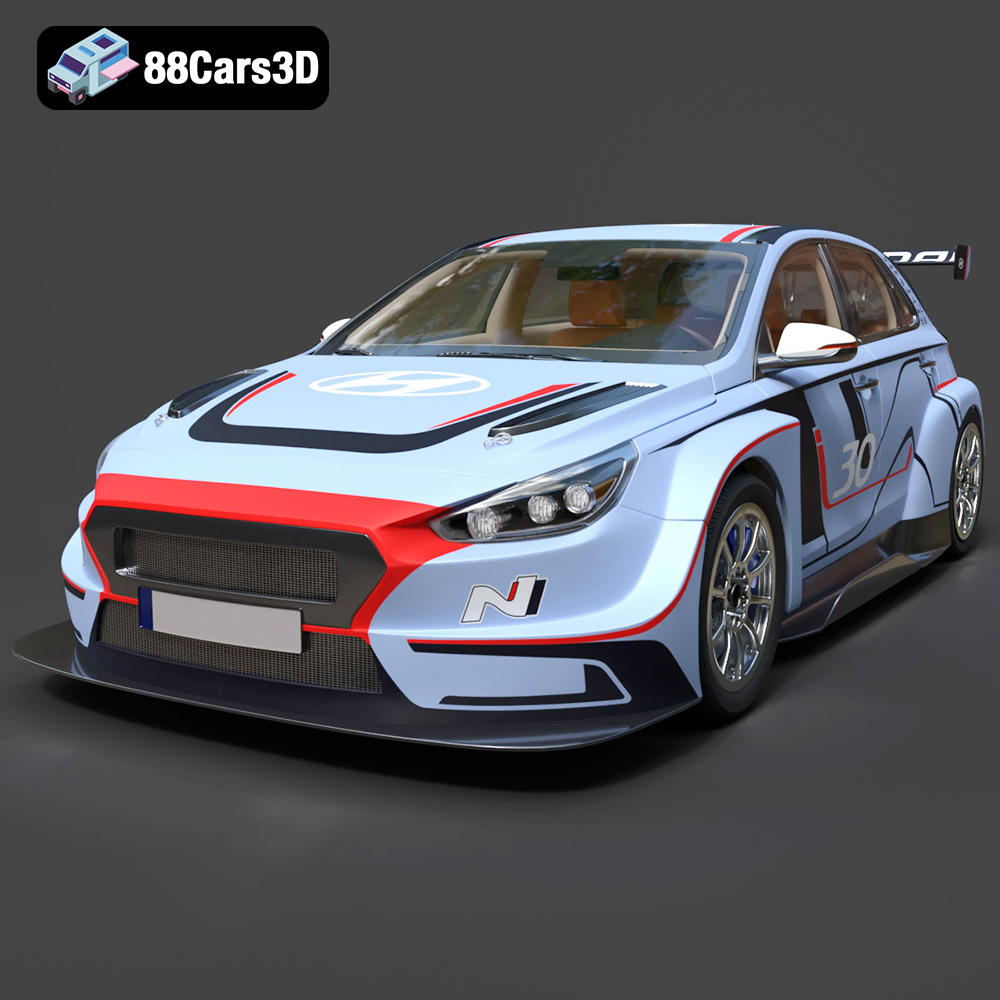
Texture: Yes | Material: Yes
Download the highly detailed, game-ready Hyundai i30 N TCR Hatchback 2020 3D Model. Features aggressive touring car aerodynamics, high-downforce rear wing, and race-spec interior. Includes .blend, .fbx, .obj, .glb, .stl, .ply, .unreal, and .max formats for game development, AR/VR, and rendering.
Price: $204.99
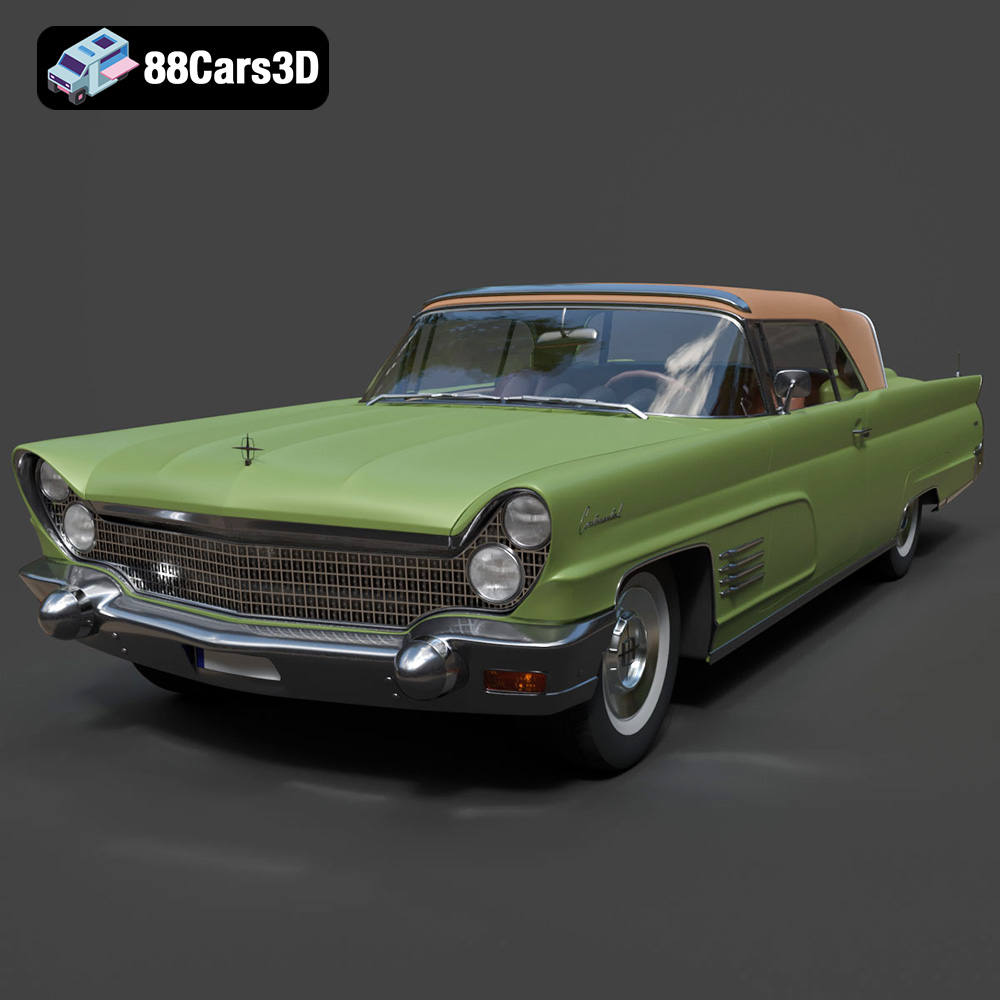
Texture: Yes | Material: Yes
Download the highly detailed, game-ready Lincoln Continental Mark V 1960 3D Model. Features iconic 1960s luxury cruiser styling, massive chrome grille, reverse-slant rear window, and sweeping tail fins. Includes .blend, .fbx, .obj, .glb, .stl, .ply, .unreal, and .max formats for game development, AR/VR, and rendering.
Price: $208.99
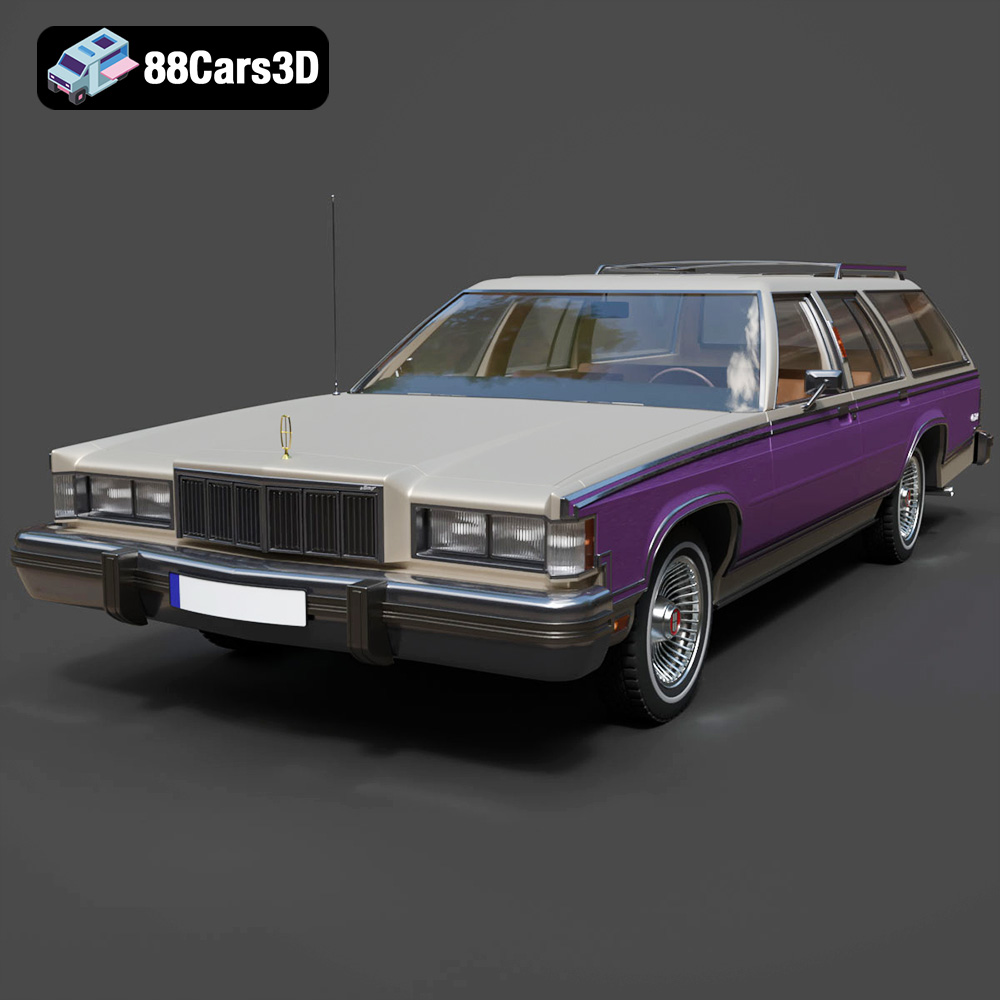
Texture: Yes | Material: Yes
Download the highly detailed, game-ready Mercury Marquis Colony Park 1981 3D Model. Features iconic simulated woodgrain siding, classic full-size wagon proportions, and realistic chrome exterior trim. Includes .blend, .fbx, .obj, .glb, .stl, .ply, .unreal, and .max formats for game development, AR/VR, and rendering.
Price: $262.50
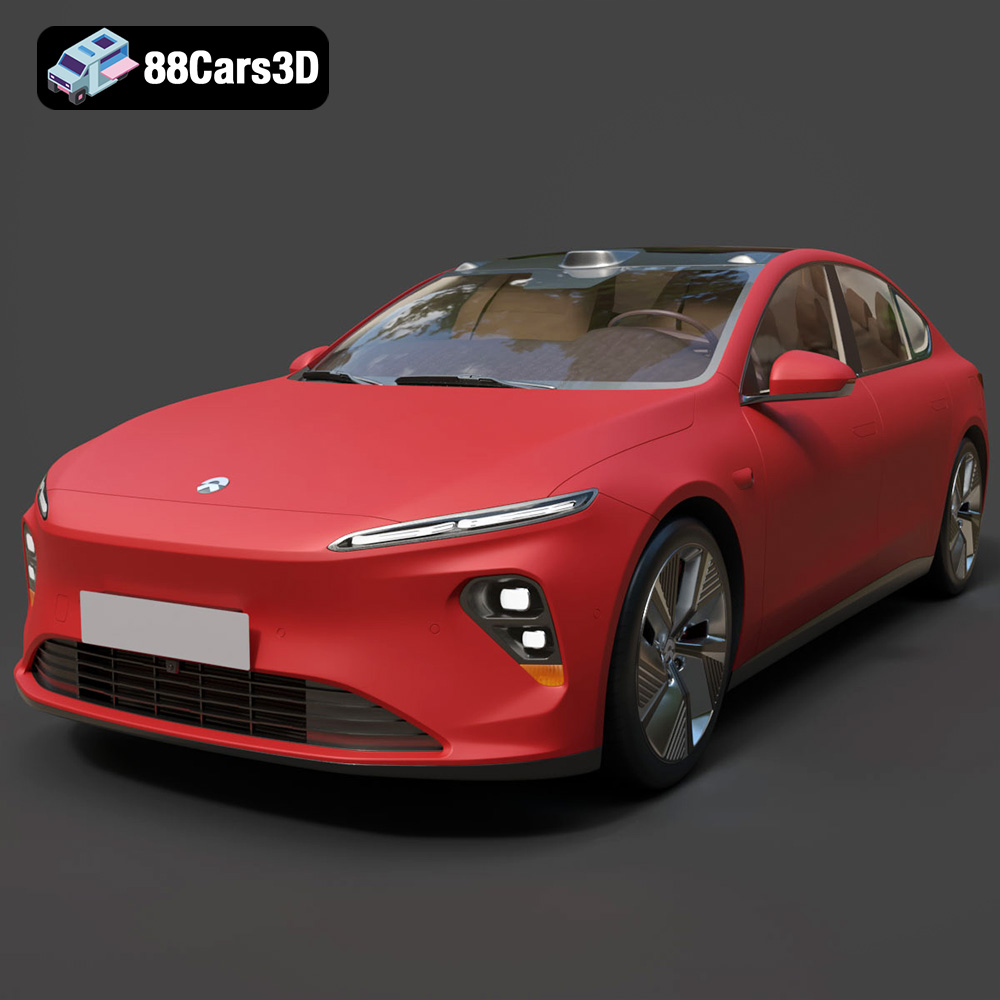
Texture: Yes | Material: Yes
Download the highly detailed, game-ready Nio ET7 2021 3D Model. Features sleek aerodynamic luxury electric sedan styling, integrated LiDAR sensors, and signature Double-Dash LED lights. Includes .blend, .fbx, .obj, .glb, .stl, .ply, .unreal, and .max formats for game development, AR/VR, and rendering.
Price: $207.99
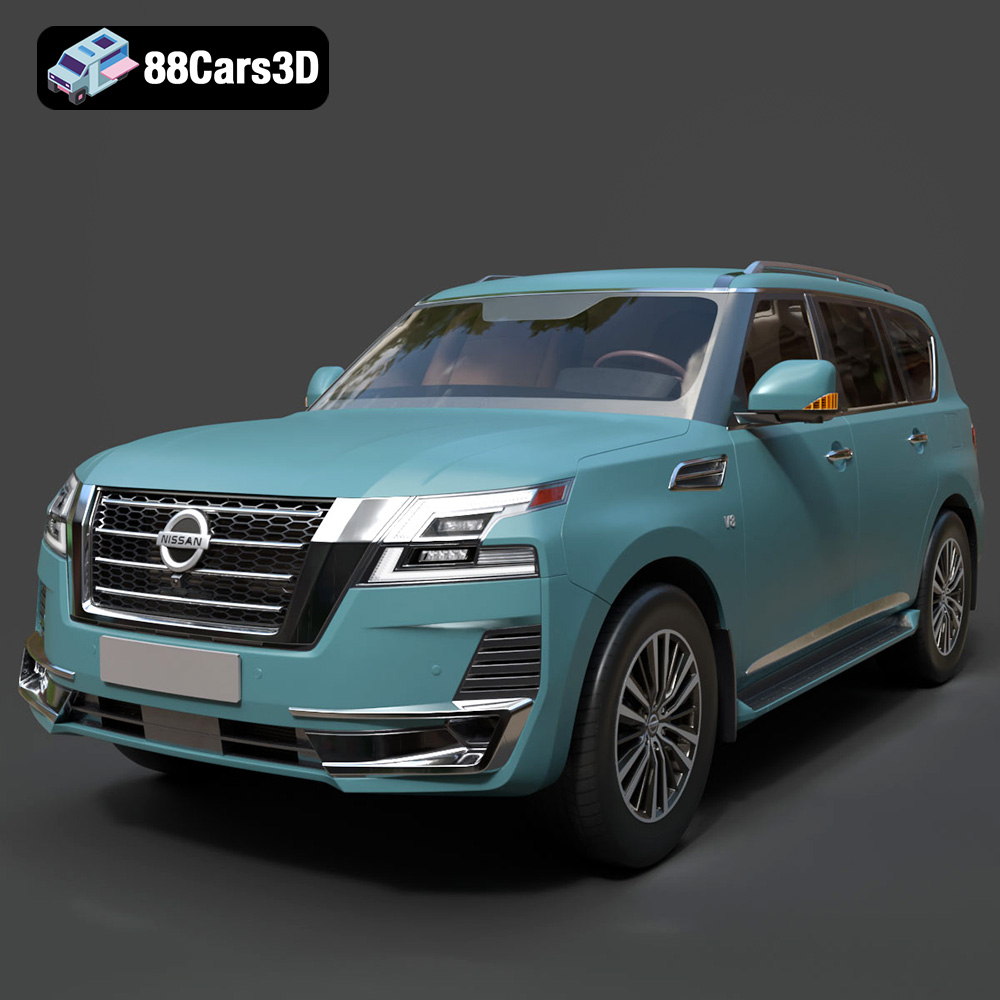
Texture: Yes | Material: Yes
Download the highly detailed, game-ready Nissan Patrol 2021 3D Model. Features signature V-motion grille, realistic exterior detailing, and a fully rendered luxury interior. Includes .blend, .fbx, .obj, .glb, .stl, .ply, .unreal, and .max formats for game development, AR/VR, and rendering.
Price: $297.99
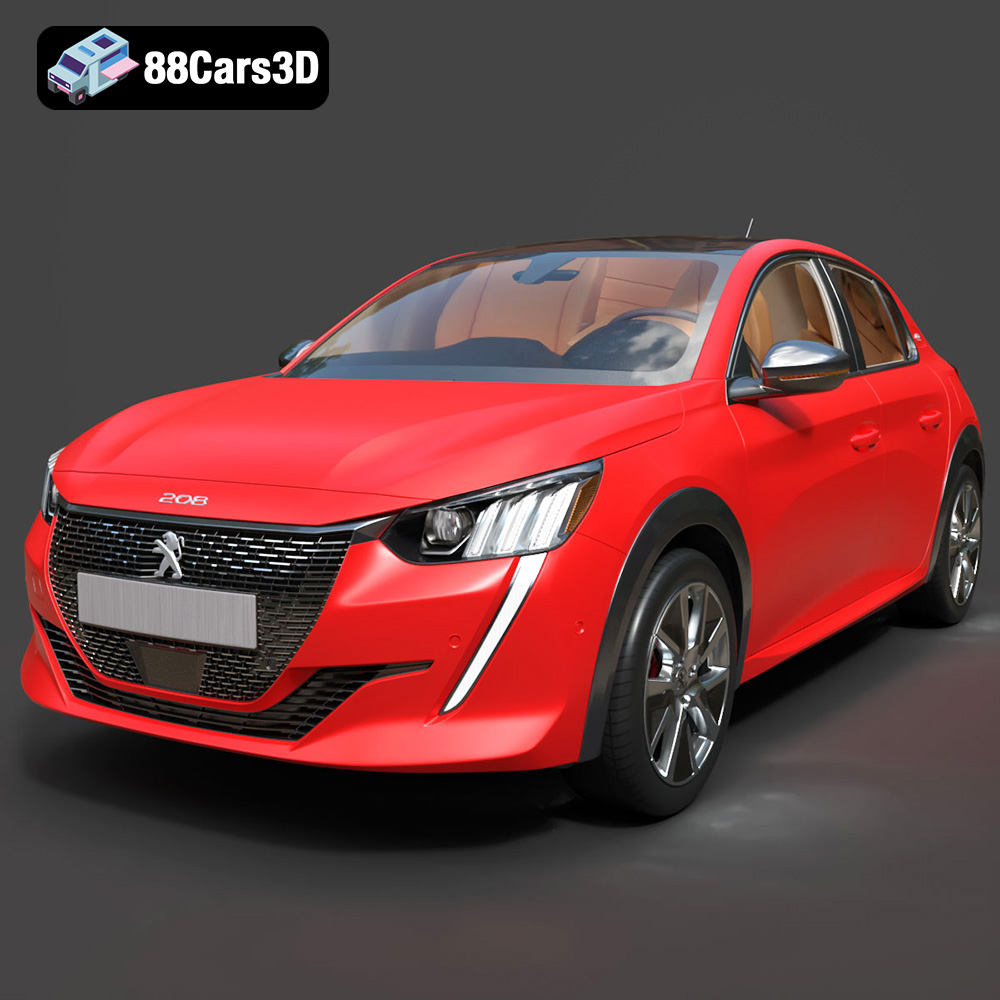
Texture: Yes | Material: Yes
Download the highly detailed, game-ready Peugeot e-208 2020 3D Model. Features 3-claw LED lighting, dynamic body geometry, and a fully detailed i-Cockpit interior. Includes .blend, .fbx, .obj, .glb, .stl, .ply, .unreal, and .max formats for game development, AR/VR, and rendering.
Price: $224.00
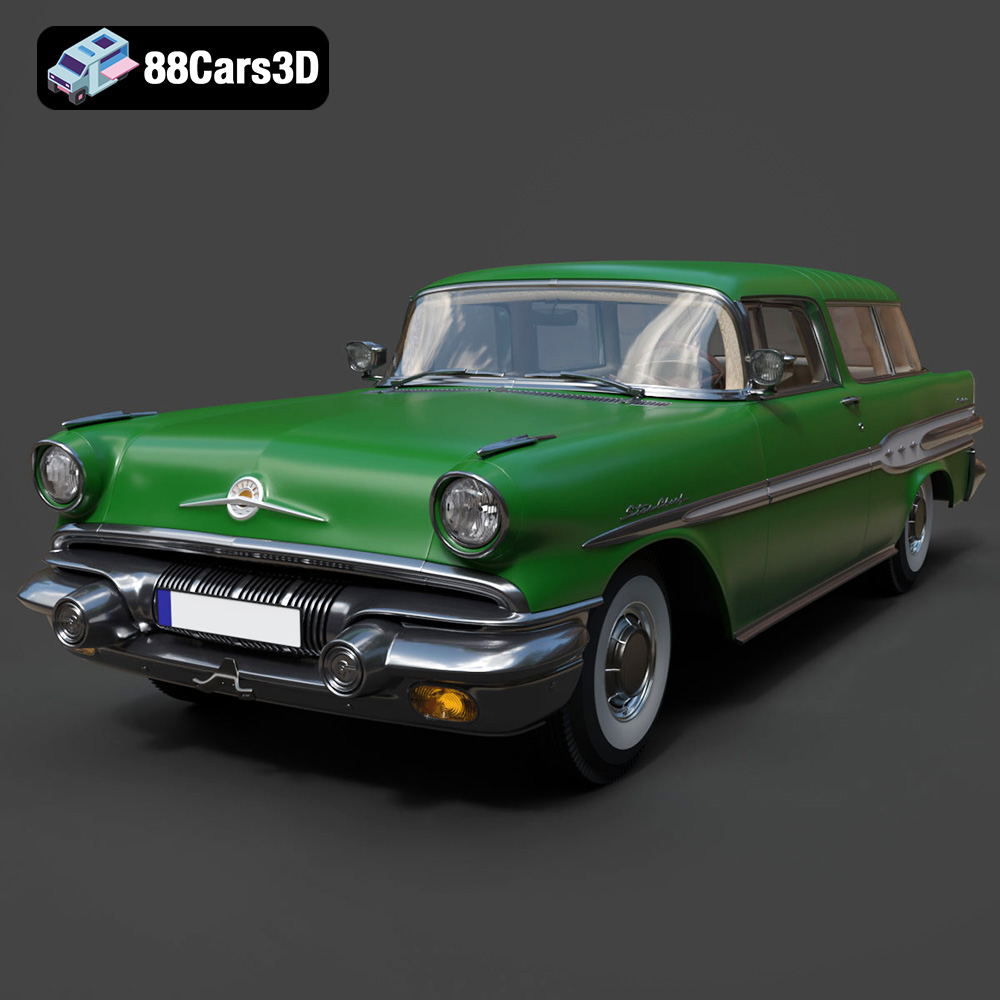
Texture: Yes | Material: Yes
Download the highly detailed, game-ready Pontiac Star Chief Custom Safari 2-door 1957 3D Model. Features classic 1950s two-door wagon bodywork, iconic chrome tail fins, and realistic interior detailing. Includes .blend, .fbx, .obj, .glb, .stl, .ply, .unreal, and .max formats for game development, AR/VR, and rendering.
Price: $203.50
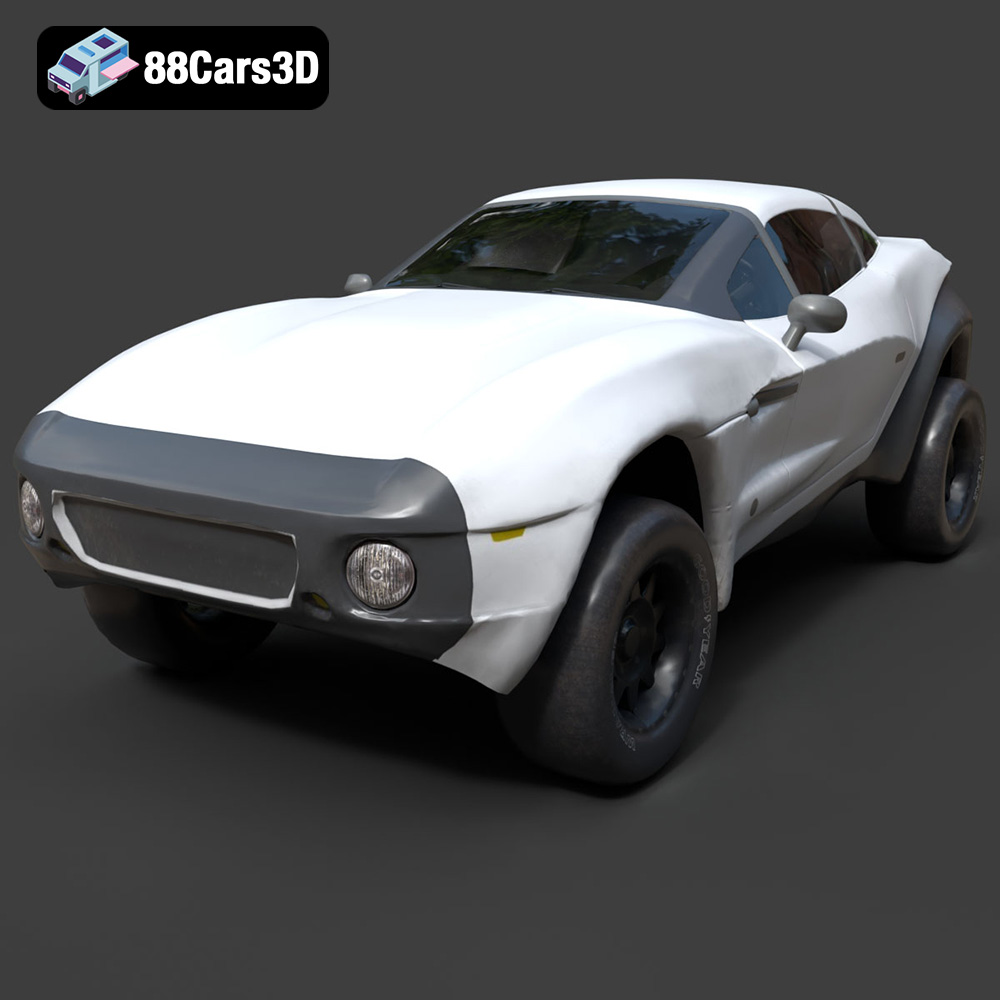
Texture: Yes | Material: Yes
Download the highly detailed, game-ready Local Motors Rally Fighter 3D Model. Features aggressive off-road long-travel suspension, detailed interior cockpit, and high-clearance body styling. Includes .blend, .fbx, .obj, .glb, .stl, .ply, .unreal, and .max formats for game development, AR/VR, and rendering.
Price: $99.99
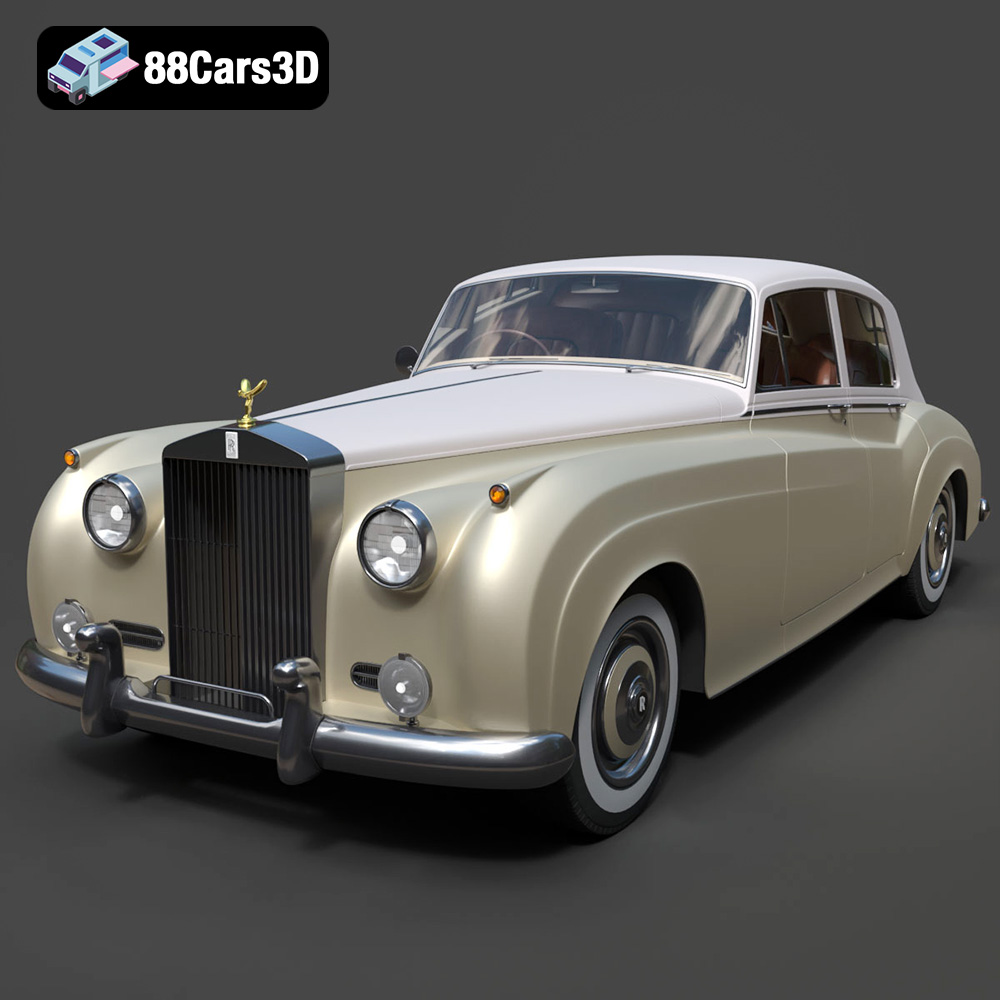
Texture: Yes | Material: Yes
Download the highly detailed, game-ready Rolls-Royce Silver Cloud II 1959 3D Model. Features classic chrome radiator grille, iconic Spirit of Ecstasy ornament, and elegant two-tone bodylines. Includes .blend, .fbx, .obj, .glb, .stl, .ply, .unreal, and .max formats for game development, AR/VR, and rendering.
Price: $201.00
