

In the expansive universe of 3D design, the automotive sector stands as a pinnacle of technical artistry and precision. Creating a believable 3D car model goes far beyond mere aesthetics; it demands a profound understanding of intricate modeling techniques, sophisticated texturing, dynamic rendering, and meticulous optimization for various applications. Whether you’re a seasoned professional aiming for photorealistic renders for an advertising campaign, a game developer crafting immersive virtual worlds, or an architect visualizing a future urban landscape, the ability to produce high-quality 3D car assets is paramount.
Blender, the versatile open-source 3D creation suite, has emerged as a powerhouse tool for automotive designers and artists. Its comprehensive feature set, from advanced polygonal modeling and sculpting to powerful PBR material systems and robust rendering engines like Cycles and Eevee, makes it an ideal choice for tackling the complexities of car design. Moreover, Blender’s physics simulations, particularly Rigid Body and Cloth dynamics, open up new avenues for realism, allowing artists to breathe life into their static models with dynamic interactions and authentic material behaviors. This in-depth guide will navigate you through the essential workflows and advanced techniques within Blender to master the creation, optimization, and dynamic simulation of 3D car models, ensuring your assets are not just visually stunning but also technically sound for any project. We’ll explore everything from foundational topology to cutting-edge physics, empowering you to elevate your automotive visualization to an unparalleled level of realism.
The journey to a photorealistic 3D car model begins with impeccable topology. For automotive designs, clean and efficient mesh geometry isn’t just a best practice; it’s a fundamental requirement for achieving smooth, unbroken reflections and proper deformation. Automotive surfaces are characterized by sweeping curves, sharp creases, and subtle transitions, all of which must be captured with a topology that supports these nuances without creating pinching or artifacts. The goal is to distribute polygons intelligently, ensuring denser mesh where curvature is high or details are critical, and sparser where surfaces are flat.
Clean edge flow refers to the logical and continuous progression of edges across your model’s surface. For cars, this means ensuring that edge loops follow the contours of the body panels, wheel arches, and character lines. This approach is critical for several reasons: it facilitates smooth subdivision, makes UV unwrapping more manageable, and ensures accurate deformation during animation or simulation. When modeling, prioritize quads (four-sided polygons) over triangles or N-gons, as quads behave predictably under subdivision and are generally easier to manage. Tools like Blender’s ‘Loop Cut and Slide’ (Blender 4.4 documentation on Loop Cut and Slide) are invaluable for adding detail while maintaining clean edge flow. Focus on creating edge loops that define the silhouette and major features of the car first, then gradually add supporting loops to refine the curves and add intricate details like panel gaps and vents. Avoid poles with more than five edges, as these can lead to pinching and unsightly surface irregularities.
Subdivision surface modeling is the cornerstone of high-fidelity automotive models. By applying a Subdivision Surface modifier, a low-poly base mesh can be smoothly interpolated into a high-poly, organic form. This workflow allows artists to work with a manageable number of control points while achieving intricate surface detail. However, careful planning of your base mesh is essential. Aim for a balance: enough polygons in your base mesh to define the core shape and critical features, but not so many that it becomes cumbersome to edit. For a typical high-quality 3D car model, the final polycount after subdivision can range from 200,000 to over 1 million triangles, depending on the level of detail (e.g., engine bay, interior components). For game assets or AR/VR applications, these counts must be significantly lower, necessitating multiple Levels of Detail (LODs) or a focus on baking normal maps from high-poly sculpts onto optimized low-poly meshes. Understanding when and where to apply subdivision, and how to control its effect with supporting edge loops, is key to achieving both aesthetic quality and performance efficiency.
Once the geometric foundation of your 3D car model is solid, the next crucial step is to adorn it with realistic textures and materials. This phase breathes life into the model, defining everything from the reflectivity of the paintwork to the subtle imperfections of a leather interior. Achieving this level of realism relies heavily on two interconnected processes: meticulous UV unwrapping and the creation of physically based rendering (PBR) materials. These techniques ensure that your car models not only look stunning in a render but also maintain visual fidelity across different lighting conditions and rendering environments.
UV mapping is the process of flattening a 3D model’s surface into a 2D plane, allowing you to apply 2D textures. For a complex object like a car, strategic UV mapping is paramount. Poor UVs can lead to distorted textures, visible seams, and inefficient texture space utilization. The goal is to create clean, non-overlapping UV islands that minimize distortion and make texture painting or procedural material application straightforward. For automotive bodies, consider breaking down the mesh into logical panels (hood, doors, roof, fenders) and unwrapping each section independently. Tools like Blender’s ‘Smart UV Project’ can offer a quick starting point, but manual seam placement and ‘Unwrap’ operations (using features like ‘Angle Based’ or ‘Conformal’) provide superior control. When placing seams, try to hide them in areas that are less visible or along natural breaks in the geometry, such as panel gaps. Efficient UV packing—arranging UV islands closely together within the 0-1 UV space—is also vital for maximizing texture resolution and reducing the number of texture maps required, which is beneficial for performance in game engines. Aim for consistent texel density across all major parts of the car to ensure uniform texture resolution and detail.
Physically Based Rendering (PBR) materials are the industry standard for achieving photorealistic results. Blender’s Principled BSDF shader, based on Disney’s principled BRDF, simplifies the creation of a vast range of materials by providing a single, comprehensive shader that accurately simulates how light interacts with surfaces. For a car, this means meticulously defining properties like base color (albedo), metallicness, roughness, normal details, and clearcoat. Car paint, for instance, often requires a complex setup involving a base color, metallic flakes (often simulated with a noise texture and high anisotropy), and a clearcoat layer with varying roughness and IOR (Index of Refraction). Rubber tires need high roughness and a subtle normal map for tread detail, while chrome accents demand high metallic values and low roughness. When working with PBR, consistency is key: ensure your texture maps (albedo, metallic, roughness, normal, displacement) are calibrated correctly and follow a linear color space. Platforms like 88cars3d.com rely on models with expertly crafted PBR materials to ensure they look stunning in any render or game engine. Understanding the interplay of these parameters within the Principled BSDF shader is crucial for bringing your automotive creations to life with unparalleled realism.
Beyond static poses, the world of 3D car models truly comes alive with dynamic simulations. Blender’s robust physics engine offers powerful tools for simulating real-world interactions, adding an extra layer of realism and storytelling to your automotive visualizations. Specifically, Rigid Body dynamics and Cloth simulations allow artists to depict everything from dramatic vehicle impacts to elegantly draped car covers. Integrating these simulations requires careful setup and an understanding of their underlying principles, but the results can be incredibly impactful for animations, forensic reconstructions, or even just adding subtle realism to a scene.
Rigid Body physics in Blender allows objects to collide, react to gravity, and interact with each other in a physically plausible manner. For automotive applications, this can be incredibly versatile. Imagine simulating a car crash scenario for a visualization, depicting debris scattering from an impact, or demonstrating the articulation of a suspension system. To set up a Rigid Body simulation, you assign ‘Rigid Body’ properties to objects, defining them as either ‘Active’ (they are affected by forces and collisions) or ‘Passive’ (they participate in collisions but are static). For a car, the main body and wheels would typically be active rigid bodies, while the ground plane would be passive. Key parameters to adjust include mass, friction, and bounce. When dealing with complex car models, it’s often more efficient to use a simpler ‘Collision Shape’ (like a convex hull or bounding box) for performance, rather than the intricate mesh itself. For a detailed guide on setting up rigid body simulations and understanding collision shapes, you can refer to the Blender 4.4 documentation on Rigid Body physics. Animating hinges or constraints between components, such as a car door opening or the individual parts of a suspension reacting to movement, adds a layer of mechanical authenticity that static models cannot convey.
Cloth simulation in Blender excels at replicating the natural behavior of fabrics, complete with wrinkles, folds, and gravitational sag. While not directly applied to the car body itself, cloth simulations are invaluable for accessories and environmental elements associated with automotive scenes. A classic example is a car cover gracefully draping over a vehicle, showing off its contours while subtly concealing details. Other uses include flags waving in the wind near a dealership, or even more abstract fabric elements in a conceptual automotive presentation. To implement a cloth simulation, you designate a mesh as a ‘Cloth’ object and define its physical properties like stiffness, mass, and internal friction. The car model itself would typically be set as a ‘Collision’ object, allowing the cloth to interact realistically with its surfaces without passing through. Adjusting parameters such as ‘Bending’ and ‘Stretching’ helps achieve the desired fabric type, from heavy canvas to light silk. For a comprehensive overview of cloth simulation settings and optimization, consult the Blender 4.4 documentation on Cloth physics. Baking these simulations is crucial for playback performance and for exporting the animated mesh if needed. Mastering cloth simulation adds an extraordinary touch of realism and visual narrative to any automotive scene.
The culmination of meticulous modeling, texturing, and dynamic simulations is the rendering process, where all elements converge to produce a compelling image or animation. Blender offers two powerful built-in rendering engines, Cycles and Eevee, each with distinct advantages for automotive visualization. Choosing the right engine and mastering its settings, alongside expert lighting and environment setup, is critical for achieving cinematic quality that captivates your audience. Whether you’re aiming for absolute photorealism or stylized, real-time feedback, Blender provides the tools to bring your 3D car models to life.
Lighting is the single most important factor in making your 3D car model look realistic. An incorrectly lit scene can make even the best model appear flat and unconvincing. High Dynamic Range Images (HDRIs) are a foundational element for automotive rendering, providing realistic environment lighting that simulates real-world illumination and reflections. An HDRI acts as both a light source and a reflection map, imbuing your car with authentic reflections of its surroundings. Supplement HDRIs with targeted area lights to highlight specific features, create sharp reflections on paintwork, or add a dramatic key light. For a studio look, a classic three-point lighting setup (key, fill, back light) combined with softbox-style area lights can yield polished, commercial-grade results. Pay close attention to the light’s color temperature and intensity, using a physically accurate approach. For instance, cooler light for a modern studio, warmer tones for golden hour exteriors. Reflections on automotive surfaces are crucial; ensure your lighting setup emphasizes the curvature and material properties, especially the clearcoat on the paint, to truly sell the realism of the model.
Blender’s Cycles renderer is an unbiased, physically based path tracer renowned for its stunning photorealism. It excels at accurately simulating light bounces, reflections, and refractions, making it ideal for high-quality product visualization and cinematic renders where fidelity is paramount. To optimize Cycles renders, leverage GPU rendering (CUDA, OptiX, or HIP), adjust samples, and use denoising techniques. Features like light portals can improve interior rendering efficiency, while adaptive sampling intelligently focuses computational power where it’s most needed. On the other hand, Eevee is a real-time renderer designed for speed and interactivity. While not as physically accurate as Cycles, Eevee can produce incredibly convincing results, especially with careful material setup, screen-space reflections, ambient occlusion, and volumetric effects. It’s perfect for rapid previewing, animation playback, and projects requiring faster turnaround times. For automotive work, Eevee can be used for pre-visualization, early animation tests, or even final renders where a slightly stylized or faster-paced look is desired. Understanding the strengths and limitations of both Cycles and Eevee allows you to choose the most appropriate engine for your specific automotive rendering task, balancing between uncompromising realism and efficient workflow.
Creating high-quality 3D car models for static renders is one challenge; preparing them for real-time interactive environments like game engines or AR/VR applications presents another. These platforms demand extreme efficiency and optimized assets to maintain smooth performance and immersive experiences. The same high-polygon, richly detailed model suitable for a cinematic render would cripple a game engine if not properly adapted. Mastering the art of optimization is crucial for ensuring your automotive assets from sources like 88cars3d.com perform flawlessly across a wide range of devices and applications.
The cornerstone of real-time optimization for complex models like cars is the implementation of Levels of Detail (LODs). LODs involve creating multiple versions of a single model, each with progressively lower polygon counts and simpler materials. When the car is close to the camera, the high-detail LOD is displayed; as it moves further away, the engine switches to a lower-detail LOD, significantly reducing the computational load without a noticeable drop in visual quality. Blender’s Decimate modifier can be used to generate lower-poly versions, or manual retopology might be necessary for cleaner results. Another vital technique is culling, which prevents objects or parts of objects that are outside the camera’s view frustum or occluded by other geometry from being rendered. Frustum culling and occlusion culling are automatic in most game engines but require well-structured scenes. Managing draw calls is also critical. Each time the GPU is instructed to draw something, it incurs a “draw call” overhead. Minimizing draw calls means consolidating meshes (e.g., combining multiple small car parts into a single mesh where appropriate) and using texture atlases (combining multiple textures into one larger texture) to reduce material changes. For a detailed vehicle with many components, optimizing these aspects can make the difference between a smooth 60 FPS experience and a stuttering mess.
Once your 3D car model is optimized, it needs to be exported in a format compatible with your target engine or platform. The FBX format is a ubiquitous choice for transferring models between Blender and game engines like Unity and Unreal Engine. When exporting, ensure you bake all necessary textures (albedo, normal, metallic, roughness, ambient occlusion) and apply any modifiers that affect geometry. Be mindful of unit scales and axis conventions, as these can vary between software. For web-based 3D, AR, and VR applications, GLB (Binary glTF) and USDZ are increasingly becoming the formats of choice. GLB is highly efficient, self-contained (includes textures), and widely supported for interactive 3D on the web. USDZ, developed by Apple, is optimized for AR experiences on iOS devices. Both GLB and USDZ prioritize small file sizes and fast loading times, which are crucial for seamless real-time experiences. When preparing models for these formats, ensure textures are properly compressed (e.g., JPEG, PNG), materials are simple PBR shaders, and animations are baked. Converting your carefully crafted Blender assets into these optimized formats ensures that your high-quality 3D car models can reach the widest possible audience across various interactive platforms.
The utility of high-quality 3D car models extends far beyond digital screens. With the advent of advanced additive manufacturing, these digital assets can be transformed into physical objects, opening up possibilities for prototyping, collectible models, and custom merchandise. However, preparing a digital model for 3D printing introduces a unique set of technical requirements. Concurrently, effective asset management is crucial for any professional workflow, ensuring that your valuable 3D car models are organized, accessible, and ready for future projects or commercial opportunities, such as being listed on marketplaces like 88cars3d.com.
Converting a render-ready 3D car model into a 3D printable file requires meticulous attention to mesh integrity and physical properties. Unlike digital rendering, where non-manifold geometry or open edges might go unnoticed, 3D printing demands a perfectly watertight mesh. This means ensuring all surfaces are closed, there are no interior faces, and every edge belongs to exactly two faces. Blender’s 3D Print Toolbox addon is invaluable for this, providing tools to check for non-manifold edges, intersections, and other common printing issues. Key steps include: 1. Scaling: Ensure your model is scaled correctly to real-world units for the desired print size. 2. Wall Thickness: Verify that all parts of the model have sufficient thickness to be structurally sound when printed (typically a minimum of 0.8mm to 2mm depending on material and printer). Thin details that look fine digitally might break during printing. 3. Boolean Operations: If your model consists of multiple intersecting parts, use Blender’s Boolean modifiers to merge them into a single, cohesive mesh. 4. Mesh Repair: Use tools like ‘Remove Doubles’ or ‘Make Manifold’ to clean up any geometric errors. Sometimes, external software like Meshmixer or Netfabb might be needed for more complex repairs. The final output for most 3D printers is typically an STL or OBJ file. Careful preparation ensures that your beautifully designed 3D car model translates seamlessly from the digital realm to a tangible, physical object.
As your collection of 3D car models grows, establishing a robust asset management system becomes indispensable. An organized library not only saves time but also safeguards the integrity of your work and facilitates team collaboration. Each model should be meticulously organized with clear naming conventions for files, textures, and internal scene elements. Essential components like high-poly meshes, low-poly variants, baked textures, and specific file formats (FBX, GLB, USDZ) should be neatly categorized. Implementing version control, even for solo artists, is a game-changer. Tools like Git (with Git LFS for large files) or dedicated asset management systems allow you to track changes, revert to previous iterations, and safely experiment without fear of losing valuable work. For commercial ventures, especially when selling models on marketplaces such as 88cars3d.com, comprehensive documentation for each asset is crucial. This includes details about polygon counts, texture resolutions, material setups, origin points, and any specific software dependencies. A well-managed asset library not only streamlines your personal workflow but also enhances the perceived value and usability of your models for clients and customers, ensuring they can easily integrate your creations into their projects without friction.
The journey of mastering 3D car model creation and optimization in Blender is a testament to both artistic vision and technical prowess. We’ve traversed the critical stages, from laying down pristine topology that captures the sleek lines of automotive design, through the intricate process of UV mapping and crafting physically accurate PBR materials, to the exciting realm of dynamic simulations that inject realism into every scene. We’ve also delved into the nuanced world of rendering with Cycles and Eevee, understanding how to light and compose shots for cinematic impact, and explored the essential optimizations required for seamless integration into real-time environments like game engines and AR/VR platforms. Finally, we touched upon the practical considerations of preparing models for 3D printing and the importance of efficient asset management for a professional workflow.
Blender, with its continuous evolution and robust feature set, empowers artists and designers to push the boundaries of automotive visualization. The ability to create stunning, performance-optimized, and dynamically interactive 3D car models is a highly sought-after skill in today’s digital landscape. Whether you are aiming to create breathtaking architectural visualizations, develop immersive game assets, or produce compelling marketing content, the principles and techniques discussed here provide a solid foundation. By consistently refining your skills, experimenting with new workflows, and leveraging high-quality assets available on platforms like 88cars3d.com, you can ensure your 3D car models not only meet but exceed industry standards, driving your creative projects forward with unparalleled realism and technical excellence.
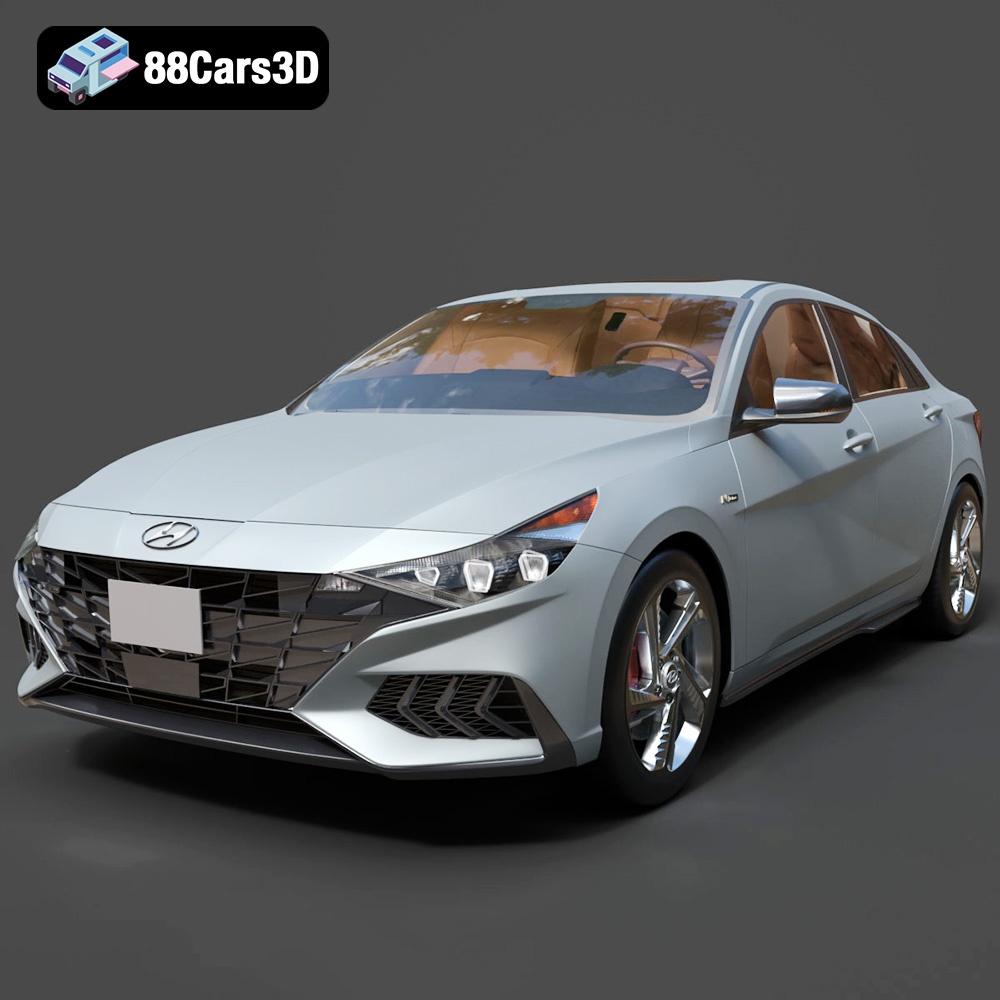
Texture: Yes | Material: Yes
Download the highly detailed, game-ready Hyundai Elantra N Line 2021 3D Model. Features aggressive N Line body styling, parametric jewel grille, and sport interior details. Includes .blend, .fbx, .obj, .glb, .stl, .ply, .unreal, and .max formats for game development, AR/VR, and rendering.
Price: $226.00
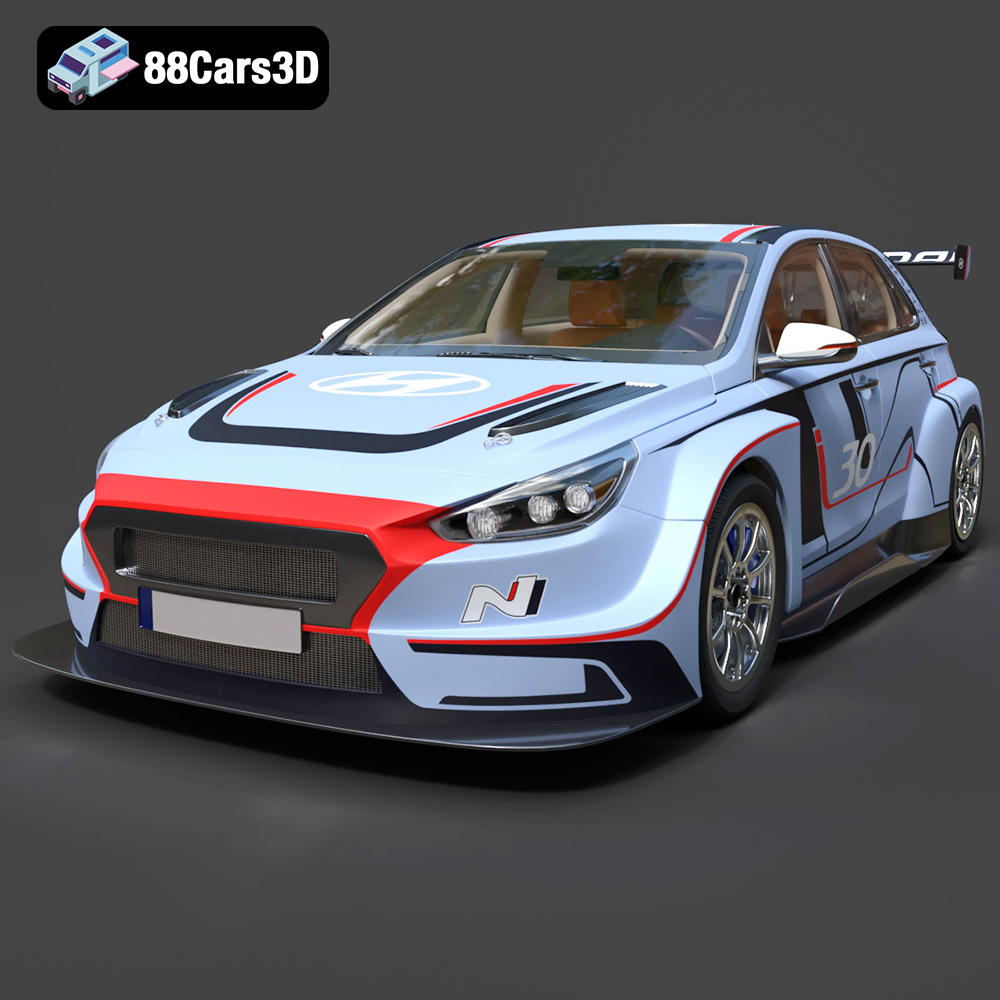
Texture: Yes | Material: Yes
Download the highly detailed, game-ready Hyundai i30 N TCR Hatchback 2020 3D Model. Features aggressive touring car aerodynamics, high-downforce rear wing, and race-spec interior. Includes .blend, .fbx, .obj, .glb, .stl, .ply, .unreal, and .max formats for game development, AR/VR, and rendering.
Price: $204.99
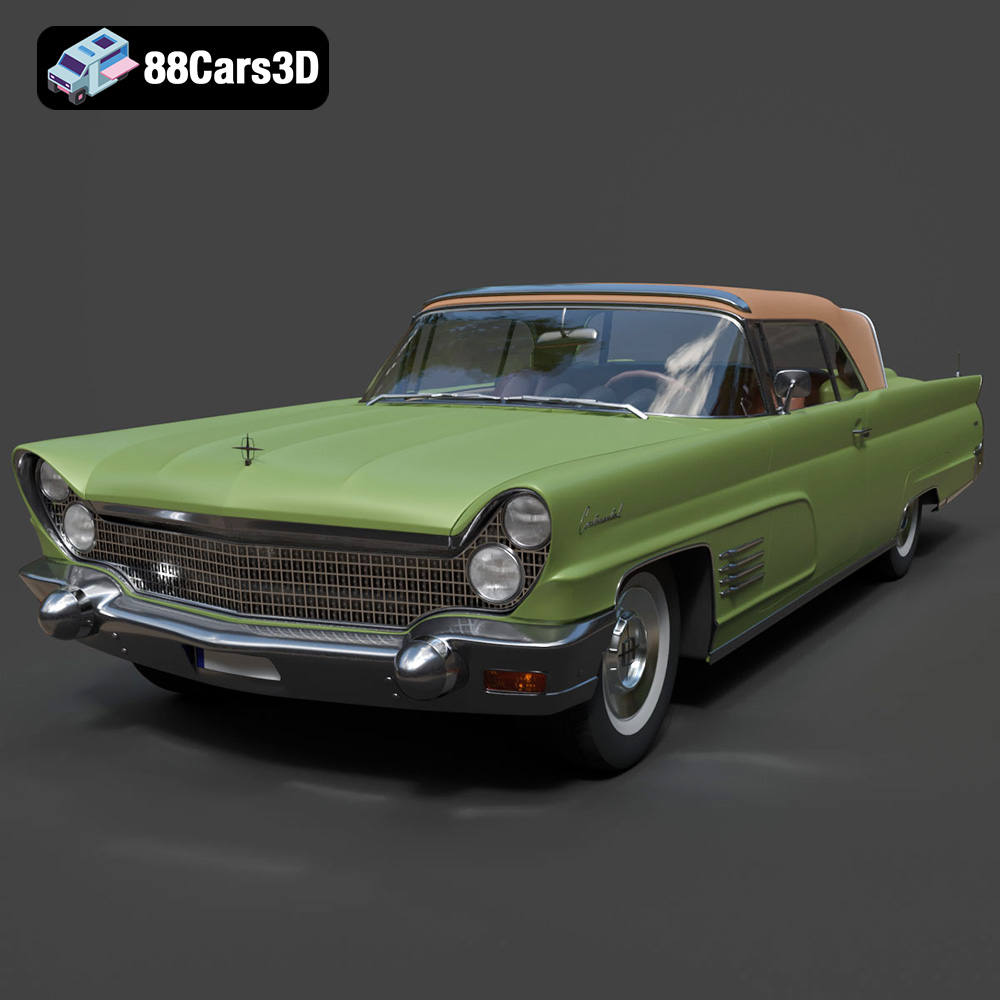
Texture: Yes | Material: Yes
Download the highly detailed, game-ready Lincoln Continental Mark V 1960 3D Model. Features iconic 1960s luxury cruiser styling, massive chrome grille, reverse-slant rear window, and sweeping tail fins. Includes .blend, .fbx, .obj, .glb, .stl, .ply, .unreal, and .max formats for game development, AR/VR, and rendering.
Price: $208.99
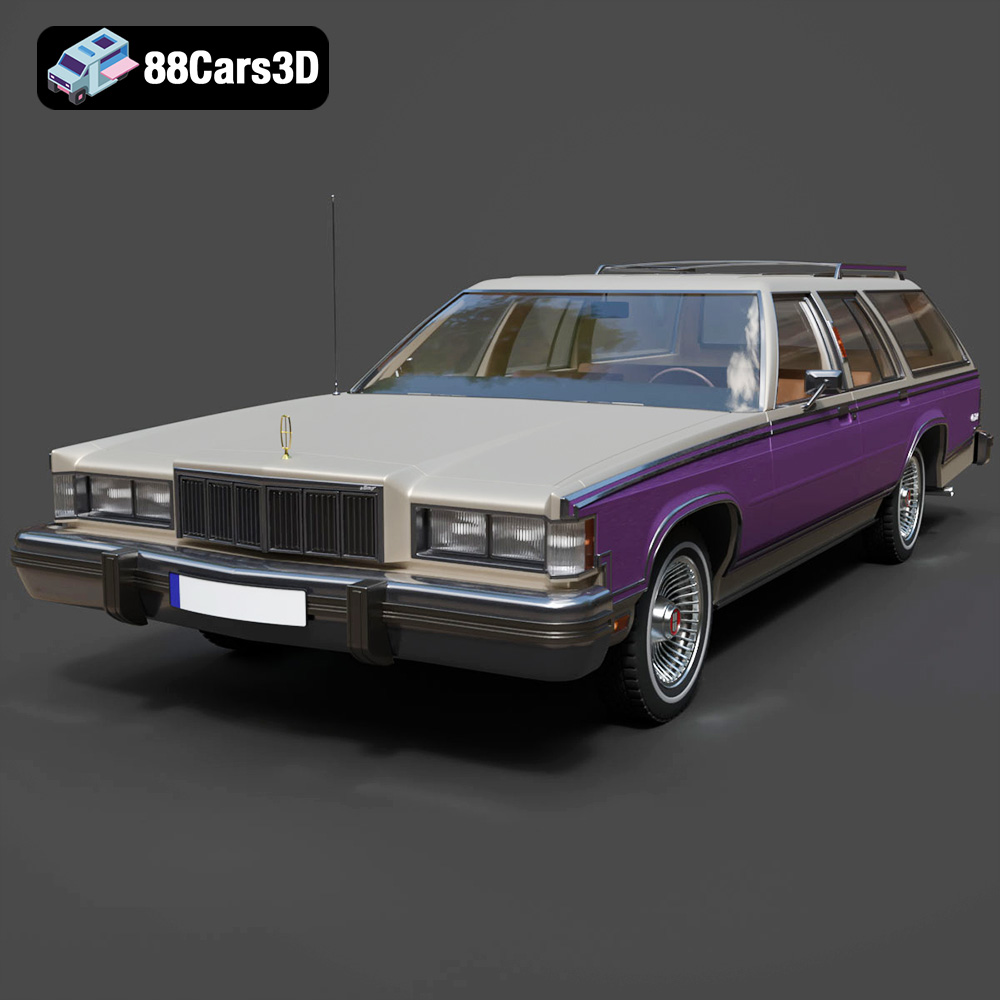
Texture: Yes | Material: Yes
Download the highly detailed, game-ready Mercury Marquis Colony Park 1981 3D Model. Features iconic simulated woodgrain siding, classic full-size wagon proportions, and realistic chrome exterior trim. Includes .blend, .fbx, .obj, .glb, .stl, .ply, .unreal, and .max formats for game development, AR/VR, and rendering.
Price: $262.50
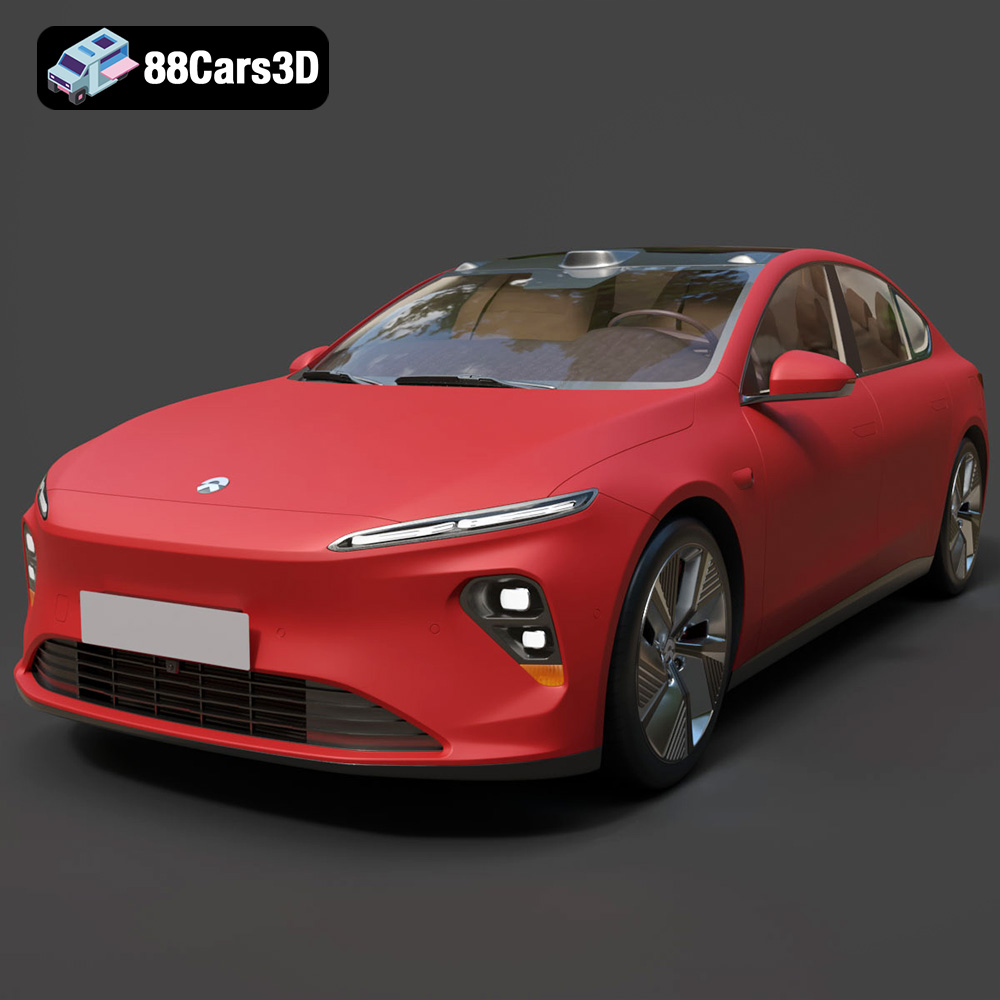
Texture: Yes | Material: Yes
Download the highly detailed, game-ready Nio ET7 2021 3D Model. Features sleek aerodynamic luxury electric sedan styling, integrated LiDAR sensors, and signature Double-Dash LED lights. Includes .blend, .fbx, .obj, .glb, .stl, .ply, .unreal, and .max formats for game development, AR/VR, and rendering.
Price: $207.99
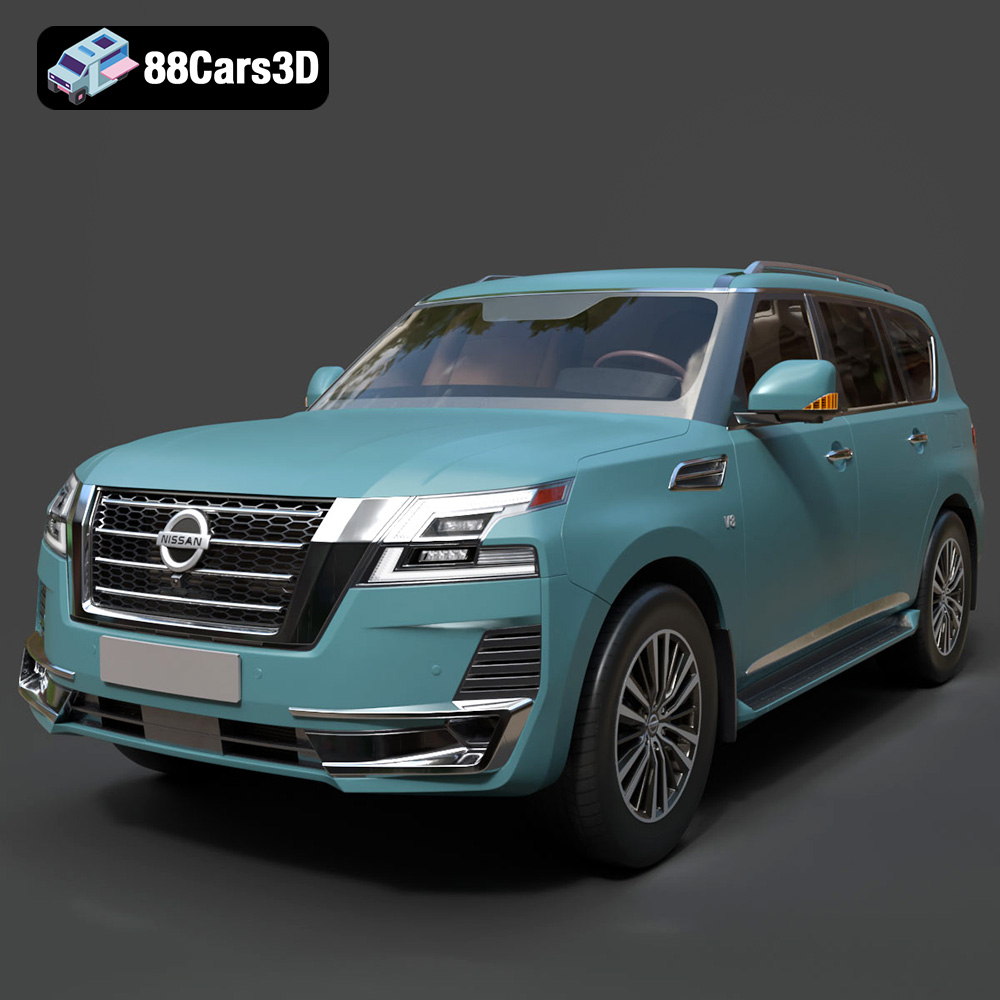
Texture: Yes | Material: Yes
Download the highly detailed, game-ready Nissan Patrol 2021 3D Model. Features signature V-motion grille, realistic exterior detailing, and a fully rendered luxury interior. Includes .blend, .fbx, .obj, .glb, .stl, .ply, .unreal, and .max formats for game development, AR/VR, and rendering.
Price: $297.99
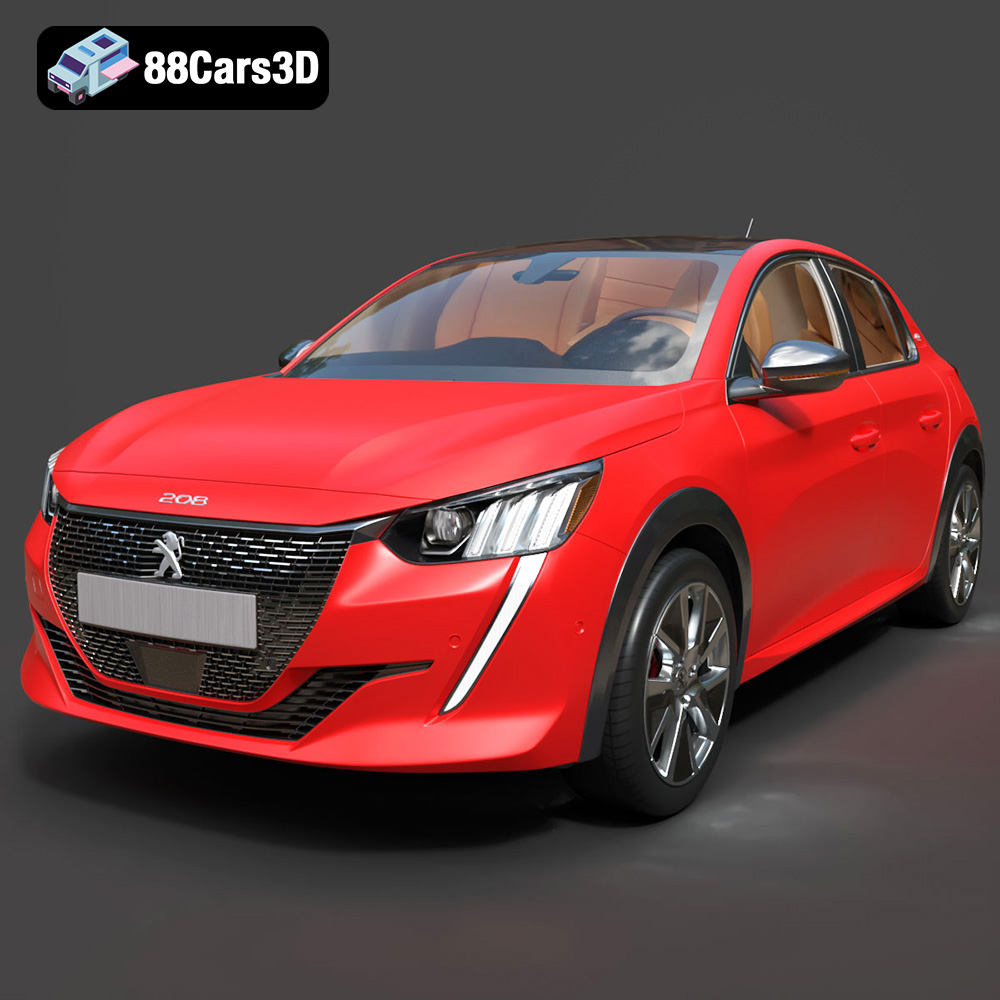
Texture: Yes | Material: Yes
Download the highly detailed, game-ready Peugeot e-208 2020 3D Model. Features 3-claw LED lighting, dynamic body geometry, and a fully detailed i-Cockpit interior. Includes .blend, .fbx, .obj, .glb, .stl, .ply, .unreal, and .max formats for game development, AR/VR, and rendering.
Price: $224.00
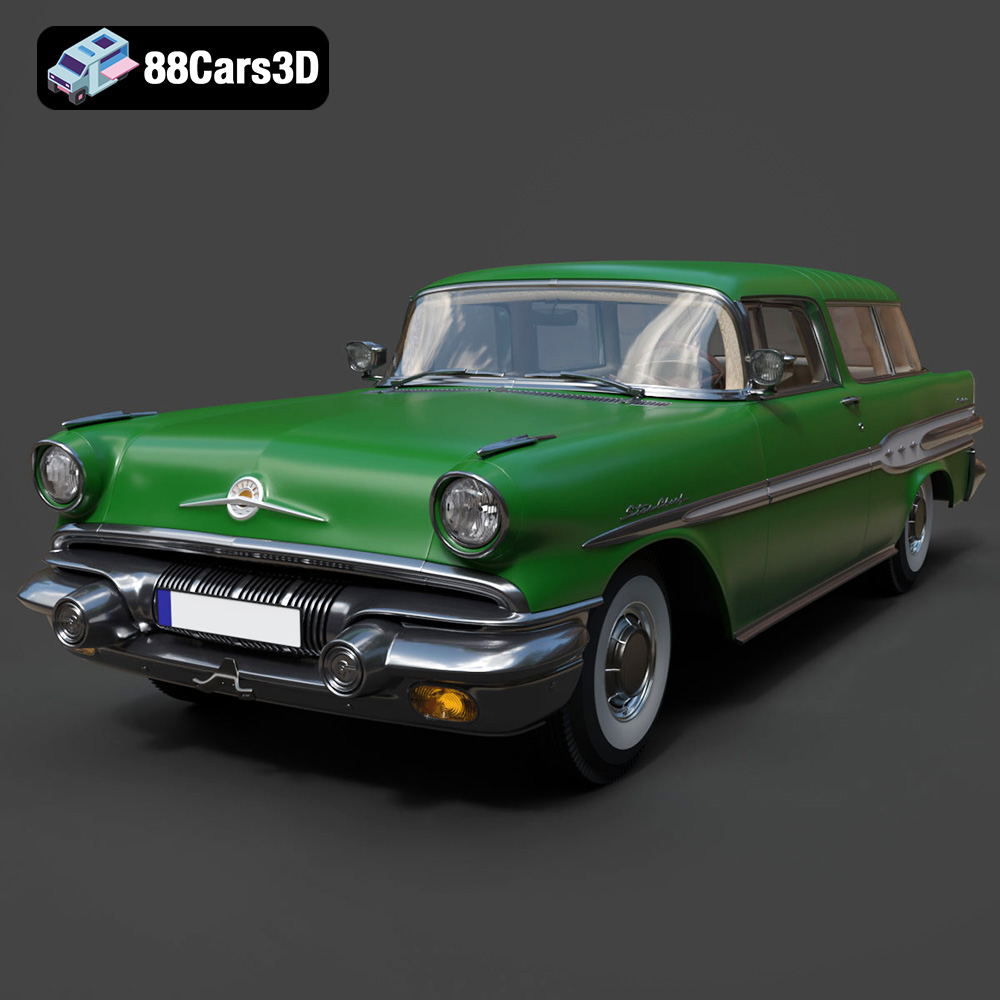
Texture: Yes | Material: Yes
Download the highly detailed, game-ready Pontiac Star Chief Custom Safari 2-door 1957 3D Model. Features classic 1950s two-door wagon bodywork, iconic chrome tail fins, and realistic interior detailing. Includes .blend, .fbx, .obj, .glb, .stl, .ply, .unreal, and .max formats for game development, AR/VR, and rendering.
Price: $203.50
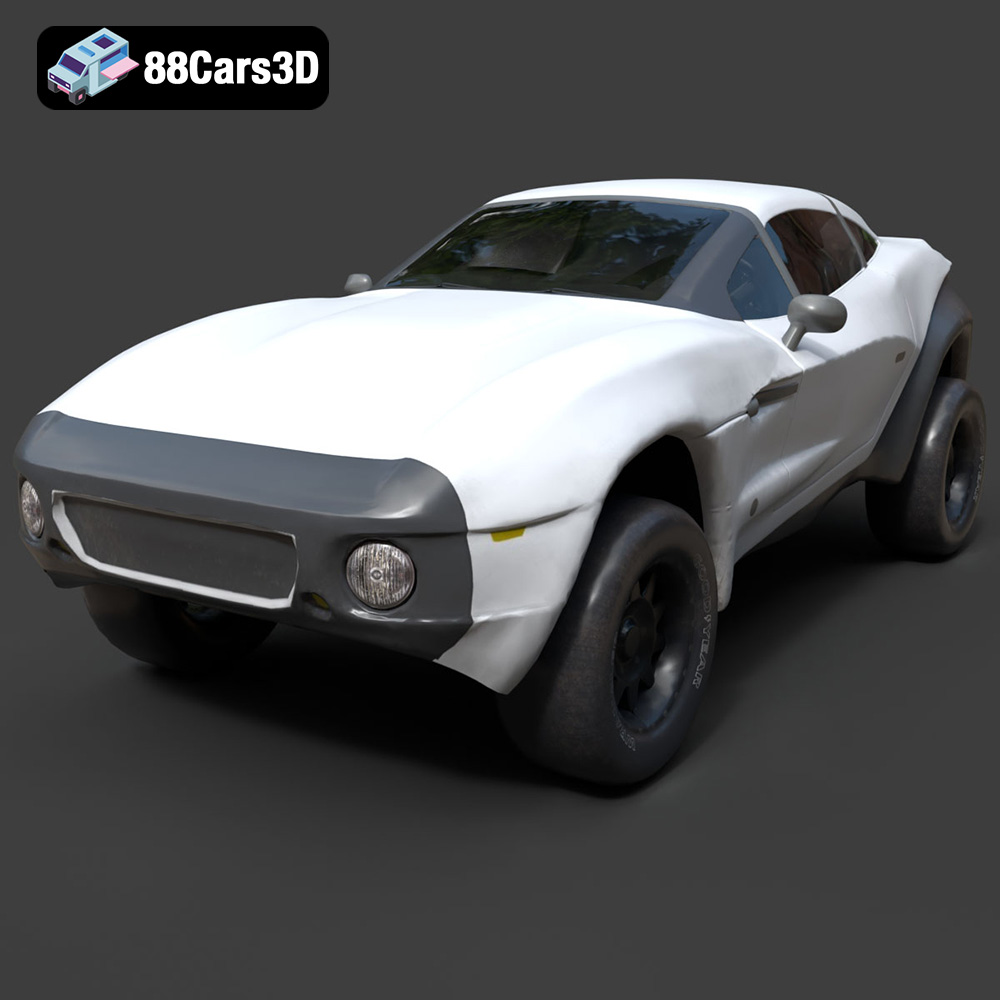
Texture: Yes | Material: Yes
Download the highly detailed, game-ready Local Motors Rally Fighter 3D Model. Features aggressive off-road long-travel suspension, detailed interior cockpit, and high-clearance body styling. Includes .blend, .fbx, .obj, .glb, .stl, .ply, .unreal, and .max formats for game development, AR/VR, and rendering.
Price: $99.99
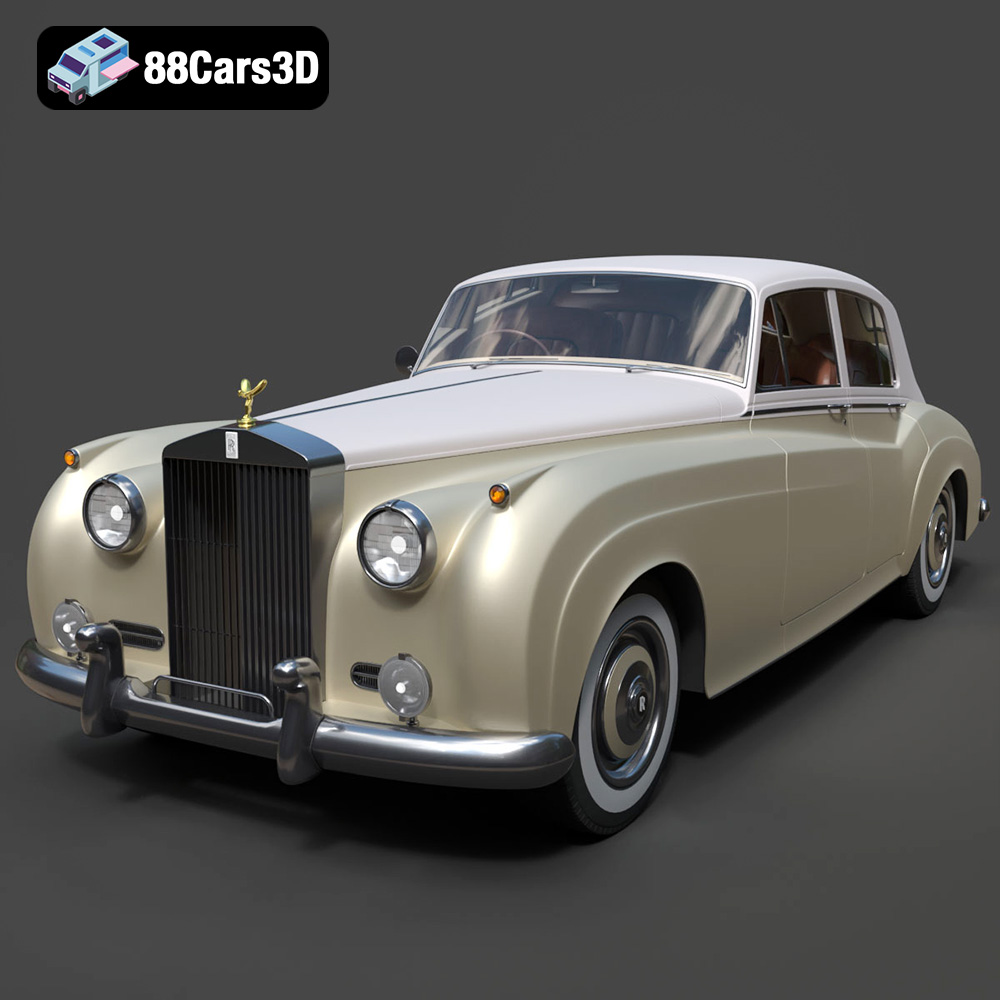
Texture: Yes | Material: Yes
Download the highly detailed, game-ready Rolls-Royce Silver Cloud II 1959 3D Model. Features classic chrome radiator grille, iconic Spirit of Ecstasy ornament, and elegant two-tone bodylines. Includes .blend, .fbx, .obj, .glb, .stl, .ply, .unreal, and .max formats for game development, AR/VR, and rendering.
Price: $201.00
