Get 20% OFF All Premium 3D & STL Models!

In the dynamic world of 3D visualization, automotive models stand as a pinnacle of technical artistry, demanding precision, realism, and efficiency. Whether you’re crafting breathtaking renders for marketing, developing immersive game environments, or prototyping designs for the automotive industry, the quality of your 3D car models dictates the success of your project. From the intricate curves of a supercar body to the meticulous details of an interior, every polygon, texture, and shader plays a crucial role in bringing these virtual vehicles to life.
This comprehensive guide delves into the multifaceted journey of creating, optimizing, and utilizing high-fidelity 3D car models. We’ll explore the foundational principles of clean topology, demystify advanced UV mapping techniques, uncover the secrets of stunning PBR materials, and navigate the complexities of rendering and real-time optimization. You’ll gain insights into industry-standard workflows, software-specific tips for platforms like 3ds Max, Blender, Unity, and Unreal Engine, and learn how to prepare your assets for diverse applications, including AR/VR, 3D printing, and professional visualization. Prepare to elevate your understanding and master the art of automotive 3D modeling, ensuring your projects achieve unparalleled visual fidelity and performance.
The underlying structure of a 3D model, known as its topology, is paramount, especially for complex, curvaceous surfaces like those found on automobiles. Good topology isn’t just about aesthetics; it’s fundamental for smooth subdivision, clean deformation, and efficient UV mapping. For automotive models, the goal is often to capture sweeping lines and crisp creases without introducing pinching or artifacting when the model is subdivided or animated. This requires a meticulous approach to edge flow, ensuring that edge loops follow the natural contours and design lines of the vehicle.
A well-modeled car will typically rely on an all-quad mesh, meaning every face in the model is a four-sided polygon. While triangles (tris) and N-gons (polygons with more than four sides) have their specific uses, a predominantly quad-based mesh provides the most predictable and smooth results when using subdivision surface modifiers like TurboSmooth in 3ds Max, Subdivision Surface in Blender, or Smooth Mesh in Maya. Clean quad topology ensures that the surface deforms evenly, which is crucial for reflections on car paint and subtle panel gaps. Bad topology, characterized by stretched quads, poles with too many or too few edges, or irregular edge loops, will inevitably lead to visual defects, especially under lighting or when applying texture maps.
Achieving a clean quad-based mesh for automotive surfaces involves a disciplined modeling approach. Start with low-polygon base meshes that capture the primary forms, then incrementally add detail. Tools like the “Cut,” “Loop Cut,” “Extrude,” and “Bridge” functionalities in your preferred 3D software are your allies. The aim is to create edge loops that flow along the contours of the car, defining the major panels, wheel arches, and character lines. These edge loops act as guides for subdivision, ensuring the model maintains its shape and integrity at higher polygon counts. When working with subdivision surfaces, a common practice is to create support loops (also known as control loops or holding edges) near sharp corners or creases. These extra edge loops, placed very close to the original edge, tell the subdivision algorithm to maintain sharpness in that area, preventing it from rounding off excessively. For instance, around a door frame or a headlight recess, strategically placed support loops will ensure a crisp, well-defined edge.
Automotive design is replete with sharp edges and distinct creases that differentiate body panels and define the vehicle’s aesthetic. Replicating these effectively in a subdivision surface workflow without resorting to excessively dense base meshes is a key skill. Beyond support loops, some software offers dedicated tools for creasing. For example, in Blender, you can use the “Crease” value on edges to control how sharp they remain after subdivision. Similarly, in Maya, you can use “Crease Sets.” This allows you to maintain sharp features on a relatively low-poly model, which can then be smoothed without losing those critical design lines. Understanding where to use these techniques versus adding more geometric support loops is crucial for balancing visual fidelity with polygon efficiency. Overuse of support loops can lead to areas of unnecessarily high polygon density, impacting performance, particularly for game assets. Professional 3D car models, like those found on platforms such as 88cars3d.com, typically demonstrate exceptional control over topology, allowing for both realistic rendering and efficient game engine integration.
Once your 3D car model boasts impeccable topology, the next critical step is UV mapping. UV mapping is the process of flattening the 3D surface of your model into a 2D space, allowing you to apply textures accurately. For a vehicle, with its intricate shapes, numerous parts, and demanding visual fidelity, this process can be incredibly complex. Proper UV mapping is essential for realistic PBR (Physically Based Rendering) materials, seamless texture application, and efficient utilization of texture memory. Poor UVs can lead to stretched textures, visible seams, or inefficient texture packing, all of which detract from the final render quality and game performance.
The goal of UV mapping a car is to create clean, non-overlapping UV islands that are scaled appropriately (maintaining consistent texel density) and laid out efficiently within the 0-1 UV space. Different parts of a car – the large, sweeping body panels, the detailed interior components, the transparent glass, and the mechanical underside – will often require distinct UV unwrapping strategies. For high-resolution renders, you might even utilize UDIMs, which allow textures to span multiple UV tiles, providing extremely high detail without a single gigantic texture map. However, for game engines or real-time applications, consolidating UVs into a single 0-1 space or a few atlases is usually preferred to minimize draw calls.
The car body, being the most visible and often largest component, demands careful attention. Techniques like “pelt mapping” or advanced planar projections followed by relaxation tools are common. For large, continuous surfaces, minimize UV seams as much as possible, placing them in less visible areas (e.g., along panel gaps, underneath the car, or hidden by trim pieces). The interior, with its multitude of smaller, distinct parts (dashboard, seats, steering wheel, buttons), often benefits from individual planar or box projections for each component, then packed efficiently. Glass components (windshield, windows, headlights) typically require simple planar projections and often occupy their own dedicated UV space or atlas, as their material properties are unique and often don’t require complex texture maps beyond roughness or normal details for imperfections. Mechanical parts under the hood or chassis might be less visible but still require proper UVs for ambient occlusion or wear textures; these can often have more seams if they are rarely seen up close.
Texel density refers to the number of texture pixels per unit of 3D space. Maintaining a consistent texel density across your entire model is crucial for visual uniformity. If parts of your model have a low texel density, textures applied to them will appear blurry or pixelated, while areas with excessively high density might be overkill and waste texture memory. Most 3D applications offer tools to visualize and manage texel density. For a high-quality car model, you might aim for a texel density of around 10.24 pixels/cm (1024×1024 texture for a 100x100cm area) for the main body, scaling down slightly for less visible interior parts. When unwrapping, strive to minimize visible UV seams. Seams can break the continuity of textures, especially normal maps, and become noticeable under certain lighting conditions. Where seams are unavoidable, try to align them with natural breaks in the geometry, such as panel lines, creases, or hard edges, making them less conspicuous. Stitching UVs where possible, and using specialized texture painting tools like Substance Painter that can intelligently hide seams, are also valuable strategies. For game assets, consolidating multiple smaller components into a single texture atlas by packing their UVs together can significantly reduce draw calls and improve performance, even if it means sacrificing some individual texel density for less critical parts.
With a solid mesh and clean UVs, the next step is to imbue your 3D car model with lifelike materials. Physically Based Rendering (PBR) has become the industry standard for achieving photorealistic results, accurately simulating how light interacts with surfaces in the real world. PBR materials rely on a set of texture maps that describe a surface’s properties, dictating how it reflects light, absorbs color, and appears to the viewer. Understanding these maps and how to create sophisticated shader networks is essential for making your automotive renders truly shine.
The core concept of PBR is energy conservation and realism: a surface cannot reflect more light than it receives, and light reflection is governed by physical laws. This approach simplifies material creation while ensuring consistent, realistic results across different lighting environments. For automotive models, this translates into believable car paint, realistic glass, detailed rubber tires, and nuanced interior fabrics and plastics. The choice between a Metallic/Roughness workflow and a Specular/Glossiness workflow depends largely on your chosen renderer or game engine, though Metallic/Roughness is increasingly prevalent.
Each PBR map conveys specific information:
Car paint is notoriously complex due to its multi-layered nature: a base color coat, a metallic flake layer, and a clear coat. Simulating this requires a sophisticated shader. In most PBR setups, you’d start with your base color (Albedo), then dial in metallic and roughness values. For the metallic flake effect, many renderers offer specialized car paint shaders or allow you to layer materials using blend modes. You might use a texture map or procedural noise plugged into the normal map slot to simulate the subtle metallic flakes under the clear coat, along with a slight roughness variation. The clear coat itself is often represented by a separate, highly reflective, and very smooth (low roughness) layer on top of the base paint. This layering is achievable in renderers like Corona, V-Ray, Cycles, and Arnold, typically using “Blend” materials or complex shader networks. For game engines like Unity or Unreal Engine, you might utilize their advanced material editors, leveraging parameters like ‘Clear Coat’ or ‘Anisotropy’ to achieve similar effects.
Beyond paint, other materials require careful attention. Glass needs appropriate transmission (refraction) and reflection values, often with a subtle roughness map for imperfections. Tires require a rough, dark material with a detailed normal map derived from the tread geometry. Chrome and other polished metals demand high metallic values and very low roughness. Websites like 88cars3d.com ensure that their 3D car models come with professionally set up PBR materials, ready for immediate use in various rendering engines, saving artists countless hours of material creation and tweaking.
A perfectly modeled and textured 3D car model only truly comes alive under the right lighting. Rendering an automotive scene is an art form that blends technical proficiency with an keen eye for photographic composition and illumination. The goal is to highlight the car’s design, materials, and overall aesthetic in a way that is both visually striking and believable. This involves mastering various lighting techniques, understanding renderer-specific settings, and applying sophisticated post-processing to achieve that “magazine cover” quality.
High-fidelity automotive rendering demands attention to global illumination, accurate reflections, and nuanced shadow casting. The choice of renderer (Corona Renderer, V-Ray, Cycles, Arnold, Octane) often dictates the specific workflow and capabilities, but the underlying principles of lighting remain universal. The challenge lies in creating an environment that complements the vehicle without overpowering it, emphasizing its curves and material properties through light and shadow.
Each renderer has its own strengths and specific settings to master for automotive work:
Regardless of the renderer, paying attention to render passes (beauty, reflection, refraction, normal, AO, Z-depth) allows for greater flexibility in post-production.
The final 10-20% of a stunning render often comes from post-processing. Software like Adobe Photoshop, Affinity Photo, or Blackmagic Fusion can take your raw render passes and transform them into a cinematic masterpiece. Common post-processing steps include:
This stage is where artistic vision truly comes to fruition, taking a technically sound render and imbuing it with emotion and visual impact.
While high-fidelity renders prioritize visual realism above all else, game development, AR, and VR demand a delicate balance between visual quality and real-time performance. A beautifully detailed 3D car model that looks stunning in a static render might bring a game engine to its knees. Optimizing 3D car models for interactive experiences involves meticulous planning and execution, focusing on reducing polygon counts, draw calls, and texture memory usage without sacrificing too much visual integrity. This section explores strategies to ensure your automotive assets perform smoothly in real-time environments.
The core challenge is that every millisecond counts. Unlike offline rendering where computation time is less critical, interactive applications require frames to be rendered in fractions of a second (e.g., 60 frames per second means each frame has ~16ms to render). High polygon counts, too many materials, unoptimized textures, and inefficient lighting can quickly exceed this budget. Therefore, a strategic approach to asset creation and optimization is crucial from the outset, especially for high-detail objects like vehicles.
LODs are a cornerstone of real-time optimization. Instead of using a single, high-polygon model for all distances, LODs involve creating multiple versions of the same asset, each with progressively lower polygon counts. The game engine then automatically switches between these versions based on the object’s distance from the camera. For example, a hero car model might have an LOD0 (50,000-150,000 tris) for close-ups, an LOD1 (20,000-40,000 tris) for medium distances, and an LOD2 (5,000-10,000 tris) for far distances, with a final billboard or extremely low-poly version (LOD3, 500-1000 tris) for objects barely visible. Tools within Unity, Unreal Engine, or even dedicated DCC software can generate or manage these LODs. The goal is to reduce the overall geometry that the GPU needs to process.
Draw calls are another critical performance bottleneck. Every time the CPU tells the GPU to draw something, it’s a draw call. Each material, mesh, and light source can potentially generate a draw call. Reducing draw calls is paramount. This can be achieved through:
As mentioned, texture atlasing is highly effective for consolidating resources. Instead of having dozens of small texture maps for a car’s interior (one for each button, dial, vent), you can arrange all the UVs for these smaller elements onto a single, larger UV space, then create one texture map that contains all the necessary visual information. This means the engine only has to load and sample one texture for many different parts, dramatically reducing draw calls and memory footprint. This is particularly valuable for the dashboard, console, and door panels.
Material instancing builds on this concept. Rather than creating entirely new materials for every color variation of a car or slightly different metallic trim, you define a master material (e.g., a “Car Paint Master” or “Plastic Trim Master”). Then, you create instances of this master material, allowing artists to change parameters like base color, roughness, or normal map intensity without creating a completely new shader. This is extremely efficient, as the engine can reuse the same shader code, only swapping out the specific parameter values. For games featuring multiple car models or numerous customization options, material instancing is indispensable for managing performance and iteration time.
For physically interactive 3D car models in games, accurate collision detection is vital. However, using the high-polygon render mesh for collision checks is highly inefficient. Instead, dedicated collision meshes are created. These are simplified, low-polygon versions of the car’s exterior, specifically designed for physics calculations. They can be simple convex hulls for basic collisions or more complex compound collision shapes for detailed interactions. The complexity of the collision mesh directly impacts the performance of the physics engine.
Beyond collision meshes, other physics optimizations include:
For AR/VR, polygon counts and draw calls are even more critical due to the higher refresh rates and stereo rendering requirements (effectively rendering the scene twice). Models must be ruthlessly optimized, often with aggressive LOD transitions and baking static lighting into textures to reduce real-time light calculations. Platforms like 88cars3d.com often provide models specifically optimized for game engines, ensuring that these crucial performance considerations are already addressed, offering clean topology, optimized UVs, and often multiple LODs straight out of the box.
The utility of high-quality 3D car models extends far beyond traditional rendering and game development. They are increasingly vital assets in rapid prototyping, architectural visualization, product configurators, and immersive AR/VR experiences. Understanding how to prepare and adapt these models for diverse applications, and navigate the myriad of file formats, is crucial for any professional working with 3D content.
Each application has its own unique set of requirements and technical considerations. A model suitable for a cinematic render might be entirely inappropriate for 3D printing without significant modifications. Similarly, a game-ready asset might lack the detail required for a high-resolution architectural visualization. The flexibility and adaptability of your 3D car models are key to maximizing their value across various industries.
3D printing transforms digital models into physical objects, but this requires the model to be “manifold” or “watertight.” A watertight mesh has no holes, non-manifold edges, or inverted normals – it defines a solid, enclosed volume. Common issues in models not intended for 3D printing include:
Before export, it’s crucial to use mesh inspection and repair tools (available in Blender, 3ds Max, or dedicated software like Meshmixer or Netfabb) to ensure the model is manifold. Another critical factor is wall thickness. Digital models might have infinitely thin surfaces, but physical objects require a minimum thickness to be printable and structurally sound. You might need to add a “Shell” or “Thicken” modifier to your model, or explicitly model thickness into components. For precise scale models, ensuring all parts meet the printer’s minimum wall thickness requirement (e.g., 0.8mm for many FDM printers) is essential. Also, consider the specific material being used for printing, as this impacts strength and detail resolution.
The choice of file format is critical for compatibility and data preservation during export and import:
When sourcing models, like those from 88cars3d.com, ensuring they offer a range of these formats guarantees maximum versatility for your projects.
High-quality 3D car models are indispensable across various industries:
Each of these applications leverages the core principles of modeling, texturing, and optimization discussed throughout this article, tailored to their specific needs and technical constraints.
The journey through the creation, optimization, and application of high-quality 3D car models reveals a multifaceted discipline demanding both technical prowess and artistic vision. From the foundational integrity of clean topology and efficient UV mapping to the advanced artistry of PBR materials and realistic lighting, every stage is critical in achieving a compelling result. We’ve explored the nuances of preparing models for stunning cinematic renders, ruthless optimization for real-time game engines and AR/VR, and the specific requirements for physical fabrication through 3D printing.
Mastering these techniques ensures your 3D car models not only look exceptional but also perform efficiently across a diverse range of platforms and industry applications. Whether you are an aspiring 3D artist, a game developer, an automotive designer, or a visualization professional, understanding these workflows is paramount to your success. By applying best practices in modeling, texturing, rendering, and optimization, you empower yourself to create compelling, high-impact automotive content that resonates with your audience.
Remember, the quality of your base assets is everything. Investing in or creating models with clean topology, proper UVs, and well-structured materials from the outset, such as the premium selection available at 88cars3d.com, will save countless hours down the line and elevate the final output of any project. Continuously refine your skills, embrace new technologies, and always strive for that perfect blend of realism and performance. Your journey in automotive 3D modeling is an ongoing evolution, and with these insights, you are well-equipped to drive your projects forward with confidence and creativity.
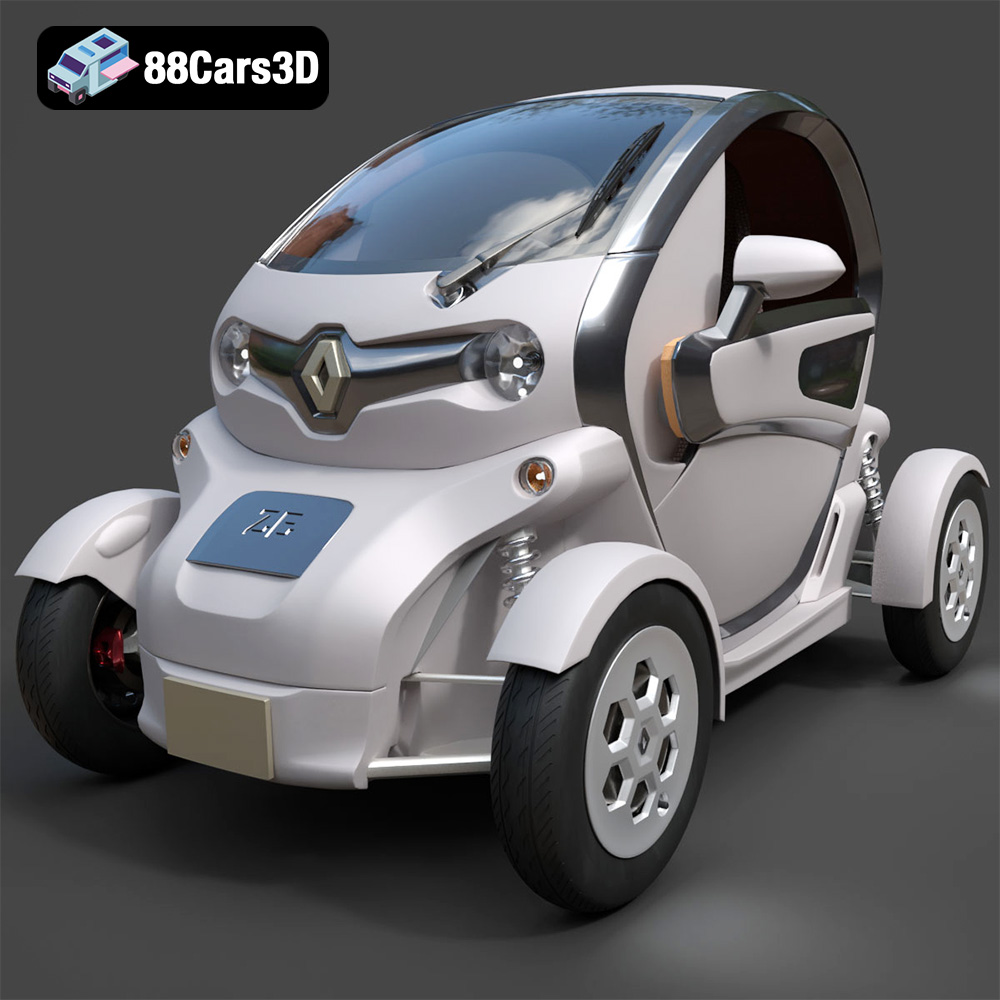
Texture: Yes
Material: Yes
Download the Renault Twizy ZE 3D Model featuring clean geometry, realistic detailing, and a fully modeled interior. Includes .blend, .fbx, .obj, .glb, .stl, .ply, .unreal, and .max formats for rendering, simulation, and game development.
Price: $4.99
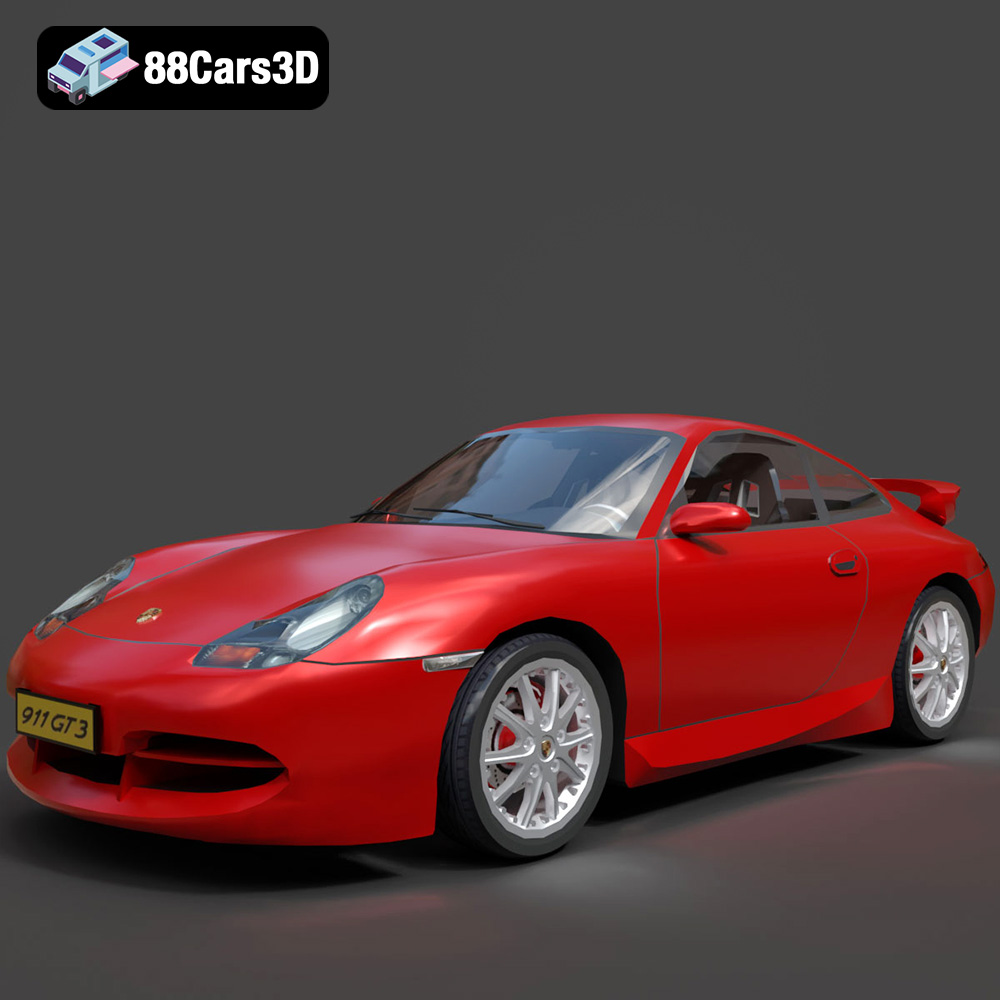
Texture: Yes
Material: Yes
Download the Porsche 911 GT3 3D Model featuring clean geometry, realistic detailing, and a fully modeled interior. Includes .blend, .fbx, .obj, .glb, .stl, .ply, .unreal, and .max formats for rendering, simulation, and game development.
Price: $4.99
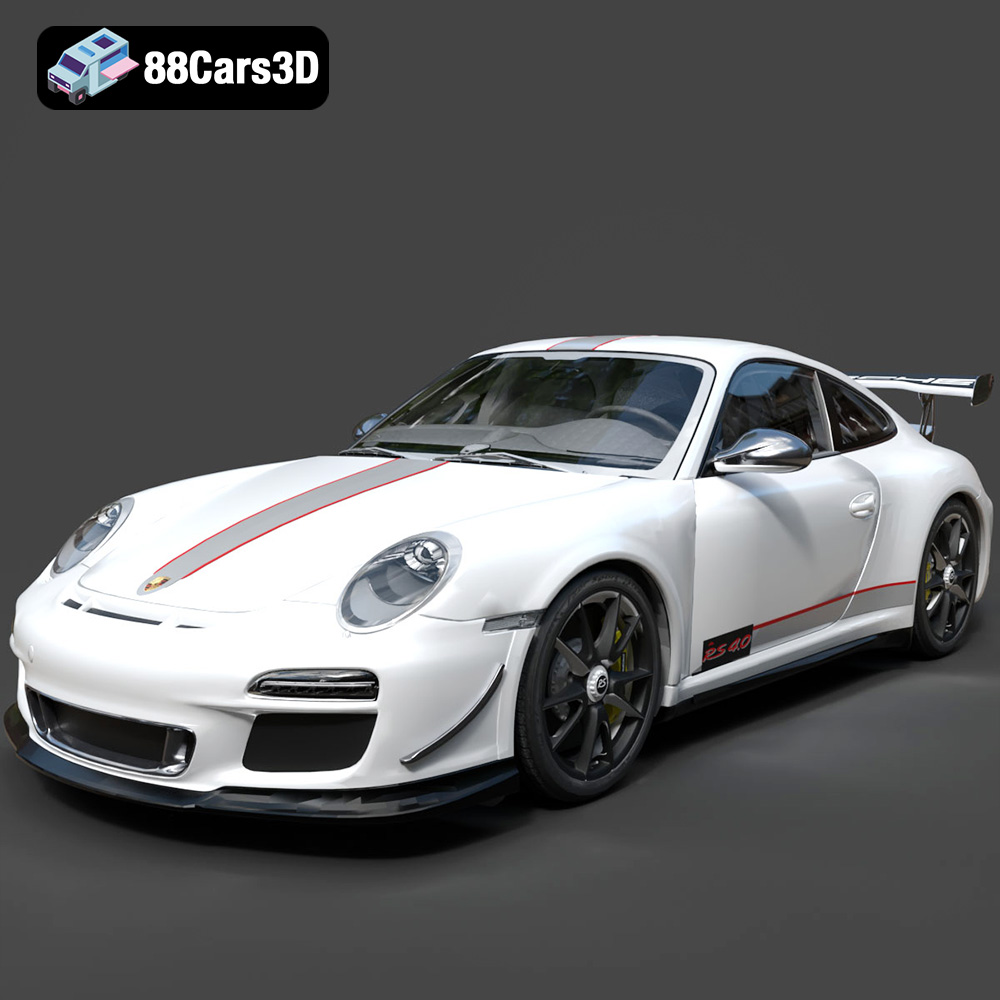
Texture: Yes
Material: Yes
Download the Porsche 911 997 GT3 RS 4.0 2011 3D Model featuring clean geometry, realistic detailing, and a fully modeled interior. Includes .blend, .fbx, .obj, .glb, .stl, .ply, .unreal, and .max formats for rendering, simulation, and game development.
Price: $4.99
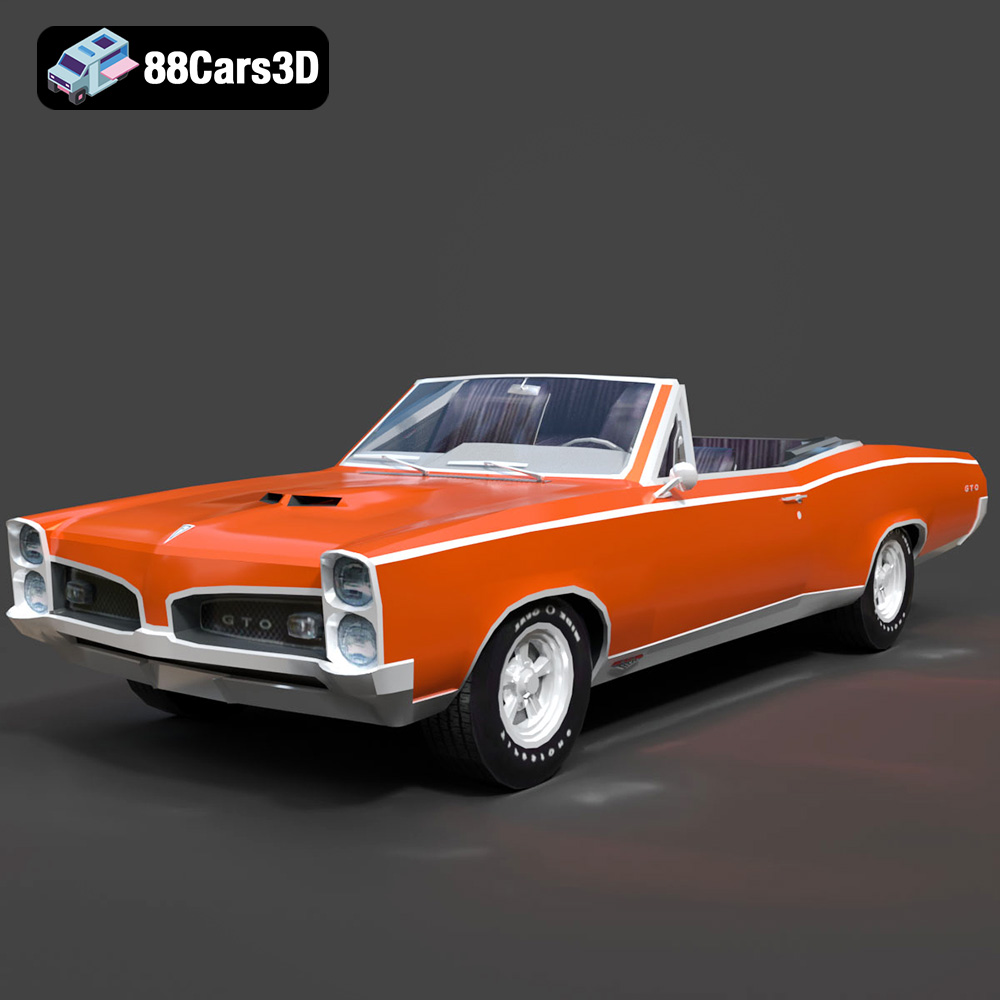
Texture: Yes
Material: Yes
Download the Pontiac GTO Cabrio 1967 3D Model featuring clean geometry, realistic detailing, and a fully modeled interior. Includes .blend, .fbx, .obj, .glb, .stl, .ply, .unreal, and .max formats for rendering, simulation, and game development.
Price: $4.99
Texture: Yes
Material: Yes
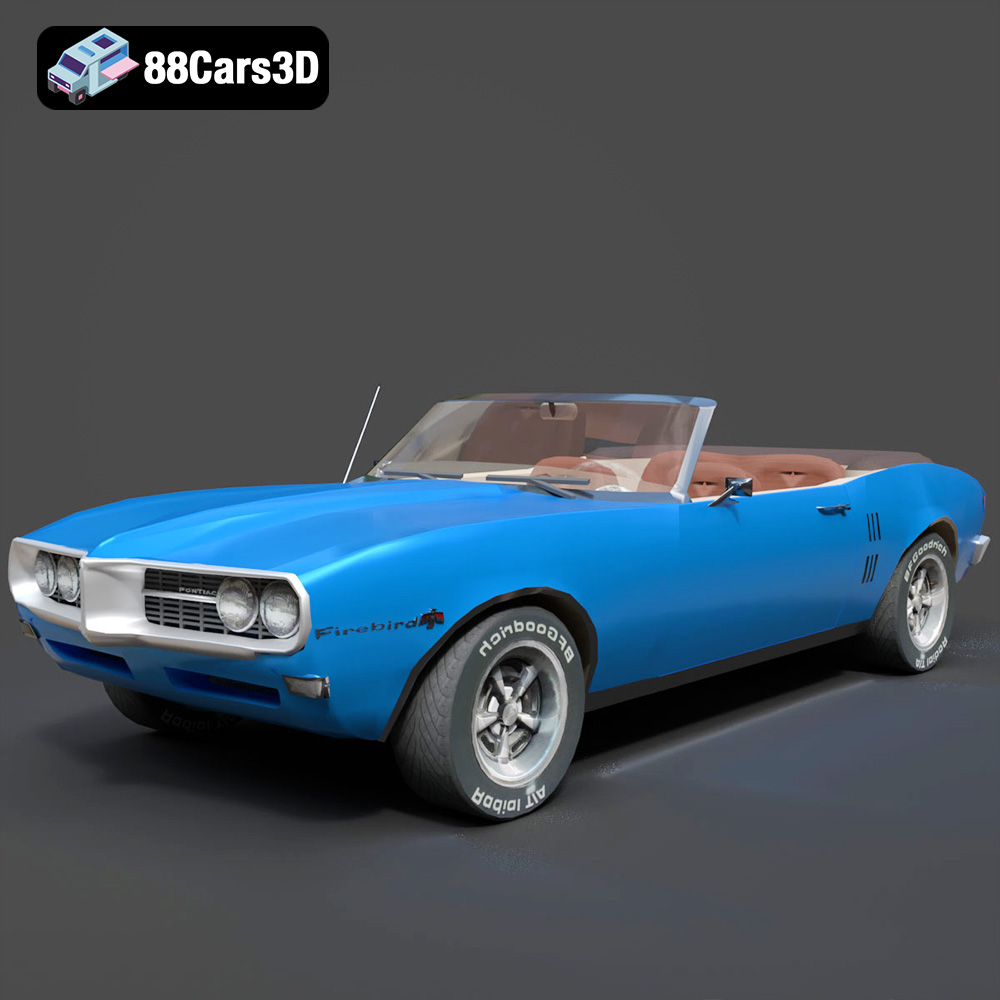
Download the Pontiac Firebird Convertible 1968 3D Model featuring clean geometry, realistic detailing, and a fully modeled interior. Includes .blend, .fbx, .obj, .glb, .stl, .ply, .unreal, and .max formats for rendering, simulation, and game development.
Price: $4.99

Texture: Yes
Material: Yes
Download the Peugeot 508 2011 3D Model featuring clean geometry, realistic detailing, and a fully modeled interior. Includes .blend, .fbx, .obj, .glb, .stl, .ply, .unreal, and .max formats for rendering, simulation, and game development.
Price: $4.99
Texture: Yes
Material: Yes
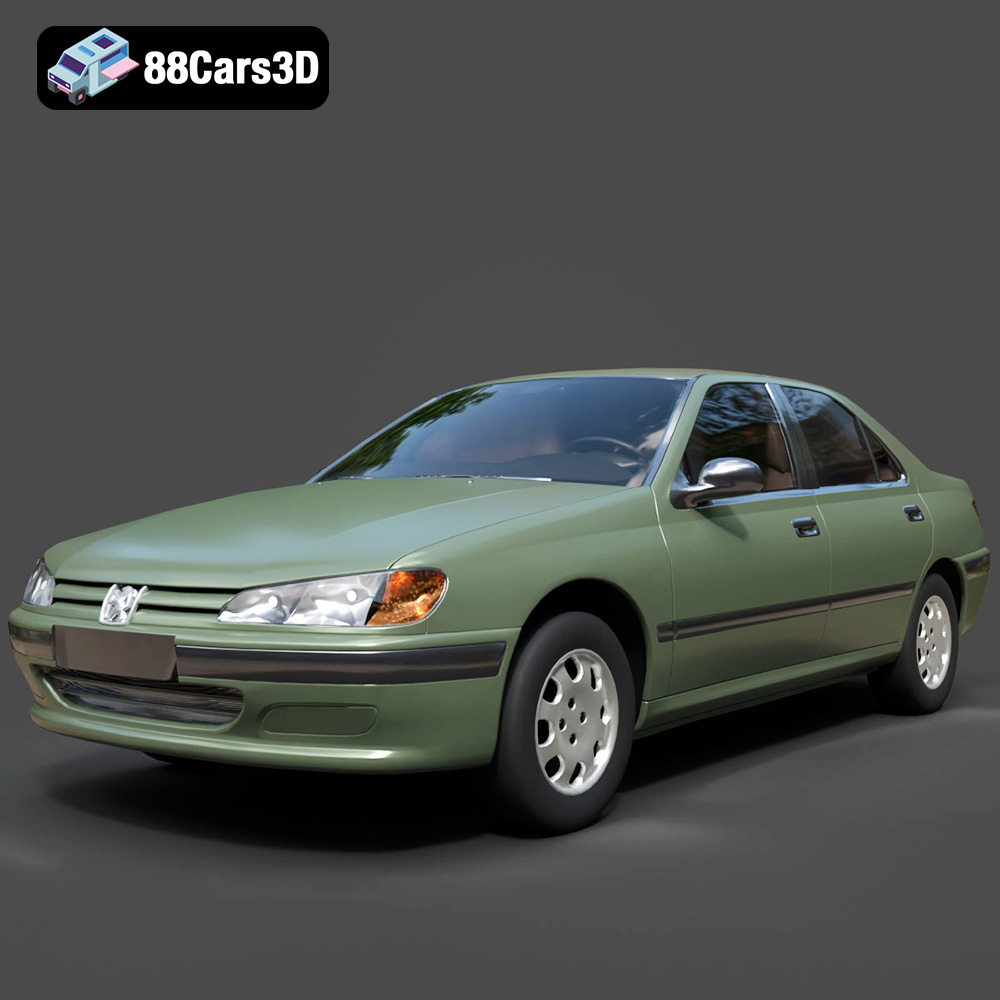
Download the Peugeot 406 1996 3D Model featuring clean geometry, realistic detailing, and a fully modeled interior. Includes .blend, .fbx, .obj, .glb, .stl, .ply, .unreal, and .max formats for rendering, simulation, and game development.
Price: $10
Texture: Yes
Material: Yes
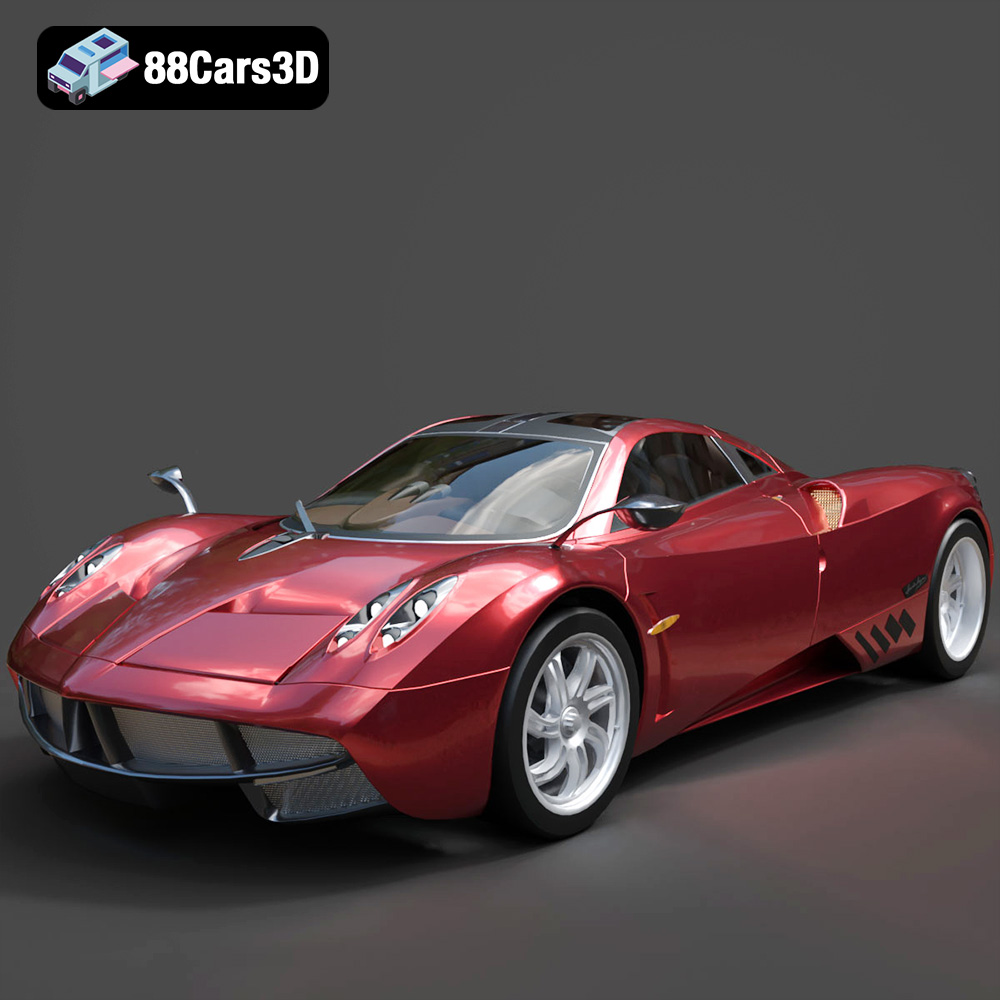
Download the Pagani Huayra 2012 3D Model featuring clean geometry, realistic detailing, and a fully modeled interior. Includes .blend, .fbx, .obj, .glb, .stl, .ply, .unreal, and .max formats for rendering, simulation, and game development.
Price: $10
Texture: Yes
Material: Yes
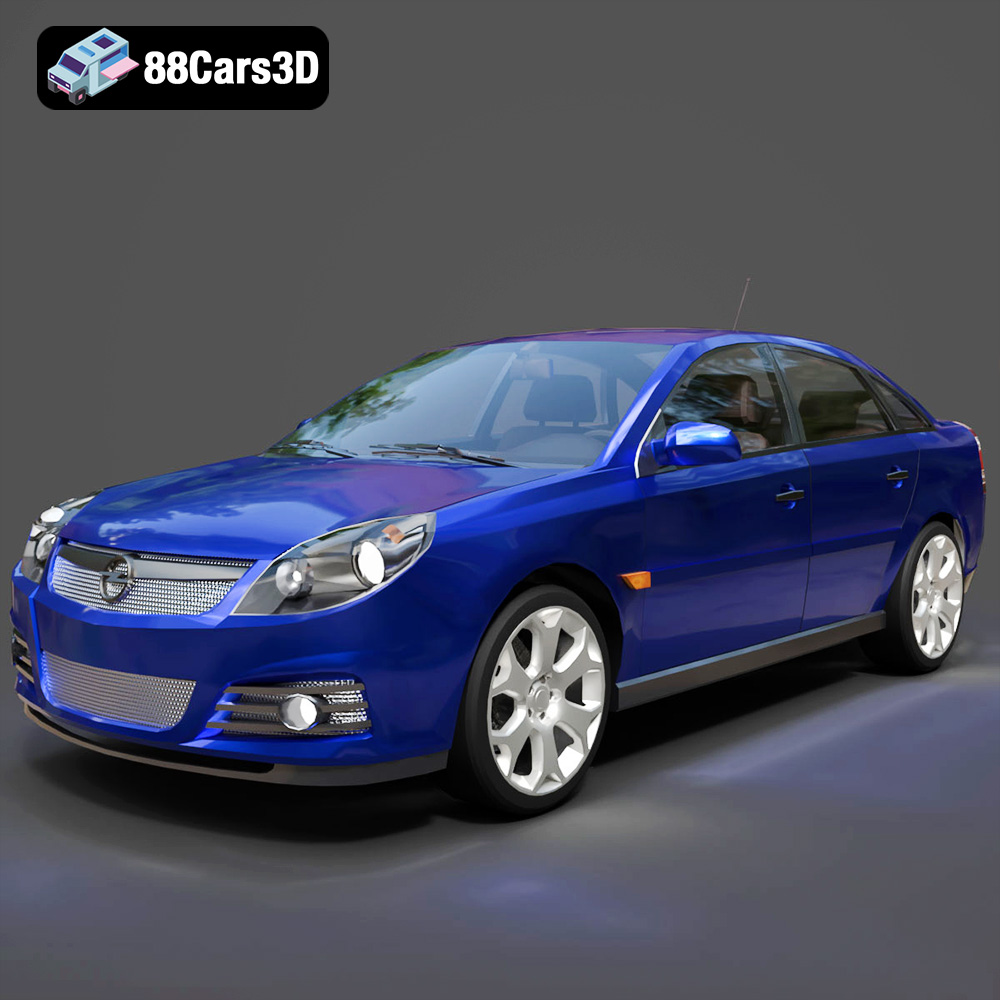
Download the Opel Vectra C 2005 3D Model featuring clean geometry, realistic detailing, and a fully modeled interior. Includes .blend, .fbx, .obj, .glb, .stl, .ply, .unreal, and .max formats for rendering, simulation, and game development.
Price: $10

Texture: Yes
Material: Yes
Download the Opel Insignia OPC 3D Model featuring clean geometry, realistic detailing, and a fully modeled interior. Includes .blend, .fbx, .obj, .glb, .stl, .ply, .unreal, and .max formats for rendering, simulation, and game development.
Price: $10

