Get 20% OFF All Premium 3D & STL Models!

The sleek lines, the intricate mechanics, the sheer power – cars have always captivated us. In the realm of 3D, this fascination translates into a demand for exceptionally detailed and realistic automotive models. Whether you’re an automotive designer visualizing a new concept, a game developer crafting an immersive racing experience, an architect integrating vehicles into a scene, or an artist pushing the boundaries of photorealism, the quality of your 3D car models is paramount. It dictates everything from the believability of your renders to the performance of your real-time applications.
Creating or sourcing high-quality 3D car models is a complex endeavor, requiring a deep understanding of various technical disciplines. From meticulously clean topology that supports flawless deformation, to advanced Physically Based Rendering (PBR) materials that accurately simulate real-world surfaces, and optimized assets ready for interactive experiences in AR/VR or game engines – each stage demands precision and expertise. This comprehensive guide will take you on a journey through the essential techniques and best practices for working with 3D automotive models. We’ll delve into the intricacies of modeling, texturing, rendering, optimization, and preparing models for diverse applications, ensuring your digital vehicles truly stand out.
The backbone of any high-quality 3D car model lies in its topology. Clean, efficient, and well-structured geometry is not just aesthetically pleasing in the viewport; it’s fundamental for smooth subdivision, distortion-free deformation, and efficient rendering. Automotive surfaces, with their complex curves, sharp creases, and delicate panel gaps, demand an exceptional level of topological precision. Without it, even the most advanced materials and lighting will fail to mask underlying mesh issues.
Adhering to quad-based topology (meshes composed primarily of four-sided polygons) is a critical industry best practice. Quads are predictable, subdivide cleanly, and allow for consistent edge flow. This consistency is crucial for defining the subtle contours and reflections that make a car model convincing. When modeling, prioritize edge loops that follow the natural flow of the car’s design – around wheel arches, along body lines, and defining panel separations. These loops act as guides for maintaining curvature and sharpness, particularly when using subdivision surface modifiers (like TurboSmooth in 3ds Max or Subdivision Surface in Blender). Support loops (or control loops) are equally vital; these are additional edge loops placed near hard edges to sharpen the transition after subdivision, preventing unwanted softening while still allowing for a smooth overall surface.
Achieving perfect edge flow for automotive models involves more than just using quads; it’s about intelligent placement. Consider the precise flow of edges around areas like headlights, taillights, grilles, and air intakes. These elements often introduce complex junctions in the mesh, where edges need to converge and diverge gracefully. Tools like Blender’s LoopTools, Maya’s Quad Draw, or 3ds Max’s Graphite Modeling Tools can significantly aid in retopologizing messy areas or creating clean geometry from scratch. For intricate details like panel gaps, ensure that the edges defining these separations are tight and consistent, providing a crisp, realistic break in the surface. Inconsistent edge flow can lead to pinching, unwanted bumps, or ugly reflections, ruining the illusion of a perfectly manufactured vehicle.
Polygon counts are a constant balancing act in 3D, especially for automotive assets. A render-ready, high-resolution car model might comfortably sit between 200,000 to over 1 million polygons, allowing for extreme detail in close-up shots. Such models feature fully modeled interiors, intricate engine components, and highly detailed tires and brakes. However, for real-time applications like games or AR/VR, these counts are often too high, leading to performance bottlenecks. This is where a strategic approach to Level of Detail (LODs) becomes indispensable.
LODs involve creating multiple versions of the same model, each with progressively fewer polygons. A typical LOD setup might include:
This strategy ensures that your game engine or AR/VR application only renders the necessary amount of detail based on the model’s distance from the camera, significantly optimizing performance. When sourcing 3D car models from marketplaces such as 88cars3d.com, look for listings that explicitly mention optimized topology and included LODs, as this saves considerable production time.
Once your 3D car model has impeccable topology, the next crucial step is to give it a skin – realistic textures and materials. This is where UV mapping and the creation of Physically Based Rendering (PBR) materials come into play, transforming a sterile wireframe into a vibrant, believable vehicle. The way light interacts with a surface – how it reflects, absorbs, and scatters – defines its perceived material. PBR workflows have become the industry standard for achieving this authenticity, requiring carefully crafted texture maps.
Effective UV mapping is the foundation for any texture work. UVs are 2D coordinates that tell your software how to project a 2D image (texture) onto the 3D surface of your model. Poor UVs lead to stretched textures, visible seams, and wasted texture space, all of which detract from realism. For complex objects like cars, a systematic approach is essential. Generally, you’d unwrap different components (body panels, wheels, interior, glass) separately to ensure optimal resolution and minimal distortion. Large, continuous surfaces like the main body panels often benefit from large, contiguous UV islands to avoid visible seams and allow for high-resolution decals or paint effects.
When UV mapping a car, consider the specific needs of each part. For the main body, a single large UV island or a few carefully cut islands covering major panels will allow for high-resolution paint textures, typically 4K or even 8K, to capture subtle metallic flakes, clear coat reflections, and surface imperfections. Ensure that seams are placed in inconspicuous areas, such as along natural panel lines or hidden edges. For smaller, repeating elements like tire treads or interior buttons, tiling textures can be efficient, requiring less unique UV space. Glass, chrome trim, and rubber seals also need their own clean UVs, even if they primarily use procedural materials, as these surfaces may still require normal maps or ambient occlusion maps to define fine details or wear. Maximizing texture density across your UV layout is key – arranging islands efficiently to minimize empty space without causing overlap is a skill developed with practice.
PBR materials simulate how real-world materials interact with light, leading to significantly more believable results. The core of PBR revolves around a few key texture maps:
For automotive paint, a complex shader network is often required to mimic the multi-layered nature of real car finishes (e.g., base coat, clear coat, metallic flakes). This might involve blending multiple PBR shaders or utilizing specialized car paint shaders available in renderers like Corona, V-Ray, or Cycles. Chrome and other metallic parts will have high metallic values and very low roughness. Glass requires specific transparency and refraction settings, often with subtle normal maps to break up reflections or add fingerprints. Software like Substance Painter is invaluable for creating these PBR texture sets, allowing artists to paint directly onto the 3D model and generate all necessary maps simultaneously. When you acquire models from platforms like 88cars3d.com, they often come with pre-configured PBR materials and high-resolution textures, ready to drop into your preferred rendering engine.
With a perfectly modeled and textured 3D car model, the next step is to make it shine – quite literally – through advanced rendering. This involves meticulous lighting, environmental setup, and fine-tuning render settings to achieve photorealistic results. The goal is to make the digital car indistinguishable from a photograph, capturing every nuance of its surface and form.
The choice of renderer plays a significant role in your workflow. Popular choices in the industry include Corona Renderer and V-Ray (often paired with 3ds Max), Cycles (Blender), and Arnold (Maya). Each offers distinct advantages in terms of speed, feature set, and integration, but all adhere to the principles of physical light simulation. Regardless of your renderer, a key philosophy is to emulate real-world photography and lighting setups. Just as a professional photographer carefully positions lights and chooses a location, a 3D artist must construct a believable digital environment for their automotive subject.
High Dynamic Range Images (HDRIs) are the cornerstone of realistic automotive lighting. An HDRI captures a full spherical view of a real-world environment, including all its light information. When used as an environment map in your renderer, it bathes your car model in physically accurate light, generating incredibly realistic reflections on the glossy surfaces of the paint, chrome, and glass. HDRIs can simulate anything from a cloudy outdoor day to a sun-drenched desert, or even an indoor studio. For studio shots, supplementing the HDRI with targeted area lights, softboxes, and rim lights allows for precise control over highlights and shadows, emphasizing the car’s sculpted forms. These lights can be strategically placed to create elegant reflections that define the curves and edges, drawing the viewer’s eye. Experiment with different light temperatures and intensities to evoke specific moods and atmosphere, just as you would in a real photoshoot.
Optimal render settings are a balance between image quality and render time. Modern renderers offer various sampling and denoising options to achieve clean images efficiently. For instance, in Corona Renderer, you might focus on increasing passes and using the built-in denoiser; in Cycles, adjusting sample counts and utilizing Open Image Denoise can drastically reduce noise. Always render multiple passes (render elements/channels) in addition to the beauty pass. Essential passes for automotive rendering include:
Post-processing and compositing are where the final magic happens. Using software like Adobe Photoshop, Affinity Photo, or Blackmagic Fusion, you can combine these render passes, perform color grading, adjust contrast, add subtle lens effects (bloom, flares, chromatic aberration), and sharpen the image. This stage is crucial for elevating a good render to an outstanding one, allowing you to fine-tune the visual narrative and achieve that coveted “magazine cover” look. Professional 3D car models from marketplaces like 88cars3d.com are often meticulously crafted to render perfectly, streamlining this entire process for artists and studios.
Developing interactive experiences, whether for high-fidelity PC games, console titles, or mobile applications, requires a different approach to 3D car models. While visual fidelity is still paramount, performance becomes an equally critical factor. Game engines like Unity and Unreal Engine demand assets that are not only visually appealing but also highly optimized to maintain smooth frame rates and responsiveness. The focus shifts from raw polygon count to efficient resource management and streamlined rendering pipelines.
The core challenge in game development is rendering many objects, often in complex environments, at 30, 60, or even 120 frames per second. Unoptimized 3D car models can quickly become bottlenecks, causing frame drops and a poor user experience. Therefore, significant effort goes into reducing draw calls, managing texture memory, and employing clever tricks to simulate detail without excessive geometry. This includes everything from how geometry is constructed to how materials are batched and how assets are streamed.
The most critical optimization technique for game-ready 3D car models is the intelligent use of Level of Details (LODs), as discussed earlier. Implementing a robust LOD system ensures that only the necessary amount of geometric detail is rendered based on the camera’s distance to the vehicle. Beyond geometry, draw call reduction is vital. Each unique material, texture, or mesh typically results in a separate draw call, which can quickly overwhelm a GPU. Strategies to reduce draw calls include:
Further optimizations involve creating simplified collision meshes (often convex hulls or simplified primitives) instead of using the high-detail visual mesh for physics calculations. Shadow casting can also be optimized with simplified shadow proxies or by baking static shadows for stationary vehicles. Culling techniques, like frustum culling (not rendering objects outside the camera’s view), are handled automatically by game engines but rely on well-defined bounding boxes for your models.
Importing 3D car models into game engines usually involves the FBX file format, which efficiently carries geometry, UVs, PBR textures, and skeletal animation data. Once imported into Unity or Unreal Engine:
Understanding engine-specific features, such as Unreal’s Chaos Vehicle Physics or Unity’s Wheel Collider, will enable you to create highly realistic driving dynamics. For complex projects, models sourced from marketplaces like 88cars3d.com often include pre-setup LODs and materials, significantly accelerating the integration process.
The utility of high-quality 3D car models extends far beyond static renders and conventional game development. Emerging technologies like Augmented Reality (AR) and Virtual Reality (VR) are transforming how we interact with digital content, offering immersive experiences for design visualization, training, and consumer engagement. Simultaneously, 3D printing opens up opportunities to bring these digital designs into the physical world, creating prototypes, scale models, or custom parts. Each of these applications imposes its own unique set of technical requirements and optimization challenges.
For AR/VR, the emphasis is on extreme performance and low latency to prevent motion sickness and ensure a smooth, interactive experience. This often means even more stringent polygon budgets and careful consideration of rendering techniques. For 3D printing, the focus shifts to mesh integrity, ensuring that the digital model is a watertight, manifold object ready for fabrication without errors. Understanding these specific demands is crucial for successfully deploying your automotive models in these cutting-edge fields.
Developing 3D car models for AR/VR means pushing optimization to its limits. While traditional games might tolerate occasional frame drops, VR requires a consistently high frame rate (e.g., 90 FPS or higher) to avoid nausea. AR applications, often running on mobile devices, face even tighter constraints. This translates to:
When users can walk around, sit inside, or even customize a virtual car in their living room, accuracy and interactivity become paramount. 3D car models designed with AR/VR in mind, often available on platforms like 88cars3d.com, typically feature pre-optimized geometry and PBR textures tailored for efficient real-time rendering on various devices.
Turning a digital 3D car model into a physical object via 3D printing requires a different kind of preparation. The primary concern is mesh integrity – the model must be “manifold” or “watertight.” This means:
Tools within 3D software like Blender’s 3D Print Toolbox, Autodesk Meshmixer, or Netfabb are invaluable for identifying and repairing mesh errors. You’ll often need to merge separate components into a single solid mesh, fill holes, and ensure correct scaling for your desired print size. The most common file formats for 3D printing are STL (Stereolithography) and OBJ, though others like AMF are gaining traction. Before sending to print, always run a final check with a dedicated 3D printing slicer software, which can often highlight any remaining issues and prepare the model for the specific printer.
The journey of a 3D car model often involves moving between different software applications and platforms. This necessitates a clear understanding of various 3D file formats, their capabilities, and the best practices for converting and integrating them into diverse workflows. Interoperability is a key concern in the 3D industry, and choosing the right format for the right task can save immense time and prevent frustrating technical hurdles.
Each file format is designed with specific use cases in mind, supporting different types of data (geometry, UVs, materials, animations, scene hierarchy). While some formats are proprietary to specific software (e.g., .max for 3ds Max, .blend for Blender), universal exchange formats facilitate seamless data transfer between applications and platforms. Knowing when to use which format, and how to correctly handle conversions, is a hallmark of a professional 3D workflow.
Here’s a breakdown of common 3D file formats and their typical applications:
When converting models between different software packages or for specific applications, several considerations are paramount:
By understanding these nuances, you can navigate complex pipelines with confidence. Marketplaces like 88cars3d.com often provide 3D car models in multiple formats (e.g., .MAX, .FBX, .OBJ, .GLB, .USDZ) to offer maximum flexibility and reduce conversion hassles for professionals working across various platforms and software.
The journey from a digital concept to a hyper-realistic render or a game-ready asset for 3D car models is a testament to the blend of technical skill and artistic vision in the 3D industry. We’ve explored the critical importance of impeccable topology and edge flow for automotive surfaces, the precision required in UV mapping and crafting exquisite PBR materials, and the advanced techniques for stunning automotive rendering using industry-leading engines.
We’ve also delved into the specialized demands of game engine optimization, including strategies like LODs and draw call reduction for seamless real-time experiences in Unity and Unreal Engine. Beyond traditional applications, we’ve touched upon the unique challenges and opportunities presented by AR/VR platforms and the meticulous preparation needed for successful 3D printing. Finally, a clear understanding of various file formats and robust workflow integration ensures that your high-quality assets can traverse any pipeline.
Mastering these aspects is crucial for anyone aiming to create or utilize top-tier 3D car models. The commitment to detail, optimization, and adherence to industry best practices is what elevates a good model to an exceptional one, unlocking its full potential across design, visualization, and interactive entertainment. For those seeking professional, ready-to-use 3D car models that embody these very principles, we invite you to explore the extensive collection at 88cars3d.com, where quality and versatility meet the demands of modern 3D production.
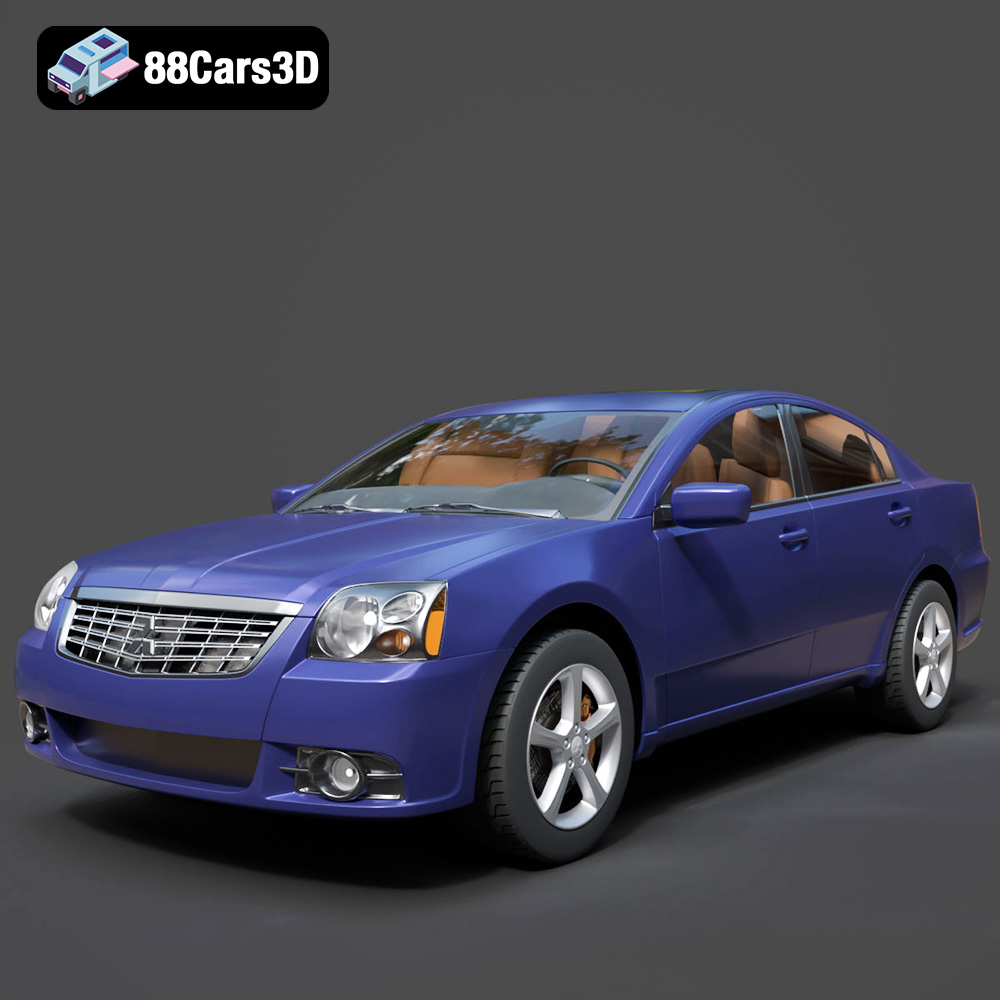
Texture: Yes
Material: Yes
Download the Mitsubishi Galant 2009 3D Model featuring clean geometry, realistic detailing, and a fully modeled interior. Includes .blend, .fbx, .obj, .glb, .stl, .ply, .unreal, and .max formats for rendering, simulation, and game development.
Price: $4.99
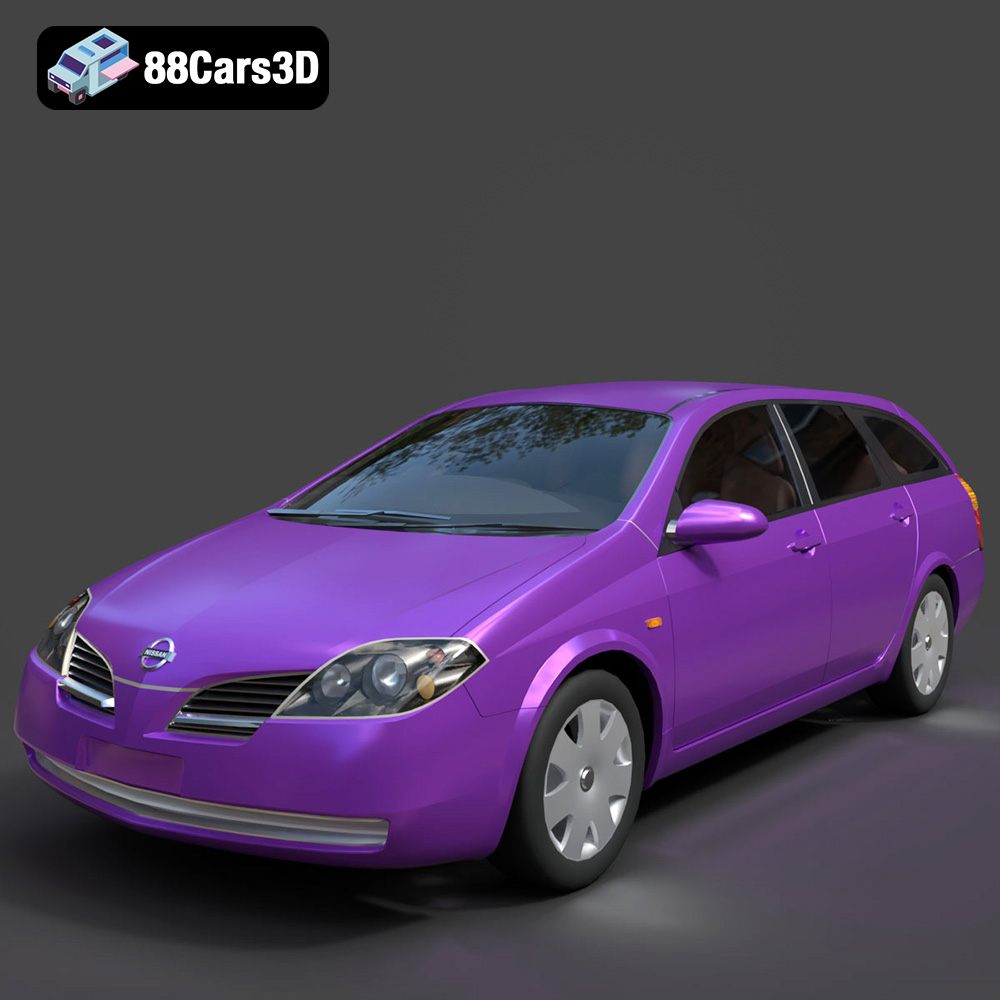
Texture: Yes
Material: Yes
Download the Nissan Primera Wagon 3D Model featuring clean geometry, realistic detailing, and a fully modeled interior. Includes .blend, .fbx, .obj, .glb, .stl, .ply, .unreal, and .max formats for rendering, simulation, and game development.
Price: $4.99
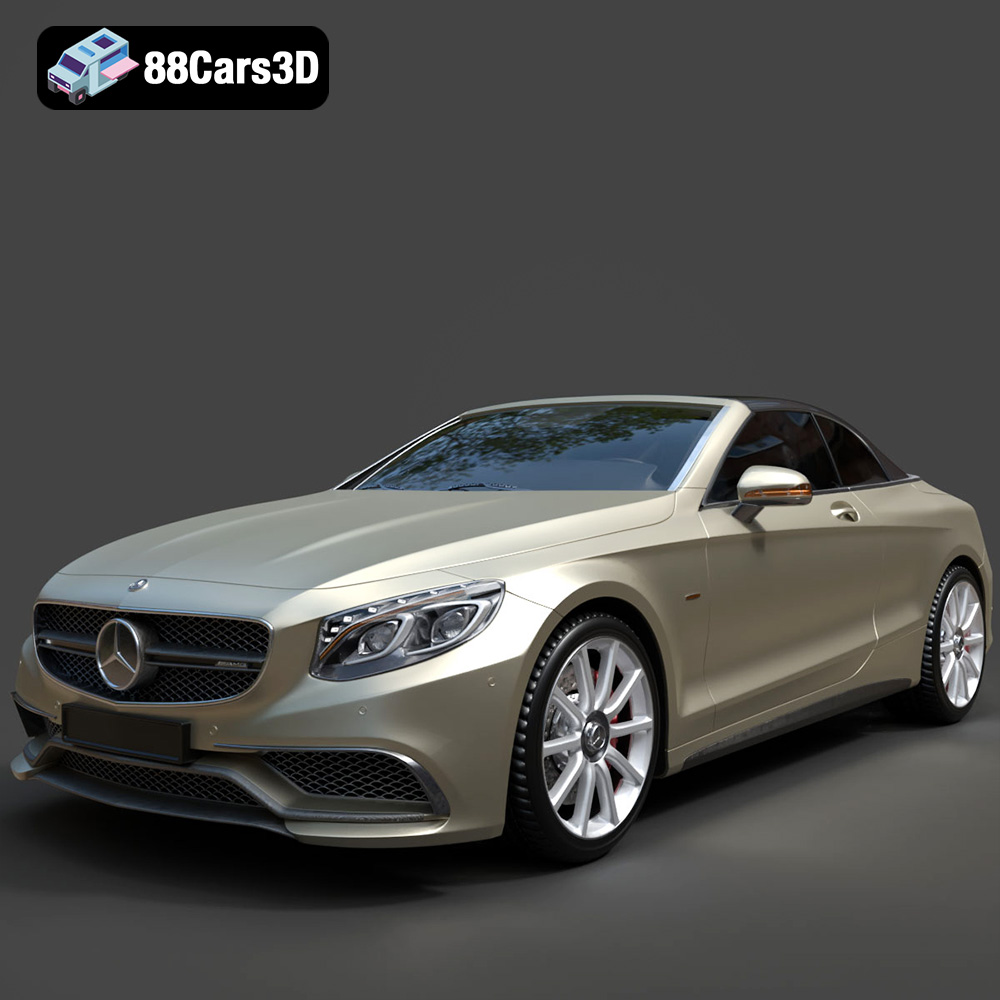
Texture: Yes
Material: Yes
Download the Mercedes-Benz S63 AMG Cabriolet 2017 3D Model featuring clean geometry, realistic detailing, and a fully modeled interior. Includes .blend, .fbx, .obj, .glb, .stl, .ply, .unreal, and .max formats for rendering, simulation, and game development.
Price: $20.99
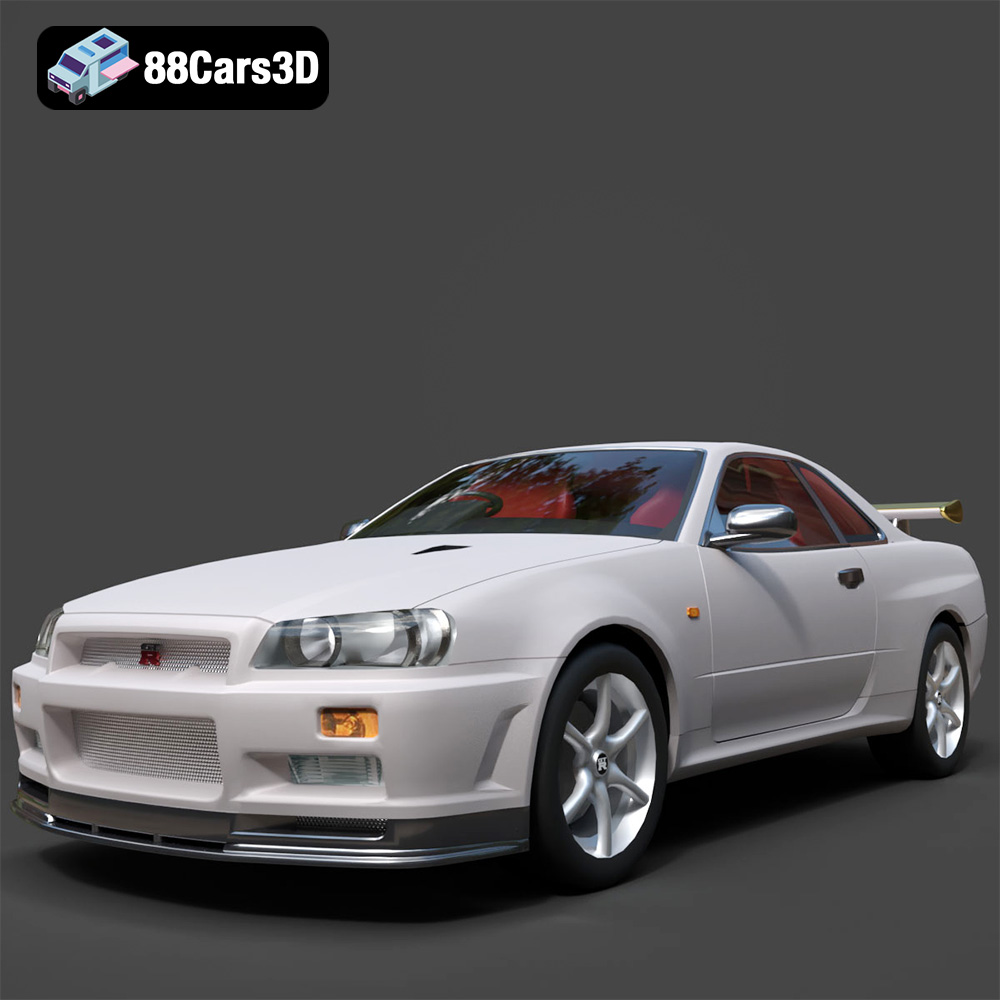
Texture: Yes
Material: Yes
Download the Nissan Skyline R34 2002 3D Model featuring clean geometry, realistic detailing, and a fully modeled interior. Includes .blend, .fbx, .obj, .glb, .stl, .ply, .unreal, and .max formats for rendering, simulation, and game development.
Price: $4.99
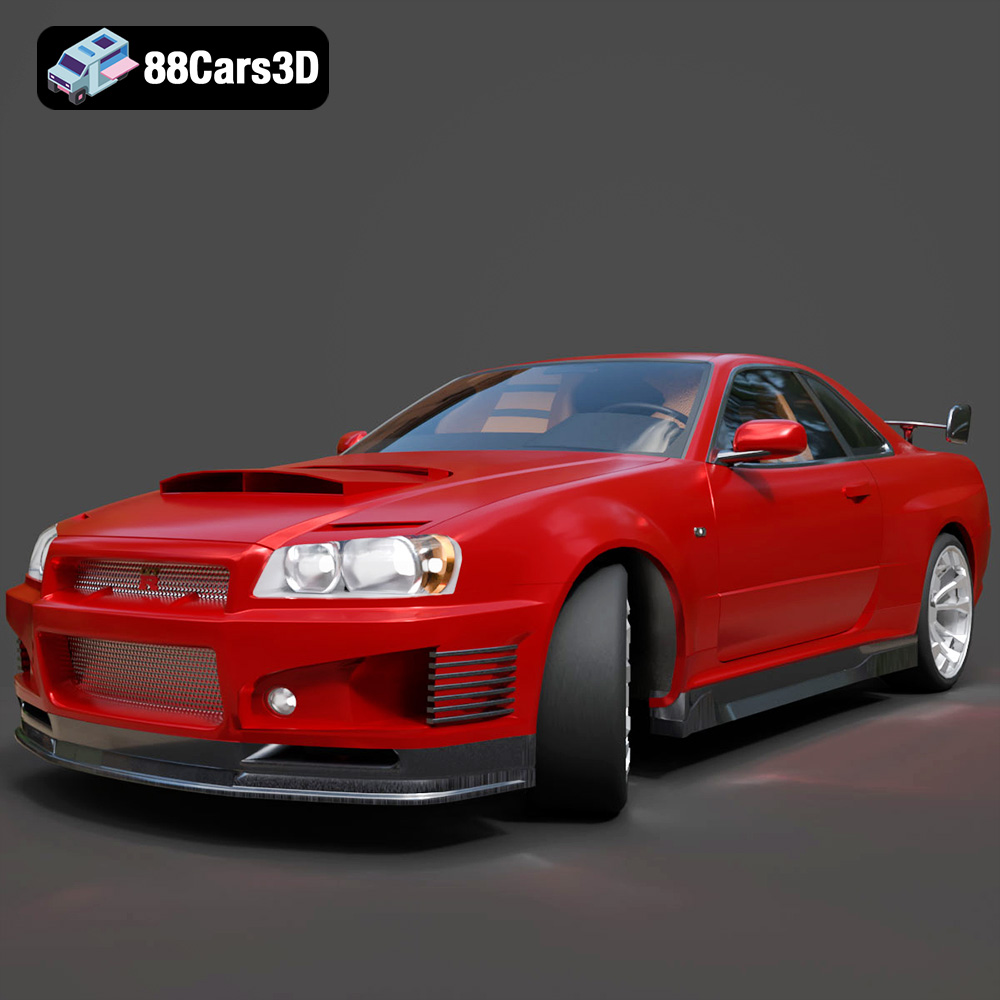
Texture: Yes
Material: Yes
Download the Nissan Skyline 3D Model featuring clean geometry, realistic detailing, and a fully modeled interior. Includes .blend, .fbx, .obj, .glb, .stl, .ply, .unreal, and .max formats for rendering, simulation, and game development.
Price: $9.99
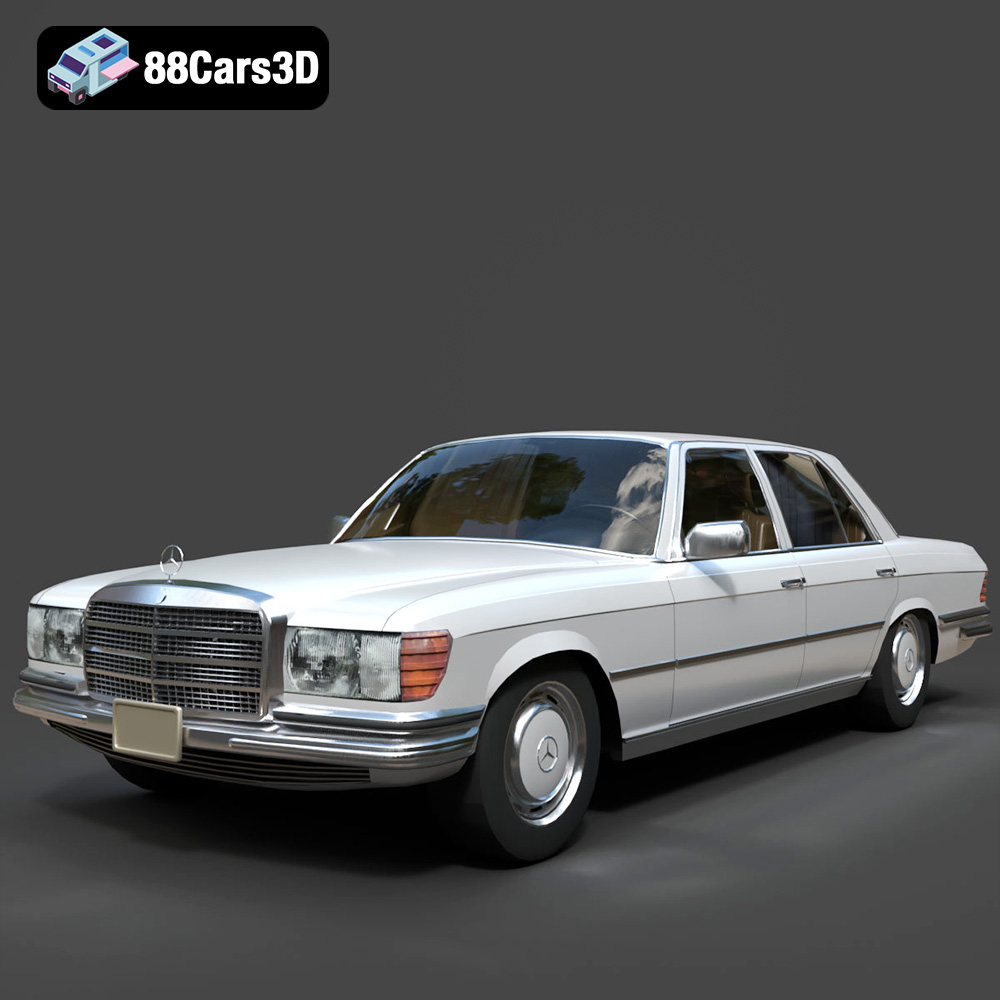
Texture: Yes
Material: Yes
Download the Mercedes-Benz S-Klasse W116 3D Model featuring clean geometry, realistic detailing, and a fully modeled interior. Includes .blend, .fbx, .obj, .glb, .stl, .ply, .unreal, and .max formats for rendering, simulation, and game development.
Price: $4.99
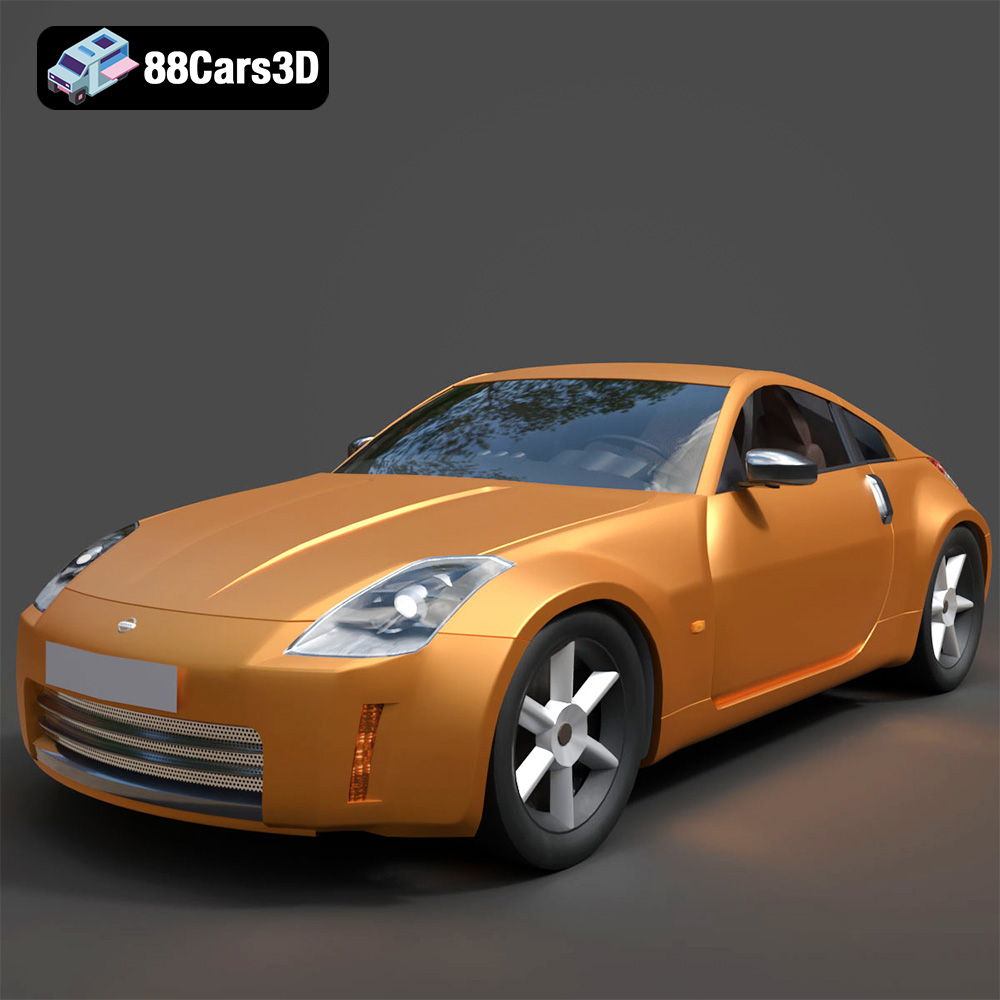
Texture: Yes
Material: Yes
Download the Nissan 350Z 3D Model featuring clean geometry, realistic detailing, and a fully modeled interior. Includes .blend, .fbx, .obj, .glb, .stl, .ply, .unreal, and .max formats for rendering, simulation, and game development.
Price: $4.99

Texture: Yes
Material: Yes
Download the Nissan Skyline V35 2001 3D Model featuring clean geometry, realistic detailing, and a fully modeled interior. Includes .blend, .fbx, .obj, .glb, .stl, .ply, .unreal, and .max formats for rendering, simulation, and game development.
Price: $4.99

Texture: Yes
Material: Yes
Download the Mercedes-Benz S-Klasse 221-007 3D Model featuring clean geometry, realistic detailing, and a fully modeled interior. Includes .blend, .fbx, .obj, .glb, .stl, .ply, .unreal, and .max formats for rendering, simulation, and game development.
Price: $4.99
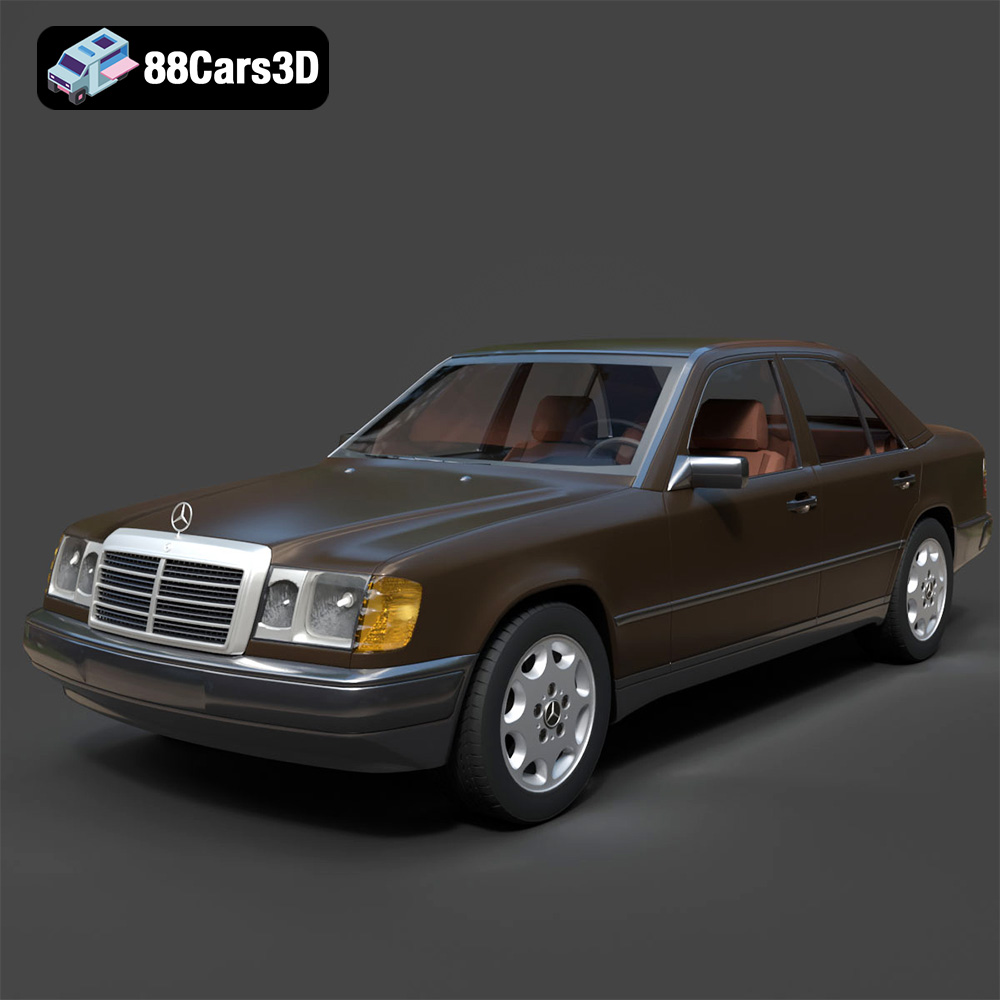
Texture: Yes
Material: Yes
Download the Mercedes W124 Sedan 3D Model featuring clean geometry, realistic detailing, and a fully modeled interior. Includes .blend, .fbx, .obj, .glb, .stl, .ply, .unreal, and .max formats for rendering, simulation, and game development.
Price: $4.99

