The glint of chrome reflecting a bustling city, the subtle nuances of paintwork under a cloudy sky, or the dramatic interplay of light and shadow on a sculpted body line – what elevates a good 3D car render to a breathtaking masterpiece? More often than not, the secret lies in impeccable lighting. While traditional light sources offer control, nothing quite matches the organic, true-to-life feel that High Dynamic Range Imaging (HDRI) brings to the table for automotive visualization. For 3D artists, game developers, and automotive designers striving for unparalleled realism, mastering HDRI lighting isn’t just an advantage; it’s a necessity.
This comprehensive guide will take you on a deep dive into the world of HDRI lighting for automotive renders. We’ll demystify the technical aspects, walk through practical implementations across various software, and explore advanced techniques that will transform your car models into photorealistic visions. From understanding the core principles of HDRI to optimizing your renders for real-time applications and post-processing for that final polish, you’ll gain the knowledge to consistently achieve stunning results. Prepare to unlock a new level of realism in your automotive projects, whether you’re working with custom models or premium 3D car models sourced from platforms like 88cars3d.com.
Understanding HDRI: The Foundation of Realistic Lighting
At its heart, HDRI is about capturing and reproducing light with an exceptional range of intensity, far beyond what standard image formats (like JPG or PNG) can achieve. This extended dynamic range is what allows HDRIs to faithfully represent the vast differences between the brightest highlights and the deepest shadows in a real-world scene, offering an unparalleled foundation for realistic lighting in 3D environments.
What is High Dynamic Range Imaging?
High Dynamic Range Imaging (HDRI) refers to a set of techniques used in imaging and photography to reproduce a greater dynamic range of luminosity than is possible with standard digital imaging or photographic techniques. In simpler terms, an HDRI image contains significantly more data about light intensity across its pixels. While a standard 8-bit image (LDR) might store values from 0 to 255 for each color channel, an HDRI typically uses 32-bit floating-point values, allowing for an astronomical range of intensity values. This means that a single pixel in an HDRI can store information about a bright sun hotspot and a deep shadow simultaneously, capturing the full spectrum of light and shadow as seen by the human eye. This extended range, often measured in “stops” of exposure, is crucial because real-world light sources can vary in intensity by many orders of magnitude.
Why HDRI is Indispensable for Automotive Rendering
For automotive rendering, HDRI is not just a tool; it’s a game-changer. Its primary benefit lies in providing incredibly accurate and natural environmental lighting. When an HDRI is used as an environment map in a 3D scene, it projects the captured real-world light onto your 3D car model from all directions. This results in:
- Realistic Reflections: The intricate surfaces of a car – the metallic paint, polished chrome, and glass – perfectly reflect the environment captured in the HDRI, yielding believable visual fidelity. The subtleties of a cloudy sky or the distinct shapes of buildings are mirrored accurately.
- Accurate Shadows: Shadows cast by HDRI lighting are soft, nuanced, and reflect the actual light source sizes and positions from the captured environment, providing a natural ground contact and sense of depth.
- Ambient Illumination: Beyond direct light, HDRIs provide comprehensive ambient illumination, filling the scene with natural bounce light and subtle color tints from the environment, making the car look like it truly belongs in the scene.
- Speed and Simplicity: Setting up complex lighting with multiple artificial light sources to mimic a real environment can be incredibly time-consuming. An HDRI can often provide a compelling lighting setup with minimal effort, allowing artists to focus more on materials and composition.
Compared to traditional three-point lighting setups, which rely on carefully placed key, fill, and rim lights, HDRI offers an organic, holistic approach. While traditional methods offer precise control over artistic intent, HDRI excels at replicating real-world lighting conditions with remarkable authenticity, which is paramount for photorealistic automotive visualization.
Types of HDRIs and Their Applications
The choice of HDRI significantly impacts the mood, reflections, and overall aesthetic of your automotive render. HDRIs come in various “flavors,” each suited for different scenarios:
- Studio HDRIs: These are captured in controlled studio environments, often featuring seamless white or gray backgrounds with soft, diffused lighting. They are excellent for showcasing design details, highlighting paint shaders, and achieving a clean, commercial look, much like a car showroom. Reflections will be smooth and even, emphasizing the car’s form.
- Outdoor HDRIs: These are the most diverse, capturing various natural environments.
- Daylight HDRIs: From bright sunny days with sharp shadows to overcast skies with diffused, soft lighting, these are ideal for realistic outdoor scenes. A sunny HDRI provides crisp, strong reflections, while an overcast one offers more subtle, broad reflections across the car’s body.
- Sunset/Sunrise HDRIs: Characterized by warm, golden hues and longer, softer shadows, these create dramatic and emotional lighting, perfect for evoking a sense of luxury or performance.
- Night HDRIs: Featuring sparse, strong light sources (streetlights, building lights) against a dark sky, these are challenging but rewarding, creating striking reflections and strong contrasts that emphasize the car’s form in a unique way.
- Urban Environment HDRIs: Captured in cityscapes, these HDRIs provide complex reflections of buildings, street furniture, and artificial lights. They are excellent for creating dynamic, busy scenes that immerse the car within a lively setting. The reflections will be detailed and often geometrically interesting, enhancing the realism of metallic and glass surfaces.
Understanding how different HDRIs influence the car’s paint, chrome, and glass is key. A highly reflective car paint will act like a mirror, faithfully showing the HDRI. Chrome will pick up strong specular highlights, while glass will refract and reflect the environment with nuanced transparency. Experimentation with various HDRI types is crucial to find the perfect match for your desired narrative and visual impact.
Sourcing and Preparing Your HDRIs for Optimal Results
The quality of your final render is directly proportional to the quality of your input assets, and HDRIs are no exception. Choosing the right HDRI and preparing it correctly are critical steps towards achieving photorealistic automotive renders. High-quality HDRIs, often commercially available, are shot with specialized equipment and processed to ensure maximum dynamic range and resolution.
Choosing the Right HDRI for Your Scene
Selecting an HDRI isn’t just about finding a pretty picture; it’s about matching the lighting characteristics to your scene’s narrative and visual goals. Several factors play a crucial role:
- Resolution: Higher resolution HDRIs (e.g., 8K, 16K, 32K+) provide sharper reflections and more detailed environmental lighting. While 4K might suffice for distant backgrounds or general ambient lighting, for close-up automotive renders where reflections are prominent, 8K or 16K are often preferred. Anything below 4K can lead to blurry or pixelated reflections, detracting from realism.
- Dynamic Range (Exposure Stops): A good HDRI should capture a wide range of exposure stops (typically 15-20+ stops) to accurately represent bright light sources (like the sun) and deep shadows simultaneously. This ensures that your reflections have proper intensity and that shadows are realistic. HDRIs with limited dynamic range will result in flat, unrealistic lighting.
- Environment Type and Mood: Does your scene call for a bright, sunny afternoon, a dramatic sunset, or a moody, overcast day? The HDRI should align with the desired emotional tone and physical environment. Consider the direction and softness of light, the color temperature, and the overall atmosphere it conveys.
- Matching HDRI to the Desired Narrative: If your car is meant to be in a city, choose an urban HDRI. If it’s on a racing track, find one with a suitable trackside environment. The environment should support the story you’re trying to tell with your render, providing context and visual consistency.
Always preview the HDRI carefully, paying attention to potential distractions or unwanted elements that might appear in reflections. Many premium HDRI packs are meticulously cleaned to avoid such issues.
HDRI File Formats and Specifications
The two most common file formats for HDRIs are .hdr and .exr (OpenEXR). Both are excellent for storing high dynamic range data, but they have subtle differences:
.hdr (Radiance HDR): This is an older, simpler format developed by Greg Ward. It uses a run-length encoding compression method and stores pixel values as RGBE (Red, Green, Blue, Exponent). While effective, it’s generally less efficient and can sometimes be limited in its color depth compared to OpenEXR, though still vastly superior to LDR formats..exr (OpenEXR): Developed by Industrial Light & Magic (ILM), OpenEXR is the industry standard for high-dynamic range images in film and visual effects. It supports multiple compression methods (e.g., Piz, Zip, RLE, B44), various bit depths (16-bit float, 32-bit float), and can store multiple layers or channels (e.g., diffuse, specular, normals). For automotive rendering, 32-bit float OpenEXR is generally preferred due to its superior precision and ability to store the full dynamic range without compromise, ensuring the most accurate lighting data.
When loading HDRIs into your chosen renderer, the process is typically straightforward:
- Corona Renderer (3ds Max): In the render setup, navigate to the Scene tab and locate the “Environment” rollout. You can either use a “Corona Sky” map and load your HDRI into its “Texture” slot, or directly load the HDRI into the 3ds Max Environment Map slot (Rendering > Environment).
- V-Ray (3ds Max/Maya): Use a “V-Ray Dome Light.” Load your HDRI into the texture slot of the dome light. Ensure “Spherical (full dome)” is selected as the texture type.
- Cycles (Blender): Access the World properties. Change the “Background” shader node to an “Environment Texture” node and open your HDRI file. For more advanced control, this node can be connected to other nodes in the Shader Editor.
- Arnold (Maya): Create an “aiSkyDomeLight.” Load your HDRI into the “Color” attribute of the SkyDome light.
Always verify that your software is interpreting the HDRI’s color space correctly (usually sRGB or linear, depending on your workflow) to avoid color shifts.
Basic HDRI Manipulation and Adjustment
Once loaded, HDRIs are rarely used in their raw form. A few basic adjustments can significantly enhance their effectiveness:
- Rotation: This is arguably the most important adjustment. Rotating the HDRI (usually around the Z-axis, or Y-axis depending on the software’s up-axis) allows you to position the key light source and critical reflections exactly where you want them on your car model. Subtle rotations can dramatically change how highlights fall on the body panels, influencing the visual impact and emphasizing the car’s form.
- Exposure/Intensity: Adjusting the HDRI’s overall brightness is crucial for matching the scene’s exposure and avoiding blown-out highlights or overly dark shadows. Most renderers provide an intensity multiplier or an exposure setting directly on the environment map or dome light.
- White Balance/Color Tint: While HDRIs are designed to provide accurate color information, sometimes a slight adjustment to white balance or adding a subtle color tint can help integrate the car more seamlessly into a specific artistic vision or backplate. Be careful not to overdo this, as it can quickly degrade realism.
- Background Blur vs. Sharp Reflections: Often, you want sharp, detailed reflections on your car but a blurred background for artistic depth of field. Many renderers allow you to control the visibility of the HDRI background independently from its lighting and reflection contribution. Alternatively, you can render the car and environment separately, blurring the background in post-processing while retaining sharp reflections.
These adjustments are typically found within the shader/material editor or light settings of your 3D software and renderer.
Implementing HDRI Lighting in Popular 3D Software
The core concept of using HDRI remains consistent across different 3D applications and renderers, but the specific implementation steps vary. Understanding these workflows is essential for any 3D artist aiming for automotive realism.
3ds Max & Corona Renderer Workflow
Corona Renderer, known for its ease of use and photorealistic output, makes HDRI integration straightforward within 3ds Max. This combination is a favorite among automotive visualization professionals for its speed and quality.
- Environment Setup: Go to
Rendering > Environment (keyboard shortcut 8). Here, you’ll find the global environment map slot.
- Load Corona Sky/HDRI: Drag a
CoronaBitmap or CoronaSky map into this slot from the Material Editor (make sure to instance it). If using CoronaBitmap, load your .exr or .hdr file directly. If using CoronaSky, you can load the HDRI into its ‘Texture’ slot. This allows you to combine the HDRI with Corona’s procedural sky for atmospheric effects, though for pure HDRI lighting, a direct CoronaBitmap is often used.
- Mapping Type: Ensure the mapping type for your HDRI bitmap is set to
Spherical Environment. This correctly wraps the 360-degree image around your scene.
- Intensity and Rotation: In the
CoronaBitmap parameters, you’ll find options for ‘Multiplier’ (intensity) and ‘Rotation’ (around the Z-axis). Adjust these to control the overall brightness and position the key light and reflections appropriately.
- Corona LightMix: A powerful feature of Corona is LightMix. Once your HDRI is loaded into the environment, it automatically appears as a separate layer in LightMix within the VFB (Virtual Frame Buffer). This allows you to adjust its intensity, color, and saturation non-destructively during and after rendering, offering incredible flexibility for fine-tuning the lighting.
- Physical Camera: Always pair HDRI lighting with a
CoronaCamera. Its physical properties (ISO, shutter speed, f-stop) mimic real-world cameras, allowing you to correctly expose your scene and control depth of field, further enhancing realism.
For rendering high-quality 3D car models, especially those with clean topology and realistic materials (like those found on 88cars3d.com), the Corona + HDRI workflow provides a robust and efficient solution.
Blender & Cycles/Eevee Integration
Blender, with its powerful Cycles and real-time Eevee renderers, offers a flexible node-based approach to HDRI lighting. This allows for extensive customization and creative control.
- World Properties: Navigate to the
World Properties panel (the red globe icon). Under the “Surface” section, click the yellow dot next to “Color.”
- Environment Texture Node: From the dropdown menu, select
Environment Texture. This will add an environment texture node to your world background.
- Open HDRI: Click “Open” and browse to your HDRI file (
.exr or .hdr).
- Shader Editor for Control: For advanced manipulation, switch to the
Shader Editor. Ensure “World” is selected from the dropdown menu (not “Object”). You’ll see your “Environment Texture” node connected to the “Background” node, which then connects to the “World Output.”
- Mapping and Texture Coordinate Nodes: To control rotation, scale, and other transformations, add a
Mapping node and a Texture Coordinate node (Shift+A > Search). Connect the “Generated” output from the “Texture Coordinate” node to the “Vector” input of the “Mapping” node. Then, connect the “Vector” output of the “Mapping” node to the “Vector” input of the “Environment Texture” node. Now you can rotate the HDRI on the Z-axis, adjust its scale, and move it using the “Mapping” node’s settings.
- Strength Adjustment: The “Strength” input on the “Background” node controls the overall intensity of the HDRI lighting.
For more detailed information on working with environment textures in Blender’s Cycles, refer to the official Blender 4.4 documentation: Blender 4.4 Environment Texture Documentation. This resource provides in-depth explanations of node functionality and advanced setups for achieving precise lighting control.
Maya & Arnold/V-Ray Setup
Maya, an industry-standard for animation and VFX, integrates HDRI lighting seamlessly with its bundled Arnold renderer and the popular V-Ray plugin.
Arnold Workflow:
- Create aiSkyDomeLight: Go to
Arnold > Lights > SkyDomeLight. This creates a dome-shaped light source that wraps the environment around your scene.
- Load HDRI Texture: In the
SkyDomeLight‘s Attribute Editor, locate the “Color” attribute. Click the checkered box next to it and select “File” as the texture type. Load your .exr or .hdr file.
- Mapping and Exposure: Ensure the “Mapping” type on the File node is set to “Spherical.” The
SkyDomeLight itself has an “Exposure” attribute to control intensity and a “Rotate” parameter to adjust the HDRI’s orientation.
- Samples: Crucially, increase the “Samples” attribute on the
SkyDomeLight (e.g., to 3 or more). This significantly reduces noise in areas lit by the HDRI, especially in reflections and indirect illumination.
V-Ray Workflow:
- Create V-Ray Dome Light: Go to
V-Ray > Lights > Dome Light.
- Load HDRI Texture: In the
Dome Light‘s Attribute Editor, expand the “Texture” section. Click the checkered box next to “Texture” and select “File.” Load your .exr or .hdr file.
- Mapping and Intensity: Ensure the “Texture Type” is set to “Spherical (full dome).” Adjust the “Intensity multiplier” to control brightness and use the “Dome Tex Placement” rollout to rotate the HDRI.
- Subdivs: Similar to Arnold’s samples, increase the “Subdivs” on the
V-Ray Dome Light (e.g., to 16-32) to reduce noise and improve the quality of shadows and reflections generated by the HDRI.
Both Arnold and V-Ray offer excellent control over HDRI lighting, allowing artists to achieve stunning realism, especially when paired with meticulously crafted 3D car models.
Advanced HDRI Techniques for Hyper-Realistic Automotive Renders
While basic HDRI setup provides a solid foundation, truly hyper-realistic automotive renders often require going beyond the default settings. These advanced techniques help seamlessly integrate your 3D car model into its environment, enhance specific details, and resolve common rendering challenges.
Backplate Integration and Matching
Many professional automotive renders combine a 3D car model with a photographic backplate – a static background image that often provides a more detailed or complex environment than an HDRI alone. The key to success is seamless integration:
- Perspective Matching: The camera in your 3D scene must precisely match the focal length and perspective of the photograph used as a backplate. Tools like FSP (Focal Plane Sensor) or manual alignment using perspective grids are crucial here. If the perspectives don’t match, the car will appear to float or be incorrectly scaled within the scene.
- Color Matching and Blending: The lighting from your HDRI (which illuminates the car) must perfectly match the lighting in the backplate. Pay close attention to color temperature, saturation, and overall brightness. Slight color shifts can be done in post-processing, but a good initial match is vital. Ensure the ground plane’s color and texture blend with the backplate to avoid harsh seams.
- Shadow Catchers and Ground Plane Reflections: To ground the car realistically, you need to simulate shadows and reflections on the backplate. Use a “shadow catcher” material (a plain, invisible plane that only renders shadows and reflections) on a geometry that matches the ground in your backplate. This allows the HDRI-lit car to cast realistic shadows and reflect onto the environment, completing the illusion. In Corona, this is a dedicated
CoronaShadowCatcherMtl; in Blender, you can set an object’s “Visibility” to “Shadow Catcher” in Cycles.
A perfectly matched backplate and HDRI create an immersive and believable render where the 3D car model feels truly part of the scene.
Combining HDRI with Auxiliary Lights
While HDRI provides comprehensive environmental lighting, it might not always provide the punch or highlight exactly where you need it. This is where auxiliary lights come into play:
- Enhancing Details: Use small area lights or spot lights to highlight specific features like headlights, taillights, badges, or intricate wheel designs. These focused lights can bring out details that might otherwise be lost in the broader HDRI illumination. For instance, a subtle area light placed strategically can emphasize the sculpted lines of a fender.
- Adding Rim Lights for Definition: Placing a thin, rectangular area light behind and slightly to the side of the car can create a beautiful rim light, separating the car from the background and enhancing its silhouette. This technique is particularly effective for dramatic presentations of high-end 3D car models.
- Interior Illumination: For renders featuring the car’s interior, HDRI alone might not be enough. Small, discreet lights placed inside the cabin can simulate dashboard lighting, ambient interior glows, or even reading lights, adding depth and realism to interior shots.
- Balancing HDRI Intensity with Artificial Lights: The key is balance. Your auxiliary lights should complement the HDRI, not overpower it. Adjust their intensity and color temperature to seamlessly blend with the overall environmental lighting. Use the HDRI as your primary light source and auxiliary lights for emphasis.
This hybrid approach allows for both the naturalism of HDRI and the artistic control of traditional lighting.
Rendering Optimizations and Quality Settings
Achieving photorealistic quality often comes at the cost of render time. Optimizing your settings can significantly speed up your workflow without compromising visual fidelity, especially when dealing with complex 3D car models and intricate shaders.
- Importance Sampling: Most modern renderers (Cycles, Corona, Arnold, V-Ray) feature “Importance Sampling” for environment maps. This technique focuses render samples on the brighter, more influential areas of the HDRI, reducing noise in highlights and reflections more efficiently than uniform sampling. Always enable it for HDRI lighting.
- Ray Samples/Subdivs: For dome/environment lights, increasing the sample count (e.g., “Samples” in Arnold, “Subdivs” in V-Ray, “Bounces” in Cycles) directly improves the quality of shadows and reflections generated by the HDRI, reducing graininess. Start with a moderate value (e.g., 8-16) and increase until noise is acceptable.
- Global Illumination (GI) Settings: Fine-tune your GI settings (e.g., brute force, irradiance caching, light cache) to balance quality and speed. For interiors or complex indirect light, higher GI samples are needed, but for primarily exterior automotive shots, you can often optimize.
- Noise Reduction Techniques: Modern renderers are equipped with powerful denoisers (e.g., NVIDIA OptiX for Cycles/Arnold, Intel Open Image Denoise for Cycles, Corona Denoiser). These AI-powered tools can significantly clean up noisy renders in post-production, allowing you to render with fewer samples and faster times. Incorporate them into your workflow, but understand their limitations and avoid over-denoising.
- Render Passes: Render out separate passes (e.g., reflection, diffuse, specular, shadow, beauty) to gain maximum flexibility in post-processing. This allows you to adjust individual elements without re-rendering the entire scene.
Efficient rendering is about finding the sweet spot between visual quality and computational cost.
Achieving Photographic Realism: Materials, Post-Processing, and Beyond
Even with perfect HDRI lighting, your automotive render won’t reach its full potential without accurate PBR materials and careful post-processing. These elements are the final touches that bridge the gap between a 3D model and a photorealistic image.
PBR Materials and HDRI Interaction
Physically Based Rendering (PBR) materials are designed to react to light in a physically accurate manner, mimicking how real-world materials behave. The synergy between PBR materials and HDRI lighting is critical for automotive realism:
- Metallic, Roughness, and Clear Coat: These three channels are paramount for car paint.
- Metallic: A high metallic value (close to 1) combined with a low roughness value (close to 0) will create highly reflective surfaces like chrome or polished metals, which will vividly display the HDRI environment.
- Roughness: Controls the sharpness of reflections. A low roughness value results in sharp, mirror-like reflections, while a higher value diffuses them, creating a matte or satin finish. Car paint often has varying roughness values due to its clear coat layer.
- Clear Coat: This dedicated layer simulates the glossy, protective coating found on car paint. It has its own roughness, normal, and IOR (Index of Refraction) settings, allowing for realistic depth and secondary reflections over the base paint color and metallic flakes. The clear coat layer is often responsible for the subtle nuances of reflections and specular highlights.
- Importance of Accurate UV Mapping: For complex car surfaces, proper UV mapping is absolutely essential. While an HDRI primarily influences reflections and diffuse lighting, detailed textures for brake calipers, interior elements, tire sidewalls, or body decals rely on clean, non-overlapping UVs. When sourcing high-quality 3D car models from marketplaces such as 88cars3d.com, ensure they come with professional UV mapping to facilitate seamless texturing and material application. Poor UVs lead to stretched or distorted textures, breaking the illusion of realism.
- Creating Realistic Car Paint Shaders: A convincing car paint shader is complex, often combining metallic, clear coat, and sometimes subsurface scattering for deeper colors. Experiment with flake maps, subtle normal maps, and varying clear coat roughness to achieve specific paint finishes like pearl, metallic, or matte. The HDRI will then interact with these layers, bringing the material to life.
Understanding how PBR values translate to real-world material properties and how they interact with the HDRI’s light data is fundamental to creating believable surfaces.
Post-Processing Techniques for Automotive Renders
No professional render leaves the 3D software untouched. Post-processing in tools like Photoshop, Lightroom, or Affinity Photo is where you refine the image to photographic perfection, adding subtle elements that enhance realism and artistic impact.
- Exposure, Contrast, and Color Grading: These are the foundational adjustments. Correcting exposure ensures the image isn’t too dark or bright. Adjusting contrast adds punch and depth. Color grading (e.g., adding warmth, coolness, or specific color palettes) unifies the image and enhances its mood, matching it closer to real-world photography.
- Adding Subtle Chromatic Aberration and Depth of Field:
- Chromatic Aberration: A subtle amount of chromatic aberration (color fringing at high-contrast edges) can mimic real camera lens imperfections, adding a touch of realism.
- Depth of Field (DoF): While often rendered in 3D, DoF can be refined or added in post, drawing attention to the car and blurring the background or foreground for artistic effect. Use a Z-depth pass from your renderer to accurately apply DoF in post.
- Lens Flares and Glows: Carefully placed lens flares and subtle glows around bright light sources (like headlights or sun reflections) can mimic optical effects and enhance visual interest. Use these sparingly to avoid an artificial look.
- Compositing Render Passes: This is where render passes (reflection, diffuse, shadow, ambient occlusion, raw light, etc.) truly shine. By combining and adjusting these passes in a compositing software (Nuke, After Effects, Photoshop), you gain granular control over every aspect of the image. For example, you can independently adjust the intensity of reflections, darken shadows, or boost specific highlights without affecting other elements of the render. This non-destructive workflow is invaluable for achieving a polished final image.
Post-processing is an art form itself, transforming a technically accurate render into a visually compelling photograph.
Addressing Common Challenges
Even experienced artists encounter challenges. Here’s how to troubleshoot common issues when working with HDRI lighting:
- Grainy Shadows/Reflections: This is almost always due to insufficient samples on your dome light or environment map. Increase the “Samples” (Arnold), “Subdivs” (V-Ray), or “Bounces” (Cycles) of your HDRI light source. For overall scene noise, also increase global rendering samples.
- Unrealistic Reflections:
- Blurry Reflections: Check the HDRI resolution. Lower resolution HDRIs will yield blurry reflections.
- Incorrect Reflections: Rotate the HDRI. The direction of the dominant light source and important environmental elements needs to align with your desired reflections.
- Reflections Too Strong/Weak: Adjust the HDRI’s intensity multiplier and/or the roughness values of your car’s materials.
- Mismatched Lighting with Backplate:
- Color/Brightness Mismatch: Adjust the HDRI’s color temperature and exposure in your 3D software or in post-processing to match the backplate.
- Shadow Discrepancy: Ensure the HDRI’s dominant light source direction aligns with the light direction in the backplate. Verify the shadow catcher is set up correctly and its material properties (e.g., ground roughness) match the backplate.
- Perspective Mismatch: Re-align your 3D camera to the backplate using perspective matching tools.
- “Flat” or Lifeless Lighting: Ensure your HDRI has sufficient dynamic range. A low dynamic range HDRI will result in less contrast and duller lighting. Supplement with subtle auxiliary lights to add punch and definition where needed.
Systematic troubleshooting, combined with a solid understanding of HDRI principles, will help you overcome these hurdles.
Beyond Still Renders: HDRI for Real-Time and Interactive Applications
The power of HDRI extends far beyond static images, playing a crucial role in bringing realism to interactive experiences like video games, augmented reality (AR), and virtual reality (VR) applications. However, real-time environments impose unique performance constraints that necessitate specific optimization strategies.
HDRI in Game Engines (Unity & Unreal Engine)
Game engines utilize HDRIs to provide realistic skyboxes, environmental lighting, and reflections for 3D car models and other game assets. The goal is to achieve visual quality akin to offline renders but within strict performance budgets.
- Sky Spheres and Sky Light Actors: In engines like Unreal Engine, an HDRI is typically applied to a
Sky Sphere or a Sky Light actor. The Sky Light captures the environment (often from a cubemap generated from an HDRI) and applies it as ambient and reflective lighting to the scene. Similarly, Unity uses a Skybox material where an HDRI cubemap can be assigned to illuminate the scene.
- Pre-computing Cubemaps for Performance: Directly sampling a high-resolution spherical HDRI in real-time can be computationally expensive. Game engines often convert HDRIs into cubemaps (a set of six square textures representing the environment in all directions). These cubemaps can then be pre-convoluted (pre-blurred at various roughness levels) to simulate realistic reflections for different material types without heavy real-time calculations. This is stored in what’s known as an “irradiance map” and a “specular cubemap.”
- LODs (Level of Detail) and Texture Atlasing: For detailed 3D car models in game engines, optimizing performance is crucial.
- LODs: Create multiple versions of your car model with decreasing polygon counts (e.g., LOD0 for close-up, LOD1 for mid-distance, LOD2 for far away). The engine automatically switches between these based on camera distance, saving polygon processing power. High-quality models from 88cars3d.com often come with pre-built LODs.
- Texture Atlasing: Combine multiple smaller textures (e.g., for different car parts) into a single, larger texture atlas. This reduces the number of draw calls (requests for the GPU to render an object), significantly improving rendering performance.
Effectively using HDRI in game engines requires a balance between visual fidelity and optimization techniques to ensure smooth frame rates.
AR/VR Visualization with HDRI
AR (Augmented Reality) and VR (Virtual Reality) demand even stricter performance optimizations, as they involve rendering complex scenes at very high frame rates (e.g., 90 FPS) for an immersive experience. HDRI is vital for grounding virtual cars in real-world environments or creating believable virtual worlds.
- Real-time Reflection Probes: For dynamic reflections on car surfaces in AR/VR, reflection probes are frequently used. These are localized cubemaps generated at specific points in the scene, capturing the environment’s reflections. For moving objects like cars, dynamic reflection probes can update in real-time, albeit with a higher performance cost, or pre-baked probes can be blended.
- Baking Lighting for Static Environments: For AR/VR experiences with static environments (e.g., a virtual showroom), lighting can be entirely “baked” into lightmaps and irradiance volumes. This pre-calculates all indirect lighting and shadows from the HDRI, storing it as textures, which greatly reduces real-time computation during runtime. The HDRI provides the source for this baked lighting.
- Performance Considerations for High-Quality Automotive Assets: Highly detailed 3D car models, while stunning in offline renders, can quickly overwhelm AR/VR hardware. Optimizations like aggressive LODs, efficient material setups (minimal shader complexity), and careful texture budget management are paramount. HDRI resolution for cubemaps in AR/VR often needs to be lower than for offline renders to save memory and processing power.
HDRI provides the realism, but smart optimization ensures that realism is experienced smoothly in AR/VR.
HDRI for 3D Printing and Visualization
While HDRI doesn’t directly influence the physical process of 3D printing, it plays a crucial role in the **visualization** phase leading up to it. Before a 3D car model is sent to a 3D printer, artists need to thoroughly inspect and present the model to clients or stakeholders. This is where HDRI comes in:
- Pre-print Visualization: Using HDRI lighting to render your 3D car model before printing allows you to visualize how the physical model would look under various real-world lighting conditions. This helps in assessing the design, proportions, and surface finishes in a realistic context. You can use studio HDRIs for a clean presentation of the form, or outdoor HDRIs to see how reflections might fall on the printed surface.
- Assessing Design and Form: Realistic lighting helps reveal subtle imperfections in the mesh, highlights surface curvature, and makes it easier to spot potential issues that might affect the 3D print. For example, under strong HDRI lighting, slight dents or uneven surfaces might become visible through distorted reflections.
- Preparing Models for 3D Printing: Separately, the preparation for 3D printing involves ensuring the model has:
- Manifold Geometry: No holes, non-intersecting faces, or flipped normals.
- Watertight Mesh: A completely enclosed volume.
- Proper Scaling: Ensuring the model is scaled correctly for the printer’s build volume.
- Mesh Repair: Using software tools to automatically or manually fix any geometric errors.
So, while HDRI is a visualization tool, it indirectly supports the 3D printing workflow by enabling comprehensive and realistic pre-print inspection and presentation of the 3D car model.
Conclusion
The journey to mastering photorealistic automotive renders is a multifaceted one, but at its core lies the profound impact of High Dynamic Range Imaging. From the subtle glint of a highlight on polished chrome to the nuanced shadows that define a car’s aggressive stance, HDRI lighting provides the environmental data necessary to elevate your 3D car models from mere digital assets to captivating visual experiences. We’ve explored the fundamental principles, delved into software-specific workflows, uncovered advanced techniques for backplate integration and auxiliary lighting, and even touched upon optimization strategies for real-time applications.
Remember, the power of HDRI lies in its ability to bring the complexity and beauty of real-world lighting directly into your virtual scenes. Experiment with different HDRIs, pay meticulous attention to your PBR materials, and embrace post-processing as the final layer of polish. Practice is key, and with each render, your eye for detail and understanding of light will sharpen. Whether you’re crafting renders for advertising, game development, or architectural visualization, the techniques outlined here will empower you to achieve truly exceptional results.
Ready to put these techniques into practice? Begin your next project with a foundation of excellence by exploring the vast selection of high-quality 3D car models available on 88cars3d.com. Each model is meticulously crafted with clean topology and realistic materials, providing the perfect canvas for you to apply your newfound HDRI lighting expertise and create stunning automotive masterpieces.
Featured 3D Car Models

Texture: Yes
Material: Yes
Download the Porsche 911 Turbo S 2024 3D Model featuring clean geometry, realistic detailing, and a fully modeled interior. Includes .blend, .fbx, .obj, .glb, .stl, .ply, .unreal, and .max formats for rendering, simulation, and game development.
Price: $20
View Product

Texture: Yes
Material: Yes
Download the Pontiac Solstice 2009 3D Model featuring clean geometry, realistic detailing, and a fully modeled interior. Includes .blend, .fbx, .obj, .glb, .stl, .ply, .unreal, and .max formats for rendering, simulation, and game development.
Price: $10
View Product

Texture: Yes
Material: Yes
Download the Mini Cooper Countryman 2025 3D Model featuring clean geometry, realistic detailing, and a fully modeled interior. Includes .blend, .fbx, .obj, .glb, .stl, .ply, .unreal, and .max formats for rendering, simulation, and game development.
Price: $29.9
View Product

Texture: Yes
Material: Yes
Download the Mercedes C Classe 2012 3D Model featuring clean geometry, realistic detailing, and a fully modeled interior. Includes .blend, .fbx, .obj, .glb, .stl, .ply, .unreal, and .max formats for rendering, simulation, and game development.
Price: $19.9
View Product

Texture: Yes
Material: Yes
Download the Mercedes-Benz S65 AMG 2018 3D Model featuring clean geometry, realistic detailing, and a fully modeled interior. Includes .blend, .fbx, .obj, .glb, .stl, .ply, .unreal, and .max formats for rendering, simulation, and game development.
Price: $19.9
View Product

Texture: Yes
Material: Yes
Download the Mazda 3 Sedan 2004 3D Model featuring clean geometry, realistic detailing, and a fully modeled interior. Includes .blend, .fbx, .obj, .glb, .stl, .ply, .unreal, and .max formats for rendering, simulation, and game development.
Price: $10
View Product

Texture: Yes
Material: Yes
Download the Martin Rapide 2011 3D Model featuring clean geometry, realistic detailing, and a fully modeled interior. Includes .blend, .fbx, .obj, .glb, .stl, .ply, .unreal, and .max formats for rendering, simulation, and game development.
Price: $20.9
View Product

Texture: Yes
Material: Yes
Download the Car Tasergal 005 3D Model featuring clean geometry, realistic detailing, and a fully modeled interior. Includes .blend, .fbx, .obj, .glb, .stl, .ply, .unreal, and .max formats for rendering, simulation, and game development.
Price: $10
View Product

Texture: Yes
Material: Yes
Download the Kia Picanto 2024 3D Model featuring clean geometry, realistic detailing, and a fully modeled interior. Includes .blend, .fbx, .obj, .glb, .stl, .ply, .unreal, and .max formats for rendering, simulation, and game development.
Price: $15.99
View Product
Texture: Yes
Material: Yes
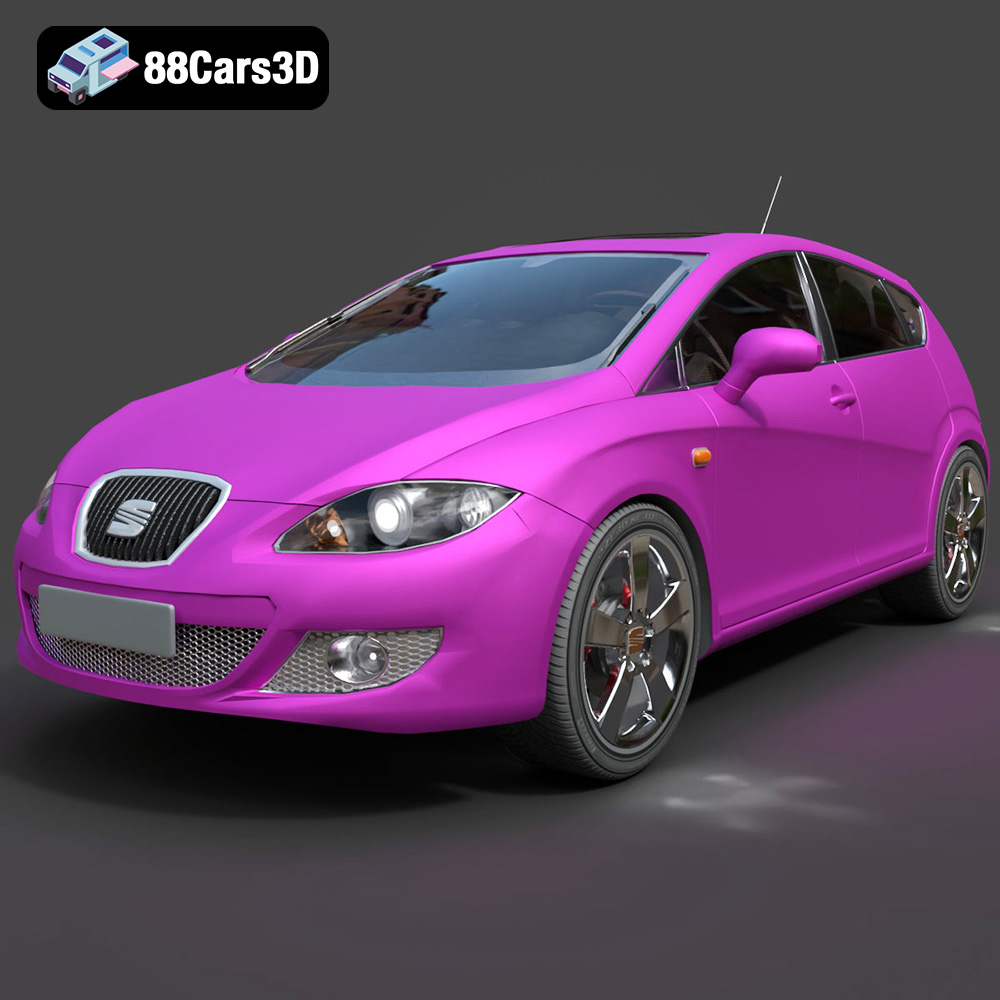
Download the Seat Leon 3D Model featuring a dynamic design, detailed interior, and accurate proportions. Includes .blend, .fbx, .obj, .glb, .stl, .ply, .unreal, and .max formats for rendering, simulation, and game development.
Price: $20.79
View Product


