Get 50% OFF All Premium 3D & STL Models!

“`html
The allure of a classic sports car, the sleek lines of a modern hypercar, or the rugged charm of an off-road icon – these automotive dreams are now within reach, not just on the road, but on your 3D printer bed. Bringing these automotive masterpieces into the physical realm through 3D printing requires a crucial first step: transforming digital vehicle models into robust, printable STL files. This process is an art and a science, blending digital sculpting with the practical demands of additive manufacturing. Whether you’re a seasoned maker aiming to expand your collection of printable car models or a newcomer eager to embark on your first automotive 3D printing project, understanding the intricacies of file preparation is paramount. This guide will walk you through the essential steps, from initial mesh assessment to final export, ensuring your digital creations translate into stunning physical replicas. We’ll delve into critical aspects like manifold geometry, wall thickness, support optimization, and the crucial interplay between your 3D model and 3D printer settings. Get ready to unlock the potential of your favorite vehicles in STL format, ready for your printer to bring them to life.
At the heart of 3D printing lies the STL (STereoLithography) file format. Unlike complex 3D modeling formats that store intricate data about surfaces, textures, and colors, STL files simplify this information into a concise representation of a 3D object’s surface geometry. It achieves this by approximating the object’s surfaces with a mesh of interconnected triangles. Each triangle is defined by the coordinates of its three vertices and a normal vector, which indicates the outward direction of the surface. This triangular facet approach is universally understood by slicing software, making it the de facto standard for sending designs to 3D printers. For automotive models, this means the intricate curves of a fender, the sharp edges of a spoiler, and the fine details of a grille are all broken down into thousands, or even millions, of tiny triangles. The density and orientation of these triangles directly impact the quality and printability of your model. A well-formed STL file will have consistent triangle orientation (all normals pointing outwards) and a watertight, manifold mesh, preventing errors during slicing and printing. Understanding this fundamental structure is the first step in ensuring your vehicle models are successfully translated into physical objects, whether you’re sourcing them from platforms like 88cars3d.com or preparing your own designs.
The arrangement and connectivity of triangles in an STL file, known as mesh topology, are critical for printability. A “manifold” mesh is the gold standard – essentially, it means the mesh is watertight, with no holes, no internal faces, and no edges shared by more than two triangles. Think of it like a sealed container; if there’s a hole, your slicer won’t know where the “inside” and “outside” are, leading to errors. For complex automotive shapes, maintaining manifold integrity can be challenging, especially after modifications or if the original model was not designed with 3D printing in mind. Identifying non-manifold edges, self-intersecting faces, or disconnected components is a vital part of the preparation process. Software tools like Meshmixer, Blender, or Autodesk Netfabb are indispensable for diagnosing and repairing these topological issues, ensuring a clean and solid representation of your car model.
STL files come in two primary flavors: ASCII and Binary. ASCII STLs are human-readable, containing text-based descriptions of the triangles. While easier to inspect manually, they are significantly larger in file size. Binary STLs, on the other hand, store the same information more compactly, resulting in much smaller files and faster loading times in slicing software. For complex automotive models with high polygon counts, binary format is almost always preferred due to efficiency. Most 3D modeling and CAD software will allow you to choose the export format. Always opt for binary unless there’s a specific reason to generate an ASCII file for debugging purposes. The quality of the printed model is independent of the STL format; it’s the underlying mesh data that matters.
Before you even think about exporting your vehicle model as an STL file, a thorough preparation phase is essential. This involves refining the digital model to meet the specific requirements of 3D printing, particularly for intricate objects like cars. The goal is to create a model that is not only aesthetically pleasing but also structurally sound and easy to print. This often means making compromises or additions that wouldn’t be necessary for digital rendering alone. For instance, delicate parts like mirrors or antennas might need to be thickened or designed to be printed separately and attached later. Similarly, internal structures that aren’t visible externally, such as hollow chassis components, need to be managed to avoid printing issues or unnecessary material usage. Investing time in this preparation stage directly translates to fewer print failures and a higher quality final product, saving you time and material in the long run.
One of the first considerations is scaling. Vehicle models can originate from various sources and may be modeled in different units (e.g., millimeters, centimeters, inches). It’s crucial to ensure your model is scaled correctly in your 3D modeling software before exporting to STL. Most 3D printers operate in millimeters, so setting your working units to millimeters is a good practice. If you intend to print a 1:18 scale model, you’ll need to scale your digital model accordingly. For example, if the real car is 4500mm long, a 1:18 scale model would be approximately 250mm long (4500mm / 18). Incorrect scaling can result in a model that’s too small to capture detail or too large to fit on your print bed. Always double-check the dimensions of your exported STL file in your slicer to confirm the intended scale.
3D printers have limitations on how thin a feature can be printed successfully. For automotive models, elements like door handles, emblems, window frames, and thin spoilers require careful attention to wall thickness. A common recommendation for FDM printing is a minimum wall thickness of 1-2mm, depending on the nozzle size and material. Resin printers can achieve finer details, but even they have limits. If a feature is too thin, it may break off during printing, post-processing, or simply not be visible. Conversely, overly thick walls can obscure fine details and add unnecessary weight and print time. Analyze your model for thin areas and consider thickening them. Sometimes, this can be achieved through a “solidify” or “extrude” modifier in modeling software. For extremely fine details that are impossible to print reliably, consider designing them as separate, thicker pieces to be glued on post-print.
Very few complex models are best printed as a single, monolithic piece. For intricate vehicle models, breaking them down into sub-assemblies is often the most effective approach. This allows for optimal orientation of individual parts, easier support generation and removal, and the possibility of printing different components in different materials or colors. Common separations include the car body, chassis, wheels, interior components (dashboard, seats), and small exterior details like mirrors and spoilers. This modular approach not only improves print quality but also simplifies post-processing and allows for greater customization. When downloading models from marketplaces such as 88cars3d.com, you’ll often find that they are already provided as multi-part assemblies, streamlining this process significantly.
Even meticulously designed models can sometimes develop errors during the 3D modeling or export process. These errors, often referred to as mesh imperfections, can cause significant problems for slicing software, leading to failed prints or distorted geometries. The process of identifying and rectifying these issues is known as mesh repair. For complex automotive models, where smooth curves and sharp edges coexist, ensuring the mesh is “watertight” and free of topological defects is paramount. Fortunately, several powerful software tools are available to assist with this crucial step, turning potentially problematic models into reliable print-ready files. Investing time in mesh repair is a proactive measure that significantly increases the likelihood of a successful print.
Dedicated mesh repair software like Autodesk Netfabb (which offers basic free services), Meshmixer, or even some advanced features within slicers like PrusaSlicer can automatically detect and attempt to fix common issues. These tools can identify non-manifold edges, holes, inverted normals, and self-intersecting faces. However, automatic repair isn’t always perfect, especially with highly complex geometries. Manual intervention is often required. In software like Blender, you can enter “Edit Mode” to manually select vertices, edges, and faces to mend holes, dissolve redundant geometry, or remove isolated components. For automotive models, paying close attention to areas where different parts of the mesh meet is essential, as these are common sites for topological errors.
Highly detailed 3D models, especially those sculpted with organic modeling tools, can have an extremely high polygon count. While more polygons can mean finer detail, they also result in massive STL files that can bog down slicing software and even overwhelm some 3D printers’ processing capabilities. Decimation is the process of reducing the number of polygons in a mesh while trying to preserve its overall shape and key features. Tools like Meshmixer or Blender’s “Decimate” modifier can intelligently reduce the polygon count. The key is to find a balance: enough polygons to retain the smooth curves and sharp edges of the car, but not so many that the file becomes unmanageable. For printable car models, the target polygon count will depend on the desired print resolution and the capabilities of your printer; often, files with a few hundred thousand to a couple of million triangles are a good starting point.
Once you have a clean, watertight STL file of your vehicle model, the next critical step is slicing. Slicing software acts as the translator between your 3D model and your 3D printer, converting the digital geometry into a series of thin layers and generating the machine code (G-code) that the printer follows. For complex automotive models, the slicing process requires careful consideration of various parameters to achieve high fidelity, structural integrity, and reasonable print times. This is where theoretical knowledge meets practical application, and understanding the interplay between different settings is crucial for success. Platforms like Cura, PrusaSlicer, and Simplify3D offer a wide array of tools to optimize your prints.
Layer height is arguably the most impactful setting for print quality. It determines the thickness of each individual layer deposited by the printer. A smaller layer height (e.g., 0.1mm or even 0.05mm) results in finer detail, smoother curves, and reduced visible “stair-stepping” on sloped surfaces, which is particularly important for the smooth body panels of a car. However, printing at lower layer heights significantly increases print time. Conversely, a larger layer height (e.g., 0.2mm or 0.3mm) speeds up printing considerably but sacrifices surface detail. For highly detailed car models, a common strategy is to use a fine layer height for the main body and potentially a slightly larger one for less visible internal components or simple parts like chassis elements. Always evaluate the trade-off based on the desired outcome and your patience.
Infill refers to the internal structure printed within the outer walls of your model. For most display models, high infill percentages are unnecessary and waste material and print time. An infill density between 10-20% is often sufficient to provide structural support for the outer layers and add some rigidity. However, consider the specific needs of your model. For parts that might be handled frequently or require higher strength, a slightly higher infill might be beneficial. The choice of infill pattern also matters. Patterns like ‘Grid’, ‘Cubic’, or ‘Gyroid’ offer good strength in multiple directions. For very thin or delicate parts, consider using ‘Lightning’ infill (available in some slicers) which strategically places infill only where needed to support overhangs, drastically reducing material usage and print time.
Print speed is another critical factor that influences both quality and time. While faster printing is appealing, excessively high speeds can lead to poor layer adhesion, ringing artifacts, and reduced detail. For detailed automotive models, it’s often best to print at moderate speeds. A good starting point for outer walls might be 40-50 mm/s, with inner walls and infill printed faster (e.g., 60-80 mm/s). Travel speed (how fast the nozzle moves when not printing) can be set higher (e.g., 100-150 mm/s) to save time. Proper cooling is also essential, especially for PLA, to help solidify the extruded plastic quickly, allowing for sharper details and better overhang performance. Ensure your part cooling fan is set appropriately, typically at 100% for PLA after the first few layers.
Vehicle models are inherently complex, featuring overhangs, bridges, and intricate details that defy gravity. This is where support structures become indispensable. Supports are temporary scaffolding generated by the slicer that hold up these unsupported sections during printing, preventing collapses and ensuring the model’s geometry is accurately reproduced. Effective support generation and removal are critical for achieving a clean, professional finish on your 3D printed cars. Without them, delicate features like spoilers, mirrors, or undercarriages would likely fail. Mastering support settings can be the difference between a beautiful replica and a failed print.
Slicers typically offer various support types, most commonly ‘Normal’ or ‘Tree’ (also known as ‘Organic’ or ‘Branching’). Normal supports create a dense grid structure directly beneath overhangs. They are generally easier to generate but can be more difficult to remove cleanly, sometimes leaving significant marks on the model’s surface. Tree supports, on the other hand, branch out from a single point on the build plate or the model itself, touching the overhang only where necessary. They use less material, are often easier to remove, and cause less surface scarring, making them ideal for detailed models where surface finish is paramount. For automotive prints, tree supports are often the preferred choice for their efficiency and cleaner removal characteristics.
Fine-tuning support settings is crucial. Support density controls how solid the support structure is; lower densities (e.g., 5-15%) are often sufficient and easier to remove. Support placement (e.g., ‘Touching Buildplate’ vs. ‘Everywhere’) determines where supports are generated. ‘Touching Buildplate’ is ideal for models that have a flat base, while ‘Everywhere’ is necessary for models with significant overhangs originating from other parts of the model itself. The most critical setting for clean removal is the support interface. Enabling interface layers creates a denser, flatter surface directly beneath the model, which peels away more cleanly than standard support structures. Adjusting the ‘Support Z Distance’ (the gap between the support and the model) is also key; a small gap (e.g., 0.1-0.2mm) ensures good support but can make removal harder, while a larger gap eases removal but might result in a less perfect surface finish on the supported area.
Removing supports requires patience and the right tools. Start by gently wiggling the support structures at their base. For FDM prints, needle-nose pliers, flush cutters, and hobby knives are essential. Work slowly and deliberately to avoid damaging the model. For stubborn supports, a quick blast of compressed air can sometimes help loosen them. For resin prints, supports are typically removed with flush cutters or a small saw, often before final curing. After support removal, some sanding may be necessary to smooth out any remaining marks. A light sanding with progressively finer grit sandpaper (e.g., starting at 220 grit and moving up to 1000+ grit) can prepare the surface for painting. Consider submerging the model in a warm water bath with soap after support removal to help release small support fragments.
The choice of material and the type of 3D printer you use significantly influence the final outcome of your automotive models. Each material has its own set of properties, advantages, and challenges, and different printer technologies excel at reproducing fine details in unique ways. Understanding these factors allows you to make informed decisions that align with your desired aesthetic, functional requirements, and printing capabilities. Whether you’re aiming for a durable, paintable finish or a display piece with intricate details, the right combination of material and printer technology is key to success.
FDM (Fused Deposition Modeling) printers build objects by extruding melted plastic filament layer by layer. They are widely accessible, offer a broad range of materials (PLA, PETG, ABS, ASA), and are generally more cost-effective for larger prints. FDM is excellent for producing sturdy, functional parts or larger display models where layer lines might be acceptable or easily sanded away. However, FDM printers struggle with extremely fine details and sharp edges compared to resin. Resin (SLA/DLP/MSLA) printers use UV light to cure liquid photopolymer resin layer by layer. They offer significantly higher resolution and can reproduce incredibly fine details, making them ideal for intricate automotive models with sharp panel lines, delicate emblems, and smooth surfaces. However, resin prints can be more brittle, require more post-processing (washing, curing), and often have a smaller build volume. For hyper-detailed car models, resin printing is often the preferred choice.
PLA (Polylactic Acid): The most common FDM material, PLA is easy to print, comes in many colors, and has a nice matte finish suitable for painting. It’s rigid but can be brittle. Ideal for display models. PETG (Polyethylene Terephthalate Glycol): Offers better strength, temperature resistance, and impact resistance than PLA. It’s slightly more challenging to print but results in more durable parts. Good for models that might see some handling. ABS/ASA (Acrylonitrile Butadiene Styrene / Acrylonitrile Styrene Acrylate): Strong and durable with good temperature resistance. They require higher printing temperatures and often an enclosure to prevent warping. ASA offers better UV resistance than ABS. Both are excellent for models requiring high durability and can be sanded and finished smoothly. Resin Types: Standard resins are good for general-purpose models. ABS-like resins offer increased toughness and durability, while high-detail resins are optimized for capturing the finest features. Experimentation is often key to finding the material that best suits your needs.
Regardless of the printer technology, regular calibration and maintenance are crucial for consistent, high-quality prints, especially for detailed automotive models. For FDM printers, this includes calibrating the extruder (E-steps), ensuring the bed is level, and performing temperature and retraction tower tests to optimize filament extrusion. For resin printers, calibrating the Z-axis, ensuring the build plate is clean and level, and performing exposure tests are vital. Regularly cleaning the resin vat, replacing the FEP film when necessary, and ensuring the LCD screen or projector is free from debris are essential maintenance tasks. A well-maintained and calibrated printer is the foundation for reliably producing flawless 3D printed car models.
The journey doesn’t end when the print is finished and supports are removed. Post-processing is a critical phase that transforms a raw 3D print into a polished, professional-looking model. For automotive replicas, this stage is particularly important for achieving smooth finishes, accurate paint jobs, and seamless assembly. It’s where you can hide layer lines, fill gaps, and add the final details that make your printed car truly stand out. Whether you’re aiming for a factory-fresh look or a weathered patina, a thoughtful post-processing workflow will elevate your creation.
The most common post-processing step is dealing with layer lines inherent in FDM printing. Start with coarser grit sandpaper (e.g., 150-220 grit) to remove obvious ridges, then progressively move to finer grits (400, 800, 1200, and even higher). For stubborn layer lines or small imperfections, applying a filler primer or a model putty (like Bondo or Tamiya putty) can fill these gaps. Apply thin layers, sand smooth, and repeat as necessary. Once you have a smooth surface, apply a few coats of primer. Primer not only reveals any remaining imperfections that need further attention but also provides an excellent base for paint adhesion and ensures a uniform color.
With a well-primed surface, you’re ready for paint. Acrylic paints are popular due to their ease of use and quick drying times. Airbrushing offers the smoothest, most professional finish for car bodies, allowing for even coats and seamless color transitions. For smaller details like trim, lights, and grilles, fine brushes are essential. Consider using techniques like weathering powders or washes to add realism, simulating dirt, grime, or wear and tear. Always work in a well-ventilated area and use appropriate safety gear, especially when using spray paints or solvents. For parts like windows, clear acrylic paints or tinted varnishes can be used.
If your model was printed in multiple parts, this is where they come together. Cyanoacrylate (super glue) is excellent for bonding most 3D printed plastics. For larger parts or when a stronger bond is needed, two-part epoxy adhesives work well. Ensure parts align correctly before gluing. After assembly, touch up any areas where glue might have squeezed out or paint was scraped. Adding final details like decals, chrome accents, or even custom-made photo-etched parts can further enhance the realism of your 3D printed automotive masterpiece. This stage is where your patience and attention to detail truly pay off.
Transforming digital vehicle models into tangible, 3D printable STL files is a journey that requires a blend of technical understanding and practical execution. From appreciating the fundamental triangle-based structure of the STL format to meticulously preparing your model for export, each step plays a crucial role. We’ve navigated the complexities of mesh repair, the strategic importance of slicing parameters like layer height and infill, and the indispensable role of support structures in capturing intricate automotive designs. Furthermore, we’ve explored the nuances of material selection, printer capabilities (FDM vs. Resin), and the essential post-processing techniques that bring your printed creations to life. By mastering these elements, you can confidently tackle any automotive model, ensuring high-quality results whether you’re printing a classic icon or a futuristic concept. The world of printable car models is vast and exciting, and with the knowledge gained here, you’re well-equipped to explore it, download magnificent models from sources like 88cars3d.com, and embark on your next rewarding 3D printing project.
“`
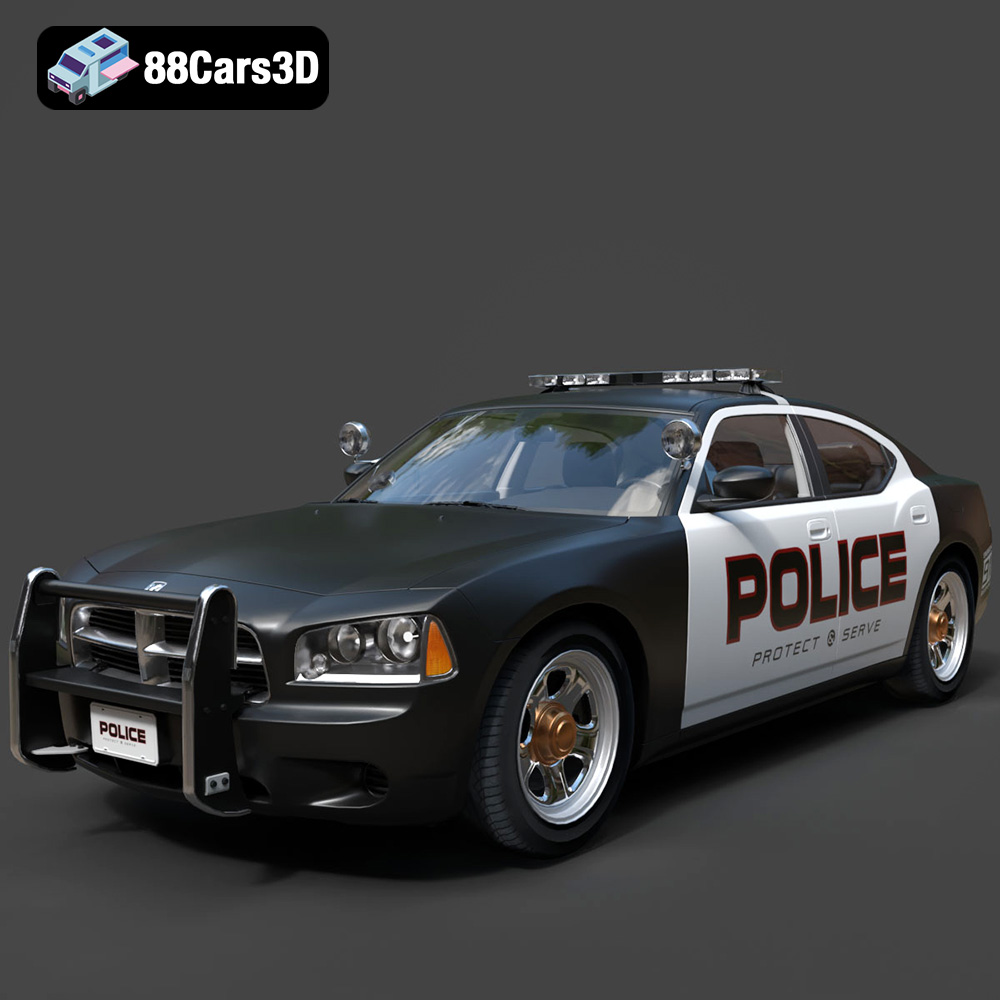
Texture: Yes
Material: Yes
Download the Aston Martin Police US 911 -005 3D Model featuring a high-fidelity exterior with police livery, detailed interior, and accurate proportions. Includes .blend, .fbx, .obj, .glb, .stl, .ply, .unreal, and .max formats for rendering, simulation, and game development.
Price: $10.79

Texture: Yes
Material: Yes
Download the Toyota MRS-007 3D Model featuring clean geometry, realistic detailing, and a fully modeled interior. Includes .blend, .fbx, .obj, .glb, .stl, .ply, .unreal, and .max formats for rendering, simulation, and game development.
Price: $10

Texture: Yes
Material: Yes
Download the Porsche 911 Turbo S 2024 3D Model featuring clean geometry, realistic detailing, and a fully modeled interior. Includes .blend, .fbx, .obj, .glb, .stl, .ply, .unreal, and .max formats for rendering, simulation, and game development.
Price: $20

Texture: Yes
Material: Yes
Download the Pontiac Solstice 2009 3D Model featuring clean geometry, realistic detailing, and a fully modeled interior. Includes .blend, .fbx, .obj, .glb, .stl, .ply, .unreal, and .max formats for rendering, simulation, and game development.
Price: $10

Texture: Yes
Material: Yes
Download the Mini Cooper Countryman 2025 3D Model featuring clean geometry, realistic detailing, and a fully modeled interior. Includes .blend, .fbx, .obj, .glb, .stl, .ply, .unreal, and .max formats for rendering, simulation, and game development.
Price: $29.9

Texture: Yes
Material: Yes
Download the Mercedes C Classe 2012 3D Model featuring clean geometry, realistic detailing, and a fully modeled interior. Includes .blend, .fbx, .obj, .glb, .stl, .ply, .unreal, and .max formats for rendering, simulation, and game development.
Price: $19.9

Texture: Yes
Material: Yes
Download the Mercedes-Benz S65 AMG 2018 3D Model featuring clean geometry, realistic detailing, and a fully modeled interior. Includes .blend, .fbx, .obj, .glb, .stl, .ply, .unreal, and .max formats for rendering, simulation, and game development.
Price: $19.9

Texture: Yes
Material: Yes
Download the Mazda 3 Sedan 2004 3D Model featuring clean geometry, realistic detailing, and a fully modeled interior. Includes .blend, .fbx, .obj, .glb, .stl, .ply, .unreal, and .max formats for rendering, simulation, and game development.
Price: $10

Texture: Yes
Material: Yes
Download the Martin Rapide 2011 3D Model featuring clean geometry, realistic detailing, and a fully modeled interior. Includes .blend, .fbx, .obj, .glb, .stl, .ply, .unreal, and .max formats for rendering, simulation, and game development.
Price: $20.9

Texture: Yes
Material: Yes
Download the Car Tasergal 005 3D Model featuring clean geometry, realistic detailing, and a fully modeled interior. Includes .blend, .fbx, .obj, .glb, .stl, .ply, .unreal, and .max formats for rendering, simulation, and game development.
Price: $10

