Get 50% OFF All Premium 3D & STL Models!

The pursuit of ultimate realism and interactivity in automotive experiences has long been a driving force in 3D visualization and game development. From the subtle glint of a polished fender to the catastrophic crumple of a high-speed collision, every detail contributes to immersion. Unreal Engine, with its cutting-edge rendering capabilities and robust physics simulation, stands at the forefront of this evolution. Central to its power for dynamic, destructible environments is the Chaos Physics System.
Chaos represents a paradigm shift in how developers can approach destruction and complex simulations within real-time applications. For anyone working with 3D car models – be it for high-fidelity automotive visualization, thrilling racing games, or interactive AR/VR experiences – understanding and leveraging Chaos is paramount. This comprehensive guide will delve deep into Unreal Engine’s Chaos Physics System, illustrating how you can harness its capabilities to create breathtakingly realistic destruction, intricate vehicle dynamics, and captivating interactive scenarios for your automotive projects.
You’ll learn how to set up your project, prepare your high-quality 3D car models (like those found on 88cars3d.com) for fracture, define material properties, and optimize performance, ensuring your real-time renders run smoothly even amidst spectacular chaos. We’ll explore specific Unreal Engine workflows, delve into technical specifications, and share best practices to elevate your automotive projects to an unprecedented level of realism.
Unreal Engine’s Chaos Physics System is a high-performance, multi-threaded physics solution designed to handle a vast array of physics simulations, including rigid body dynamics, destruction, cloth, fluid, and even hair. Introduced as a successor to the legacy PhysX system, Chaos was built from the ground up to offer unparalleled scalability, flexibility, and determinism. Its architecture allows for more consistent and repeatable physics results, which is crucial for complex simulations and multiplayer game environments.
For automotive projects, Chaos provides the foundation for creating everything from accurately simulated vehicle suspension and tire friction to incredibly detailed car damage models. It integrates seamlessly with other core Unreal Engine features like Nanite for virtualized geometry (allowing for cinematic levels of detail), Lumen for real-time global illumination, and Blueprint visual scripting for intuitive interactivity. This powerful combination allows artists and developers to push the boundaries of real-time rendering and simulation.
The transition from PhysX to Chaos marked a significant architectural evolution. Chaos is an inherently more modular and data-driven system. Unlike PhysX, which was largely a black box, Chaos exposes a greater degree of control and customization. This modularity means developers can tailor physics behavior more precisely, optimizing for specific scenarios and hardware configurations. Its multi-threaded nature ensures that complex simulations can leverage modern CPUs effectively, preventing performance bottlenecks that plagued older physics engines. The shift also brought about a robust new destruction system based on Geometry Collections, offering far greater artistic control over fracture patterns and destructible properties compared to previous solutions.
While Chaos excels at general rigid body dynamics, its specific capabilities for automotive applications are particularly impactful. For vehicle physics, it provides robust simulation of suspension, tire friction, engine forces, and transmission behavior, all configurable through dedicated Chaos Vehicle Components. However, where Chaos truly shines for automotive projects is its sophisticated destruction system. It enables artists to define how a car model deforms and breaks apart upon impact, with control over fracture patterns, material properties (like how glass shatters versus metal crumples), and the visual fidelity of internal structures. This level of detail allows for highly realistic crash simulations, essential for both immersive gaming and detailed automotive visualization.
Before diving into the intricacies of fracturing your 3D car models, a proper project setup is essential. Enabling Chaos is the first step, as it’s not always active by default in older projects. Navigate to Edit > Project Settings > Physics and ensure that Chaos is selected as the physics engine. You might also need to enable specific Chaos plugins under Edit > Plugins, such as “ChaosVehiclesPlugin” for vehicle dynamics and “ChaosCaching” for optimizing destruction scenarios. A restart of the editor will likely be required after these changes.
Once Chaos is enabled, the next crucial step is importing your 3D car models. When sourcing automotive assets from marketplaces such as 88cars3d.com, you’ll find models optimized for Unreal Engine, featuring clean topology, proper UV mapping, and PBR materials. These characteristics are vital for effective destruction. A clean mesh with well-defined material IDs for different parts (e.g., body, glass, interior) will simplify the fracturing process and ensure that interior materials are correctly applied to newly exposed surfaces. It’s also important to consider the overall hierarchy of your car model; often, it’s best to fracture major components (chassis, doors, hood, fenders) separately before combining them, allowing for more controlled destruction.
The quality of your source mesh directly impacts the quality of your destructible mesh. For optimal results, ensure your 3D car model has clean, non-overlapping UVs, especially for the interior surfaces that will become visible upon fracture. Material IDs play a crucial role here; assign different material IDs to distinct parts of your car, like body panels, windows, and interior components. This allows you to specify a unique “interior material” that appears when a piece breaks off, giving the illusion of thickness and internal structure. For example, a car door might have an exterior paint material, and an interior metal material that is exposed when the door is fractured. Avoid overly complex or dense meshes for the initial import if you plan to fracture them extensively, as this can lead to performance issues during the fracture process itself. Polygon counts around 50,000-100,000 triangles for a primary component like a chassis are a good starting point, with higher detail reserved for smaller, independent pieces.
The core asset for Chaos destruction is the Geometry Collection. To create one, simply right-click on your Static Mesh in the Content Browser and select Create > Create Geometry Collection. This will open the Geometry Collection Editor, where the real magic happens. Initially, your Geometry Collection will be an unbroken mesh. Here, you’ll use various fracture tools to break it down. Parameters like Min Cells and Max Cells control the density of the fracture. You can choose different fracture methods such as Uniform (even distribution), Voronoi (random, organic patterns), or Planar (slicing along planes). For automotive applications, a combination is often best: a coarse Voronoi fracture for the main body panels, followed by finer fractures for glass or specific impact areas. Experiment with the Noise and Grout settings to introduce irregularities and gaps, making the destruction more visually compelling. Remember to assign an Interior Material in the Geometry Collection’s Details panel; this material will be applied to the newly exposed surfaces of fractured pieces.
The Geometry Collection Editor is your primary tool for defining how your 3D car models will destruct. Once you’ve created a Geometry Collection from your static mesh, the editor provides a suite of powerful fracture tools. You can apply different fracture types to various parts of your vehicle, enabling nuanced and realistic damage. For instance, the main chassis might benefit from a more robust, large-chunk Voronoi fracture to simulate tearing metal, while windows could use a denser, smaller-piece Voronoi pattern to mimic shattered glass. Body panels might receive a blend, with large initial breaks followed by finer secondary fractures that mimic bending and crumpling.
A common workflow involves iterative fracturing. Start with a relatively coarse fracture on the entire car or major components like the chassis. Then, select specific fractured pieces and apply a finer fracture to them. For example, fracture the entire car into 10-20 large pieces. Then, select individual door or hood pieces and apply a second, more detailed fracture pass to them, creating smaller shards and deformities. This hierarchical fracturing (controlled by the “Support Depth” setting) allows for both large-scale deformation and fine-detail destruction, crucial for cinematic quality. Ensure you’re setting appropriate fracture parameters for each pass, such as Min/Max Cells to control the number of pieces and Noise to add organic irregularity. The Interior Material setting is critical here, ensuring that when pieces break, the exposed inner surfaces look realistic, reflecting metal, plastic, or foam depending on the car’s construction.
Chaos Fields are an incredibly powerful mechanism for applying forces and damage in a controlled manner. Instead of simply fracturing everything at once, Fields allow you to define regions of influence where physics events, including fracture, will occur. For a car crash simulation, you could use a Radial Falloff Field or a Box Falloff Field to simulate an impact point, triggering destruction only where the field overlaps with your Geometry Collection. This is essential for localized damage, making collisions feel organic and impactful. You can use these fields to apply force, disable collision, or specifically trigger fracture, providing a dynamic and performance-friendly way to manage destruction. By linking these fields to collision events in Blueprint, you can create highly interactive and believable destruction sequences where impact forces directly translate into physical damage.
Physical materials are fundamental to making destruction feel real. In Unreal Engine, you can create a Physical Material asset (Physics > Physical Material) and assign it to your regular PBR materials. Key properties to tune include Friction, Restitution (bounciness), and most importantly for destruction, Density. Higher density materials will have more mass and exert greater force, affecting how they interact with other objects upon fracture. For instance, a heavy metal piece will behave differently than a light plastic shard. Within the Geometry Collection Editor, you can override the physical material properties for the entire collection or individual pieces. Additionally, the Damage Threshold parameter on fractured pieces allows you to define how much force is required to break a piece, enabling some parts of the car to be more robust than others. For glass, a low damage threshold and high angular velocity threshold will simulate a quick, brittle shatter. For metal panels, a higher damage threshold allows for initial deformation before complete fracture. The Support Depth parameter is also crucial; it determines how many “layers” deep a fracture can propagate, preventing an entire car from disintegrating from a single minor impact.
Beyond stunning destruction, Chaos underpins the realistic movement and interaction of vehicles in Unreal Engine. The Chaos Vehicle Component provides a robust framework for simulating authentic vehicle physics, which is especially critical for 3D car models from a marketplace like 88cars3d.com, designed for high fidelity. When setting up a vehicle Blueprint, you’ll attach this component, which provides access to a myriad of parameters controlling engine, transmission, wheels, and suspension. Tuning these parameters is key to achieving the desired driving feel, whether it’s a nimble sports car or a heavy truck.
Suspension tuning involves setting parameters like Spring Rate, Damper Rate, and Camber/Toe Angle. A higher spring rate will make the suspension stiffer, reducing body roll, while a higher damper rate will control the speed at which the suspension compresses and extends, preventing excessive bouncing. Tire simulation is equally crucial, managed through detailed Tire Config assets. Here, you define friction curves, slip angles, and grip multipliers to simulate different tire types (e.g., street, off-road, racing slicks) and surface conditions, directly impacting handling. Finally, engine and transmission configuration involves defining torque curves, gear ratios, and clutch behavior. An accurate torque curve ensures the engine delivers power realistically across its RPM range, while correct gear ratios provide appropriate acceleration and top speed for cinematic or gameplay purposes.
Blueprint visual scripting is the connective tissue that brings interactive vehicle dynamics and destruction together. You can use Blueprint to read vehicle speed, acceleration, and impact forces, then use these values to trigger dynamic events. For example, you can detect a collision strength via the OnComponentHit event and, if it exceeds a certain threshold, apply a Chaos Field to the vehicle’s Geometry Collection, initiating localized fracture. You can also dynamically adjust vehicle parameters in Blueprint; perhaps a boost mode that temporarily increases engine torque, or a damage system that gradually degrades tire grip or suspension performance after repeated impacts. Blueprint also allows you to control the vehicle’s state, switching between driving modes, engaging parking brakes, or even initiating cinematic sequences involving vehicle stunts and destruction, all driven by player input or in-game events.
For truly advanced vehicle interactions, understanding collision channels and response settings is vital. Properly configured collision presets ensure your car interacts correctly with the environment, other vehicles, and even its own destructible pieces. When a significant impact occurs, you can leverage the OnHit events within your vehicle Blueprint to get precise collision data, including impact location and force. This data can then be fed into Chaos Fields to apply targeted destruction. For example, if a car impacts a barrier on its front-left fender, a Blueprint script could identify this and apply a concentrated force field to the Geometry Collection representing that specific fender, triggering its fracture. The Chaos Visual Debugger is an invaluable tool here, allowing you to visualize physics states, collision shapes, and force vectors in real-time within the editor, helping you diagnose and fine-tune complex interactions. You can inspect bond strengths, cluster states, and even individual rigid body properties to ensure your destruction behaves as expected.
While Chaos brings unparalleled realism, it can also be computationally intensive, especially with highly detailed 3D car models undergoing extensive destruction. Optimizing performance is crucial for maintaining real-time frame rates, particularly in games, AR/VR experiences, and high-fidelity automotive visualization. One of the most effective strategies is the intelligent use of Level of Detail (LODs) for fractured meshes. When a Geometry Collection breaks apart, the resulting pieces can still have multiple LODs, allowing Unreal Engine to swap to simpler meshes for pieces further away from the camera. You can configure these LODs directly within the Geometry Collection Editor, ensuring that distant fragments consume minimal resources.
Beyond LODs, managing the lifetime and visibility of fractured pieces is essential. Implement culling mechanisms that remove small, irrelevant fragments or those that have come to rest after a short period. Chaos offers options like Sleep Thresholds and Deactivation to automatically put quiescent physics bodies to sleep, significantly reducing CPU overhead. For scenarios with a massive number of fragments, Chaos Caching can pre-simulate and store destruction, playing it back deterministically with less runtime cost. While Nanite is fantastic for static high-poly environments, using it directly on dynamically fractured Geometry Collections is generally not recommended due to the complexities of real-time mesh changes. Instead, fracture your Nanite-enabled static mesh into a Geometry Collection, which will then generate its own traditional mesh pieces for physics simulation. Finally, enabling Async Physics Ticking in project settings can help distribute physics calculations over multiple frames, preventing sudden performance drops.
The sheer number of physics bodies generated by a highly destructive car crash can quickly overwhelm a system. To manage this, define a maximum number of active fragments for your Geometry Collections. Use Blueprint to monitor fragment counts and implement logic that despawns or hides pieces that are too small, too far away, or have been dormant for too long. Chaos also offers built-in tools like the “Destroy Clusters” setting within the Geometry Collection, which automatically removes clusters of pieces below a certain size or after a defined duration. For very small debris, consider swapping out physics-driven fragments for particle effects (e.g., using Niagara) once they lose momentum. This creates a visual effect of fine debris without the computational cost of simulating thousands of tiny rigid bodies.
Complex 3D car models, especially those with intricate undercarriages or detailed interiors, can have a high number of collision primitives. Each primitive contributes to physics calculations, and inefficient setups can lead to performance bottlenecks. When sourcing automotive assets from marketplaces like 88cars3d.com, you’ll often find models with optimized collision meshes, which is a great starting point. Review and simplify collision meshes for parts that don’t require pixel-perfect collision. Use simple primitive shapes (boxes, spheres, capsules) where possible, and combine static mesh collision into a single complex collision mesh only when absolutely necessary. Reduce the frequency of collision and overlap event generation for minor interactions. For example, if small fragments are merely resting on the ground, they might not need to generate continuous overlap events. Adjusting the “Collision Trace Channel” and “Collision Response” settings on individual components within your vehicle Blueprint and Geometry Collection can fine-tune these interactions, ensuring only relevant collisions trigger expensive calculations.
The power of Unreal Engine’s Chaos Physics System extends across various industries, profoundly impacting how interactive automotive experiences are created. In game development, Chaos enables a new generation of racing titles and open-world games with incredibly realistic car damage models, where vehicles dynamically deform and break apart based on impact severity and material properties. This goes beyond simple cosmetic damage, influencing vehicle performance and player strategy. For arcade racers, Chaos can be stylized to create over-the-top destruction, while in simulations, it can provide forensic-level crash reconstruction.
In automotive visualization, Chaos revolutionizes interactive configurators and marketing experiences. Imagine a virtual showroom where potential buyers can not only customize a car but also witness simulated crash tests or see how specific components deform under stress. This adds an unprecedented layer of realism and engagement to product showcases. Furthermore, in virtual production and film, Chaos allows for dynamic vehicle destruction sequences to be created and iterated in real-time, removing the lengthy turnaround times associated with traditional VFX pipelines. Filmmakers can choreograph complex stunts and crashes, seeing the results instantly on LED walls or virtual monitors, making on-set adjustments with unparalleled flexibility.
Unreal Engine’s Sequencer is the ultimate tool for orchestrating cinematic destruction. You can keyframe Chaos Fields to animate their position, size, and intensity, precisely timing when and where destruction occurs. Attach your Geometry Collection to a Sequencer track, and you can record and play back physics simulations, ensuring deterministic and repeatable destruction every time. For example, you can create a detailed crash animation by positioning a Chaos Field to impact the car at a specific frame, triggering fracture, and then animating additional fields or forces to simulate subsequent deformations. You can also trigger Blueprint events from Sequencer, allowing you to link destructive moments with visual effects (like smoke and sparks via Niagara) or sound cues, creating a truly immersive cinematic experience. Sequencer allows for meticulous control over every aspect of a destructive scene, from the initial impact to the final resting state of the fragments.
The foundation of any successful Chaos implementation begins with high-quality assets. Starting with premium 3D car models, such as those readily available on 88cars3d.com, significantly streamlines the entire process. These models typically feature clean, optimized topology, proper UV mapping, and well-organized material IDs, which are critical for effective fracturing and material application. When preparing assets, always aim for meshes with consistent polygon density where destruction is intended. Avoid non-manifold geometry or holes in your mesh, as these can lead to unpredictable fracture patterns. Ensure your UVs are correctly laid out, especially for interior materials that will be exposed upon fracture, as this influences how textures appear on broken surfaces. For performance, keep an eye on the overall polygon count of your source meshes; while Nanite can handle incredibly dense models, the Geometry Collection fracturing process itself can become slow with excessively complex inputs. It’s often better to have a moderately detailed base mesh and rely on Chaos’s iterative fracturing to generate high visual fidelity during destruction.
Unreal Engine’s Chaos Physics System represents a monumental leap forward in real-time simulation, offering unparalleled control and realism for dynamic content. For automotive visualization, game development, and virtual production, Chaos empowers creators to bring cars to life in ways previously unimaginable, from accurately simulated driving dynamics to breathtakingly detailed destruction. By understanding how to set up your project, prepare your 3D car models, master the nuances of fracturing, and optimize for performance, you can unlock a new realm of interactive experiences.
The journey into Chaos requires a blend of technical understanding and artistic intuition, but the rewards are profound: highly immersive, believable, and captivating automotive scenes. Experiment with different fracture patterns, fine-tune material properties, and leverage Blueprint to choreograph spectacular events. Remember that starting with high-quality, pre-optimized 3D car models, like those offered on platforms such as 88cars3d.com, provides an excellent foundation for diving into these advanced workflows. Embrace Chaos, and transform your static car models into dynamic, destructible works of art, pushing the boundaries of what’s possible in real-time automotive experiences.

Meta Description:
Texture: Yes
Material: Yes
Download the Cadillac CTS-V Coupe 3D Model featuring detailed exterior styling and realistic interior structure. Includes .blend, .fbx, .obj, .glb, .stl, .ply, .unreal, and .max formats for rendering, simulation, AR VR, and game development.
Price: $13.9

Texture: Yes
Material: Yes
Download the Buick LeSabre 1998 3D Model featuring a classic American full-size sedan design. Includes .blend, .fbx, .obj, .glb, .stl, .ply, .unreal, and .max formats for rendering, simulation, and game development.
Price: $10.79

Texture: Yes
Material: Yes
Download the Pontiac Firebird 1998 3D Model featuring clean geometry, realistic detailing, and a fully modeled interior. Includes .blend, .fbx, .obj, .glb, .stl, .ply, .unreal, and .max formats for rendering, simulation, and game development.
Price: $10

Texture: Yes
Material: Yes
Download the Opel Astra 2008 3D Model featuring clean geometry, realistic detailing, and a fully modeled interior. Includes .blend, .fbx, .obj, .glb, .stl, .ply, .unreal, and .max formats for rendering, simulation, and game development.
Price: $10

Texture: Yes
Material: Yes
Download the Mercedes Benz Joaquin-007 3D Model featuring clean geometry, realistic detailing, and a fully modeled interior. Includes .blend, .fbx, .obj, .glb, .stl, .ply, .unreal, and .max formats for rendering, simulation, and game development.
Price: $19.99
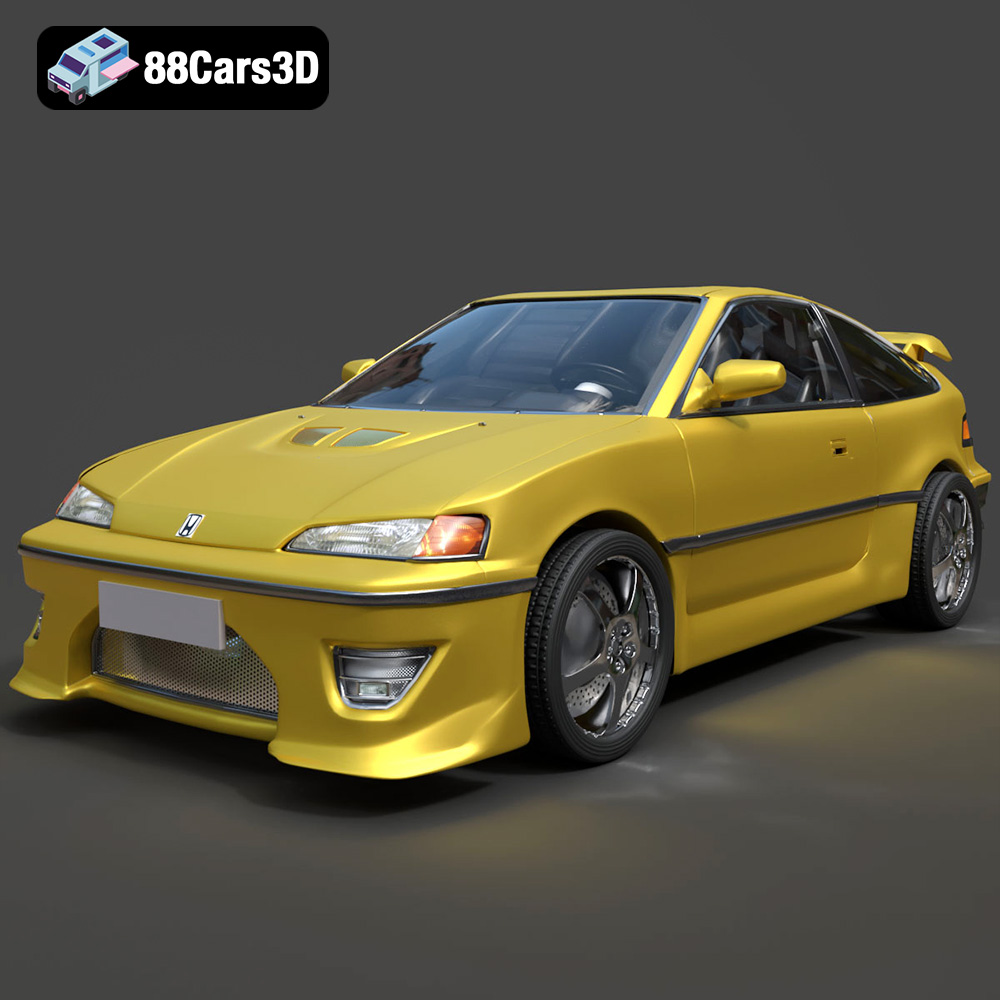
Texture: Yes
Material: Yes
Download the Honda CRX 1980 3D Model featuring clean geometry, realistic detailing, and a fully modeled interior. Includes .blend, .fbx, .obj, .glb, .stl, .ply, .unreal, and .max formats for rendering, simulation, and game development.
Price: $11.99

Texture: Yes
Material: Yes
Download the Chevrolet Camaro 69 Pro-007 3D Model featuring classic muscle car design and custom performance aesthetics. Includes .blend, .fbx, .obj, .glb, .stl, .ply, .unreal, and .max formats for rendering, simulation, and game development.
Price: $20.79

Texture: Yes
Material: Yes
Download the Honda Fit 2008 3D Model featuring a compact, versatile design with detailed exterior and interior components. Includes .blend, .fbx, .obj, .glb, .stl, .ply, .unreal, and .max formats for rendering, simulation, and game development.
Price: $10.79
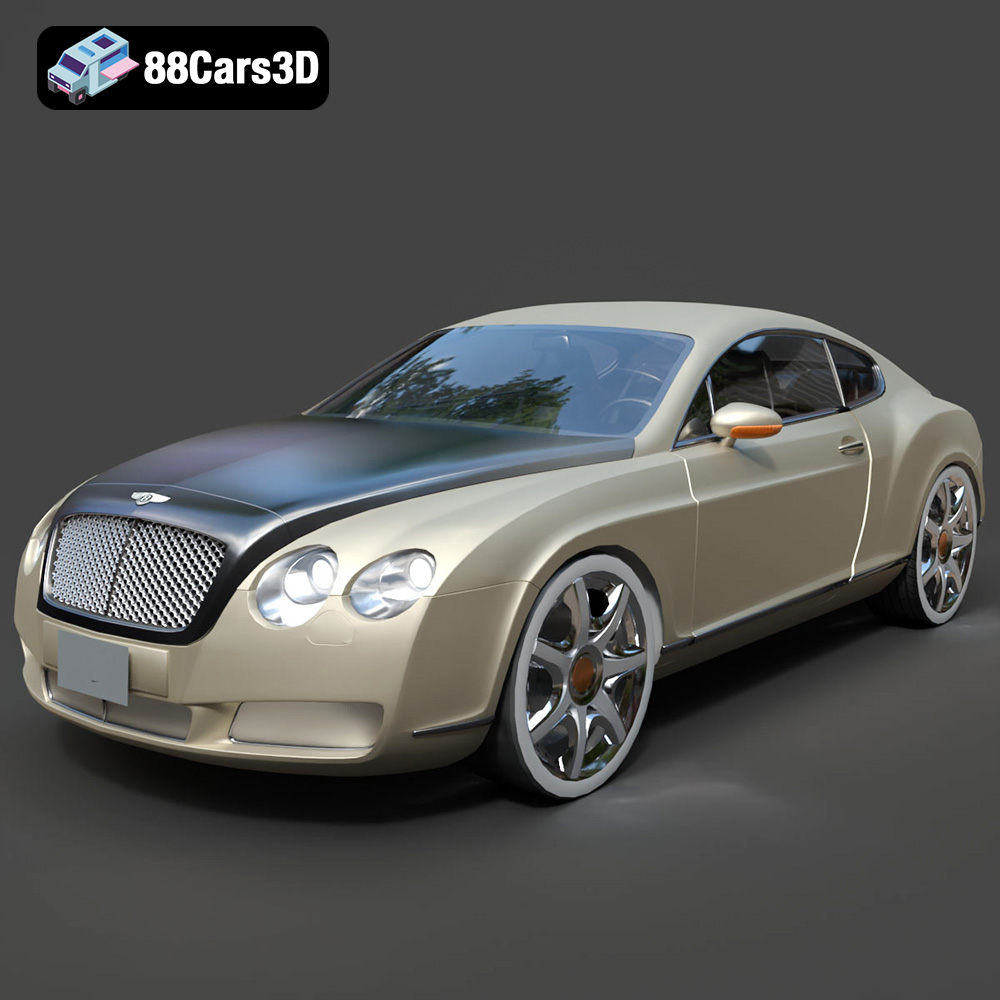
Texture: Yes
Material: Yes
Download the Bentley Continental GT-002 3D Model featuring a luxurious grand touring design and high-quality details. Includes .blend, .fbx, .obj, .glb, .stl, .ply, .unreal, and .max formats for rendering, simulation, and game development.
Price: $20.79

Texture: Yes
Material: Yes
Download the Audi R8 2006 3D Model featuring a sleek sports car design with detailed exterior and interior. Includes .blend, .fbx, .obj, .glb, .stl, .ply, .unreal, and .max formats for rendering, simulation, and game development.
Price: $20.79

