Get 50% OFF All Premium 3D & STL Models!

“`html
The allure of a perfectly rendered 3D printed car model is undeniable. From the sleek lines of a classic sports car to the rugged form of an off-road beast, these intricate replicas can bring automotive passion to life. At 88cars3d.com, we specialize in providing the high-quality, print-ready STL files that form the foundation of these stunning creations. But even the best printable car models require the right tools to truly shine. The journey from a digital file to a tangible, detailed model is heavily influenced by your choice of 3D printer. This guide is designed to equip you with the knowledge to select the ideal 3D printing technology and specific printer models that will transform your downloaded STL files into miniature automotive masterpieces. We’ll delve into the critical factors that differentiate printers for detailed work, explore the nuances of both FDM and resin printing for automotive applications, and highlight specific printers that consistently deliver exceptional results.
Whether you’re a seasoned maker pushing the boundaries of your current setup or a hobbyist just embarking on your 3D printing journey, understanding the capabilities and limitations of different 3D printers is paramount. We’ll cover everything from micron-level resolution and material compatibility to software workflows and post-processing techniques necessary for achieving that showroom finish. Prepare to discover how the right printer can elevate your hobby, streamline your workflow, and ultimately, allow you to create the most accurate and breathtaking 3D printed car models possible.
The first crucial decision in selecting a 3D printer for detailed vehicle models lies in choosing between Fused Deposition Modeling (FDM) and Stereolithography (SLA) or Digital Light Processing (DLP) – collectively known as resin printing. Each technology offers distinct advantages and disadvantages when it comes to replicating the fine details inherent in automotive design.
FDM printers work by extruding melted thermoplastic filament layer by layer onto a build platform. This is the most common and accessible form of 3D printing. For automotive models, FDM offers a fantastic balance of cost-effectiveness, material variety, and build volume. The key to achieving detail with FDM lies in meticulous 3D printer settings and nozzle selection. Smaller nozzle sizes, typically 0.2mm or 0.4mm, are essential for capturing finer features like panel gaps, emblems, and intricate wheel designs. Layer height is another critical parameter; a lower layer height (e.g., 0.1mm or even 0.08mm) will result in smoother surfaces and more defined details, albeit at the cost of longer print times. Materials like PLA are excellent for beginners due to their ease of printing and minimal warping, while PETG offers increased durability and temperature resistance, and ABS can provide a more robust finish but requires more careful temperature and ventilation management. Properly tuned slicing profiles are indispensable for optimizing FDM prints for automotive applications.
Resin printers, on the other hand, utilize UV light to cure liquid photopolymer resin layer by layer. SLA printers use a laser to trace each layer, while DLP printers use a digital projector. This process inherently produces incredibly smooth surfaces and exceptionally fine details, making them the go-to choice for miniature figurines, jewelry, and, importantly, highly detailed automotive models. The resolution of resin printers is typically measured in microns, allowing for the reproduction of features that are simply impossible to achieve with standard FDM nozzles. Layer heights can be as low as 0.025mm, resulting in prints that often require minimal post-processing to achieve a smooth finish. While the material options are more specialized (e.g., standard, tough, flexible resins), and post-processing involves washing and curing, the fidelity of detail offered by resin printing is unmatched for many enthusiasts. Platforms like 88cars3d.com often design their models with the superior detail capabilities of resin printing in mind, ensuring that every subtle curve and emblem is captured.
For those prioritizing the absolute highest level of detail, particularly for smaller-scale models or components where minute features are critical (think intricate interior details, delicate spoilers, or tiny badges), resin printing is the clear winner. However, if you’re looking for larger models, a wider range of material options for functional parts (like custom chassis or engine components), or a more budget-friendly entry point, FDM printing, when optimized correctly, can still yield impressive results. The best approach often depends on the specific model, the desired scale, and your tolerance for post-processing.
While FDM technology has advanced significantly, not all FDM printers are created equal when it comes to producing the fine details required for automotive models. Several key features distinguish printers that excel in this area: a stable frame, precise motion systems, excellent bed adhesion, and the ability to handle smaller nozzle sizes effectively. These printers offer a robust platform for achieving impressive detail without the complexities of resin printing.
Prusa printers are renowned for their reliability, ease of use, and excellent print quality out of the box. The Prusa MINI+ offers a compact footprint and impressive detail capabilities for its price point, making it an excellent entry-level option. The larger Prusa i3 MK3S+ builds upon this foundation with a larger build volume and enhanced features, including its renowned flexible build plates that ensure reliable adhesion and easy print removal. Both models benefit from PrusaSlicer, a powerful and intuitive slicing software that offers granular control over slicing parameters, crucial for optimizing FDM printing of detailed models. Their well-engineered motion systems and consistent extrusion enable smaller layer heights and finer feature reproduction. When downloading models from marketplaces such as 88cars3d.com, using a well-calibrated Prusa printer with appropriate 3D printer settings in PrusaSlicer can yield fantastic results.
The Creality Ender 3 series has long been a favorite among makers due to its affordability and vast community support. While often requiring some tuning and upgrades for optimal performance, newer models like the Ender 3 V3 SE and KE offer significant improvements in speed and print quality with features like auto-leveling and direct-drive extruders (beneficial for filament control). The direct-drive extruder, in particular, can offer better retraction control, reducing stringing and improving the quality of fine details. With careful slicing, a small nozzle (0.2mm or 0.3mm), and meticulous calibration, Ender printers can produce surprisingly detailed automotive models, making them a compelling choice for budget-conscious enthusiasts looking to get started with printable car models.
Bambu Lab has rapidly gained a reputation for delivering high-speed printing without compromising quality. Their P1 and X1 series printers feature robust CoreXY kinematics, auto-bed leveling, and sophisticated control systems that allow for incredible print speeds while maintaining fine detail. The X1 Carbon, in particular, offers advanced features like lidar scanning for first-layer inspection and active flow control, leading to exceptionally smooth prints with minimal artifacts. For detailed automotive models, the ability to print faster with excellent surface finish and crisp details is a significant advantage. Their integrated slicing software is also highly capable, allowing users to fine-tune settings for optimal results with various STL files.
When the pursuit of absolute fidelity is the primary goal, resin printers reign supreme. Their ability to resolve microscopic details makes them ideal for capturing the nuances of automotive design, from the subtle curves of a body panel to the intricate spokes of a wheel. The market offers a wide range, from entry-level machines to professional-grade printers, but certain models consistently stand out for their performance and ease of use in producing high-detail miniatures.
The Elegoo Mars series has become a benchmark for affordable, high-resolution resin printing. These printers offer excellent detail capabilities, typically featuring 2K or 4K monochrome LCD screens that significantly speed up curing times and improve print longevity. The Mars 3 Pro and Mars 4 models, for instance, provide a generous build volume for their class and are well-suited for printing detailed car models at scales commonly found in hobby collections. Their user-friendly interface and the availability of various resin types, including detail-focused formulations, make them an accessible entry point into high-fidelity 3D printing. The quality of the printed models from these machines often rivals that of much more expensive printers.
Similar to Elegoo, Anycubic’s Photon series offers a compelling range of resin printers that deliver exceptional detail at competitive price points. The Photon Mono 4K provides a compact but highly detailed printing experience, while the larger Photon Mono X 6K expands the build volume while maintaining 6K resolution, allowing for larger-scale models or printing multiple smaller components simultaneously. Anycubic’s printers are known for their robust build quality and straightforward operation. The combination of high resolution, reliable performance, and a vast selection of compatible resins makes the Photon series a favorite among hobbyists creating intricate automotive replicas.
Phrozen has established itself as a leader in delivering high-resolution resin printers that push the boundaries of detail. The Sonic Mini 4K offers a compact yet incredibly capable printing experience with its 4K monochrome screen, producing astonishingly fine details. For those needing a larger build area without sacrificing resolution, the Sonic Mighty 8K is a standout, boasting an 8K resolution on a substantial build plate. Phrozen printers are often praised for their speed and the clarity of their prints. When working with complex STL files from 88cars3d.com, these printers can render even the most intricate design elements with remarkable precision, often requiring minimal sanding.
The 3D model is only half the equation; the slicing software is the bridge between your STL files and the actual print. This software translates the 3D geometry into layer-by-layer instructions (G-code) that your 3D printer understands. For detailed automotive models, mastering your slicer is non-negotiable. You’ll need to fine-tune parameters related to layer height, wall thickness, support structures, and print speed to achieve the best possible outcome.
Support structures are essential for printing overhangs and bridges, but poorly placed or overly aggressive supports can damage delicate details or leave unsightly marks. For automotive models, strategic support placement is key. Use the slicer’s tools to generate supports only where necessary. Consider using thinner, “tree” or “organic” supports (available in some slicers) which are often easier to remove and leave less scarring than traditional supports. For resin printing, ensure supports are adequately dense to hold the model but fine enough not to damage detail upon removal. Experiment with different support densities, tip sizes, and contact Z distances to find the sweet spot between structural integrity and minimal surface impact.
Even the highest quality STL files can sometimes present challenges for 3D printers. Issues with the mesh geometry, such as non-manifold edges, holes, or inverted faces, can cause slicing errors, lead to failed prints, or result in incomplete models. Proper file preparation and mesh repair are critical steps in the workflow, especially when dealing with complex, organic shapes like those found in car models.
An STL file represents a 3D model’s surface geometry as a collection of interconnected triangles (a mesh). A “manifold” or “watertight” mesh is one where every edge is shared by exactly two triangles, creating a closed volume with no holes or internal faces. Non-manifold geometry can confuse the slicing software. For example, an “internal face” is a triangle inside the solid volume, or an “inverted face” has its normal pointing inwards instead of outwards, effectively creating a hole. Understanding these concepts helps in diagnosing and fixing issues.
When preparing models, consider the limitations of your chosen printing technology. For FDM printing, ensure that fine details have sufficient “wall thickness” to be extruded reliably. Very thin or delicate features may need to be thickened or slightly enlarged. Check for overhangs that might require excessive supports. For resin printing, ensure the model is properly hollowed to save material and reduce print time, and check that there are adequate drainage holes. Consider the orientation of the model on the build plate to minimize the surface area exposed to peeling forces from the FEP film, which can cause print failures. Platforms like 88cars3d.com invest heavily in ensuring their STL files are optimized for printability, often providing pre-supported versions for resin printers.
The 3D printing process doesn’t end when the print is finished. Post-processing is crucial for transforming a raw print into a display-worthy automotive model. This involves support removal, surface finishing, and potentially assembly and painting. The level of effort required will vary depending on the printing technology and desired outcome.
Removing supports carefully is paramount. For FDM prints, use flush cutters, pliers, and hobby knives to gently break away support material. Take your time to avoid damaging the model’s surface. Sometimes, lightly scoring a support can make it easier to snap off. For resin prints, supports are often thinner and more delicate. Use tweezers and a hobby knife, and sometimes gentle flexing of the print can help detach supports cleanly. Always wear gloves when handling uncured resin and work in a well-ventilated area.
Many detailed car models are designed to be printed in multiple parts for easier printing and better detail. Careful assembly using CA glue (super glue) or specialized plastic adhesives is then required. Pay attention to alignment keys and seams. Painting is where your model truly comes alive. Use hobby-grade spray paints or airbrushing for smooth, even coats. Masking tape is essential for achieving clean lines between different colored sections. Acrylic model paints are ideal for brush painting smaller details like trim, lights, and interiors. The final clear coat (gloss or matte) provides protection and enhances the overall appearance.
By mastering these post-processing techniques, you can elevate your 3D printed car models from mere prototypes to stunning display pieces, showcasing the incredible detail possible with modern additive manufacturing and high-quality STL files.
The journey to creating breathtaking 3D printed car models is an exciting fusion of digital design, precise technology, and skilled craftsmanship. We’ve explored the fundamental differences between FDM printing and resin printing, highlighting how each can be leveraged for automotive applications. We’ve discussed specific printer models that stand out in the market for their ability to resolve fine details, from the reliable and accessible Prusa MINIs and Ender series to the incredibly detailed Elegoo Mars and Phrozen Sonic printers. Understanding and mastering your slicing software, particularly parameters like layer height and support generation, is crucial for unlocking the full potential of your chosen printer and the intricate STL files you download.
Furthermore, we’ve emphasized the importance of meticulous file preparation and mesh repair to ensure your models print flawlessly, and delved into the essential post-processing steps – from careful support removal to sanding, priming, and painting – that transform a raw print into a show-quality replica. Whether you choose the versatility of FDM or the unparalleled detail of resin, the right equipment and knowledge will empower you to bring your passion for automobiles into the physical world. At 88cars3d.com, we are dedicated to providing you with the expertly crafted printable car models that serve as the perfect starting point. Now, armed with this comprehensive guide, you’re ready to select your ideal printer, refine your workflow, and begin creating your next detailed automotive masterpiece.
“`

Texture: Yes
Material: Yes
Download the Porsche 911 Turbo S 2024 3D Model featuring clean geometry, realistic detailing, and a fully modeled interior. Includes .blend, .fbx, .obj, .glb, .stl, .ply, .unreal, and .max formats for rendering, simulation, and game development.
Price: $20

Texture: Yes
Material: Yes
Download the Pontiac Solstice 2009 3D Model featuring clean geometry, realistic detailing, and a fully modeled interior. Includes .blend, .fbx, .obj, .glb, .stl, .ply, .unreal, and .max formats for rendering, simulation, and game development.
Price: $10

Texture: Yes
Material: Yes
Download the Mini Cooper Countryman 2025 3D Model featuring clean geometry, realistic detailing, and a fully modeled interior. Includes .blend, .fbx, .obj, .glb, .stl, .ply, .unreal, and .max formats for rendering, simulation, and game development.
Price: $29.9

Texture: Yes
Material: Yes
Download the Mercedes C Classe 2012 3D Model featuring clean geometry, realistic detailing, and a fully modeled interior. Includes .blend, .fbx, .obj, .glb, .stl, .ply, .unreal, and .max formats for rendering, simulation, and game development.
Price: $19.9

Texture: Yes
Material: Yes
Download the Mercedes-Benz S65 AMG 2018 3D Model featuring clean geometry, realistic detailing, and a fully modeled interior. Includes .blend, .fbx, .obj, .glb, .stl, .ply, .unreal, and .max formats for rendering, simulation, and game development.
Price: $19.9

Texture: Yes
Material: Yes
Download the Mazda 3 Sedan 2004 3D Model featuring clean geometry, realistic detailing, and a fully modeled interior. Includes .blend, .fbx, .obj, .glb, .stl, .ply, .unreal, and .max formats for rendering, simulation, and game development.
Price: $10

Texture: Yes
Material: Yes
Download the Martin Rapide 2011 3D Model featuring clean geometry, realistic detailing, and a fully modeled interior. Includes .blend, .fbx, .obj, .glb, .stl, .ply, .unreal, and .max formats for rendering, simulation, and game development.
Price: $20.9

Texture: Yes
Material: Yes
Download the Car Tasergal 005 3D Model featuring clean geometry, realistic detailing, and a fully modeled interior. Includes .blend, .fbx, .obj, .glb, .stl, .ply, .unreal, and .max formats for rendering, simulation, and game development.
Price: $10

Texture: Yes
Material: Yes
Download the Kia Picanto 2024 3D Model featuring clean geometry, realistic detailing, and a fully modeled interior. Includes .blend, .fbx, .obj, .glb, .stl, .ply, .unreal, and .max formats for rendering, simulation, and game development.
Price: $15.99
Texture: Yes
Material: Yes
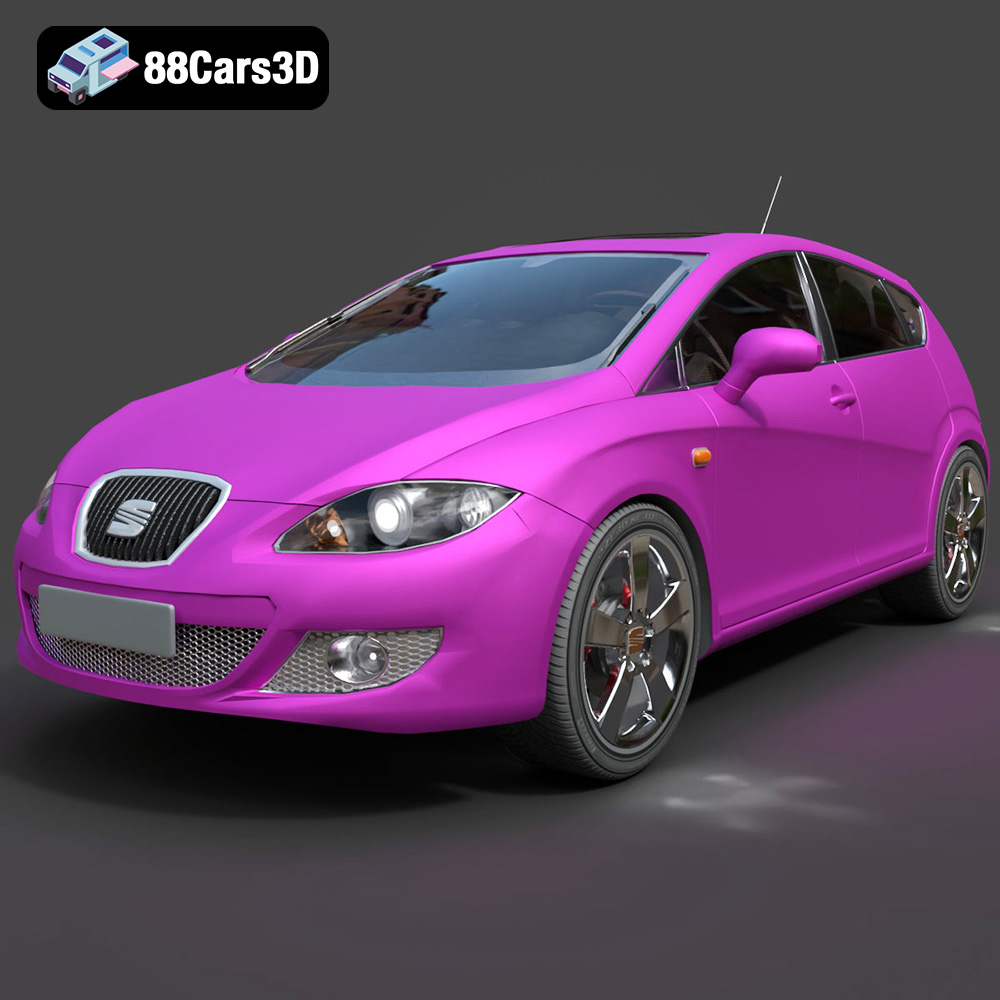
Download the Seat Leon 3D Model featuring a dynamic design, detailed interior, and accurate proportions. Includes .blend, .fbx, .obj, .glb, .stl, .ply, .unreal, and .max formats for rendering, simulation, and game development.
Price: $20.79

