

Unreal Engine has revolutionized the landscape of real-time rendering, pushing the boundaries of what’s possible in game development, architectural visualization, and especially automotive design. For anyone looking to create stunning, interactive experiences with high-fidelity 3D car models, mastering Unreal Engine is an indispensable skill. This comprehensive guide serves as your entry point into this powerful platform, specifically tailored for artists and developers working with automotive assets. Whether you’re aiming to build an interactive car configurator, render breathtaking cinematics, or integrate vehicles into next-generation games and virtual production pipelines, Unreal Engine provides the tools to bring your vision to life.
From setting up your initial project to implementing advanced rendering features like Nanite and Lumen, we’ll walk you through the essential steps and best practices. We’ll delve into optimizing high-quality 3D car models, crafting realistic PBR materials, and leveraging Blueprint for dynamic interactivity. By the end of this tutorial, you’ll have a solid understanding of how to transform raw 3D data into an immersive automotive experience within Unreal Engine, leveraging the optimized assets often found on platforms like 88cars3d.com.
Laying the Foundation: Setting Up Your Unreal Engine Project for Automotive Excellence
Embarking on any Unreal Engine project begins with a crucial initial setup. For automotive visualization and game development, careful consideration of your project template and settings can significantly impact workflow efficiency and final output quality. When you first launch Unreal Engine, you’ll be presented with various project templates. For automotive work, the “Blank” or “Games” templates often serve as a flexible starting point, allowing you to build your environment from scratch. Alternatively, the “Archviz” or “Product Configurator” templates can offer pre-configured settings and assets that might be beneficial, though they might require some adjustments for vehicle-specific physics or interactions.
A key decision involves selecting between a Blueprint or C++ project. While C++ offers maximum performance and control, Blueprint is an incredibly powerful and accessible visual scripting language perfect for most interactive automotive projects, especially for beginners. For this guide, we’ll primarily focus on Blueprint workflows. Enabling essential plugins like “Chaos Vehicles” for advanced physics, “Datasmith Importer” for CAD data, and “OpenXR” or “SteamVR” if you plan for AR/VR applications is also vital during this initial phase. Properly configuring these settings ensures your project is robust and ready to handle the demands of detailed car models and realistic environments.
Choosing the Right Template and Project Settings
When creating a new project, select the “Games” category, then choose the “Blank” template. This provides a clean slate without unnecessary assets that might bloat your project size. Under Project Settings (Edit > Project Settings), navigate to the “Maps & Modes” section. Here, you can set your default game mode, which dictates how players interact with your world, and specify your default levels for startup. For automotive scenes, a dedicated “Showcase Map” and a “Gameplay Map” (if building an interactive experience) are common.
Further, consider your rendering settings. For cutting-edge automotive visualization, ensure that “Lumen Global Illumination” and “Nanite Virtualized Geometry” are enabled under the “Rendering” section in Project Settings. These features are transformative for achieving photorealistic lighting and handling high-polygon models efficiently. Also, review the “Collision” settings to ensure proper physics interaction, and explore the “Input” section to define controls for camera movement or vehicle operation. For more details on project setup, always refer to the official Unreal Engine documentation at dev.epicgames.com/community/unreal-engine/learning.
Navigating the Editor: Essential Panels and Workflows
Once your project is set up, familiarity with the Unreal Engine editor interface is paramount. The primary panels you’ll interact with regularly include:
- Viewport: Your window into the 3D world, where you’ll arrange assets, sculpt environments, and preview your scene.
- Content Browser: This is your asset library, where you’ll import, organize, and manage all your 3D models, textures, materials, and other project files.
- Details Panel: Context-sensitive, displaying properties and settings for any selected asset or actor in your scene. Crucial for fine-tuning materials, lighting, and object transforms.
- World Outliner: A hierarchical list of all actors (objects) currently present in your level. Essential for selecting, organizing, and managing scene complexity.
- Modes Panel: Allows you to switch between different editing modes like “Select,” “Landscape,” “Foliage,” and “Mesh Paint.”
A common workflow involves importing assets into the Content Browser, dragging them into the Viewport, and then using the Details Panel to adjust their properties and place them accurately. Utilizing keyboard shortcuts for common actions (W, E, R for movement, rotation, scaling, respectively) will significantly accelerate your workflow. Consistent naming conventions for assets and folders within the Content Browser are also vital for maintaining project organization, especially when working with extensive automotive libraries.
Bringing Your Vision to Life: Importing and Optimizing 3D Car Models
The quality of your 3D car models forms the backbone of any automotive visualization. Sourcing high-quality, pre-optimized assets from marketplaces like 88cars3d.com is a great starting point, as these models are often designed with clean topology, proper UVs, and PBR-ready materials. However, even the best models require careful import and optimization within Unreal Engine to ensure optimal performance and visual fidelity.
The goal is always a balance between visual quality and real-time performance. High-polygon models, while visually stunning, can quickly bring even powerful machines to a crawl if not managed correctly. Unreal Engine offers a suite of tools, including Level of Detail (LODs) and Nanite Virtualized Geometry, to tackle this challenge. Understanding how to prepare your models pre-import and leverage these in-engine features will be critical for achieving smooth frame rates in your automotive scenes, whether for games, configurators, or virtual production. This section will guide you through the process of bringing your vehicles into Unreal Engine and making them runtime-ready.
Understanding File Formats and Import Settings
The primary file format for importing static meshes into Unreal Engine is FBX (Filmbox). It supports geometry, materials (basic properties), animations, and skeletal data. When exporting your car models from 3D modeling software (e.g., Blender, 3ds Max, Maya), ensure the following:
- Triangulated Geometry: Unreal Engine converts all geometry to triangles internally. Pre-triangulating can sometimes prevent unexpected shading issues.
- Clean Mesh: No non-manifold geometry, duplicate vertices, or flipped normals.
- Proper Scale: Export with real-world scale (e.g., 1 unit = 1cm) to avoid scaling issues in Unreal Engine.
- Pivots: Ensure pivot points are logically placed (e.g., center of the car for the main body).
- Material IDs: Assign distinct material IDs to different parts of the car (body, wheels, windows, interior) to simplify material assignment in Unreal.
Upon importing an FBX file into Unreal Engine, you’ll encounter the FBX Import Options dialog. Key settings include:
- Skeletal Mesh / Static Mesh: For car bodies, select “Static Mesh.” If importing a rig for animations, select “Skeletal Mesh.”
- Import Materials: Generally, enable this. Unreal will attempt to create basic materials, which you can then refine.
- Combine Meshes: Often useful for car models where multiple smaller parts form a larger component (e.g., individual body panels). Consider if your model is already optimized for modularity.
- Auto Generate Collision: Enable for simple collision. For complex shapes, you might need to create custom collision meshes.
- Build Nanite: Absolutely enable this for high-polygon car models to take advantage of Nanite’s performance benefits.
Consider using USD (Universal Scene Description) or USDZ formats if your workflow supports them. Unreal Engine has robust support for USD, allowing for more collaborative and non-destructive workflows, especially beneficial for complex automotive assemblies.
Strategic Optimization: LODs, Nanite, and Performance
Level of Detail (LODs): LODs are different versions of a mesh with varying polygon counts. The engine automatically switches to a lower LOD when the object is further from the camera, reducing rendering overhead. While Nanite often mitigates the need for manual LODs on static meshes, traditional LODs are still crucial for:
- Skeletal Meshes (animated parts, e.g., doors opening).
- Meshes that don’t support Nanite (e.g., transparent materials, masked materials, or specific shaders).
- AR/VR applications where Nanite might have specific overheads or isn’t fully utilized.
You can generate LODs directly within Unreal Engine from the Static Mesh Editor. Aim for a significant polygon reduction (e.g., 50% for LOD1, 75% for LOD2, etc.) while maintaining visual integrity. For car models, having 3-5 LODs is common, with the lowest LOD potentially being a simplified proxy mesh.
Nanite Virtualized Geometry: This is a game-changer for high-fidelity automotive models. Nanite allows you to import incredibly high-polygon models (millions of triangles) without baking normal maps or creating manual LODs. It intelligently streams and renders only the necessary detail, drastically improving performance. To enable Nanite, simply check “Build Nanite” during import or convert existing meshes in the Static Mesh Editor. Ensure your car models are composed of static meshes for Nanite to work its magic. For dynamic parts or transparent materials, you might need to exclude them from Nanite or use traditional LODs. Nanite is a cornerstone of modern Unreal Engine automotive visualization, enabling unprecedented detail at real-time frame rates.
Performance Monitoring: Utilize Unreal Engine’s built-in profilers (e.g., Stat Unit, Stat FPS, Stat RHI) to monitor performance. Identify bottlenecks related to polygon count, draw calls, or material complexity. Optimizing car models involves reducing unnecessary polygons where Nanite isn’t applied, consolidating materials where possible, and ensuring efficient UV layouts for texture packing.
Crafting Reality: Mastering PBR Materials and Texturing
Photorealism in Unreal Engine heavily relies on the accurate representation of physically based rendering (PBR) materials. For automotive projects, this means meticulously crafting car paint, glass, rubber, leather, and metallic surfaces that react realistically to light. PBR materials use maps (Albedo/Base Color, Normal, Roughness, Metallic, Ambient Occlusion) to define how light interacts with a surface, ensuring consistency across different lighting conditions.
The Unreal Engine Material Editor is a node-based interface where you connect various texture samples, mathematical operations, and parameters to create complex material networks. Understanding the core principles of PBR and how to translate real-world material properties into these node graphs is fundamental. High-quality textures are just as important as the 3D model itself, so ensuring your textures are optimized for Unreal Engine’s rendering pipeline is crucial for achieving that showroom-quality finish.
The PBR Workflow in Unreal Engine
At its core, a PBR material in Unreal Engine aims to simulate how light interacts with a surface based on physical properties:
- Base Color (Albedo): This map defines the diffuse color of the surface. For non-metals, it represents the color of reflected light. For metals, it’s typically the color of the metal itself. Avoid baked lighting information here.
- Metallic: A grayscale map (0 to 1) indicating how metallic a surface is. 0 = dielectric (non-metal), 1 = metal.
- Roughness: A grayscale map (0 to 1) determining how rough or smooth a surface is. 0 = perfectly smooth/mirror-like, 1 = perfectly rough/diffuse.
- Normal Map: This map provides per-pixel surface normal information, simulating fine surface detail without adding actual geometry. Essential for car body imperfections, tire treads, and interior details.
- Ambient Occlusion (AO): A grayscale map that darkens crevices and shadowed areas, enhancing perceived depth and realism. Connect to the Ambient Occlusion pin or use it as a multiplier for Base Color.
In the Material Editor, you’ll typically start with a `Material` node and connect Texture Sample nodes for each of your PBR maps. For instance, an Albedo texture goes into the `Base Color` pin, a Roughness texture into `Roughness`, and so on. Remember that sRGB should be enabled for Base Color maps, but disabled for Roughness, Metallic, and Normal maps, as they represent linear data.
For detailed material creation, explore the comprehensive guides on materials available through the Unreal Engine documentation.
Creating Realistic Car Paint and Interior Materials
Car Paint: Automotive paint is complex, often featuring multiple layers (primer, base coat, clear coat) with metallic flakes and clear reflective finishes. To simulate this in Unreal Engine:
- Base Color: Use a solid color or a subtle gradient for the base coat.
- Metallic: For metallic paints, a value between 0.8 and 1.0 is common. For non-metallic, use 0.
- Roughness: This is critical. A very low roughness (0.05-0.15) for the clear coat layer gives that characteristic glossy reflection. You might blend multiple roughness values using masks to simulate wear and tear.
- Flakes: This often requires a custom material function or a more advanced material setup. You can use a very small, tiling normal map or procedural noise to simulate the metallic flakes under the clear coat. A Fresnel node can also be used to adjust the metallic property based on viewing angle, mimicking how flakes become more apparent at grazing angles.
Interior Materials (Leather, Plastics, Fabrics): These require distinct PBR setups:
- Leather:
- Base Color: Rich, muted color texture.
- Roughness: Higher roughness than paint (0.4-0.7) with subtle variations from a texture map to simulate natural oils and wear.
- Normal Map: Essential for subtle wrinkles, pores, and stitching details.
- Metallic: 0 (non-metal).
- Plastics:
- Base Color: Varies greatly depending on the plastic type.
- Roughness: Mid-range (0.3-0.8) with variations to simulate texture.
- Normal Map: For subtle surface grain.
- Metallic: 0.
- Glass: Requires a separate translucent material. Set its `Blend Mode` to `Translucent` and `Shading Model` to `Default Lit` or `Thin Translucency`. Connect your Base Color to `Diffuse Color`, set `Opacity` (often driven by a parameter or texture), and tweak `Refraction` for optical distortion.
Remember to instance your materials after creation (right-click Material > Create Material Instance). Material Instances allow you to tweak parameters (like color, roughness values, texture scales) without recompiling the entire material, significantly speeding up iteration.
Illuminating the Scene: Advanced Lighting with Lumen and Beyond
Lighting is arguably the most critical element in establishing photorealism for automotive visualization. Unreal Engine offers a powerful and flexible lighting system, with Lumen leading the charge for dynamic global illumination. Achieving stunning, realistic renders requires a deep understanding of light sources, reflection captures, and atmospheric effects. Poor lighting can make even the highest-quality 3D car models appear flat or artificial. This section will guide you through harnessing Unreal Engine’s lighting capabilities, particularly Lumen, to make your vehicles truly shine.
Beyond Lumen, traditional light types (Directional, Point, Spot, Rect) still play vital roles, often complementing the global illumination solution. We’ll also explore environment lighting techniques, such as High Dynamic Range Image (HDRI) backdrops, and delve into volumetric fog and sky atmosphere for comprehensive scene illumination. The goal is to create believable lighting scenarios that enhance the form and material properties of your automotive assets.
Dynamic Global Illumination with Lumen
Lumen is Unreal Engine 5’s default global illumination and reflections system, providing highly dynamic and realistic indirect lighting. For automotive projects, Lumen is transformative, as it accurately calculates how light bounces off surfaces, illuminating darker areas and coloring ambient light based on the environment. To use Lumen effectively:
- Enable Lumen: Ensure Lumen Global Illumination and Lumen Reflections are enabled in Project Settings > Rendering.
- Light Sources: Use standard Unreal Engine lights (Directional Light for sun, Skylight for ambient sky illumination). Lumen automatically processes their bounced light.
- Emissive Materials: Lumen also considers light emitted from emissive materials (e.g., car headlights, interior screens). Ensure your emissive values are realistic.
- Scene Setup: Lumen thrives with enclosed or semi-enclosed environments, allowing light to bounce naturally. For open environments, ensure a robust Skylight setup.
- Post Process Volume: Add a Post Process Volume to your scene, set its “Bounds” to “Infinite Extent (Unbound),” and then fine-tune Lumen settings under the “Global Illumination” and “Reflections” sections. Adjust “Exposure,” “Contrast,” and “Color Grading” for cinematic appeal.
While powerful, Lumen has performance considerations. Ensure your meshes have good UVs and reasonable density. For static props or parts of the environment that don’t need to move, baking static lighting (pre-computation) can still be an option for optimal performance, but Lumen generally handles dynamic scenes with incredible efficiency. Always profile your scene to ensure optimal performance with Lumen enabled.
Mastering Reflection Captures and Sky Atmospheres
Reflection Captures: While Lumen provides real-time reflections, especially for rough surfaces, Sphere and Box Reflection Captures are still essential for high-quality reflections on very glossy or metallic surfaces, particularly pre-Lumen versions or for performance optimization in specific scenarios. They capture a static snapshot of the environment and apply it as a reflection map. For automotive scenes:
- Sphere Reflection Capture: Place these strategically around your car, especially near highly reflective surfaces like the body paint and chrome trim. Adjust their radius to cover the reflective object adequately.
- Box Reflection Capture: Ideal for capturing reflections within enclosed spaces, such as an automotive showroom.
Proper placement and density of reflection captures ensure that reflections on your car models are accurate and compelling, contributing significantly to the perception of realism. Rebuild reflections after making significant changes to your scene or light sources.
Sky Atmosphere and Volumetric Cloud: For outdoor automotive renders, the Sky Atmosphere component generates a physically accurate sky, sun, and atmospheric scattering effects. Combine it with a Directional Light (representing the sun) and a Skylight (capturing the sky’s ambient color) for a cohesive and dynamic lighting setup. The Volumetric Cloud actor can further enhance realism by adding dynamic, customizable clouds that cast shadows and react to the sun’s position.
High Dynamic Range Images (HDRIs): HDRIs are an excellent way to provide realistic environment lighting and reflections, especially for product visualization. Import an HDRI into Unreal Engine, apply it to a Material, and then use that Material in your Skylight. You can also project the HDRI onto a large sphere around your scene for a visible backdrop. Adjust the intensity and rotation of the HDRI to match your desired lighting mood and angle, ensuring that the reflections on your car align perfectly with the background.
Breathing Life into Vehicles: Blueprint, Physics, and Interactivity
Moving beyond static renders, Unreal Engine empowers developers to create fully interactive automotive experiences. Blueprint Visual Scripting is the cornerstone of this interactivity, allowing artists and designers to implement complex logic without writing a single line of code. From opening car doors and turning on lights to full-fledged driving simulations, Blueprint makes it accessible. This section delves into utilizing Blueprint for common automotive interactions and integrating realistic vehicle physics.
Creating an interactive car configurator, for instance, requires robust event handling for user input, dynamically changing materials, and playing animations. For game developers or virtual reality experiences, realistic vehicle dynamics are paramount. Unreal Engine’s Chaos physics system, coupled with the Chaos Vehicles plugin, provides a powerful framework for simulating believable car behavior, adding another layer of immersion to your automotive projects.
Introduction to Blueprint Visual Scripting for Automotive Interaction
Blueprint is a visual scripting system that uses nodes and wires to define game logic. It’s incredibly intuitive and perfect for creating interactive elements for your car models:
- Event Graph: This is where you connect events (like a key press, a collision, or a timer) to actions (like changing a material, playing an animation, or calling a function).
- Variables: Store data (e.g., current car color, door open status).
- Functions: Reusable blocks of logic.
- Macros: Similar to functions, but can expose execution pins.
Example: Simple Door Open/Close Interaction:
- Create a new Blueprint Actor (e.g., BP_CarDoor).
- Add your car door Static Mesh component to this Blueprint.
- In the Event Graph:
- Right-click and search for an “Input Event” (e.g., “Keyboard L” for ‘Left Door’).
- Connect this to a “FlipFlop” node. This node toggles between two execution paths each time it’s activated.
- From the “A” output of FlipFlop, drag a wire and search for “Set Relative Rotation” for your car door mesh. Set the desired open rotation (e.g., Yaw +90 degrees).
- From the “B” output of FlipFlop, connect another “Set Relative Rotation,” setting it back to the closed rotation (e.g., Yaw 0 degrees).
- For smoother animation, use a “Lerp (Rotator)” node over time, driven by a “Timeline.”
You can extend this concept to change materials (e.g., car paint color), toggle lights, or trigger sound effects. Blueprint is also key for creating advanced menu systems for automotive configurators, allowing users to select different wheels, interior trims, or body kits. Remember to learn more about the fundamentals of Blueprint scripting at dev.epicgames.com/community/unreal-engine/learning.
Implementing Vehicle Physics and Driving Mechanics
Unreal Engine’s Chaos Physics system offers a robust solution for vehicle dynamics. To implement basic driving mechanics:
- Enable Chaos Vehicles Plugin: Go to Edit > Plugins and enable “Chaos Vehicles.” Restart Unreal Engine.
- Create a Vehicle Blueprint: Right-click in the Content Browser > Blueprint Class. Search for “Wheeled Vehicle Pawn” and select it. Name it (e.g., BP_SportsCar).
- Assign Skeletal Mesh: Open your new Vehicle Blueprint. In the Components panel, select the “Mesh” component (inherited from Wheeled Vehicle Pawn) and assign your car’s skeletal mesh (exported with a vehicle rig) to it.
- Configure Vehicle Movement Component: Select the “Vehicle Movement” component. Here, you’ll find parameters for:
- Engine Setup: Torque curve, max RPM, gear ratios.
- Differential Setup: Front-wheel drive, rear-wheel drive, all-wheel drive.
- Wheel Setup: Add each wheel, specify its bone name from your skeletal mesh, and configure tire properties (radius, width, friction).
- Suspension: Stiffness, damping, spring length.
- Input Mapping: In Project Settings > Input, create Action Mappings (e.g., “Throttle,” “Brake,” “Steering”) and assign keyboard/gamepad inputs.
- Event Graph Logic: In your Vehicle Blueprint’s Event Graph, use the input events to drive the vehicle. For example:
- “Throttle” input event > “Set Throttle Input” node.
- “Steering” input event > “Set Steering Input” node.
- “Brake” input event > “Set Brake Input” node.
Fine-tuning these parameters requires experimentation, but it allows for highly customizable and realistic vehicle behavior. For advanced setups, you might consider using the “Vehicle Advanced” project template or exploring specific vehicle templates available through Epic Games’ marketplace.
Unleashing Creativity: Cinematics, Virtual Production, and AR/VR
Unreal Engine is not just for games; it’s a powerful tool for cinematic content creation, virtual production, and immersive AR/VR experiences. For automotive projects, this opens up incredible possibilities: from crafting a stunning commercial using Sequencer to placing a virtual car on a real-world set via virtual production, or allowing users to explore a vehicle in augmented reality. Leveraging these advanced features can elevate your automotive visualizations beyond static images or simple interactions.
This final section explores how to use Sequencer for cinematic storytelling, understand the fundamentals of integrating your car models into virtual production workflows (especially with LED walls), and optimize your assets and scenes for the unique demands of AR/VR, ensuring a smooth and engaging experience across various platforms.
Crafting Cinematic Sequences with Sequencer
Sequencer is Unreal Engine’s multi-track editor for creating cinematic sequences, animations, and gameplay events. It’s the industry-standard tool for pre-rendered cinematics and real-time virtual camera control. For automotive marketing or presentations, Sequencer is invaluable:
- Open Sequencer: Go to Window > Cinematics > Sequencer.
- Create a New Level Sequence: Click “Add” in the Sequencer editor and choose “New Level Sequence.”
- Add Tracks:
- Camera Track: Add a “Cine Camera Actor” to your scene, then drag it into Sequencer to create a camera track. You can animate its position, rotation, and lens settings (focal length, aperture, focus distance).
- Actor Tracks: Drag your car model (or specific parts like doors, wheels) into Sequencer to create actor tracks. You can animate their transforms (movement, rotation, scale) over time.
- Material Tracks: Animate material parameters (e.g., car paint color fading, roughness changes).
- Event Tracks: Trigger Blueprint events at specific points in your timeline (e.g., to turn on headlights).
- Keyframing: Use the red circle next to properties in the Details panel or on the tracks themselves to set keyframes. Unreal Engine will automatically interpolate between them.
- Rendering: Once your sequence is complete, use the “Render Movie” button (clapperboard icon) to export your cinematic as an image sequence or video file (e.g., MP4, EXR, PNG).
Sequencer also integrates with Unreal Engine’s Take Recorder for capturing real-time performances or data, and Control Rig for advanced character and vehicle rigging and animation. It’s a comprehensive tool for high-quality, professional-grade automotive animations.
Considerations for Virtual Production and AR/VR Experiences
Virtual Production and LED Walls: Integrating 3D car models into virtual production workflows, particularly with LED volumes, allows for real-time interaction between physical actors/props and virtual environments. This requires:
- High-Fidelity Assets: Your 3D car models must be optimized for real-time, often leveraging Nanite, with flawless materials and lighting.
- Color Calibration: Ensure your Unreal Engine scene is color-calibrated to match the LED wall and camera settings for seamless integration.
- Camera Tracking: Accurate camera tracking is crucial for matching the virtual camera’s perspective to the physical camera, maintaining parallax and realism.
- Lighting Integration: Virtual lights in Unreal Engine can be set up to cast light onto physical objects on set, and vice-versa, creating highly believable composites.
- Performance: Maintaining a stable high frame rate (e.g., 60 FPS or higher) is paramount for virtual production to avoid motion sickness and achieve smooth camera moves.
AR/VR Optimization for Automotive Applications: Creating immersive AR/VR experiences with car models presents unique optimization challenges:
- Performance Budget: AR/VR demands extremely high and stable frame rates (typically 90+ FPS per eye) to prevent motion sickness. This means stricter polygon budgets (often requiring traditional LODs even with Nanite for certain platforms), lower texture resolutions, and simpler material setups.
- Draw Calls: Minimize draw calls by merging meshes and optimizing materials.
- Occlusion Culling: Ensure effective occlusion culling to prevent rendering objects that are not visible.
- Single Pass Stereo: Enable this rendering technique for VR to render both eyes in a single pass, saving significant performance.
- Instanced Static Meshes: Use instanced static meshes for repetitive elements (e.g., bolts, small interior components) to reduce draw calls.
- Lighting: Often, baked lighting (Lightmass) or simplified dynamic lighting setups are preferred over full Lumen for performance-critical AR/VR applications, depending on the target hardware.
- UI/UX: Design intuitive user interfaces (UMG) and interaction methods (e.g., gaze-based, controller-based) suitable for the AR/VR environment.
- Collision: Optimize collision meshes to be simpler than visual meshes.
Platforms like 88cars3d.com offer models often prepared with these considerations in mind, making them an excellent starting point for AR/VR development.
Conclusion
Unreal Engine stands as an unparalleled platform for anyone working with 3D car models, offering a comprehensive suite of tools for everything from stunning static renders to fully interactive driving experiences and cutting-edge virtual production. We’ve journeyed through the essential steps of setting up your project, importing and optimizing high-quality automotive assets, and mastering PBR materials to achieve photorealism. We explored the transformative power of Lumen for dynamic global illumination and harnessed Blueprint to infuse your vehicles with interactive life.
From crafting cinematic sequences with Sequencer to navigating the unique demands of AR/VR and virtual production, the possibilities are limitless. The key to success lies in a foundational understanding of Unreal Engine’s core features, a commitment to optimization, and continuous experimentation. Embrace the power of features like Nanite and Lumen, and always strive for the perfect balance between visual fidelity and real-time performance. With these skills, you’re well-equipped to create breathtaking automotive experiences that push the boundaries of real-time rendering. Start building your next incredible project today, and remember that sourcing optimized 3D car models from trusted marketplaces like 88cars3d.com can give you a significant head start.
Featured 3D Car Models
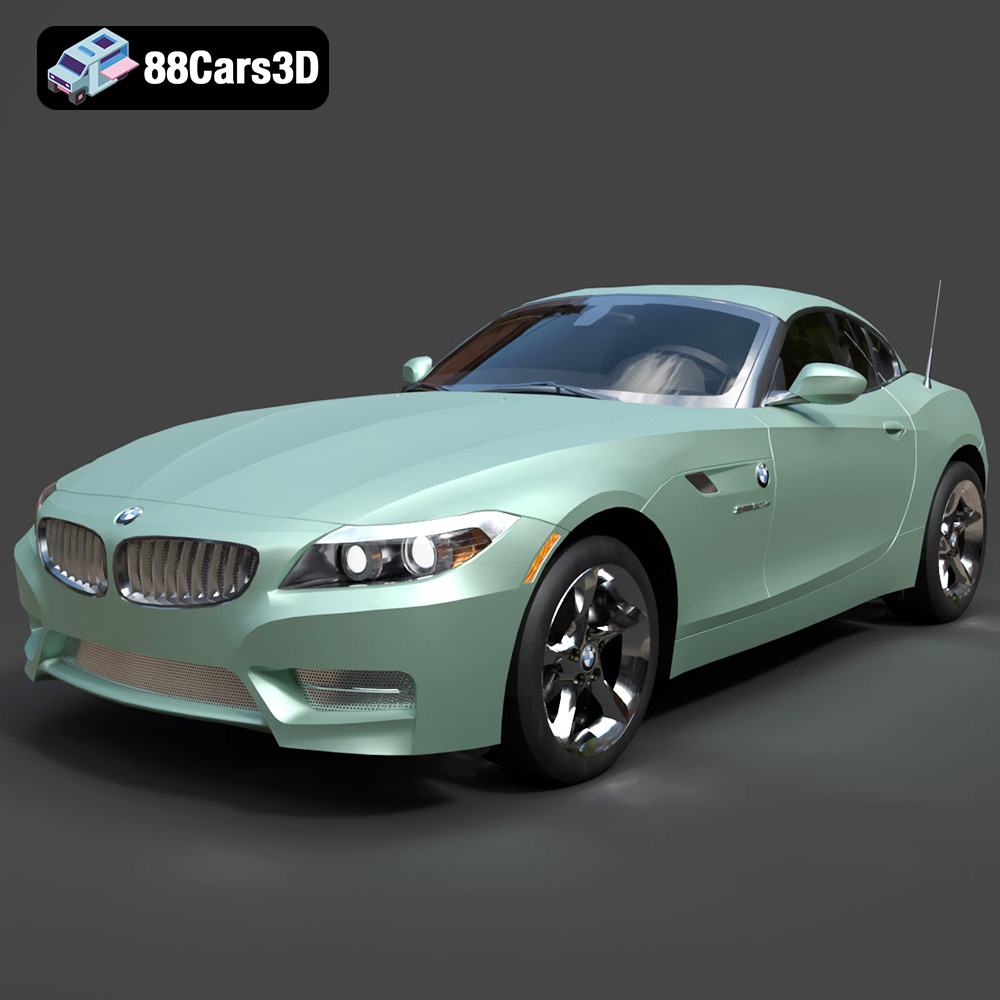
BMW Z4 Roadster E89 2012 3D Model
Texture: Yes
Material: Yes
Download the BMW Z4 Roadster E89 3D Model featuring clean geometry, realistic detailing, and a fully modeled interior. Includes .blend, .fbx, .obj, .glb, .stl, .ply, .unreal, and .max formats for rendering, simulation, and game development.
Price: $13.99

BMW Z4 E85 2005 3D Model
Texture: Yes
Material: Yes
Download the BMW Z4 E85 3D Model featuring clean geometry, realistic detailing, and a fully modeled interior. Includes .blend, .fbx, .obj, .glb, .stl, .ply, .unreal, and .max formats for rendering, simulation, and game development.
Price: $13.99

BMW M3 2024 3D Model
Texture: Yes
Material: Yes
Download the BMW M3 2024 3D Model featuring clean geometry, realistic detailing, and a fully modeled interior. Includes .blend, .fbx, .obj, .glb, .stl, .ply, .unreal, and .max formats for rendering, simulation, and game development.
Price: $13.99
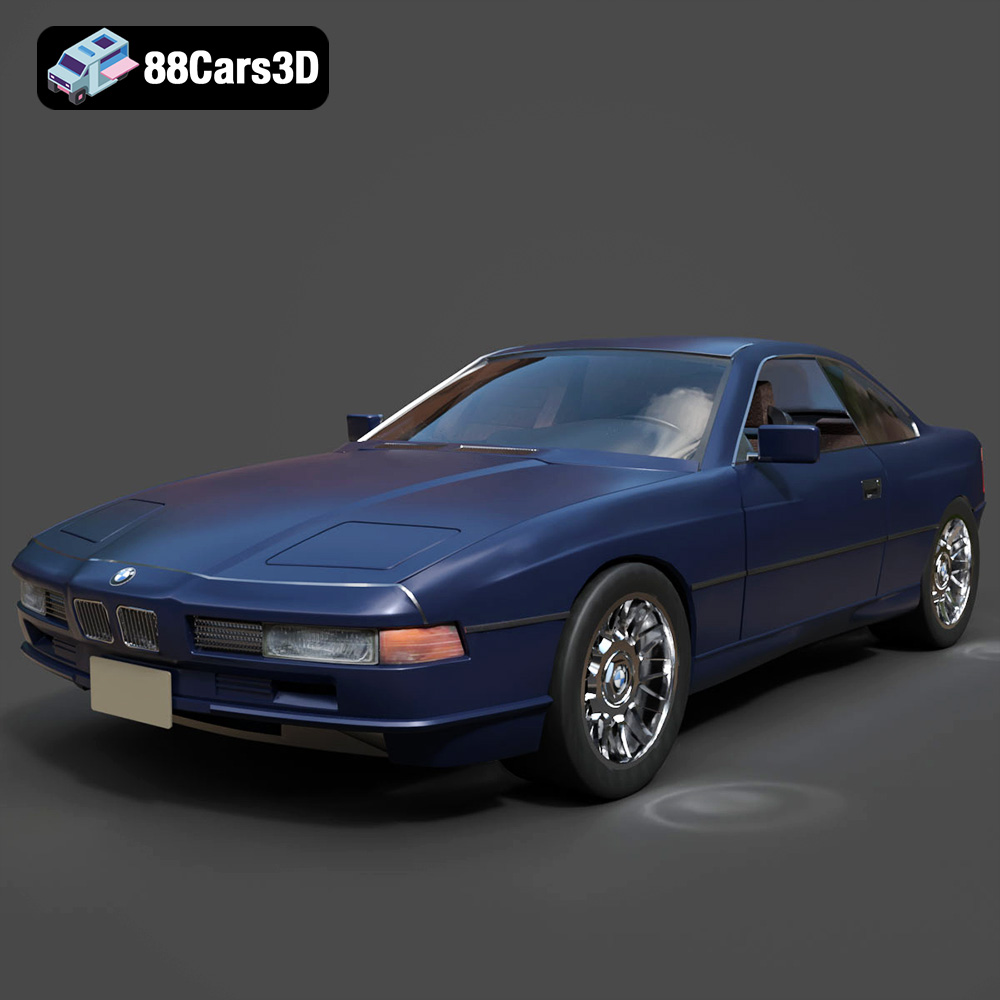
BMW 850i Coupe 1990 3D Model
Texture: Yes
Material: Yes
Download the BMW 850i Coupe 1990 3D Model featuring clean geometry, realistic detailing, and a fully modeled interior. Includes .blend, .fbx, .obj, .glb, .stl, .ply, .unreal, and .max formats for rendering, simulation, and game development.
Price: $13.99
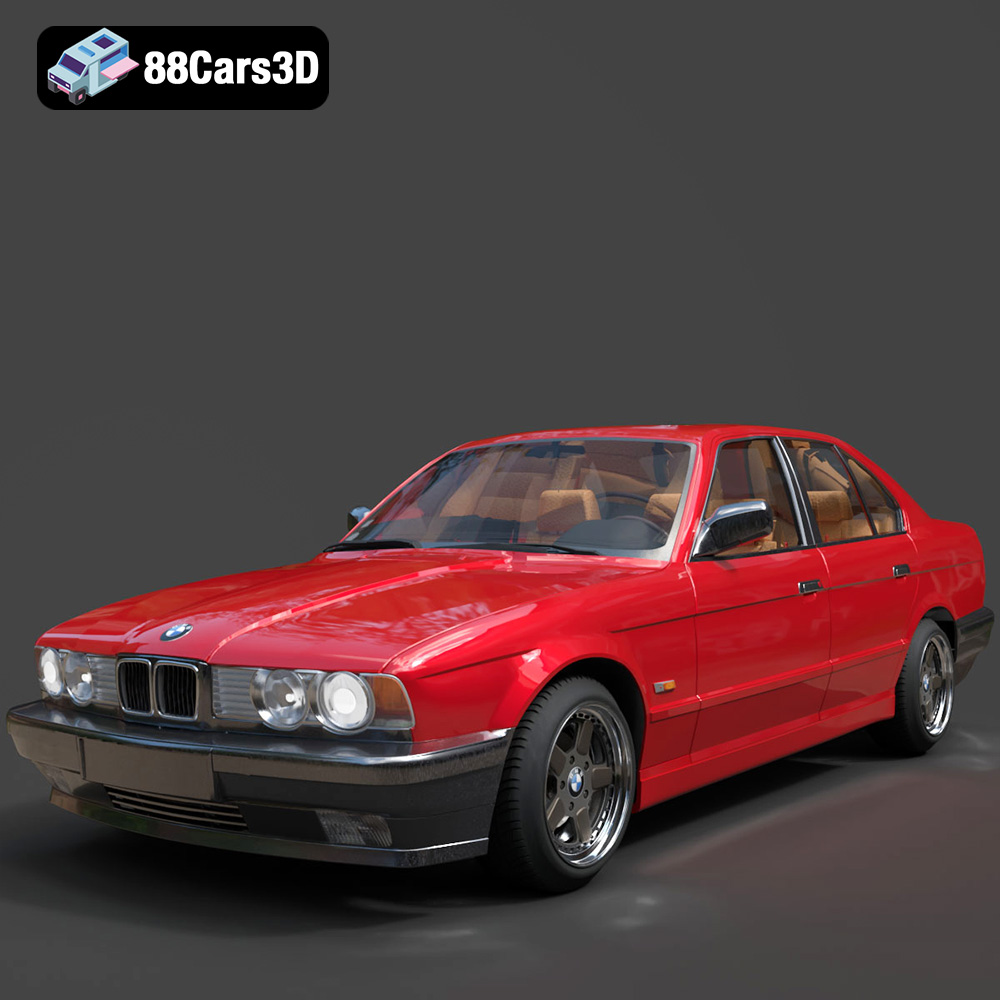
BMW 525i E34 1993 3D Model
Texture: Yes
Material: Yes
Download the BMW 525i E34 1993 3D Model featuring clean geometry, realistic detailing, and a fully modeled interior. Includes .blend, .fbx, .obj, .glb, .stl, .ply, .unreal, and .max formats for rendering, simulation, and game development.
Price: $12.99

BMW 7 Series 2016 3D Model
Texture: Yes
Material: Yes
Download the BMW 7 Series 2016 3D Model featuring luxurious design, detailed interior, and accurate exterior. Includes .blend, .fbx, .obj, .glb, .stl, .ply, .unreal, and .max formats for rendering, simulation, and game development.
Price: $10.79
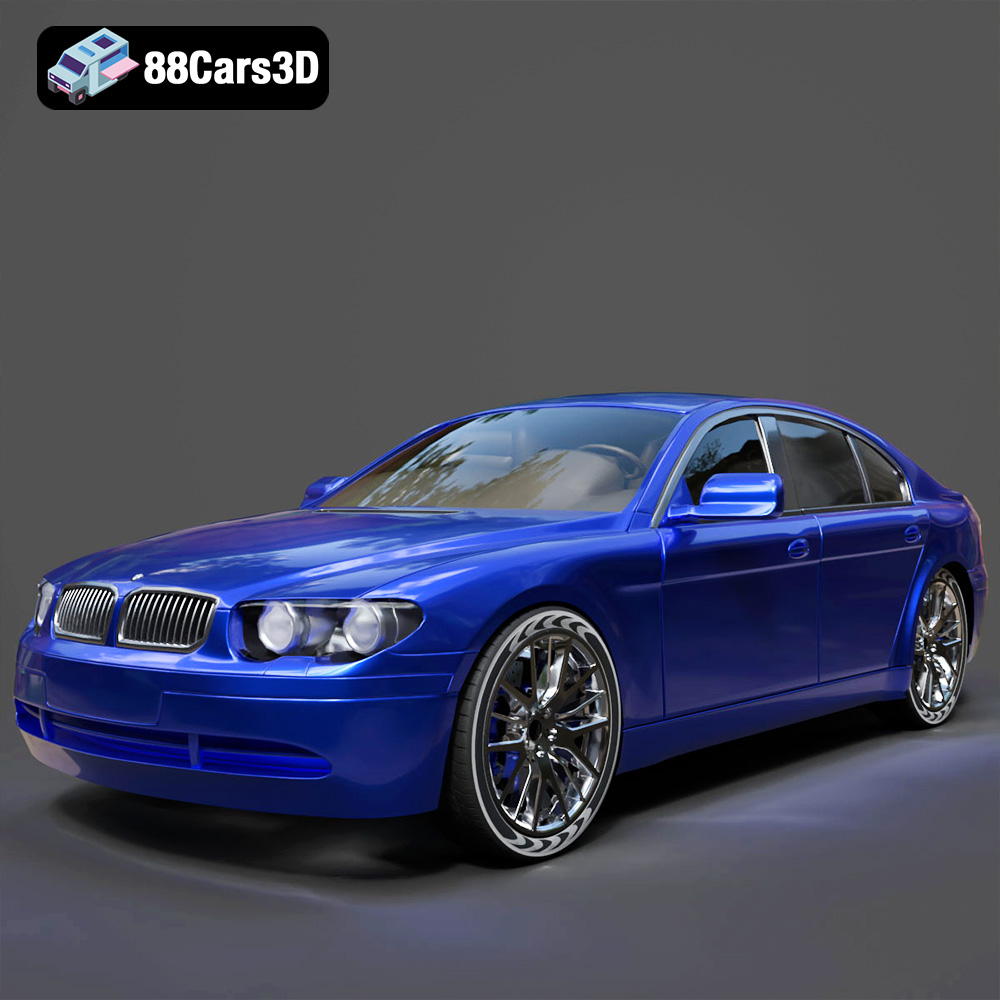
BMW 7 Series 30th Anniversary 3D Model
Texture: Yes
Material: Yes
Download the BMW 7 Series 30th Anniversary 3D Model featuring a meticulously crafted exterior, detailed interior, and realistic wheels. Includes .blend, .fbx, .obj, .glb, .stl, .ply, .unreal, and .max formats for rendering, simulation, and game development.
Price: $35.79

BMW 7-Series F02 3D Model
Texture: Yes
Material: Yes
Download the BMW 7-Series F02 3D Model featuring a detailed exterior and interior, optimized for rendering and animation. Includes .blend, .fbx, .obj, .glb, .stl, .ply, .unreal, and .max formats for rendering, simulation, and game development.
Price: $10.79
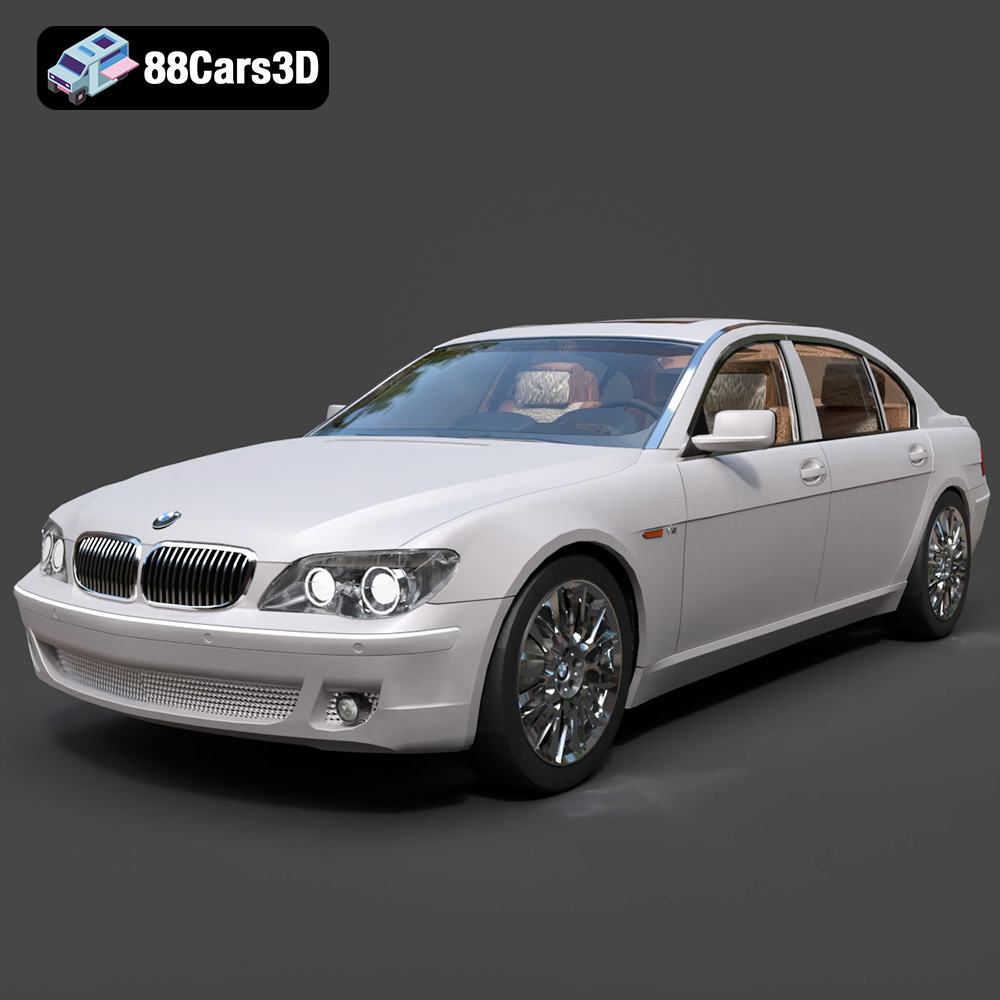
BMW 760Li E66 2005 3D Model
Texture: Yes
Material: Yes
Download the BMW 760Li E66 2005 3D Model featuring a detailed exterior, refined interior, and robust chassis. Includes .blend, .fbx, .obj, .glb, .stl, .ply, .unreal, and .max formats for rendering, simulation, and game development.
Price: $10.79
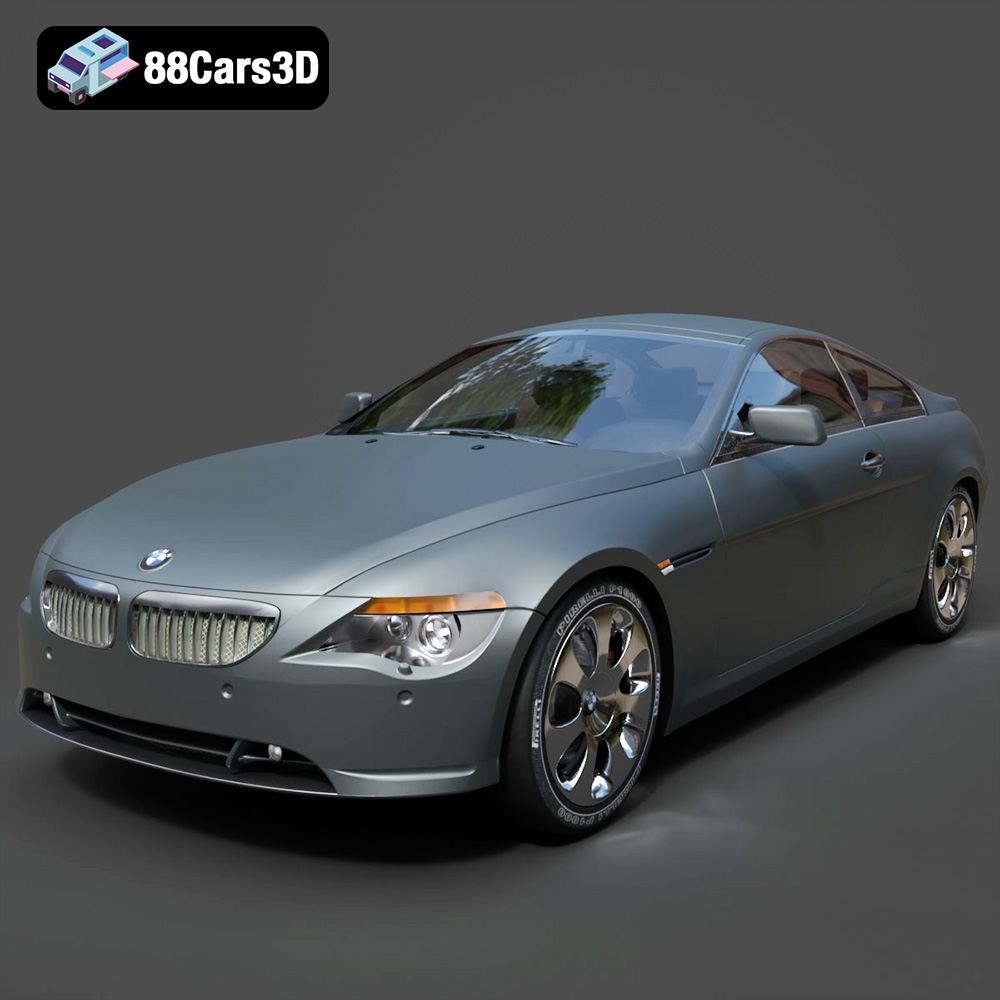
BMW 6 Series 3D Model
Texture: Yes
Material: Yes
Download the BMW 6 Series 3D Model featuring precisely modeled body panels, detailed interior, and authentic wheels. Includes .blend, .fbx, .obj, .glb, .stl, .ply, .unreal, and .max formats for rendering, simulation, and game development.
Price: $10.79
