

The automotive industry is in a perpetual state of innovation, not just in vehicle design and engineering, but also in how cars are envisioned, marketed, and experienced. Gone are the days when static renders and physical prototypes were the only means of showcasing a vehicle. Today, Unreal Engine stands at the forefront of this revolution, empowering designers, marketers, and developers to create breathtakingly realistic 3D car models and immersive experiences in real time.
This comprehensive guide delves deep into the capabilities of Unreal Engine 5, providing you with the knowledge and actionable insights to master automotive visualization and real-time rendering. Whether you’re an experienced 3D artist, a game developer venturing into automotive, or a professional aiming to elevate your visualization pipeline, you’ll discover how to leverage features like Nanite, Lumen, Blueprint, and Sequencer to achieve unparalleled realism and interactivity. We’ll explore everything from efficient project setup and optimizing game assets to crafting intricate PBR materials and building interactive configurators. Prepare to accelerate your creative vision and transform your automotive projects.
Setting the Stage: Unreal Engine Project Setup & Importing 3D Car Models
A solid foundation is crucial for any successful Unreal Engine project, especially when dealing with the high fidelity demands of automotive visualization. Proper project setup ensures optimal performance and a smooth workflow, laying the groundwork for stunning visuals. The first step involves configuring your project to harness Unreal Engine 5’s powerful rendering features and then efficiently importing your 3D car models.
Project Configuration for Automotive Realism
When starting a new project in Unreal Engine 5, consider selecting the “Games” or “Film, Television, and Live Events” template as a base, then customize it for automotive visualization. Key settings to enable and configure include:
- Ray Tracing: For photorealistic reflections, shadows, and global illumination, enable Hardware Ray Tracing in Project Settings > Engine > Rendering. This works in conjunction with Lumen for superior lighting.
- Virtual Textures (Optional): While not always necessary, Virtual Textures can be beneficial for extremely large, detailed surfaces like road networks or expansive environments. Enable it under Project Settings > Engine > Rendering.
- High-Quality Shaders: Ensure your project is set to use the highest shader quality. This can often be found in the scalability settings (Edit > Project Settings > Engine > Rendering > Default PostProcess Settings > Global Post Process Material).
- Consistent Folder Structure: Organize your content logically. A recommended structure might be:
/Content/Cars/[CarName]/Meshes,/Content/Cars/[CarName]/Materials,/Content/Cars/[CarName]/Textures,/Content/Environments/, etc. This maintains clarity, especially in larger projects.
Always review the official Unreal Engine documentation for the most up-to-date best practices on project settings, as features evolve with each engine version.
Seamless Import and Initial Optimization of 3D Car Models
Importing your 3D car models into Unreal Engine requires attention to detail for optimal results. Most high-quality automotive assets, such as those found on platforms like 88cars3d.com, are provided in formats like FBX, USD, or USDZ. USD (Universal Scene Description) is particularly gaining traction as an industry-standard format for data exchange, offering robust support for complex scene hierarchies, animations, and material definitions.
- Import Process: In the Content Browser, click “Add/Import” and select your FBX, USD, or USDZ file. During import, ensure “Combine Meshes” is unchecked if you need individual control over car parts (e.g., doors, wheels, interior elements). For static, high-poly components that benefit from Nanite, ensure “Build Nanite” is enabled.
- Clean Topology and UVs: The quality of your imported model is paramount. Models from 88cars3d.com are typically designed with clean topology, proper UV mapping, and grouped meshes. Clean topology minimizes rendering artifacts, while well-laid-out UVs are essential for high-fidelity textures without stretching or seams.
- Initial Scale and Pivot: Verify that your imported car model is at the correct scale (Unreal Engine uses centimeters by default). Adjusting the pivot point to the center of the car’s base can simplify placement and rotation within the scene.
- Collision Generation: For interactive scenarios (e.g., driving simulations), generate appropriate collision meshes. Simple Box/Sphere collision is often sufficient for static objects, but complex convex hull collision might be needed for more precise interactions with the vehicle body.
By carefully handling these initial steps, you ensure your 3D car models are prepared for the advanced material, lighting, and interactive stages of your Unreal Engine project.
Crafting Visual Fidelity: PBR Materials, Textures, and Advanced Shaders
The realism of your automotive visualization largely hinges on the quality and accuracy of its materials. Unreal Engine’s Physically Based Rendering (PBR) system allows artists to replicate real-world material properties with remarkable precision. Understanding and mastering the Material Editor is key to transforming a bland 3D model into a photorealistic vehicle.
Mastering Physically Based Materials in Unreal Engine
PBR materials are designed to react to light in a physically plausible manner, making them ideal for achieving photorealistic results. The core components of a PBR material typically include:
- Base Color (Albedo): Represents the diffuse color of the surface without any lighting information. For metals, this is typically a solid color, while for non-metals, it’s the color under white light.
- Normal Map: Provides surface detail by faking high-polygon geometry through tangent-space normals, crucial for bumps, grooves, and intricate details on car bodies and interiors.
- Roughness: Controls the microsurface imperfections, dictating how rough or smooth a surface appears, directly impacting how light is scattered or reflected. A low roughness value means a highly reflective, mirror-like surface; high roughness means a dull, matte surface.
- Metallic: A binary value (0 or 1) indicating whether a material is metallic (1) or non-metallic (0). For complex car paints, a metallic map can define areas of flake and clear coat.
- Ambient Occlusion (AO): Fakes soft shadows in crevices and corners, enhancing depth and realism.
- Opacity: For transparent or translucent materials like glass or headlights.
In the Unreal Engine Material Editor, you connect texture maps (e.g., Albedo, Normal, Roughness, Metallic, AO from 88cars3d.com assets) to their respective input pins. For realistic car paint, you’ll often use complex material functions that combine metallic properties with clear coat effects, flake normals for metallic speckles, and Fresnel reflections. Material Instances are invaluable for creating variations (e.g., different car colors or finishes) from a single master material, significantly improving workflow efficiency and reducing render time.
Leveraging Advanced Shaders and Texture Workflows
Beyond the basics, Unreal Engine offers advanced techniques to push the visual boundaries of your automotive renders:
- Decals: Use deferred decals for adding surface details like dirt, grime, scratches, or custom graphics and badging directly onto the car body without modifying the base UVs or geometry. This is highly flexible and non-destructive.
- Layered Materials: For complex surfaces like carbon fiber under a clear coat, or worn leather, layered materials allow you to blend multiple materials using masks. This technique is computationally more expensive but delivers incredible realism for intricate parts.
- Texture Resolution and Streaming: Use appropriate texture resolutions (e.g., 4K or 8K for primary body panels, 2K for interiors and smaller details). Unreal Engine’s texture streaming system efficiently loads only the necessary mip levels, managing memory effectively. Always analyze texture memory usage to maintain optimal performance.
Achieving realistic materials requires keen observation of real-world surfaces and meticulous attention to detail in the Material Editor. Experiment with parameters and node networks to truly bring your 3D car models to life.
Illuminating the Scene: Real-Time Lighting with Lumen and Beyond
Lighting is the single most critical factor in achieving believable automotive visualization. Unreal Engine 5’s revolutionary Lumen global illumination system, combined with traditional lighting techniques, offers unprecedented flexibility and realism for dynamic real-time environments. Mastering these tools allows you to capture the subtle nuances of light interaction on highly reflective surfaces, like car paint and glass.
Dynamic Global Illumination with Lumen
Lumen is Unreal Engine 5’s fully dynamic global illumination and reflections system, eliminating the need for baking lightmaps and providing instant feedback on lighting changes. This is invaluable for automotive visualization, where iterative design and rapid scene adjustments are common. Lumen works by:
- Software Ray Tracing: Traces rays against a mesh representation called a ‘Signed Distance Field’ (SDF) or a ‘Card Based Representation’ (CBR) to approximate indirect lighting bounce.
- Screen Traces: For high-frequency details, Lumen utilizes screen-space information to refine reflections and direct lighting.
- Hardware Ray Tracing (Optional): When enabled and supported by your GPU, Lumen can leverage hardware ray tracing for even more precise and detailed global illumination and reflections, offering the highest fidelity.
To configure Lumen for automotive scenes, navigate to Project Settings > Engine > Rendering and ensure ‘Global Illumination’ and ‘Reflections’ are set to ‘Lumen’. In your Post Process Volume, tweak Lumen settings like ‘Final Gather Quality’ and ‘Diffuse Boost’ for optimal visual fidelity, understanding that higher values will impact performance. Lumen’s ability to provide instantly updated global illumination means that moving a car, changing its paint, or adjusting a light source immediately affects the entire scene’s lighting, which is crucial for interactive configurators and virtual showrooms.
Integrating Traditional Lighting & Advanced Techniques
While Lumen handles global illumination, direct lighting still relies on traditional light sources, expertly combined for stunning results:
- Directional Light: Represents the sun and provides powerful, consistent directional lighting and shadows. Crucial for outdoor scenes or studio lighting setups simulating natural light.
- Sky Light: Captures the ambient light from the sky or an HDRI (High Dynamic Range Image). Integrating a high-quality HDRI is paramount for realistic environmental lighting and reflections on car surfaces. Dragging an HDRI into your scene and converting it to a Sky Sphere with a Sky Light is a quick way to achieve accurate ambient lighting.
- Rect Lights (Area Lights): Essential for studio photography setups, these lights provide soft, even illumination with realistic falloff. Place them strategically around the car to highlight curves, emphasize reflections, and create compelling product shots.
- Ray-Traced Reflections and Shadows: Even with Lumen, enabling dedicated ray-traced reflections and shadows in your Post Process Volume can further enhance realism, especially for highly reflective car bodies. This comes at a performance cost but delivers unparalleled visual quality.
Experimentation is key. Use a combination of these lights to craft the perfect mood and highlight the intricate details of your 3D car models, from the sheen of the paint to the depth of the interior. For more on lighting in Unreal Engine, consult the official Unreal Engine learning resources.
Unleashing Performance & Detail: Nanite, LODs, and Optimization Strategies
Achieving photorealism in automotive visualization often means working with extremely high-polygon models, rich textures, and complex lighting. Balancing this visual fidelity with real-time performance is a constant challenge. Unreal Engine 5’s Nanite virtualized geometry system and intelligent Level of Detail (LOD) management, coupled with strategic optimization techniques, are game-changers in this regard.
Nanite Virtualized Geometry for High-Fidelity Car Models
Nanite is a revolutionary virtualized geometry system in Unreal Engine 5 that allows artists to import and render movie-quality source assets directly into the engine, composed of millions or even billions of polygons. For 3D car models, this means you no longer need to painstakingly optimize geometry, decimate meshes, or manually create LODs for static parts. Nanite handles the streaming and scaling of detail on demand, rendering only the necessary micropolygons for each frame, based on camera distance and screen size.
- How Nanite Works: Nanite converts your high-poly meshes into a specialized internal format that can be streamed and rendered very efficiently. It intelligently culls unseen geometry and dynamically adjusts the level of detail, making draw calls virtually independent of polygon count.
- Benefits for Automotive:
- Unprecedented Detail: Import CAD data or highly detailed sculpted meshes directly, preserving every curve and intricate detail of the car body, interior, and engine components.
- Simplified Workflow: Eliminates the time-consuming process of manual LOD creation for static meshes.
- Performance: Despite handling massive poly counts, Nanite often outperforms traditional LOD systems by reducing memory footprint and draw calls.
- Importing with Nanite: When importing an FBX or USD file, simply check the “Build Nanite” option in the import dialogue. You can also enable Nanite for existing static meshes in their details panel.
- Limitations: Nanite currently has limitations with certain features, such as animated meshes (e.g., car doors, wheels), transparent materials, and complex WPO (World Position Offset). For these elements, traditional LODs and optimization are still necessary.
When sourcing automotive assets from marketplaces such as 88cars3d.com, look for models already optimized with clean geometry suitable for Nanite conversion, or those that provide multiple LODs for full flexibility.
Effective LOD Management and Real-time Optimization
Even with Nanite handling static high-poly meshes, traditional LODs (Level of Detail) remain crucial for animated parts, foliage, or instances where Nanite isn’t applicable. Effective optimization is a continuous process throughout your project’s lifecycle.
- Traditional LODs: For components like wheels, suspension, or animated parts of the interior, generate multiple LOD levels (e.g., LOD0 for full detail, LOD1, LOD2, etc., for progressively lower polygon counts). Set appropriate screen size thresholds for LOD transitions to avoid popping. Unreal Engine can auto-generate LODs, but manual refinement often yields better visual results.
- Profiling Tools: Utilize Unreal Engine’s built-in profilers to identify bottlenecks.
Stat unit: Displays overall frame rate, Game thread, Draw thread, and GPU times.Stat GPU: Provides detailed breakdown of GPU rendering passes.Stat rhi: Shows draw calls and primitive counts.Stat engine: General engine statistics.
Use these commands in the console (~) to pinpoint areas for optimization.
- Draw Call Reduction: Minimize draw calls by merging static meshes where possible (e.g., small interior components if they don’t require individual interaction) or using mesh instancing for repetitive objects like tire treads.
- Texture Optimization: Ensure texture resolutions are appropriate for their importance and distance from the camera. Use DXT compression where visually acceptable. Employ texture streaming to only load necessary mip levels.
- Shader Complexity: Visualize shader complexity (View Modes > Shader Complexity) to identify overly complex materials that might be impacting GPU performance. Simplify material graphs where possible, or use cheaper alternatives.
- Post-Processing Optimization: Be judicious with post-processing effects. While bloom, depth of field, and chromatic aberration enhance realism, they can be performance-intensive. Optimize their settings to find a balance between quality and frame rate.
By combining Nanite’s power with smart LODs and rigorous optimization, you can achieve stunning visual fidelity without sacrificing real-time performance, making your automotive visualization truly exceptional.
Interactive Experiences & Cinematic Storytelling: Blueprint, Sequencer, and Virtual Production
Beyond static renders, Unreal Engine excels at creating dynamic, interactive experiences and cinematic narratives for automotive visualization. From allowing users to customize a vehicle in real-time to producing Hollywood-grade promotional videos, Blueprint, Sequencer, and virtual production tools unlock a new dimension of creative possibility.
Blueprint for Automotive Configurators and Dynamic Interactions
Blueprint Visual Scripting is Unreal Engine’s powerful node-based scripting system, enabling artists and designers to create complex gameplay and interactive logic without writing a single line of code. For automotive applications, Blueprint is invaluable for:
- Interactive Configurators: Allow users to change paint colors, swap wheel designs, select interior trims, or add accessories in real-time. This involves using Blueprint to drive material parameters (e.g., changing the Base Color or Metallic value of a car paint material) or dynamically swapping out static meshes (e.g., replacing one wheel mesh with another).
- Opening Doors and Hoods: Implement simple animations to open and close car doors, the hood, or the trunk with a button press or mouse click. This typically involves animating the rotation or translation of specific mesh components using event-driven Blueprint logic.
- UI Integration with UMG: Combine Blueprint with the Unreal Motion Graphics (UMG) UI Editor to create intuitive user interfaces (UI) for your configurator. Buttons, sliders, and dropdown menus can trigger Blueprint events to modify the car’s appearance or behavior.
- Basic Vehicle Physics and Controls: While complex vehicle dynamics require dedicated physics setups, Blueprint can be used for simpler interactive experiences, such as driving the car around a showroom floor. Unreal Engine provides a Vehicle Movement Component that can be configured and controlled via Blueprint, offering a good starting point for basic interactivity. Consult the official Unreal Engine documentation for guidance on setting up vehicle physics.
The power of Blueprint lies in its accessibility, enabling rapid prototyping and iteration for highly engaging automotive experiences.
Cinematic Production with Sequencer & Virtual Production Workflows
For cinematic content, Sequencer is Unreal Engine’s multi-track non-linear editor for creating breathtaking animations, cutscenes, and marketing visuals. It’s the go-to tool for crafting high-quality promotional videos and dynamic presentations:
- Keyframe Animation: Animate camera movements, car components (e.g., wheels rotating, doors opening), and even material parameters over time. You can import animations from external DCC applications or create them directly in Sequencer.
- Camera Paths and Composition: Define intricate camera paths, control focal length, depth of field, and aperture to achieve professional cinematic shots that highlight the car’s design.
- Post-Processing Overrides: Control post-processing effects (color grading, bloom, vignette, motion blur) on a per-shot or per-sequence basis, giving you precise artistic control over the final look.
- High-Quality Renders: Use Sequencer to render out high-resolution images or video sequences (MP4, EXR, ProRes) for marketing materials, design reviews, or film-quality output.
Virtual Production and LED Wall Workflows: Unreal Engine is at the heart of modern virtual production, particularly for automotive commercials and films. By integrating 3D car models into an nDisplay-powered LED volume, filmmakers can composite virtual environments and vehicles with live actors and physical sets in real-time. This allows for immediate feedback on lighting and camera angles, dramatically reducing post-production time and cost, and enabling design teams to visualize vehicles in a dynamic, collaborative setting.
From interactive showrooms to live broadcast virtual productions, Unreal Engine provides a comprehensive suite of tools to tell compelling stories with your automotive visualization.
Beyond the Desktop: AR/VR and Future Frontiers in Automotive
The application of Unreal Engine in the automotive sector extends far beyond traditional desktop real-time rendering. Augmented Reality (AR) and Virtual Reality (VR) are transforming how cars are designed, experienced, and sold, offering immersive ways to interact with 3D car models. As technology evolves, so too do the frontiers of automotive visualization, with new standards and techniques continually emerging.
Optimizing Automotive Models for AR/VR Experiences
Bringing highly detailed 3D car models into AR/VR environments presents unique performance challenges due to the stringent frame rate requirements (typically 90 FPS or higher) to avoid motion sickness and provide a comfortable experience. Optimization is absolutely critical:
- Polygon Budget: While Nanite can handle high poly counts on desktop and console, it’s generally not yet suitable for mobile AR/VR platforms due to its current performance characteristics and memory usage. For AR/VR, aim for well-optimized traditional meshes with aggressive LODs. A typical budget for a full car might be between 100,000 to 500,000 polygons, heavily dependent on the target device and complexity.
- Draw Call Reduction: Minimize the number of draw calls by combining meshes where possible and using mesh instancing for repetitive elements (e.g., bolts, small interior components).
- Texture Size and Compression: Reduce texture resolutions to what’s visually necessary for the VR/AR headset. Use appropriate compression formats (e.g., ASTC for mobile, BC7 for desktop VR) and ensure texture streaming is enabled.
- Forward Shading and Instanced Stereo: Enable ‘Forward Shading’ in Project Settings > Engine > Rendering for VR applications. This rendering path is often more efficient than deferred shading for VR. Also, ensure ‘Instanced Stereo’ rendering is enabled for both eyes to render simultaneously, significantly boosting performance.
- Post-Processing: Be extremely conservative with post-processing effects. Many demanding effects (e.g., screen space reflections, complex anti-aliasing) should be disabled or heavily optimized for AR/VR.
- UI/UX Considerations: Design user interfaces specifically for AR/VR. Avoid flat, screen-space UI elements that break immersion. Instead, use world-space UI that feels integrated into the 3D environment.
AR/VR applications for automotive include interactive showrooms, design reviews where designers can ‘sit’ inside a virtual car, and even augmented reality manuals for repair and maintenance. These immersive experiences are powerful tools for engagement and collaboration.
Emerging Trends and the Future of Automotive Visualization
The landscape of real-time rendering in automotive is continuously evolving:
- USD (Universal Scene Description): As mentioned earlier, USD is becoming an increasingly important standard for pipeline interoperability. Its ability to describe complex scene graphs, geometry, materials, and animations makes it ideal for collaborative workflows across different software platforms and engine iterations. Unreal Engine’s native USD support will continue to strengthen, simplifying asset exchange and version control.
- Cloud Rendering and Streaming: With the increasing demand for high-fidelity interactive experiences across various devices, cloud rendering and streaming solutions are gaining traction. This allows complex Unreal Engine scenes to be rendered remotely and streamed to less powerful devices (e.g., mobile phones, web browsers), democratizing access to high-end automotive visualization.
- Machine Learning for Content Creation: While not directly creating assets, ML is being explored for tasks like intelligent asset optimization, generating texture variations, or even assisting in lighting setup, speeding up content creation workflows.
- Digital Twins: The concept of a ‘digital twin’ where a real-world vehicle has a high-fidelity virtual counterpart, updated in real-time with sensor data, is gaining ground. Unreal Engine is a prime candidate for visualizing these digital twins, offering capabilities for simulation, diagnostics, and interactive training.
The future of automotive visualization with Unreal Engine is one of ever-increasing realism, interactivity, and integration across the entire product lifecycle, from initial concept to end-user experience.
Conclusion
Unreal Engine 5 has truly revolutionized the landscape of automotive visualization and real-time rendering. We’ve journeyed through the intricate processes of setting up projects, seamlessly importing and optimizing 3D car models, and crafting breathtakingly realistic PBR materials. We’ve explored the dynamic illumination capabilities of Lumen, leveraged the power of Nanite for unprecedented geometric detail, and mastered performance optimization techniques vital for real-time applications.
The ability to create interactive configurators with Blueprint, produce cinematic masterpieces with Sequencer, and deploy immersive AR/VR experiences demonstrates the engine’s versatility. From design reviews and marketing campaigns to virtual showrooms and interactive training, Unreal Engine empowers automotive professionals to innovate at every stage.
The key takeaway is that achieving stunning automotive visualization in Unreal Engine requires a blend of artistic vision, technical understanding, and meticulous optimization. By embracing the workflows and features discussed, you can elevate your projects to industry-leading standards. To kickstart your journey with high-quality, pre-optimized game assets, explore the extensive collection of 3D car models available at 88cars3d.com, specifically designed for seamless integration with Unreal Engine.
Now, it’s your turn to unleash your creativity. Dive into Unreal Engine, experiment with these powerful tools, and transform your automotive visualization projects into truly unforgettable experiences.
Featured 3D Car Models
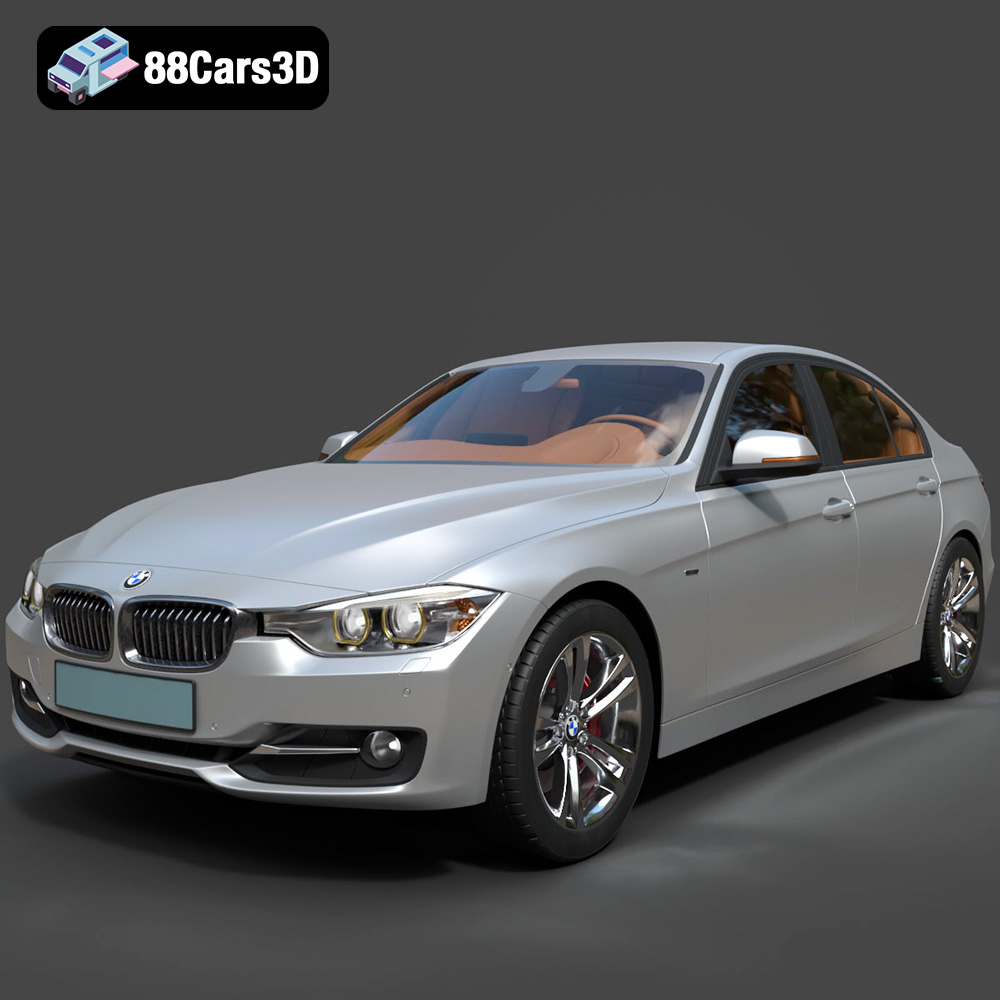
BMW 3 F30 3D Model
Texture: Yes
Material: Yes
Download the BMW 3 F30 3D Model featuring a detailed exterior, realistic interior, and optimized mesh. Includes .blend, .fbx, .obj, .glb, .stl, .ply, .unreal, and .max formats for rendering, simulation, and game development.
Price: $10.79
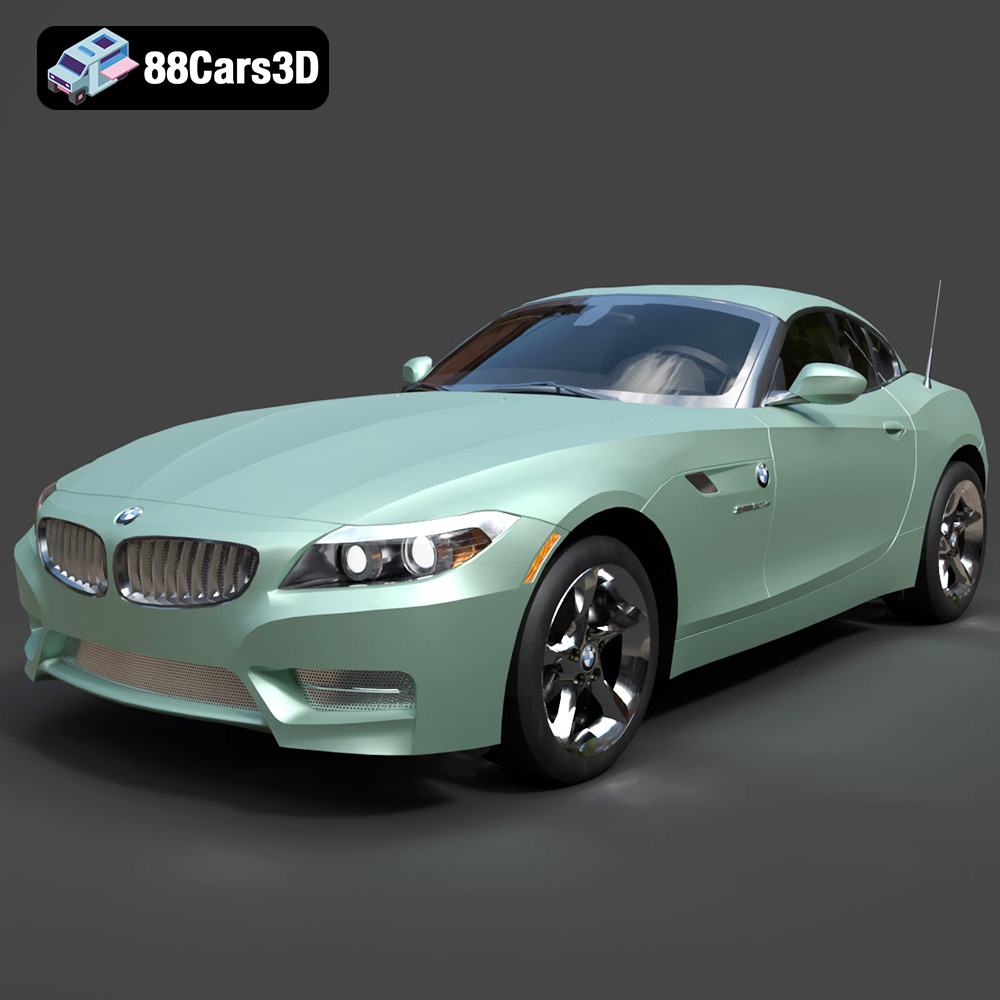
BMW Z4 Roadster E89 2012 3D Model
Texture: Yes
Material: Yes
Download the BMW Z4 Roadster E89 3D Model featuring clean geometry, realistic detailing, and a fully modeled interior. Includes .blend, .fbx, .obj, .glb, .stl, .ply, .unreal, and .max formats for rendering, simulation, and game development.
Price: $13.99

BMW Z4 E85 2005 3D Model
Texture: Yes
Material: Yes
Download the BMW Z4 E85 3D Model featuring clean geometry, realistic detailing, and a fully modeled interior. Includes .blend, .fbx, .obj, .glb, .stl, .ply, .unreal, and .max formats for rendering, simulation, and game development.
Price: $13.99

BMW M3 2024 3D Model
Texture: Yes
Material: Yes
Download the BMW M3 2024 3D Model featuring clean geometry, realistic detailing, and a fully modeled interior. Includes .blend, .fbx, .obj, .glb, .stl, .ply, .unreal, and .max formats for rendering, simulation, and game development.
Price: $13.99
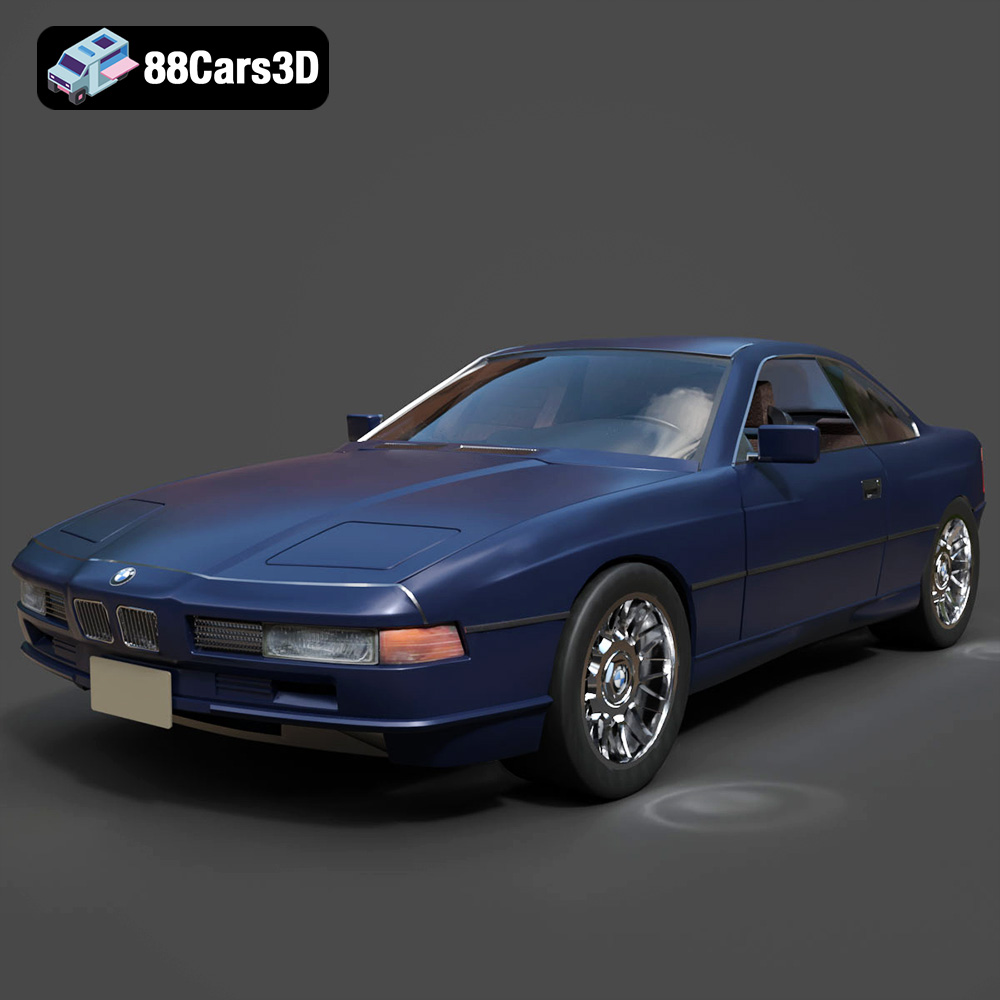
BMW 850i Coupe 1990 3D Model
Texture: Yes
Material: Yes
Download the BMW 850i Coupe 1990 3D Model featuring clean geometry, realistic detailing, and a fully modeled interior. Includes .blend, .fbx, .obj, .glb, .stl, .ply, .unreal, and .max formats for rendering, simulation, and game development.
Price: $13.99
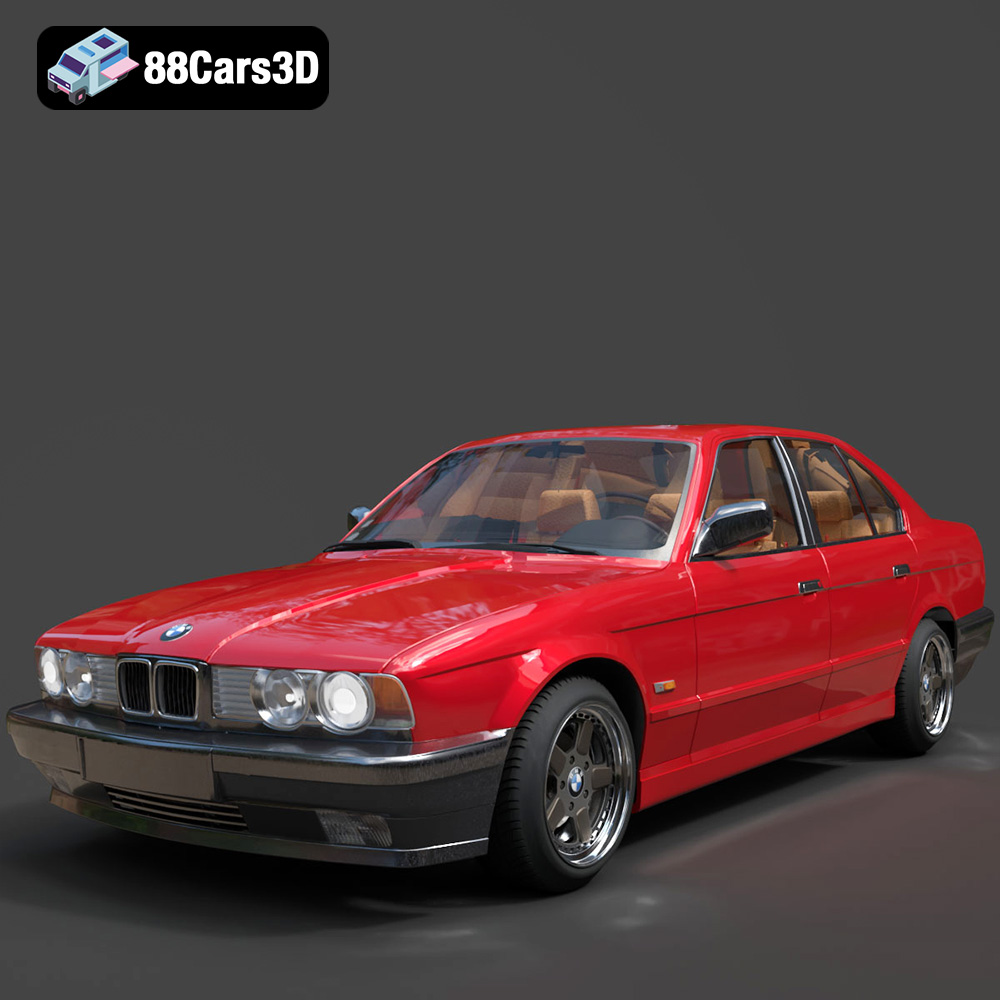
BMW 525i E34 1993 3D Model
Texture: Yes
Material: Yes
Download the BMW 525i E34 1993 3D Model featuring clean geometry, realistic detailing, and a fully modeled interior. Includes .blend, .fbx, .obj, .glb, .stl, .ply, .unreal, and .max formats for rendering, simulation, and game development.
Price: $12.99

BMW 7 Series 2016 3D Model
Texture: Yes
Material: Yes
Download the BMW 7 Series 2016 3D Model featuring luxurious design, detailed interior, and accurate exterior. Includes .blend, .fbx, .obj, .glb, .stl, .ply, .unreal, and .max formats for rendering, simulation, and game development.
Price: $10.79
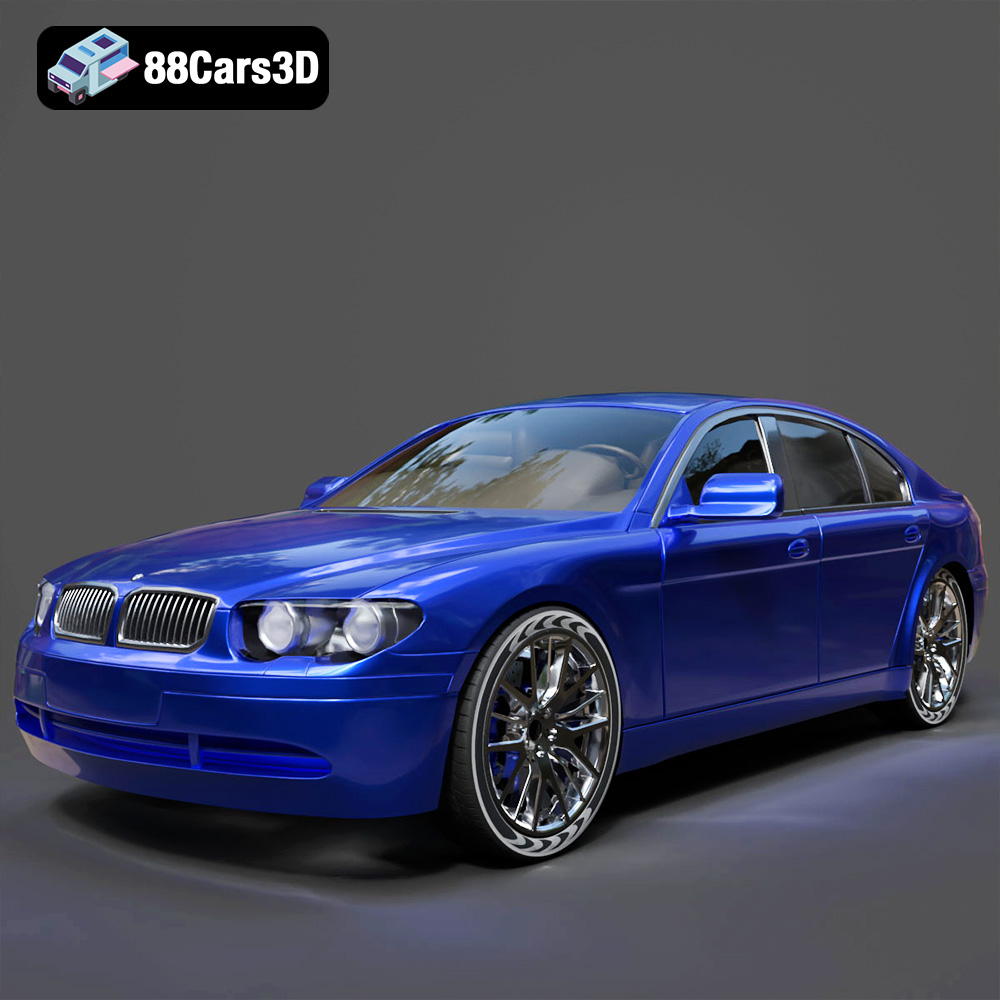
BMW 7 Series 30th Anniversary 3D Model
Texture: Yes
Material: Yes
Download the BMW 7 Series 30th Anniversary 3D Model featuring a meticulously crafted exterior, detailed interior, and realistic wheels. Includes .blend, .fbx, .obj, .glb, .stl, .ply, .unreal, and .max formats for rendering, simulation, and game development.
Price: $35.79

BMW 7-Series F02 3D Model
Texture: Yes
Material: Yes
Download the BMW 7-Series F02 3D Model featuring a detailed exterior and interior, optimized for rendering and animation. Includes .blend, .fbx, .obj, .glb, .stl, .ply, .unreal, and .max formats for rendering, simulation, and game development.
Price: $10.79
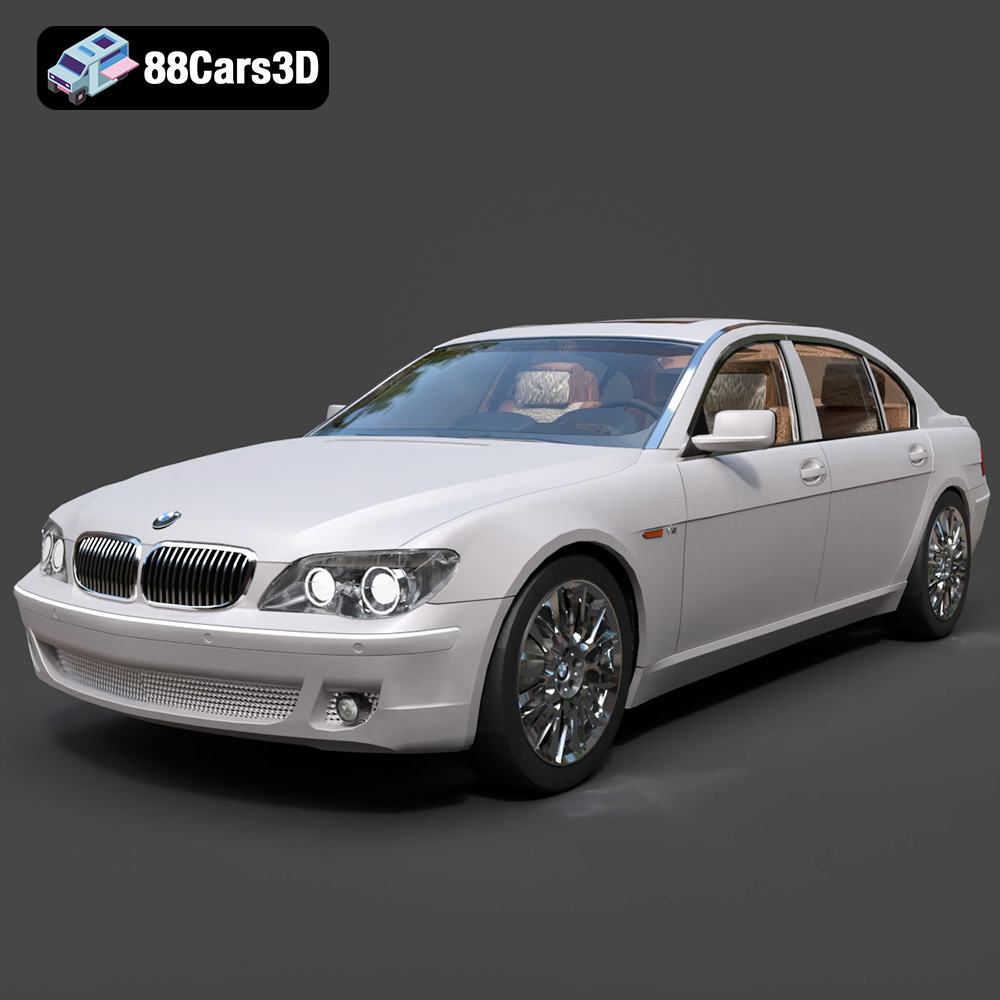
BMW 760Li E66 2005 3D Model
Texture: Yes
Material: Yes
Download the BMW 760Li E66 2005 3D Model featuring a detailed exterior, refined interior, and robust chassis. Includes .blend, .fbx, .obj, .glb, .stl, .ply, .unreal, and .max formats for rendering, simulation, and game development.
Price: $10.79
