

The automotive industry is in a constant state of evolution, not just in vehicle design and propulsion, but also in how cars are visualized, marketed, and experienced. Unreal Engine (UE) stands at the forefront of this revolution, offering unparalleled real-time rendering capabilities that empower artists, designers, and developers to create breathtakingly realistic and interactive automotive experiences. From high-fidelity marketing renders and immersive configurators to real-time game assets and virtual production showcases, Unreal Engine has become the go-to platform for automotive visualization professionals. The demand for exquisite 3D car models, serving as the foundation for these experiences, has never been higher, and platforms like 88cars3d.com provide precisely the high-quality, production-ready assets needed to hit the ground running.
This comprehensive guide will dive deep into leveraging Unreal Engine 5 for automotive visualization, transforming premium 3D car models into stunning interactive realities. We’ll explore the entire workflow, from initial project setup and efficient model import to crafting photorealistic materials, mastering dynamic lighting with Lumen, optimizing performance with Nanite and LODs, and building compelling interactive experiences with Blueprint and cinematic sequences. We’ll also dedicate a significant portion to the powerful Niagara VFX system, demonstrating how to infuse your automotive scenes with dynamic, realistic effects. Prepare to unlock the full potential of your automotive projects within Unreal Engine, pushing the boundaries of realism and interactivity.
Laying the Foundation: Project Setup and Importing 88cars3d.com Models
A robust foundation is crucial for any high-fidelity Unreal Engine project, especially when dealing with the demanding visual requirements of automotive visualization. Proper project setup ensures optimal performance and a smooth development workflow. When beginning an automotive project in Unreal Engine, selecting the right template and configuring initial settings can save significant time and prevent headaches down the line. We recommend starting with a Blank project or, for more advanced cinematic work, the Film, Television & Live Events template, as it often includes useful cinematic tools and post-processing volumes configured by default. For game development or interactive applications, a Blank project offers maximum flexibility.
Once your project is created, the next critical step is to import your high-quality 3D car models. Sourcing optimized, production-ready assets, such as those found on 88cars3d.com, is paramount. These models often come with clean topology, proper UV mapping, and a logical material setup, which significantly streamlines the integration process. When importing, always aim for FBX as the primary format due to its widespread compatibility and support for hierarchical structures, skeletal meshes (if applicable for vehicle physics), and embedded materials/textures. USD (Universal Scene Description) is also gaining traction, offering robust scene description capabilities and better interoperability across different 3D applications, and 88cars3d.com provides assets in formats compatible with these industry standards.
Unreal Engine Project Configuration for Automotive
For automotive visualization, several project settings should be reviewed immediately. Navigate to Edit > Project Settings. Under Engine > Rendering, ensure that “Lumen Global Illumination” and “Lumen Reflections” are enabled for cutting-edge dynamic lighting. Consider enabling “Nanite Virtualized Geometry” for high-polygon models to achieve unprecedented detail without sacrificing performance. For accurate color representation, ensure “Color Space” is set to “sRGB” or “ACEScg” if working within a professional color-managed pipeline. Further down, under “Post Processing,” evaluate if “Motion Blur” or “Ambient Occlusion” settings are appropriate for your desired visual style. For cinematic applications, raising the default “LOD Bias” for textures can improve visual fidelity at the cost of memory. Remember to restart the engine after making significant rendering setting changes.
- Input > Global Cursor Settings: Disable “Show Software Cursor” if you want to use custom hardware cursors for interactive elements.
- Maps & Modes: Set your default editor and game maps to ensure consistent loading.
- Packaging: Configure packaging settings for your target platform (Windows, Android, iOS, etc.) and ensure “For Distribution” is checked for final builds.
Seamless Asset Import and Initial Optimization
Importing your 3D car models from a marketplace like 88cars3d.com into Unreal Engine is typically straightforward. Drag and drop your FBX file into the Content Browser, or use the “Add > Import to > Game” option. In the FBX Import Options dialog, pay close attention to the following:
- Static Mesh Settings:
- Combine Meshes: Often beneficial for complex vehicle models that are pre-assembled, as it creates a single Static Mesh actor. However, if you need to manipulate individual parts (doors, wheels, interior components) separately, uncheck this option.
- Generate Missing Collision: Useful for basic collision, but for detailed interactions (e.g., custom wheel collision for physics), you’ll often create custom collision meshes or use simpler primitives in engine.
- Build Adjacency Buffer: Enable for better lighting results and mesh operations.
- Normal Import Method: “Import Normals and Tangents” is usually best if your source model has correctly authored normals.
- Build Nanite: Absolutely enable this for high-polygon car models to leverage Nanite’s performance benefits.
- Materials and Textures:
- Import Materials: Enable if your FBX includes materials and you want Unreal to attempt to create them (often as basic placeholders that you’ll refine).
- Import Textures: Enable to bring in associated texture maps.
Once imported, immediately review the model. Check its scale (Unreal’s default unit is centimeters, so a 1:1 scale import means 1 unit = 1cm). Adjust the scale if necessary using the asset editor’s “Build Settings” or directly on the actor in the world. Verify that the pivot point is at the base center of the vehicle for easy manipulation. For more information on importing various asset types, refer to the official Unreal Engine documentation at https://dev.epicgames.com/community/unreal-engine/learning.
Crafting Realism: PBR Materials and Advanced Lighting with Lumen
The foundation of visual realism in Unreal Engine lies in physically based rendering (PBR) materials and sophisticated lighting. PBR materials accurately simulate how light interacts with surfaces in the real world, ensuring consistency across various lighting conditions. When combined with Unreal Engine 5’s revolutionary Lumen global illumination system, the result is an incredibly immersive and dynamic visual experience, perfectly suited for showcasing high-quality 3D car models. Understanding how to properly author and implement PBR materials is crucial, as is mastering the various lighting tools at your disposal, from natural outdoor environments to controlled studio setups.
PBR relies on a set of texture maps—Albedo (Base Color), Normal, Roughness, Metallic, Ambient Occlusion, and sometimes Emissive or Height maps—to define a surface’s properties. High-quality 3D car models from 88cars3d.com often come with these maps pre-generated, providing an excellent starting point. The goal in Unreal Engine’s Material Editor is to connect these maps correctly and add specific material properties to replicate real-world car finishes, such as metallic paints, reflective glass, rubber, and intricate interior fabrics. Beyond individual materials, the overarching lighting strategy dictates how these materials are perceived. Lumen, with its real-time global illumination and reflections, provides an unparalleled level of realism and interactivity, making environment lighting a dynamic and iterative process.
PBR Material Workflow and the Material Editor
Creating compelling PBR materials in Unreal Engine begins in the Material Editor. A standard automotive paint material, for instance, requires a Base Color map (often a solid color or a subtle gradient for car paint), a Metallic map (usually a scalar value between 0 and 1, where 1 is fully metallic), and a Roughness map (defining the microsurface detail and how specular reflections spread). For highly reflective car paint, a very low roughness value (e.g., 0.1-0.2) is common. Normal maps add crucial surface detail without increasing polygon count, mimicking bumps and imperfections. Always ensure your texture maps are correctly imported with the right compression settings (e.g., BC7 for most color maps, BC5 for normal maps, uncompressed for masks). Connect these texture samples to the corresponding pins on the main Material Node (Base Color, Metallic, Roughness, Normal). For automotive applications, often custom shader logic is added to simulate clear coat layers, flake effects, or anisotropic reflections, enhancing the realism of metallic finishes. This involves using nodes like “Lerp” to blend different properties, or “Custom Expressions” for advanced mathematical calculations. For deep dives into material creation, Epic Games provides extensive documentation on their learning platform.
- Clear Coat: Utilize the “Clear Coat” input on the Material Node for realistic top-coat reflections over the base metallic paint. Adjust “Clear Coat Roughness” and “Clear Coat Normal” for layered effects.
- Glass: Create separate materials for glass using the “Translucent” blend mode, adjusting opacity, refraction, and specular properties. Consider using a “Thin Translucent” shading model for optimized single-sided glass.
- Emissive: For headlights, tail lights, or interior screens, use the “Emissive Color” input, often driven by a texture mask and a scalar parameter for intensity.
Illuminating Scenes with Lumen and Advanced Techniques
Lumen is Unreal Engine 5’s default global illumination and reflections system, providing dynamic, real-time indirect lighting. This is a game-changer for automotive visualization, allowing artists to make immediate lighting adjustments and see realistic light bounce and reflections without baking. To utilize Lumen effectively, ensure it’s enabled in your Project Settings. Start by adding key light sources: a “Directional Light” for the sun, a “Sky Light” for ambient sky lighting (capture the scene to update its contribution), and “Post Process Volume” to fine-tune exposure, color grading, and bloom.
For studio setups, “Rect Lights” and “Spot Lights” are invaluable for creating controlled light environments that highlight specific features of the car. When using Lumen, surfaces that act as light bounces (walls, ground plane) must have valid materials and sufficient detail to contribute effectively. For performance-critical scenarios or specific stylized looks, traditional baked lighting with Lightmass or static lightmaps (on non-moving objects) can still be employed, though Lumen offers unmatched flexibility. Experiment with different HDRIs (High Dynamic Range Images) in your Sky Light for varied lighting moods; a high-quality HDRI can instantly elevate your scene’s realism by providing rich environment reflections and realistic ambient light. For reflections, Lumen provides real-time ray-traced reflections by default, but consider adding “Sphere Reflection Captures” or “Planar Reflections” (for extremely precise flat surface reflections, like a showroom floor) for targeted high-quality reflections where needed, balancing fidelity with performance. Refer to Unreal Engine’s official Lumen documentation for detailed setup and optimization tips.
Performance and Detail: Nanite, LODs, and Optimization Strategies
Achieving photorealistic automotive visualizations in real-time requires a delicate balance between visual fidelity and performance. Modern 3D car models, especially those designed for high-end rendering, can feature millions of polygons and numerous texture sets. Unreal Engine 5 provides groundbreaking technologies like Nanite and robust Level of Detail (LOD) systems to manage this complexity, allowing artists to push detail boundaries without crippling frame rates. Mastering these optimization strategies is essential for delivering smooth, immersive experiences, whether for an interactive configurator, a VR showroom, or a cinematic sequence.
Nanite virtualized geometry fundamentally changes how highly detailed meshes are rendered. Instead of traditional polygon pipelines, Nanite intelligently streams and renders only the necessary detail at screen-space resolution, virtually eliminating polygon count as a performance bottleneck. This means you can import incredibly detailed CAD data or scanned models directly from 88cars3d.com with their full geometric fidelity. Complementing Nanite, traditional LODs remain crucial for assets that don’t support Nanite or for specific optimization cases, such as skeletal meshes or very distant objects. A comprehensive optimization strategy also extends to textures, materials, and overall scene complexity, ensuring that every asset contributes efficiently to the final visual output.
Harnessing Nanite for High-Fidelity Vehicle Models
Nanite is arguably one of Unreal Engine 5’s most significant advancements for high-fidelity assets. When importing your 3D car model, ensure “Build Nanite” is enabled in the FBX import options. This automatically converts your static mesh into a Nanite mesh. Once converted, you can observe its statistics in the Static Mesh Editor under the “Nanite” section. Nanite-enabled meshes can have polygon counts in the tens of millions without a noticeable performance hit, allowing for incredibly smooth surfaces and intricate details on your vehicle. However, it’s important to understand Nanite’s current limitations: it does not support skeletal meshes, non-opaque materials (like transparent glass, though transparent surfaces can be rendered on top of Nanite meshes), or vertex animation. For these cases, traditional mesh pipelines are still necessary.
When working with complex car models, consider splitting the model into Nanite and non-Nanite components. For example, the car body, wheels, and interior hard surfaces can be Nanite meshes, while glass, character models (if any), and dynamic elements (like moving suspension parts with physics) would remain traditional meshes. This hybrid approach allows you to leverage Nanite’s benefits where it’s most effective while maintaining compatibility for other features. Keep an eye on your “Nanite Visualization” modes (accessible via the “Lit” dropdown in the viewport) to understand how Nanite is processing your geometry and identify potential areas for optimization, like excessively dense areas where detail isn’t visually critical.
Strategic LODs and Performance Optimization for Real-Time
While Nanite handles detail for static meshes, Level of Detail (LOD) systems are still indispensable for skeletal meshes, transparent objects, and broader scene optimization. LODs work by swapping out a high-detail mesh for a progressively simpler version as the object moves further from the camera, reducing polygon count and draw calls. For skeletal meshes (like a car chassis with animated suspension), you’ll manually generate LODs in your 3D software or within Unreal Engine’s Static Mesh Editor (even though it’s a skeletal mesh, its components can have LODs). Aim for 3-5 LOD levels, aggressively reducing polygons for distant views. For example, LOD0 (full detail, 100% polygons), LOD1 (75% polygons), LOD2 (50% polygons), LOD3 (25% polygons), and LOD4 (billboard or impostor for extreme distance).
Beyond geometry, a holistic approach to optimization is crucial:
- Texture Resolution: Use appropriate texture resolutions. A 4K texture might be essential for the car body, but 1K or 512px might suffice for undercarriage components or distant elements. Use Unreal’s built-in texture streaming.
- Material Complexity: Simplify complex materials where possible. Excessive instructions or many texture lookups can impact performance. Utilize Material Instances for variations to reduce shader compilation time.
- Draw Calls: Minimize draw calls by strategically combining meshes (where it makes sense) and using instanced static meshes for repetitive elements (e.g., repeating fence posts, small rocks).
- Post-Processing: Be judicious with post-processing effects. While bloom, depth of field, and color grading add realism, they also add rendering cost. Fine-tune their intensity.
- Collision Complexity: Use simple collision meshes (e.g., box, sphere) for static meshes instead of per-poly collision, which is expensive.
- Profiler Tools: Regularly use Unreal Engine’s built-in profiler (
stat unit,stat gpu,stat rhi) to identify performance bottlenecks. For a comprehensive overview, refer to the Unreal Engine performance optimization guide on the Epic Games learning portal.
Bringing Cars to Life: Blueprint Interactivity and Sequencer Cinematics
Beyond static renders, Unreal Engine excels at creating dynamic and interactive experiences. Whether you’re building an automotive configurator that allows users to customize a vehicle in real-time or crafting a compelling cinematic trailer showcasing a new car model, Blueprint visual scripting and Sequencer are your go-to tools. These powerful features empower artists and designers to add logic, animation, and dynamic storytelling without writing a single line of C++ code, making complex interactions and animations accessible to a broader audience.
Blueprint allows for the creation of intricate game logic, UI interactions, and environmental responses. For automotive applications, this translates into changing paint colors, swapping wheel designs, opening doors, or even simulating basic driving mechanics. Sequencer, on the other hand, is Unreal Engine’s non-linear cinematic editor, providing a robust timeline-based system for arranging camera shots, animating objects, controlling lighting, and orchestrating complex events. Together, Blueprint and Sequencer form a potent combination for bringing your 3D car models to life, transforming them from static assets into captivating interactive elements and memorable cinematic stars.
Designing Interactive Automotive Experiences with Blueprint
Blueprint visual scripting enables you to create sophisticated interactive automotive configurators and demos. Imagine a user clicking on a paint swatch and seeing the car instantly change color, or selecting different wheel types from a UI menu. Here’s a basic workflow:
- Material Instance Parameters: For dynamic changes like paint color, create a “Material Instance Dynamic” (MID) in Blueprint. Expose parameters (e.g., “PaintColor” as a Vector Parameter) in your car paint material. In Blueprint, you can then set these parameters on the MID, changing the car’s color in real-time.
- Mesh Swapping: For changing wheels or interior options, simply swap out Static Mesh components. Create arrays of your different wheel meshes (imported from 88cars3d.com) and use Blueprint logic to set the visibility or replace the currently active mesh based on user input.
- Door/Hood Animation: Use “Timeline” nodes in Blueprint to create smooth rotational or translational animations for car doors, hoods, or trunks. Trigger these animations with user input (e.g., a mouse click on the door handle).
- User Interface (UI): Design your configurator UI using Unreal Engine’s UMG (Unreal Motion Graphics) widgets. Create buttons, sliders, and dropdown menus that, when interacted with, trigger your Blueprint logic to modify the car model.
For more complex interactions, such as basic vehicle physics (movement, steering), Unreal Engine provides built-in vehicle templates and components that can be extended with Blueprint. You can customize suspension, engine power, and tire friction to simulate a realistic driving experience. The key is to break down complex interactions into manageable Blueprint graphs, using custom events, functions, and variables to keep your logic organized and efficient.
Cinematic Storytelling with Sequencer
Sequencer is Unreal Engine’s powerful non-linear editor for creating stunning cinematic sequences, perfect for automotive marketing, presentations, or in-game cutscenes. It allows you to orchestrate cameras, actors, lights, and even UI elements over a timeline. Here’s how to utilize it effectively:
- Creating a Level Sequence: Right-click in the Content Browser > Animation > Level Sequence. Open it, and you’ll see a timeline editor.
- Adding Actors: Drag your car model, cameras, and lights from your scene into the Sequencer timeline. Each actor gets its own track.
- Keyframing Transformations: For each actor, you can keyframe its position, rotation, and scale over time. This is how you animate camera movements, car movements (e.g., driving into frame), or even subtle material changes (e.g., paint fading).
- Camera Management: Create multiple “Cine Cameras” and add them to Sequencer. Cut between different camera angles for dynamic shot compositions. Utilize camera features like focal length, aperture (for depth of field), and filmback settings to achieve a professional cinematographic look.
- Event Tracks and Blueprints: Sequencer can trigger Blueprint events at specific points on the timeline. This is incredibly powerful for complex interactions, such as playing Niagara VFX, changing UI elements, or activating specific lighting scenarios precisely when needed in a shot.
- Render and Export: Once your sequence is complete, you can render it out as high-quality video (EXR, PNG sequence, or video codecs) using the Movie Render Queue, ensuring pristine anti-aliasing and motion blur for broadcast-quality output.
Sequencer empowers you to tell a compelling story around your 3D car models, showcasing their design, features, and emotional impact with stunning visual fidelity. For comprehensive tutorials on Sequencer, refer to the official Unreal Engine learning resources.
Dynamic Visuals with Niagara: Elevating Automotive Effects
While the car model itself, its materials, and lighting form the core of automotive visualization, subtle yet impactful visual effects (VFX) can dramatically enhance realism and immersion. This is where Unreal Engine’s Niagara VFX system shines. Niagara is a powerful, node-based particle system that offers unparalleled flexibility and control over creating a vast array of dynamic effects, from intricate exhaust fumes and tire smoke to realistic rain droplets, dust trails, and subtle environmental atmospheric particles. Integrating these effects can transform a static scene into a living, breathing automotive experience.
Unlike its predecessor Cascade, Niagara is a completely modular and programmable VFX editor, allowing artists to define every aspect of a particle’s life cycle through a series of emitters, modules, and scripts. This level of control is invaluable for automotive applications, where precision and physical accuracy are often paramount. Whether you’re simulating the subtle steam from a hot engine, the dramatic smoke of a burnout, or the spray of water kicked up by tires on a wet track, Niagara provides the tools to create highly convincing and performant visual effects that truly elevate the realism of your 3D car models.
Introduction to Niagara and Basic Emitter Setup for Automotive VFX
To begin with Niagara, right-click in your Content Browser and select FX > Niagara System. You can create an empty system or start from a template. For automotive effects, templates like “Simple Explosion,” “Fountain,” or “Smoke” provide excellent starting points. A Niagara System consists of one or more “Emitters,” and each emitter has a stack of “Modules” that control particle behavior. For example, to create exhaust smoke:
- Create a New Emitter: Start with an empty emitter.
- Emitter Update:
- Spawn Burst/Spawn Rate: Set a “Spawn Rate” to a low value (e.g., 5-10) for a steady stream of smoke.
- Simulate Global Spacing: Enable this for better density control.
- Particle Spawn:
- Initialize Particle: Set “Lifetime” (e.g., 2-4 seconds) and initial “Sprite Size Mode” (Uniform, with a size like 20-50).
- Sphere Location: Add a “Sphere Location” module with a small radius (e.g., 10-20) to give the smoke a slight initial spread, simulating turbulence.
- Velocity From Point: Add velocity in the direction of exhaust flow (e.g., X-axis for forward motion, Z-axis for upward dissipation).
- Particle Update:
- Scale Sprite Size: Over Lifetime: Use a curve to make particles grow over their lifetime, simulating expanding smoke.
- Color Over Life: Change particle color from dark grey to lighter, more transparent grey to simulate dissipation.
- Force/Turbulence: Add “Curl Noise Force” or “Vortex Force” to create realistic, swirling smoke patterns.
- Gravity Force: Add a slight negative Z-axis gravity to make smoke rise.
- Render: Choose “Sprite Renderer” and assign a smoke texture (often a soft, grayscale alpha-masked texture). Ensure “Sort Mode” is set to “Back to Front” or “Distance to View” for correct transparency rendering.
Attach this Niagara System as a component to your car’s exhaust pipe socket in Blueprint, and activate it based on engine RPM or speed. This basic setup can be extended for tire smoke (using a different initial velocity and location) or dust trails.
Advanced Niagara Modules and Performance Considerations for Automotive VFX
Niagara’s true power lies in its advanced modules and scripting capabilities. To create more sophisticated automotive effects:
- Collision: Use “Collision” modules to make particles interact with the car body, ground, or other scene geometry. This is essential for rain hitting the windshield or dust settling.
- Data Interfaces: Integrate Niagara with Blueprint or C++ using “Niagara Data Interfaces.” This allows you to drive particle behavior with real-time game data, such as a car’s speed influencing exhaust density or wheel RPM affecting tire smoke intensity.
- Simulation Stages: For complex effects with many particles, use “Simulation Stages” to optimize computations, running different parts of the simulation on the GPU.
- User Parameters: Expose parameters in your Niagara System as “User Exposed” variables. These can then be controlled dynamically via Blueprint, making your VFX highly customizable and reactive within your automotive configurator or game.
Performance Optimization for Niagara:
- Particle Count: Keep particle counts as low as visually acceptable. Use larger, softer textures to compensate for fewer particles.
- Overdraw: Minimize particle overdraw (where multiple transparent particles render on top of each other). Optimize particle size and density.
- Module Complexity: Be mindful of complex modules (e.g., excessive collision checks, complex custom scripts) that can be computationally expensive.
- GPU vs. CPU Simulation: Where possible, simulate particles on the GPU (“GPU Compute Sim”) for better performance, especially with high particle counts.
- LODs for VFX: Niagara Systems can also have LODs, reducing particle count or complexity at a distance. Utilize this feature to optimize large-scale effects.
- Texture Optimization: Use optimized textures for your particles, usually grayscale for colorizing in the material, and appropriate compression.
By leveraging Niagara, you can inject incredible dynamic visual flair into your automotive projects, from subtle atmospheric effects to dramatic action sequences, making your 88cars3d.com assets truly shine. For in-depth guides on specific Niagara modules and best practices, consult the Unreal Engine documentation on Niagara.
Pushing Boundaries: Automotive Configurators, AR/VR, and Virtual Production
The capabilities of Unreal Engine extend far beyond static renders, enabling developers to create truly cutting-edge applications for the automotive industry. Real-time interactive configurators, immersive augmented and virtual reality experiences, and advanced virtual production workflows are rapidly becoming industry standards. These applications leverage the full spectrum of Unreal Engine’s features, combining high-fidelity graphics with complex interactivity and performance optimization to deliver next-generation automotive experiences. For businesses and professionals sourcing high-quality 3D car models from platforms like 88cars3d.com, understanding these advanced applications unlocks immense potential for marketing, design, and training.
Building an automotive configurator requires careful integration of UI, Blueprint logic, and optimized assets to allow users to customize vehicles in real-time. Developing for AR/VR demands meticulous performance management and specialized rendering techniques to maintain high frame rates crucial for immersion. Virtual production, particularly with LED walls, integrates physical and digital worlds, placing the digital car model seamlessly into live-action environments. Each of these applications presents unique challenges and opportunities, pushing the boundaries of what’s possible in real-time automotive visualization.
Building Next-Generation Automotive Configurators
Automotive configurators are powerful marketing and sales tools, allowing prospective buyers to customize a vehicle’s color, wheels, interior trim, and accessories in real-time. Creating a robust configurator in Unreal Engine involves several key components:
- Modular Car Assets: Your 3D car models (e.g., from 88cars3d.com) should be modular, with separate meshes for wheels, interiors, specific trim levels, and interchangeable components. This facilitates easy swapping via Blueprint.
- Material Instance System: Utilize Material Instance Dynamics (MIDs) extensively. Create parent materials with exposed parameters (Vector Parameters for color, Texture Parameters for different fabric maps, Scalar Parameters for roughness/metallic values). In Blueprint, you can create a MID for each customizable part and dynamically set these parameters based on user selections.
- UMG UI: Design an intuitive user interface using Unreal Motion Graphics (UMG). This will include buttons for categories (Exterior, Interior, Wheels), color swatches, dropdown menus, and sliders. Connect these UI elements directly to your Blueprint logic that modifies the car model.
- Save/Load Customizations: Implement functionality to save and load user configurations, perhaps through a data table or save game system, allowing users to revisit their designs.
- Camera Control: Provide intuitive camera controls (orbit, zoom) to allow users to view their customized car from all angles.
Performance is critical for configurators. Ensure your materials are optimized, use Nanite where appropriate for high-poly components, and manage texture resolutions effectively. Aim for a smooth 60 FPS experience to keep users engaged and impressed.
Optimizing for Immersive AR/VR Experiences and Virtual Production
AR/VR Optimization for Automotive:
Bringing your 3D car models into Augmented Reality (AR) or Virtual Reality (VR) environments offers unparalleled immersion for design reviews, training, or interactive showrooms. However, AR/VR development in Unreal Engine has stringent performance requirements (typically 90 FPS or higher for VR to prevent motion sickness). Key optimization strategies include:
- Aggressive LODs: Even with Nanite, non-Nanite meshes (like interactive components or UI elements) need aggressive LODs.
- Simplified Materials: Reduce the complexity of materials. Avoid expensive shader operations or excessive texture lookups. Bake complex lighting into lightmaps for static elements if Lumen proves too demanding for your target hardware.
- Forward Shading Renderer: For VR, consider using the Forward Shading Renderer in Project Settings > Rendering for potentially better performance and anti-aliasing compared to Deferred Shading, though it has limitations for certain material features.
- Stereo Instancing: Ensure “Instanced Stereo” is enabled for VR rendering in Project Settings > VR.
- Occlusion Culling: Optimize scene geometry to ensure only visible objects are rendered.
- Mobile AR (e.g., ARCore, ARKit): For mobile AR, further reduce polygon counts, use mobile-friendly materials, and keep draw calls to a minimum. Unreal Engine supports these platforms directly.
Virtual Production and LED Wall Workflows:
Virtual Production, especially with LED walls, is revolutionizing how automotive commercials and cinematic content are created. Unreal Engine acts as the real-time renderer for the digital environment displayed on the LED wall, which surrounds a physical car and actors. This allows for in-camera visual effects and realistic reflections on the car’s surface. Key aspects include:
- nDisplay: Unreal Engine’s nDisplay framework is central to virtual production. It manages the synchronized rendering across multiple displays (the LED wall panels and operator monitors). Proper calibration and content distribution are crucial.
- Camera Tracking: Real-time camera tracking systems integrate the physical camera’s position and orientation into Unreal Engine, allowing the engine to render the correct perspective on the LED wall, creating seamless parallax.
- Lighting Integration: The digital environment’s lighting in Unreal Engine needs to match the physical studio’s lighting and illuminate the physical car appropriately. This often involves DMX integration for dynamic light control.
- Performance: Maintaining a stable, high frame rate (often 24 FPS or 30 FPS for film, but very stable) is critical. Optimizing scene complexity, using Nanite, and efficient asset management are paramount.
- Color Management: Implement a robust color management workflow (e.g., ACES) to ensure color consistency between the digital content, the LED wall, and the final recorded footage.
These advanced workflows demonstrate the immense power and versatility of Unreal Engine in the automotive sector. By combining high-quality 3D car models from resources like 88cars3d.com with Unreal Engine’s real-time capabilities, the possibilities for visualization, interaction, and production are limitless.
Conclusion: Driving Innovation with Unreal Engine and 88cars3d.com
The journey through mastering automotive visualization in Unreal Engine reveals a powerful ecosystem designed to push the boundaries of real-time rendering. From meticulous project setup and the seamless integration of high-fidelity 3D car models to the intricate dance of PBR materials and the breathtaking realism of Lumen lighting, every step contributes to an unparalleled visual experience. We’ve explored how Nanite virtually eliminates polygon constraints, allowing for unprecedented detail, while Blueprint and Sequencer empower interactive configurators and cinematic storytelling. Furthermore, the dynamic capabilities of the Niagara VFX system add critical layers of realism, bringing exhaust fumes, tire smoke, and environmental effects to life with stunning fidelity.
The automotive industry’s future is increasingly intertwined with real-time technology, driven by the demand for immersive marketing, interactive design reviews, and innovative virtual production pipelines. By leveraging the advanced features of Unreal Engine 5, along with a solid foundation of optimized, high-quality assets available from marketplaces such as 88cars3d.com, artists, designers, and developers are equipped to meet these demands head-on. The principles of performance optimization, from strategic LODs to efficient texture management, remain crucial across all applications, ensuring smooth and engaging user experiences.
Whether you’re developing a cutting-edge car configurator, crafting a blockbuster automotive commercial, or stepping into the immersive world of AR/VR, Unreal Engine provides the tools, and platforms like 88cars3d.com provide the essential building blocks. The path to stunning automotive visualization is an ongoing process of learning and refinement, but with the techniques and insights shared in this guide, you are well-prepared to accelerate your projects and deliver truly captivating automotive experiences in real-time. Start experimenting today, and unlock the full creative potential of your 3D car models within Unreal Engine.
Featured 3D Car Models

BMW 7 Series E38 3D Model
Texture: Yes
Material: Yes
Download the BMW 7 Series E38 3D Model featuring its iconic luxury sedan design and classic aesthetics. Includes .blend, .fbx, .obj, .glb, .stl, .ply, .unreal, and .max formats for rendering, simulation, and game development.
Price: $10.79

BMW 6 Series 640i F12 3D Model
Texture: Yes
Material: Yes
Download the BMW 6 Series 640i F12 3D Model featuring a sleek design and detailed interior. Includes .blend, .fbx, .obj, .glb, .stl, .ply, .unreal, and .max formats for rendering, simulation, and game development.
Price: $10.79
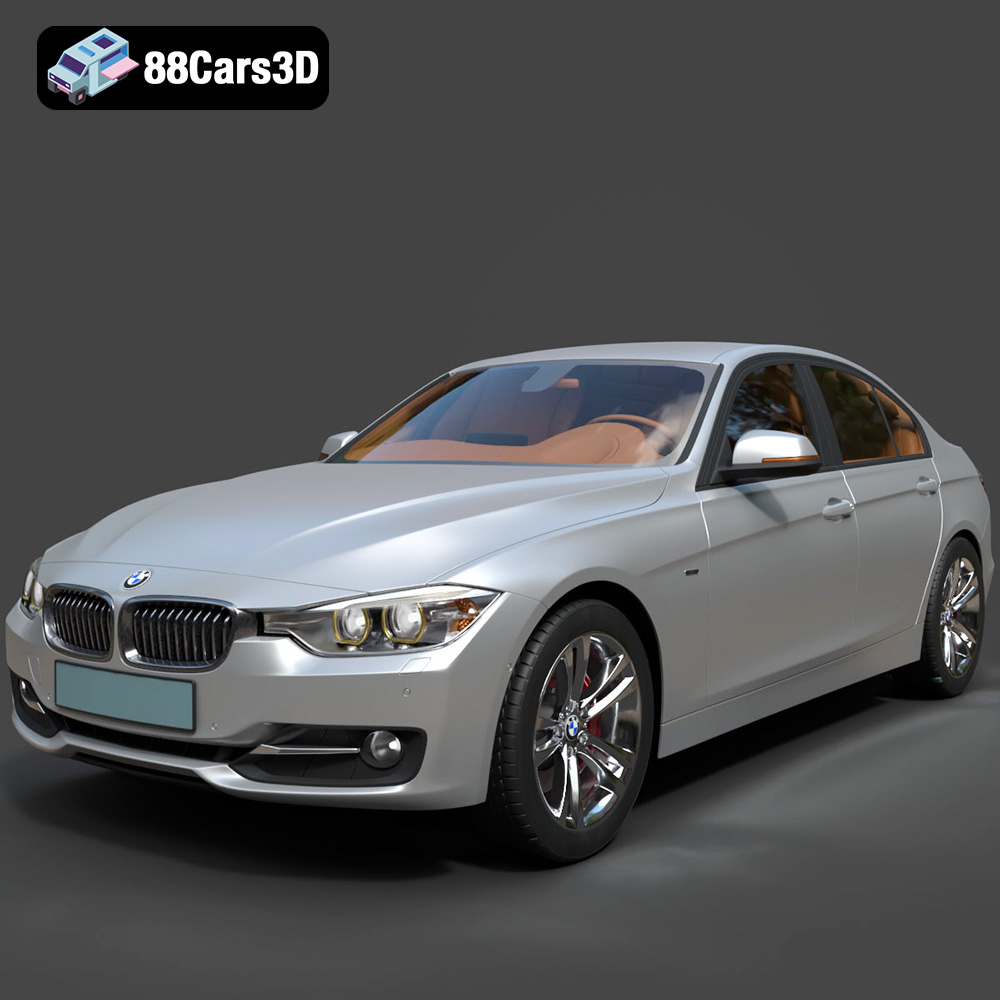
BMW 3 F30 3D Model
Texture: Yes
Material: Yes
Download the BMW 3 F30 3D Model featuring a detailed exterior, realistic interior, and optimized mesh. Includes .blend, .fbx, .obj, .glb, .stl, .ply, .unreal, and .max formats for rendering, simulation, and game development.
Price: $10.79
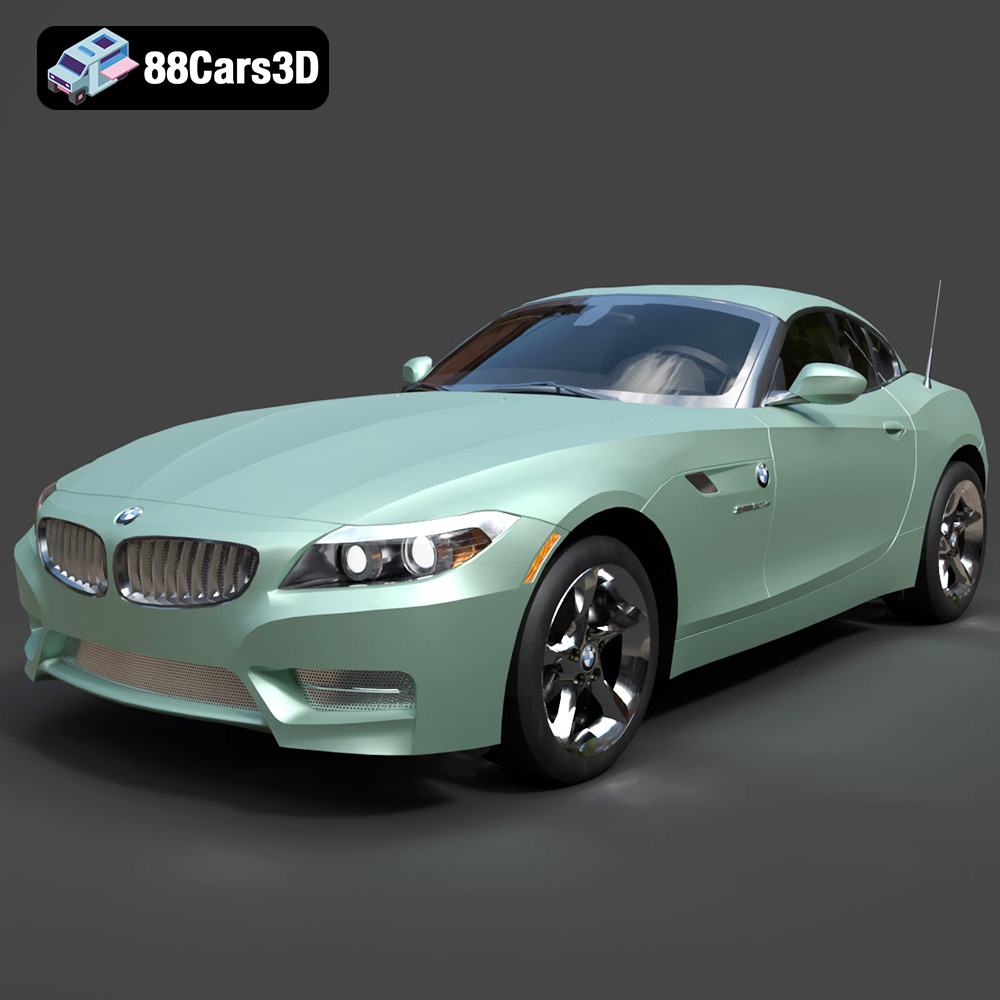
BMW Z4 Roadster E89 2012 3D Model
Texture: Yes
Material: Yes
Download the BMW Z4 Roadster E89 3D Model featuring clean geometry, realistic detailing, and a fully modeled interior. Includes .blend, .fbx, .obj, .glb, .stl, .ply, .unreal, and .max formats for rendering, simulation, and game development.
Price: $13.99

BMW Z4 E85 2005 3D Model
Texture: Yes
Material: Yes
Download the BMW Z4 E85 3D Model featuring clean geometry, realistic detailing, and a fully modeled interior. Includes .blend, .fbx, .obj, .glb, .stl, .ply, .unreal, and .max formats for rendering, simulation, and game development.
Price: $13.99

BMW M3 2024 3D Model
Texture: Yes
Material: Yes
Download the BMW M3 2024 3D Model featuring clean geometry, realistic detailing, and a fully modeled interior. Includes .blend, .fbx, .obj, .glb, .stl, .ply, .unreal, and .max formats for rendering, simulation, and game development.
Price: $13.99
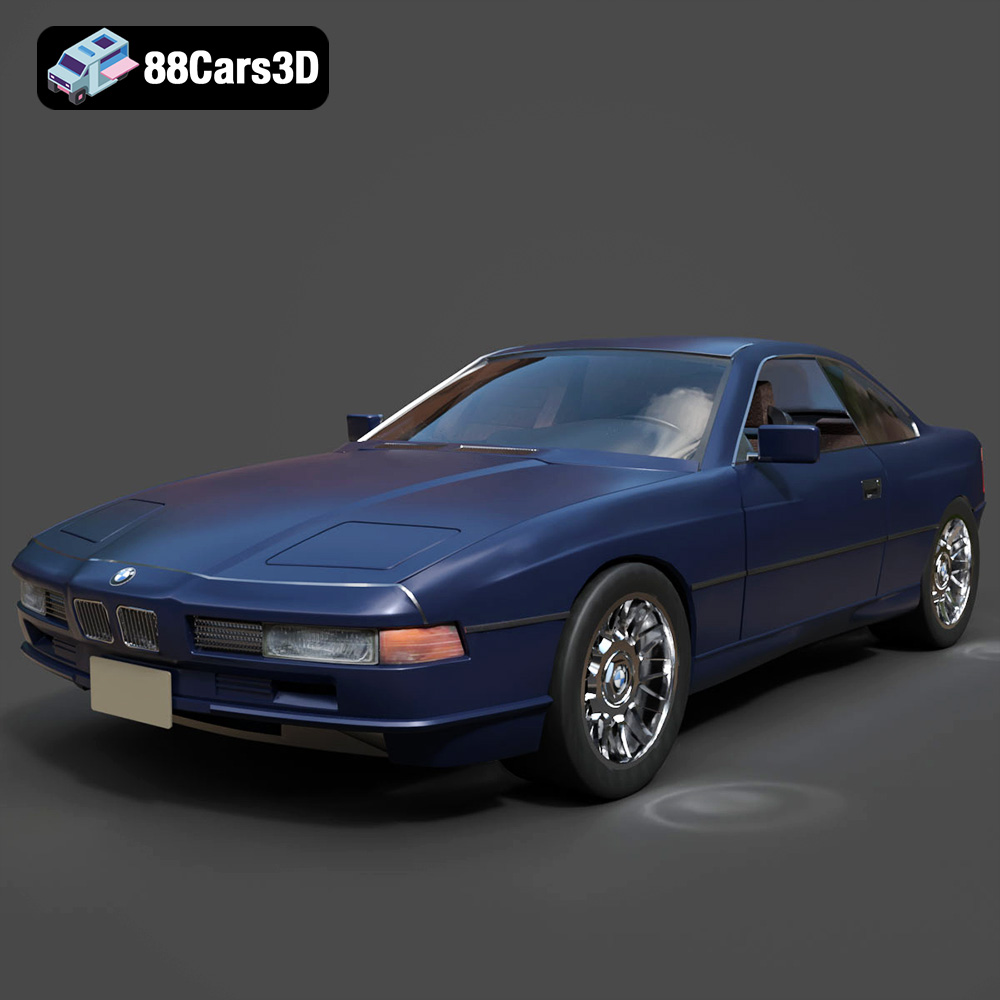
BMW 850i Coupe 1990 3D Model
Texture: Yes
Material: Yes
Download the BMW 850i Coupe 1990 3D Model featuring clean geometry, realistic detailing, and a fully modeled interior. Includes .blend, .fbx, .obj, .glb, .stl, .ply, .unreal, and .max formats for rendering, simulation, and game development.
Price: $13.99
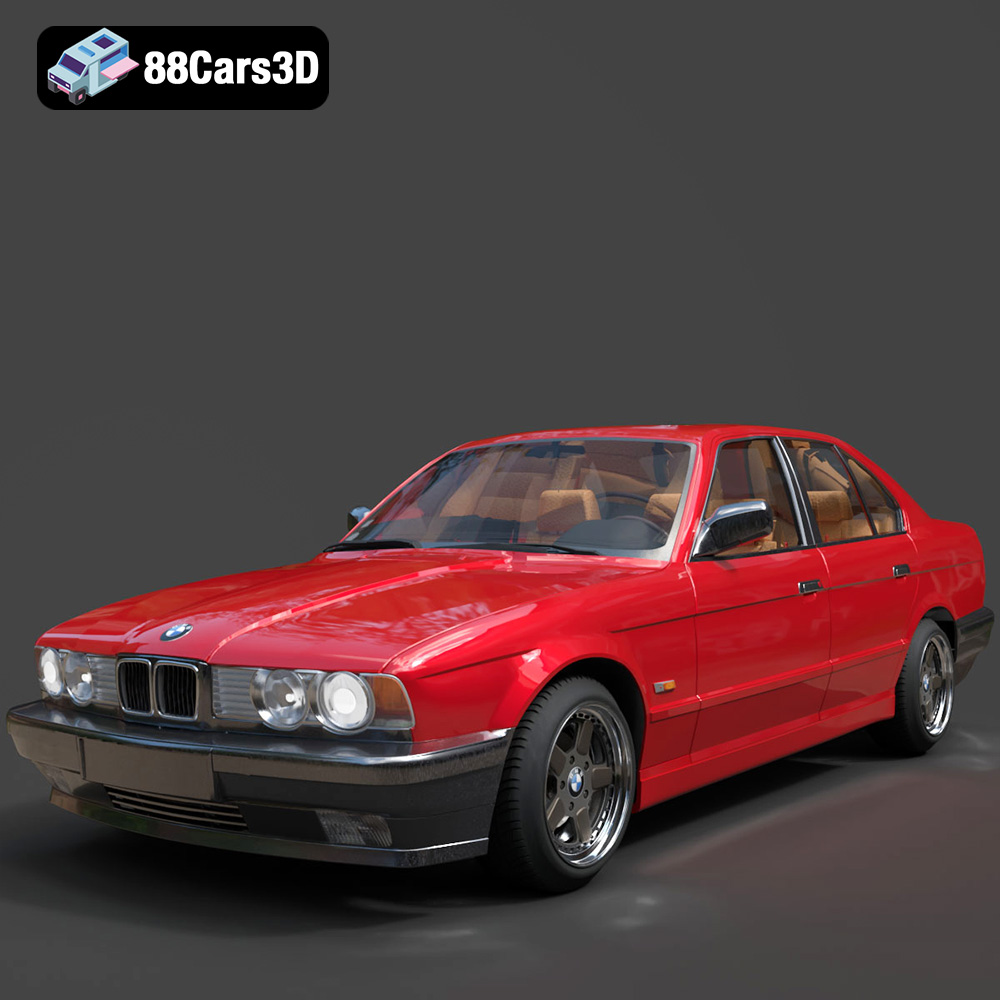
BMW 525i E34 1993 3D Model
Texture: Yes
Material: Yes
Download the BMW 525i E34 1993 3D Model featuring clean geometry, realistic detailing, and a fully modeled interior. Includes .blend, .fbx, .obj, .glb, .stl, .ply, .unreal, and .max formats for rendering, simulation, and game development.
Price: $12.99

BMW 7 Series 2016 3D Model
Texture: Yes
Material: Yes
Download the BMW 7 Series 2016 3D Model featuring luxurious design, detailed interior, and accurate exterior. Includes .blend, .fbx, .obj, .glb, .stl, .ply, .unreal, and .max formats for rendering, simulation, and game development.
Price: $10.79
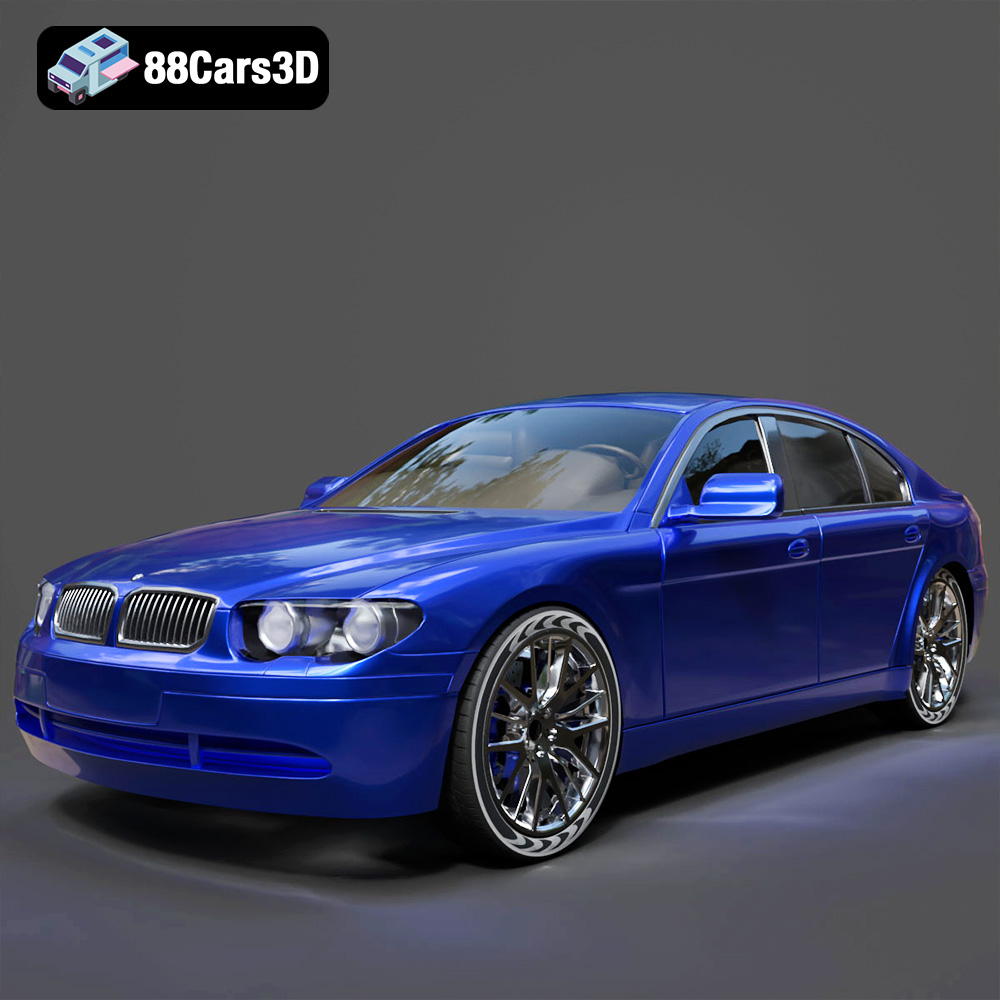
BMW 7 Series 30th Anniversary 3D Model
Texture: Yes
Material: Yes
Download the BMW 7 Series 30th Anniversary 3D Model featuring a meticulously crafted exterior, detailed interior, and realistic wheels. Includes .blend, .fbx, .obj, .glb, .stl, .ply, .unreal, and .max formats for rendering, simulation, and game development.
Price: $35.79
